

Block printing, which is sometimes referred to as stamp printing, is one of the most incredibly satisfying crafts you can tackle. After all, once it’s done you’ll have a totally customized fabric in your hands. Use it to make pillow covers, curtains, bags — or just hang that baby up as cool piece of wall art. The options really are endless, and no matter what you do, that project will look super original. Rock on!
Good to Know: You can dive deeper into block printing — and make a few projects along the way — in our class Fabric Design: Block Printing.
How to Block Print Fabric
Level: Easy
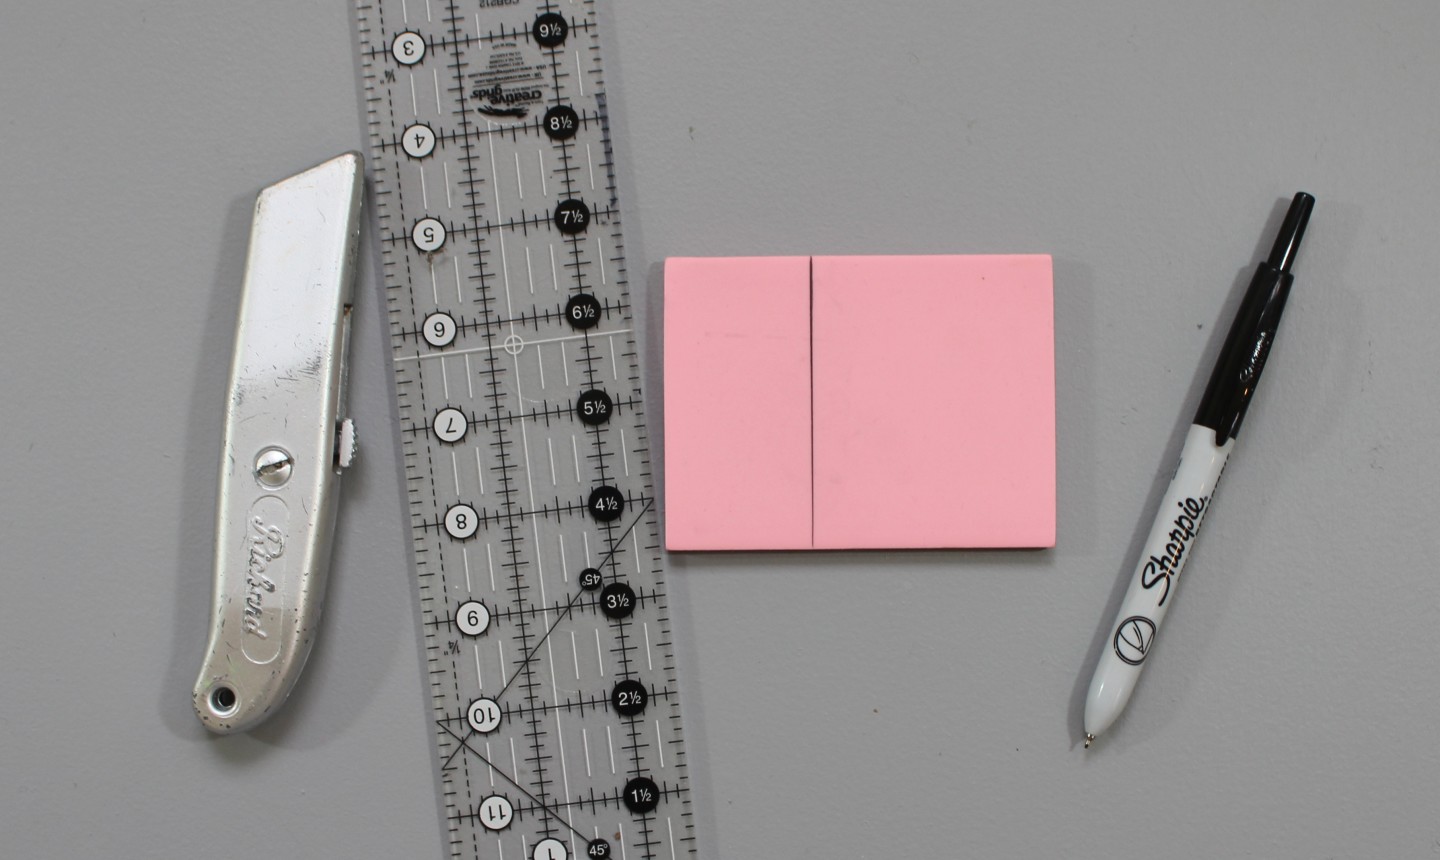
What You Need
Pro Tip: For this project, you may want to purchase a block printing starter kit. They’re perfect for newbies, and come with all the tools needed to get started in block printing.
Instructions
1. Cut the Block
First, you need to cut down your large speedy-carve block into smaller pieces. With a pen, draw a line 1½” away from the edge of the block. Gently cut along the line with a box cutter. Cut with up and down motions and try not to pull on block, as this can warp the material. You should end up with a rectangle 1½” wide.
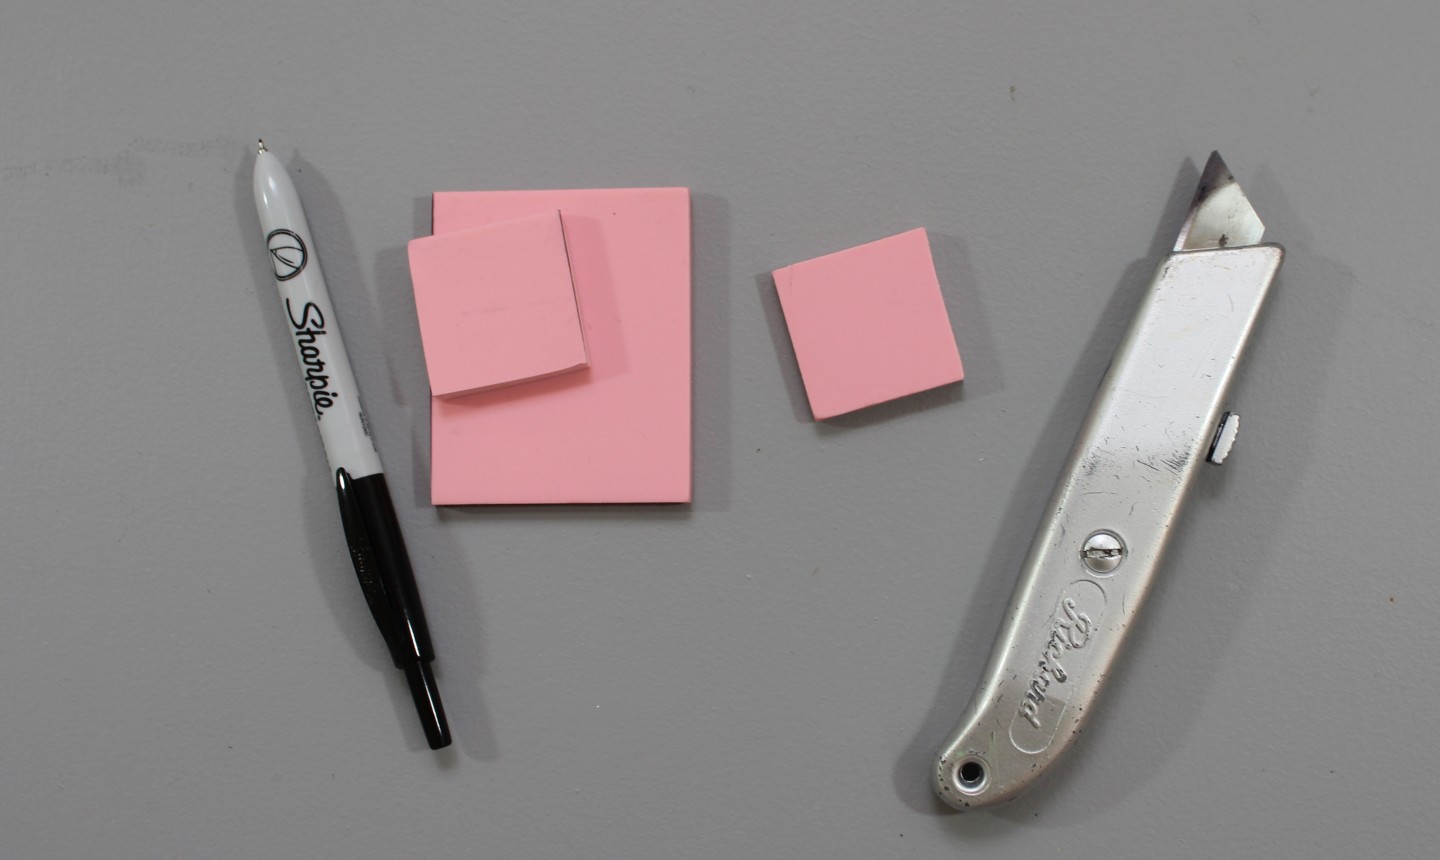
From there, cut that rectangle down into a square that is 1½” x 1½”. This is the block you’ll carve to form your stamp.
2. Draw Diagonally
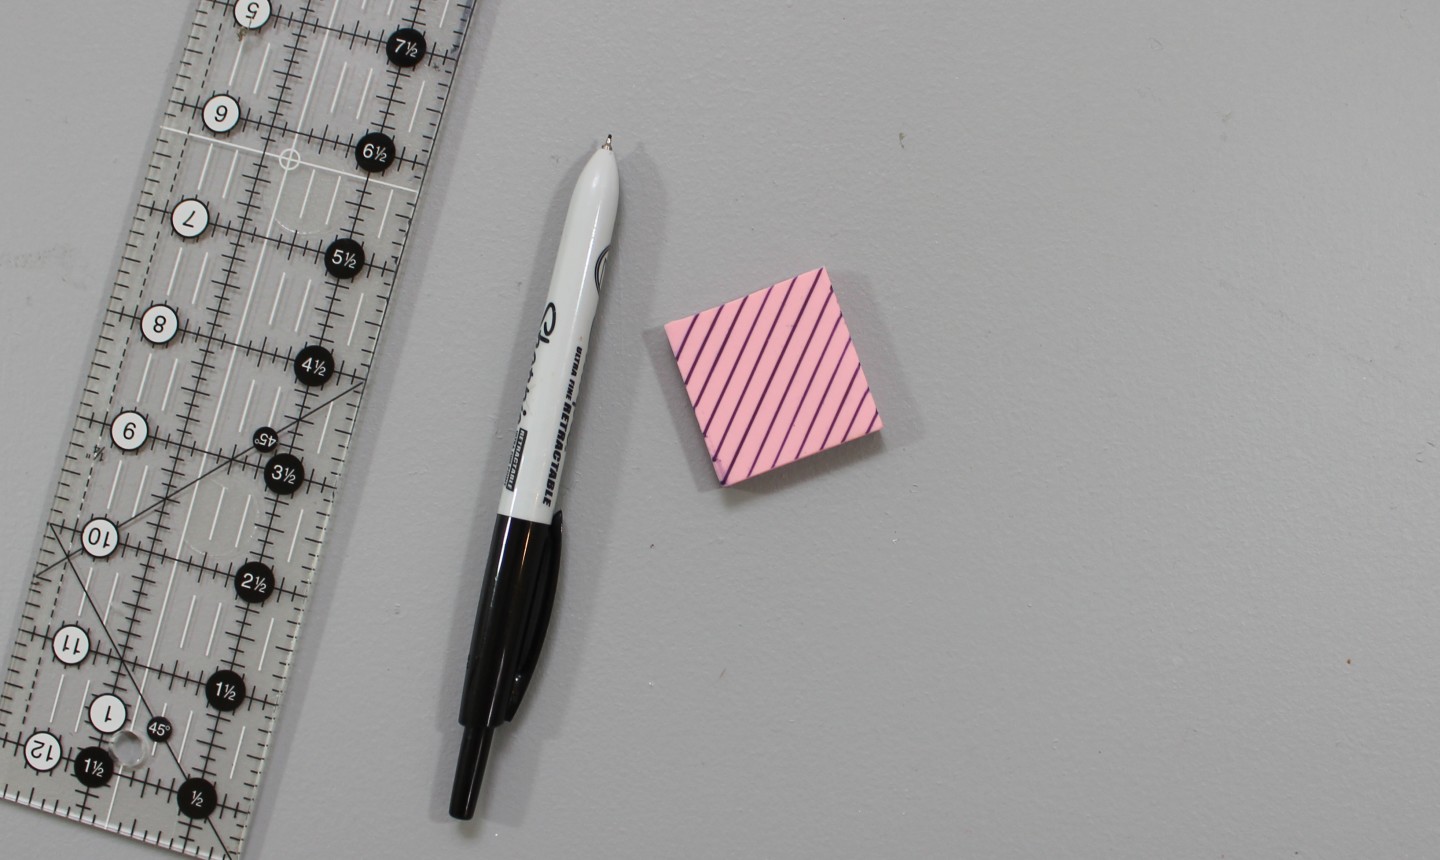
Use the ruler and draw a line diagonally across the square block, from one corner to the other. Repeat and draw additional parallel lines. The lines can be randomly placed or have exact measurements between them — it totally depends on what feels right for you.
3. Get in the Groove
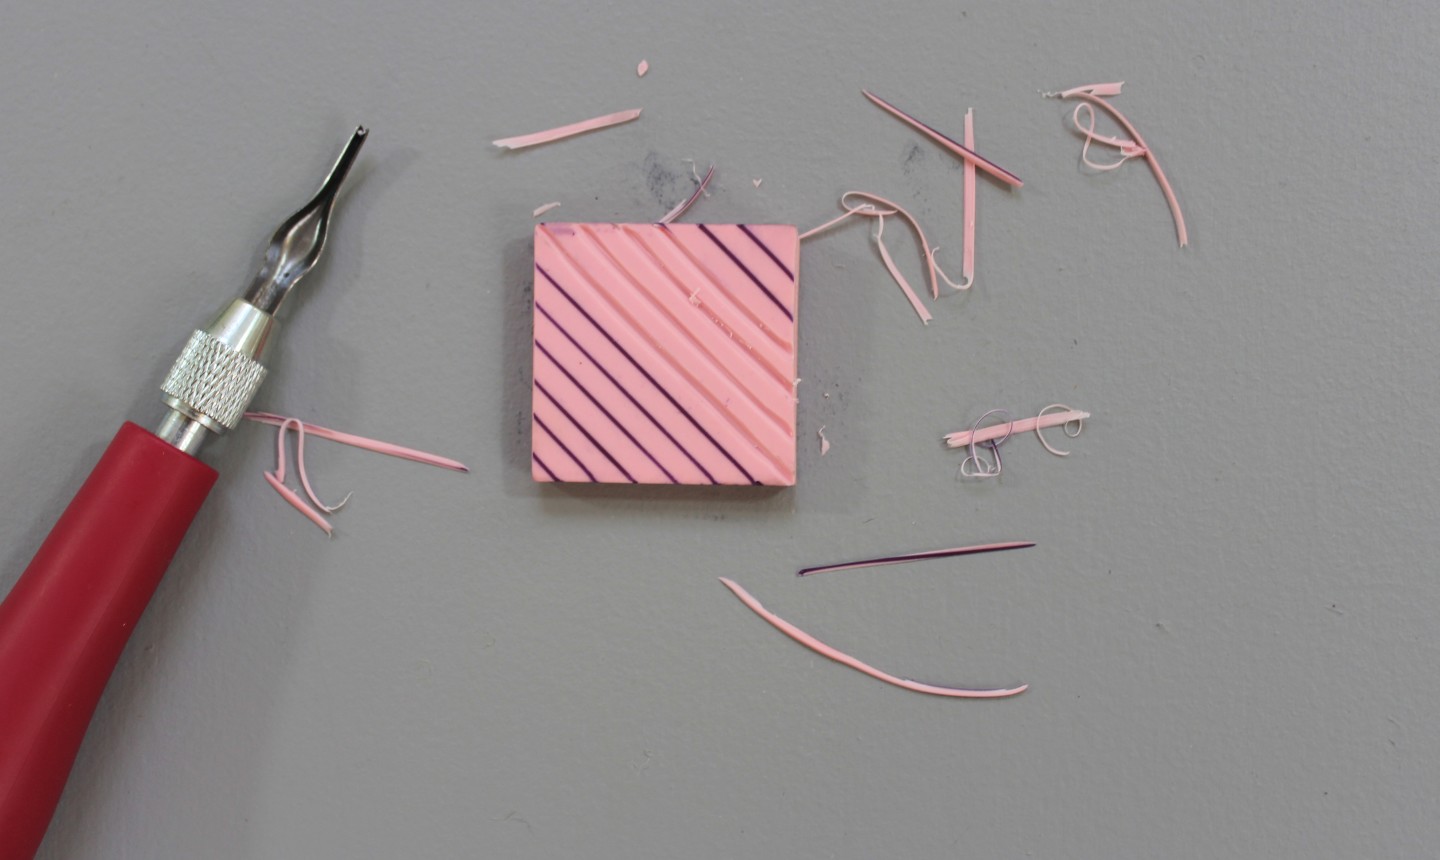
Insert the smallest blade into your lino cutter. Apply the cutter to the lines you’ve drawn, with the sharp side pointing down into the block. With a soft motion, gently push the blade across the block’s surface. Repeat for each line until your block is covered in diagonal grooves.
4. Cut Again
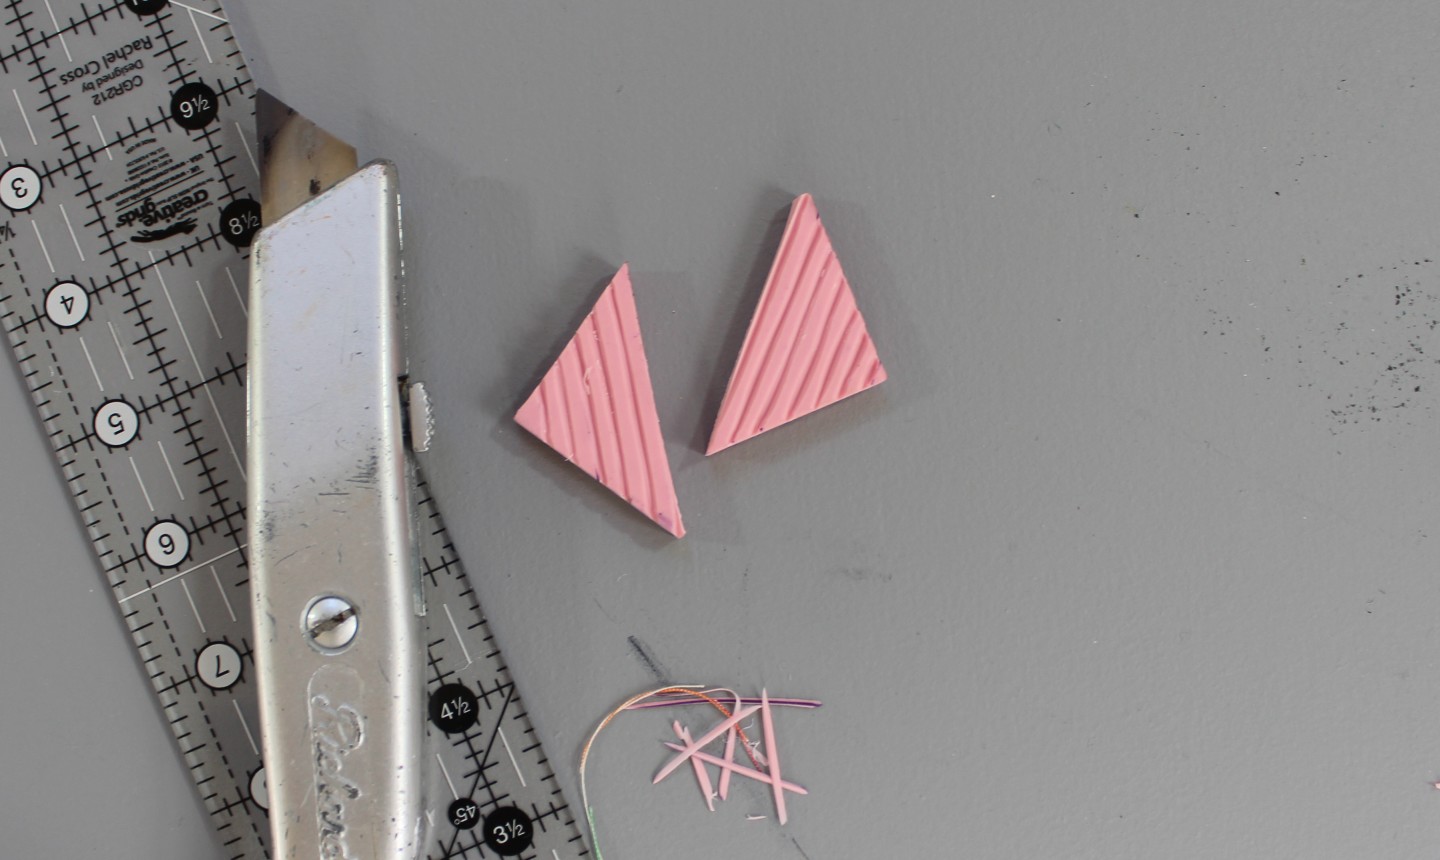
With the box cutter, cut the block in half diagonally to make two triangles. You technically only need one to make the design shown here, so set the other aside as a backup!
5. Practice, Practice, Practice!
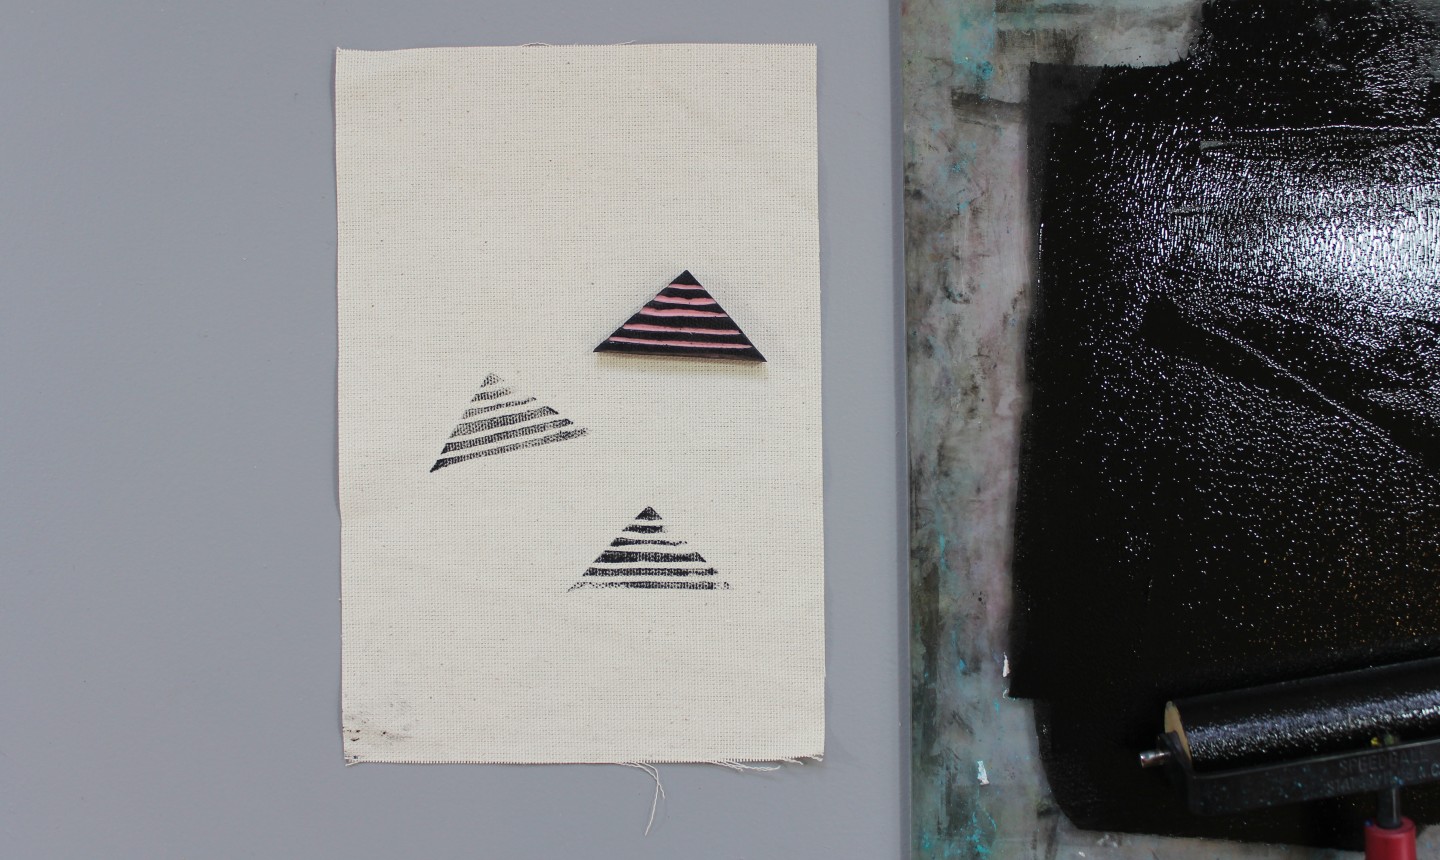
Put craft paper down to protect your work surface. Squirt a small amount of water soluble block printing ink onto your tray. Carefully roll the ink onto the brayer roller, and use the roller to apply the ink to your block’s textured surface.
Turn the block over and press it to a piece of test fabric with even pressure. Pull the block up, being careful not to smudge the ink. Keep stamping and playing around with pressure until you master the design.
6. Start Stamping for Real
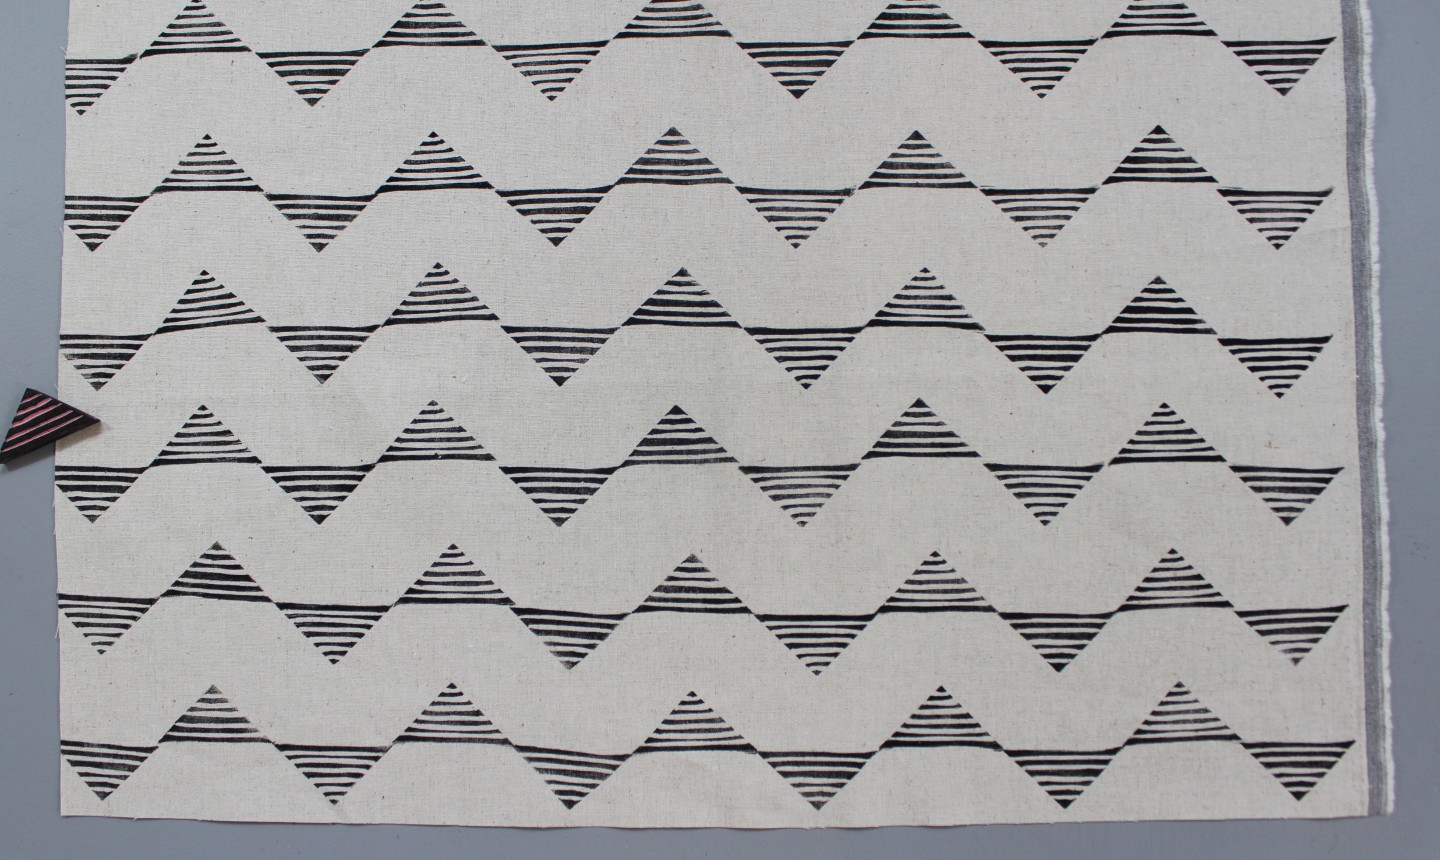
When you’re ready, lay down the fabric for your final project and stamp away! For this design, start in one corner and stamp one row at a time, alternating facing the triangle up and down. Make sure you reapply ink to your block before each stamp, so the ink in the pattern remains even. Set the fabric aside to dry.
7. Press the Fabric
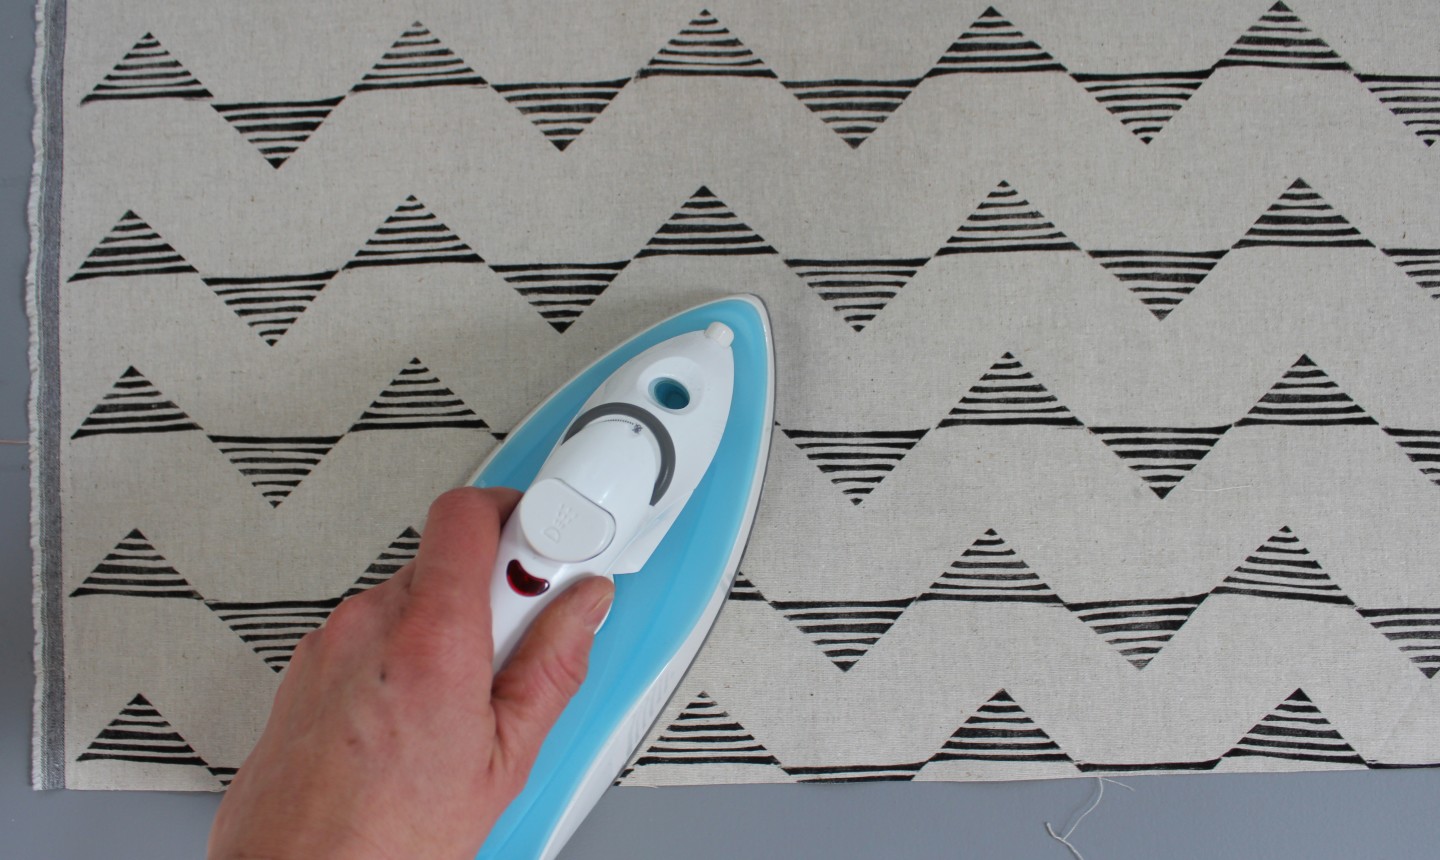
Once it’s fully dry, press your fabric to set the ink. That’s it!
Pro Tip: You can put together whatever design you want with this speedy-carve block, or create an entirely different look based on how you choose to make grooves with your lino cutter. Have fun with it!
Great idea- and works amazingly- love this !!!