As many of us have found out the hard way, getting a perfectly even watercolor wash can be challenging. Watercolors seemingly have a mind of their own, more so than any other medium. And the more you work into a wash, the more of a disaster it can become. The trick is to let the watercolors do what they are going to do. The less you interfere with the process, the easier it becomes. Here’s a few tips on how to get that perfect watercolor wash.
For this demonstration we’ll be using a #9 Round brush. A large flat brush will also work, as well as a mop.
It is also very important to have an angled surface, preferably a drafting table or easel, so you aren’t having to hold the work at an angle while painting. Rather than your hand doing all the work, you will essentially be letting gravity do the painting.
Step 1: Mixing the Pigment
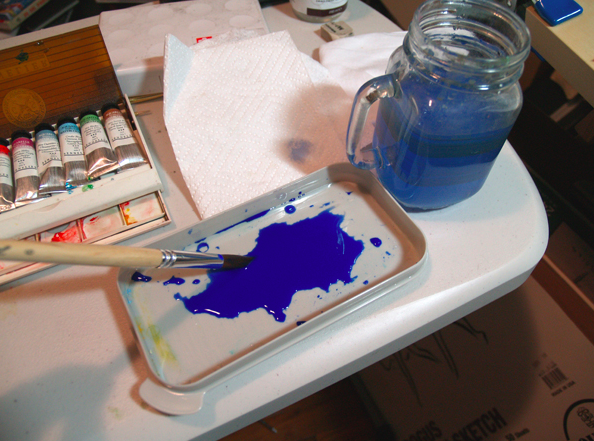
On your palette, mix a generous amount of water with your chosen pigment. I’m using Sennelier Ultramarine Blue.
Understanding Color Drying
Watercolors dry lighter than they appear when they are wet on paper. To get the correct amount of pigment in your wash, practice on a scrap piece of watercolor paper first, letting it dry to see if it’s right. Also, make sure you mix more paint and water than you need. Running out of paint before the wash is finished can be a disaster, as you likely won’t be able to mix more paint before the wash dries.

Step 2: Applying the Wash
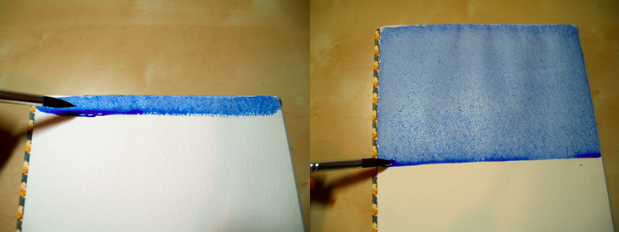
Load your brush with as much paint as it will hold. Working quickly, make a steady, controlled stroke along the top of the paper. You will notice that the water in the first stroke starts to pool or bead along the bottom edge. Don’t let this dry off, as you will need your second stroke to overlap this area to prevent a “tide mark” from appearing in the wash. Also, don’t continue below that stroke without first reloading your brush, or you will end up with uneven light and dark areas in your wash.

Tip: If you are covering your entire paper with the wash, turn is so it is vertical. This lets you keep your strokes as short as possible so you don’t run the risk of running out of paint at the end of each stroke.
Step 3: Final Touch
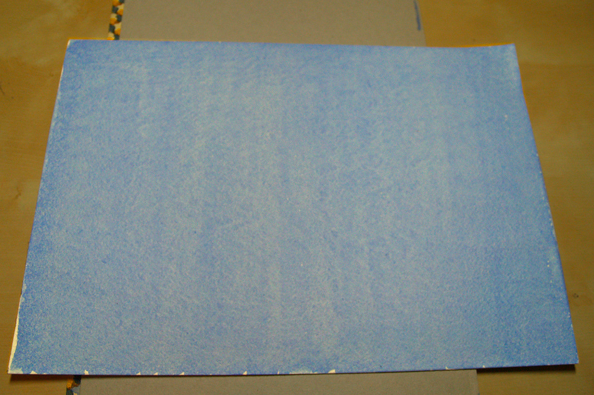
After you get to the bottom, blot your brush on a paper towel, then use the now-dry tip to carefully pull up the excess paint along the bottom of the last stroke. If you don’t, your wash will dry darker at the bottom. Allow your paper to dry completely at an angle before setting it down flat again.

Tip: If you wish to do a graded wash, going from light to dark, start with a higher concentration of paint for your first stroke. After the first stroke, only reload your brush with clean water. Gravity will pull down the pigment slowly into the newer strokes, and you will have a perfect gradient by the time you reach the bottom.
It is crucial to remember that if you notice a mistake in a previous stroke in the wash, you should not try to fix it. Once the wash has started to dry, a new stroke will almost certainly be more noticeable than any small mistake. It’s best to leave these small accidents as they are– in fact, they enhance that appearance of spontaneity and gesture that are the reasons we love watercolor in the first place. Restraint, a light touch, and thinking about what you plan to do before you do it are the most important approaches to watercolor, especially in washes.

I use a light spray mist of water all over the area before adding color. It helps move the color quickly and evenly. A hair dryer helps dry the wash quickly too.
I often turn the paper sideways, upside down, use dry brush first and after paper dries overpainting. I have stopped stretching my paper.
Thank you! Presented very clearly. Easy to follow.