
 Photo by David Lucas
Every style blogger worth her selfie is posting summer snaps with a glass of rosé in one hand and straw beach bag in the other. And with good reason: the bags are roomy, durable and pretty darn cute. (Plus, sand just shakes right out of them.) What’s not so cute: how crazy-expensive they can be, sometimes upwards of $150, especially when they have embroidery or other embellishments. Say goodbye to your #summervibes budget.
The only solution: to DIY this beach-chic bag, for a fraction of the cost, using basic embroidery skills. First, I set out to find an even weave tote that was unlined so I could access the inside to secure my stitches. I scored this plain market bag on Amazon for less than $25. Then, I went to a craft store to stock up on supplies for the embroidery (I went with a thin nylon cord; more on why below), plus tassels, embroidery floss and other possible embellishments for the handles, as well as a two-pack of thick plastic canvas needles.
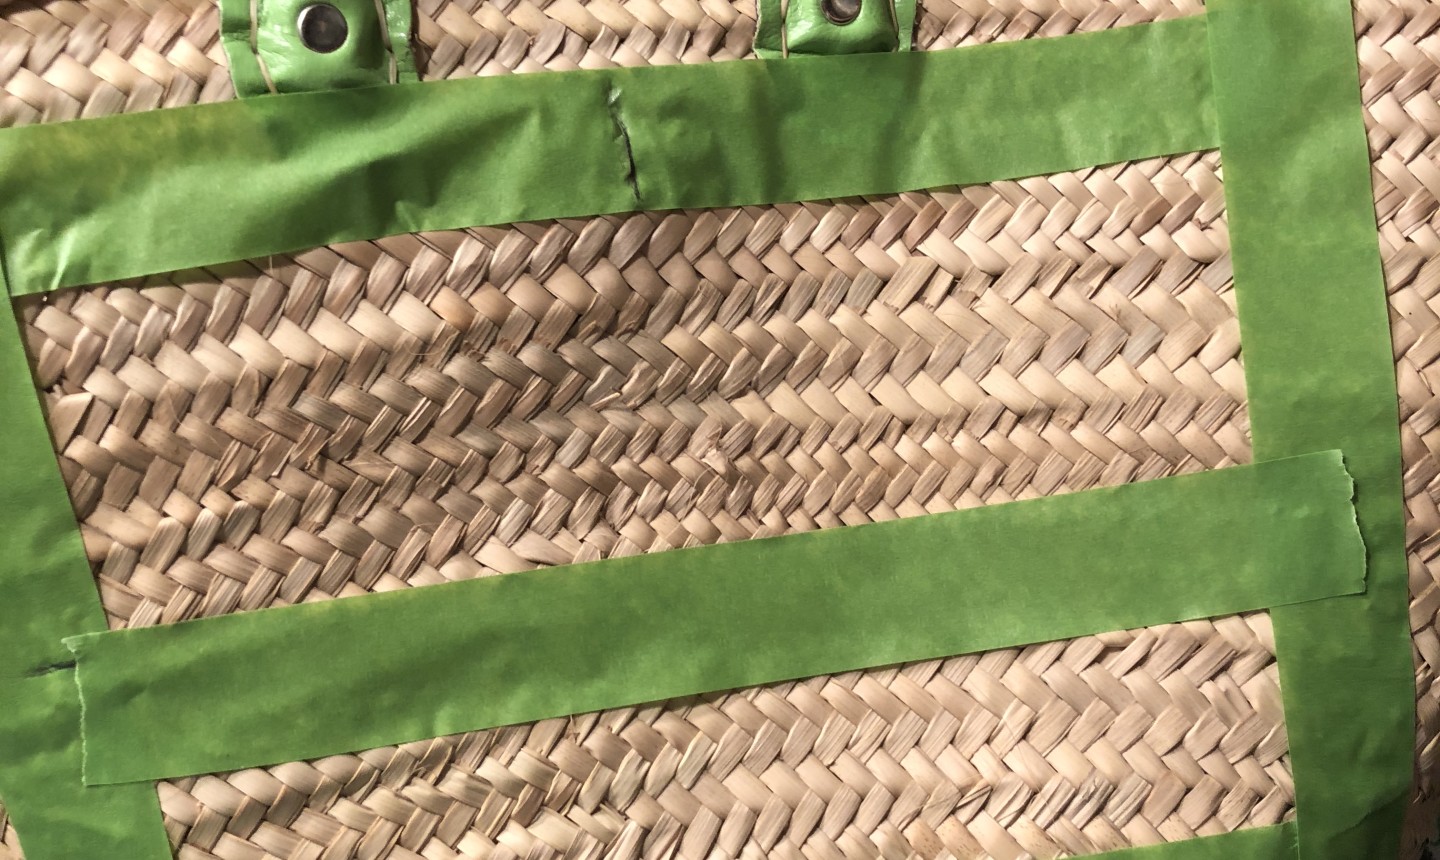
I started by creating a “frame” with painter’s tape, and marked what would be the center point between the handles, and half the depth. Then I put one more piece of tape lengthwise piece across the middle to section off “boxes” for the top word and the bottom.
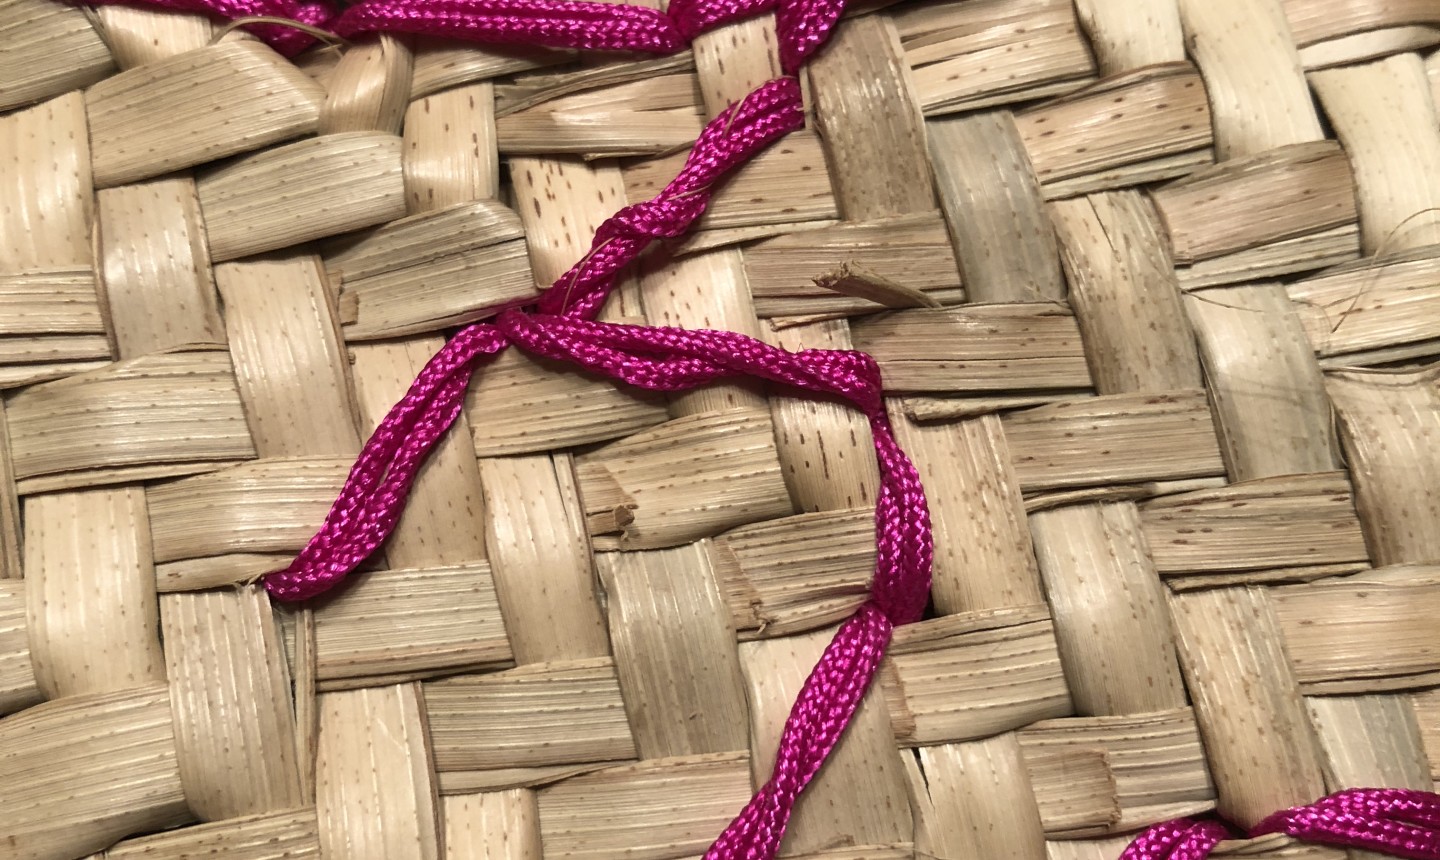
For the embroidering, I started with the top box and worked from the center out, like I would with a traditional cross-stitch project. Since the weave doesn’t go in a perfectly straight line, I used the tape almost as a ruler to line up the bottom of my stitches. At first, I tried to use a doubled-up piece of six-thread embroidery floss, but even in the brightest shades, it got lost against the thick raffia. I also tried raffia ribbon, which worked fine, but didn’t have the shimmery effect I was hoping for. To get the result I liked, I used a doubled-over piece of 1.5 mm nylon cord.
I sketched out on paper a rough plan of how I wanted the stitched letters to look, then went to work recreating it as I pulled my needle and thread through the raffia braids. Thankfully, I wanted my bag to look like something you would find in a flea market — meaning, not perfectly refined, so I intentionally let the letters be a little jagged. If you want a more polished look, find a smaller braid raffia so that your spacing will be more even and it’ll be easier to line up your stitches (like sewing on linen or Aida cloth).
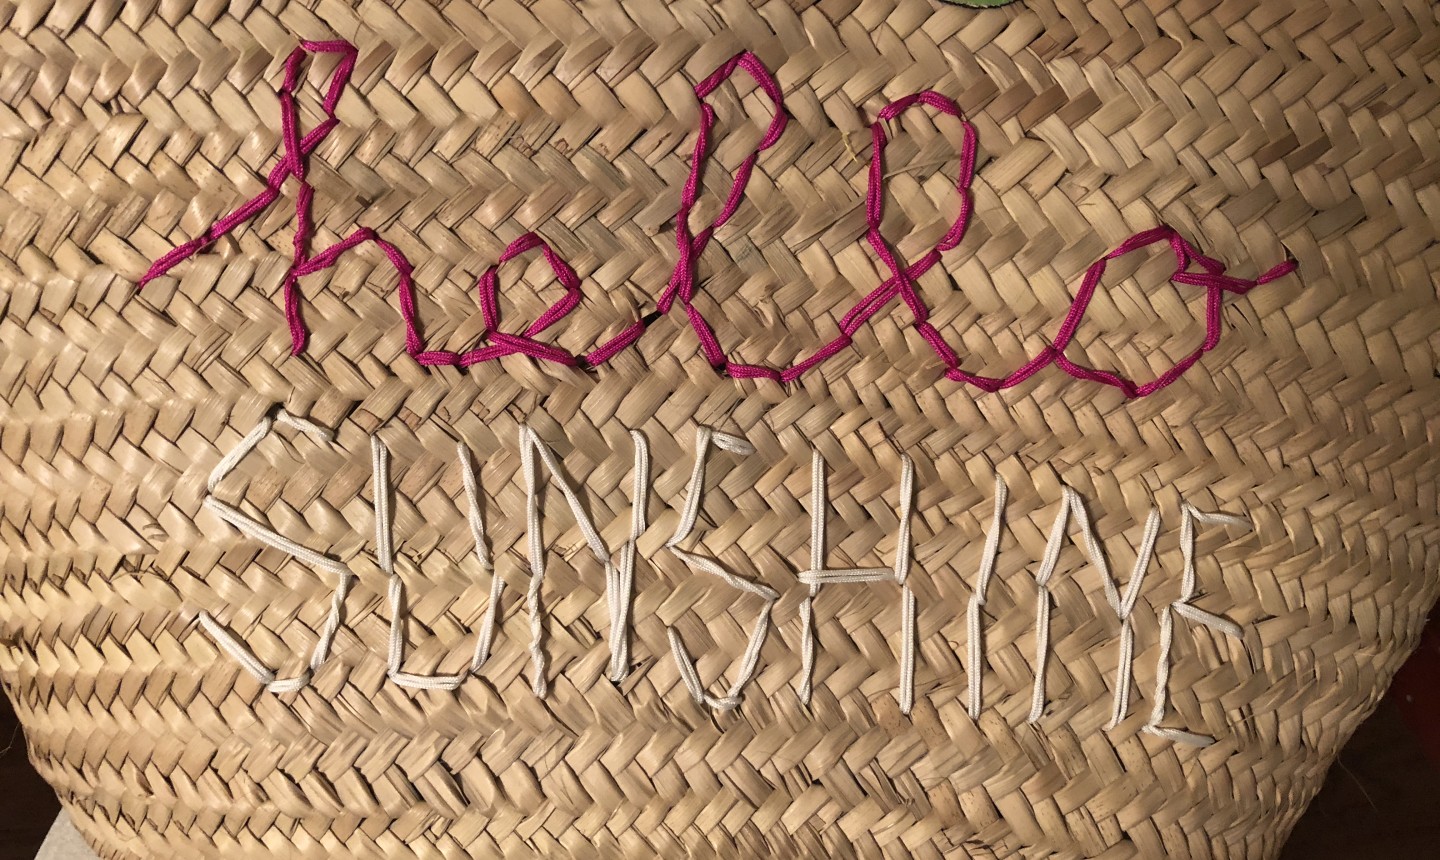
When I got to the end of the first word, I knotted the cord in back and trimmed. Then I removed the middle row of tape and repeated the process, although I went with a block font on the line below.
Don’t expect your stitches to go through completely smooth; getting the needle through in some spaces was rough, but I just wiggled the needle until it went in. But be careful how hard you pull — these bags are made of dried, woven grasses, and if you tug too taut, it’s easy to snap a braid, or create a small hole.
To attach the tassels (we used premade, but you can make your own tassels as well), I used approximately two feet of three different skeins of DMC embroidery floss to create a long braided rope with tassels at each end, and a tassel in the middle. I then created a small loop around the handle and pulled all three tassels through to secure it.
Happy beach days!
Share tips, start a discussion or ask one of our experts or other students a question.
Already a member? Sign in
No Responses to “Your Summer Beach Tote Will Look Cute With a Hit of Hand Embroidery”