
If you have two T-shirts and a pair of scissors, you’re less than an hour away from finishing this adorable embroidered shirt. And while it’s great for kids — they can totally help make the T-shirt yarn — you may just want one for yourself, too.
Embroidered Heart Shirt
Level: Beginner
What You Need
Instructions
1. Remove the Hem
Determine which of your two T-shirts you want to act as the stitches. Snip off the bottom hem, cutting through both the front and back of the shirt.
2. Trim Along the Edge
After the hem is gone, trim along the bottom of the shirt to make a thin strip of cloth. Unlike when you removed the hem, make sure you’re now only cutting one side of the shirt’s fabric.
Keep trimming around the edge until you have one long, slender length of fabric; then snip it from (what remains of) the T-shirt.
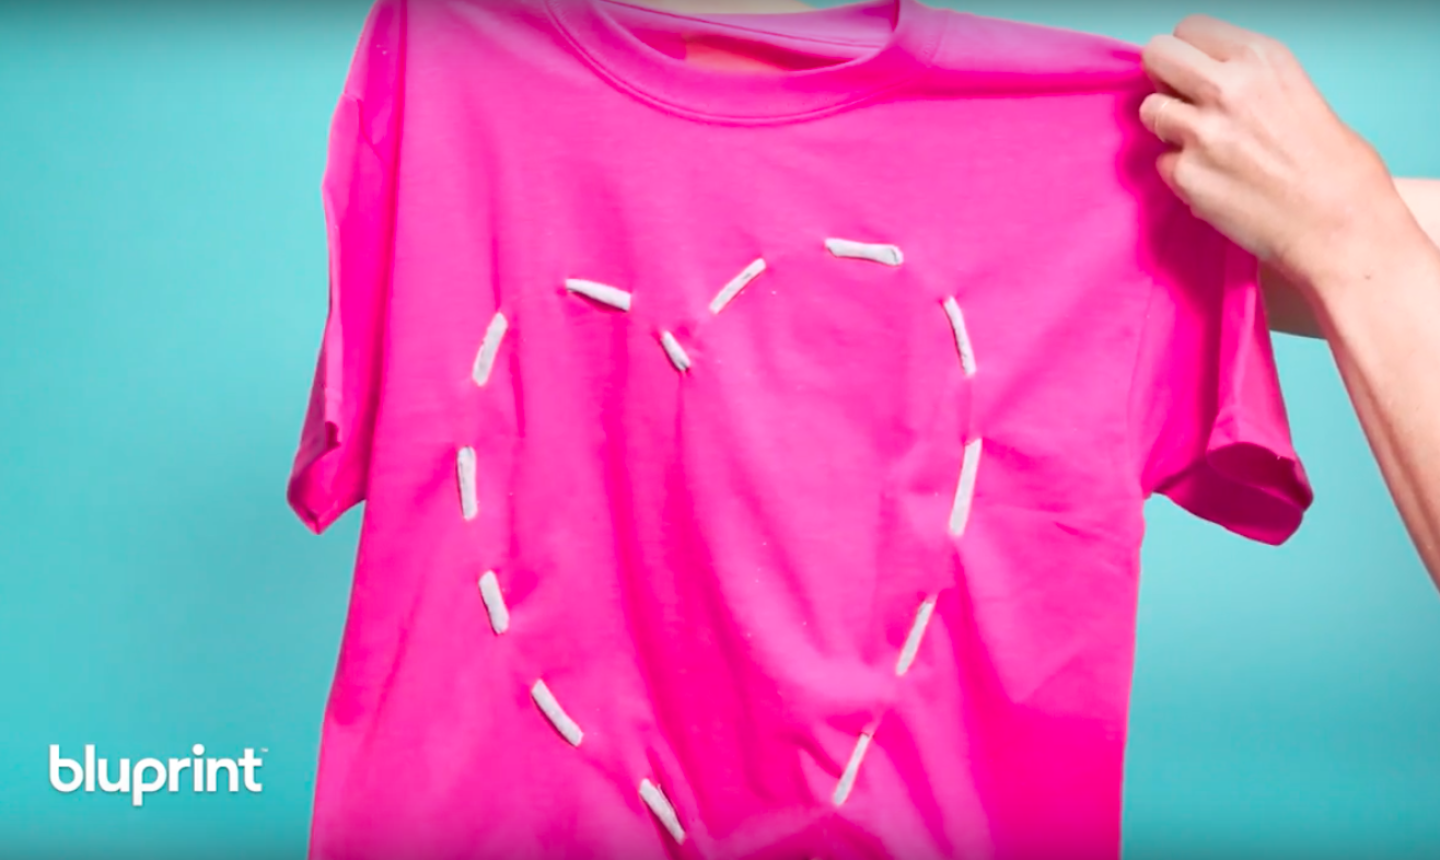
3. Draw the Heart and Cut the Holes
Use chalk to draw the outline of a heart on your second shirt. Mark a little line or dot every inch along the heart. Use your scissors to make a small cut at each inch marker.
4. Get Stitchin’
Take the strip of fabric cut from your first shirt and, starting at the bottom “point” of the heart, weave it in and out of the holes. Make sure your first stitch comes up from the inside of the shirt.
5. Tie It Together
To finish your stitches, bring your fabric back down through the same hole your first stitch came up. Tie the ends together with a knot and trim off any excess fabric.
If you're going to do this, Goolge how to make t-shirt yarn first, because there's a much better way than the one shown here.