

Cute sweater? Put a bow on it! Simple tote bag? Put a bow on it! Gift for a friend? You guessed it: put a bow on it. This super simple bow (you only need to know the knit stitch!) with give whatever you’re making that little something extra.
How to Knit a Bow
Level: Easy
What You Need
Good to Know: You can use any weight of yarn you’d like to knit a bow; just remember that if you use the same number of stitches that we did with a lighter yarn, your bow will be smaller. If you want a bow that’s larger, just increase the number of stitches per row, as well as the number of rows. If you want a bow that’s smaller, decrease the number of stitches and rows.
Instructions
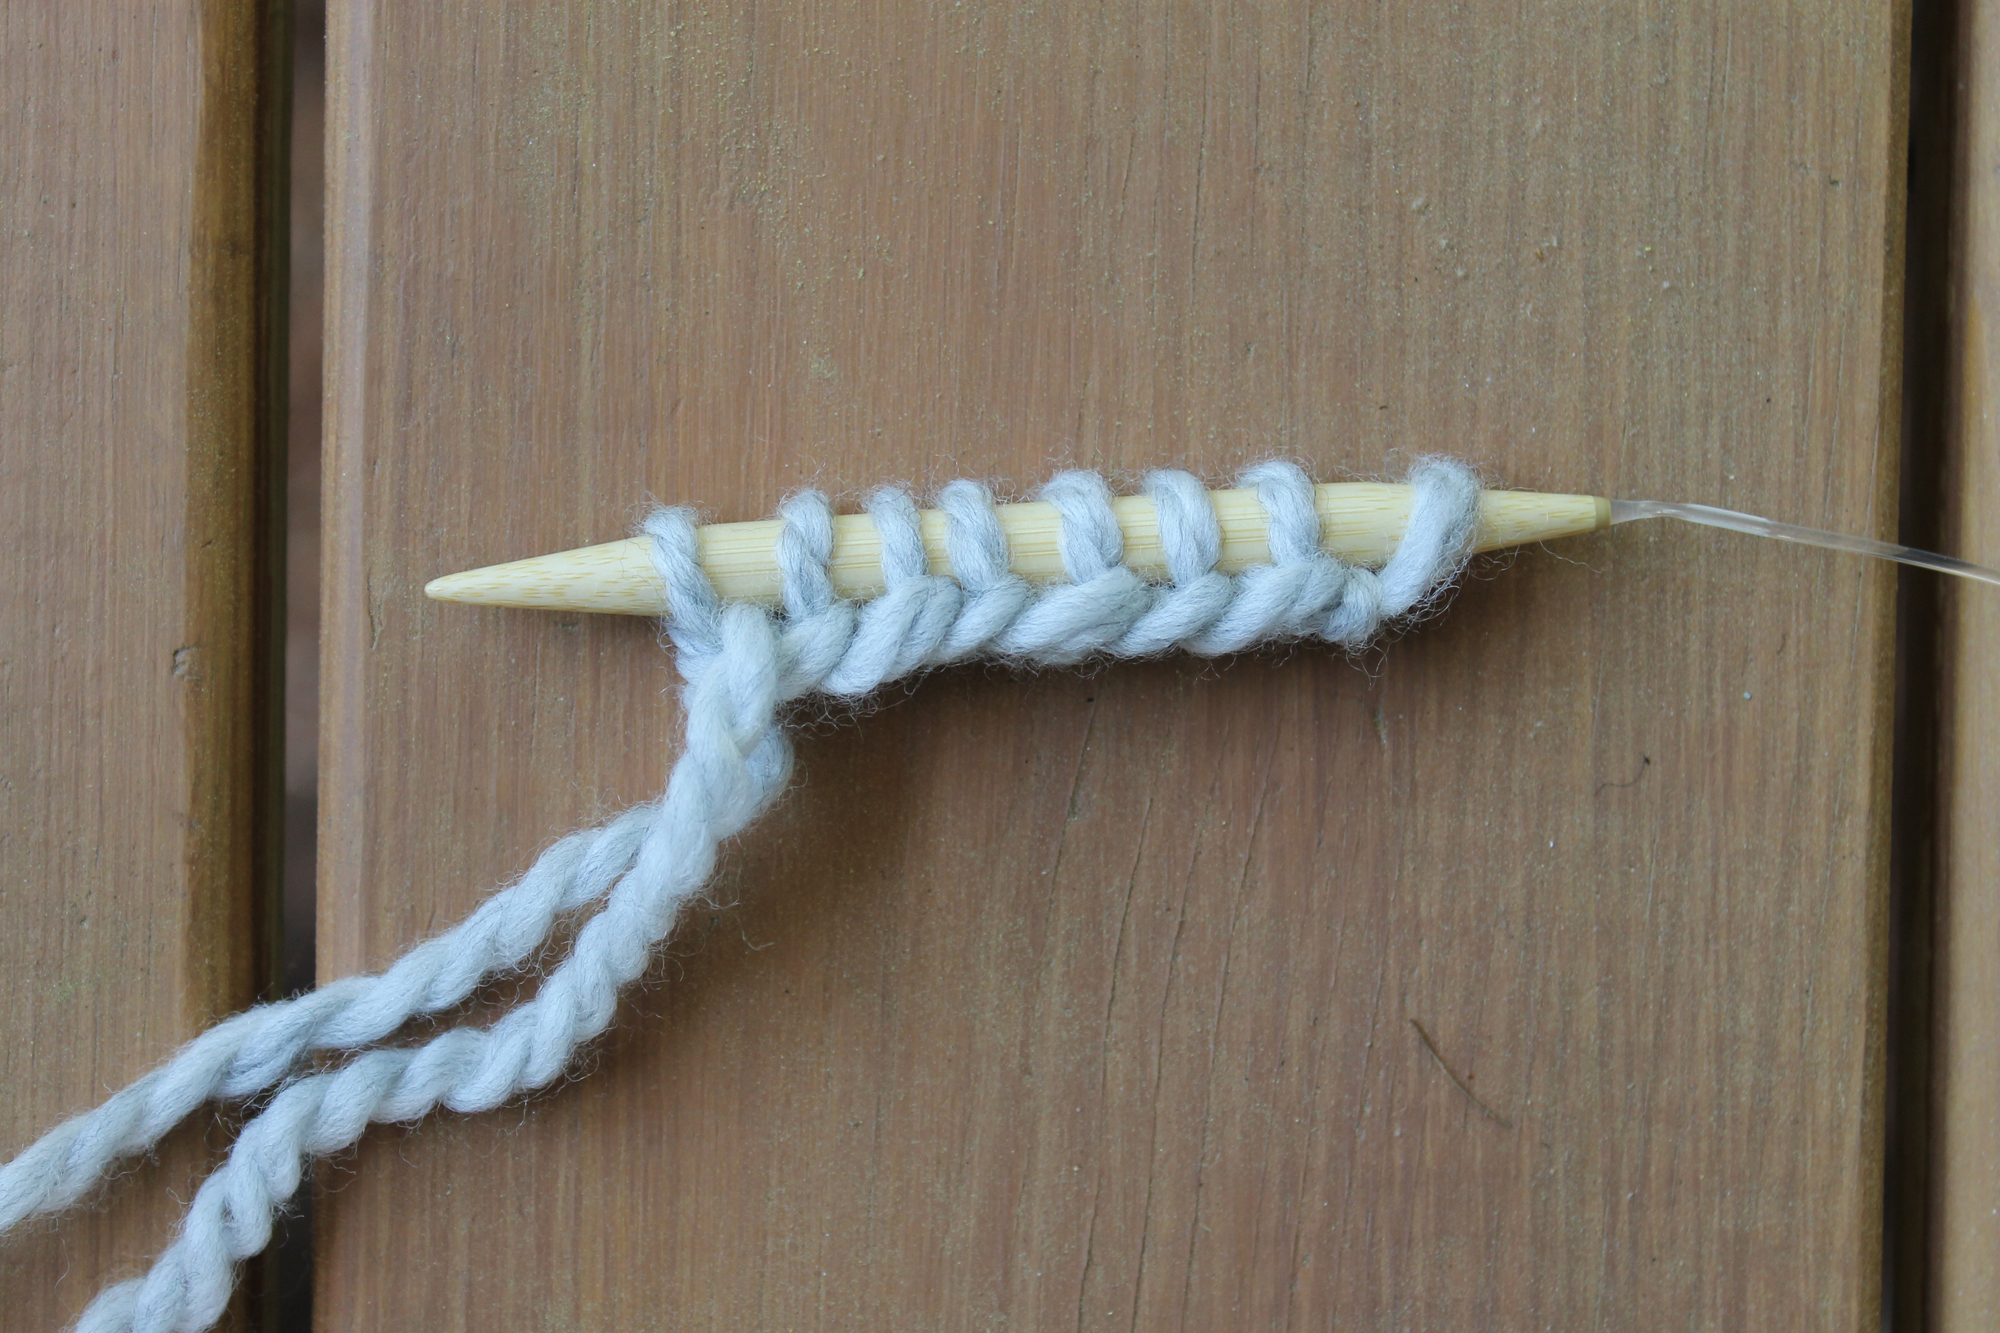
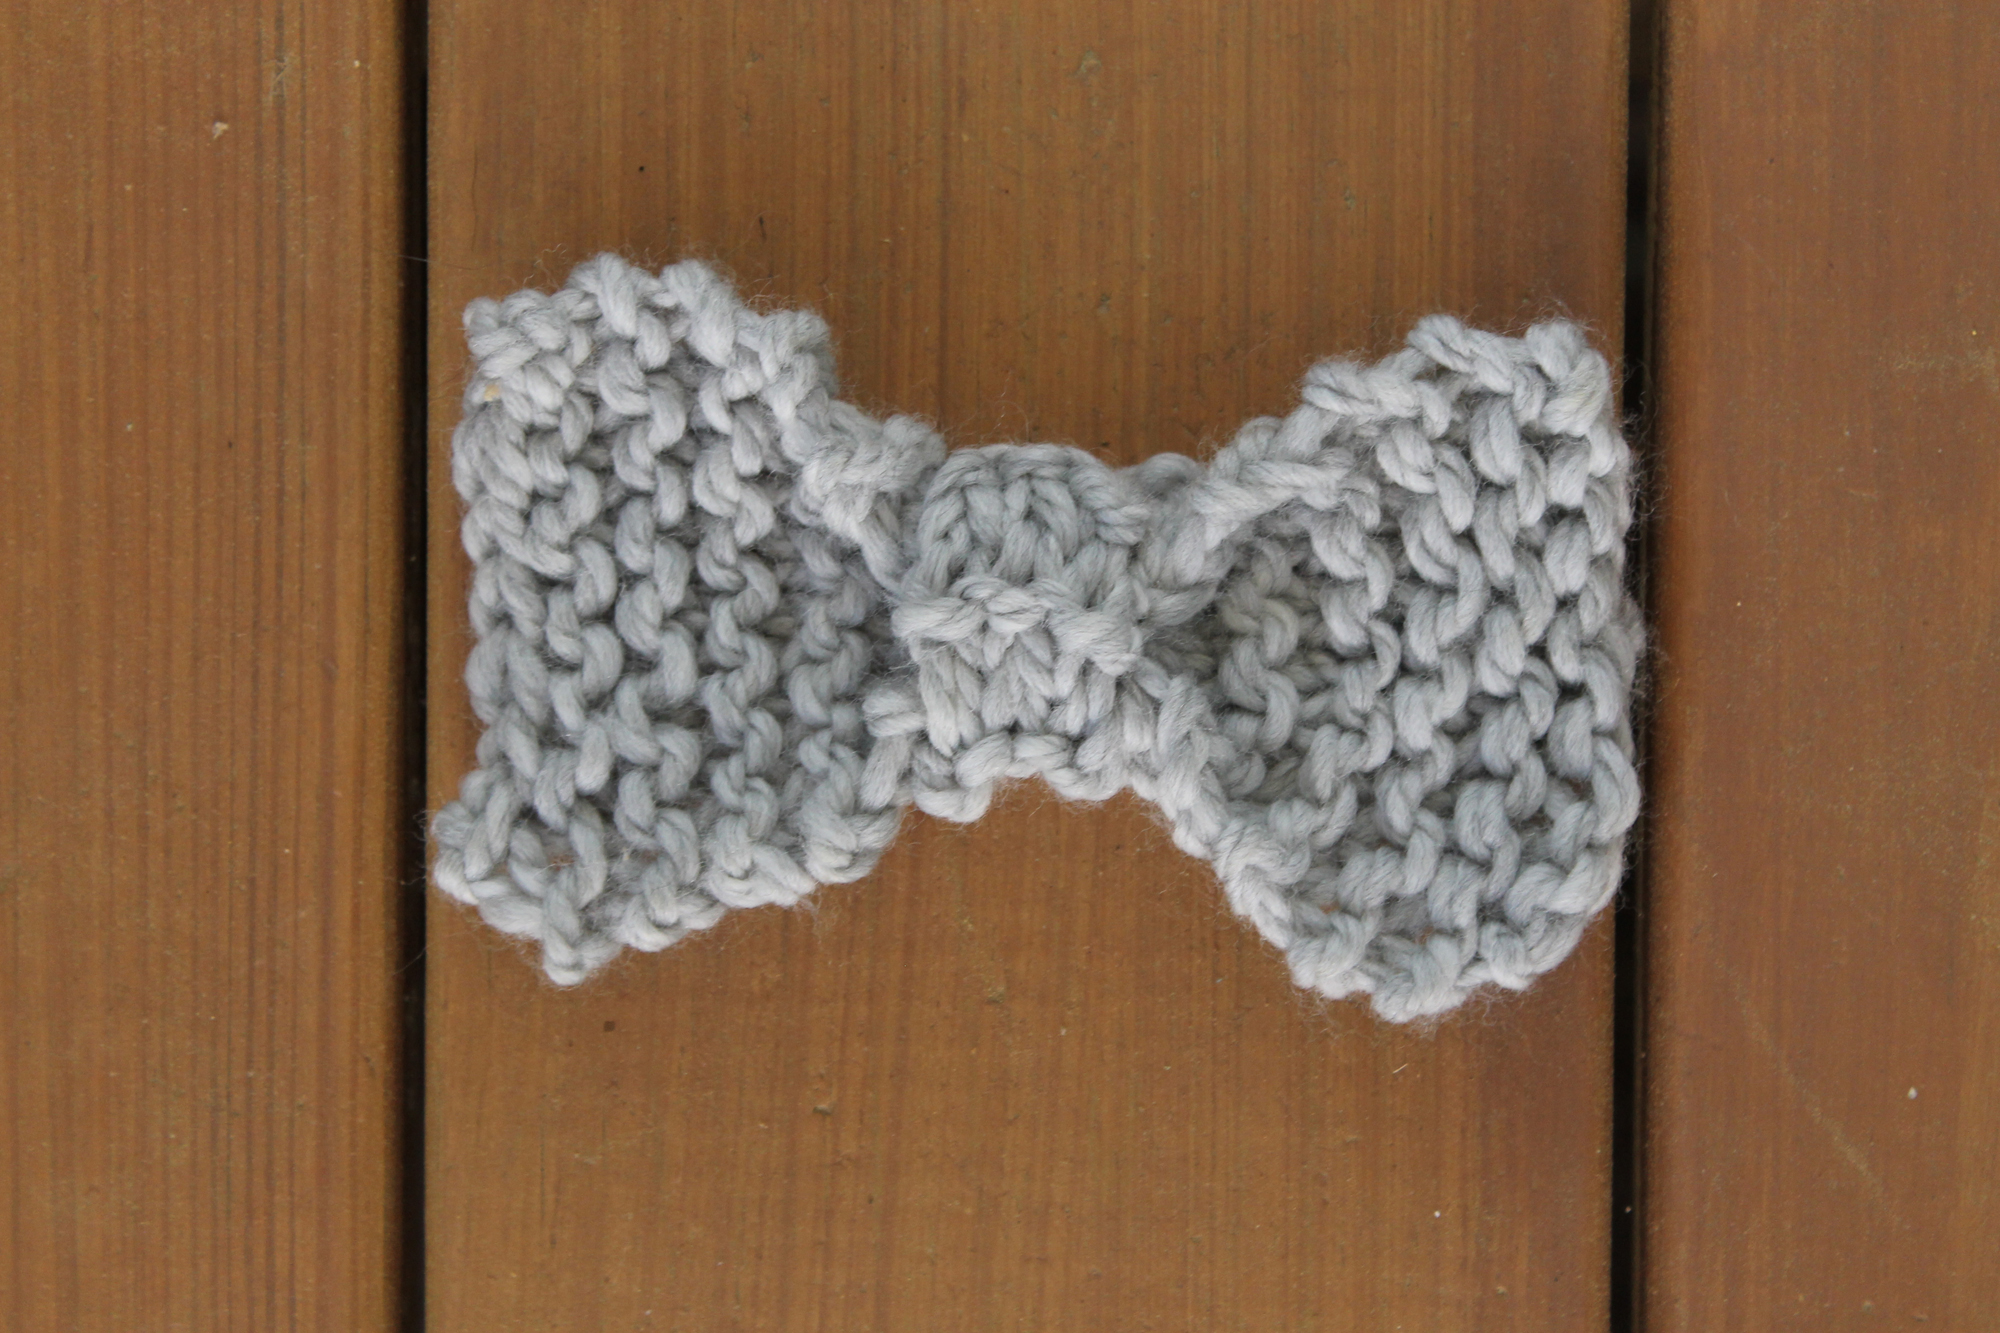
1. Cast on 8 stitches using the long-tail cast-on.
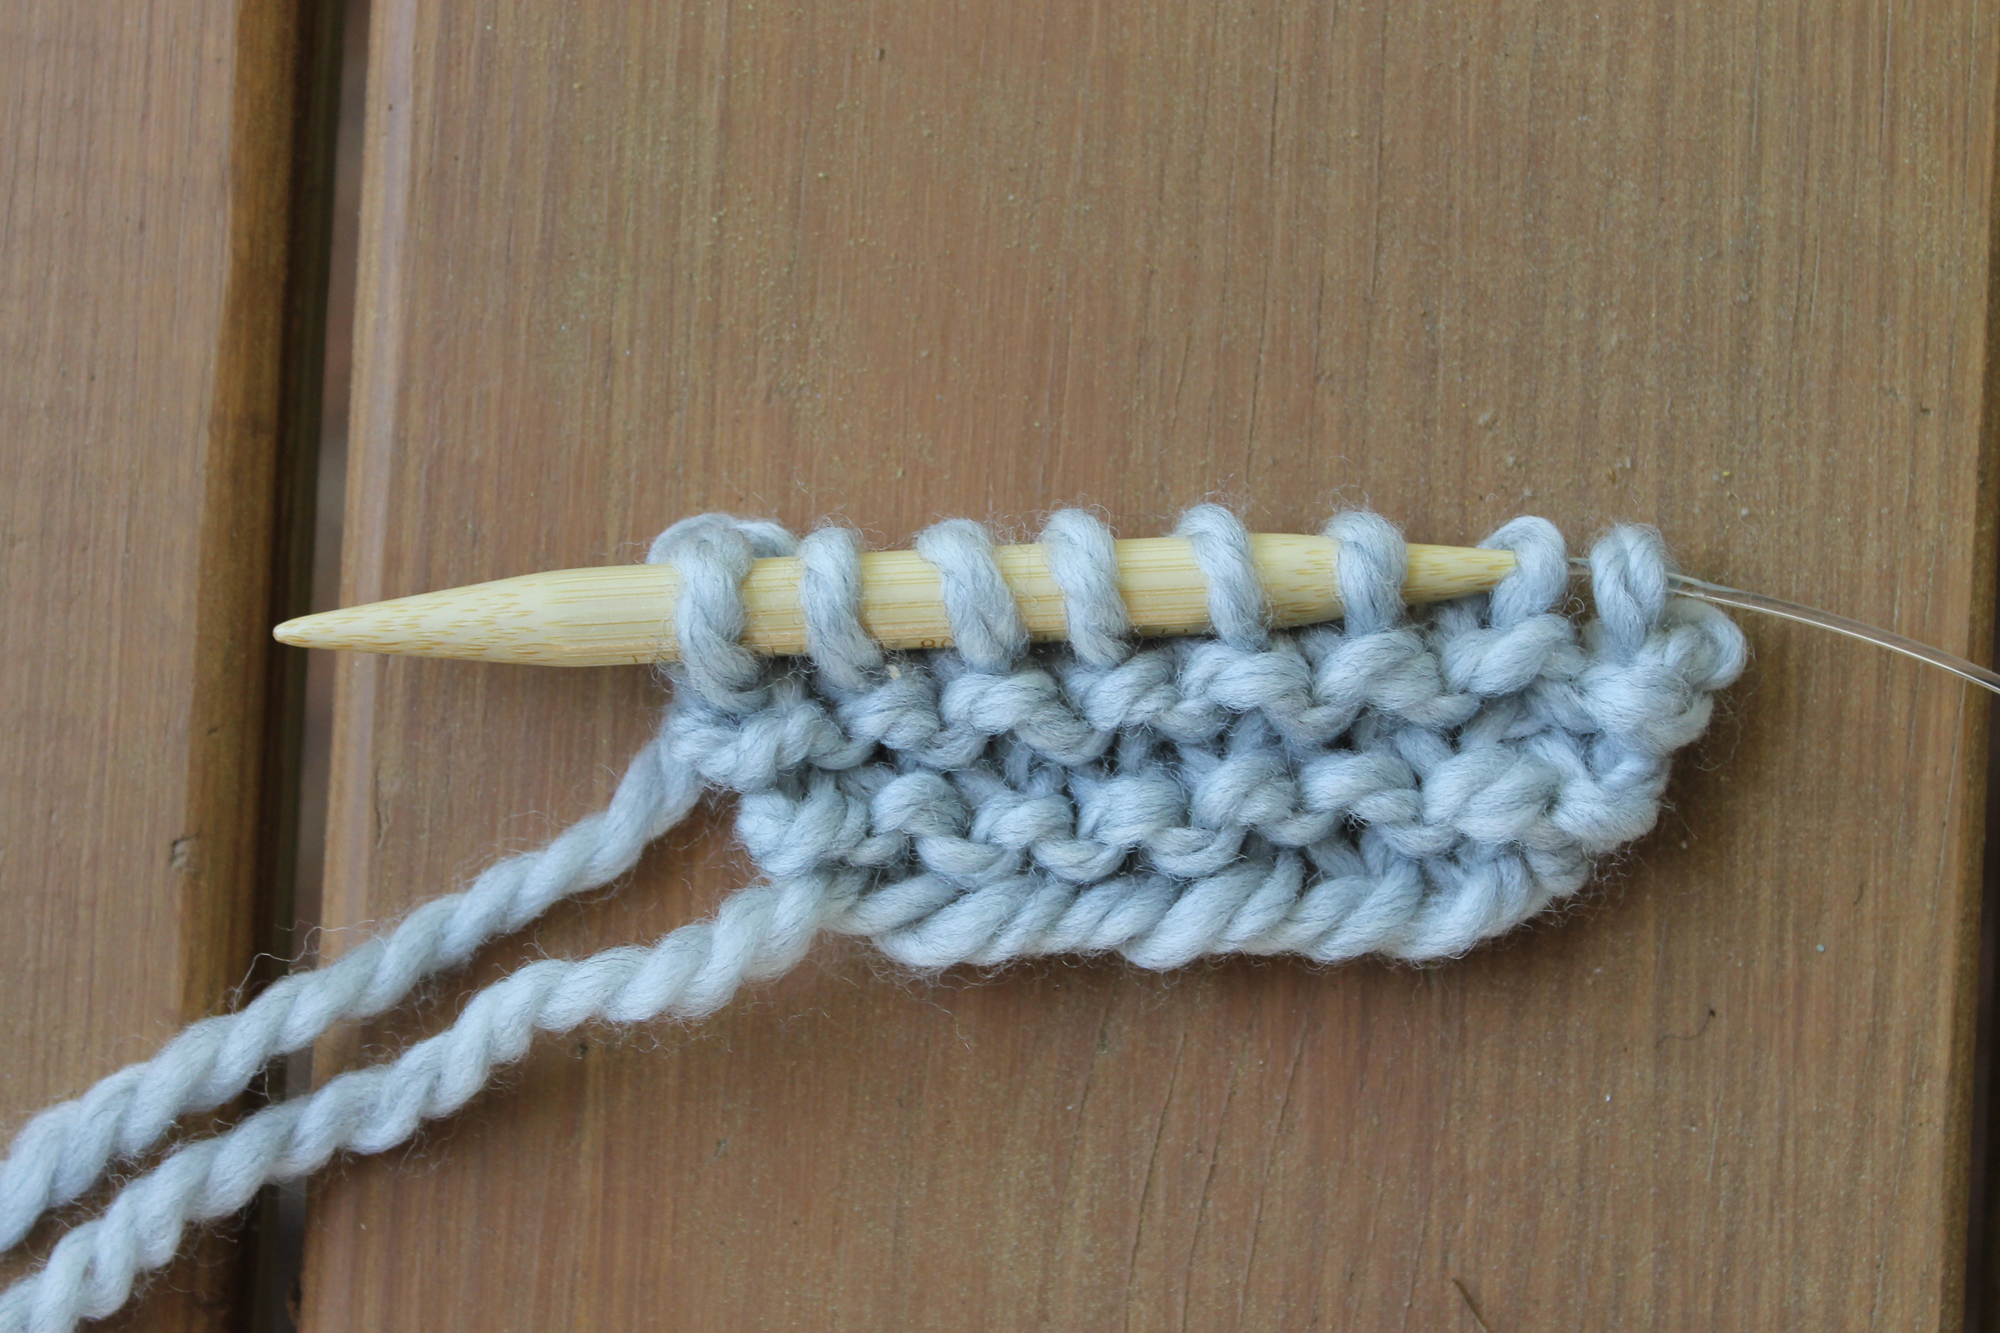
2. Work in garter stitch, knitting each row.
3. Knit until you have a rectangle that measures about 4-3/4″ long.
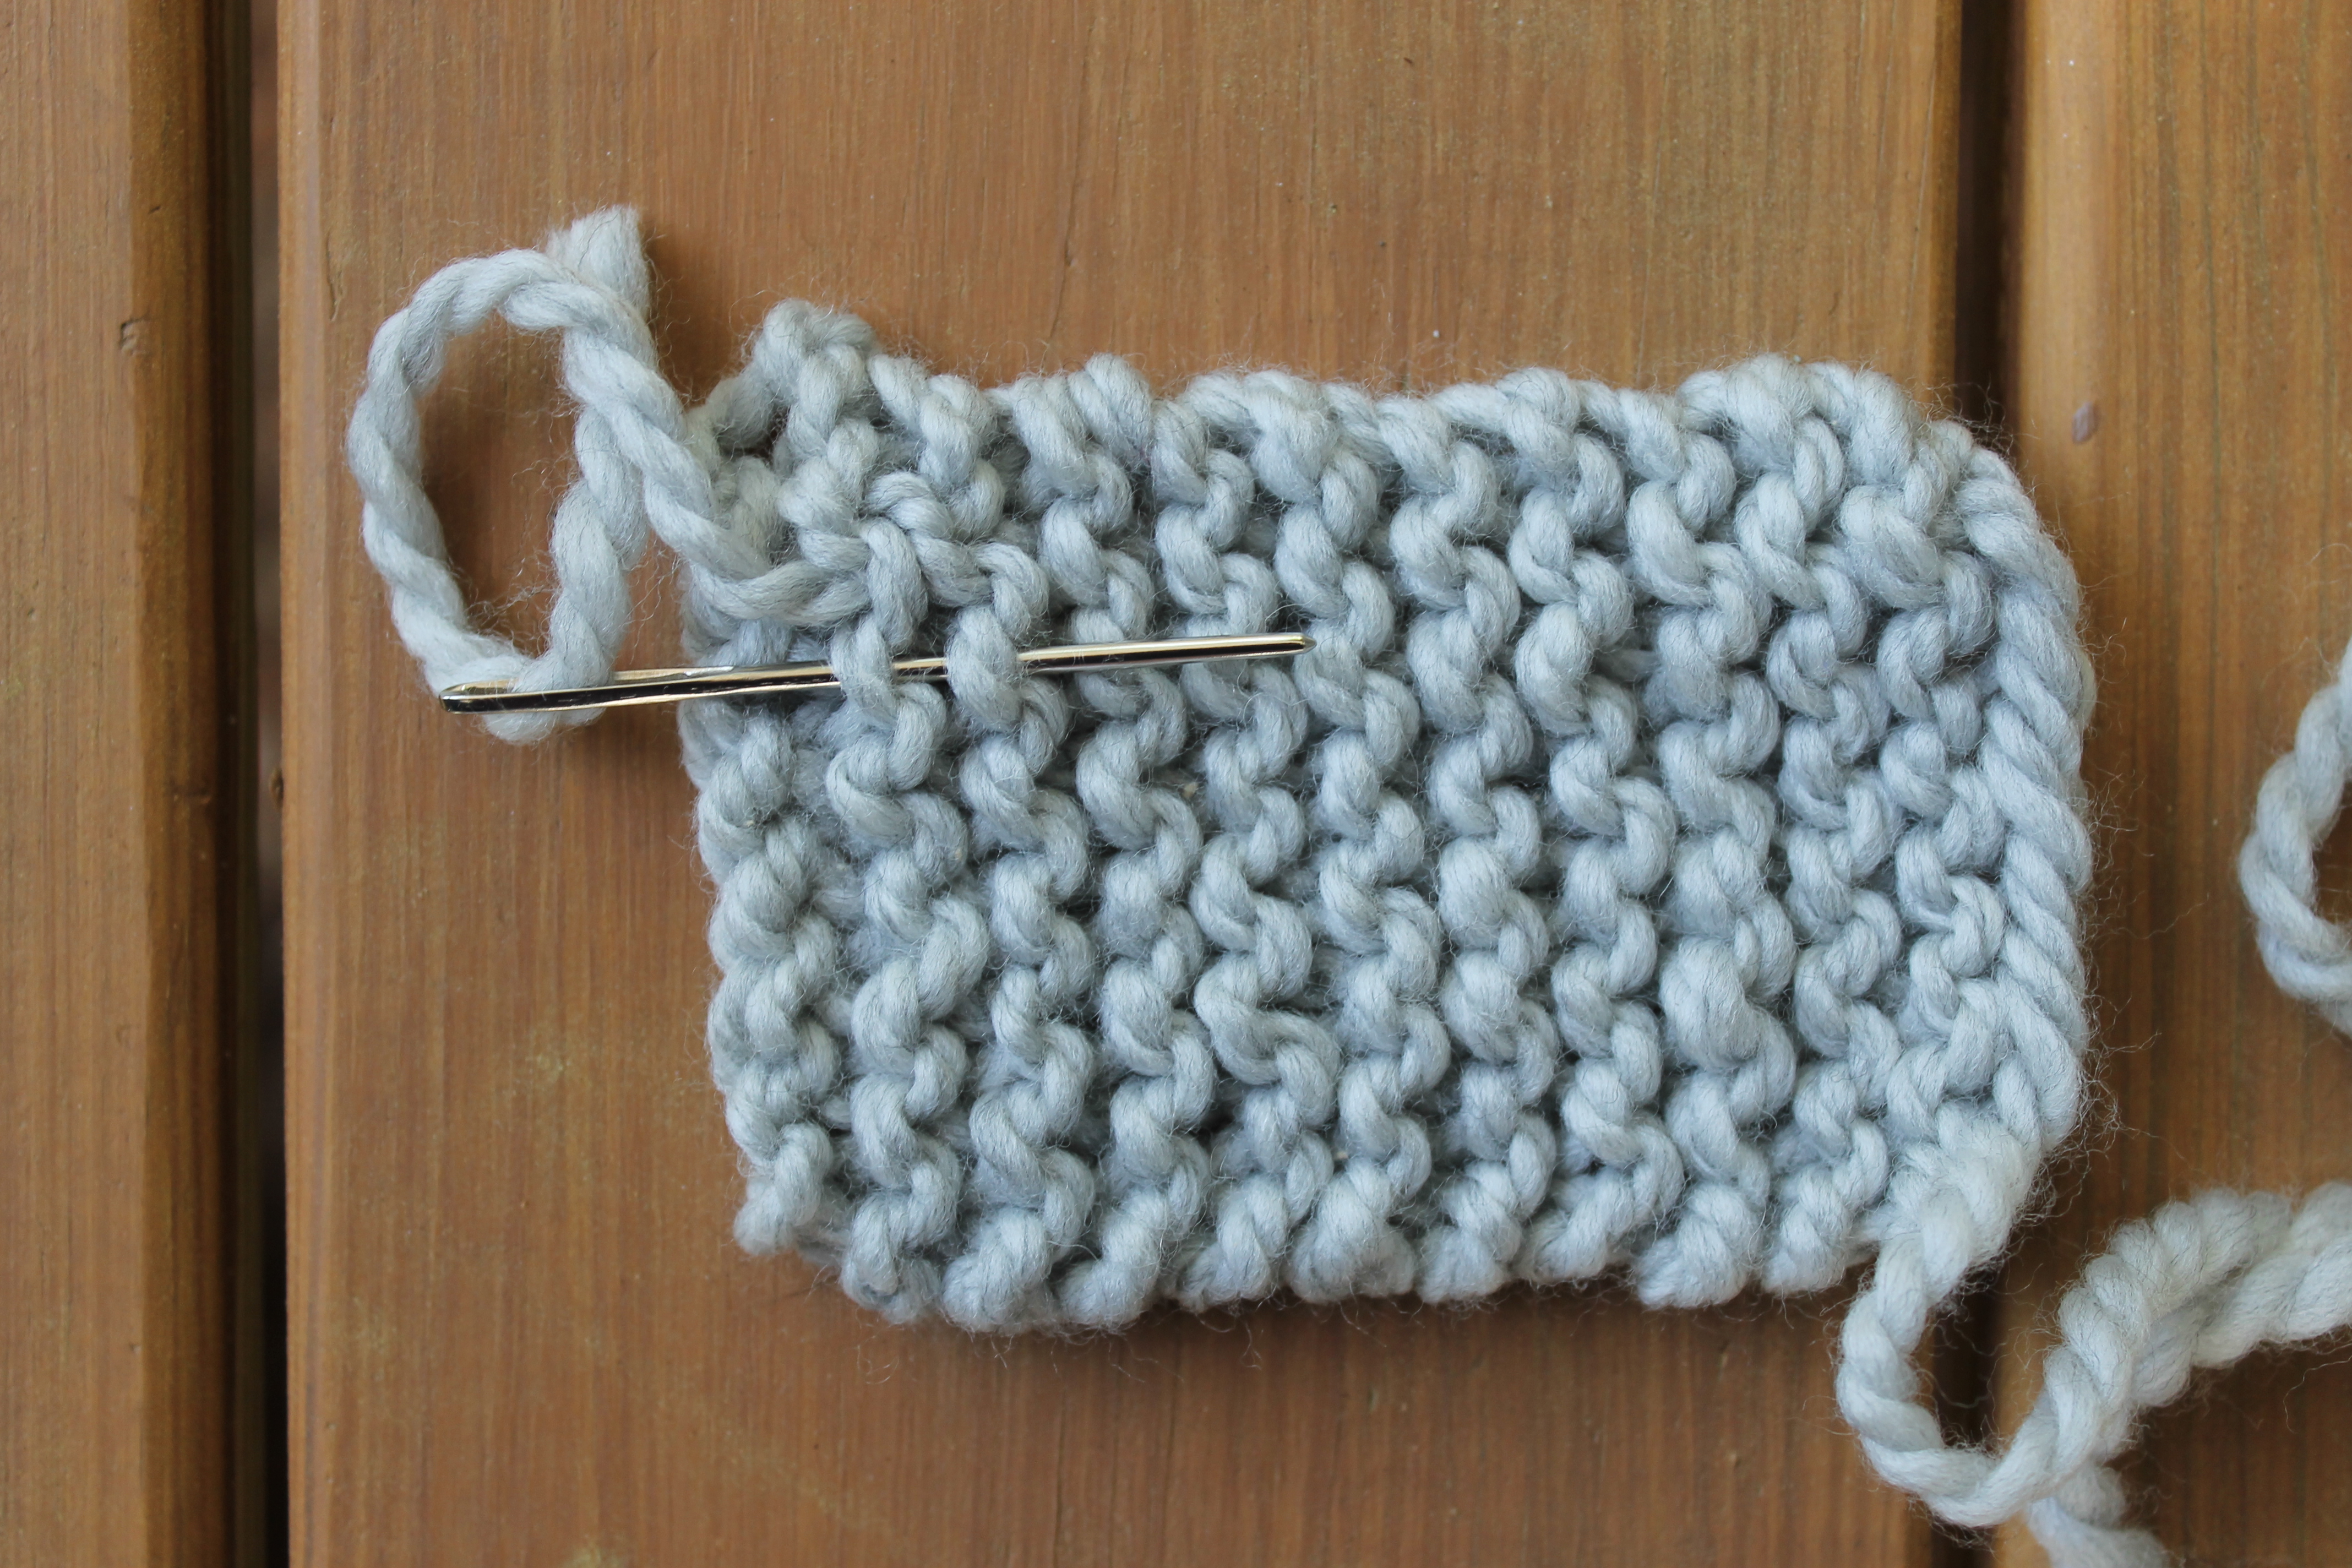
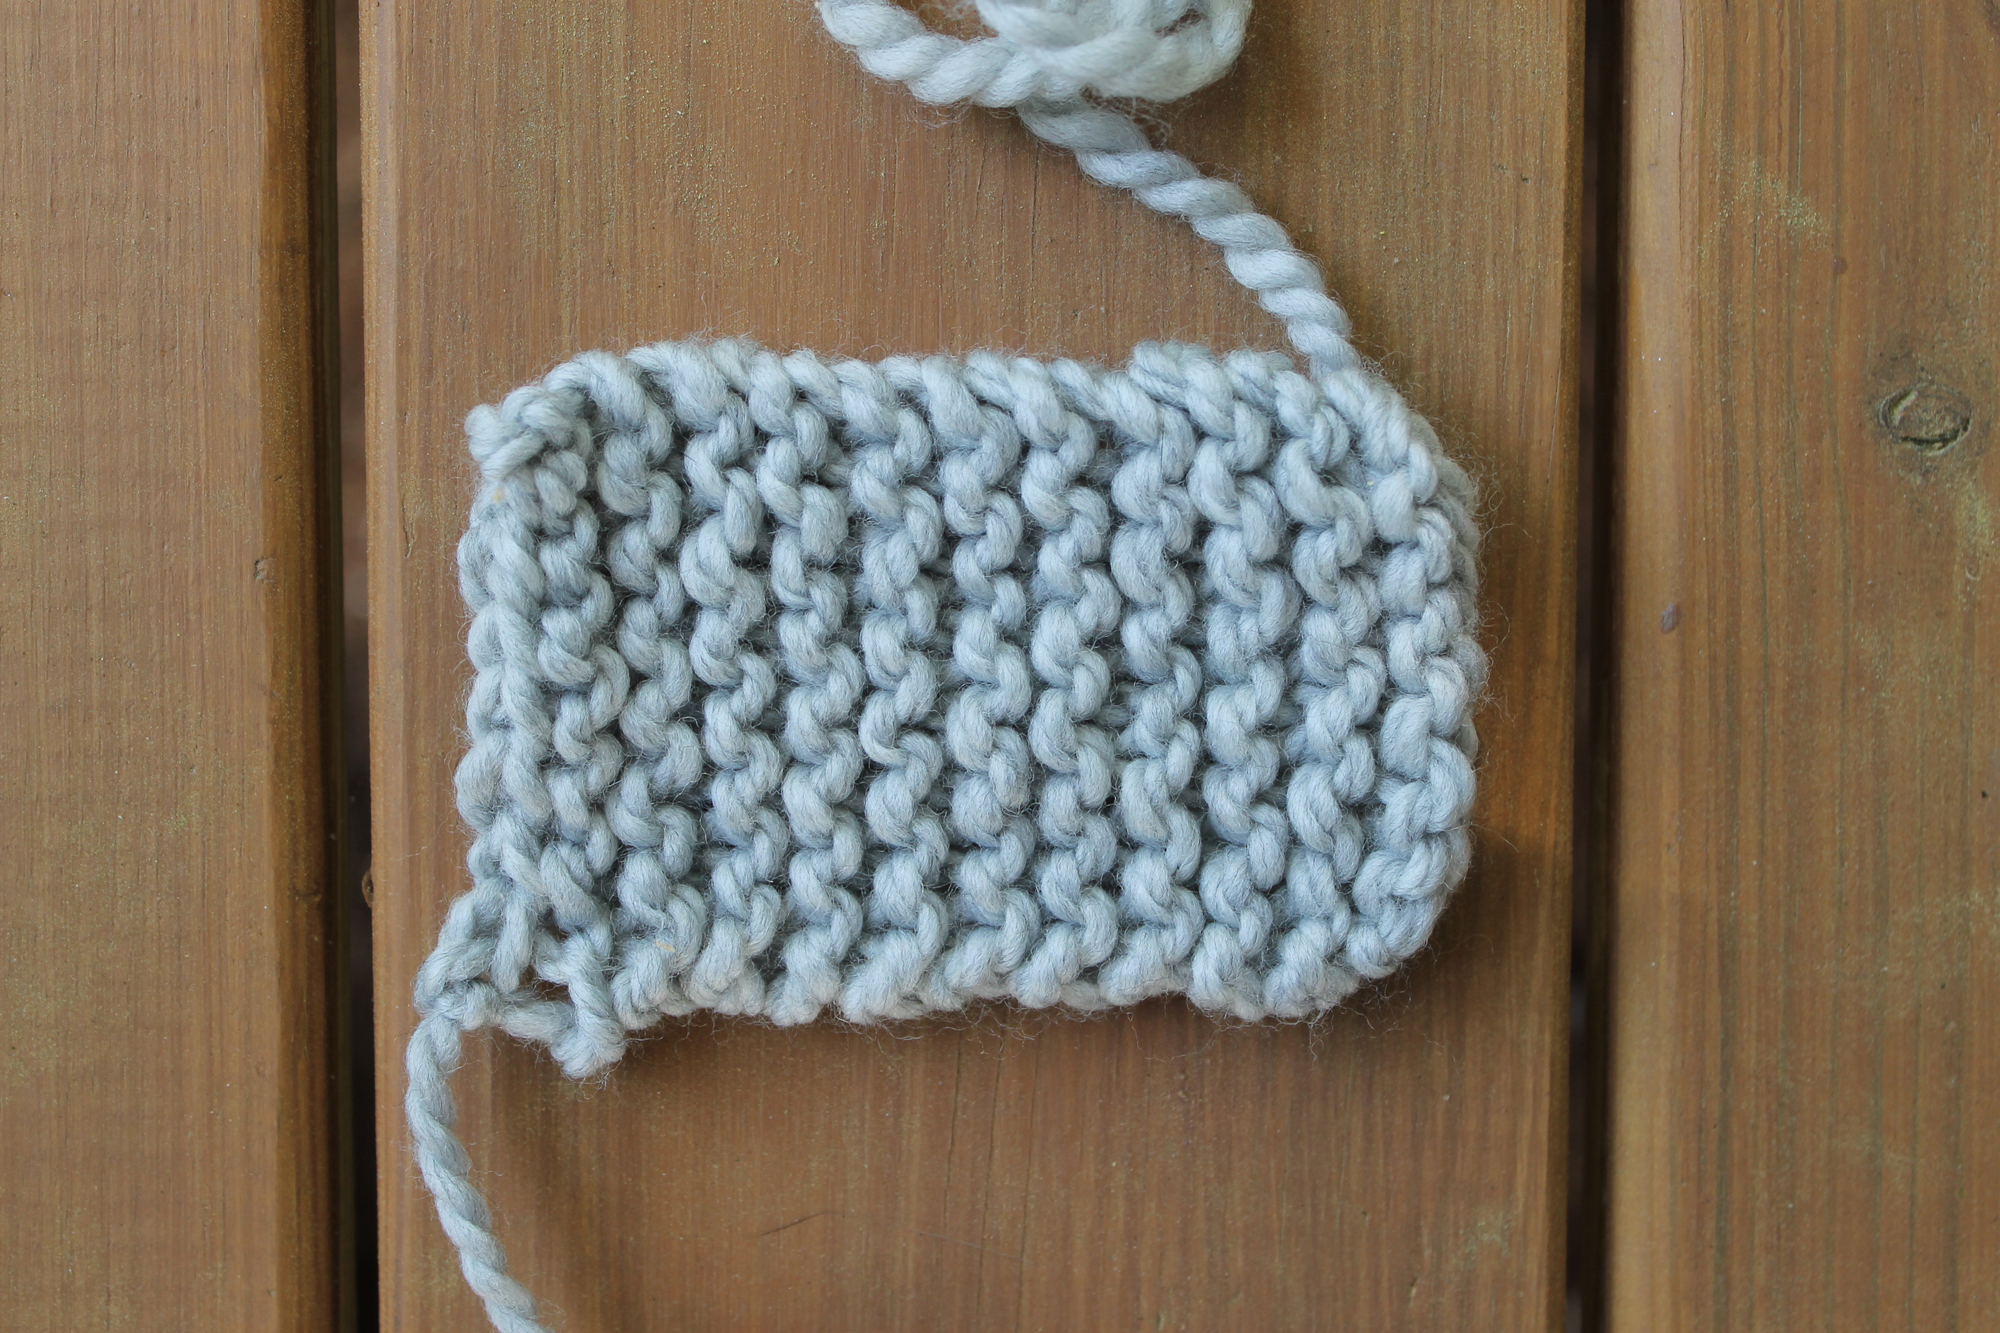
4. Bind off, and weave in all the loose ends with a yarn needle.
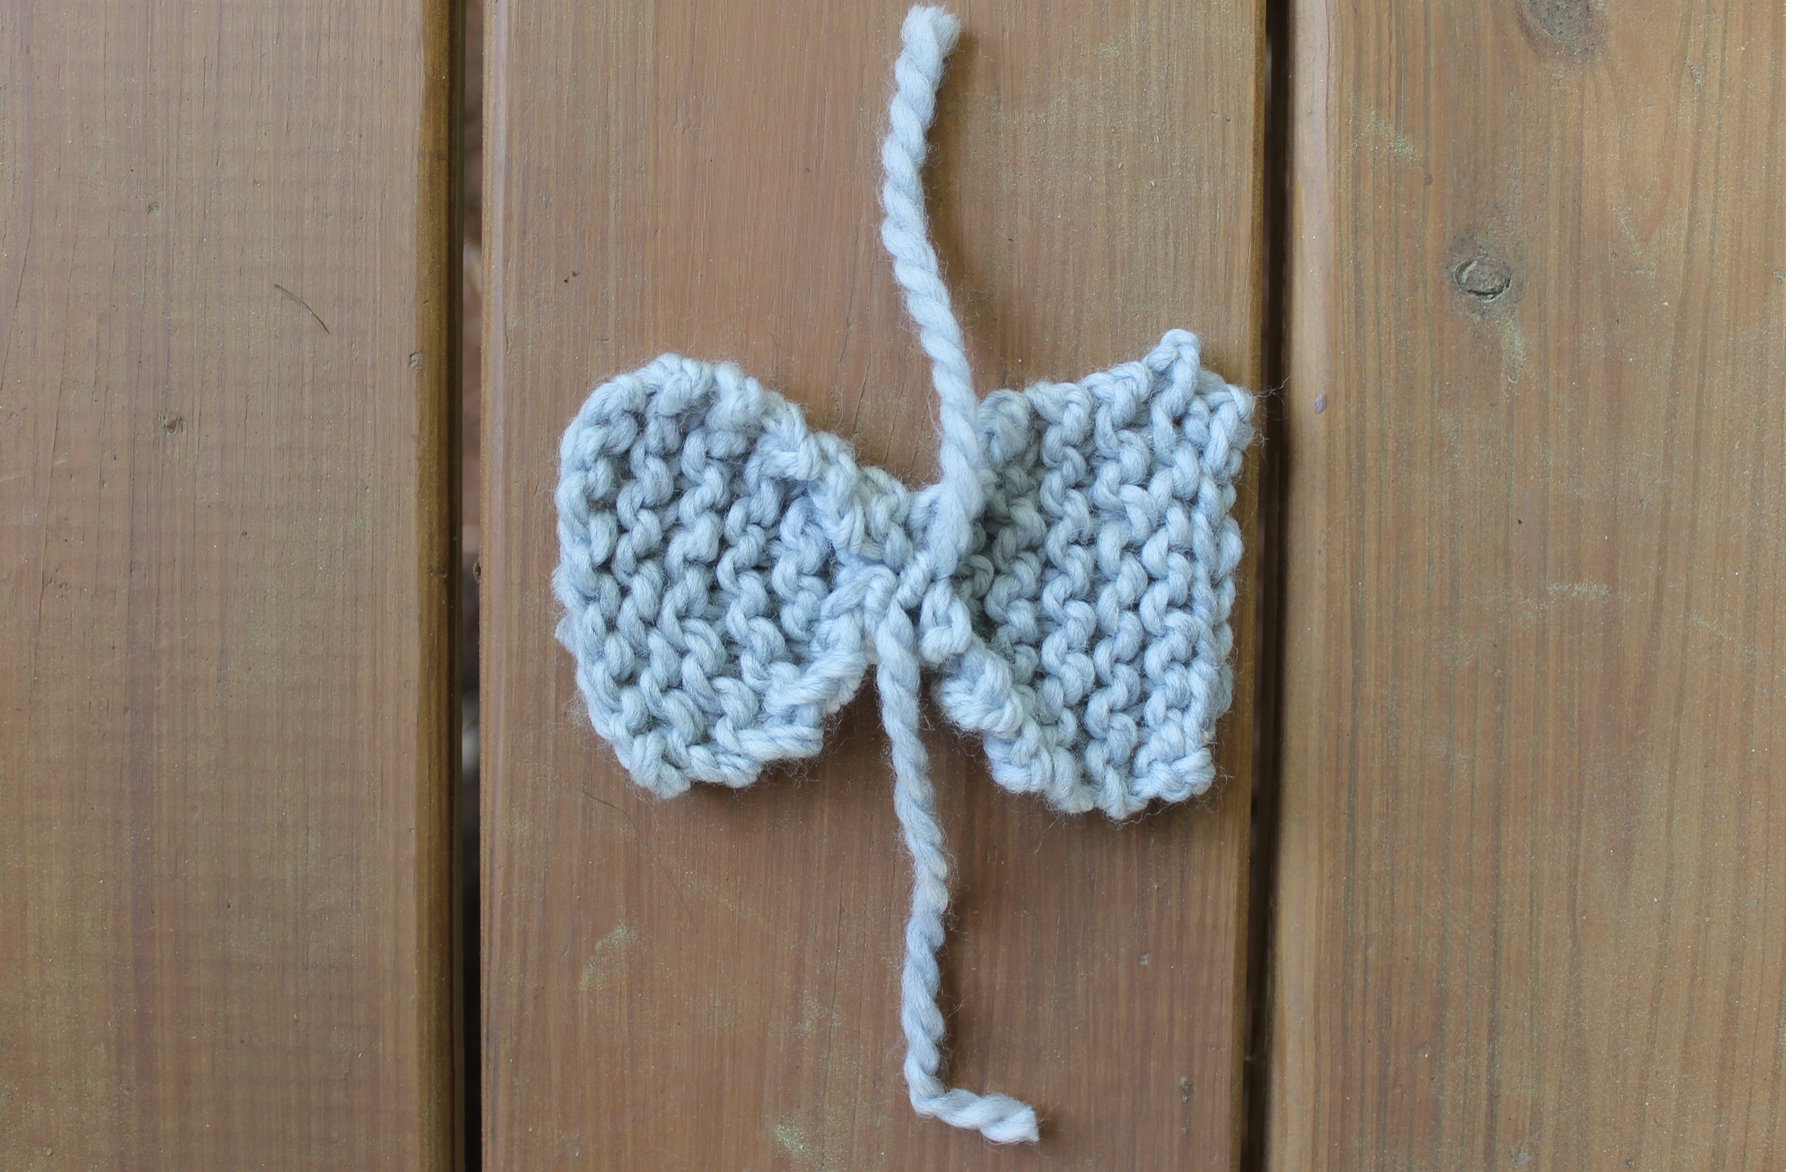
5. Cut a piece of yarn about 7″ long. (If your tail ends were pretty long, you could even use one of those here!) Wrap the length of yarn around the center of the rectangle, then tie a knot to secure it. This will give the bow more shape so that you’re not depending on the center band to hold everything in place.
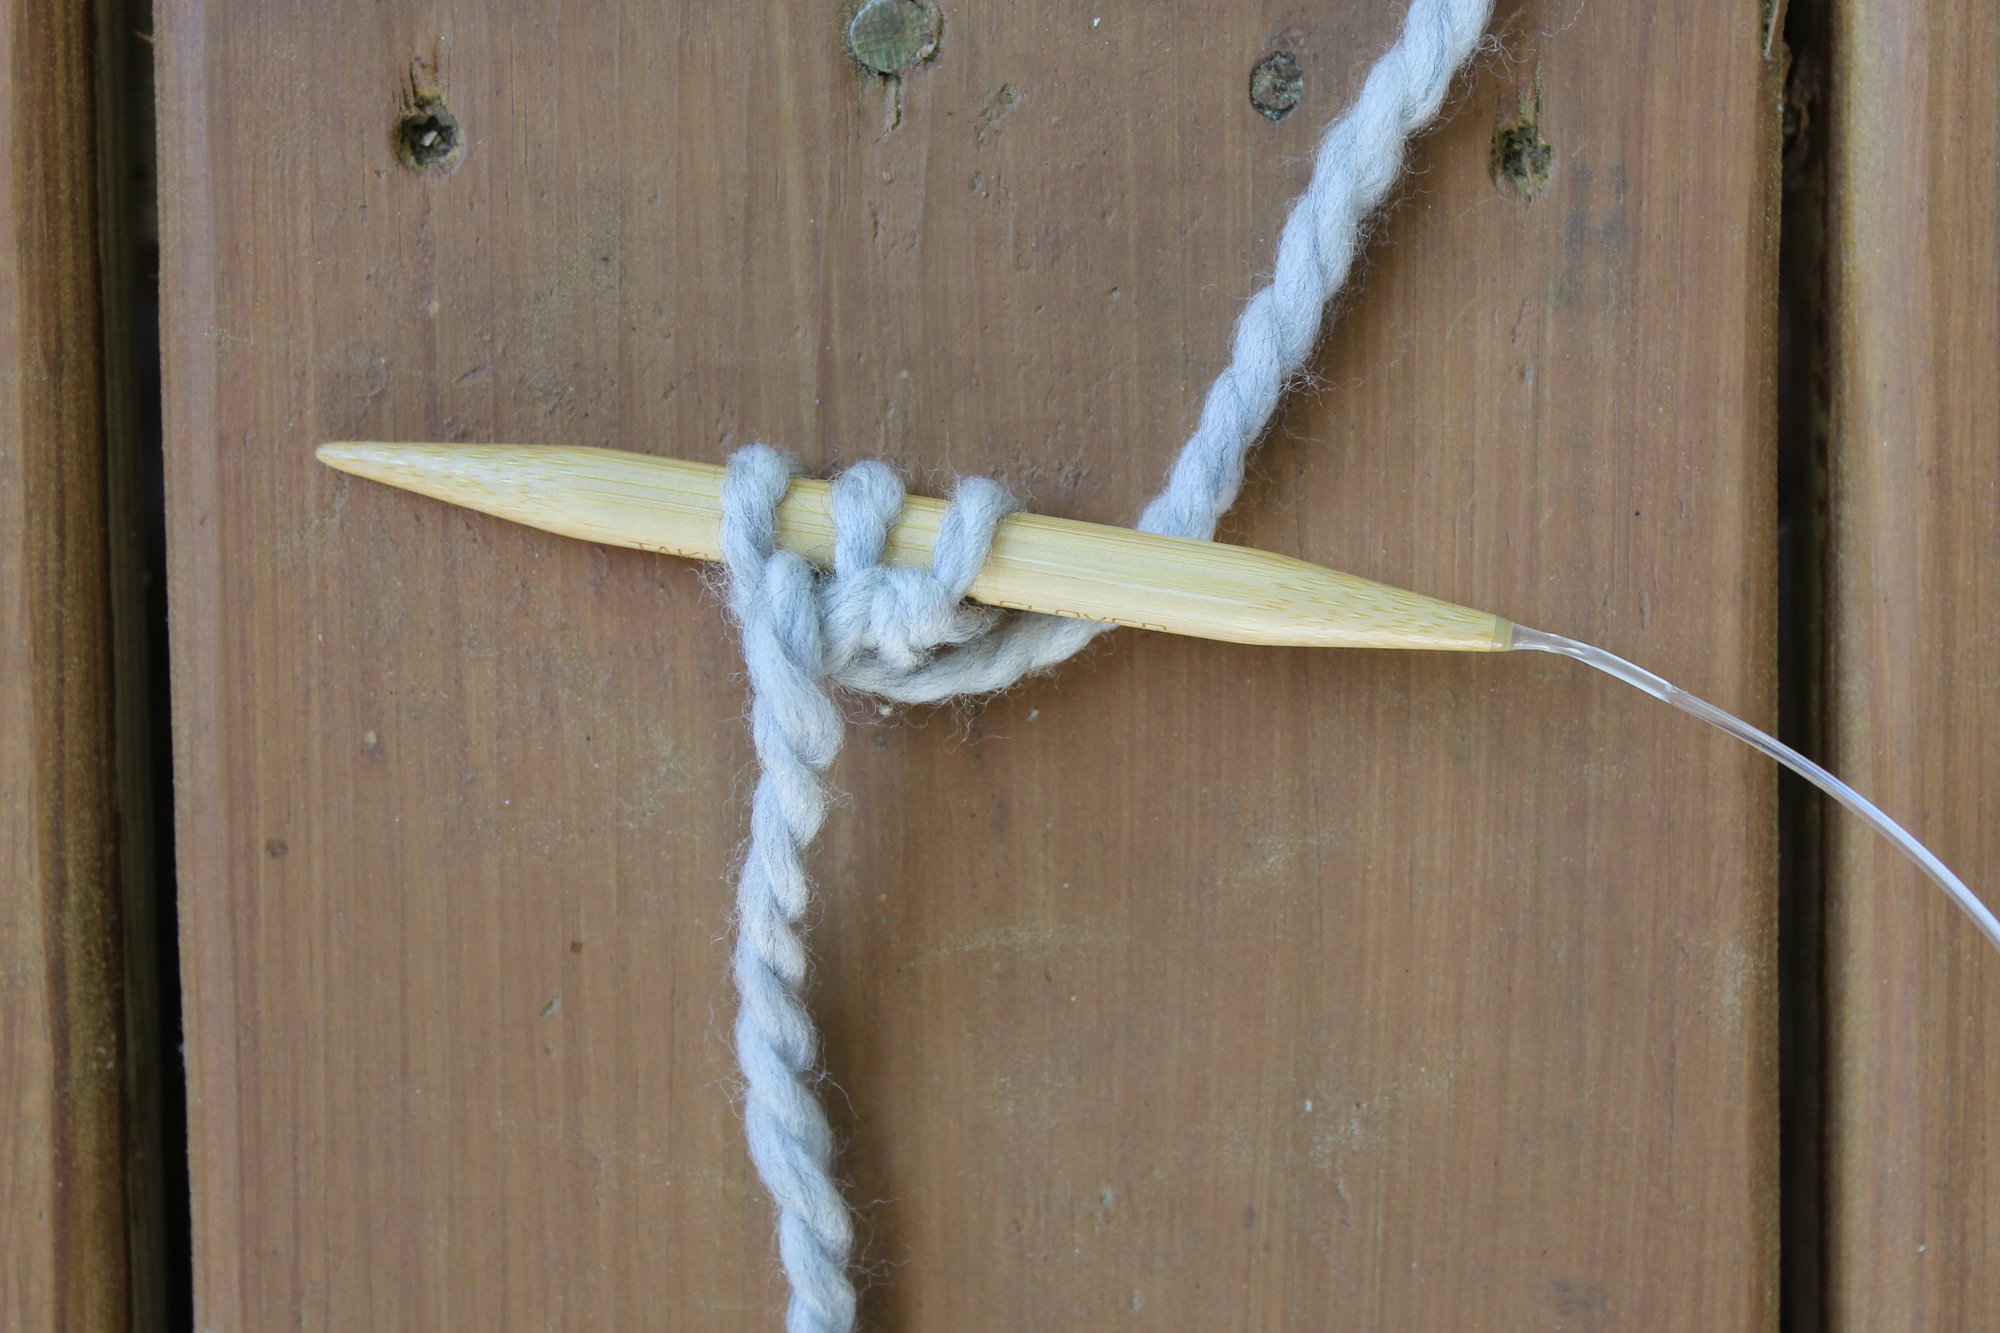
6. Now make the center band. Cast on 3 stitches.
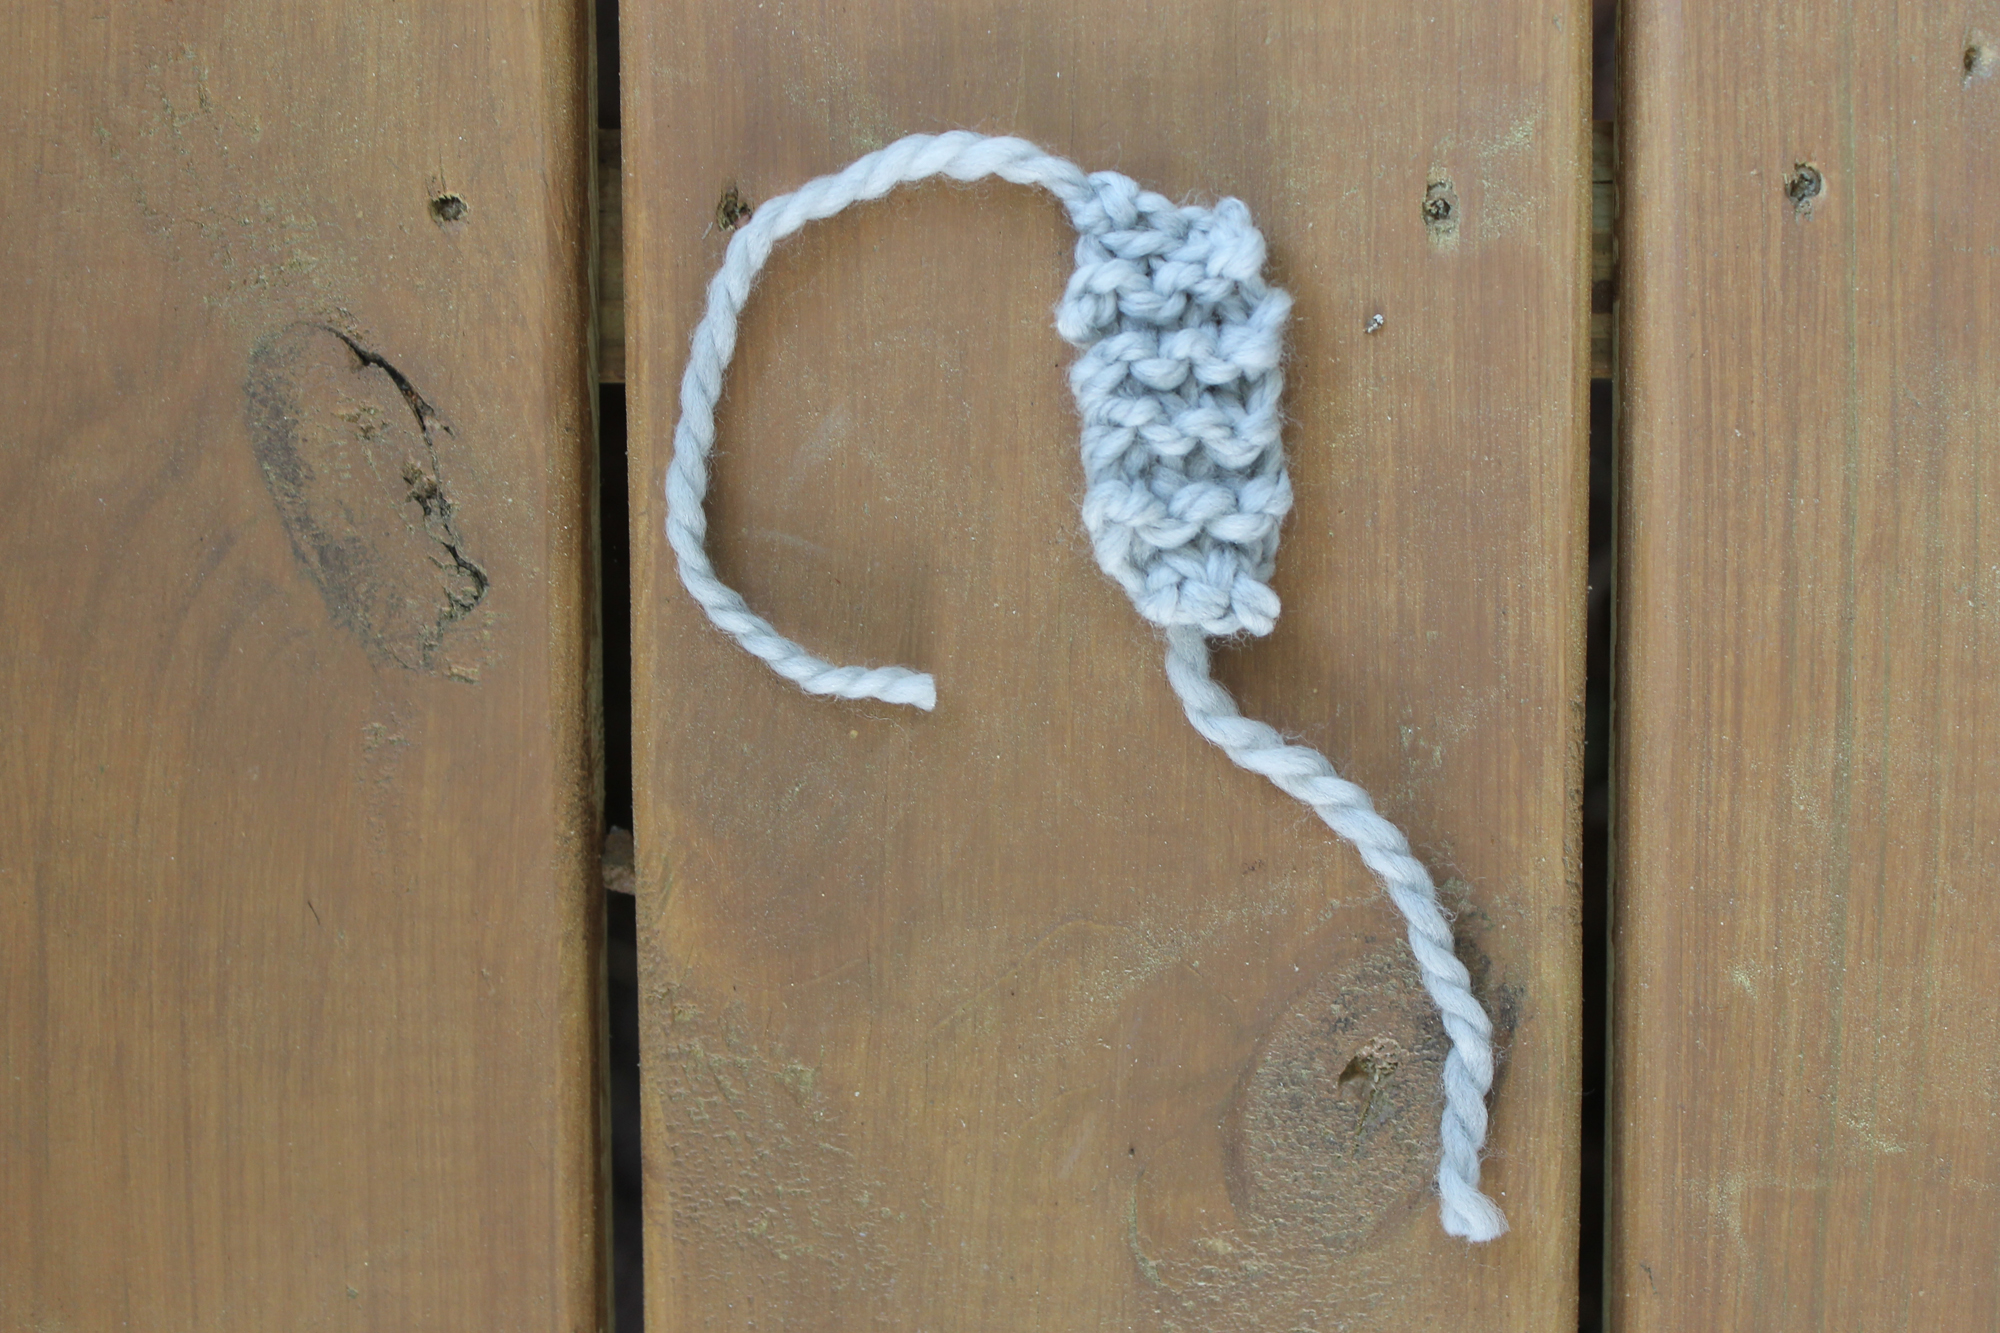
7. Knit each row until your piece measures about 2″ long. Bind off, and leave a long tail that you can use for seaming later.
8. Wrap the band around the bow, centering it. You might find that you need to stretch the band a little to wrap it around, but that’s ideal since you want it to be nice and snug.
9. Grab your yarn needle and thread it with the yarn tail you left in step 7.
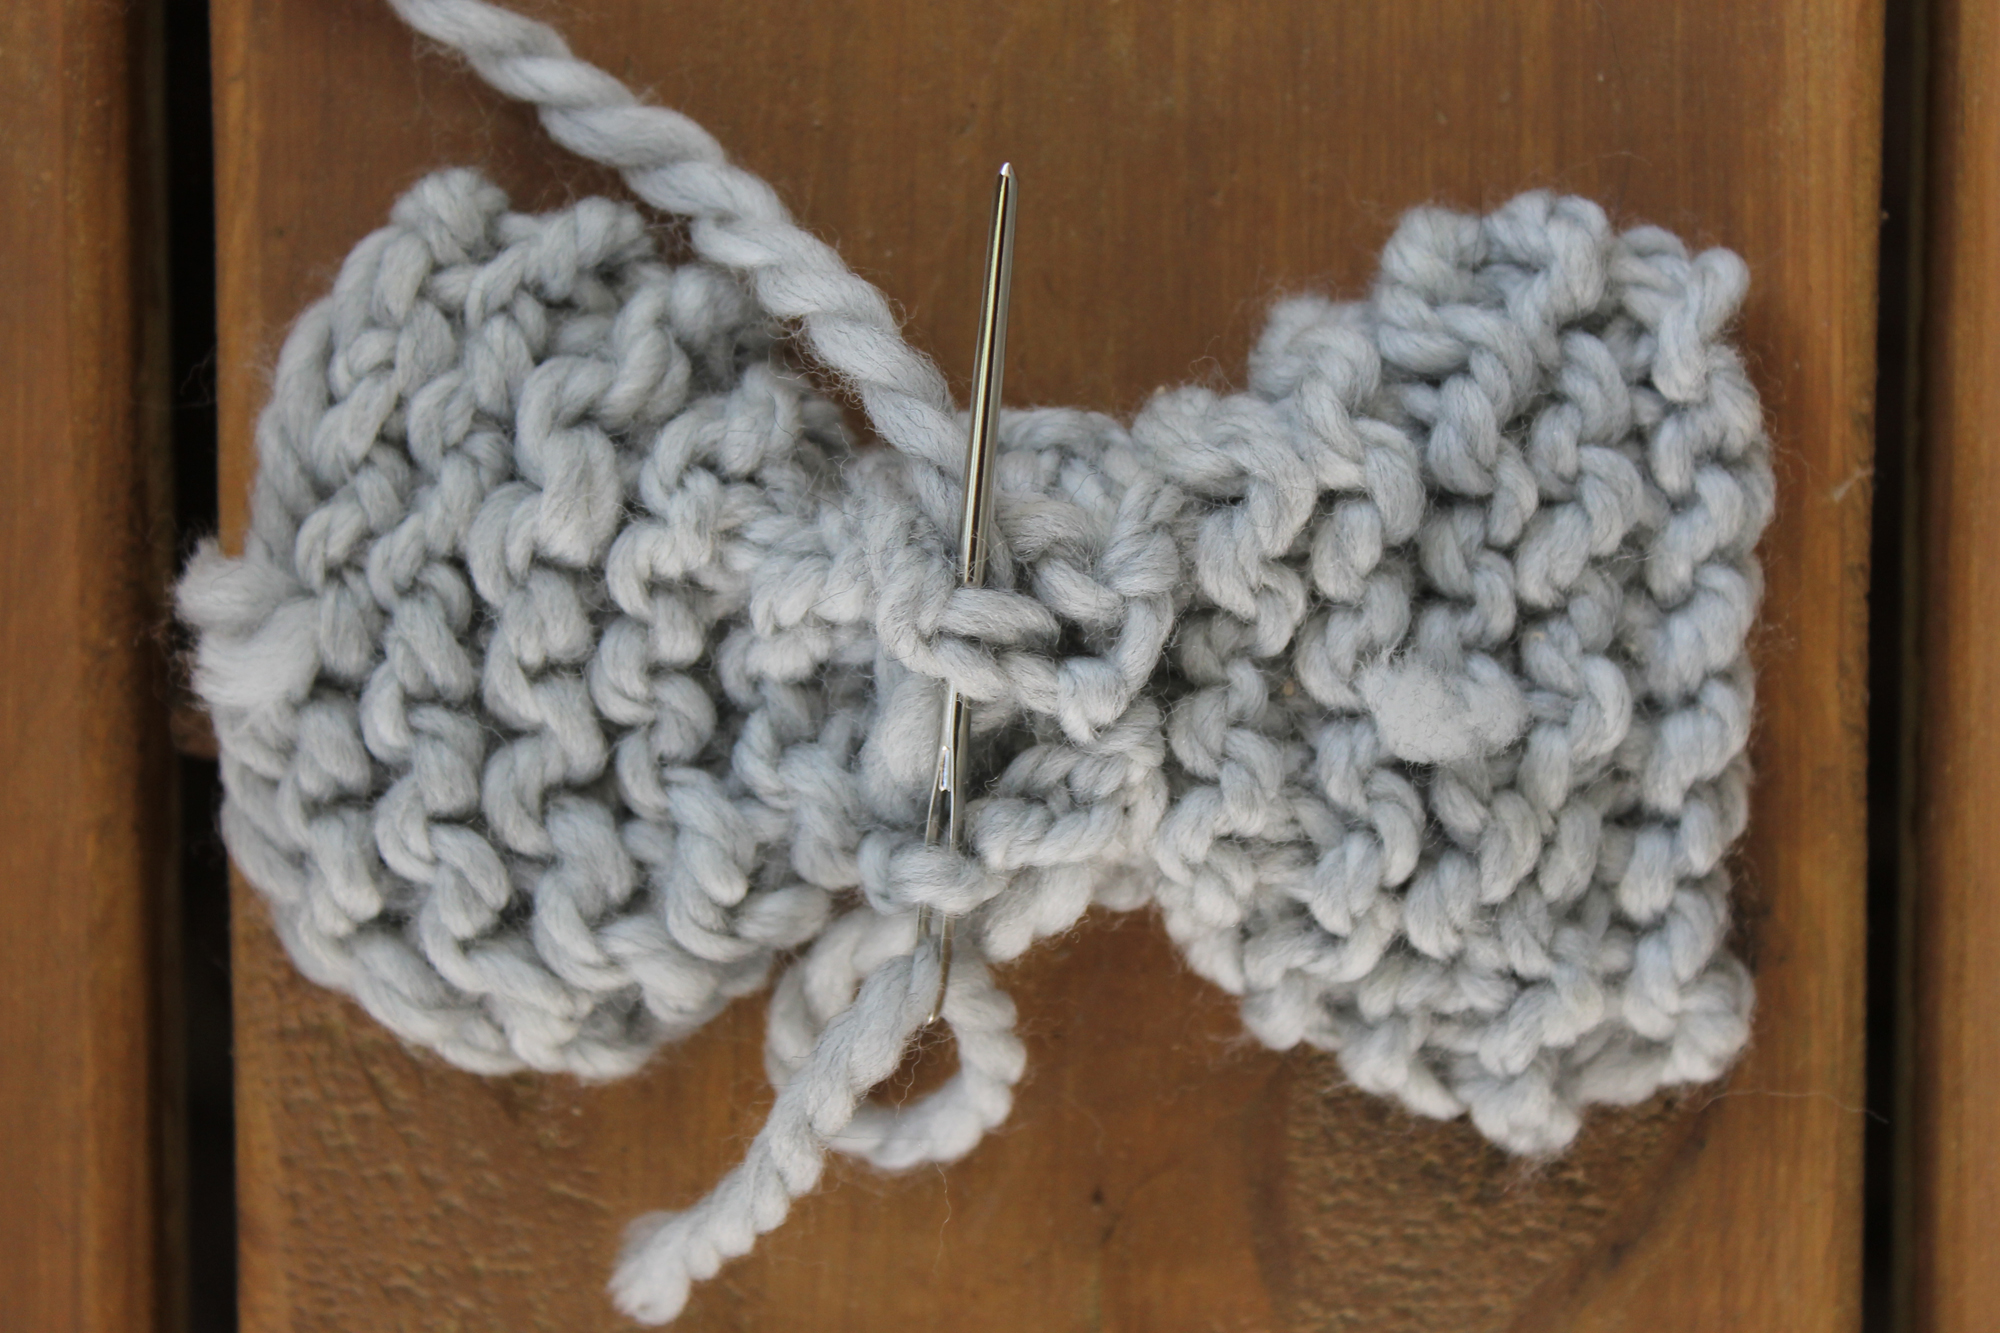
10. Sew the band’s short ends together, then weave in the loose ends. Now you have a bow!
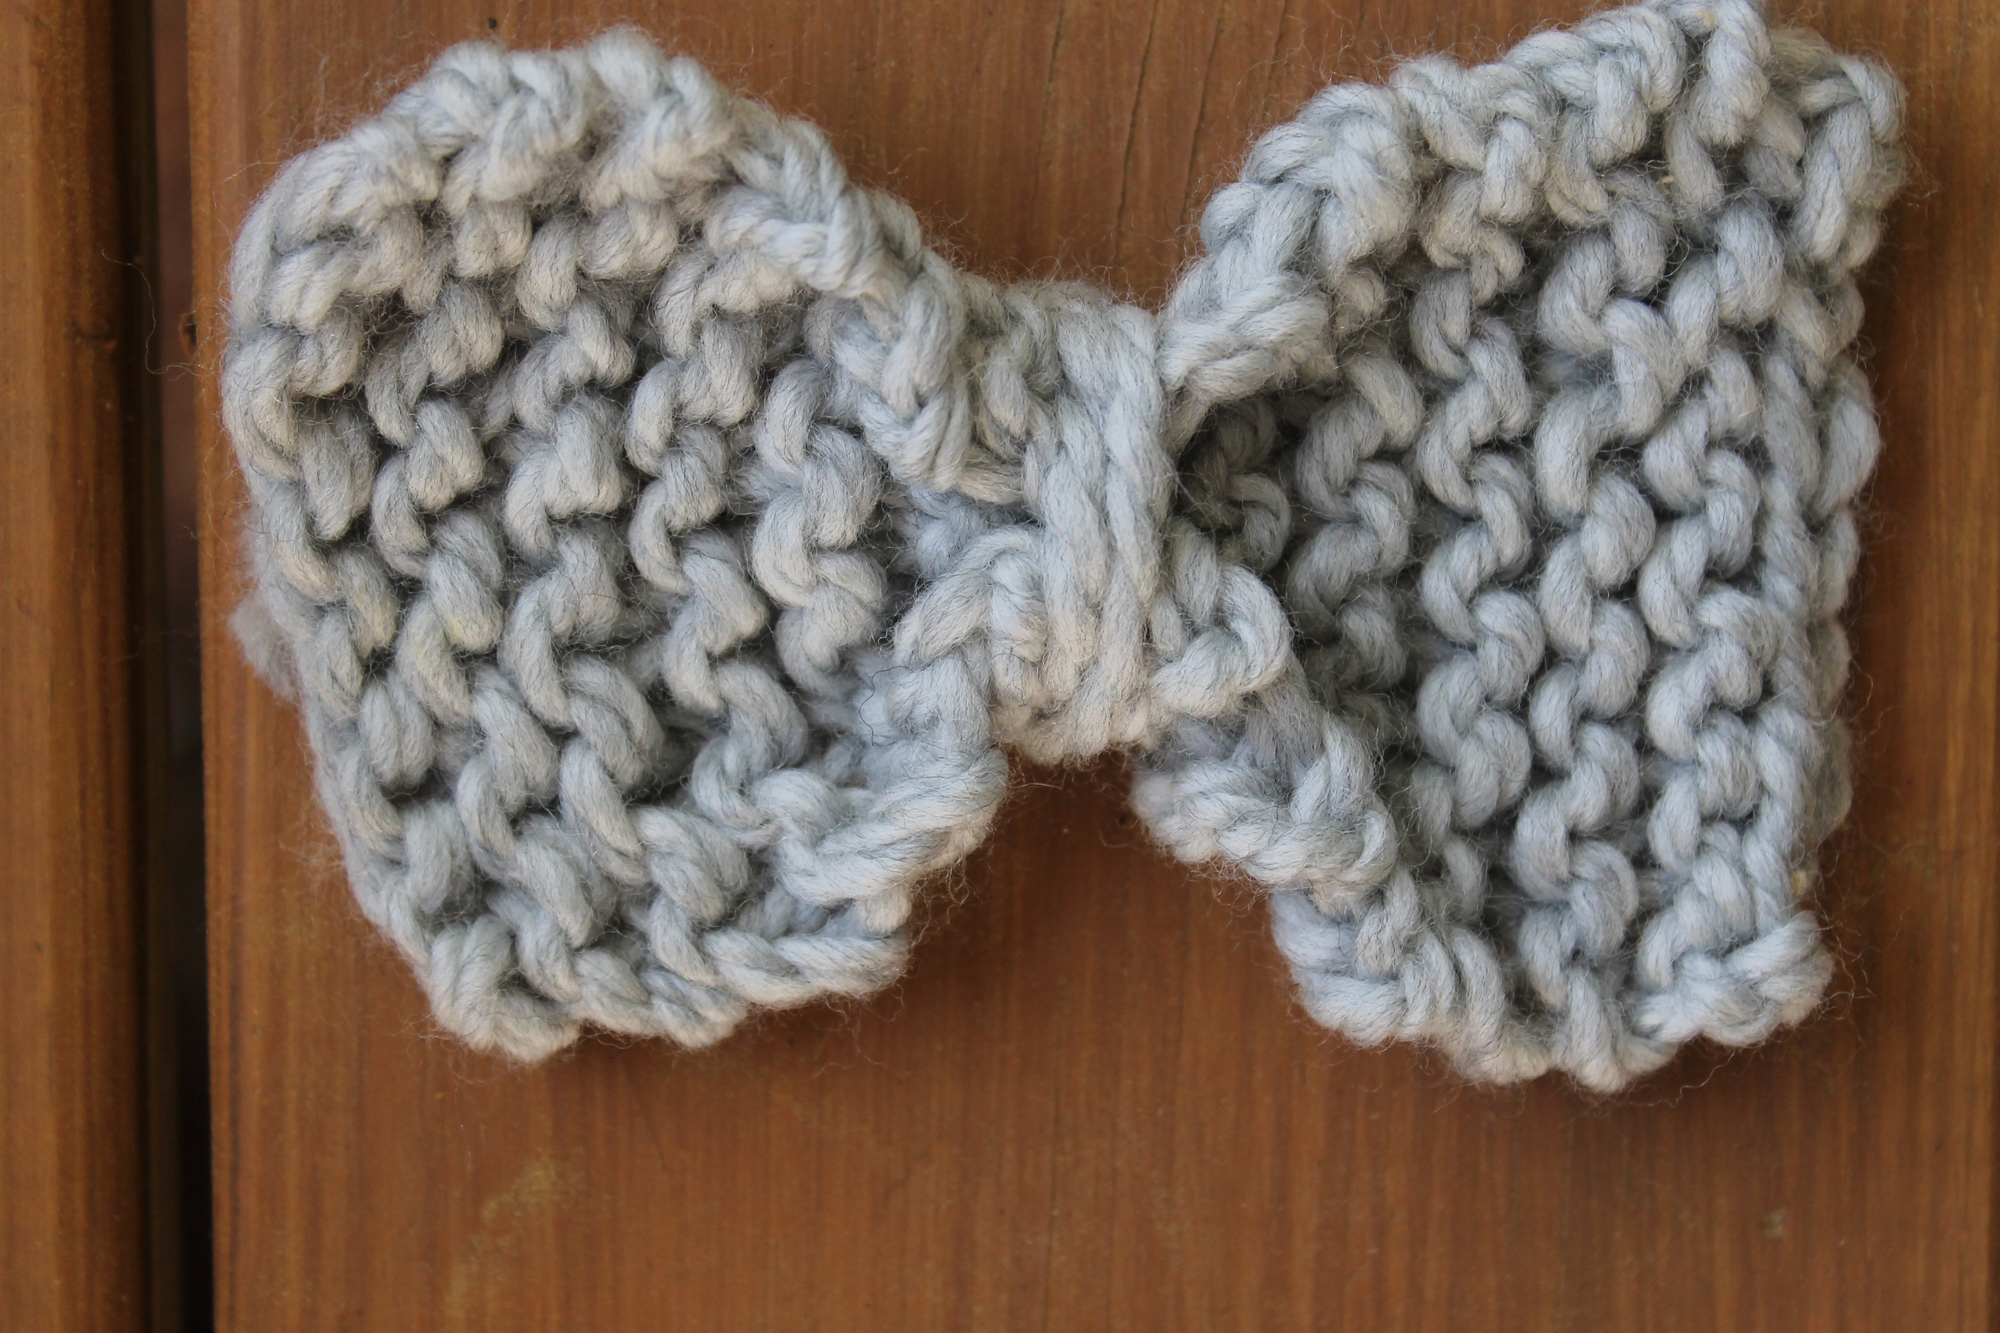
You can also customize the center band, making it thicker or thinner depending on your preference. If you’re crunched for time, simply wrapping yarn (as I did below) around the center of the bow is also an option!
And you’re done! Or not, because chances are you’re going to crank out more than one these bad bows…
Share tips, start a discussion or ask one of our experts or other students a question.
Already a member? Sign in
No Responses to “How to Knit a Beginner-Friendly Bow”