
Oh, those naughty knots! The French knot is one of those hand embroidery stitches that is either your best friend or your worst enemy. Some people love ’em, and some people hate ’em.
If you have trouble with French knots, try these five tips for foolproof French knots. You’ll find yourself a happy knot-maker in no time!
Photos via Needle ‘n Thread
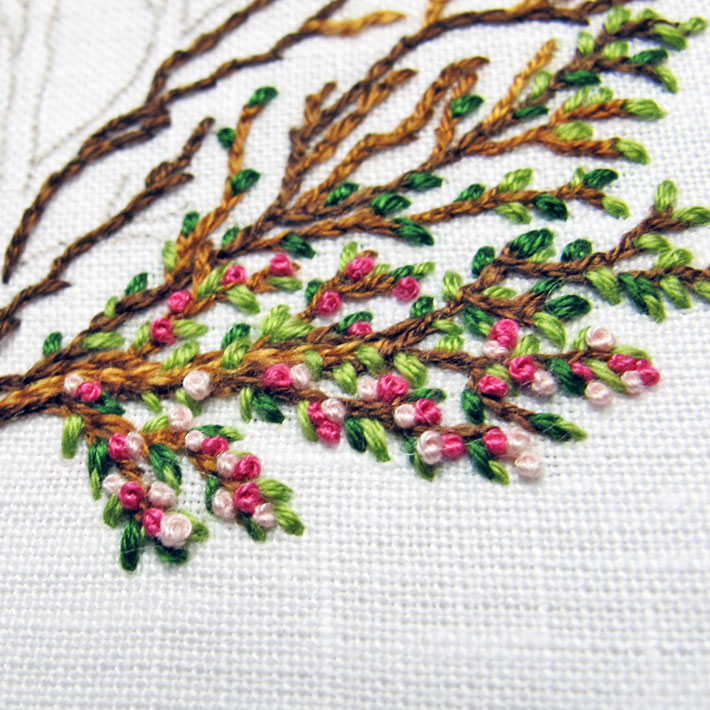
The French knot is a lovely and versatile little stitch. Clustered together, French knots create a dense, textured filling. Scattered loosely, they add an airy lightness to embroidery. And as isolated stitches, they make perfect little accents.
But the French knot can be difficult to conquer. So much can go amiss in the process of making that one tiny stitch!
Common problems with French knots
Common problems that you might encounter with French knots include the following:
- The knot pulls through to the back of the fabric.
- The working thread gets a knot in it, before it finishes its journey through the stitch.
- The knots end up lopsided, irregular in shape or size, or sitting up loosely on the fabric.
To help you avoid some of these common problems with French knots, let’s work our way together through making a French knot and then I’ll share my five tips.
How to make a French knot
In the following tutorial, I’m working on linen fabric stretched taut in an embroidery hoop. My thread is cotton a broder #25, but any thread will do. I’m using a milliner needle rather than a regular embroidery needle, and I’ll explain why down below.
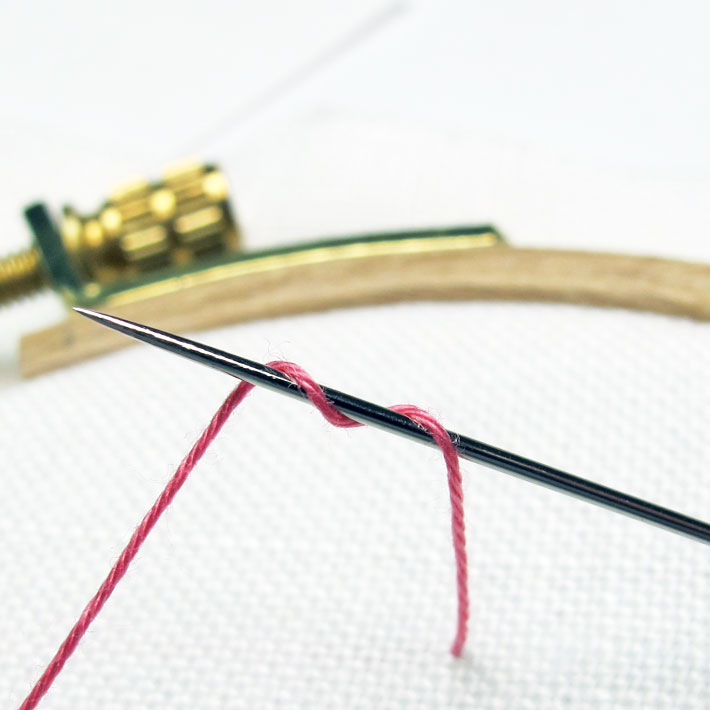
Bring your working thread to the front of the fabric. Then bring your needle up behind your working thread and wrap the thread around the needle twice, as shown in the photo above.
Many stitchers will change the weight of their knots by changing the number of wraps on the needle. If you wrap the thread once, you’ll end up with a smaller knot, and if you wrap it three times, you’ll end up with a larger knot.
I prefer to change my thread weight when I want a smaller knot or larger knot because I find that I get consistently good results with French knots with two wraps. That being said, there’s nothing wrong with adjusting the number of wraps if you want to.
Be warned, though, that knots made with more than three wraps are more likely to go amuck during the making and to come loose or be disarranged up after the embroidery is finished.
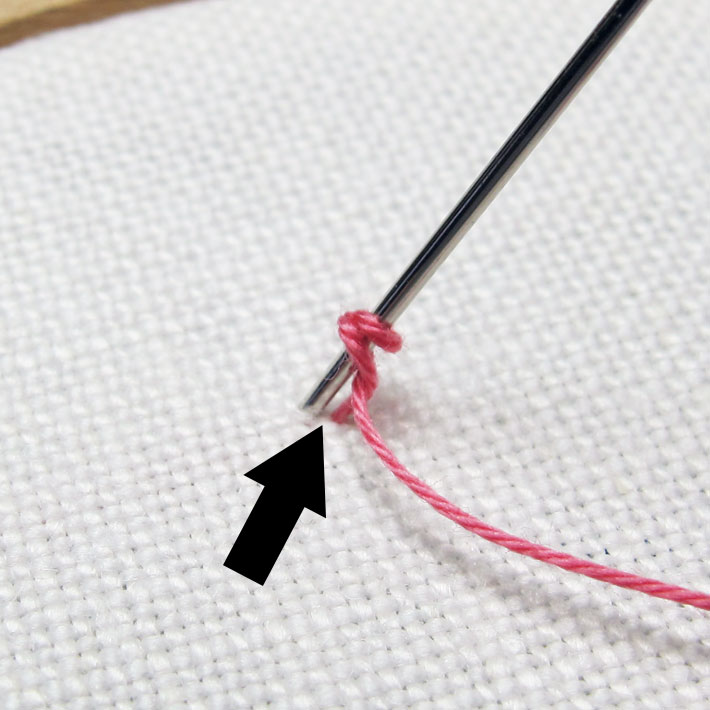
With the wraps on the needle, bring the tip of the needle down to the fabric, right next to where your working thread first emerged. Do not enter in the same hole as the working thread!
Instead, take the needle into the fabric just next to the original hole, leaving a small space of fabric between. The arrow in the photo above points to the space left between the beginning of the stitch and the end.
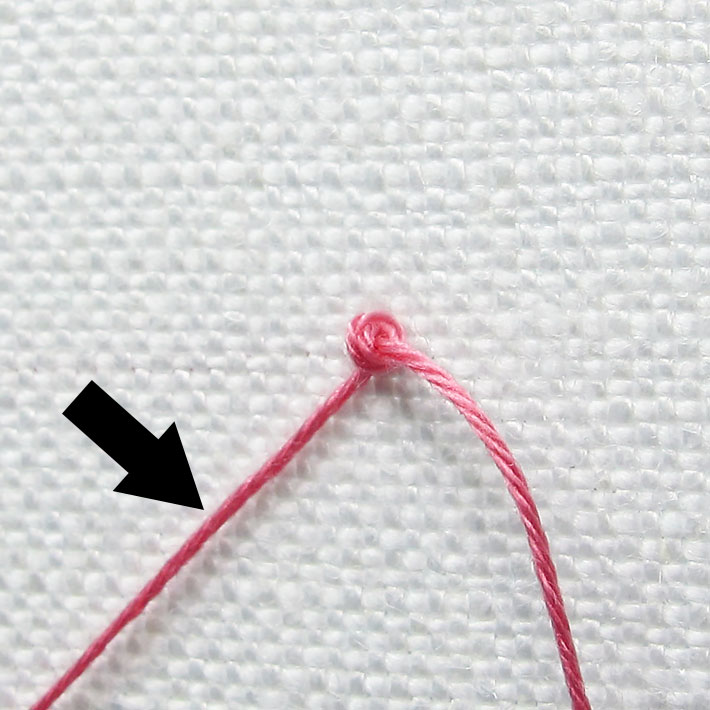
As you pull your needle and thread through the wraps and through the fabric to the back, pull slowly and keep the working thread (indicated by the arrow above) under tension.
Hold onto that thread with your thumb or a spare finger until there’s only a little bit of thread remaining above the fabric. When there’s only an inch or so of thread remaining on the front, you can let go of it and continue to pull it through to finish the stitch.
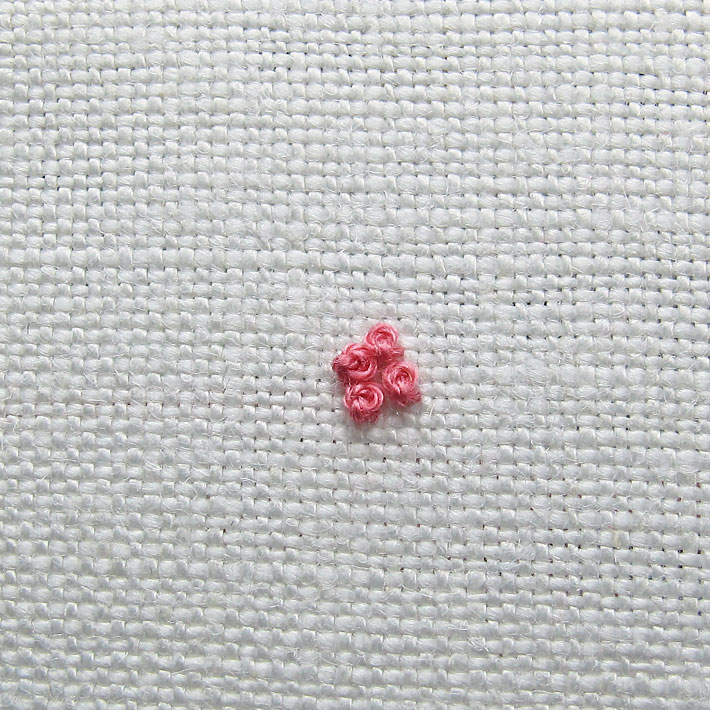
Here you have a small cluster of four French knots, all fairly equal in size and consistent in shape.
5 French knot tips
Here are five tips to help you achieve consistent, successful results with your French knots:
1. Don’t wrap the thread more than three times around the needle.
A French knot made with more than three wraps can become ungainly as you finish the stitch, creating inconsistent results as far as size goes, its loops can end up loose, and the whole knot can end up sitting loosely on the fabric, to be snagged or displaced later.
If you want a really big, textured knot-like stitch that sits up high off the fabric, try a drizzle stitch instead.
2. Leave a small space between the beginning of the stitch and the place where you take the needle down into the fabric.
This will ensure that your knot does not pop to the back of the fabric.
3. Pull the thread slowly through the wraps to the back of the fabric, so that the thread does not knot up on itself.
Those little slip knots that form in thread are just waiting to happen if you pull the working thread quickly. Often, with French knots, any additional knotting of the thread results in having to cut the thread. So go slowly until you’re really accustomed to making successful French knots!
4. Keep the working thread under tension until the last possible moment as it passes to the back of the fabric.
This will not only eliminate the chance of any extra slip knots forming in your thread, but it will keep your wraps in place, tight around the thread.
5. Try a milliner needle.
Although French knots can be successfully worked with regular embroidery needles, if you really have trouble with them, consider trying a milliner needle. A milliner needle has an eye that is the same thickness as the shaft, making it easy to pass the needle through the tight wraps without getting hung up on the eye.
And if all else fails…
Finally, if all fails and you really can’t get the French knot, try the colonial knot instead. You’ll find a handy tutorial for the colonial knot here.
The colonial knot is an easy way to make a knot almost identical to the French knot, and some stitchers prefer it. Both stitches can be used interchangeably.
I hope these tips help you conquer the French knot successfully!
This helps me as a beginner. The milliner needle a great tip. My needle eye was always getting stuck. Thanks heaps!! 😄