
You may already know this, but pompoms are totally addictive. They can top hats, embellish mittens, and even serve as a gift topper for your best friend’s birthday present. They’re fun to make, too.
Here we’ll show you three different ways to make pompoms.
Only one of these methods requires a special tool, and if you’re a pompom addict, you’ll probably want to invest in these tools anyway! The other two methods use materials you probably already have at home.
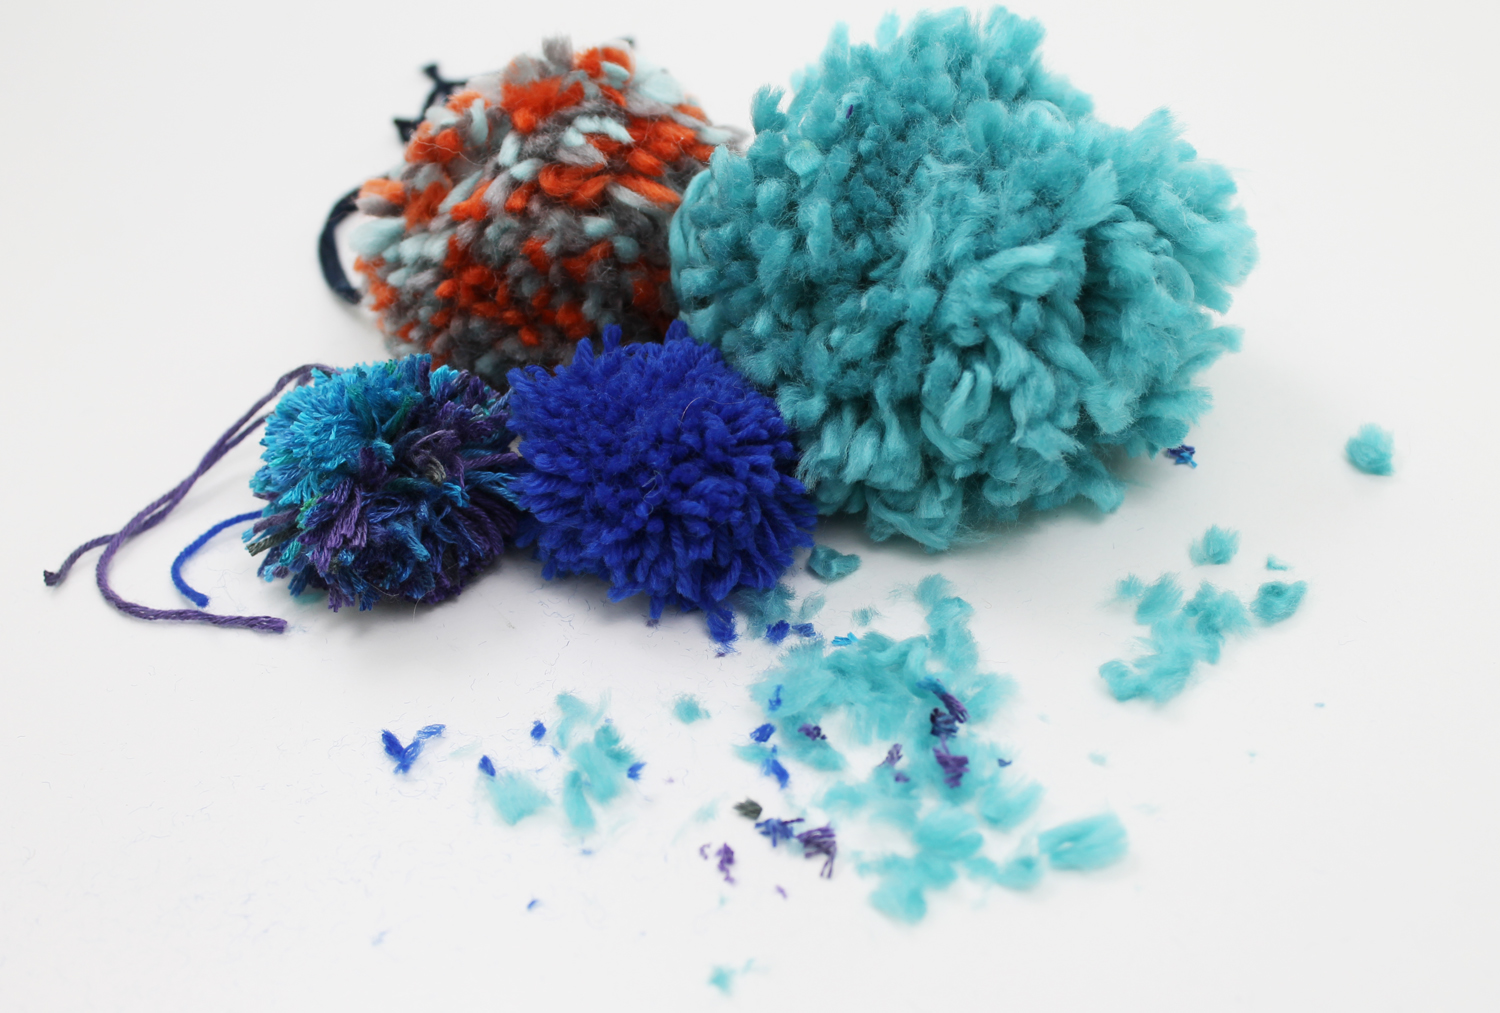
Oh, and did I mention that this is an excellent craft for your scrap yarns? Gather those small yardages from your stash and start making these puffy beauties using one of the methods below!
Method 1: Fork
What you’ll need:
- A clean four-prong fork from the kitchen
- Scissors
- Yarn
This method is great for making tiny pompoms. The pompom will only be as wide as the fork, so if you’re going for a larger pompom you might want to use one of the other methods.
Step 1:
Cut a piece of yarn about 6″ long, then set it aside for later.
Step 2:
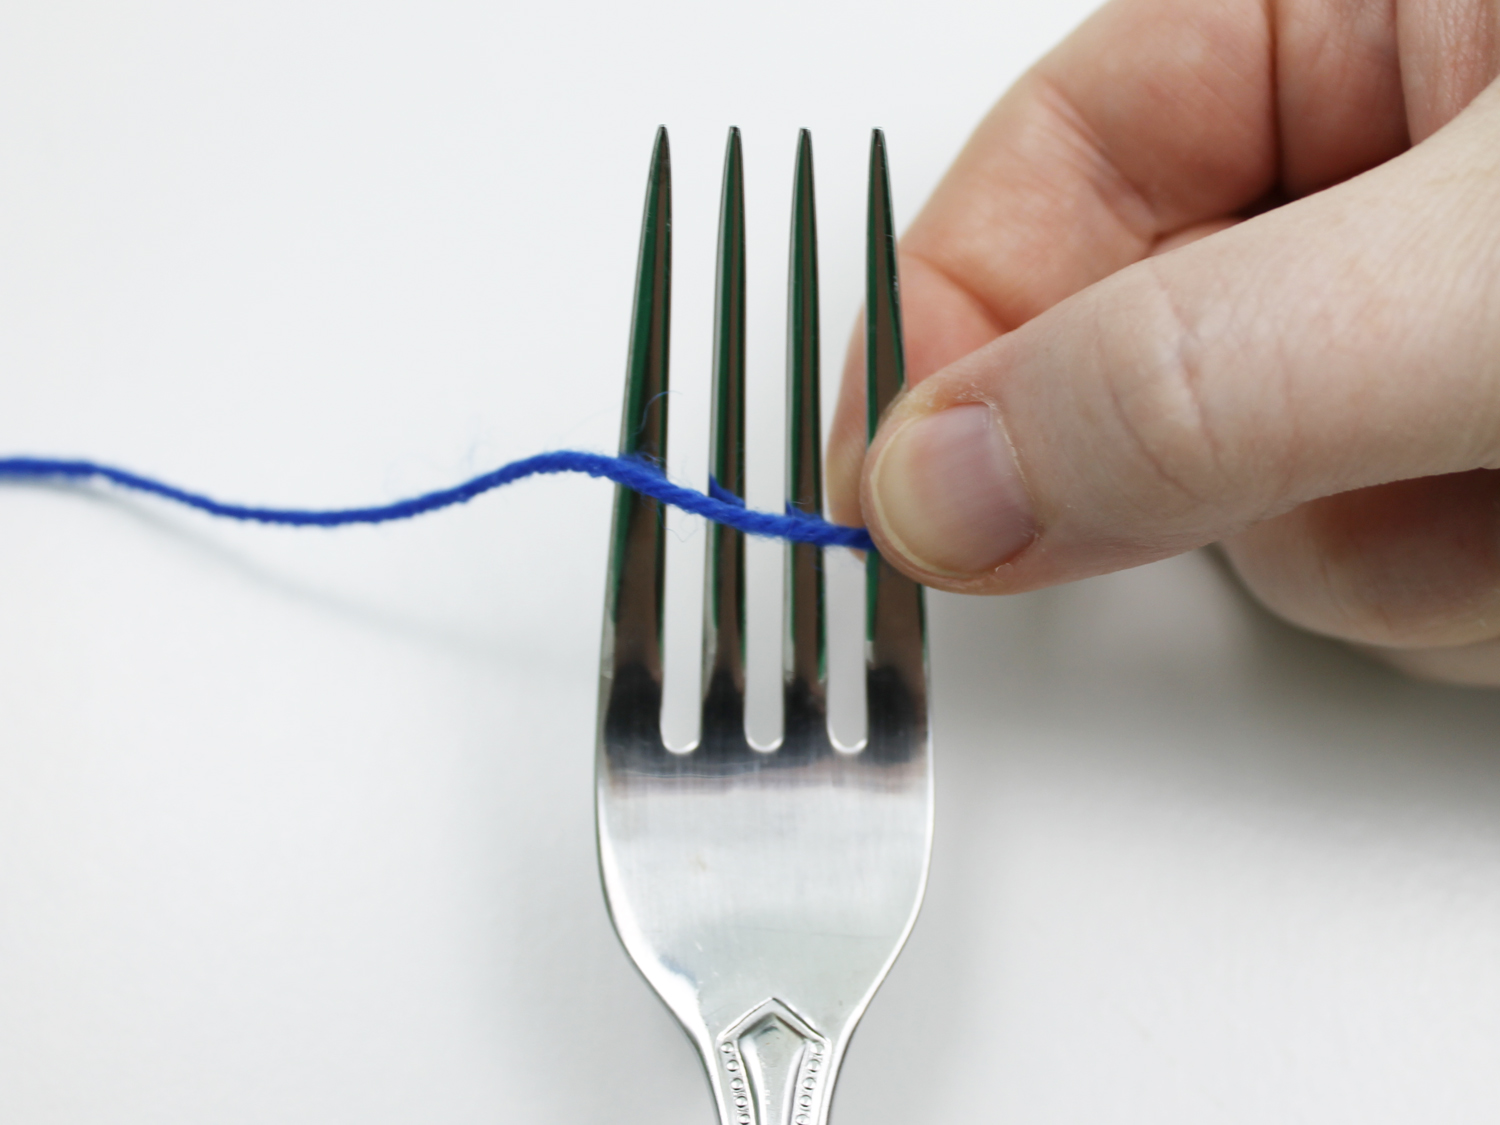
Working with your skein of yarn, place the working yarn tail straight across the fork and hold it in place with your thumb.
Step 3:
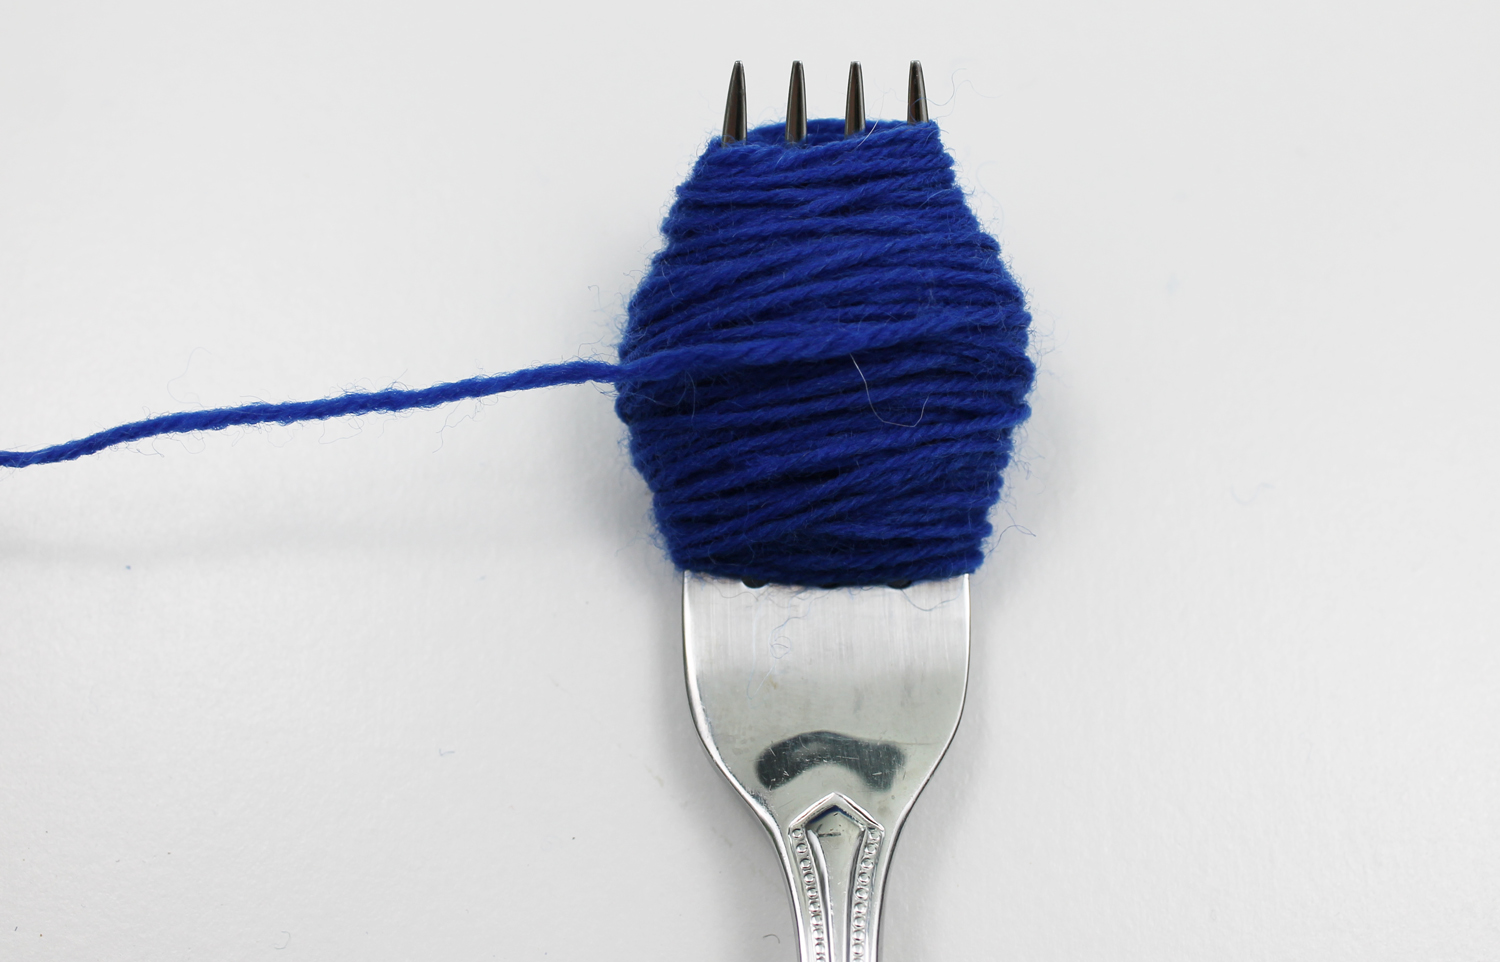
Wrap the yarn tail around the fork as many times as you’d like. The more you wrap, the larger and puffier the pompom will be.
Step 4:

When you’re finished, squeeze the wrapped strands of yarn together, getting the strands as close together as possible and revealing the prongs of the fork on both ends.
Step 5:
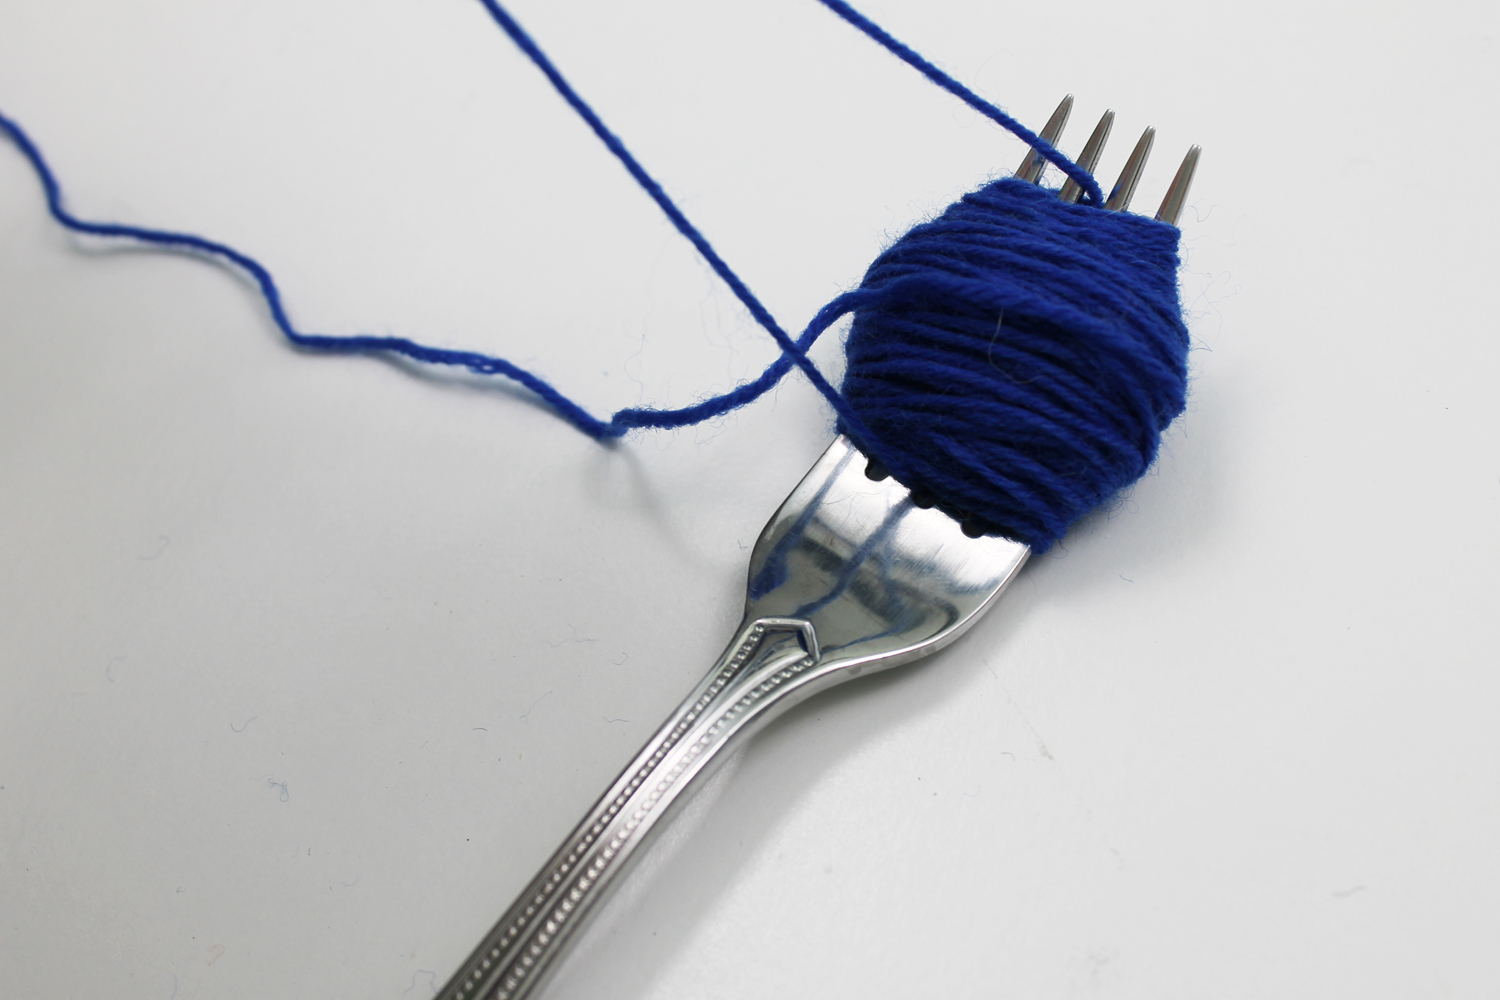
Insert the 6″ piece of yarn from Step 1 between the center prongs of the fork…
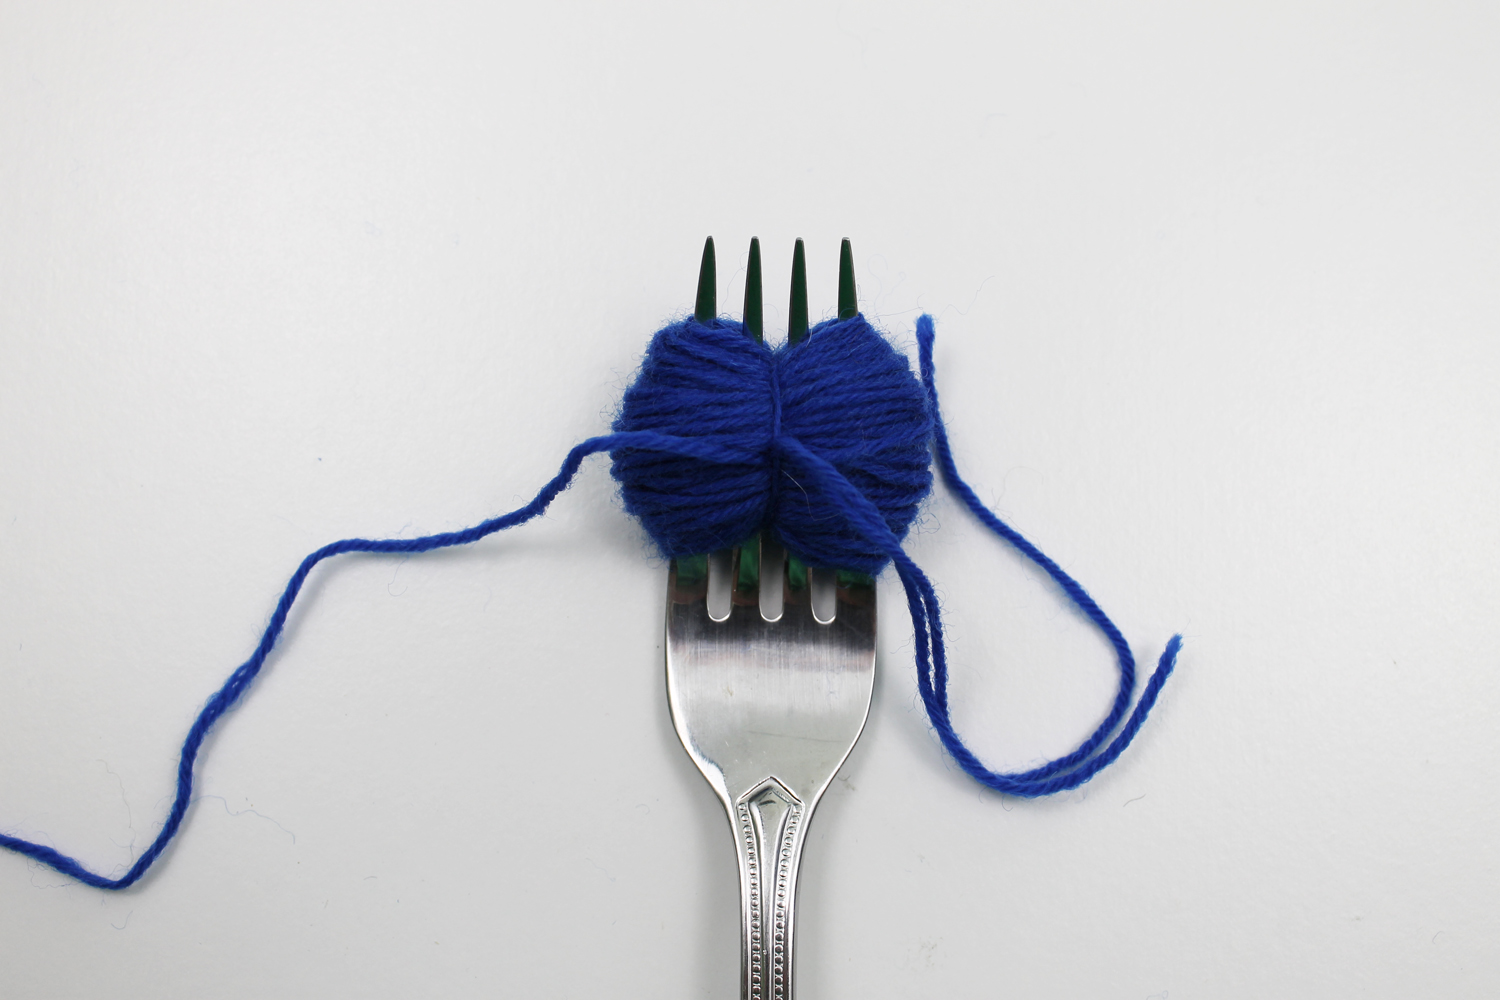
… and then tie it tightly around the wraps.
Step 6:
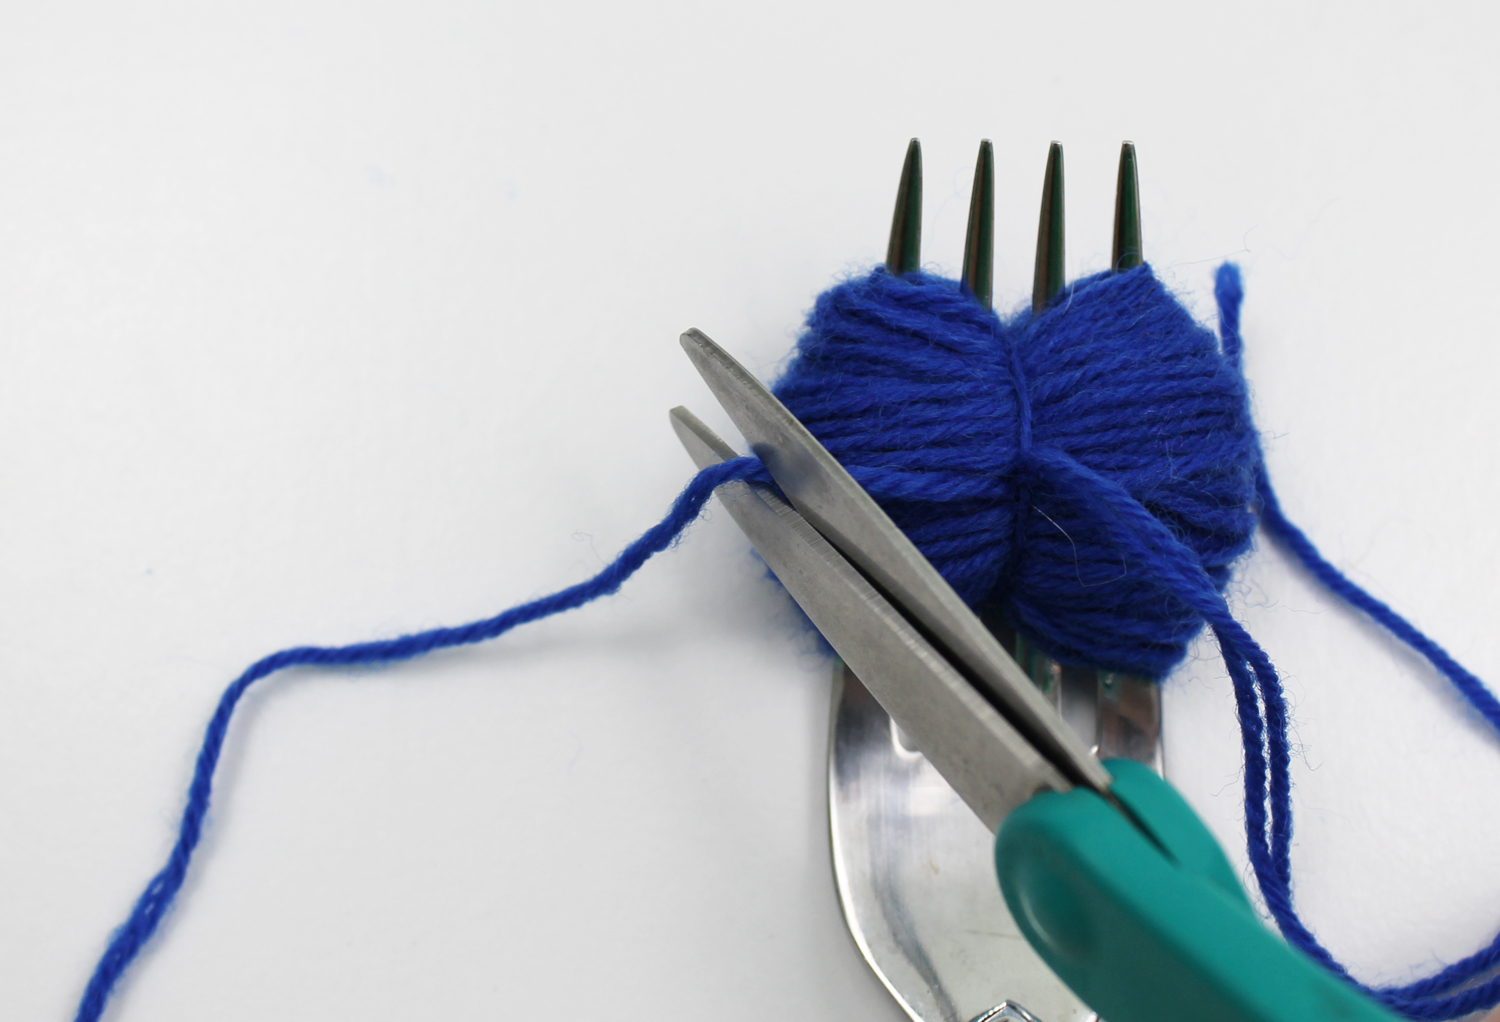
Cut the end of the working yarn close to the edge of the fork, and slide all the yarn off the fork.
Step 7:
Using scissors, cut the yarn loops on one side of the wrapped yarn.
Repeat on the opposite side, cutting the loops.
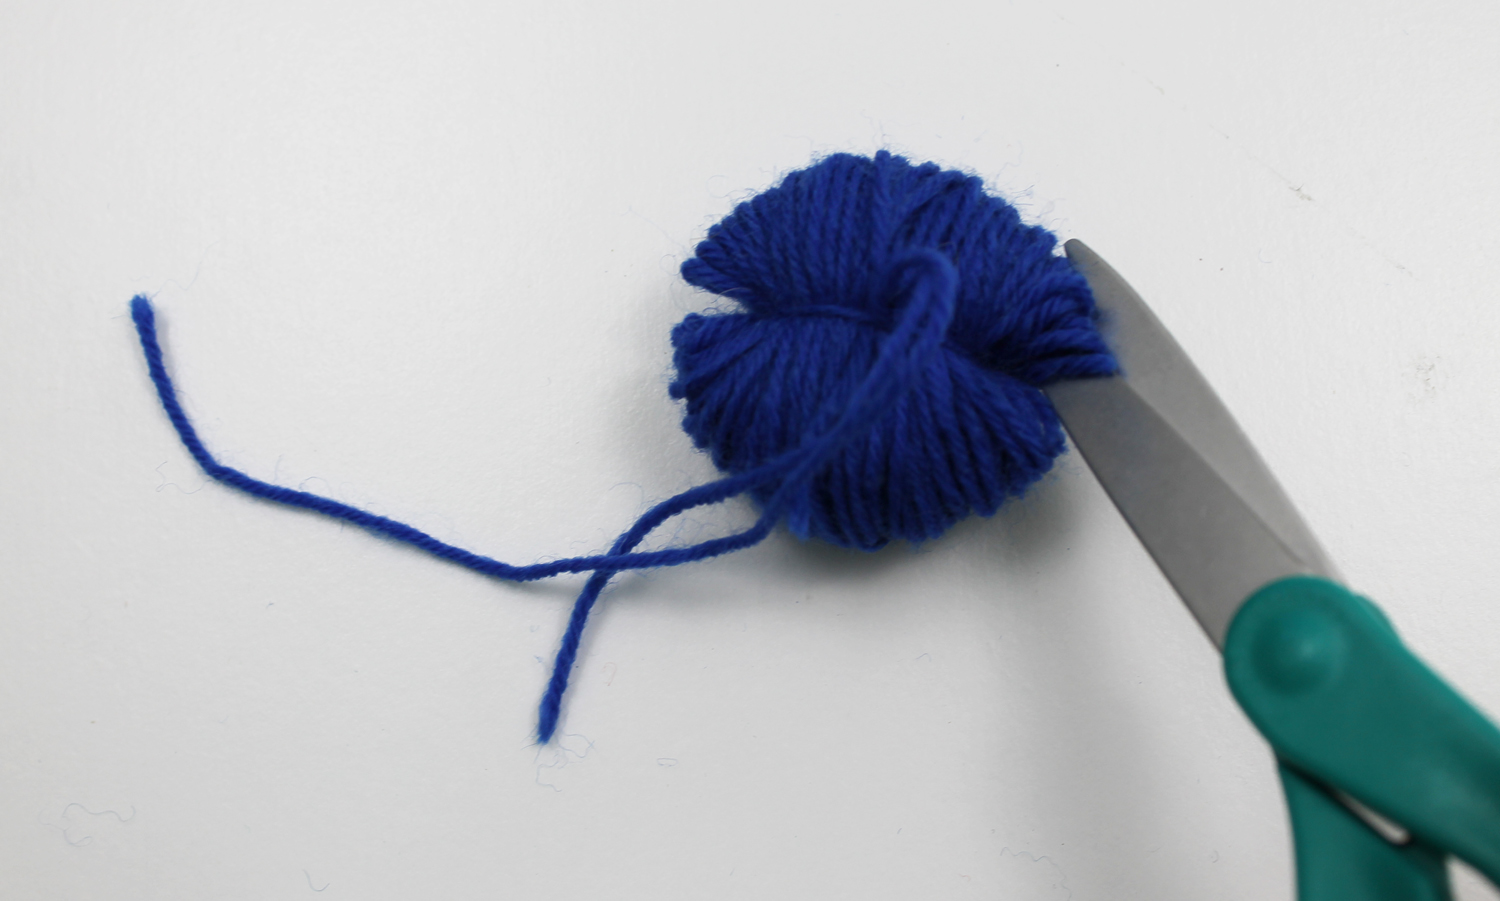
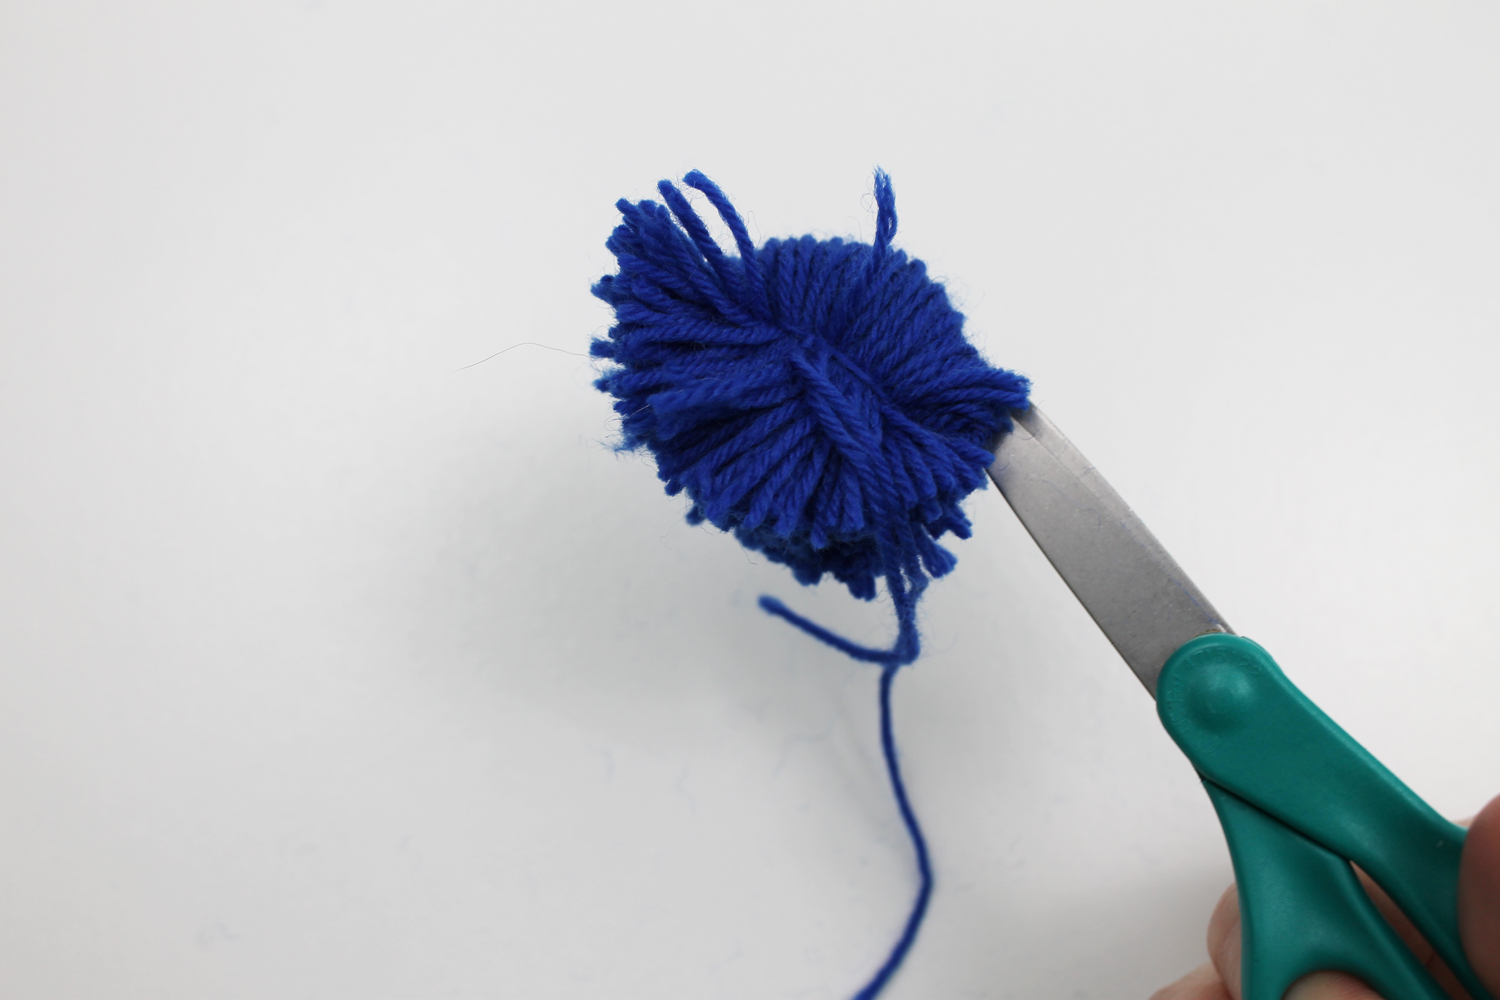
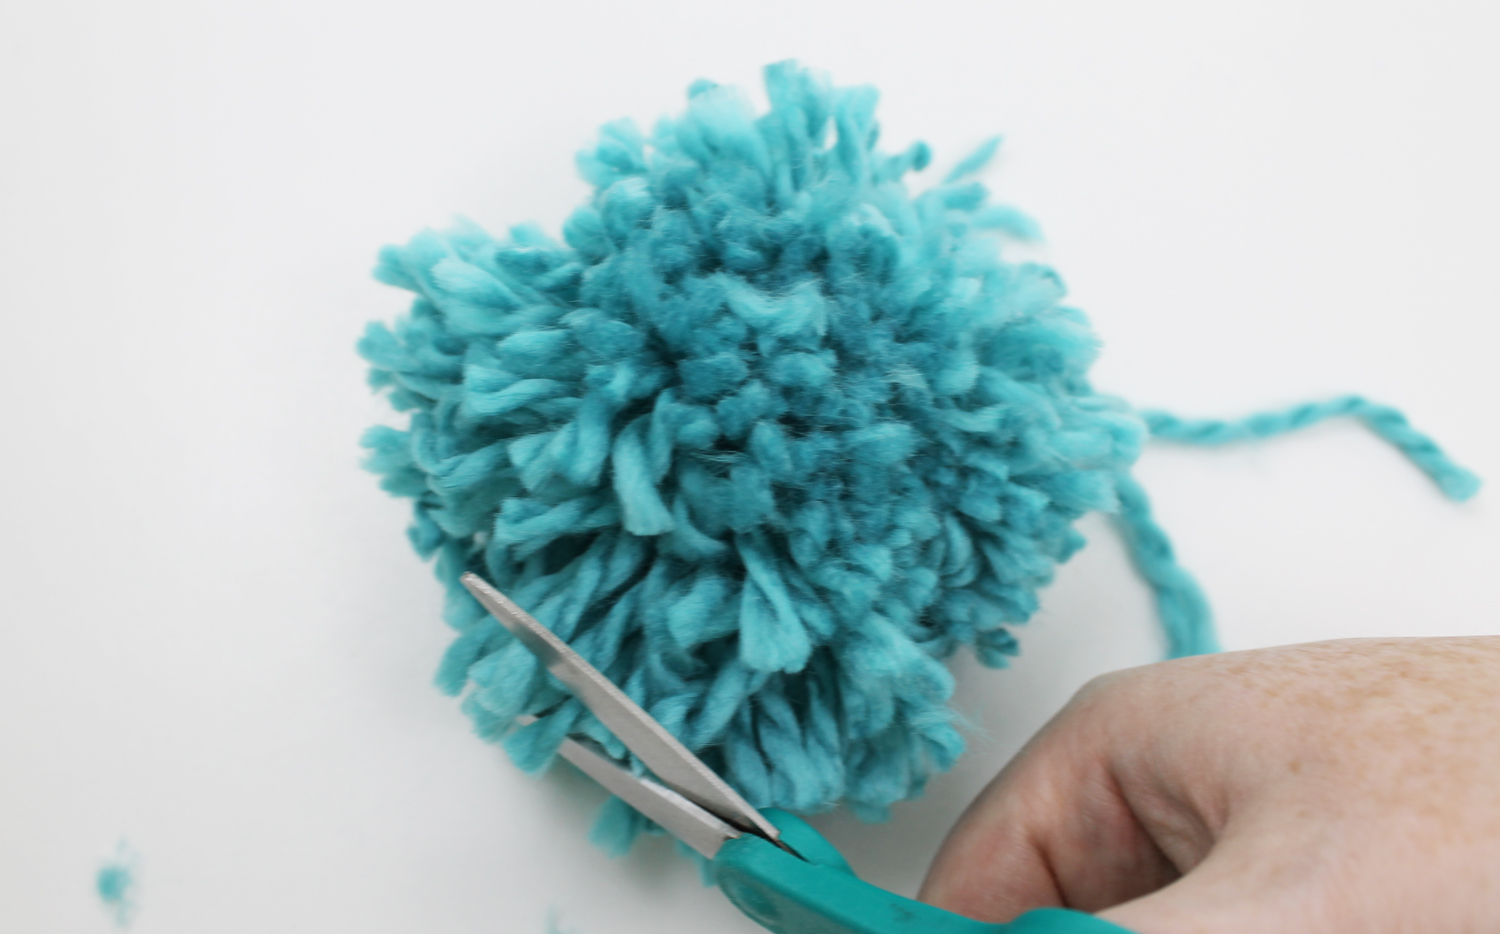
Step 8:
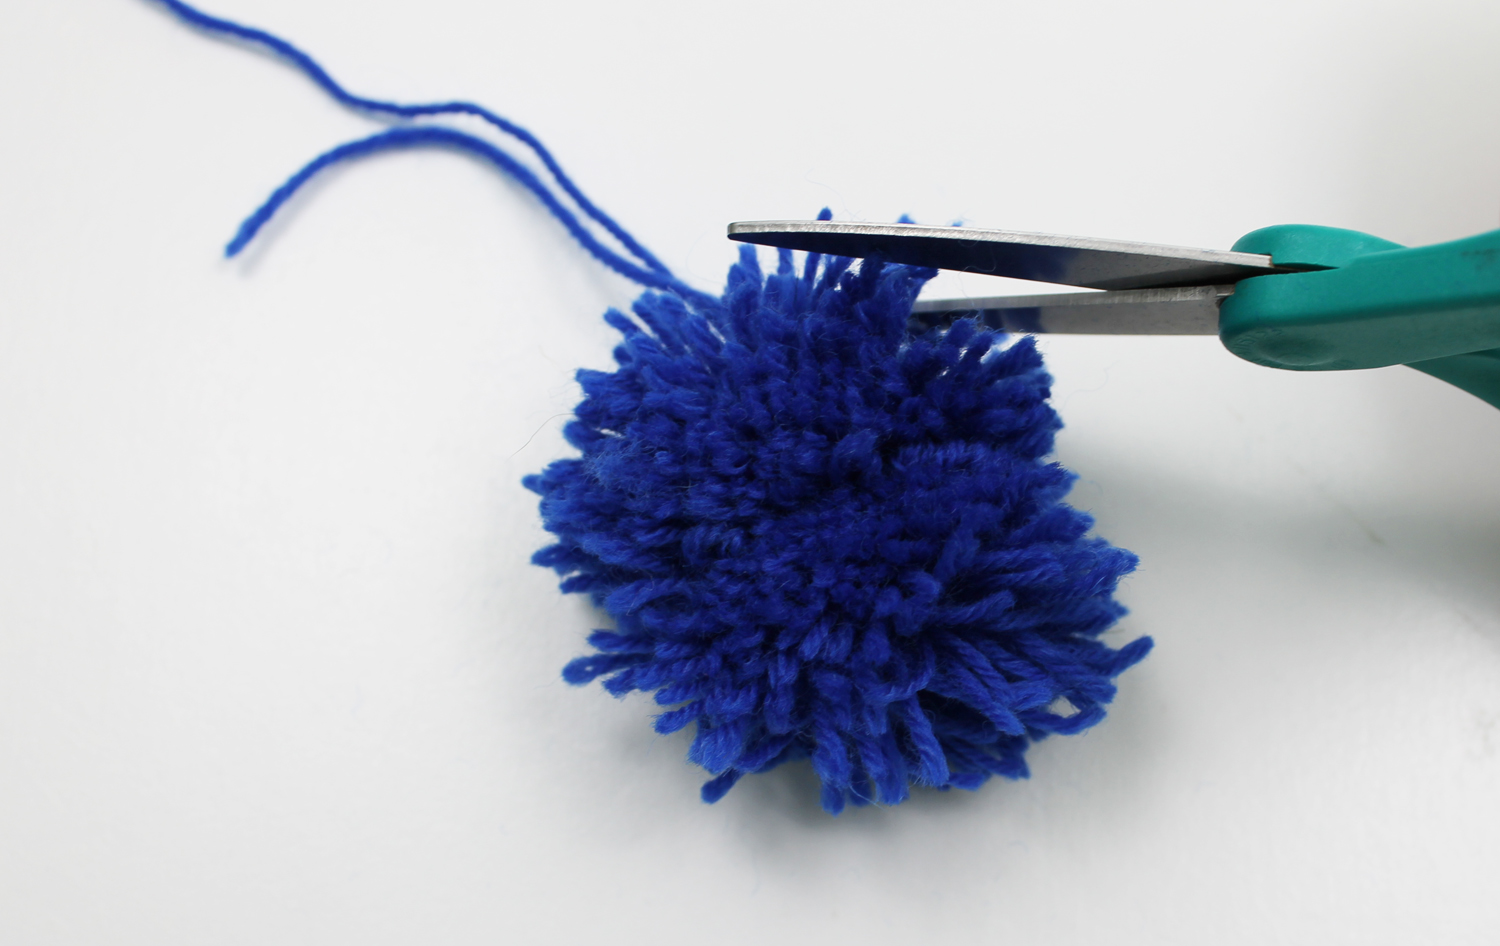
Trim the entire pompom evenly to get a nice round shape. Trim the long yarn tails if you’re not attaching the pompom to a project.
Method 2: Cardboard Wrap
What you’ll need:
- Small scrap of cardboard
- Scissors
- Yarn
Step 1:
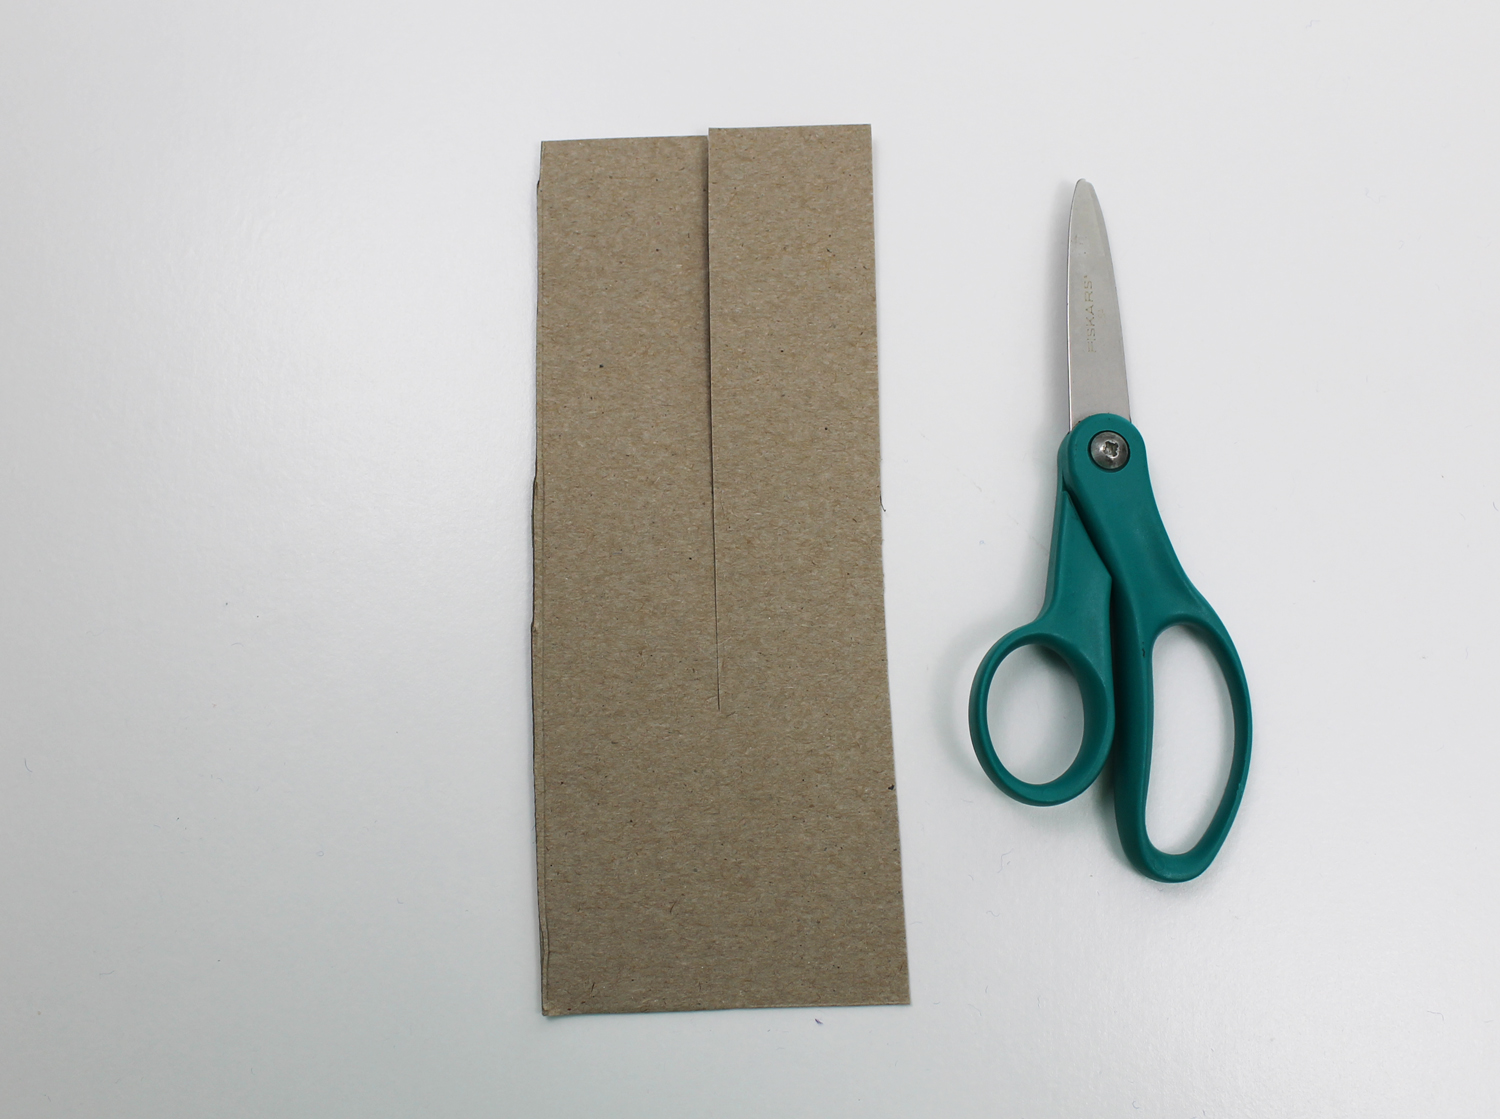
Decide how big you’d like your pompom to be. Cut a piece of cardboard that’s about 6″ tall and the width of your pompom. For instance, if you’d like your puff to be 2″ wide, cut the cardboard to be 6″ x 2″.
Cut a slit in the center of the cardboard that goes about three-quarters of the way down.
Step 2:
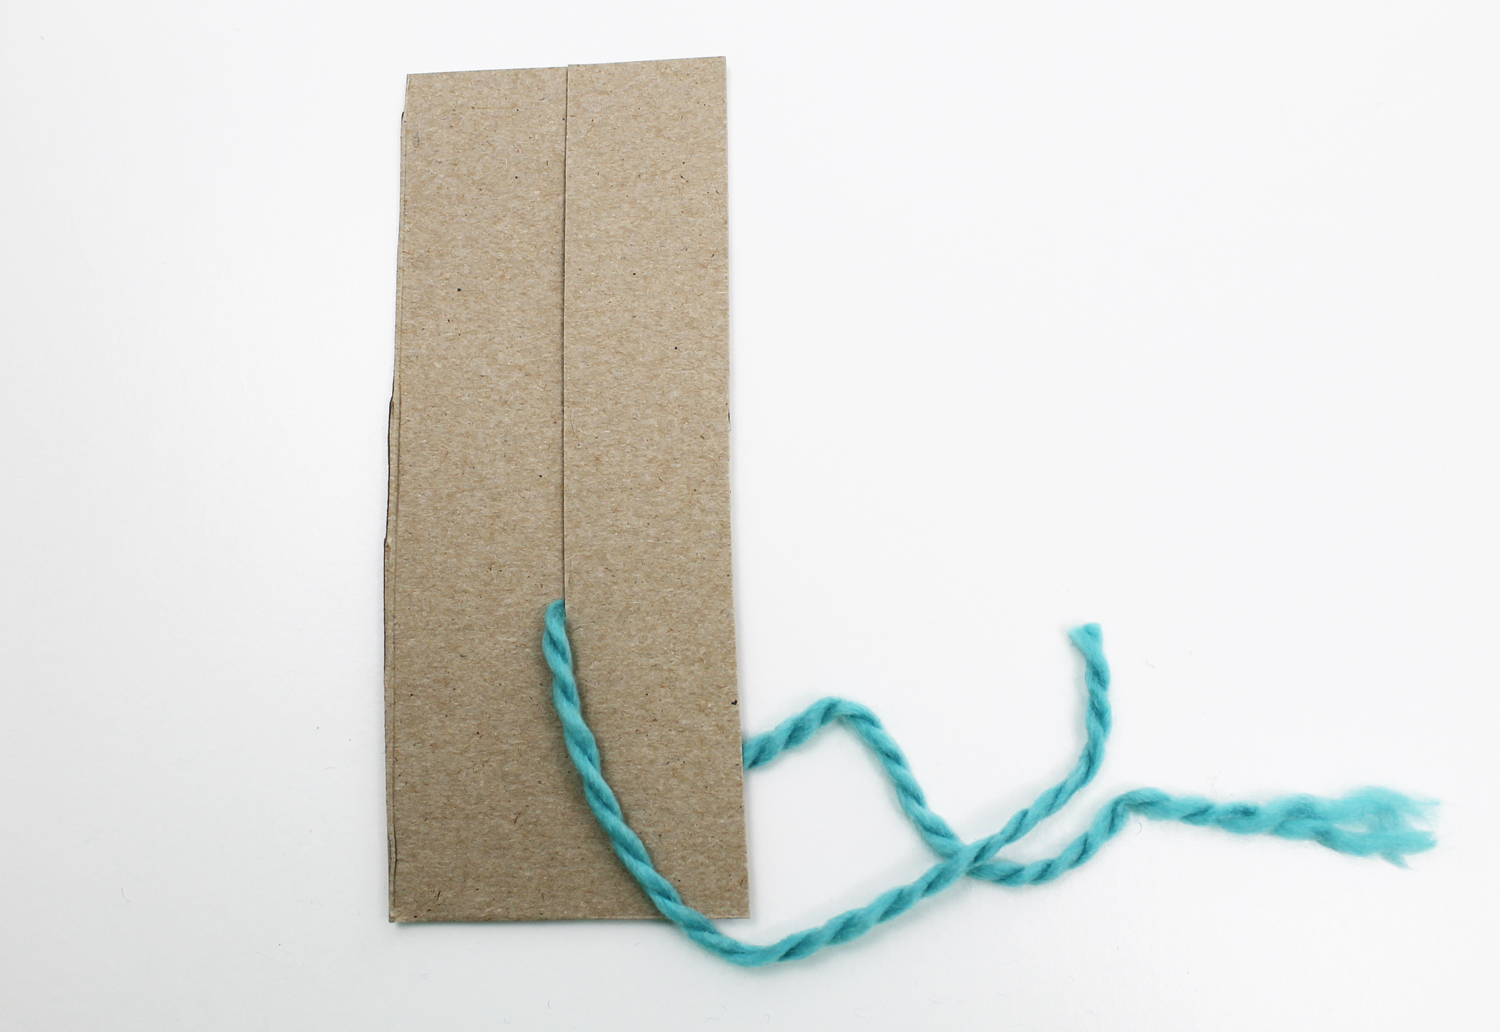
Cut about a 10″ length of yarn and insert it between the slit, sliding it to the bottom of the opening and making sure the yarn length is even on each side.
Step 3:
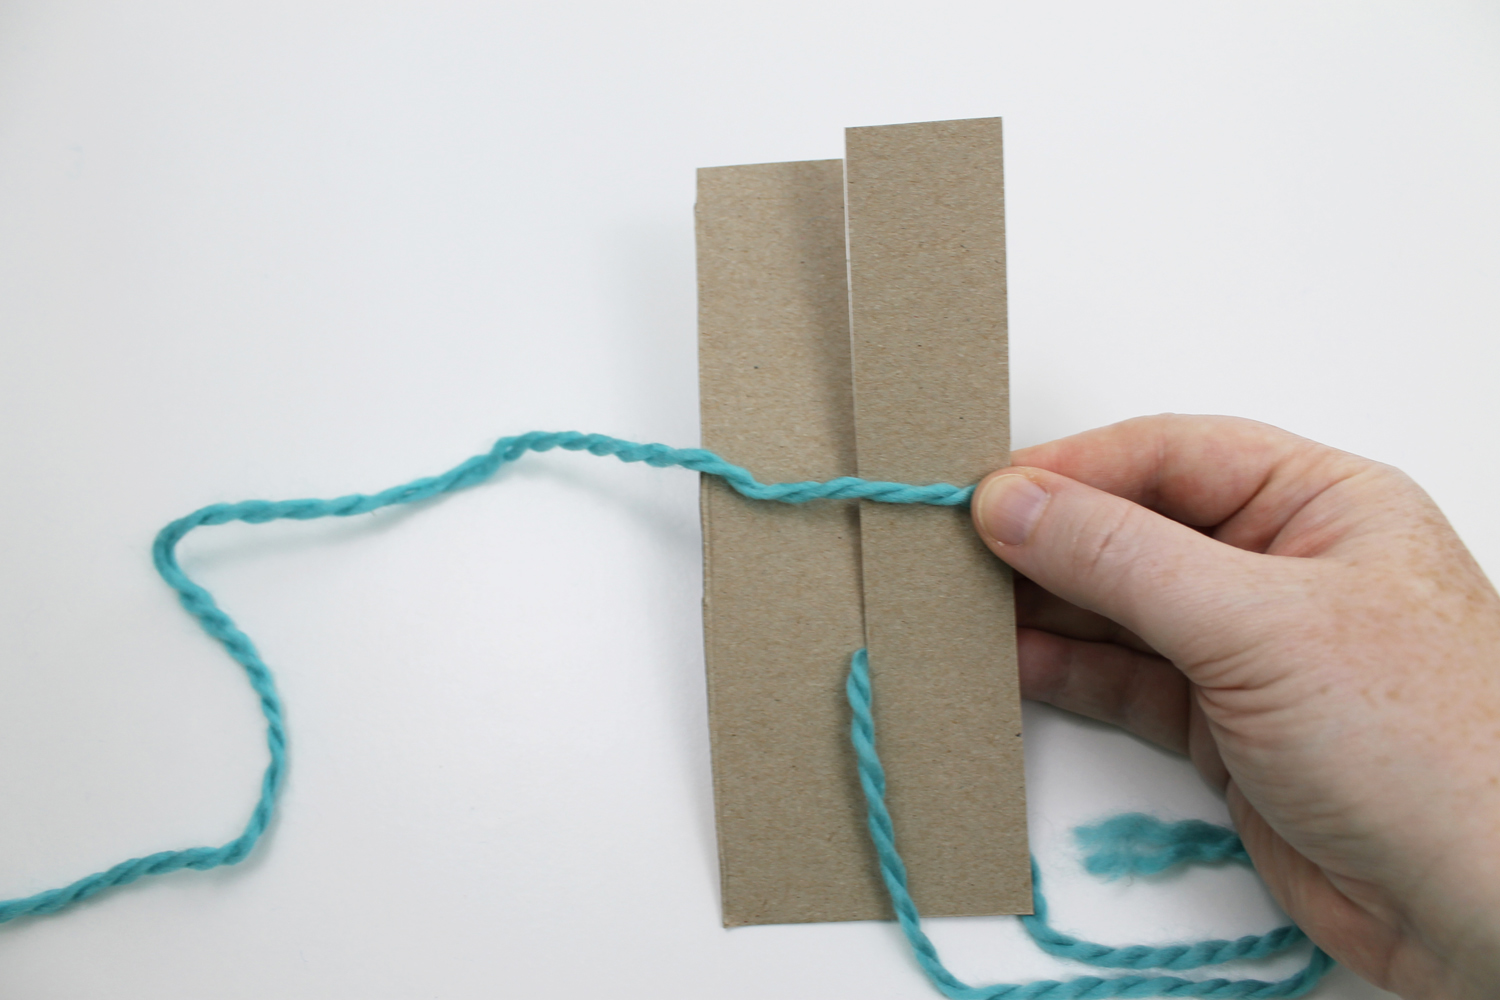
Place the end of your working yarn on the edge of the cardboard, stretching it across the width of the cardboard. Hold it in place with your thumb as you begin wrapping the yarn around the cardboard.
Step 4:
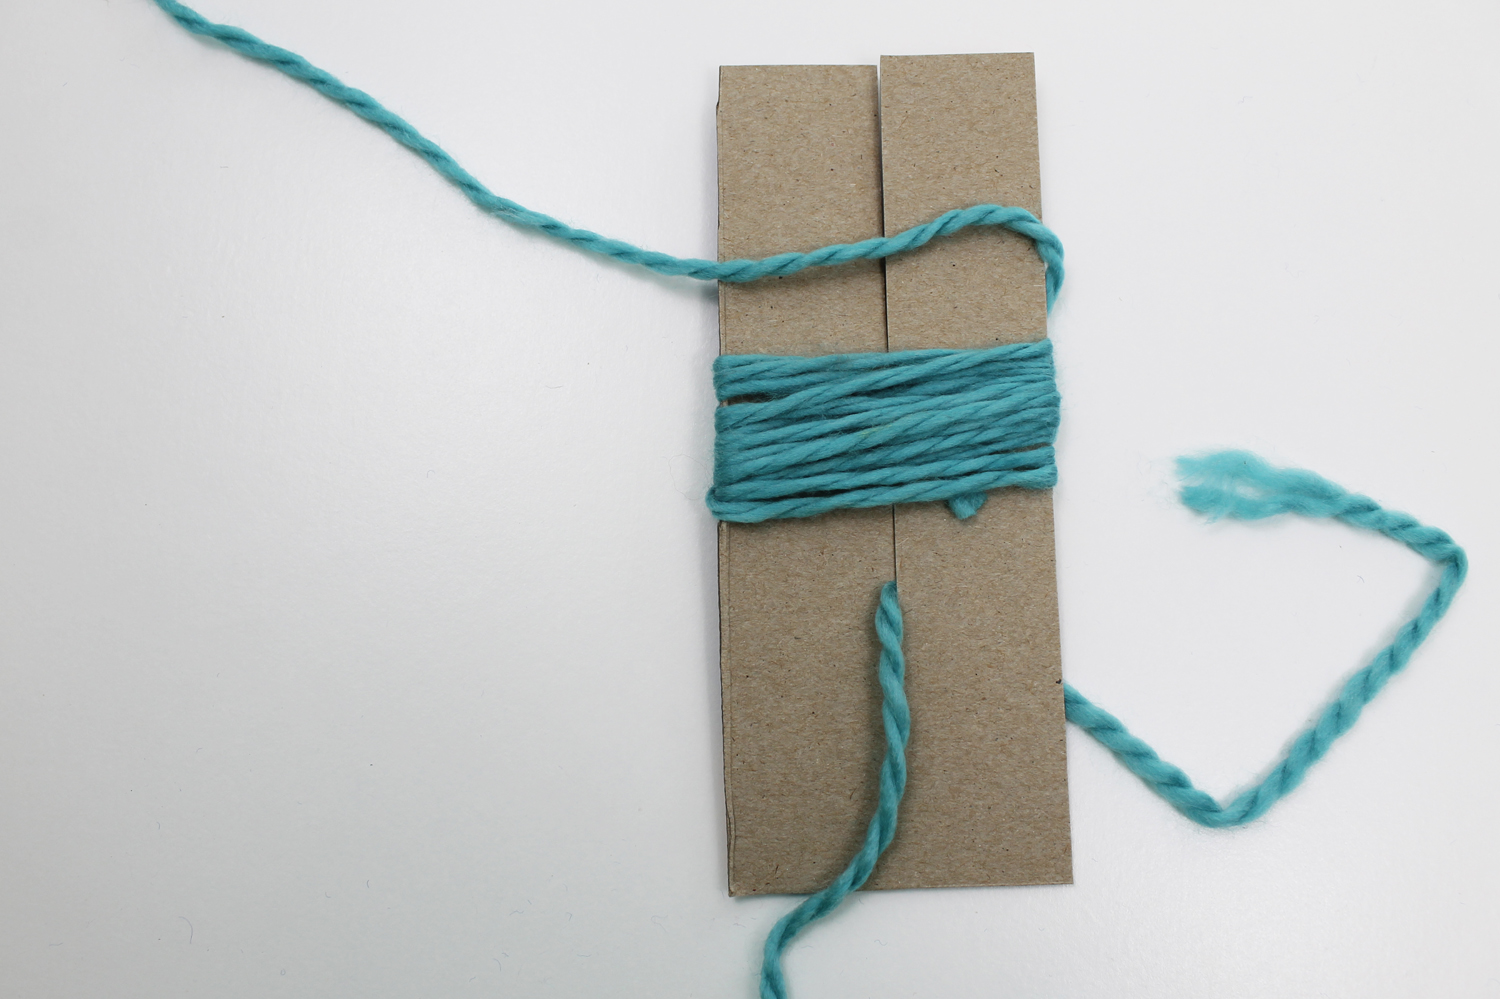
Wrap the yarn evenly around the cardboard, keeping the same tension and not pulling too tightly. If you pull too tightly, the yarn might stretch, making the yarn pompom smaller than you planned.
Continue to wrap the yarn around the cardboard. The more times you wrap the yarn around, the fuller the pompom will be.
Step 5:
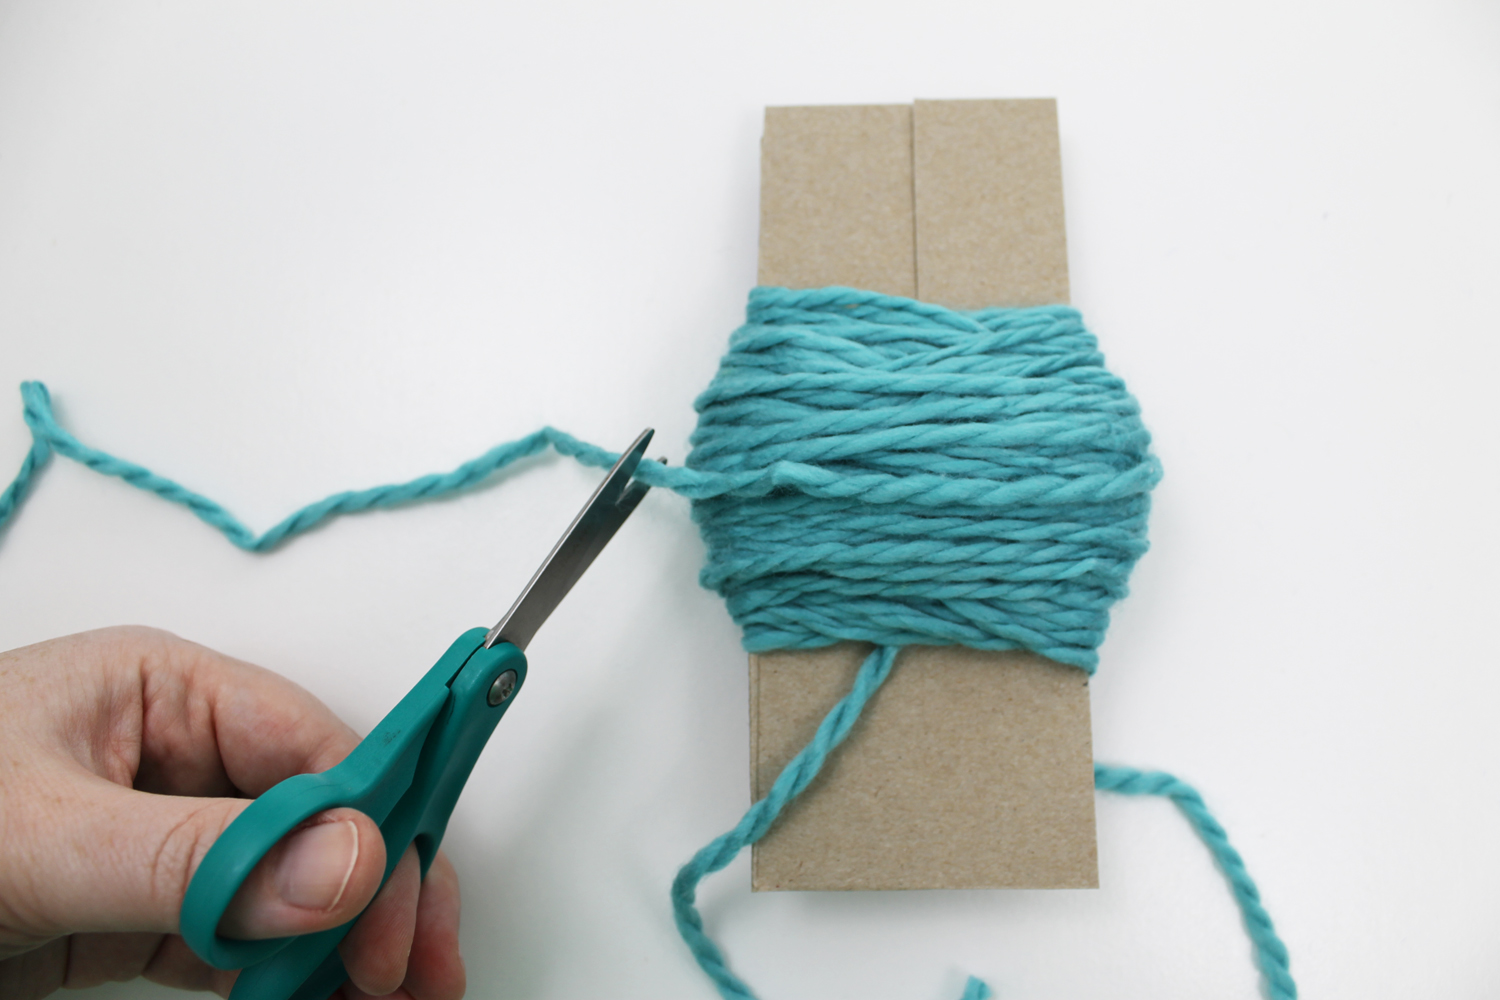
When the pompom is as big as you’d like, cut the working yarn close to the cardboard.
Step 6:
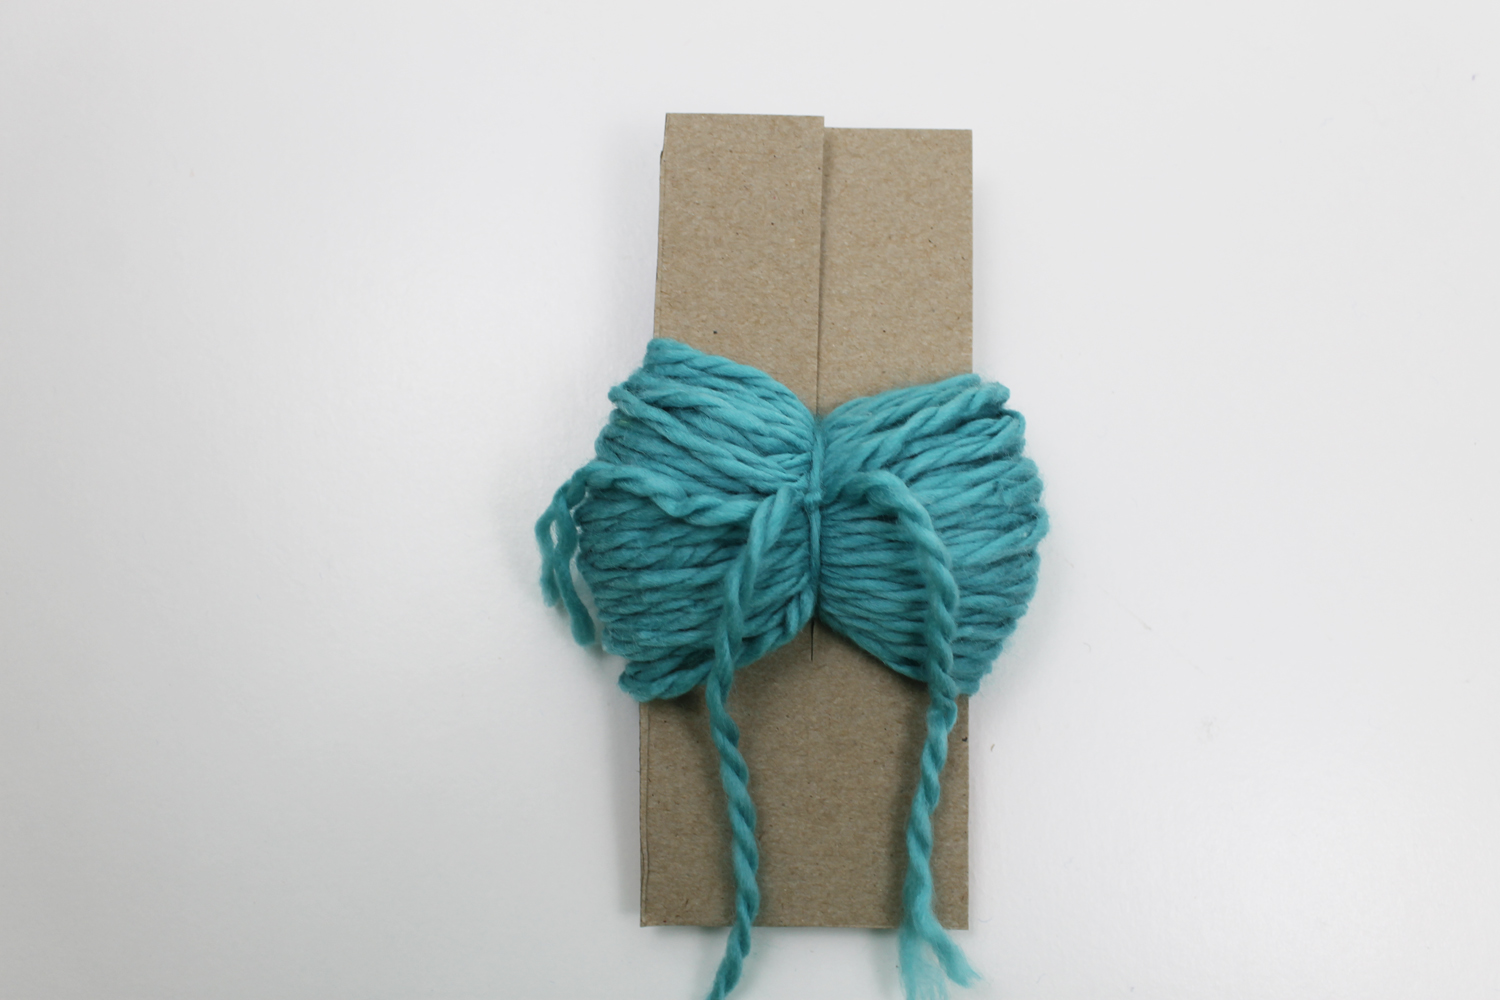
Pull up on the 10″ length of yarn that’s in the slit in the cardboard. Tie it tightly around the wraps and secure it with a knot.
Step 7:
Slide the pompom off the cardboard.
Step 8:
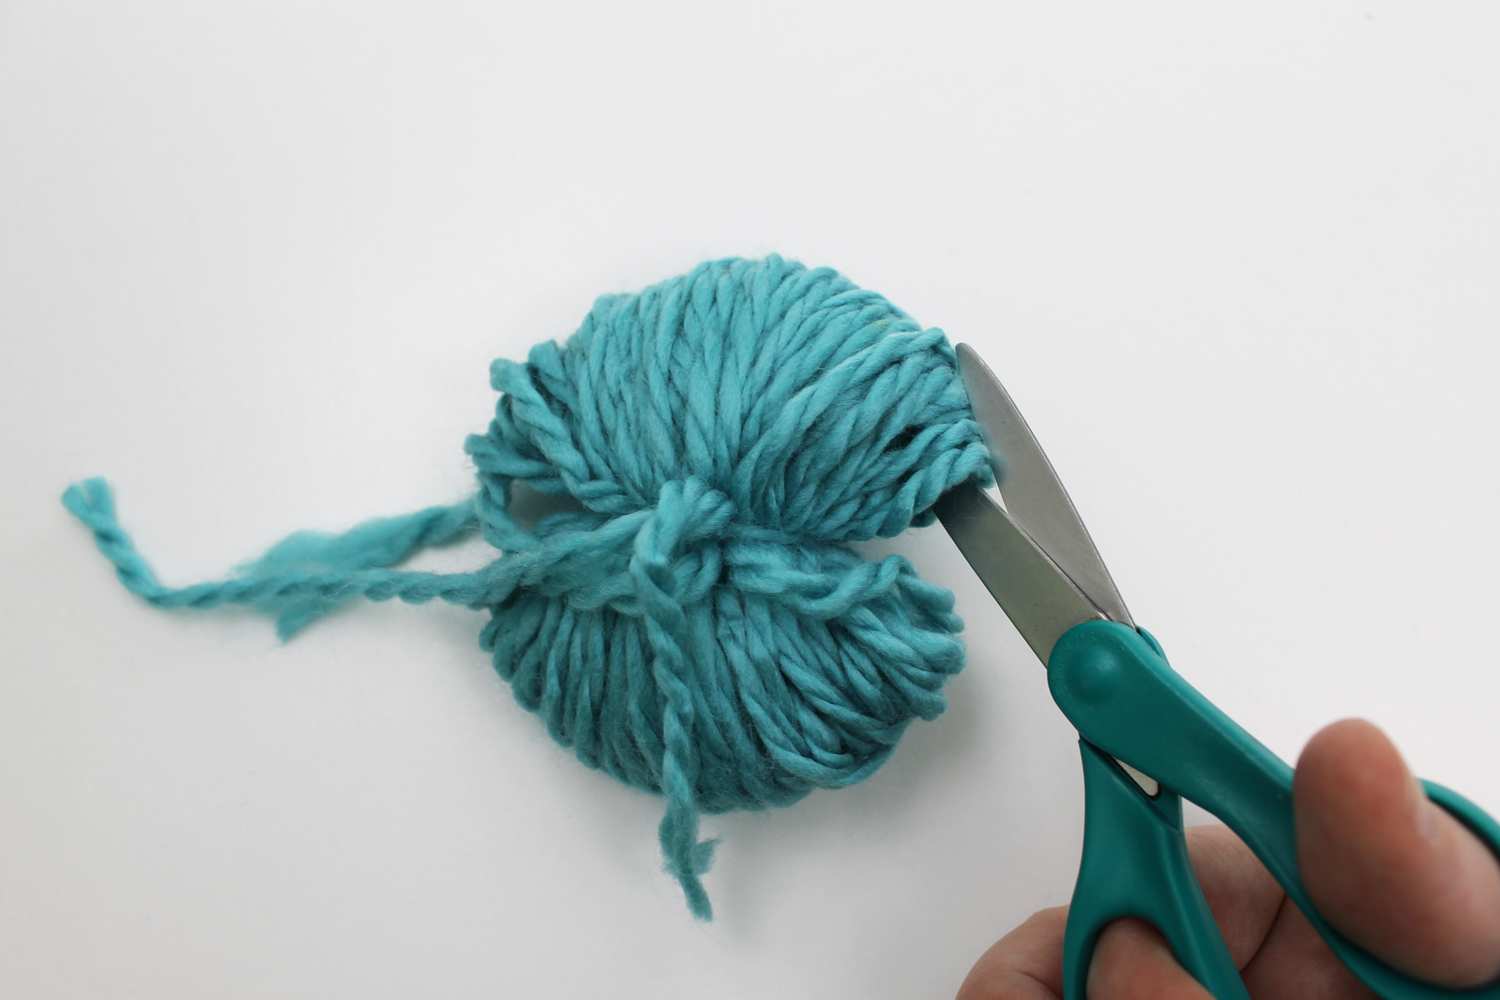
Cut the loops on one side of the pompom. Cut as evenly as possible to ensure all the strands are the same length.
Repeat on the opposite side of the pompom.
Step 9:
Fluff the pompom and trim it so the edges are even. Trim the long tails that you tied the pompom with, too, if you’re not using the tails to attach the pompom to a project.
Method 3: Pompom makers
What you’ll need:
- A pompom maker like the Bluprint Pom-Pom Maker
- Scissors
- Yarn
Step 1:

Open your pompom maker so that the colored pieces are separated, as shown above.
Step 2:

Using your thumb to hold the yarn tail in place, begin wrapping the yarn around one end of the circle. Wrap around both ridges on the plastic piece, and make sure your yarn isn’t wrapping outside the plastic pieces.
Wrap back and forth across the half circle, trying to get the wraps as even as possible across. You don’t want one side to be super thick, for instance, while the other side has just a few wraps.
Continue wrapping until you are satisfied, ending with the working yarn at the outer end of the half circle.
Step 3:

Flip the tool over, holding the yarn-wrapped half circle tightly to keep the wound strands secure. Do not cut the yarn. You’ll continue using the same piece of yarn on the other piece.
Repeat the previous steps on the other half-circle. Try to match the thickness of the first half of the circle, if you can.
Step 4:

When you’re finished wrapping the second half, fold the piece to meet the other end of the circle.
Cut the working yarn as close as you can to the pompom maker edge without accidentally snipping any of the other yarn.
Step 5:

Now for the super fun part: Grab your scissors and, starting at one half-circle edge, cut through the center of the yarn wraps. Make sure you’re cutting down the center, in the little ditch where the two pieces meet.
Repeat this on the opposite side of the circle.
Step 8:

Cut a piece of yarn that’s about 6″ long. Wrap the yarn around the center of the circle, in the same spot where you cut the wraps earlier. Tie a double knot, making sure you pull taut on the length of yarn to really secure the pompom.
Open the pompom maker so you can easily remove the yarn ball from the tool.
Step 9:

Trim the pompom to even it out. Trim away the long yarn tails if you’re not using them to attach the pompom to a project.
Share tips, start a discussion or ask one of our experts or other students a question.
No Responses to “3 Easy Ways to Make Big, Puffy Pompoms”