
Whether they’re made from fondant, buttercream or royal icing, edible sugar flowers are the perfect accents for cakes and pastries. And one of the simplest flowers anyone can make is a quick piped rosette. While you could pipe them directly onto your cake with buttercream, using royal icing gives you so much more freedom. After all, they can be perfected and dried before you arrange them!
Royal Icing Rosettes
Level: Easy
What You Need
Instructions
1. Dye the Icing
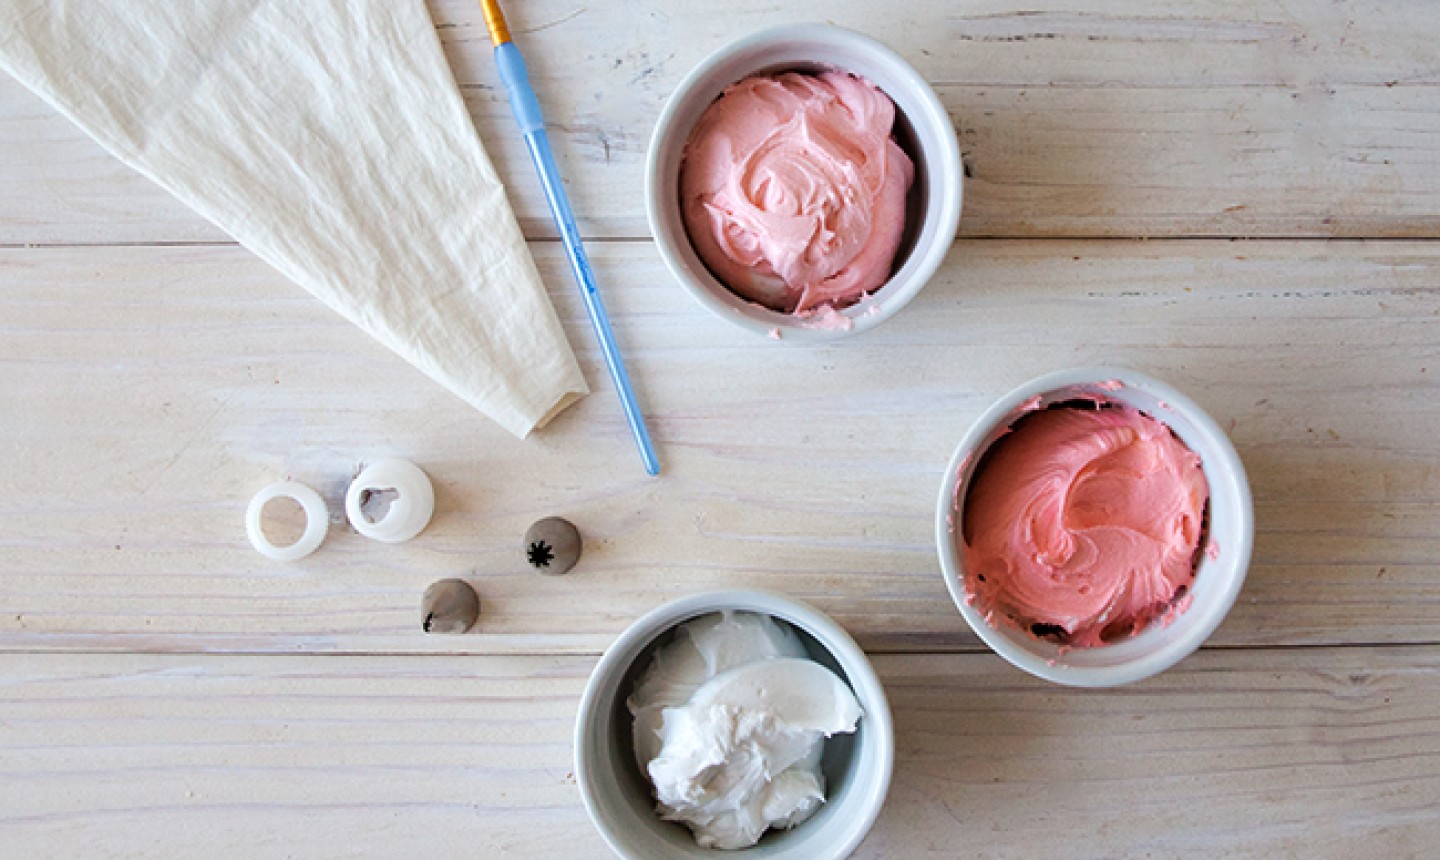
Divide your batch of royal icing into four separate bowls. Dye one bowl green with gel food coloring, and dye the rest the color of your choice. You can also opt to leave a bowl white. Cover each bowl with plastic wrap until ready to use.
Prep your work surface by spreading a piece of parchment paper over it. Spoon one bowl of royal icing into a piping bag fitted with the star tip.
2. Pipe
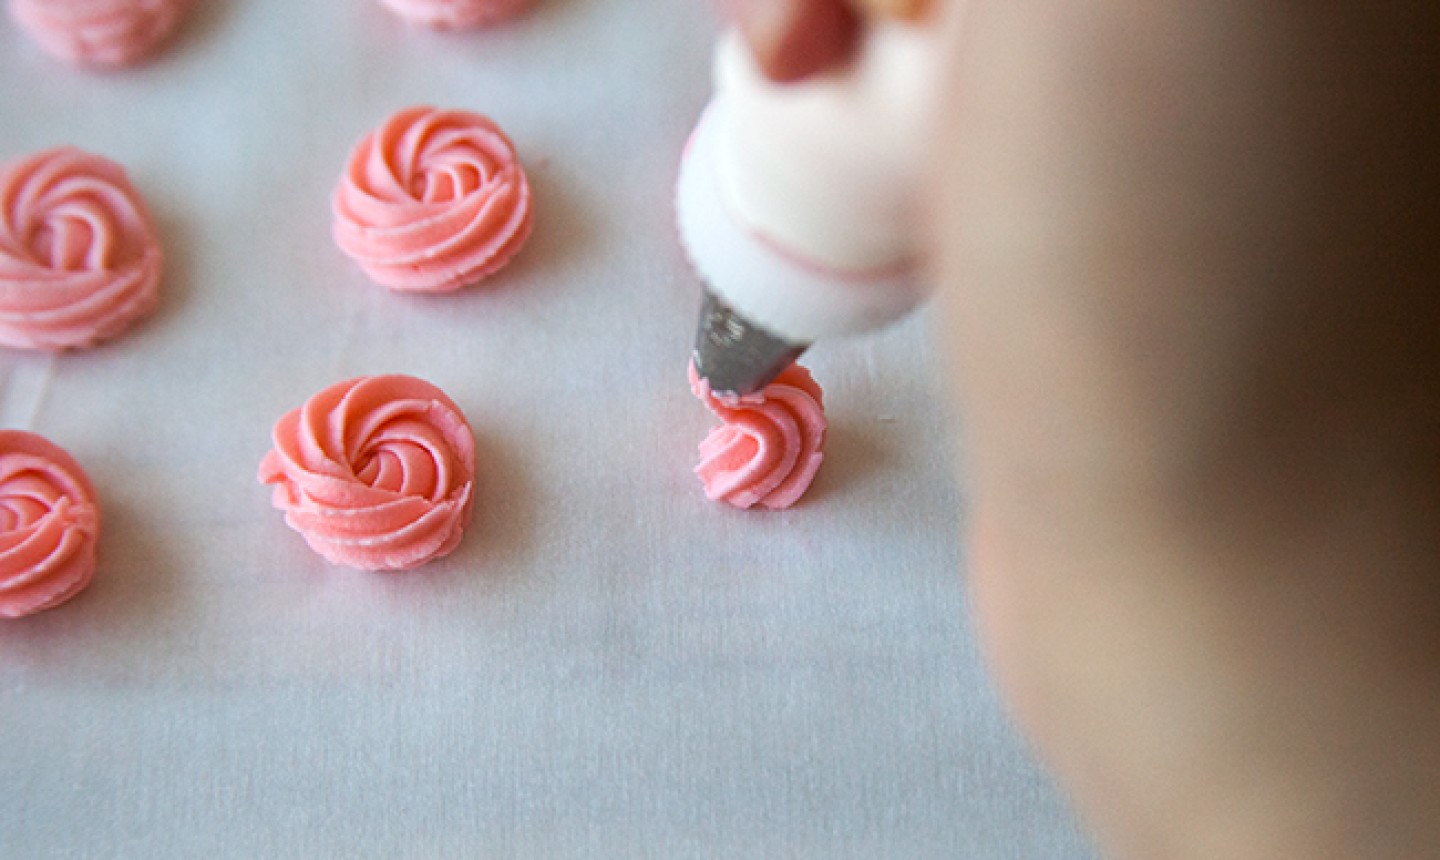
To make the rosettes, start by keeping the star tip perpendicular to the parchment paper, hovering slightly above it. Give the piping bag a squeeze to get the royal icing started.
With continuous, even pressure, begin to make a small spiral around the center of the rosette. The icing should curl over itself into a tight circle.
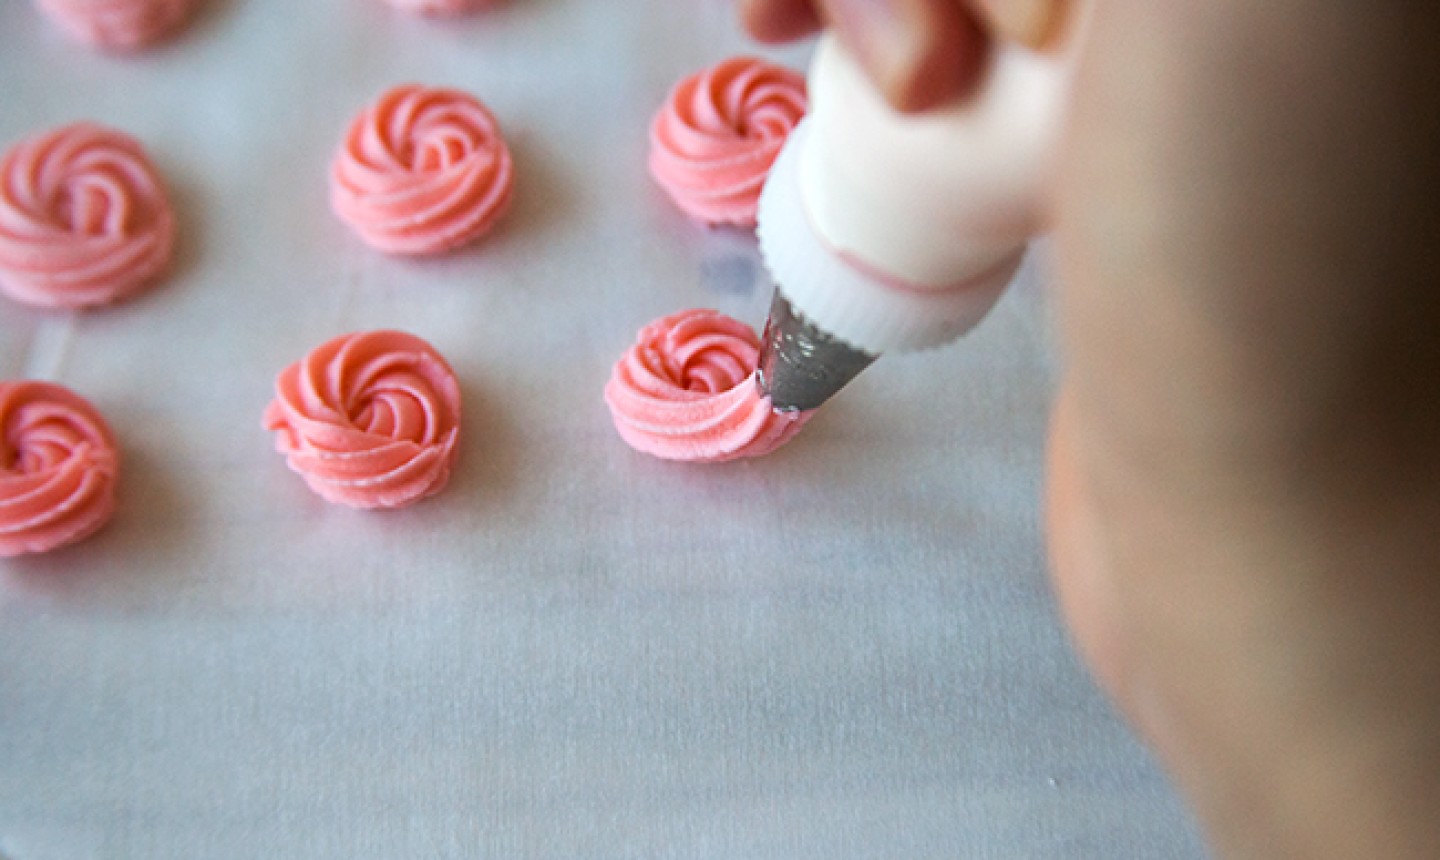
Continue to pipe the rosette until you have created a full circle of icing. Release the pressure at the end to create a tail.
Pro Tip: Do not pull up the piping bag until all the pressure has been stopped and icing is no longer flowing. Otherwise, your rosette will be distorted.
3. Tap Down the Tail
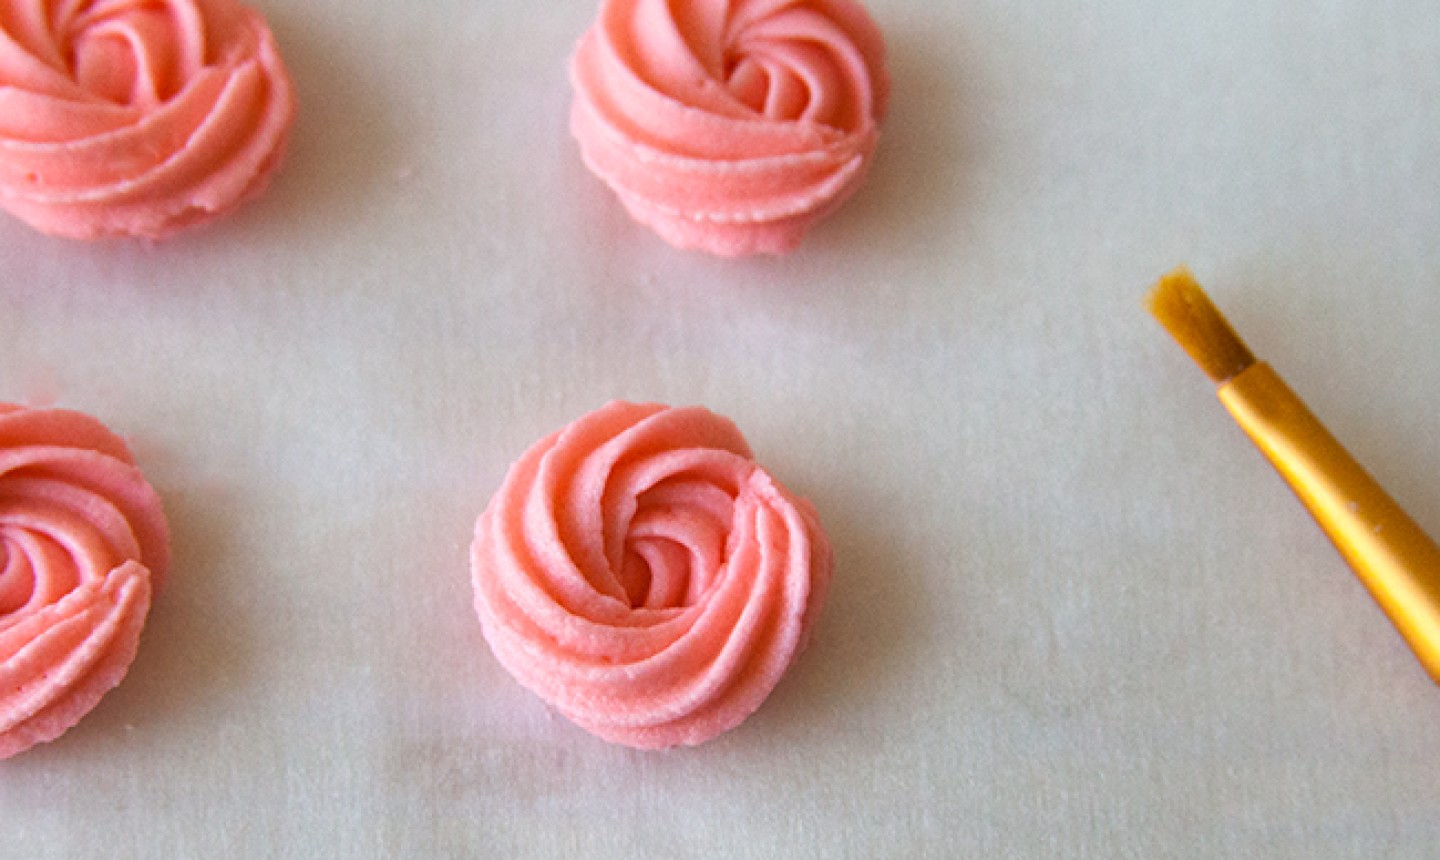
Use a clean paint brush to gently tap down the tip of the tail. Use a touch of water if necessary.
4. Let Them Dry
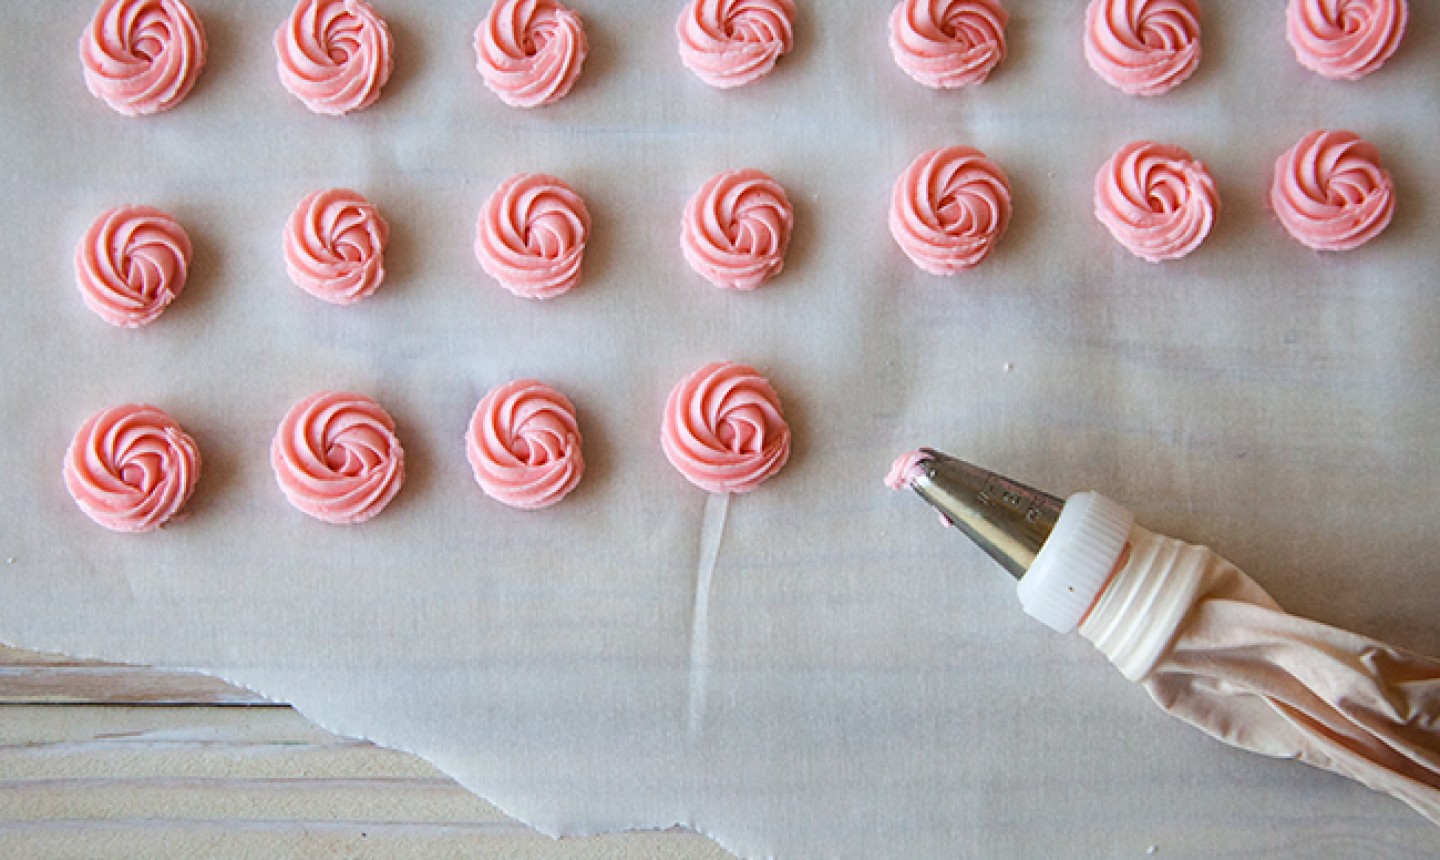
Once you’ve piped all the rosettes you need for your cake design, leave them to dry on the parchment paper for about 30-60 minutes.
5. Add the Leaves
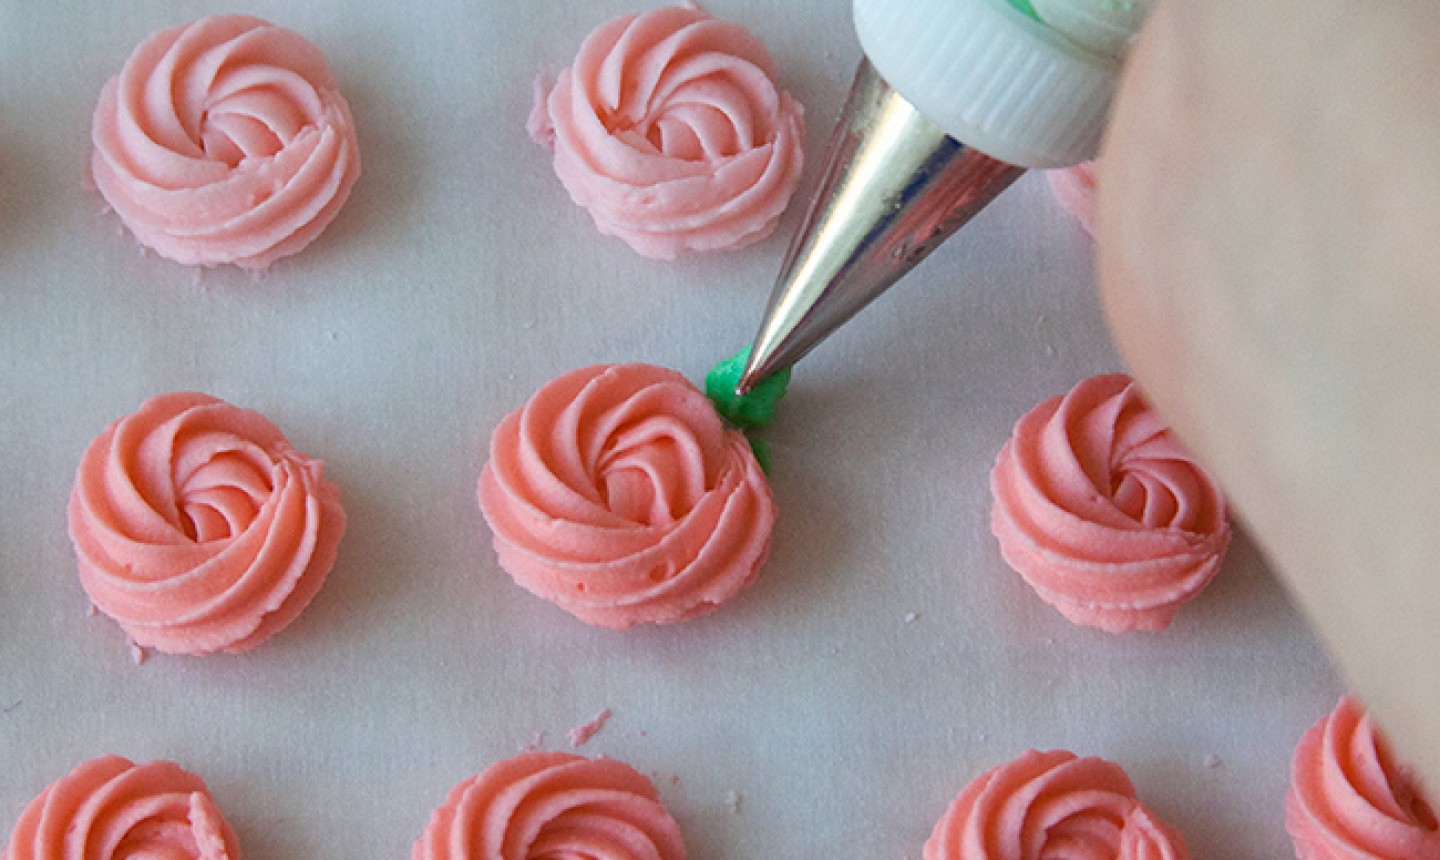
To pipe the leaves, fill a piping bag fitted with a leaf tip with green royal icing. Hold the bag at a 45-degree angle, with the tip at the base of the rosette. Apply a bit of pressure to the piping bag and start building a base of icing to make the leaf.
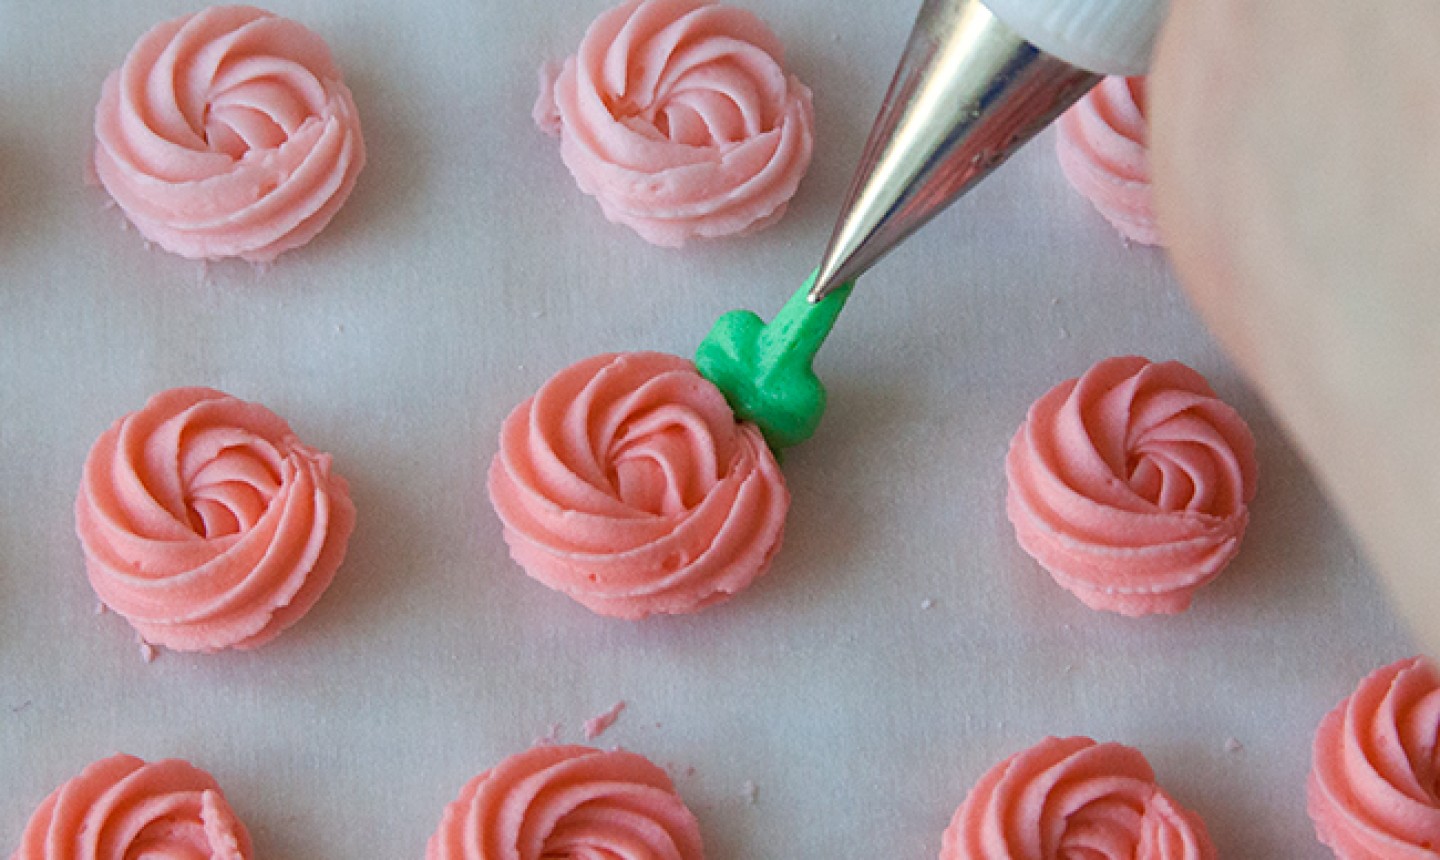
Gently pull up on the piping bag while easing up on the pressure. Once the pressure has stopped, carefully lift up the piping bag to create the tip of the leaf. (They should stand up from the parchment paper.)
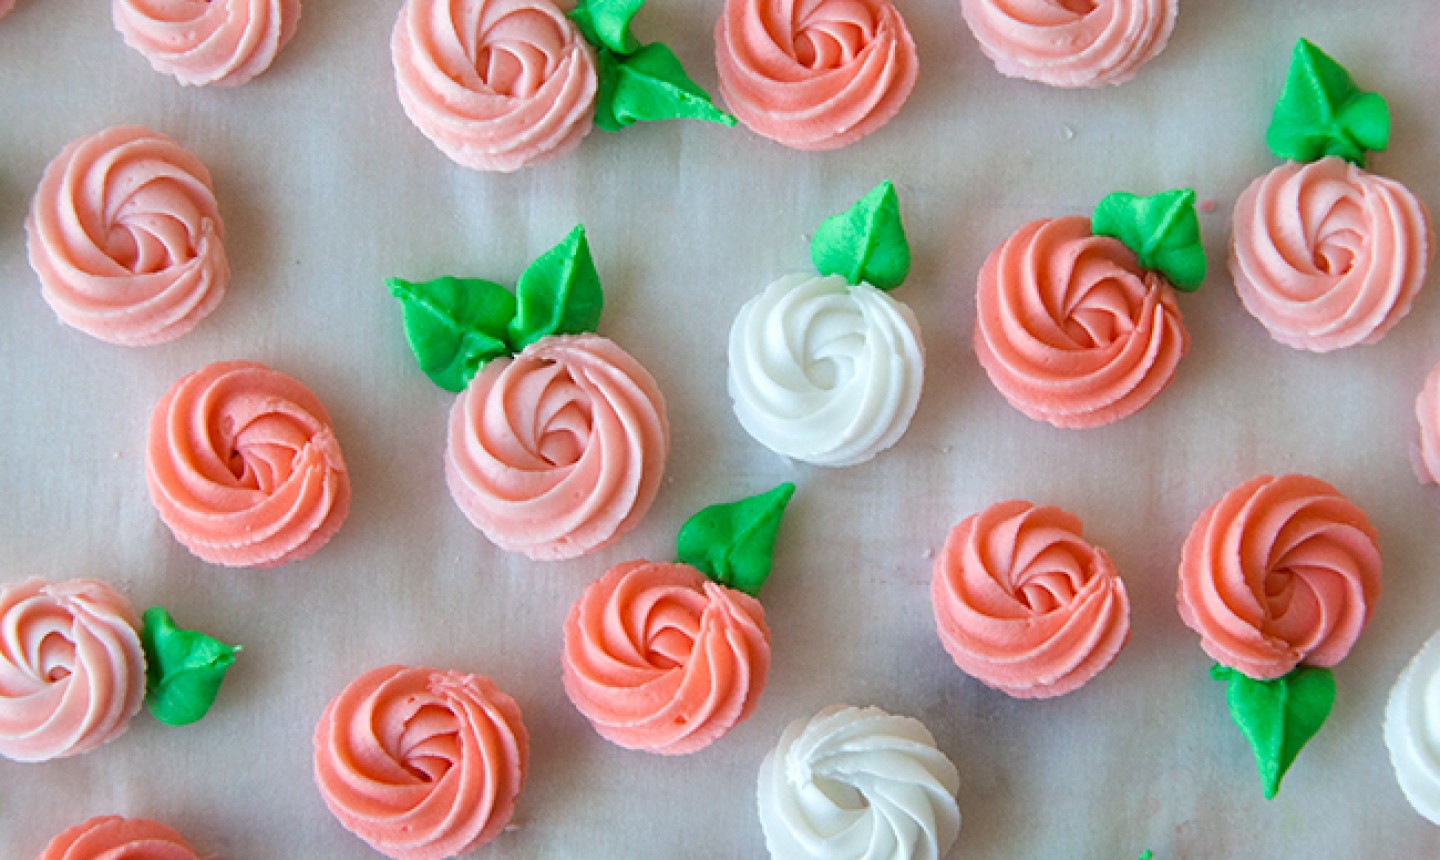
Let the leaves dry for about 30 minutes.
6. Peel and Decorate
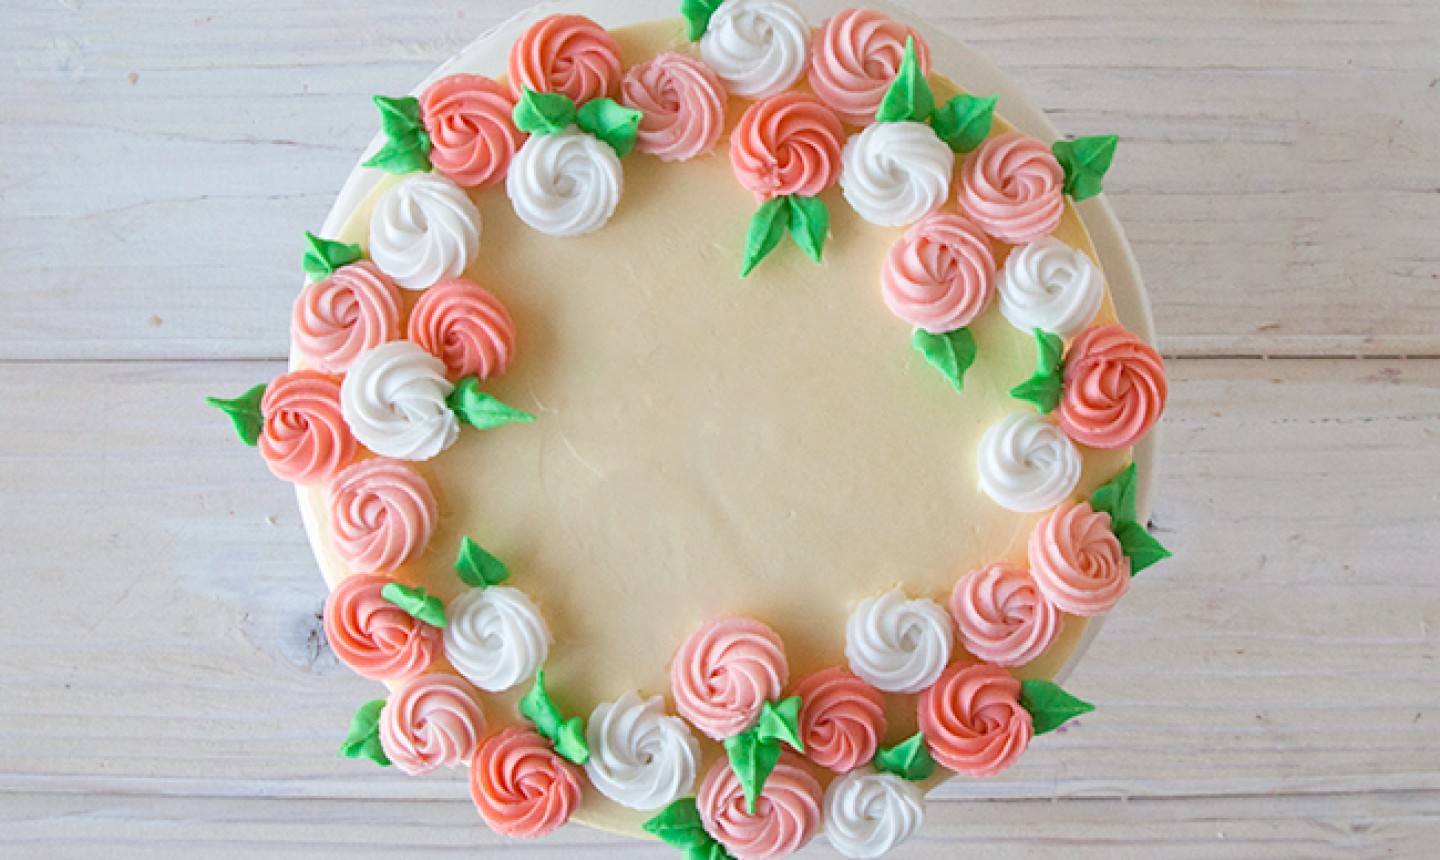
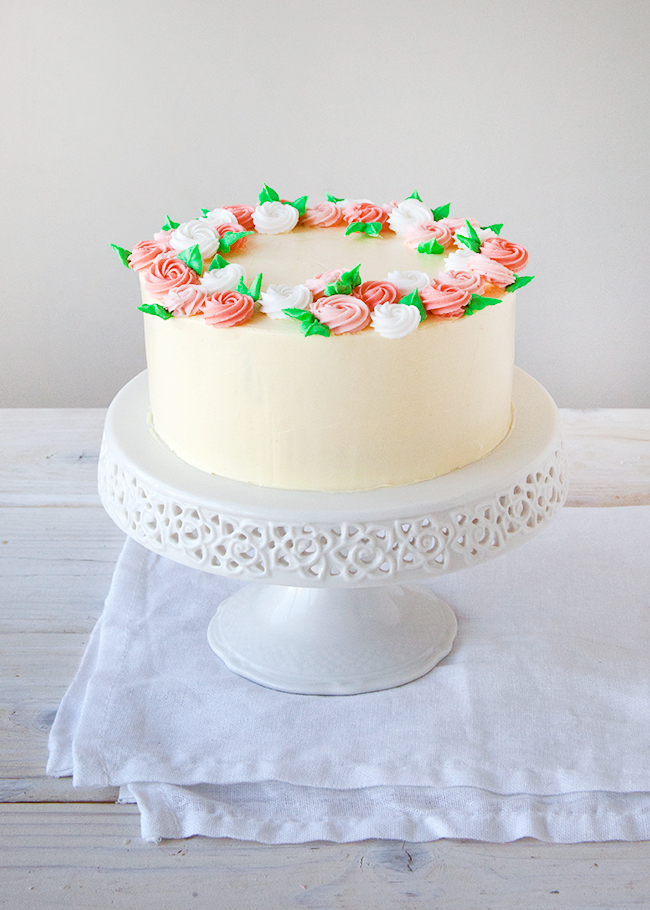
When you’re ready to decorate, carefully peel away the dried rosettes from the parchment paper. Arrange the rosettes around the top edge of an iced cake to form a decorative design.
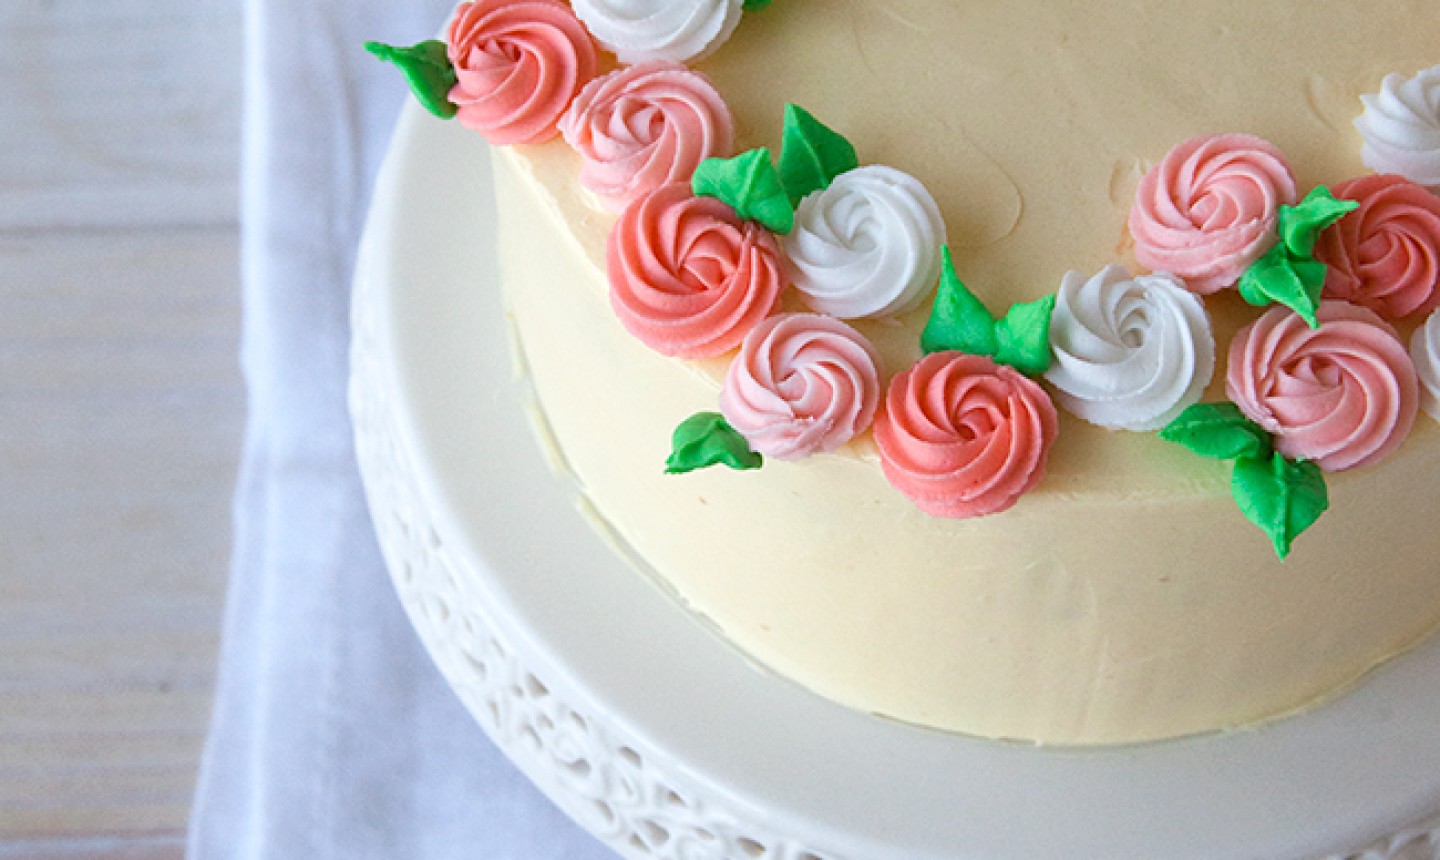
We made a floral wreath, but you can use royal icing rosettes for any project you want!
Share tips, start a discussion or ask one of our experts or other students a question.
Already a member? Sign in
No Responses to “Learn to Pipe Royal Icing Rosettes for Some Real Flower Power”