
Give your recipe collection a pinkies-out new French addition: learn how to make tuiles, a delicate, lace-like rolled cookie.
 Photos via CakeSpy
Literally translated as “tiles,” these cookies are said to be named after a particular type of rounded roof tile. Luckily, they don’t taste like tile, but like a lightly crunchy and decidedly sophisticated cookie.
Delicately scented with butter and vanilla, these cookies feel like a slightly fancy food, and would undoubtedly feel right at home garnishing a fancy dessert or served on a silver tray at the service. But they’re delicious enough for anytime eating, and once baked, they keep for weeks. While the recipe is just a touch fussy, it’s not difficult to master, and these cookies are bound to impress.
Tuiles recipe
Yield: About 24 cookies
Ingredients:
- ¼ cup plus 1 tablespoon butter, melted and cooled for several minutes
- ½ cup granulated sugar
- Pinch salt
- 2 egg whites
- 1/2 teaspoon vanilla
- ¼ cup all purpose flour, sifted
- Confectioners’ sugar, for dusting (optional)
Step 1:
Preheat the oven to 325 F.
Step 2:
Line two rimmed baking sheets with silpat baking sheets (alternatively, line two rimmed baking sheets with parchment paper and spray it with non-stick spray).
Step 3:
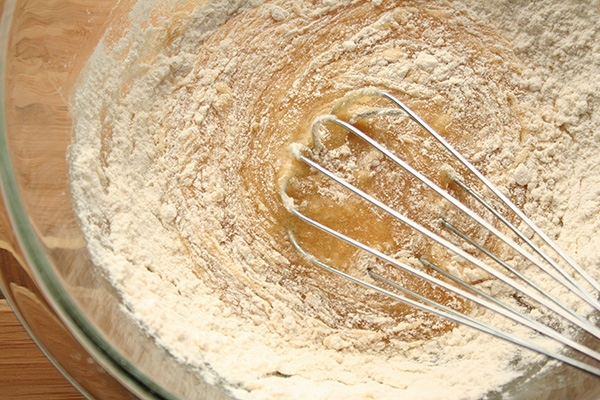
In a large bowl, whisk together the butter, sugar, salt, and egg whites until they form a smooth mixture. Stir in the vanilla. Add the flour, stirring until blended.
Step 4:
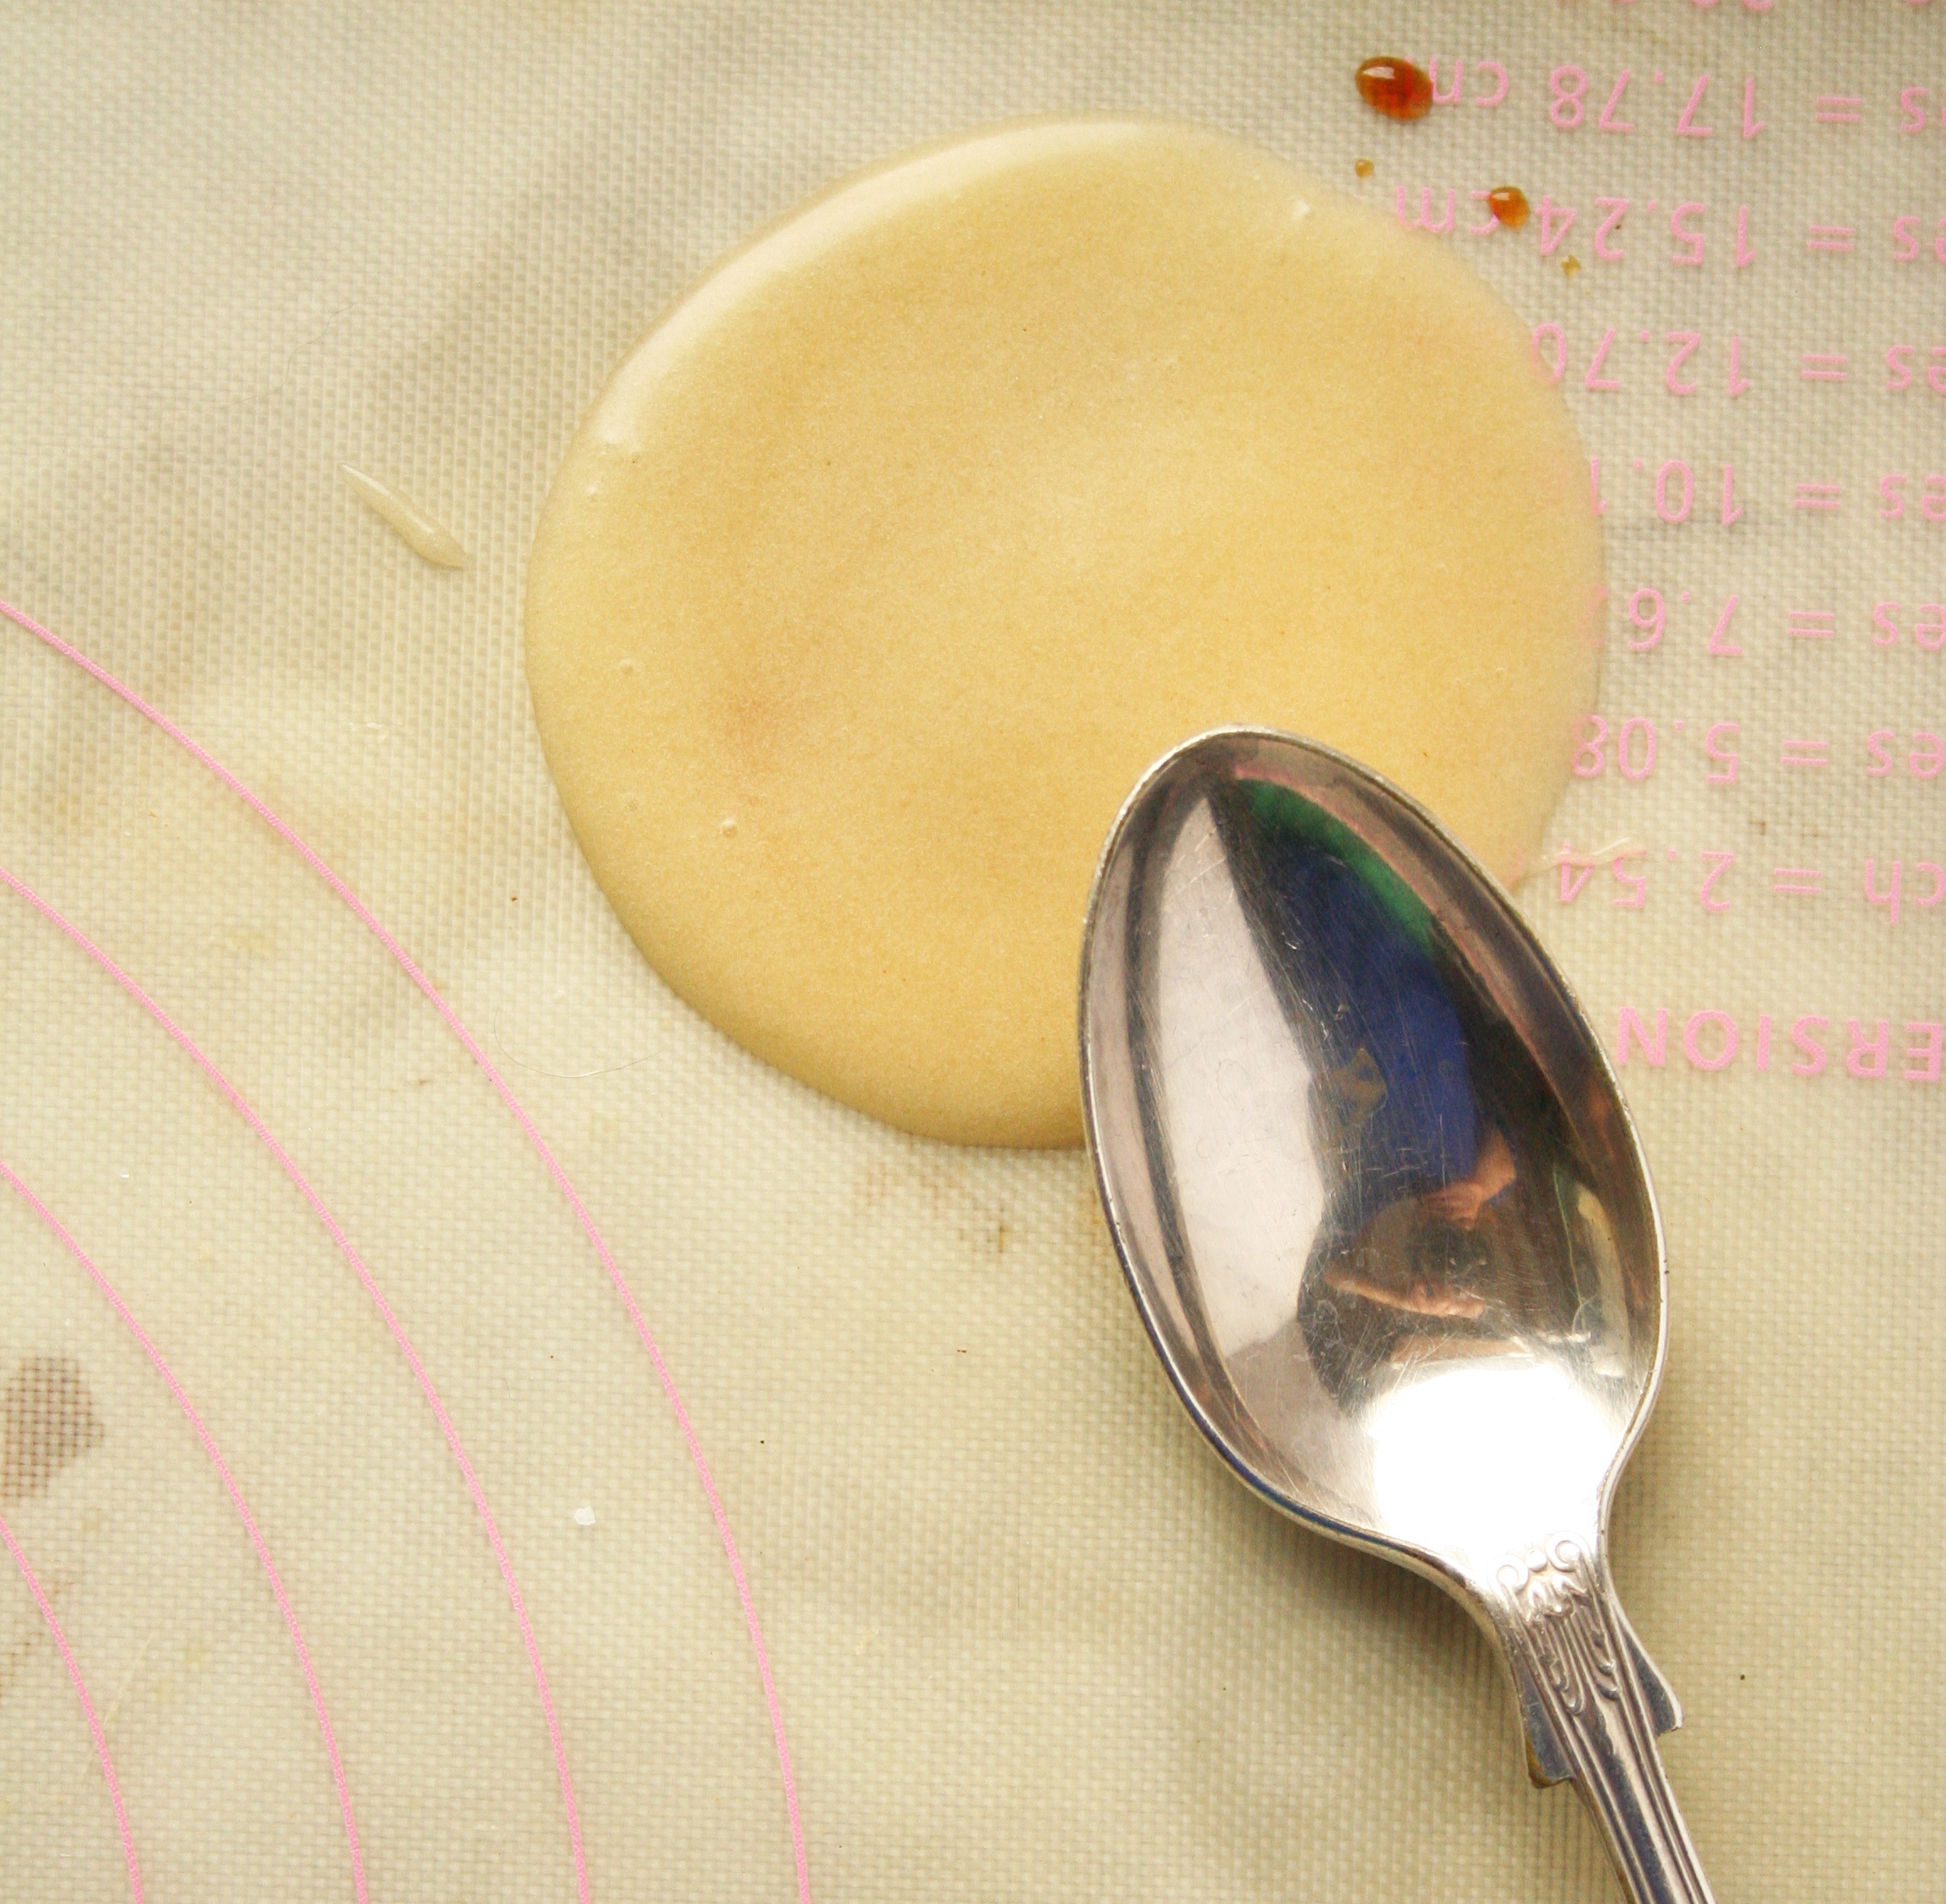
Drop ½ tablespoonfuls of batter two inches apart on the baking sheets. Use the back of a spoon to spread each portion of batter into a circle, approximately 2.5 inches in diameter. You should be able to fit 12 tuiles per tray.
Step 5:
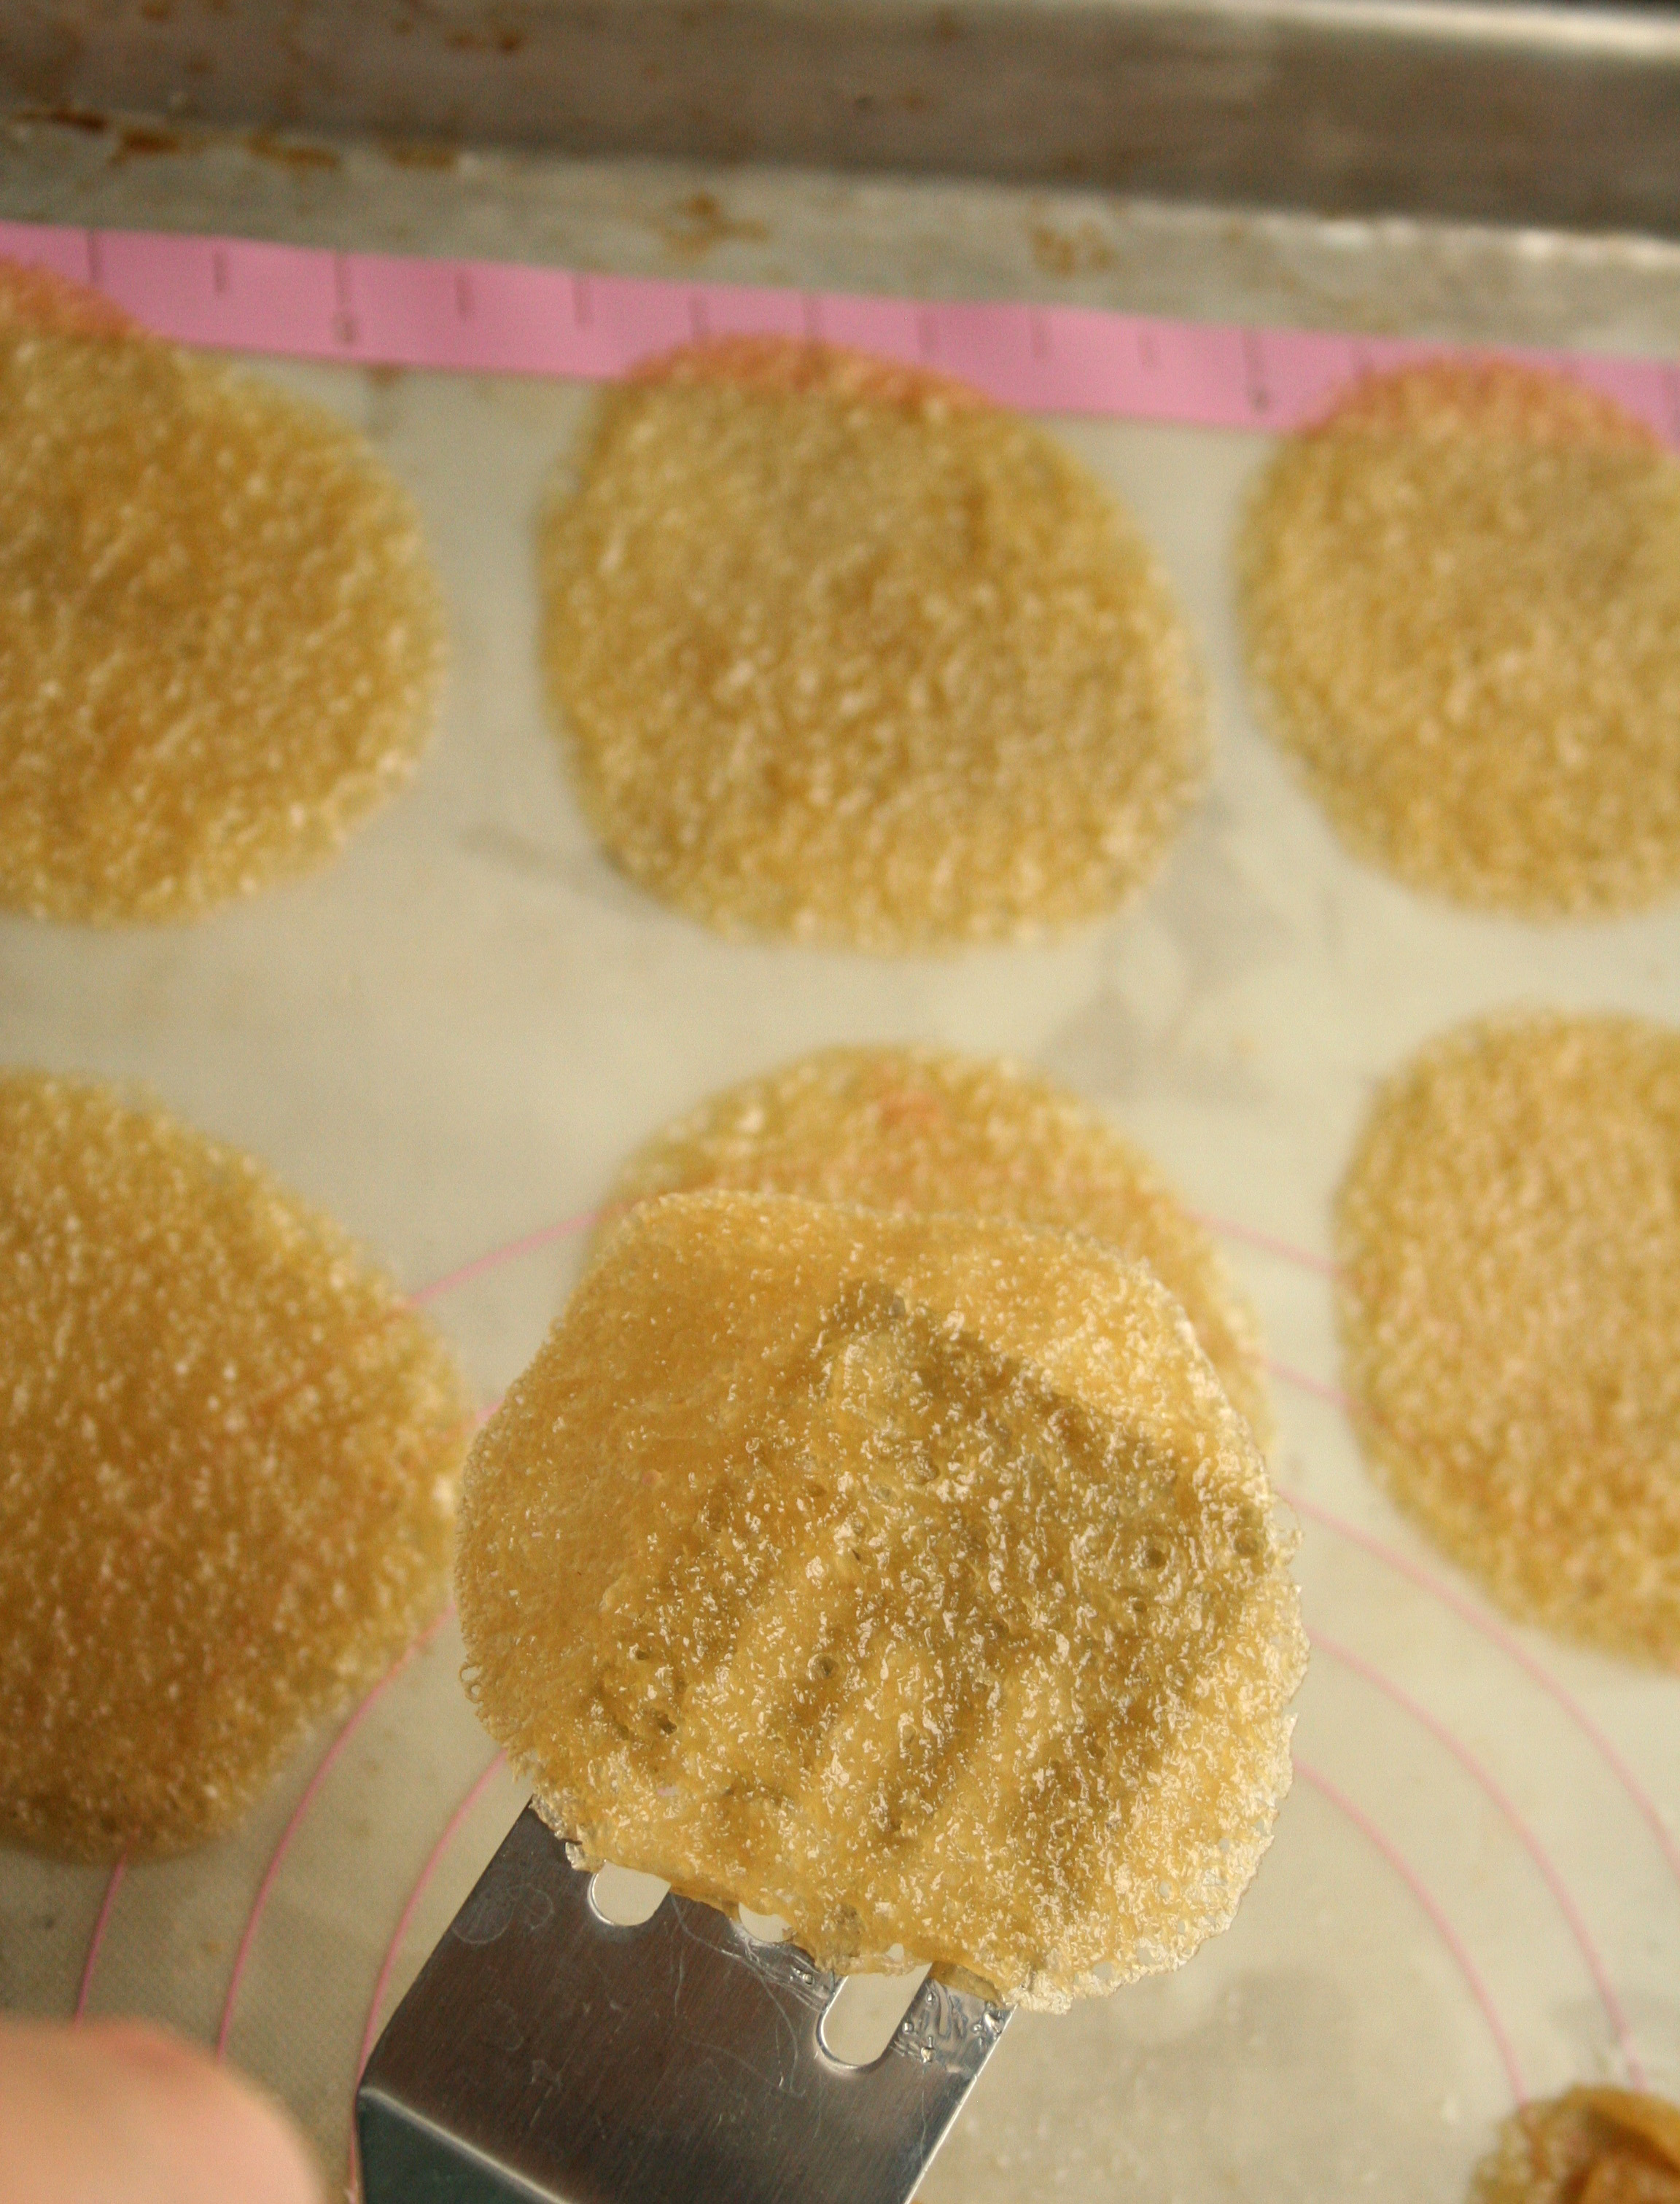
Bake the first tray 12-16 minutes, carefully monitoring the cookies: you want to take them out of the oven right when they are golden brown at the edges and set in the center.
Step 6:
Place the second tray in the oven immediately after removing the first, once again baking for 12-16 minutes, or until golden brown at the edges and set in the center. While you wait for the second batch to bake, it’s time to roll the first batch of cookies.
As soon as you can remove the cookies from the sheet using a metal spatula, removing and rolling them one at a time.
Step 7:
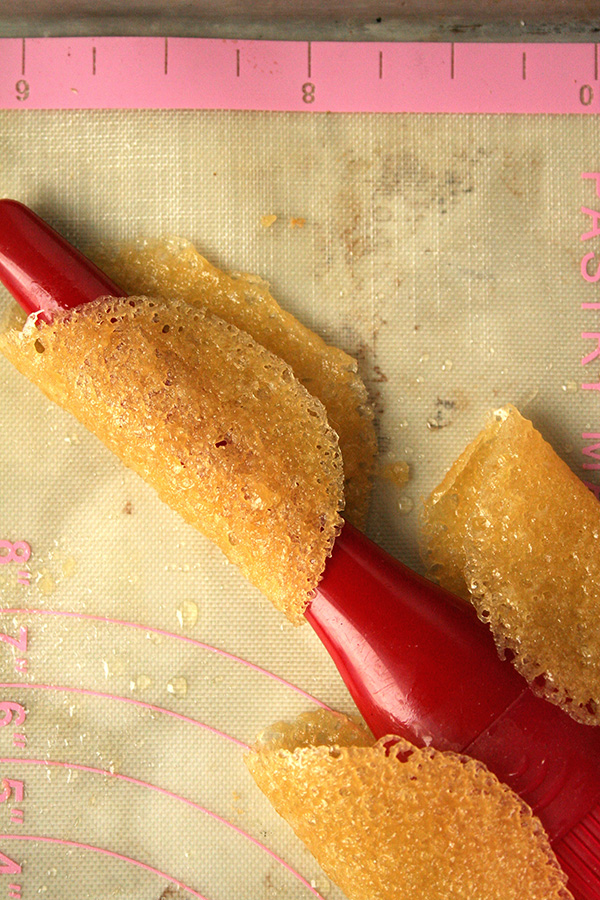
Once it’s been removed from the baking sheet, gently roll, either by hand or around a fairly thin cylinder, such as the handle of a wooden spoon or a chopstick.
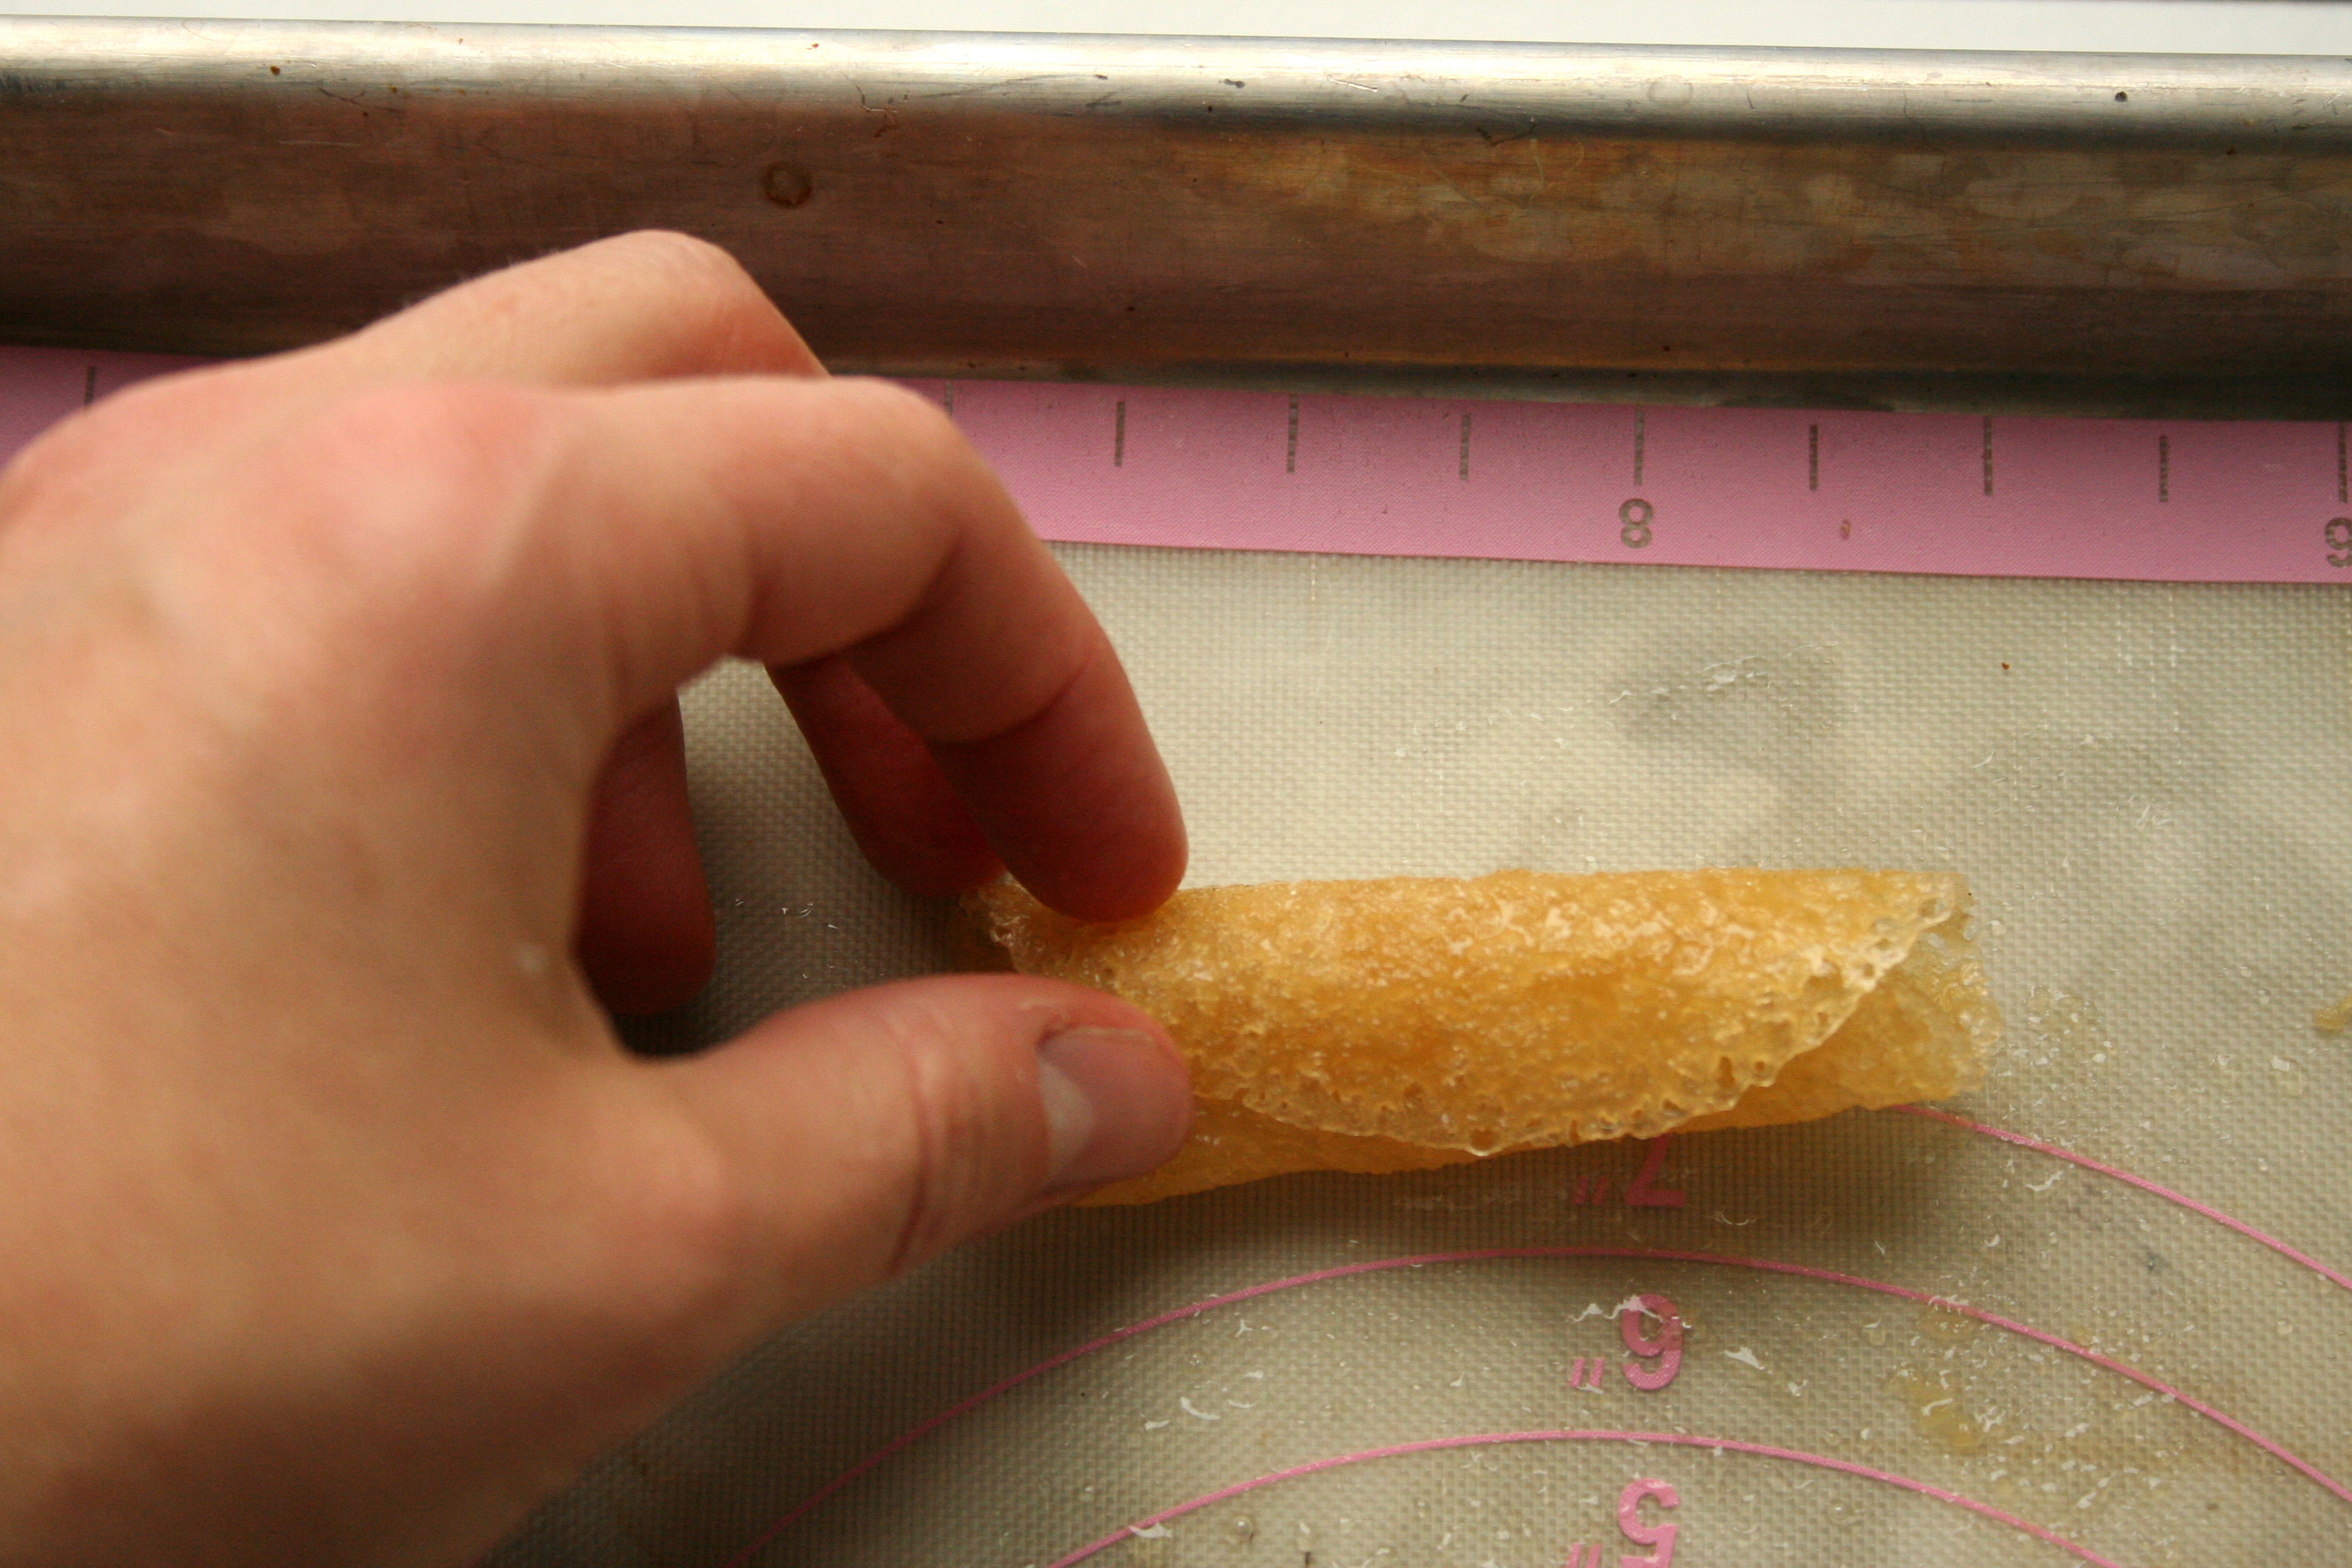
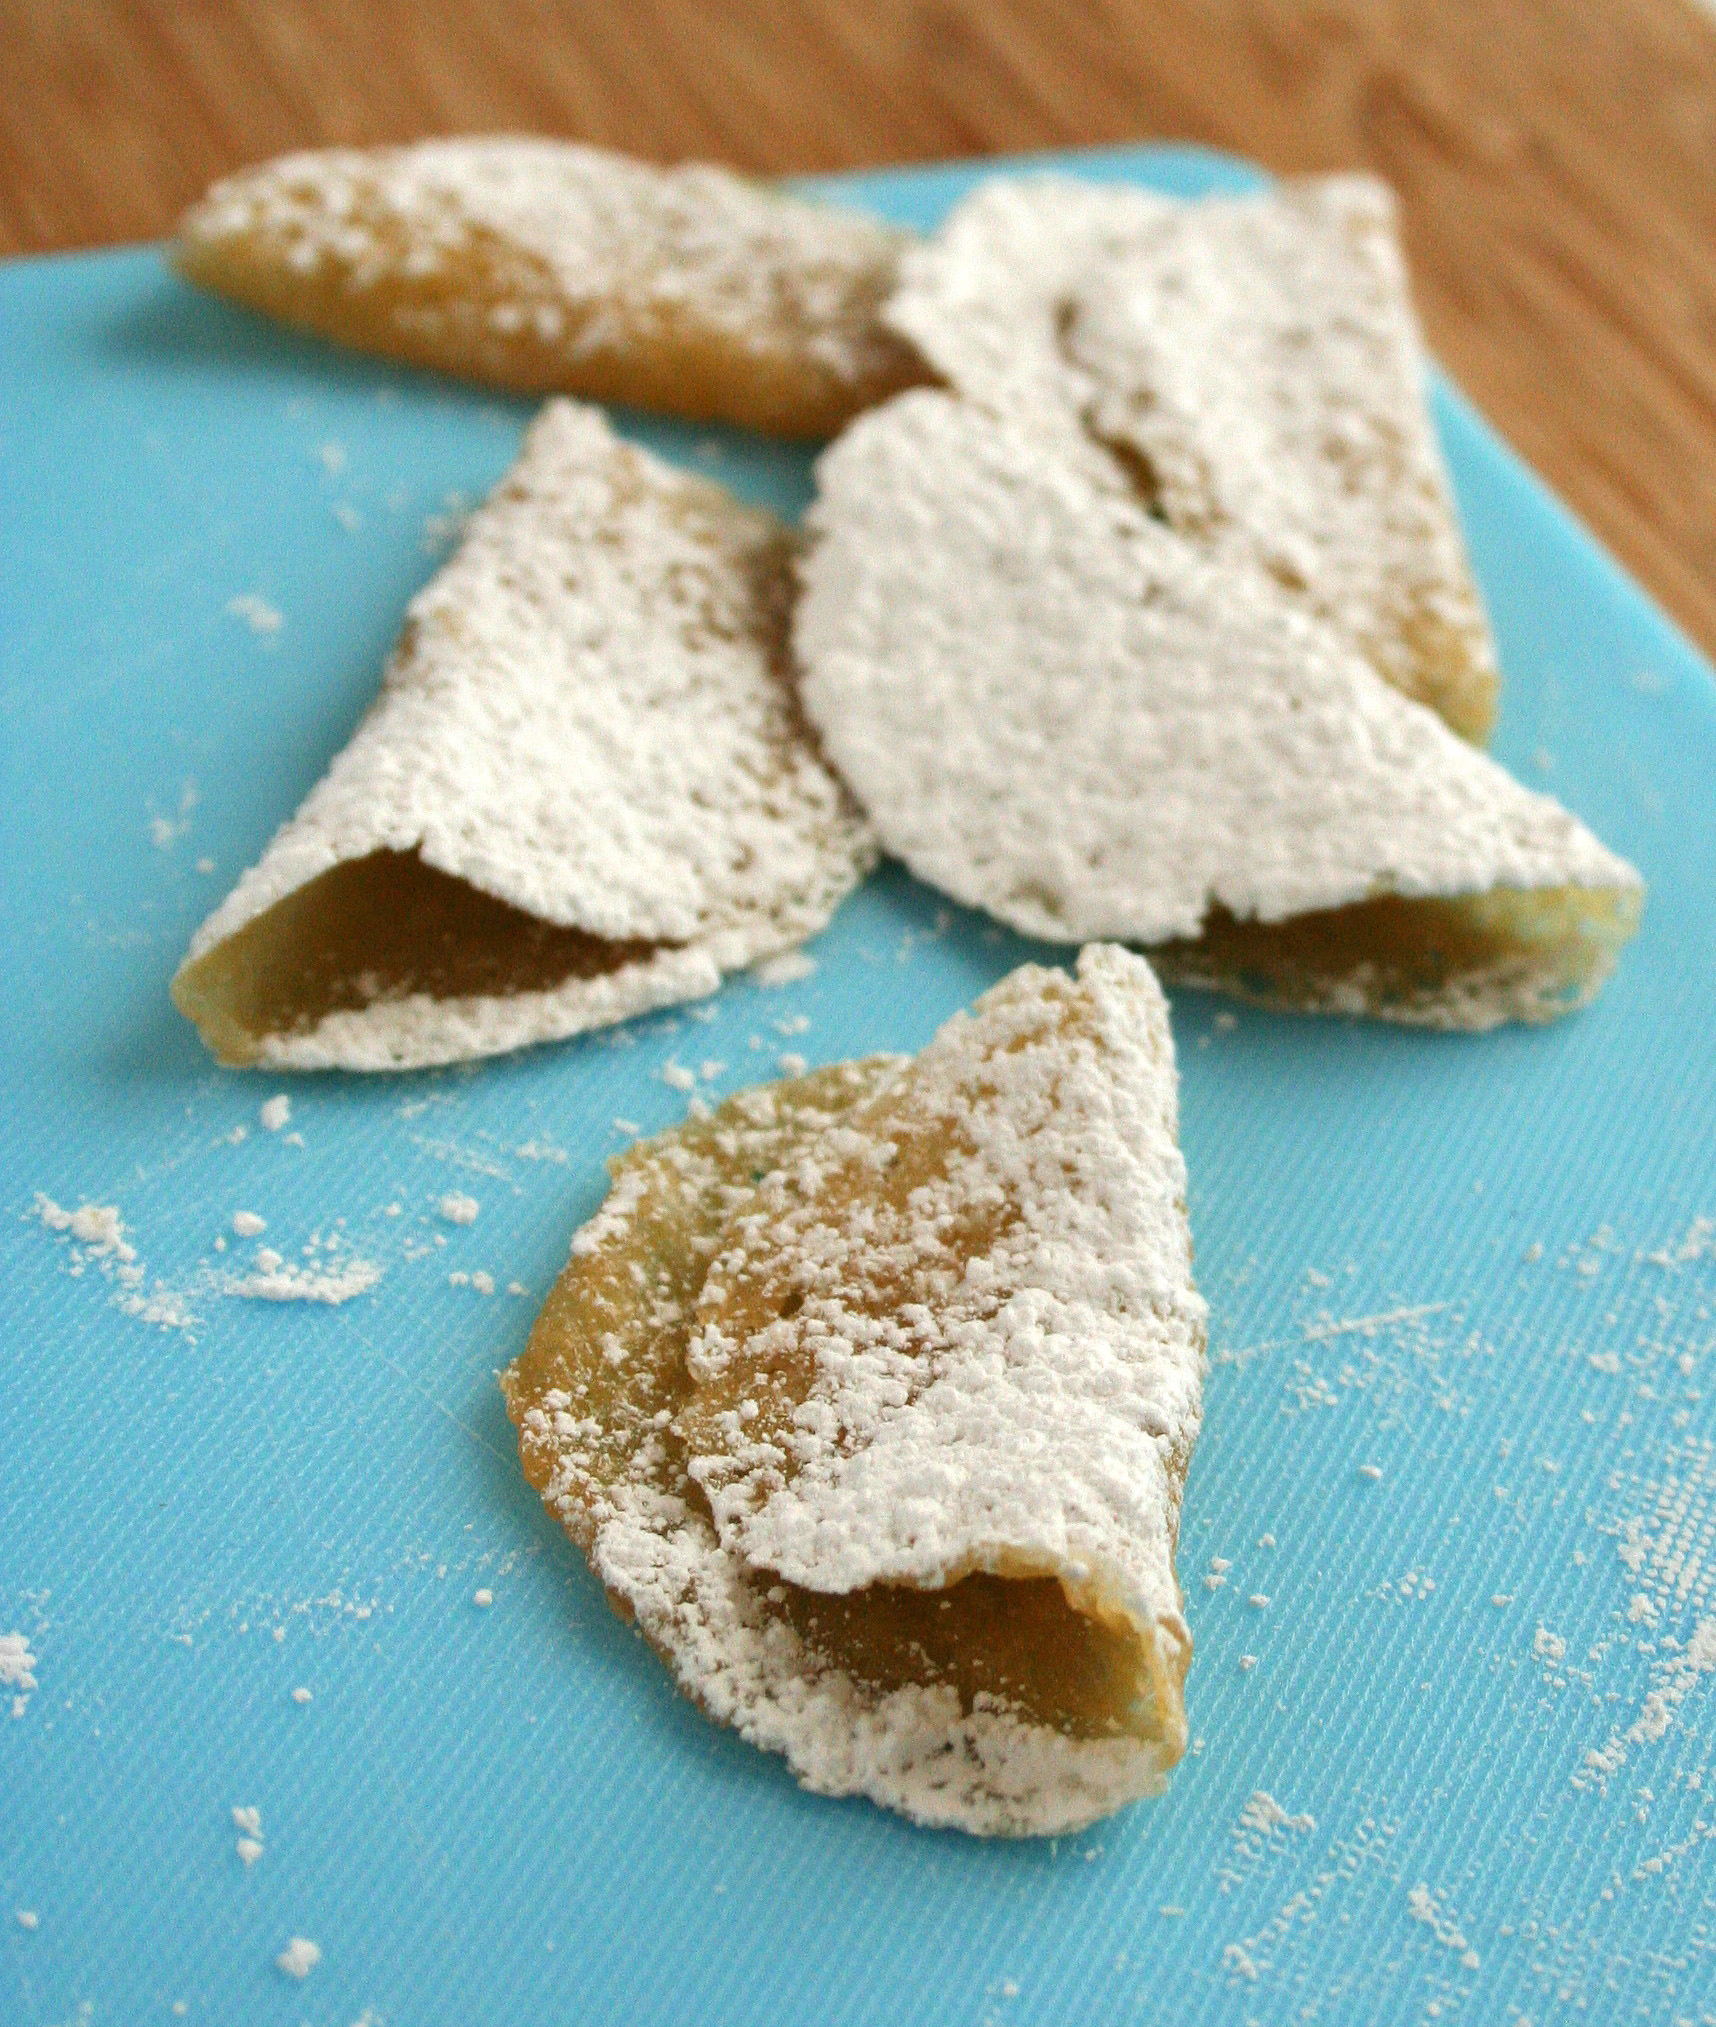
If you want rolled, cigar-shaped tuiles, align the “seam” down so that they can set without unrolling. If you prefer a less tightly rolled tuile, you can simply curve the cookies around the handle of a spoon (or even a pastry brush, as shown) to give them a more gently curved, potato-chip type shape.
After about 10 minutes, they should have become firm and you should be able to remove them from the cylinder, if used.
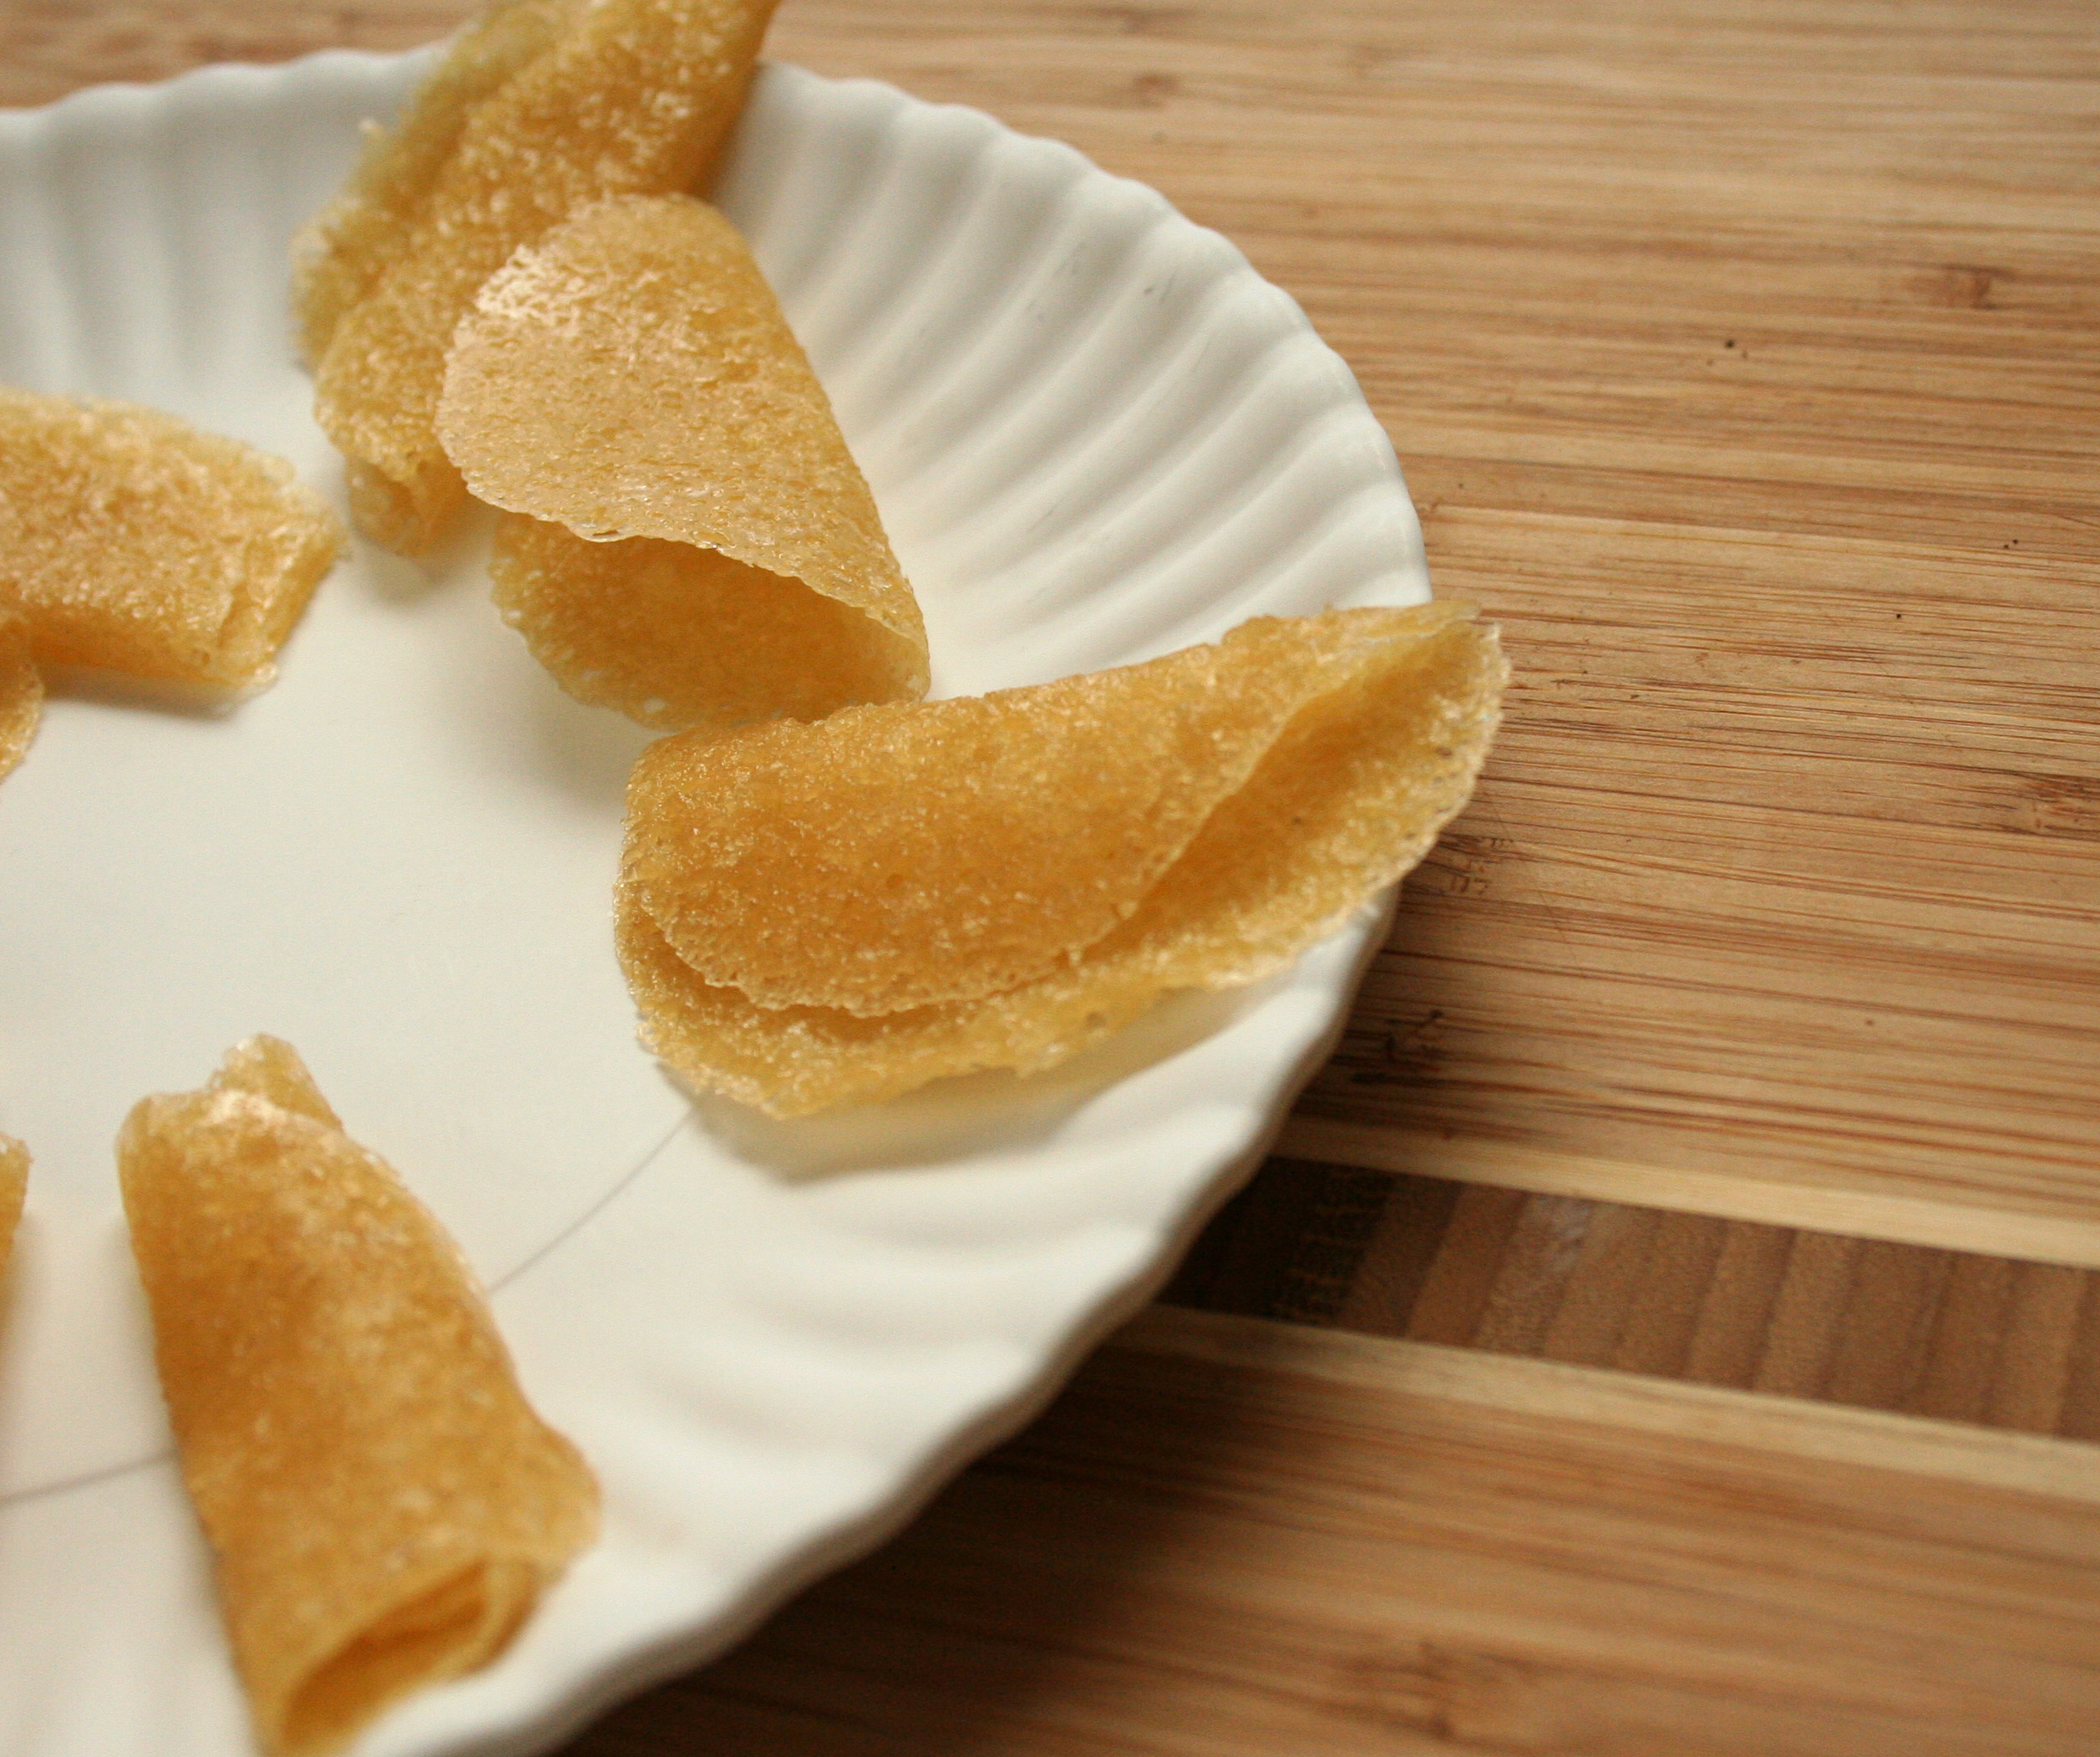
Step 8:
The cookies will become crisper as they cool. To retain this crispiness, place them in an airtight container as soon as they are cooled to room temperature. If desired, dust with confectioners’ sugar. They will keep for up to 1 month.
Recipe notes
- Use cooled melted butter in this recipe. If the butter is too hot, the cookies will spread too much and will be harder to roll.
- Bake one tray of cookies at a time. This is related to the timing of the rolling. Time is of the essence when you roll each individual cookie, and if you bake two trays at once, some of the cookies will firm up too much to roll before you get to them. In the recipe, it is suggested that you bake one tray, and when they come out of the oven you immediately put the second tray in, and while they bake, you can roll the first batch.
- A heatproof silicone baking sheet such as Silpat will make your life so, so, so much easier when making tuiles. Yes, you can use parchment paper coated with non-stick spray if you do not have a silicone baking mat, but your cookies will be noticeably harder to remove from the tray.
Share tips, start a discussion or ask one of our experts or other students a question.
No Responses to “Fun & Fancy Cookies for Your Sweetheart: How to Make Tuiles”