
Learn how to paint birds in just a few easy steps!
Materials
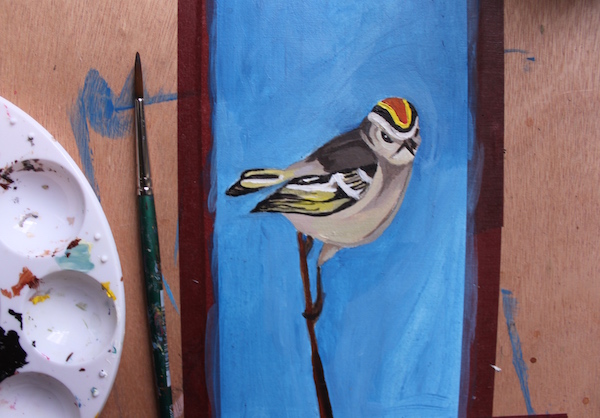
For starters, let’s go over the tools I’m using. If you already paint, then you’ll probably have most of what you need. I’ve primed a sheet of paper with acrylic matte medium to paint on. In addition, I have several tubes of acrylic pigment — blue (for the sky), browns, reds, yellows and white — that match the coloration of the bird. I’m also using a few paint brushes including a liner for the fine details.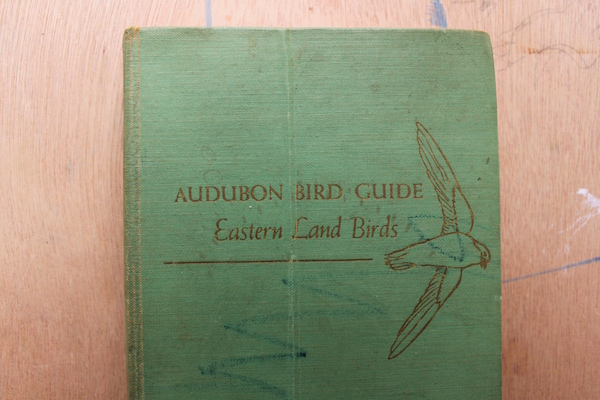 You can use whatever you like for reference. Maybe you’ve photographed a bird, or you have a bird book like I do. I picked up this used Audubon Bird Guide years ago, and I still refer to it. I selected the golden-crowned Kinglet to paint from this book.
1. Draw the bird of your choice.
 Before I put paint to paper (or canvas), I always make sure I have a solid drawing. Pencil is a lot more forgiving than paint, so it’s easier to perfect my sketch with an eraser rather than having to cover it with pigment later.
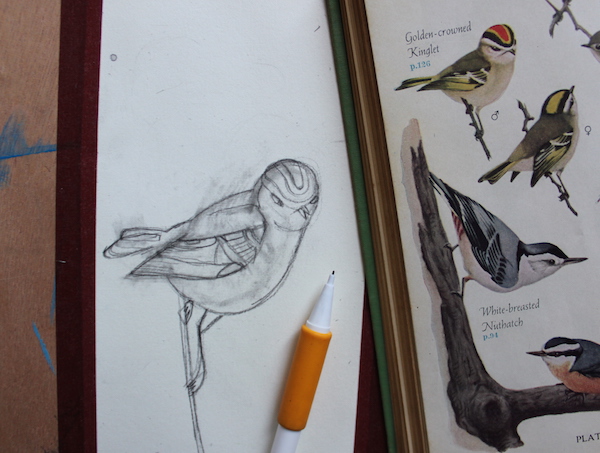 Personally, I found the drawing part the most daunting part of this whole painting. So, I started with simple geometric shapes. This ensures that I get proportions and placement correct. I then went back and refined it until I was satisfied with how it looked.
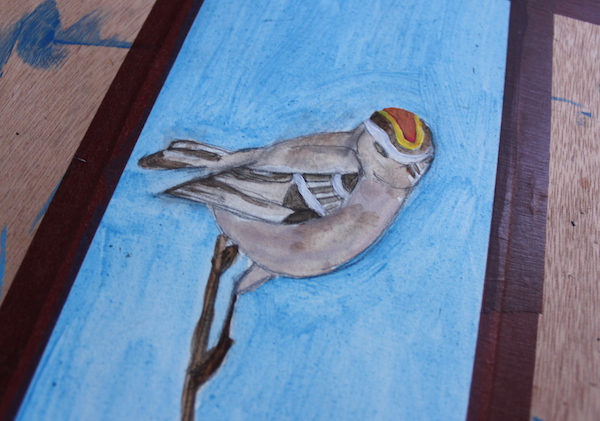
2. Paint a base coat.
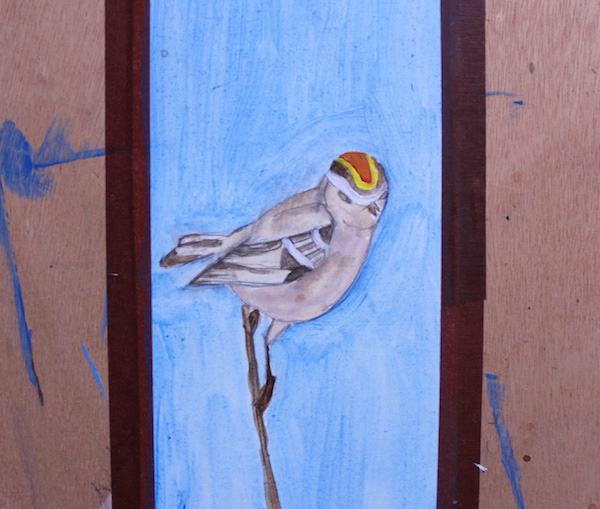 There are a lot of advantages to working in layers of paint (often called glazing), because it allows you to build a rich color base. I painted a thin coat on my prepared paper. Don’t worry if you didn’t cover all of your graphite. It’ll eventually be masked in subsequent layers.
3. Add a second, third and maybe fourth coat of paint.
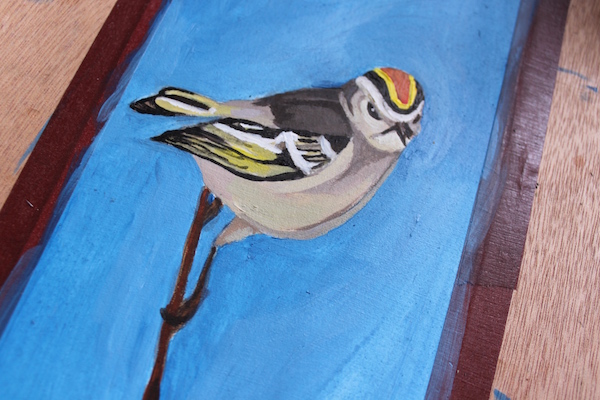
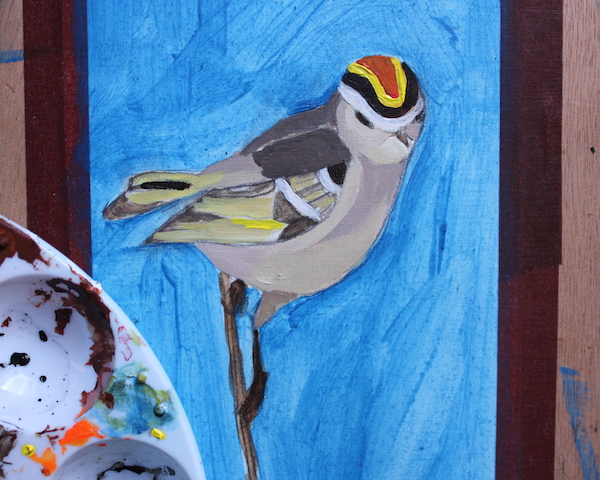 Once your base colors are dry, it’s time to really paint in the fine details. Take a close look at your reference photo and figure out where the shadows, highlights and color changes are. My bird has a bright spot of red on its head and some subtle yellow hues on its wings. Using a tiny brush, I applied thin layers of paint to build volume.
 I didn’t do this all in one coat. With some details, like the wings and head, I went over it multiple times. Other parts, like the chest, didn’t require the same type of work. It’s a good thing, compositionally, to have areas of fine detail mixed with fields of color. This will keep your painting from getting visually overwhelming.
 Tip: Mix Ultramarine Blue with Burnt Umber to create a dark, nearly-black color.
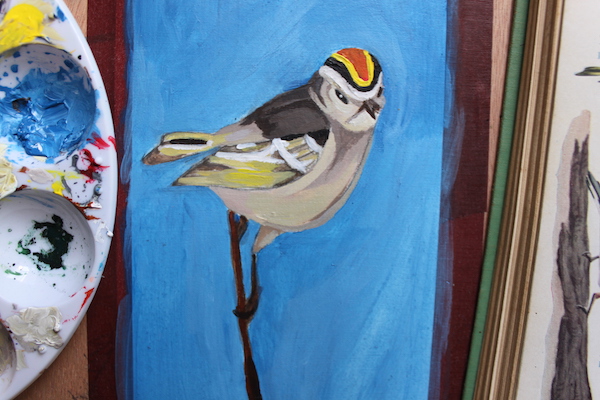
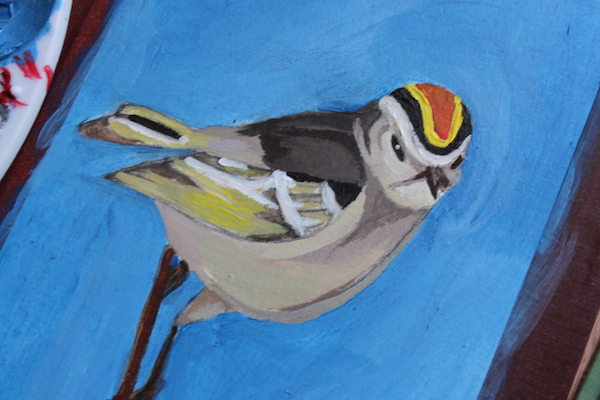
4. Outline the fine details (if necessary).
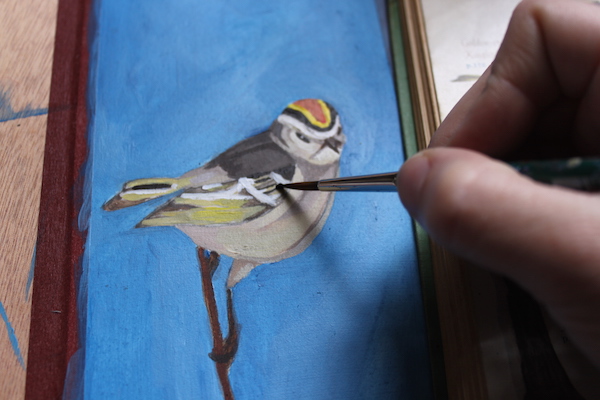 If your reference bird has a lot of marks on their feathers, then the last step is to define them. This is where a liner will come in handy. Outline the things that require a fine brush. For me, that’s the dark marks on the feathers.
 Tip: This is the final step. Before starting this process, ask yourself, “Do I need to paint any more areas?” If the answer is yes, then begin the outline process after you do that. Otherwise, you might find it difficult to preserve the fine details.
Share tips, start a discussion or ask one of our experts or other students a question.
No Responses to “Paint Realistic-Looking Birds With Acrylic Paint”