
When you sew clothing items, most of the time you are going to use a sewing pattern. These days, there are countless patterns available online (for purchase and free). But in order to use them, you need to know how to read a sewing pattern.
Whether it’s a downloadable PDF, a printed pattern (from a magazine or book) or even a vintage pattern, each and every sewing pattern will tell you the same things (more or less). In this post, we’ll review how to spot the essential information so you’ll know everything you need.
How to read a sewing pattern
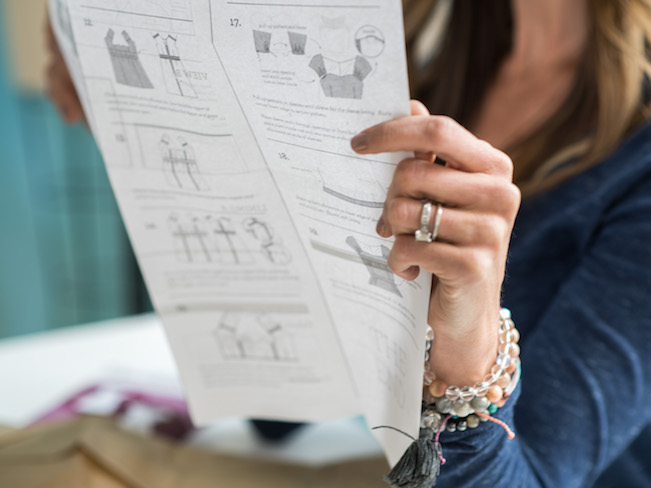
The first thing to look at is the instructions section of the booklet or file. This is where you’ll find a great amount of data, material and tips you can use before you even start to cut the fabric (and later on, to put the garment together).
1. Style lines
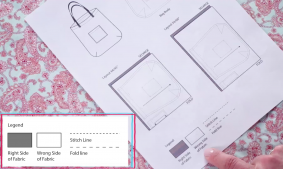
The photos shown with a pattern can be misleading. Looking at the flat, drawn designs can help you better judge whether the style suits you. The flat pattern more accurately shows the lines without any wonderful fabric distracting you; it shows you the essence and the soul of the pattern.
2. Sewing level
If you are a beginner, you’d better choose a pattern labeled “easy” because this kind of pattern will better guide you throughout the whole process (like how to properly press seams while you sew, or which tools to use for each task). Meanwhile, more advanced sewers may be bored with easy patterns and might prefer to opt for a pattern that requires more experience.
As you go on through your sewing journey and want to venture to more advanced patterns, my suggestion is to invest in sewing classes and a few good construction books. Do not rely only on sewing patterns or blogs to teach you how to sew. Learning new skills will give you more self esteem and you’ll ask for even more, guaranteed!
Bonus tips:
If you’re stuck and need help on a pattern you found online, you can try asking the designer for suggestions. Indie designers are usually available to respond to questions.
If you are a beginner, consider choosing patterns without multiple pattern pieces (like facings, collars, cuffs and so on) for your first projects. The fewer pieces, the easier and faster is will come together, giving you a quick satisfaction!
3. Fabric suggestions
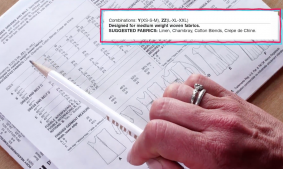
Sewing patterns often suggest a few types of fabric that are well suited for the project. Choosing one of the recommended options will ensure a finished project that looks like the picture that initially caught your eye.
While you grow as a sewer, you will want to experiment with fabrics not listed. Sometimes, even if the pattern asks for a woven fabric, you may be pleasantly surprised by the amazing results you get using a knit fabric. However, that’s not always the case: for example, fitted patterns calling for knit fabric often won’t work in woven, stable fabric. The more you learn about fabrics, the more easily you can make this judgement.
4. Fabric yardages

Designers provide fabric yardages to give you a rough estimate of how much fabric you will need. Yardages should account for pre-wash shrinkages, but stay on the safe side: Buy at least a 10 percent more fabric as a self-insurance for shrinking fabrics (usually, fabric with cotton will shrink). It’s also a good idea to buy extra fabric for patterns with a nap or fabrics with a print or pattern.
Pay attention to the width of the fabric. It’s usually 60″ or 44″, but sometimes you will find narrower fabrics (ex. some types of corduroy or silk), so you have to buy way more length to accommodate all the pattern pieces.
If your pattern includes several styles or sizes, remember to choose the right yardages.
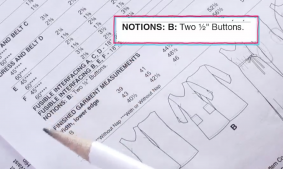
5. Thread and notions
Next to the yardages, you will usually find a helpful section that lists the notions you need for that specific pattern. For example, it will tell you if you need interfacing, zippers, bias tape, elastic, etc. Don’t forget to take a look at this part and buy what you need while going to the store.
Bonus tip:
Check if you need anything weird before you start, to be sure you can find everything. Once I had to hunt for fusible hair canvas for a coat and had no luck: if only I knew it beforehand, I would have been able to order it overseas!
6. Size chart
Somewhere on the pattern sheet, you will find a size key or chart that will help you choose the right lines for your size.
The most common mistake when choosing the right size is to go for the size you usually buy at the store. Never do this!
Each designer has its own size chart, so make your choice basing on actual body measurements. If you find your measurements are all over the chart, it’s OK. Charts are just averages, and most people will be like you. As a rule of thumb, determine the size to sew using different measurements for different pieces of clothing:
- Top/dresses: Use chest (or high bust) circumference
- Pants: Use the hips girth (meaning widest girth under the belt, usually around the seat)
- Skirts:Use natural waist (even if the skirt will then sit in a low or high waist)
Don’t make the rookie mistake of taking measurements once and then use the same ones forever. Re-measure yourself (or your kids) at least once a month to be sure the fit will be spot on!
Bonus tip:
If using a PDF pattern, you can often choose to print only one size.
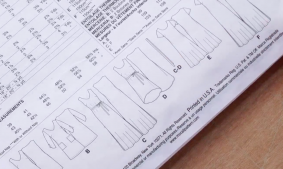
7. Pattern pieces / measurements chart
Before you start placing the pattern pieces onto the fabric, find out if every piece needs to be printed. Sometimes the designer excludes pattern pieces for simple rectangular shapes that you can cut by measurements only.
8. Symbols/notches
Various symbols are how a designer talks to you in a pattern. They will tell you how to place the pattern on top of the fabric, where the grainline is, if pieces should be aligned with the fabric fold, where to gather fabric, where to place a button and much more.
Here are some of the most common symbols:
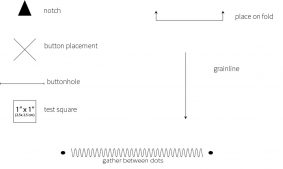
Make sure you understand the symbols’ meanings. As you cut your pattern pieces, don’t forget to transfer them onto the fabric, using the marking tool of your choice.
Cutting layouts
Some patterns include diagrams showing you how to place your pattern pieces on top of the fabric.
Let me share a secret with you: I never look at them — they usually waste a ton of fabric! My suggestion is to play Tetris with your pattern pieces and find the best way to squeeze in more pieces with less tiny scraps. You can even unfold and re-fold the fabric in a different way, provided you make sure you’re following the grainlines.
Tips for using a sewing pattern
Read through it
Don’t skip this step. Even if you’re a more seasoned sere, reading all the instructions from beginning to end will help you understand the entire workflow.
Print the pattern
If you are using a PDF sewing pattern, you need to print, trim and tape the sheets together. If you follow the directions and use the right tools, it can be even fun.
Trace the pattern (if desired)
If you are using a traditional paper pattern, tracing is a must! However, it’s not always necessary for a PDF pattern. I never trace. It takes me way less time to re-print, re-trim and re-tape than to trace the pattern.
Follow the right lines
If you are using a paper pattern or a PDF pattern without the “print size-by-size” feature, you need to identify the right lines to follow using the size chart. Highlight them with a bright pen to make them more prominent and trace the right one.
I'm a beginner and enthusiast who would love to learn about the sewing trade
Just finished basic sewing
I am making pants for my daughter. How do I figure what size she is? Her hips and waist are the same size. 39 1/2