

Making presents yourself is totally a go-to if you’re a crafter. Why can’t your packaging be decked out and DIY, too? Not only is this bag easy and fun, it’s also reusable — so it’s like a whole other gift for your recipient!
DIY Gift Bag
Level: Easy
What You Need
Instructions
1. Fold and Press the Fabric
Fold the fabric in half lengthwise, placing the wrong sides together. Press the fold so you can easily see the crease. Then unfold it and lay it out so the wrong side of the fabric is facing up.
2. Place the Interfacing
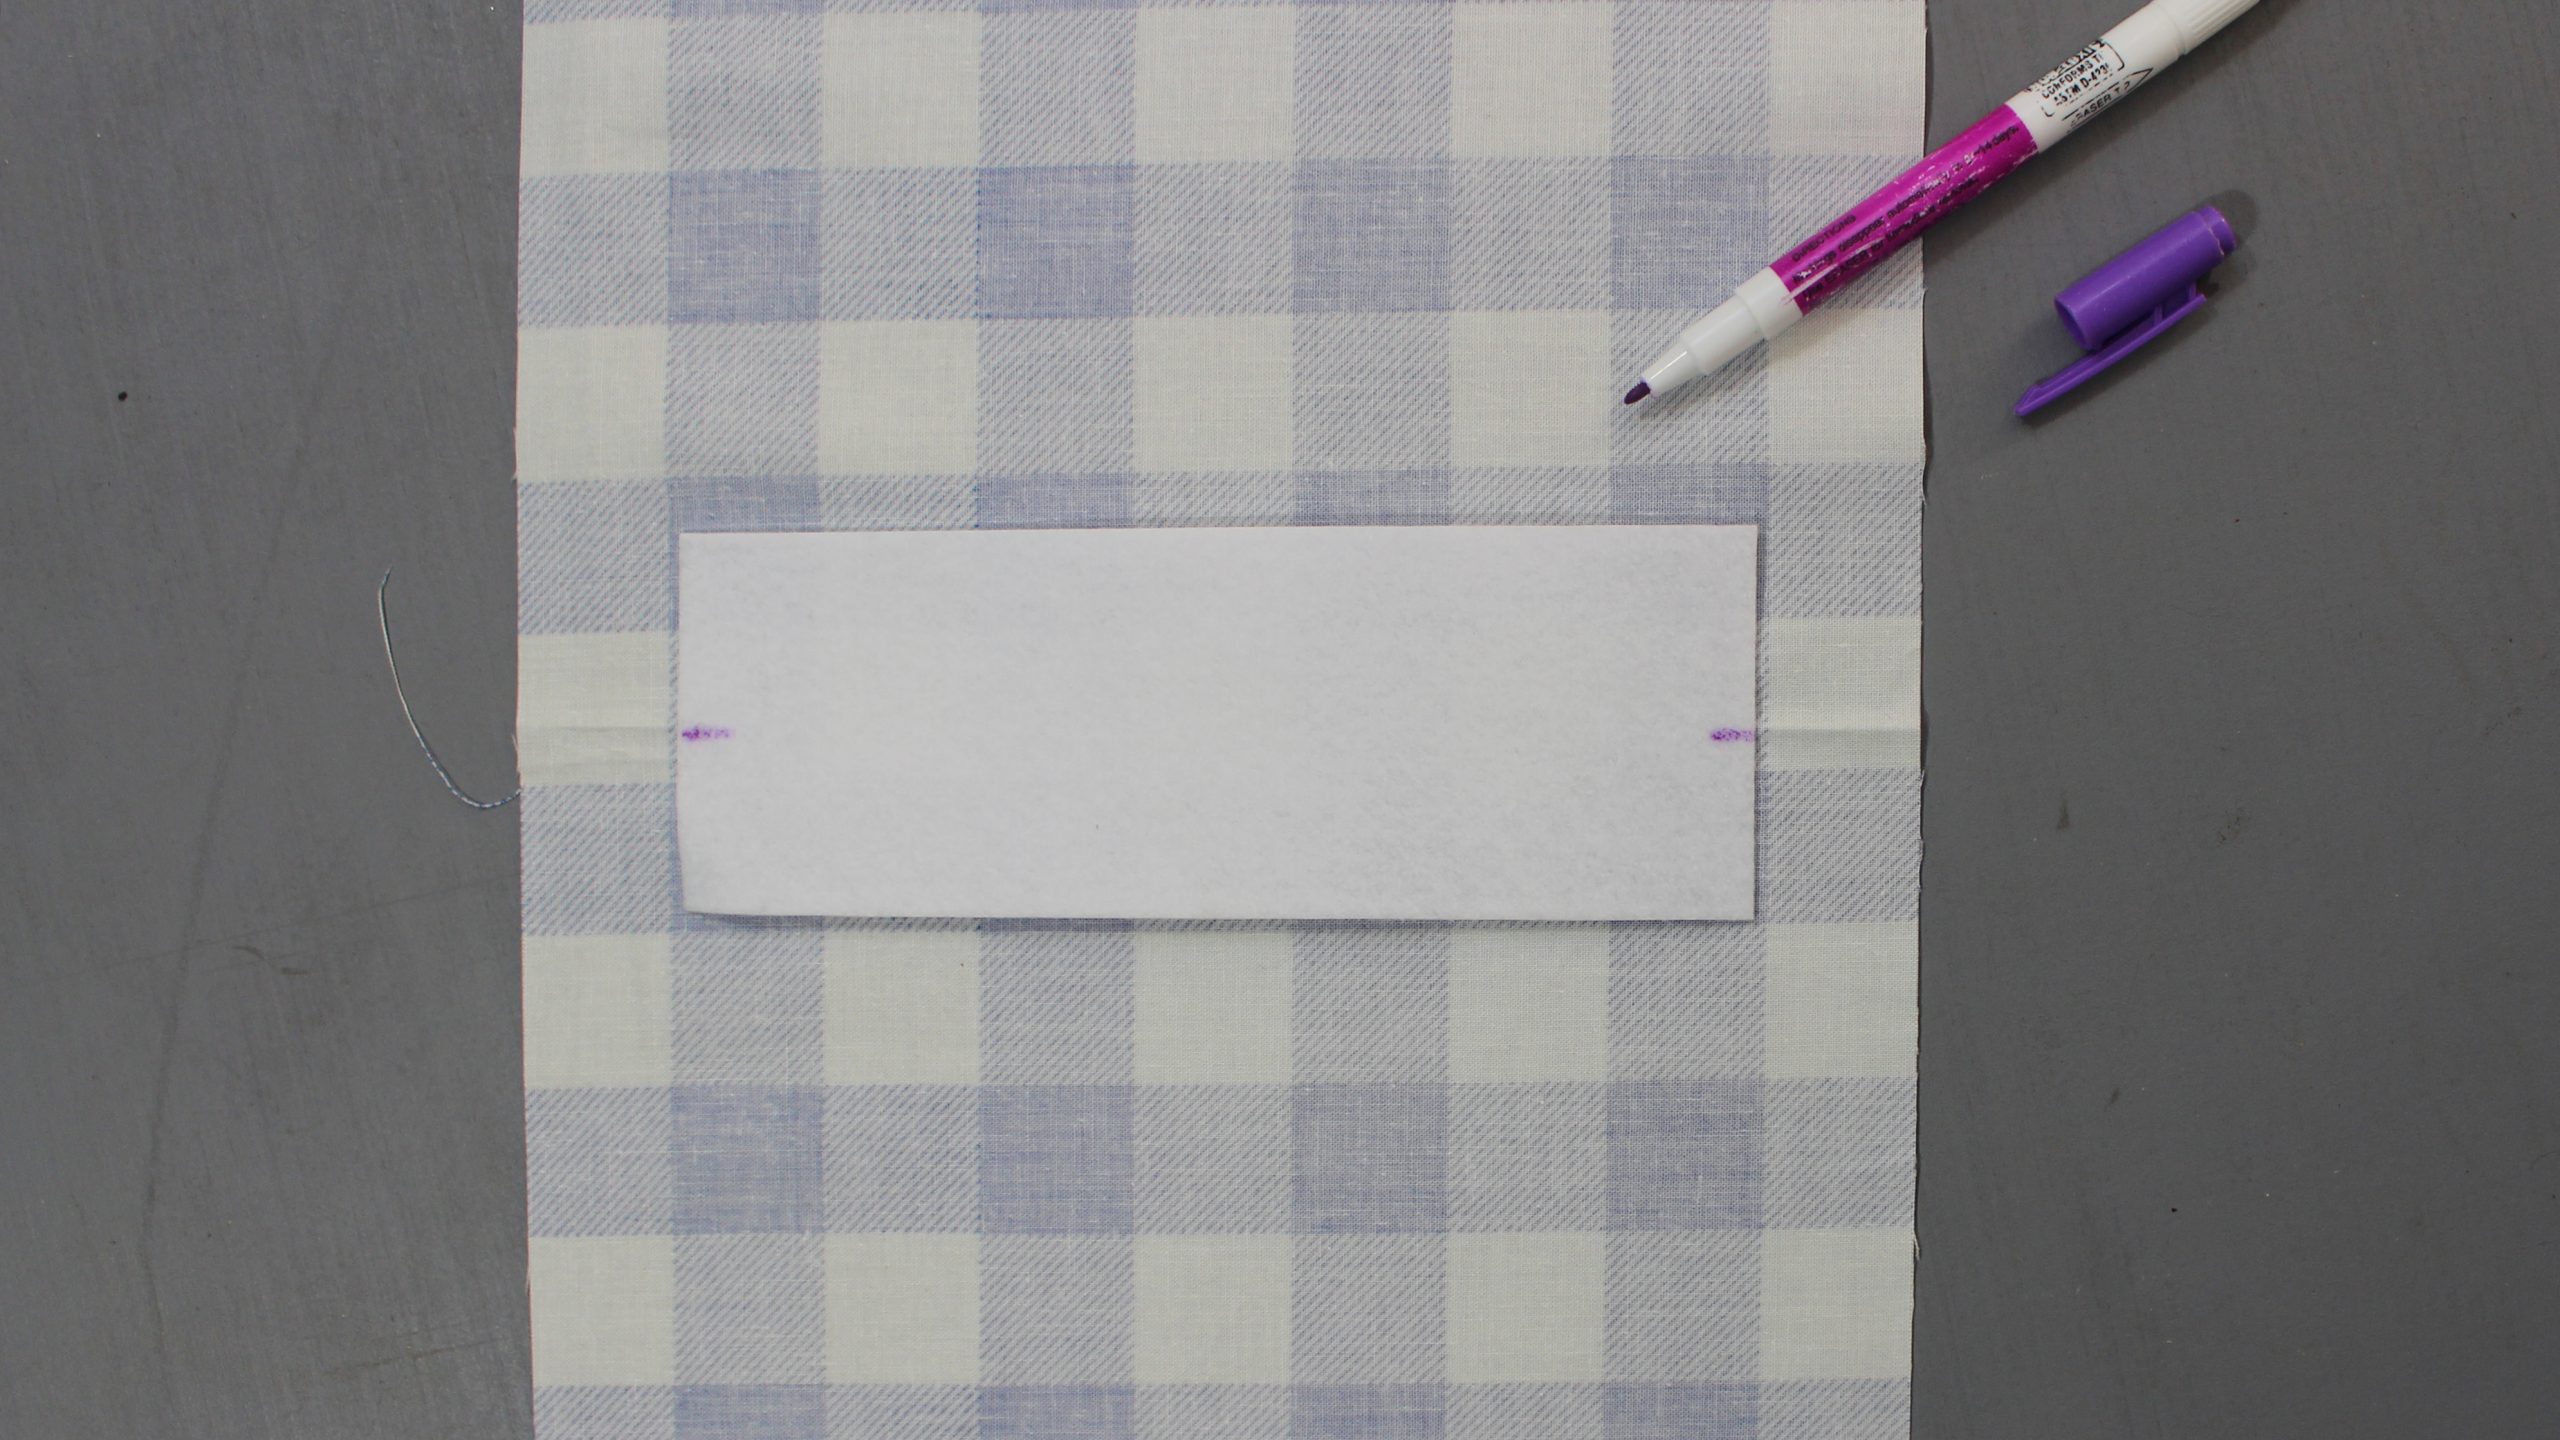
Position the fusible interfacing so it’s on the center of the fold line. The interfacing will form the bag’s base and make sure it sits straight, so it’s important that it’s centered on the fold. If necessary, use a marker to help you align. Press the interfacing to fuse it into place.
3. Serge the Sides
With right sides together, fold the fabric in half lengthwise and pin it together. Sew straight down each side edge and finish the edges to your liking, or you can go the fast route and serge the edges together. It’s much more efficient than stitching.
4. Square the Corners
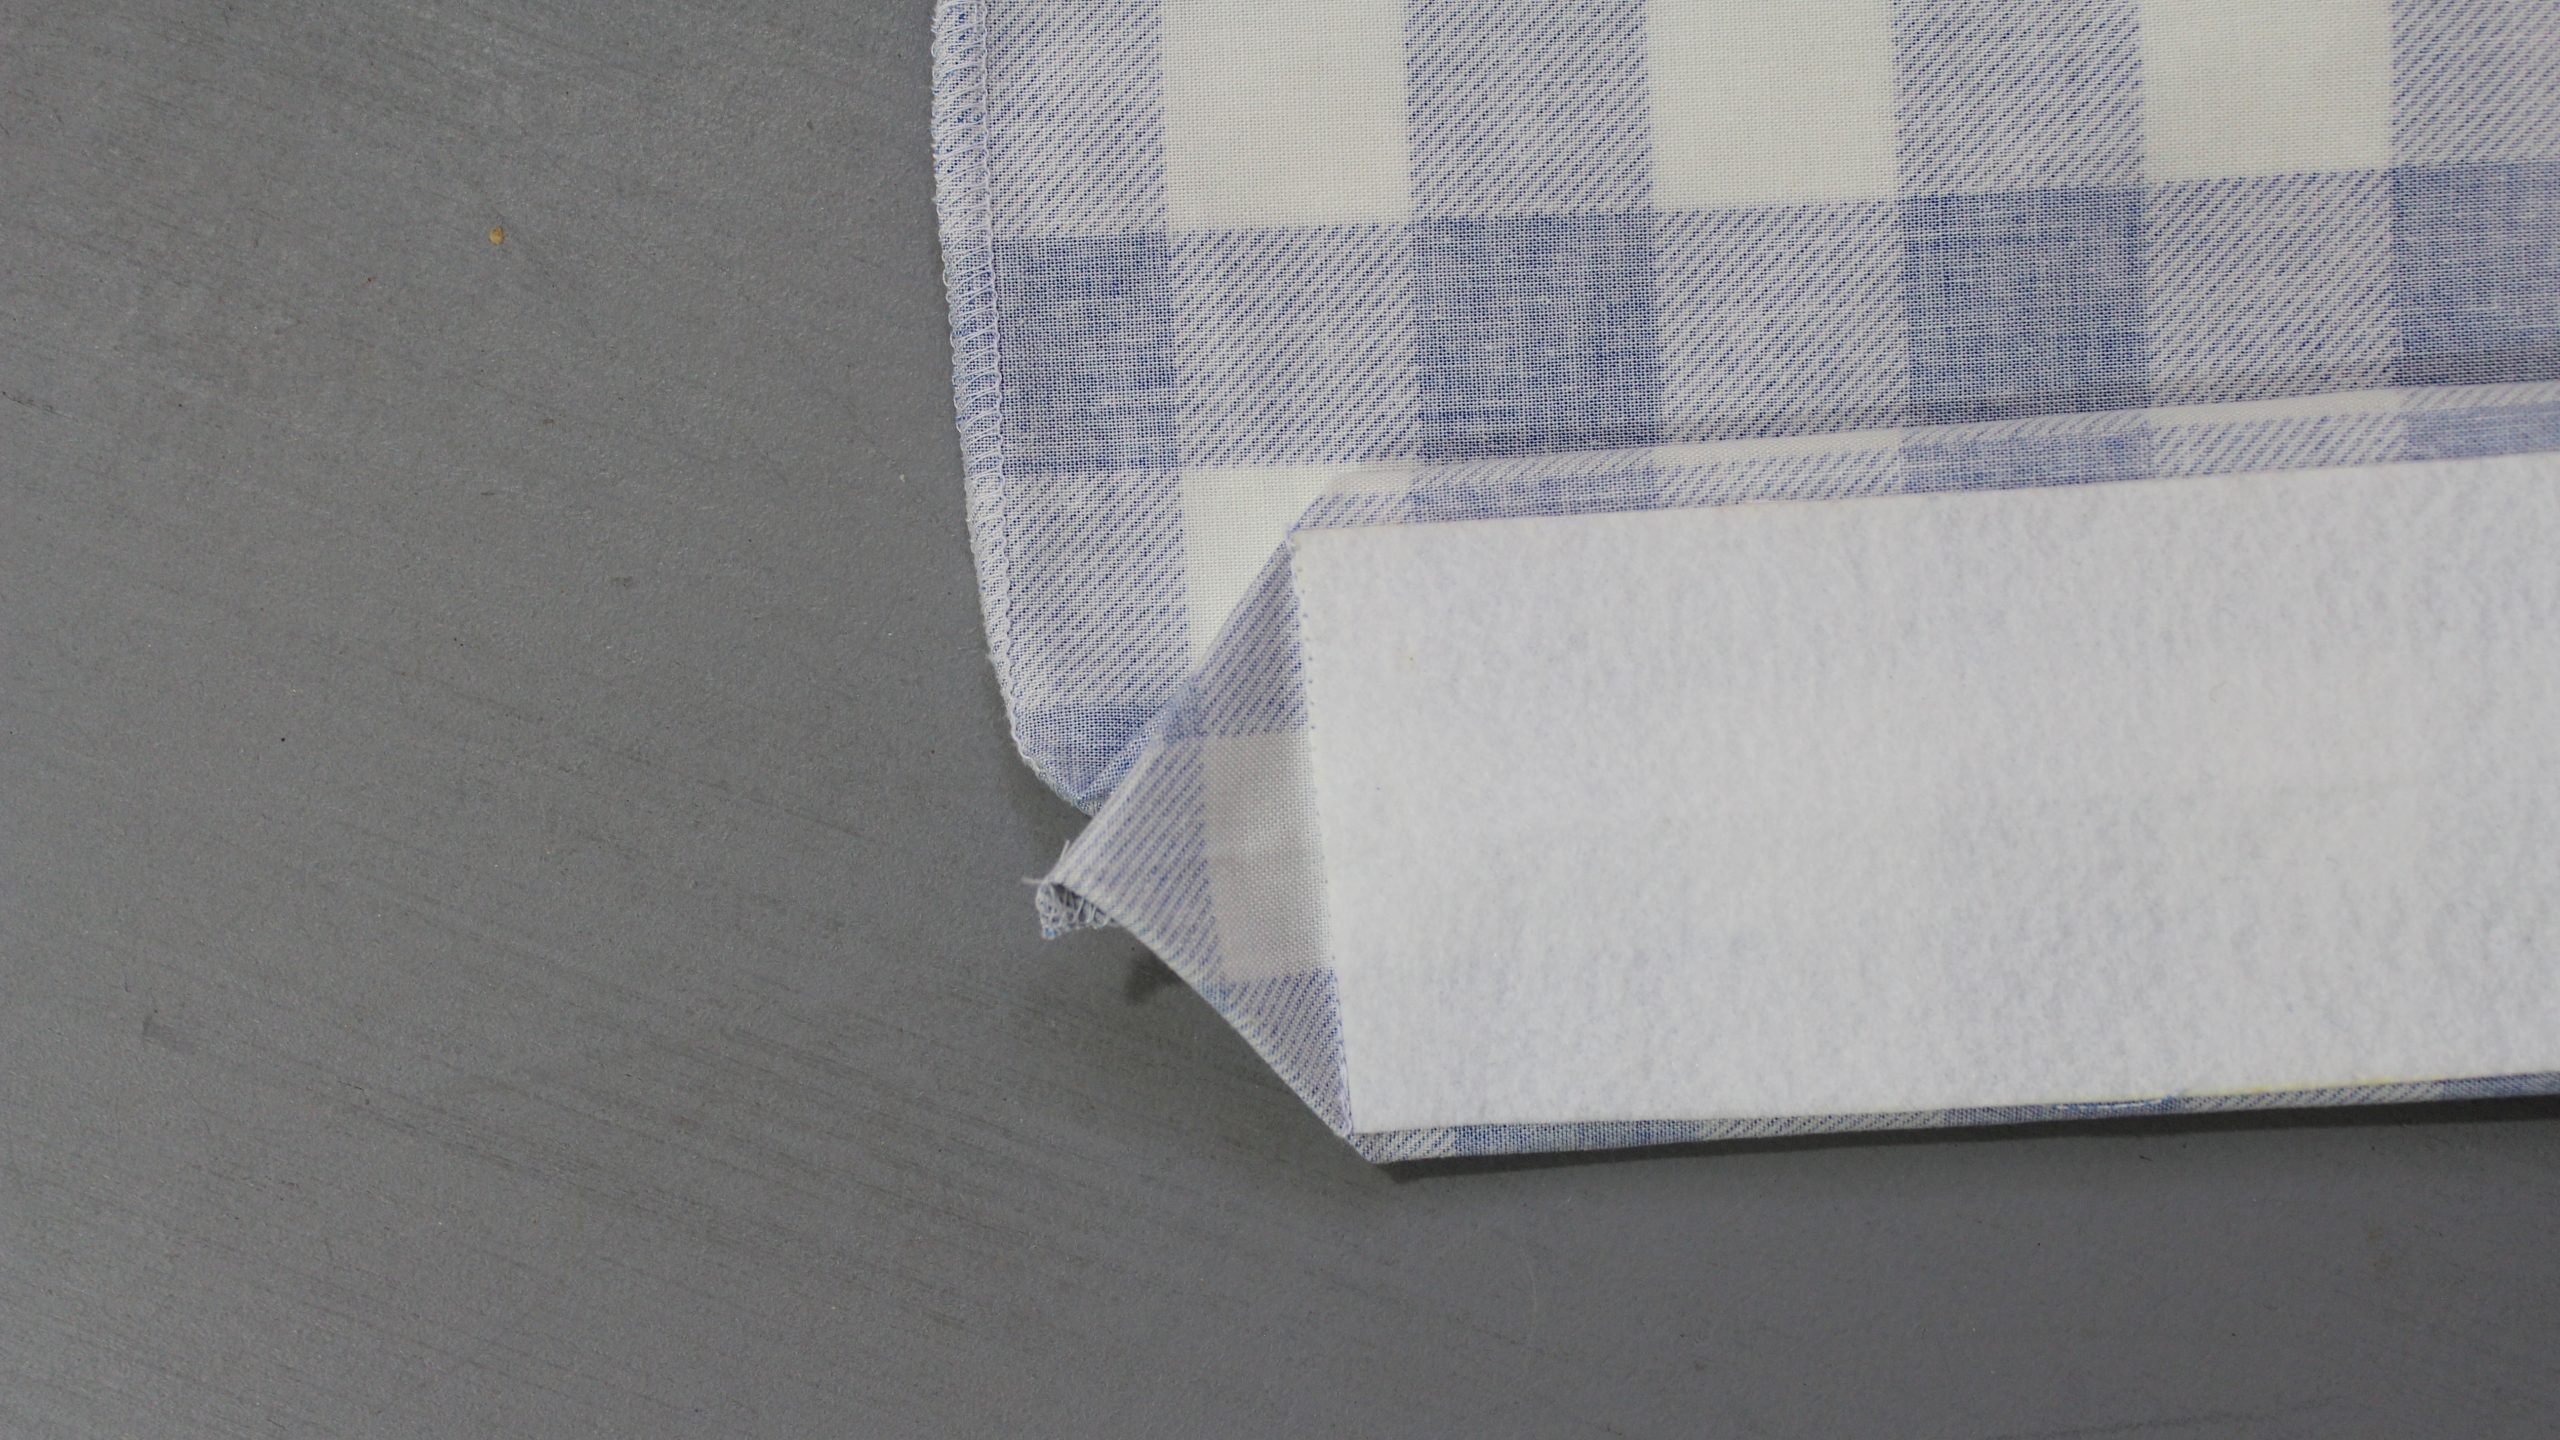
Fold the bottom corners as shown, flattening the bottom of the bag where your interfacing is, and bringing those corners to a point.

Stitch next to the interfacing each side. Then, use a serger to finish and trim off the corner points.
5. Hem
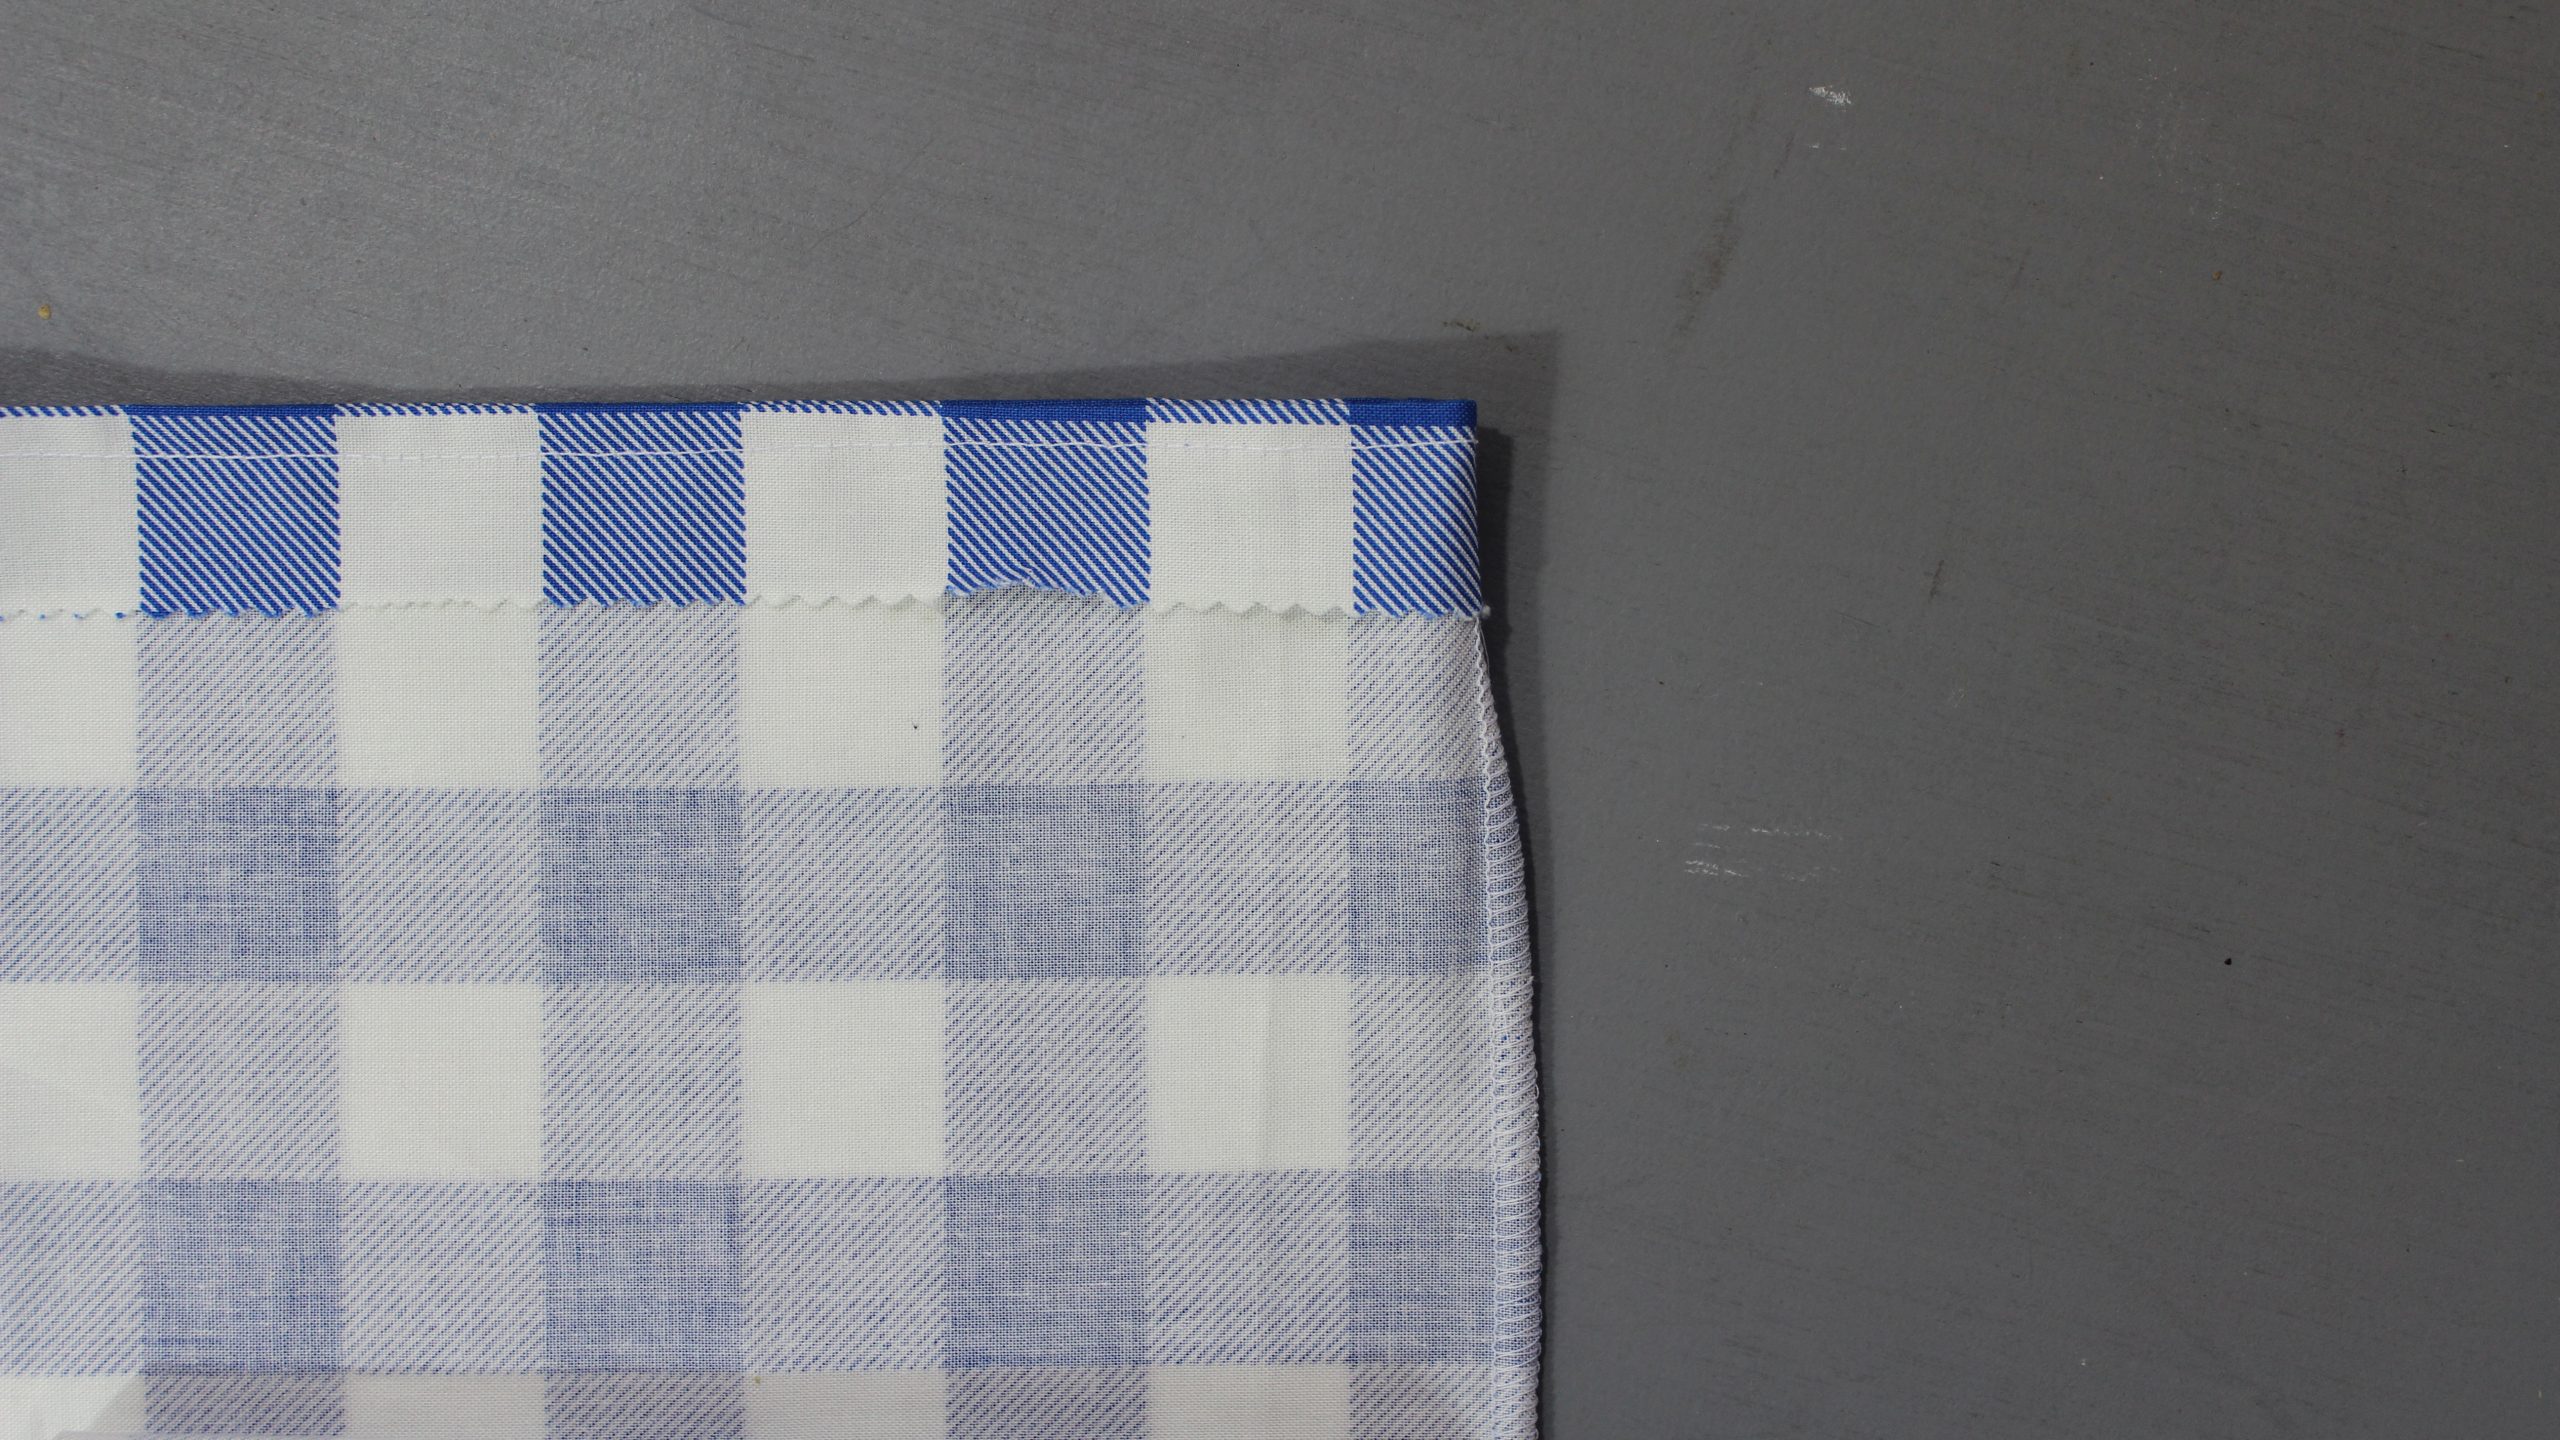
Trim along the edge with pinking shears. Turn the edge under by about ½” and press in place. Topstitch along the edge to hold the fold in place.
6. Sew the Handles
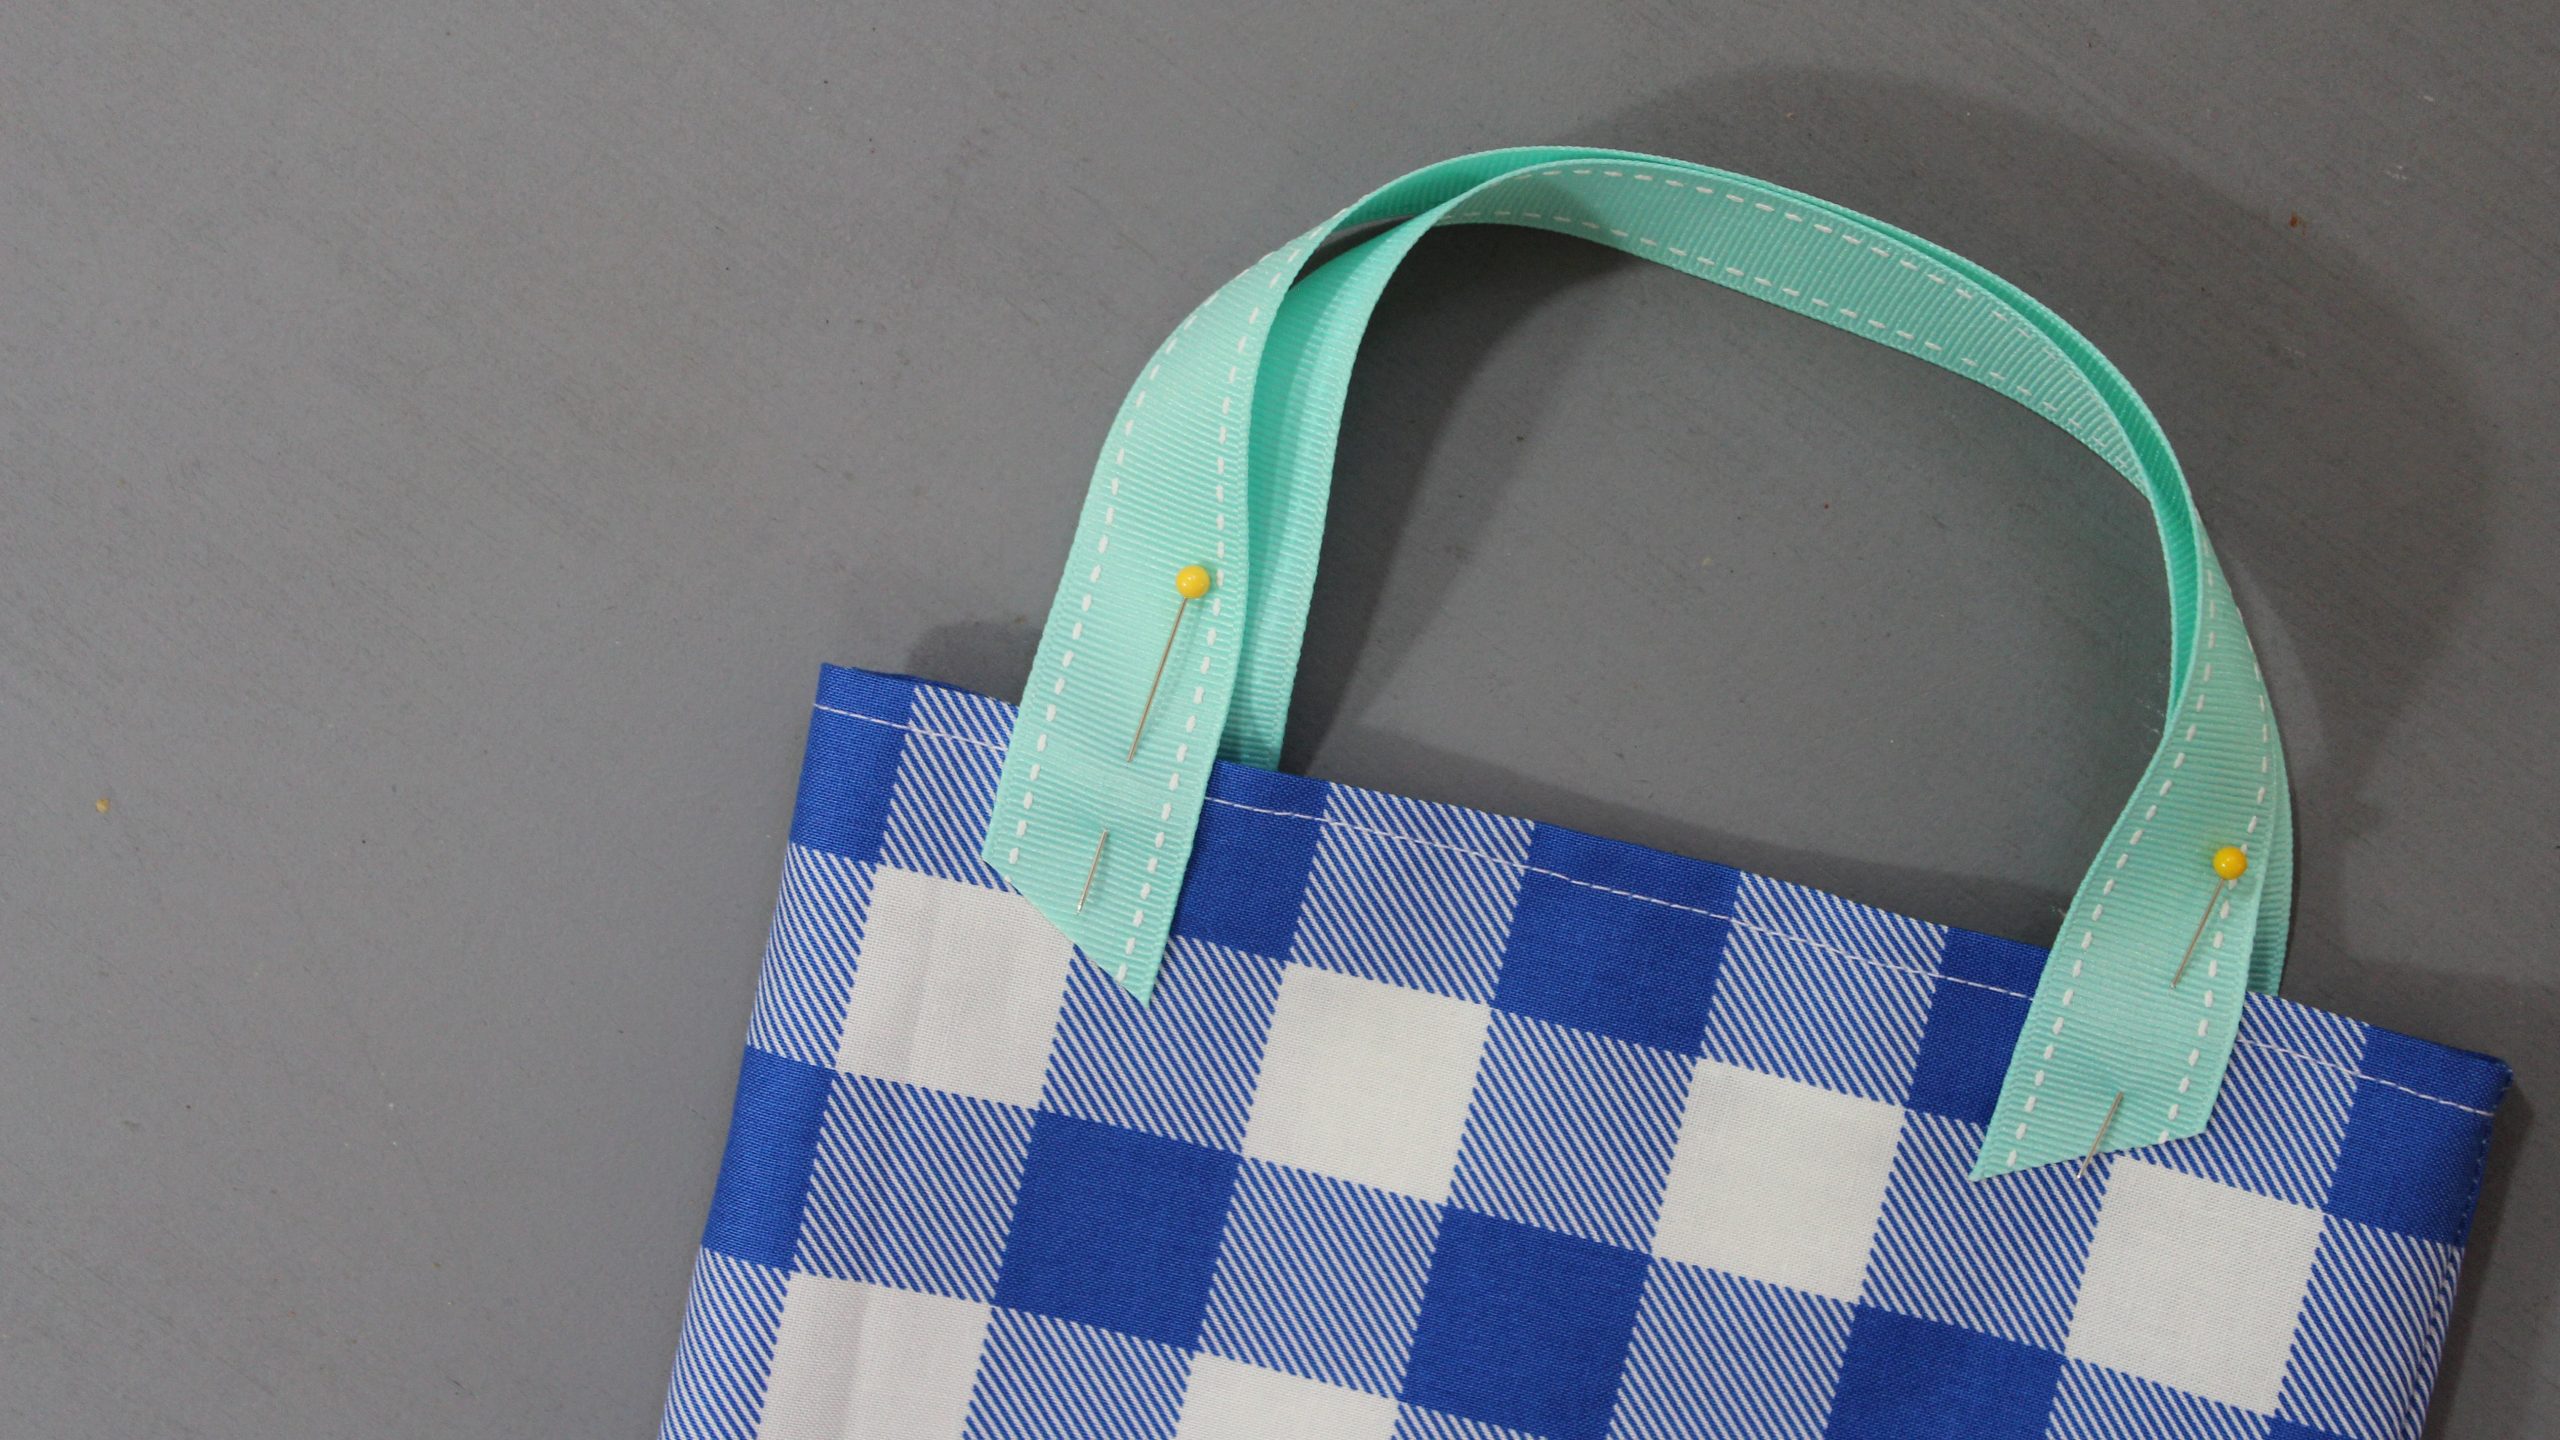
Take each piece of ribbon and cut the ends on the diagonal. Turn your bag right side out, and position each ribbon onto the top of the bag so they’re evenly centered. Pin in place, stitch ’em down and you’re done!
Look easy peasy going to try it soon can never get enough gift bags early
If you are using ribbon made of synthetic material (as most of it is, these days), you can melt the ends of the ribbon to prevent fraying. Just hold each diagonal end over a flame, and the ribbon will melt.
Love it