
Yeah, it sounds like something out of Lord of the Rings, but in crochet, a magic ring is a technique for creating a tightly closed center when you’re crocheting in the round. You can learn how to crochet a magic ring.
Usually when you’re crocheting in the round, you’re called to chain two to four stitches, create a loop and then work the first round in that loop. But the loop leaves a hole in the center of your round, which isn’t very useful when you’re making hats or amigurumi. Enter the magic ring.
A magic ring only looks daunting — it’s easy once you know how. So get ready to learn with this step-by-step guide. All you need is yarn and a hook that matches your yarn’s weight.
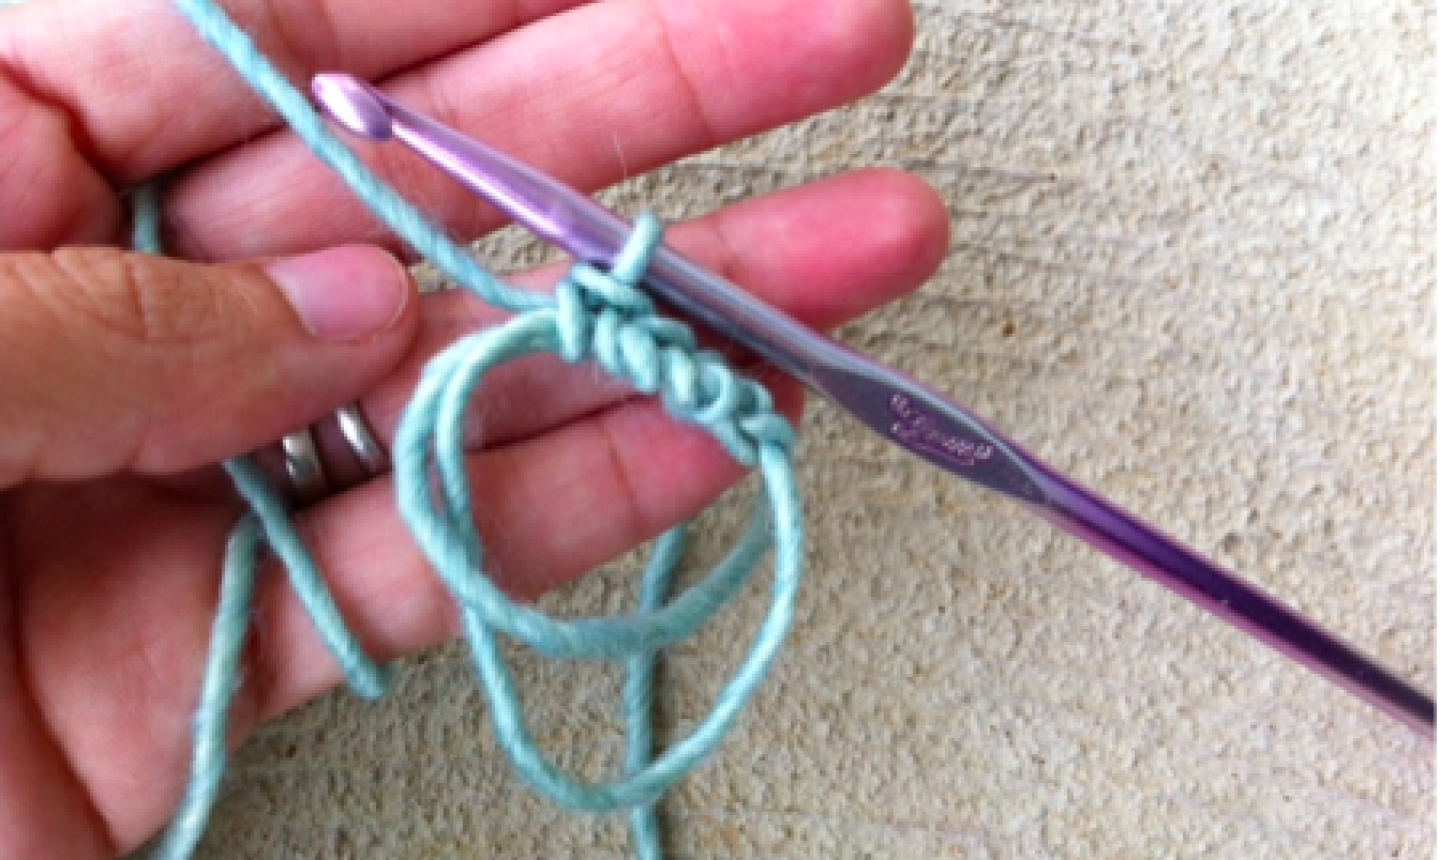
1. Loop the Yarn Around Your Fingers
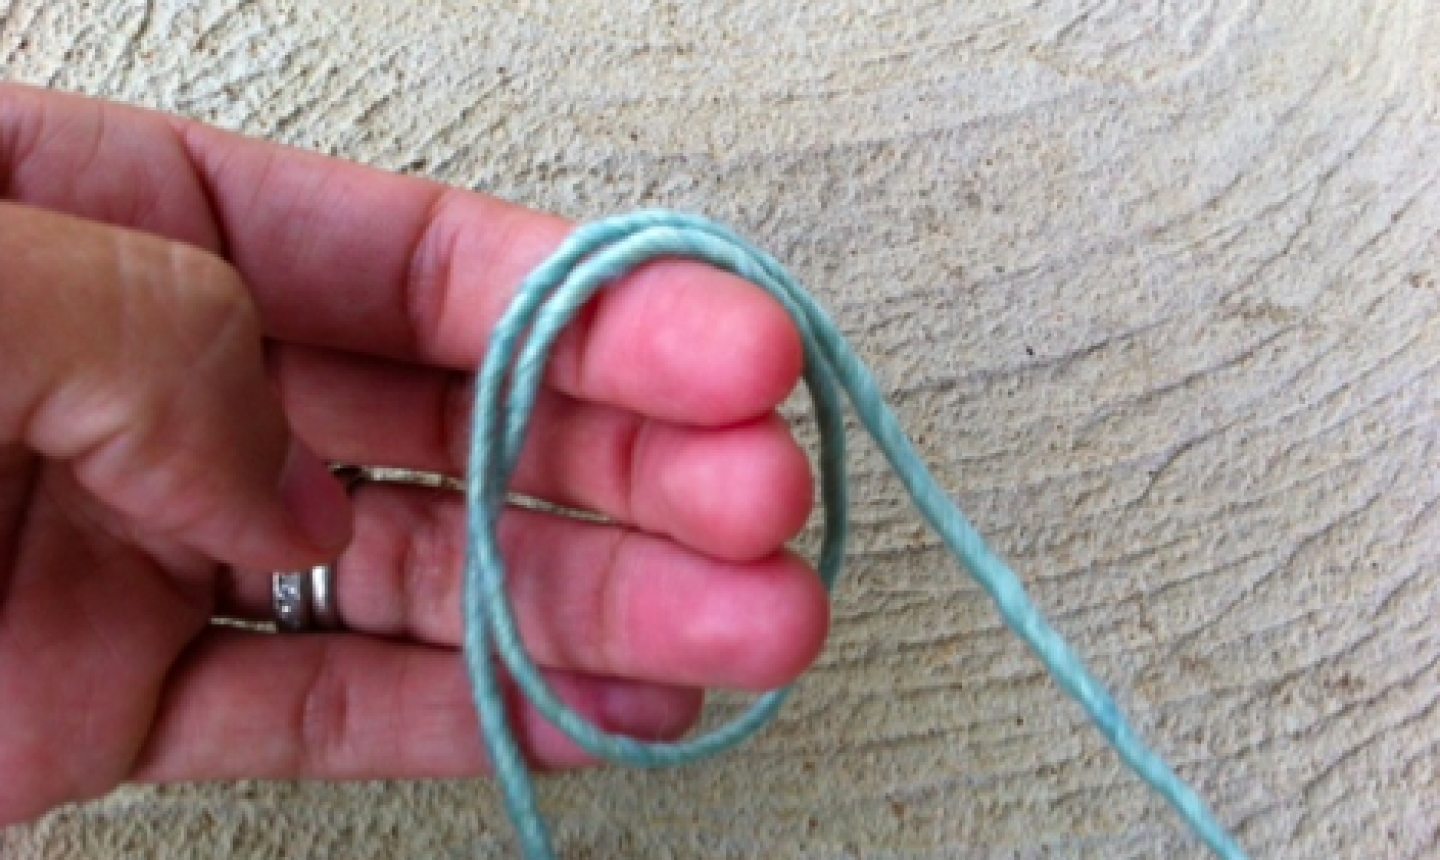
Going from left to right, place the tail of the yarn across the top of your index finger, then loop the yarn once around your four fingers. Place the working yarn (the yarn that’s closest to your skein) behind the tail. The working yarn will fall to the right and the tail will fall to the left.
2. Get Loose
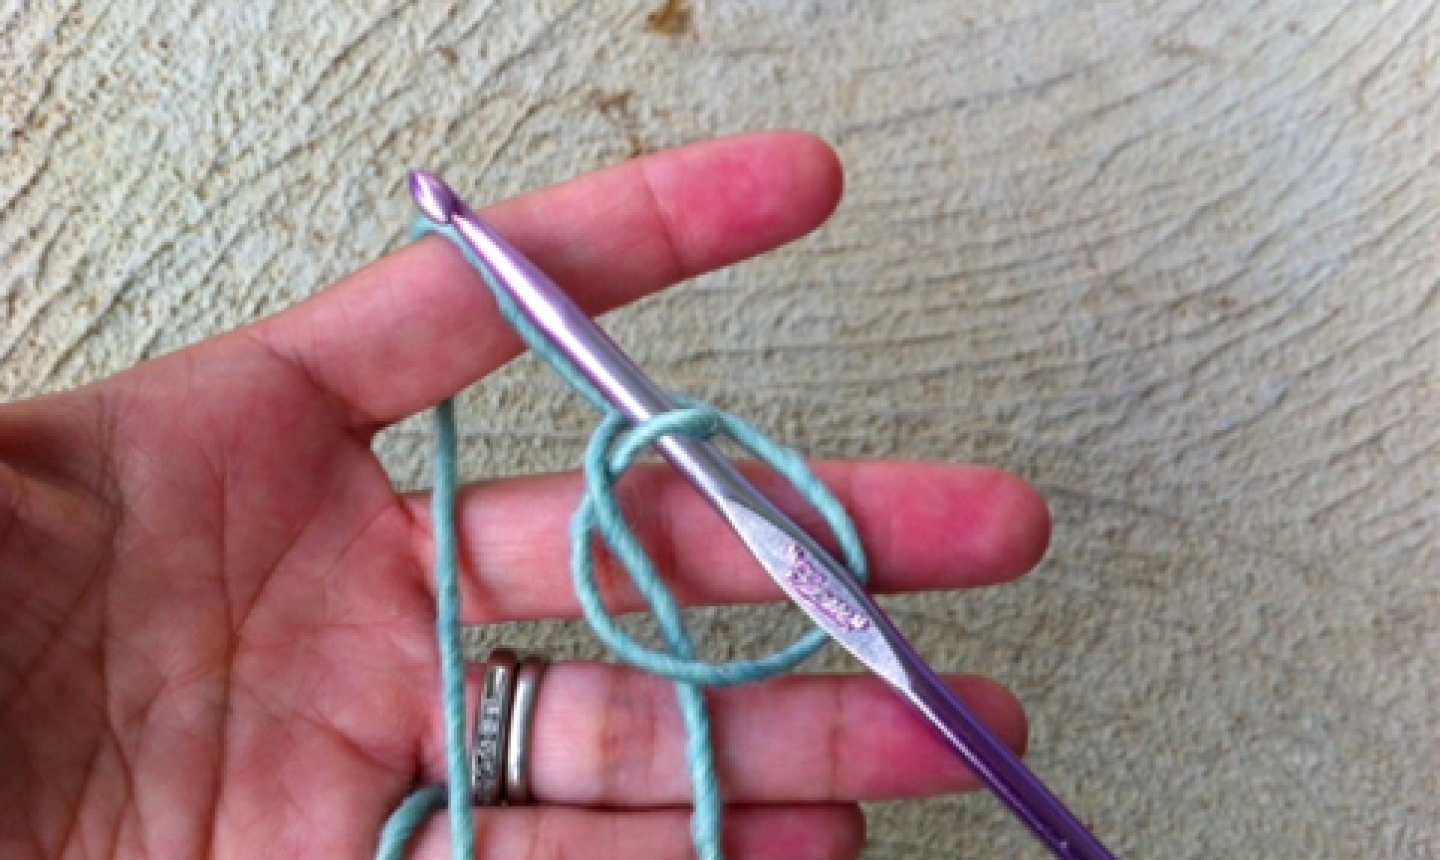
Loosen the loop from your fingers, keeping the working yarn behind the yarn tail. Or if that’s too cumbersome, pinch the loop with your fingers where the two yarns cross. Use the crochet hook to pull up a loop from the working yarn.
3. Start Stitchin’
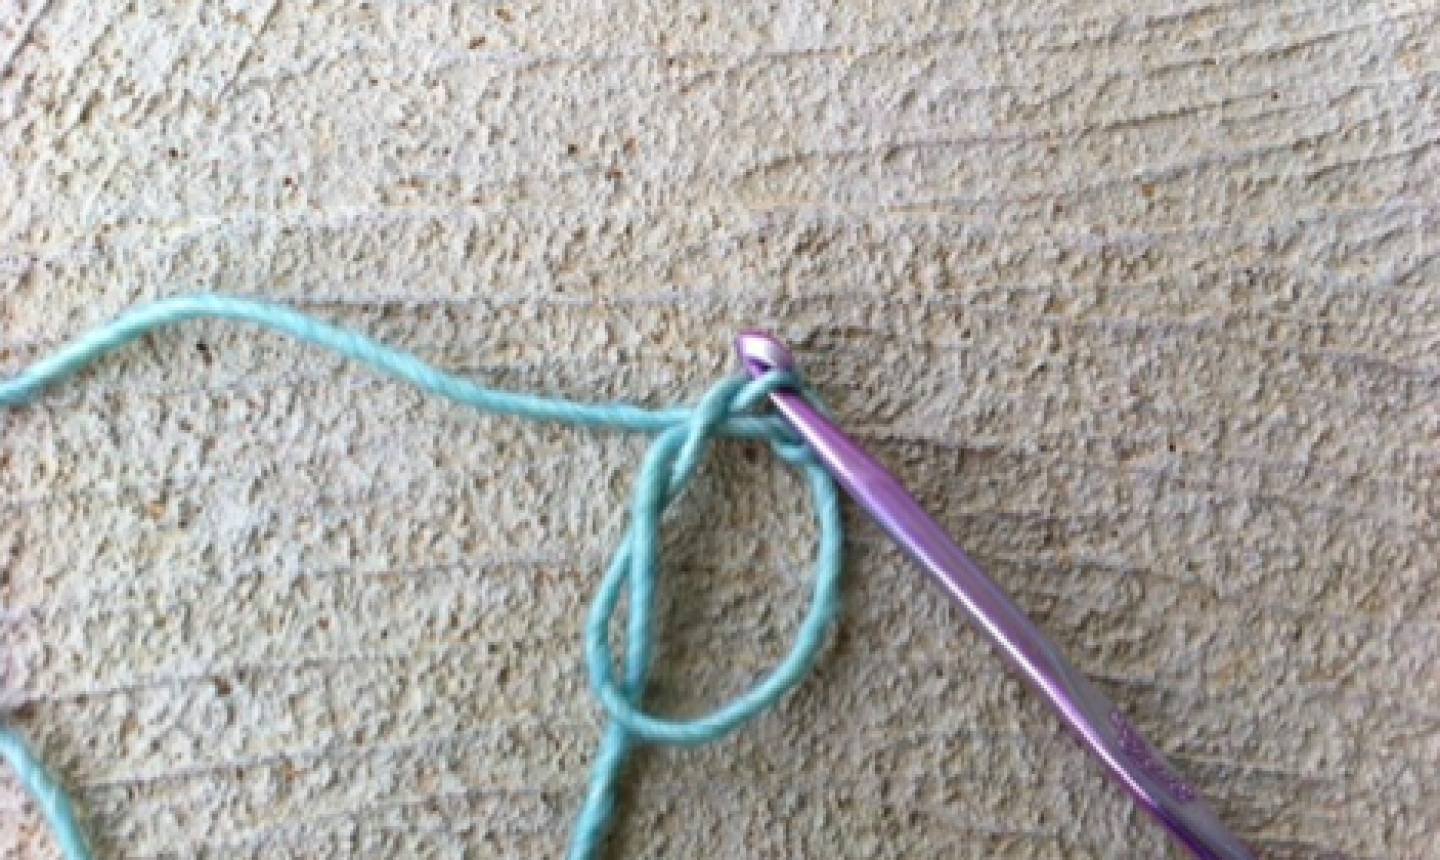
Chain one stitch.
4. Go Around
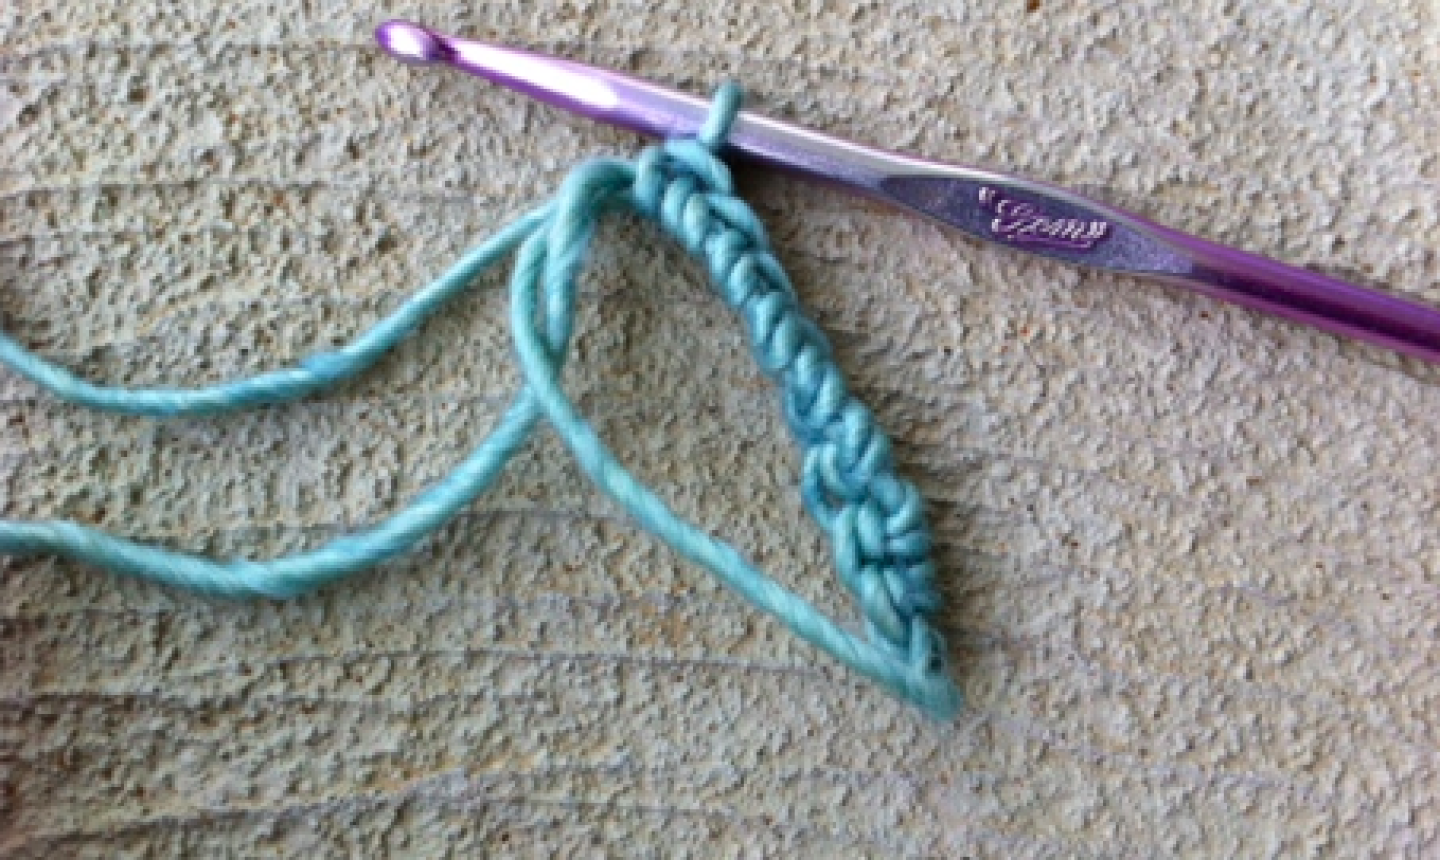
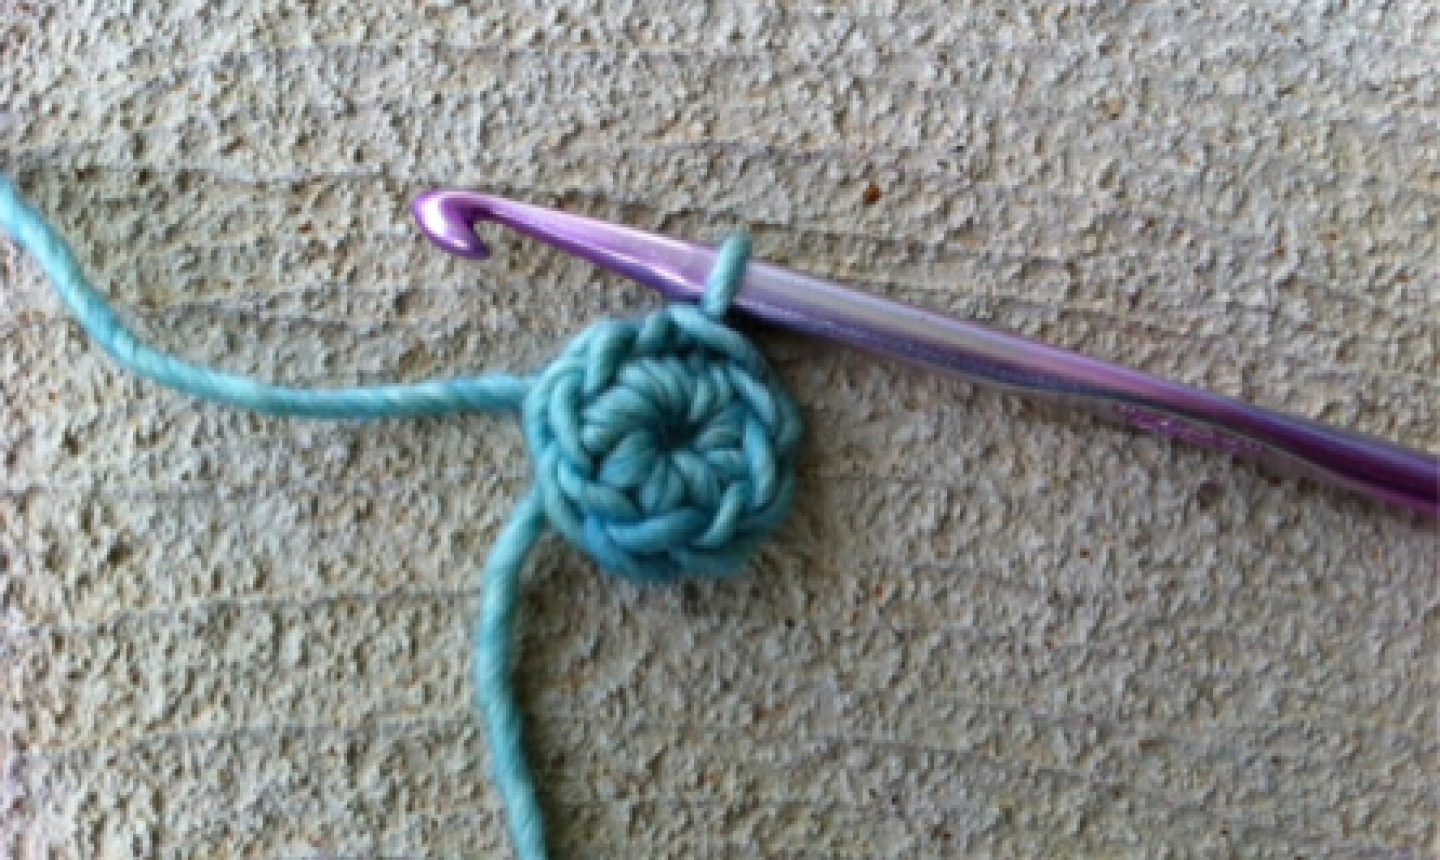
Start to single crochet around the ring and tail yarn. Single crochet as many stitches as you like, though six beyond the first chain stitch works well.
5. Pull It Closed
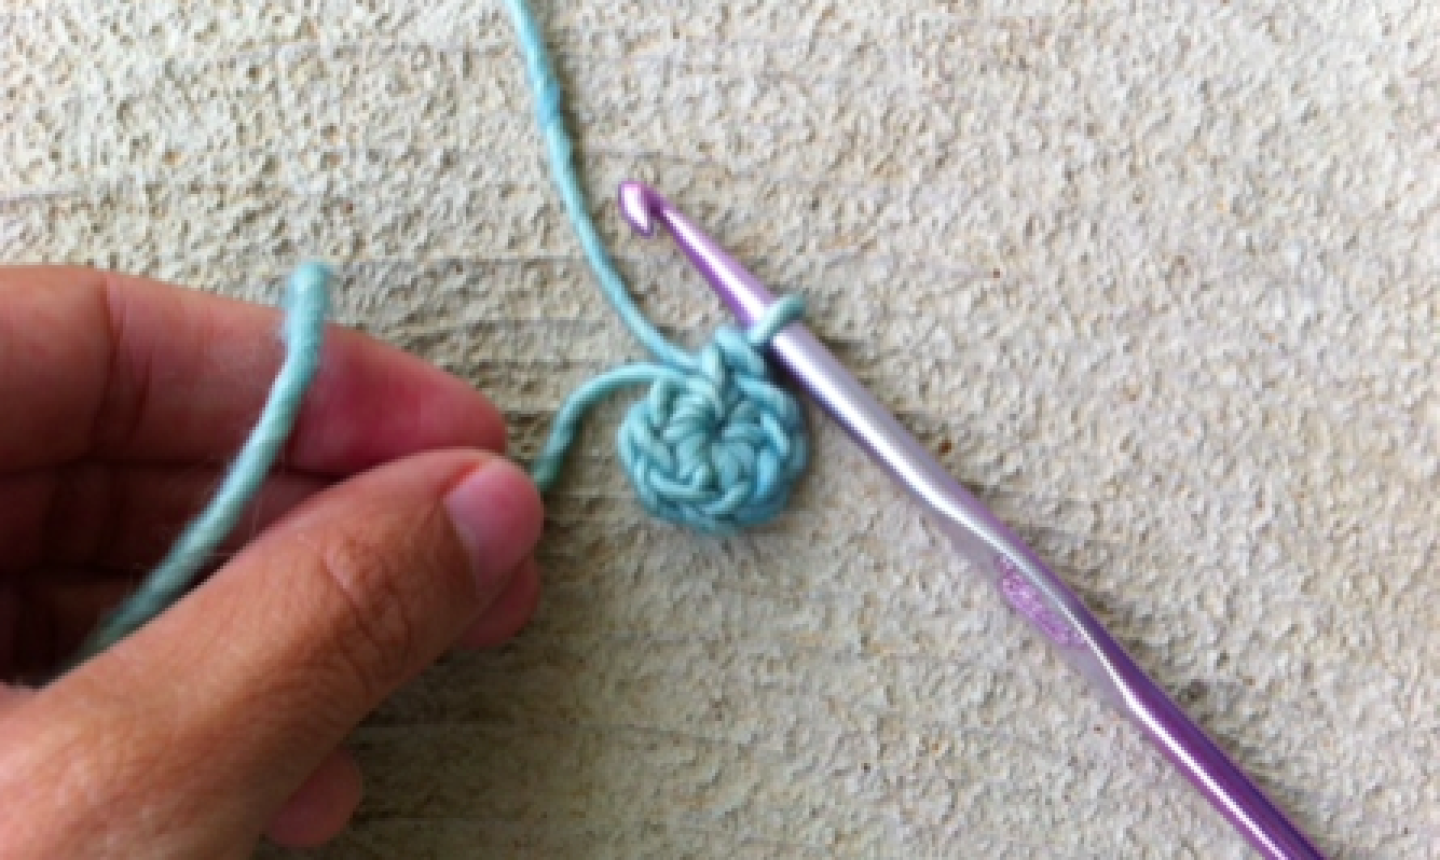
Pull the tail yarn to close the ring. Look, no hole!
6. Join It
Slip stitch into the first stitch to join the round. Easy-peasy, right?
If the magic ring still has a hole, check your yarn first, because not all weights compress that densely. Another reason: You may be making too many stitches in that first round. So stick with six or seven and see if that helps.
Also don’t forget to weave in the yarn tail as securely as you can. Otherwise the magic ring will unravel. And your amigurumi will never forgive you!
I'm really struggling to find a tutorial that explains how to crochet INTO a magic ring, once the magic ring has been made. In tutorials, often you have a photo or video of the ring being made, then the video or photos zoom through the process of crocheting into the ring, which isn't particularly helpful. Would really appreciate more steps on how to incorporate stitches into the ring, as I keep ending up with a chainy knotty mess.
I like this magic ring…I’ll have to try it. Thanks
Well I feel like a dumbass because I still don't get it.
I am also still very much a beginner at crochet. At 13 years old, a magic circle has always looked intimidating, but I had to do it for a stuffed animal pattern I was making. These directions were sooo helpful! I can make anything!!!!!
I'm a novice crochet and have never heard of a magic circle. Your directions were extremely easy to follow. Many thanks.