
Let’s face it: ripping out stitches can be scary! And because of that, knitting a provisional cast-on can be a bit scary, too.
What’s a provisional cast-on?
Provisional means temporary, and that’s exactly what this cast-on is. A provisional cast-on is a temporary cast-on that can be removed to reveal live stitches, which you can continue working.
There are a couple of different methods for creating a provisional cast-on, but I’ll show you one of my favorites.
If you’ve tried a crochet cast-on before, this particular provisional cast-on will look very familiar. The two cast-ons are similar, except that the provisional is created with scrap yarn and is meant to be unraveled.
Let’s take a look at why you’d want to use a provisional cast on, plus how to actually cast on using this method.
Why use a provisional cast on?
You might be tempted to skip the provisional cast-on because it’s intimidating. But because it results in live stitches at the beginning of your work, there are plenty of reasons why you might actually want to give it a try:
- If you’re creating a special cast-on such as a tubular cast-on.
- If you need to pick up your cast on stitches again later for something like an edging.
- When you’re not sure how long something needs to be.
- When you want to seam two pieces together using a kitchener stitch.
If you’re following a pattern, the pattern will specify that you need to use a provisional cast-on. Later the pattern will let you know when to return to that provisional cast-on, so you don’t have to worry about that!
Most patterns, though, won’t give you instructions on how to create a provisional cast-on. That’s why we’re here!
Provisional cast-on tutorial
You’ll need a couple of extra tools for this cast on:
- Crochet hook (Try to use one that matches your yarn’s weight. Check the label if you’re not sure.)
- Scrap yarn the same weight (or as close as possible) as your working yarn
- Knitting needles
- Working yarn
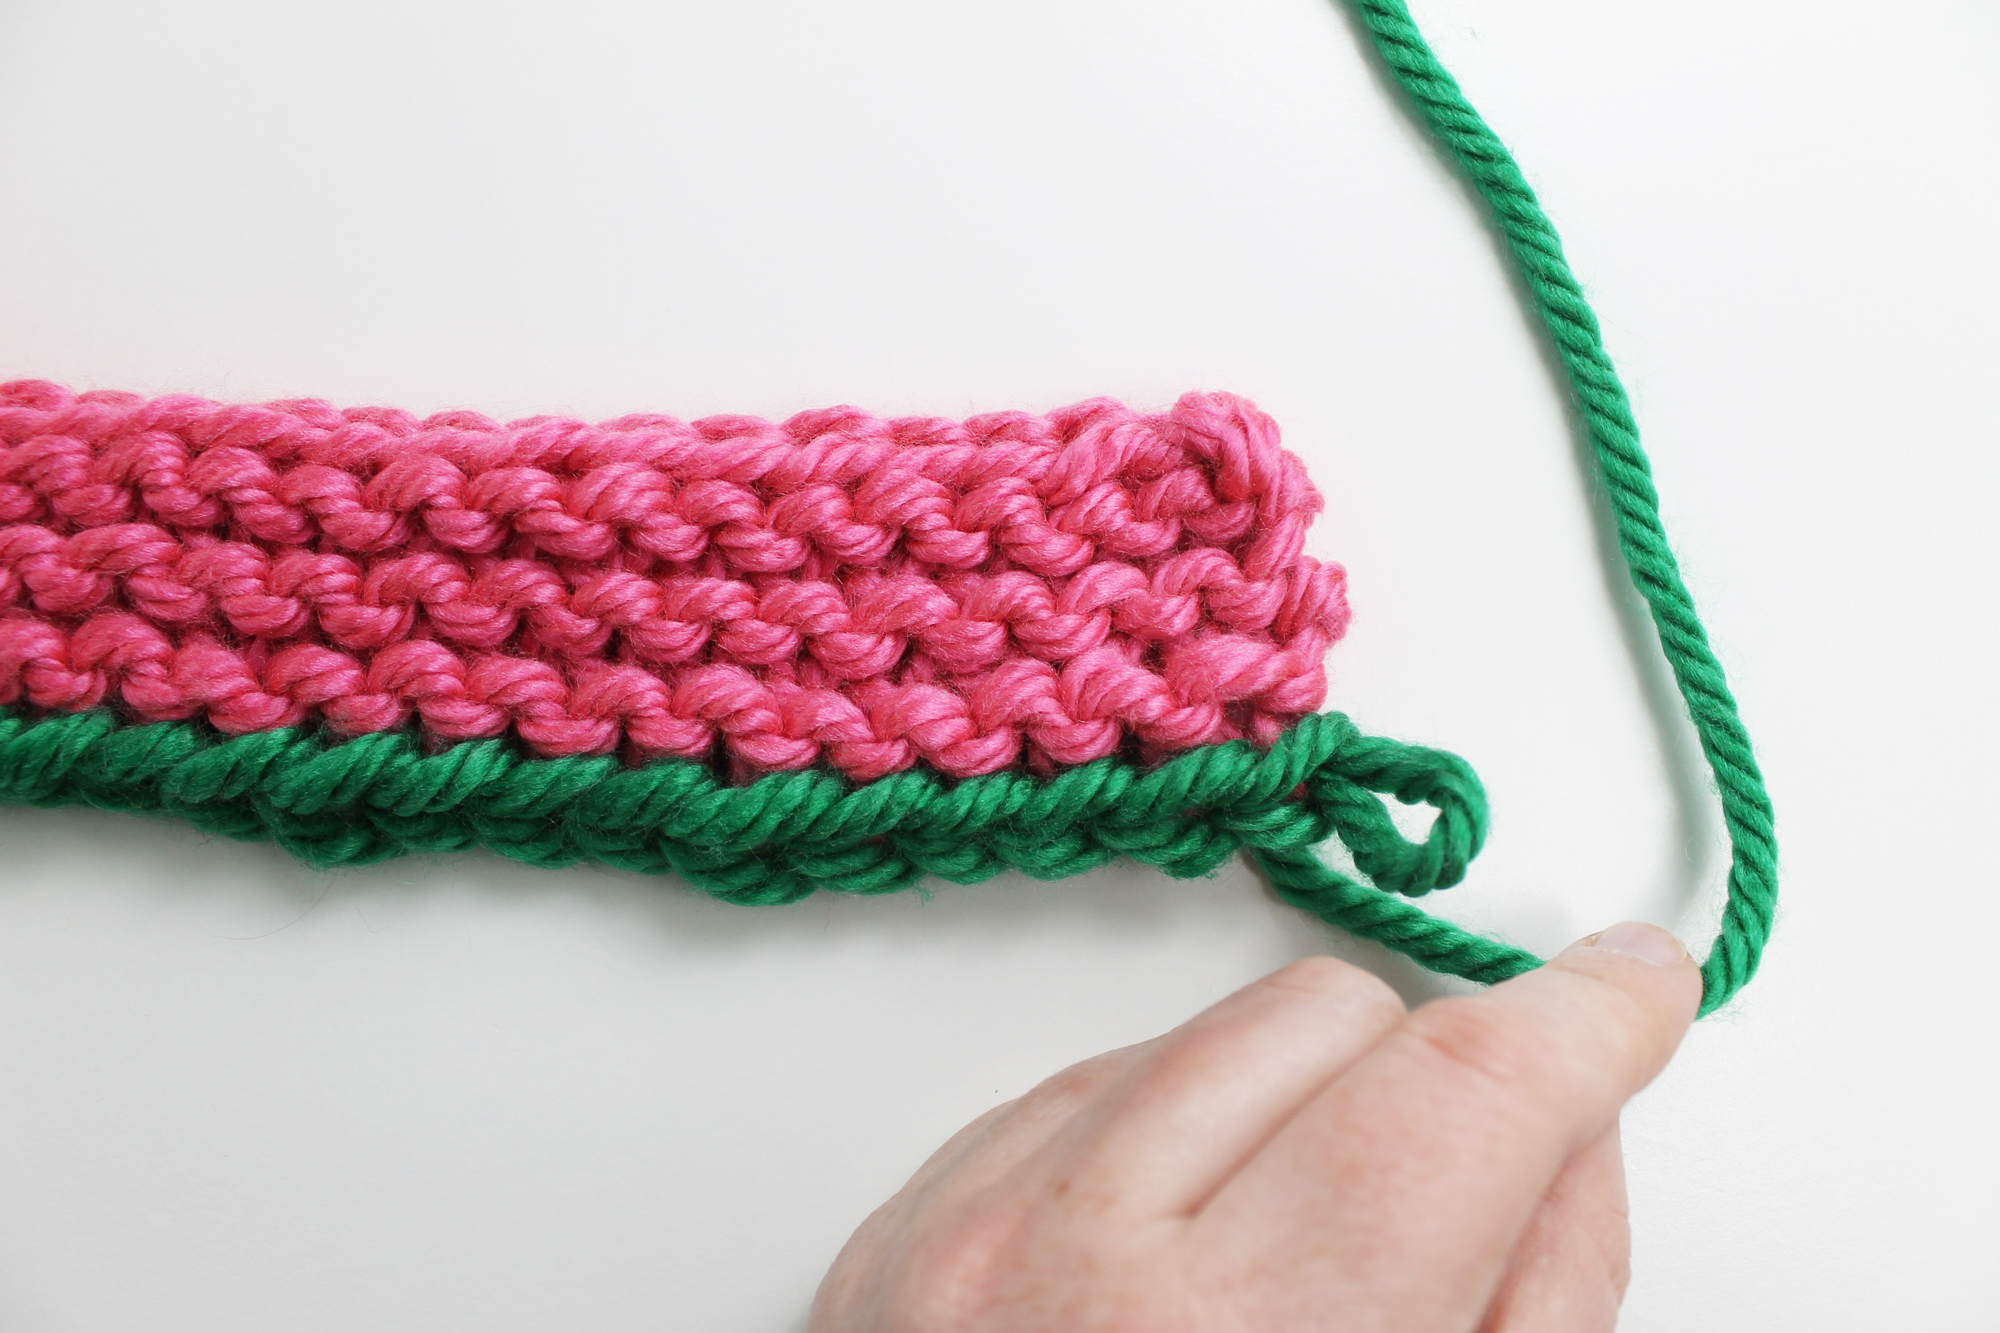
Step 1:
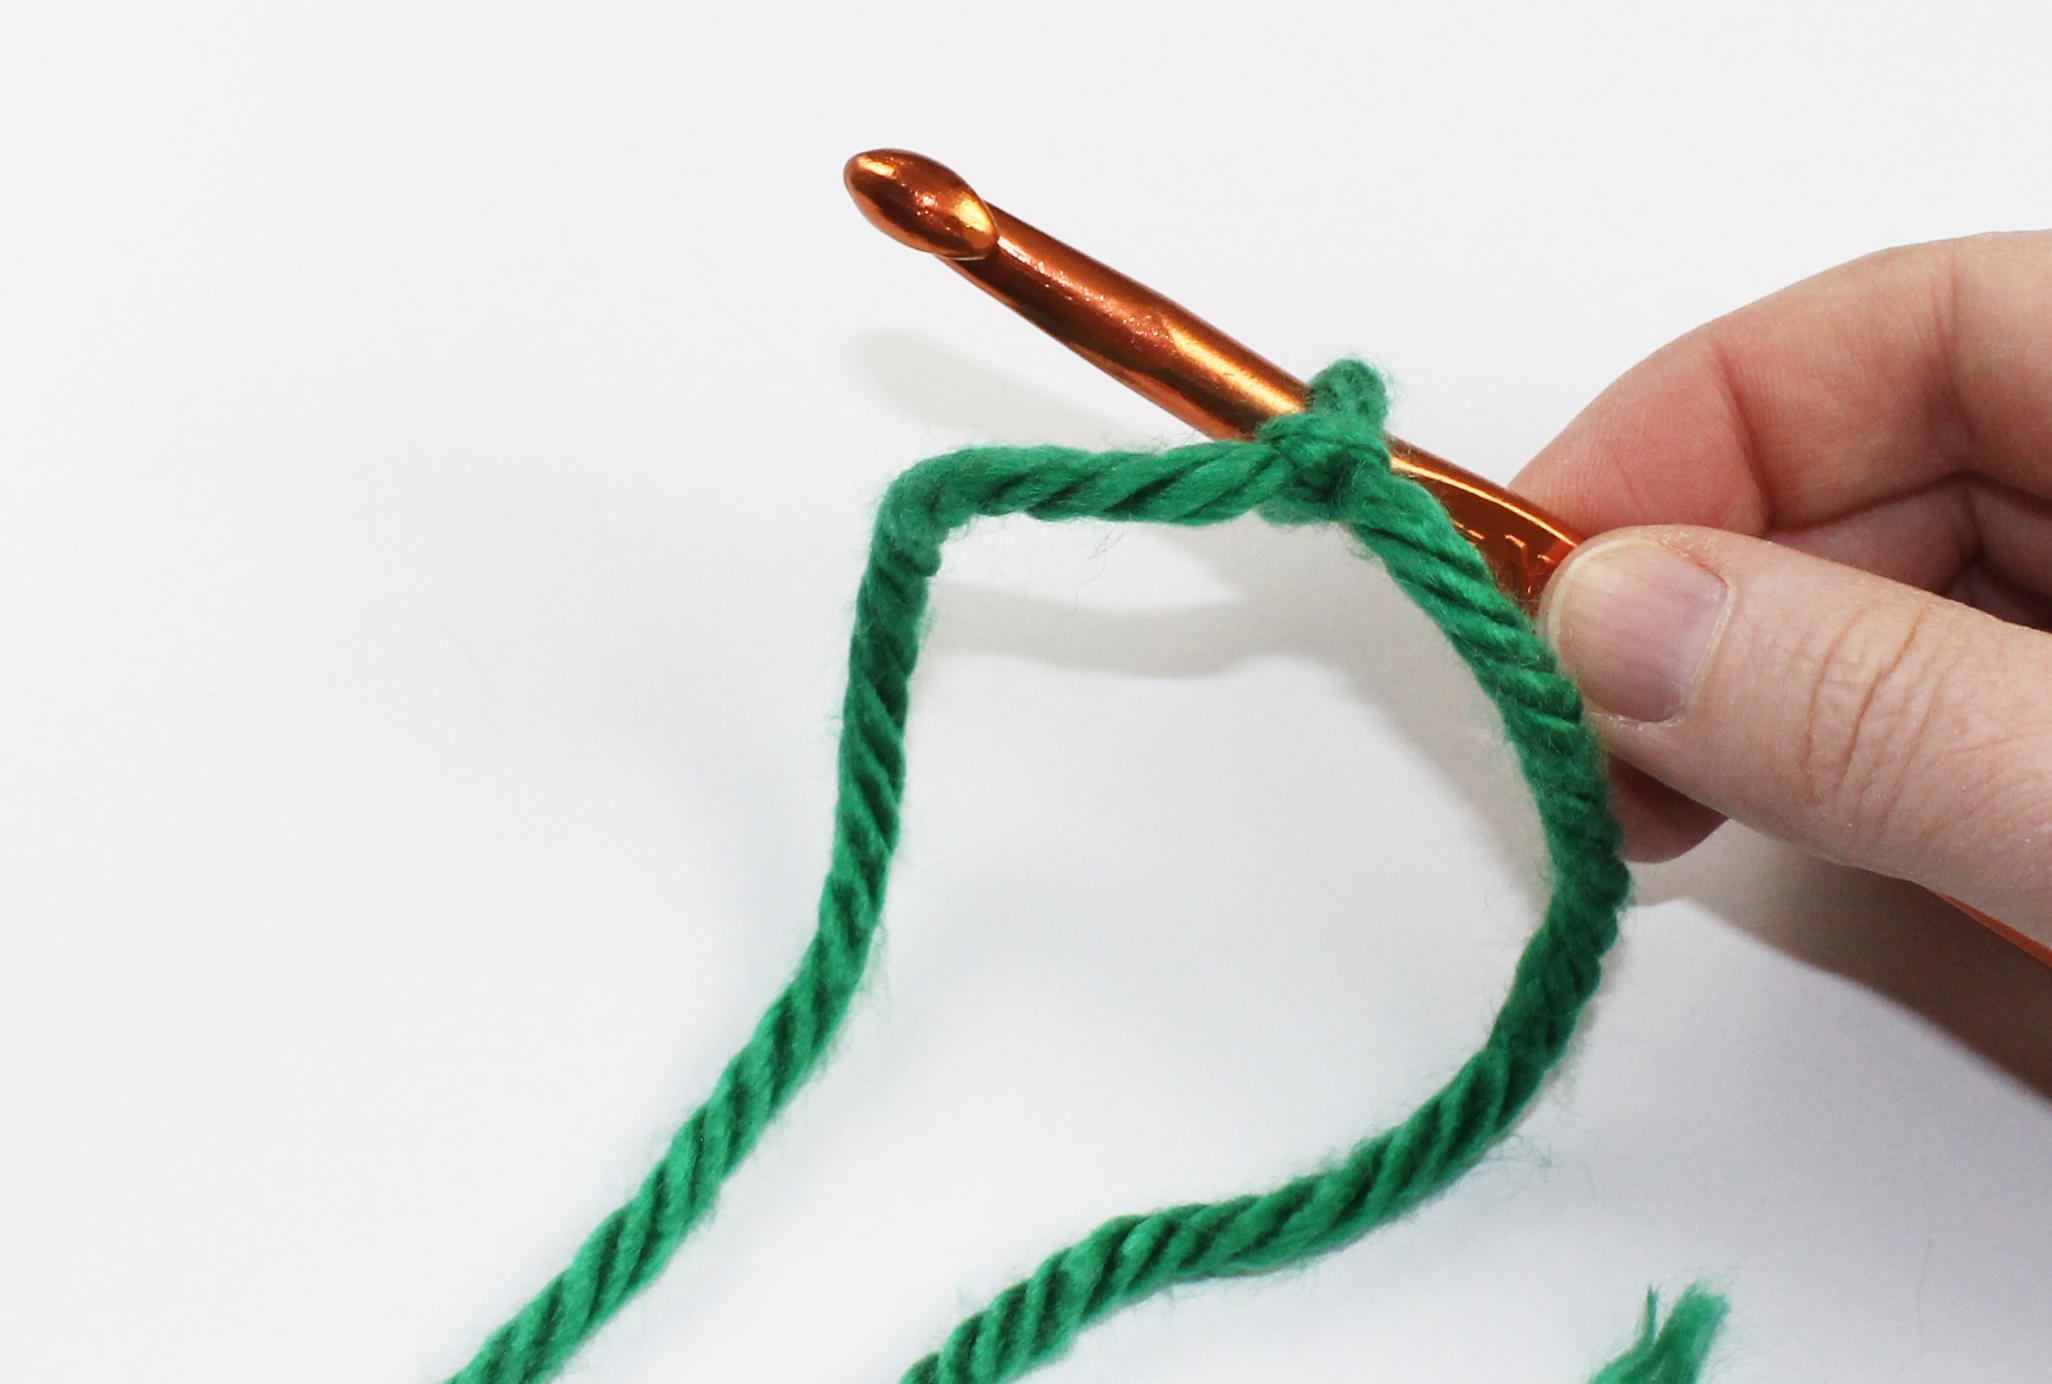
First create a slip knot with your scrap yarn, leaving a bit of yarn tail to weave in later. Place the slip knot on the crochet hook.
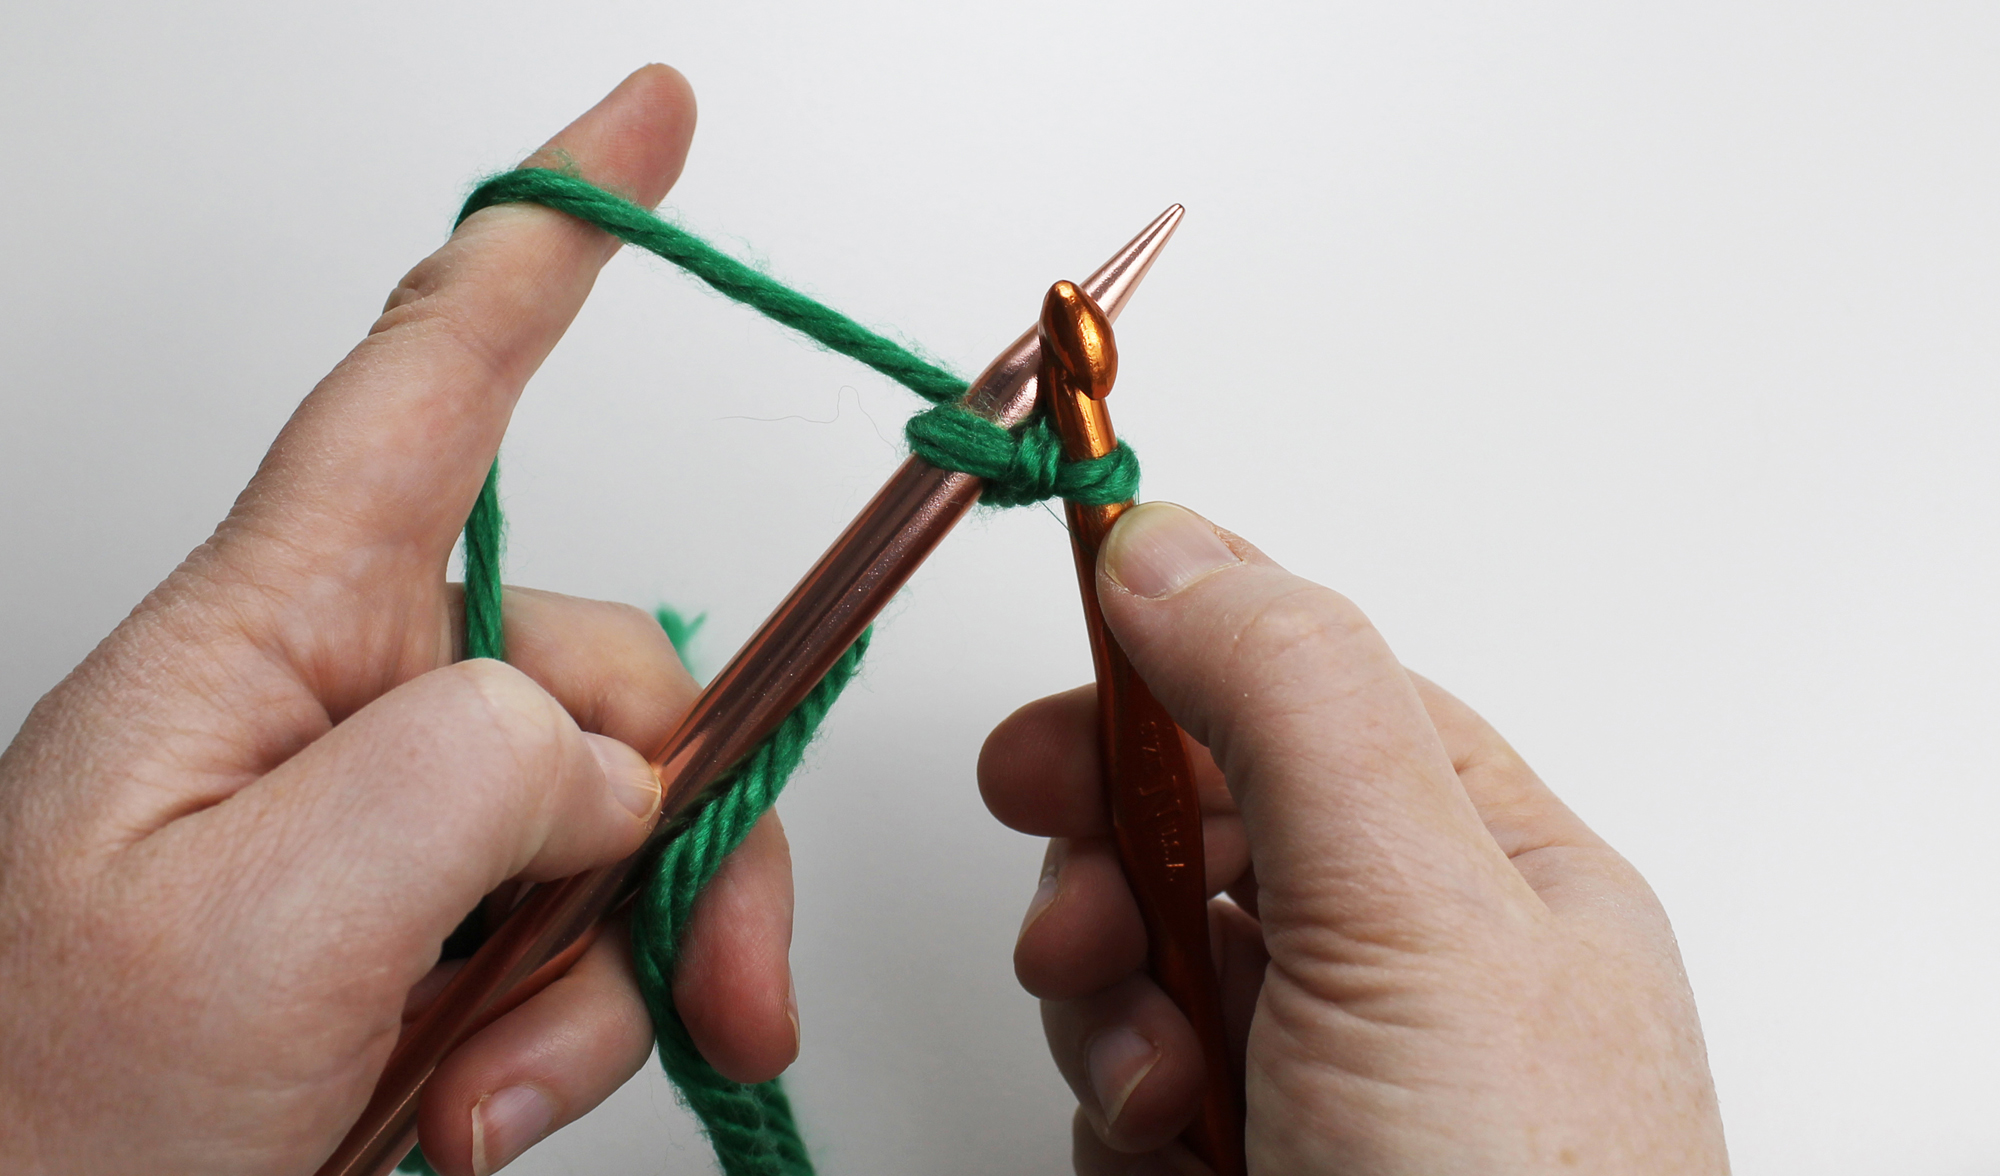
Step 2:
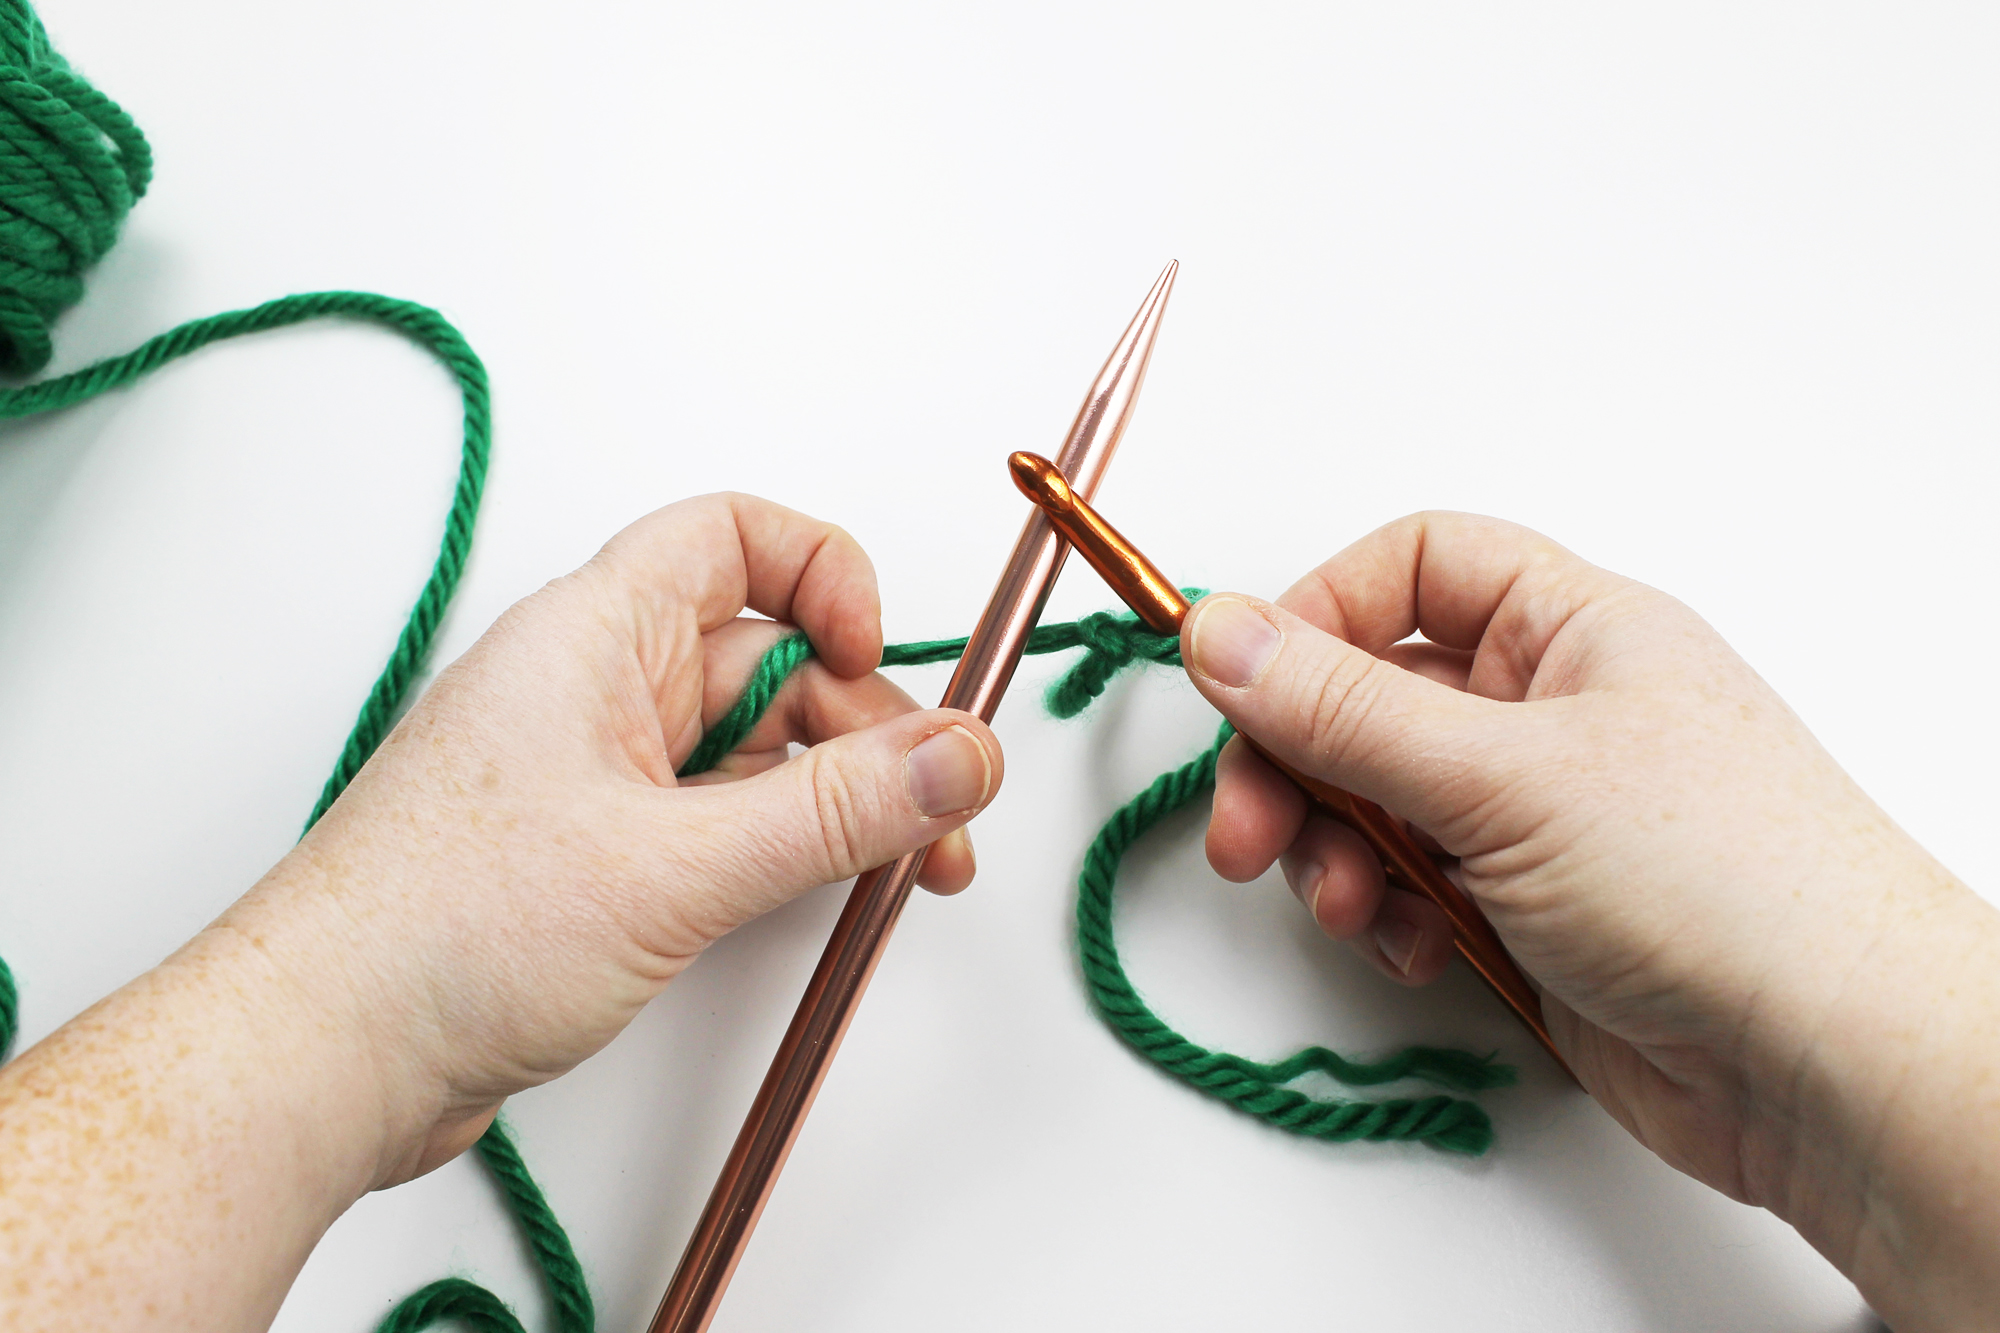
Place the crochet hook over the knitting needle. Bring the scrap yarn from behind the knitting needle.
Step 3:
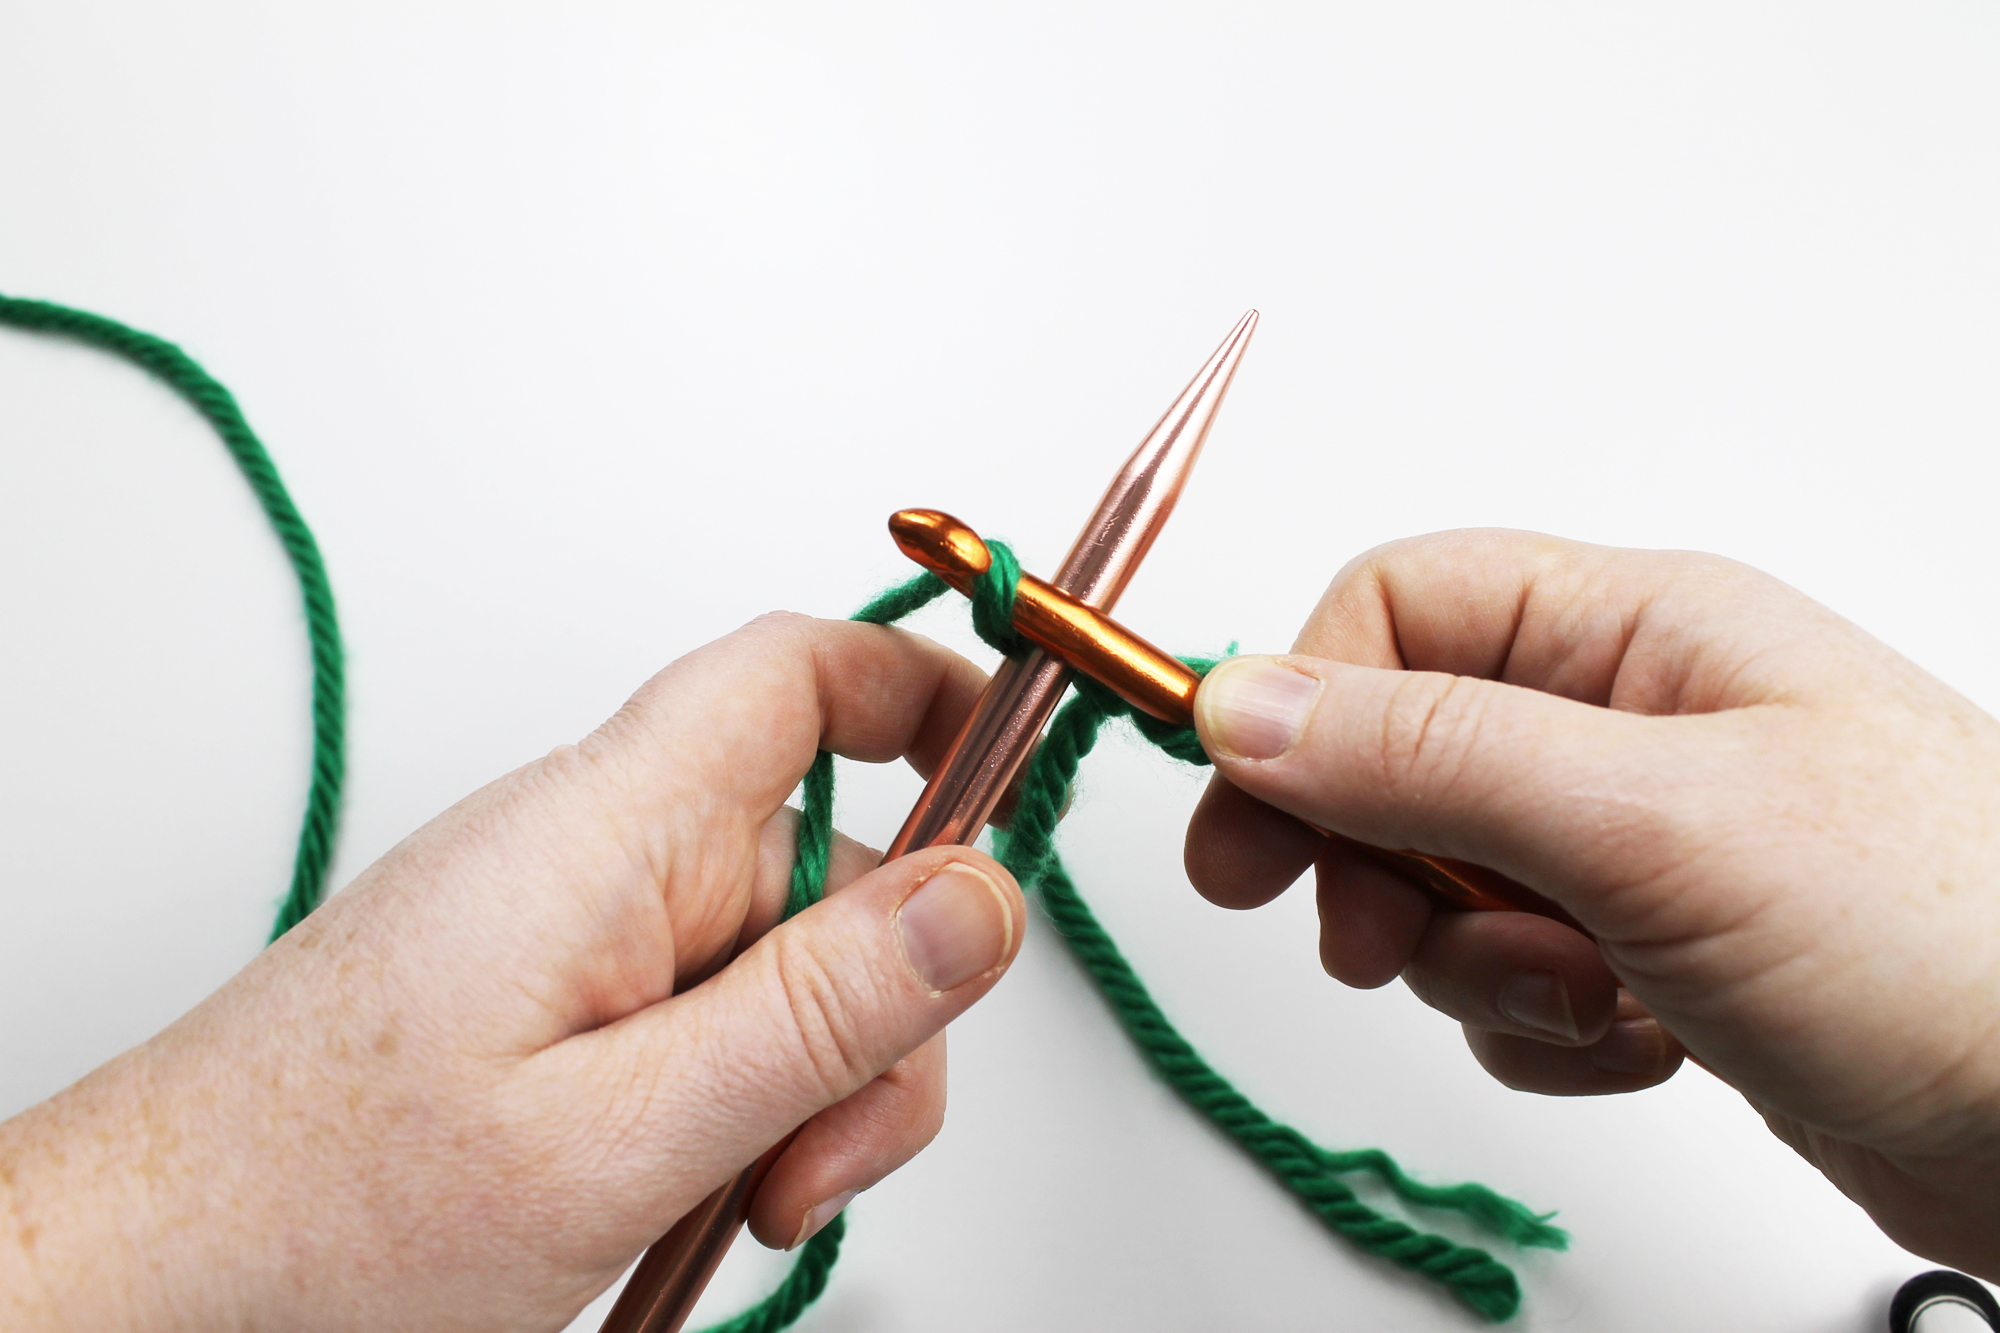
Hook the scrap yarn around the crochet hook.
Step 4:
Pull the scrap yarn through, creating a loop on the crochet hook. You’ve created one chain stitch.
Step 5:
Repeat steps 2-4 until you have chained the desired number of stitches. This number will be the number of stitches the pattern asks you to cast on.
Step 6: (optional)
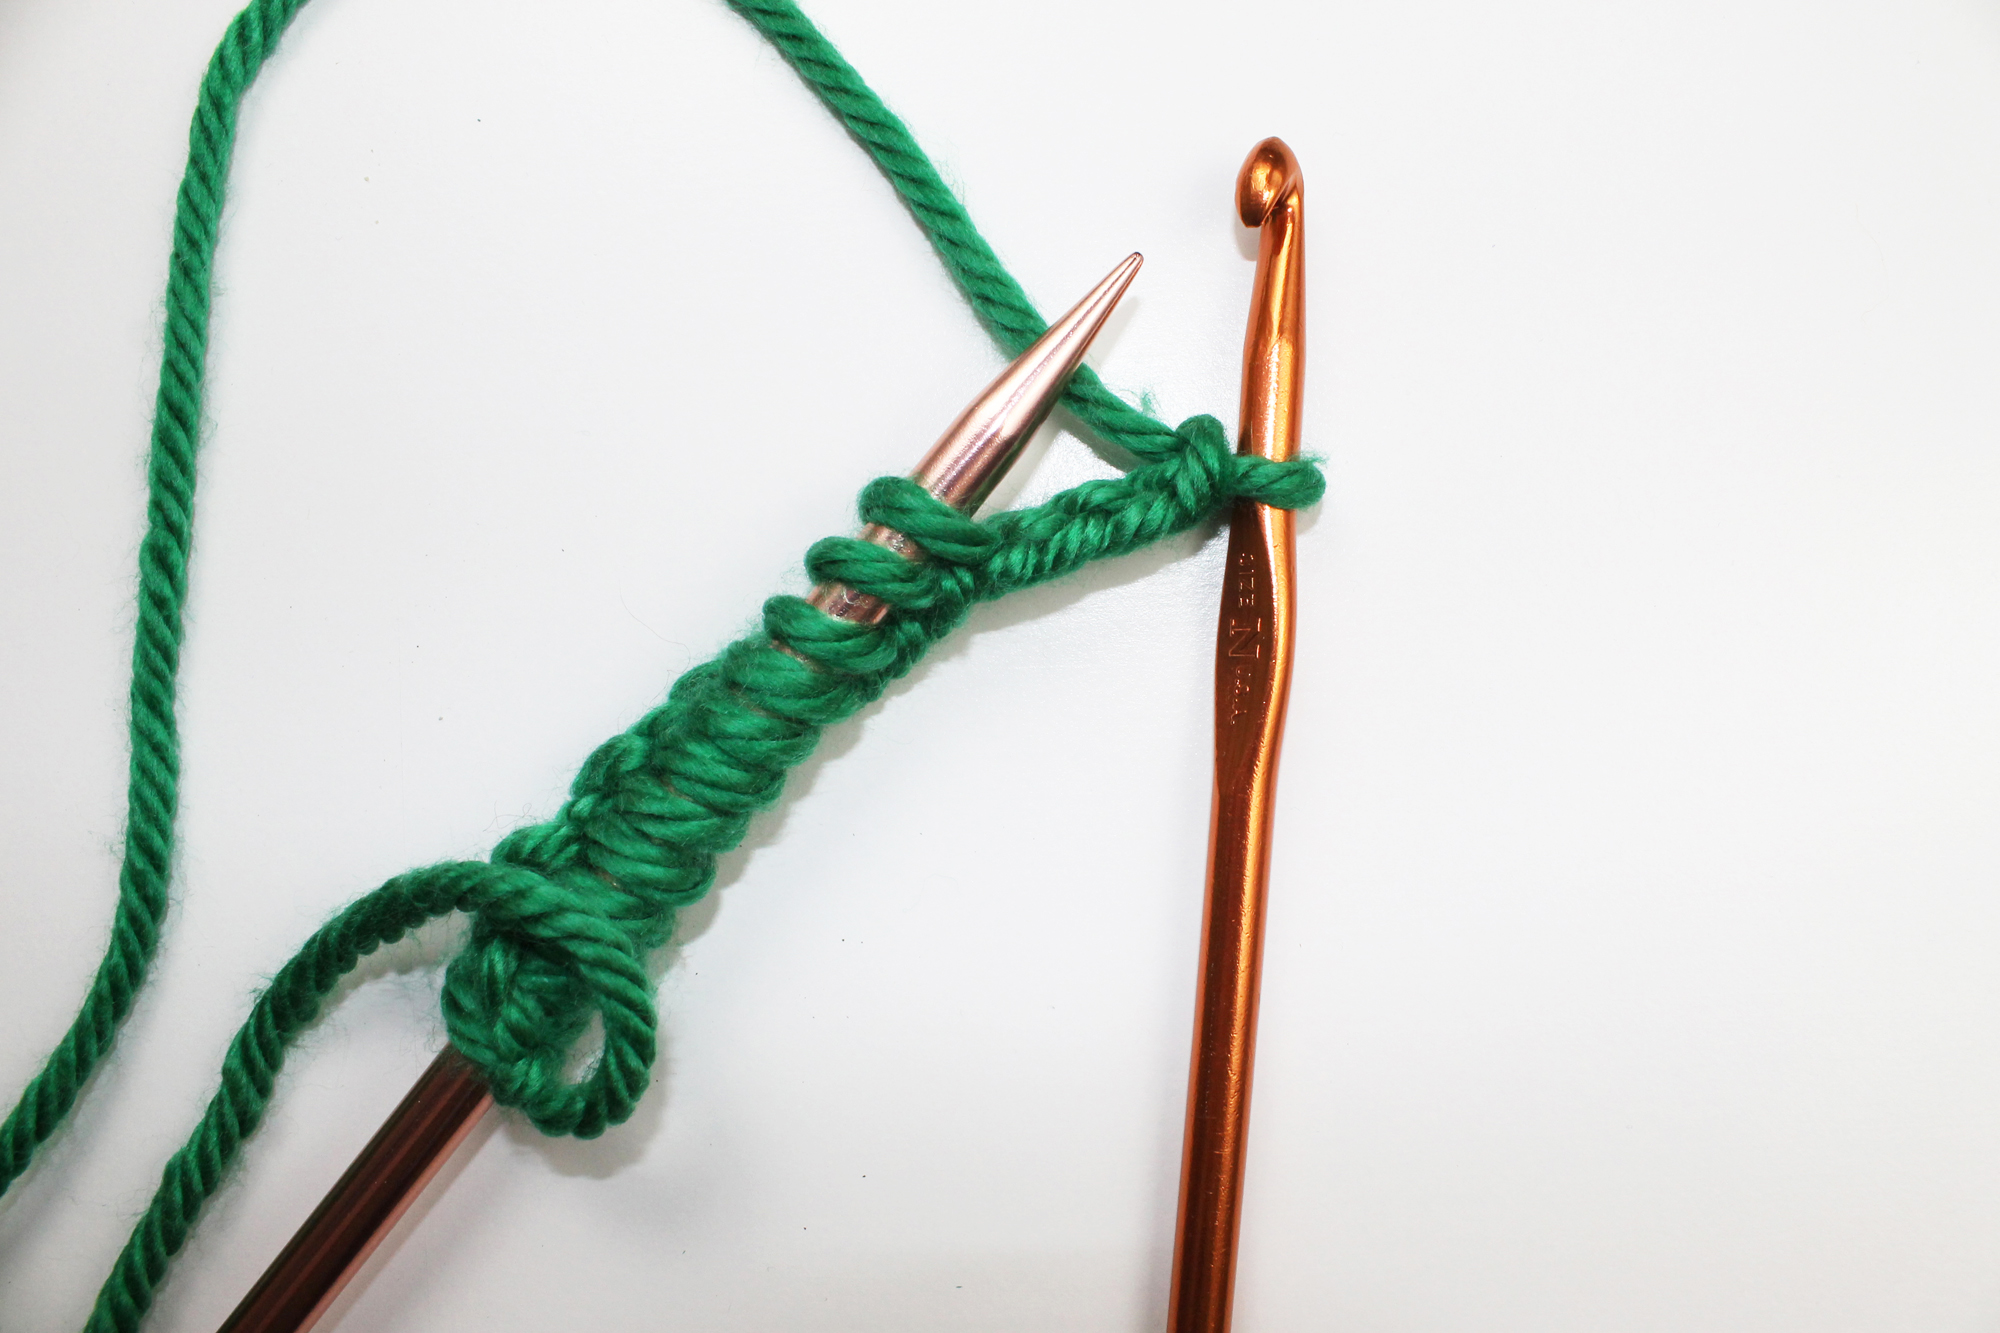
Because we’ll be unraveling this later, use the crochet hook to chain a couple of extra stitches at the end, if you’d like. This will just give you a little run-and-go when you’re pulling out the chain later.
Step 7:
Cut the scrap yarn, then insert the yarn tail through the last stitch on the needle. OR, if you don’t want to waste yarn, just pull out a big loop after your last chain so you can re-use the yarn and keep it attached to its skein. Set the crochet hook aside.
Step 8:

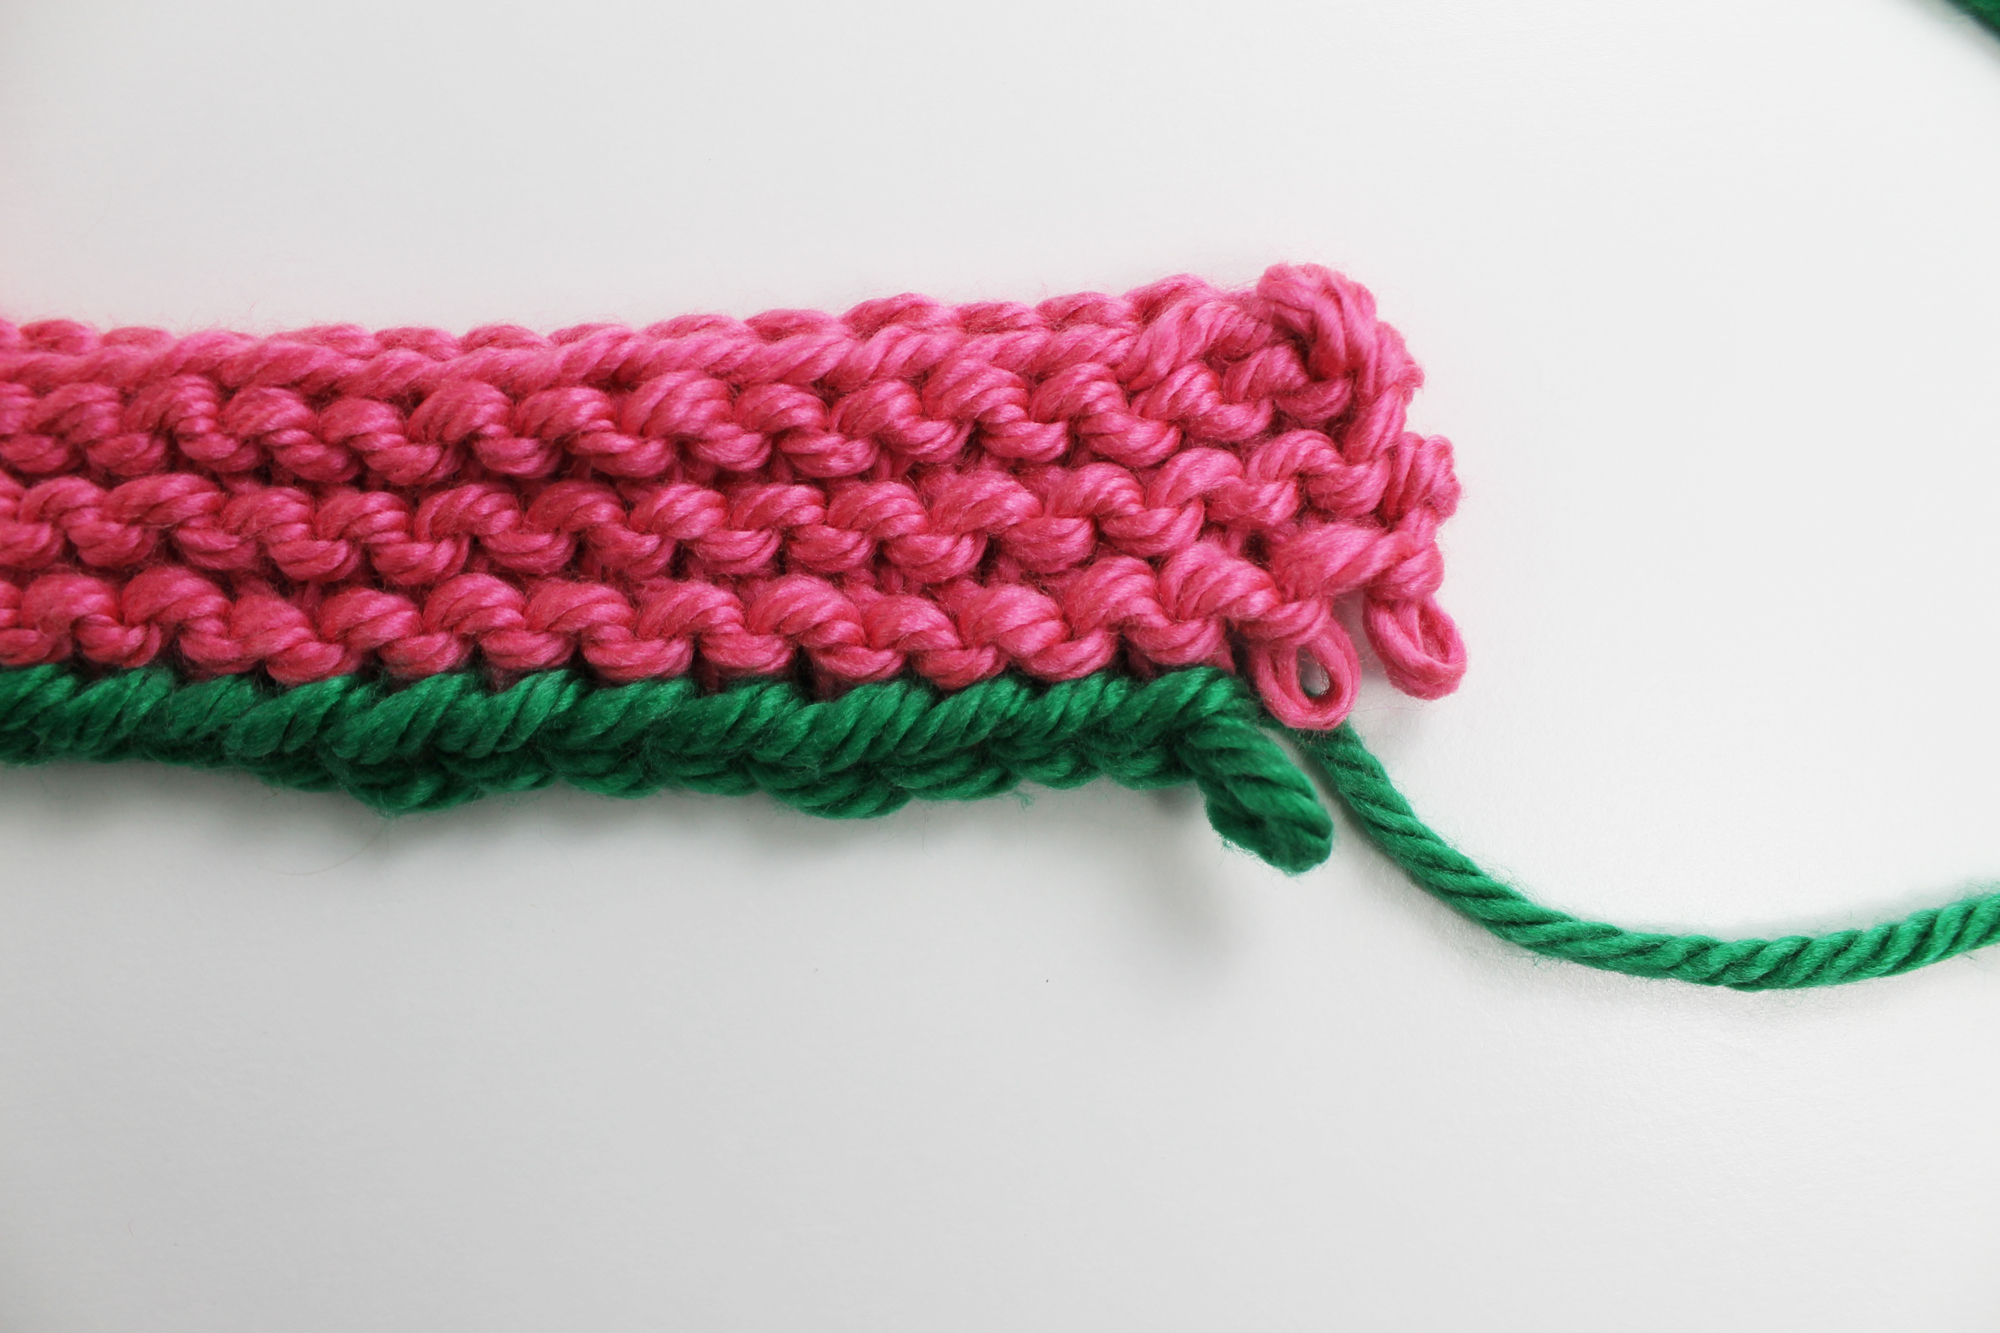
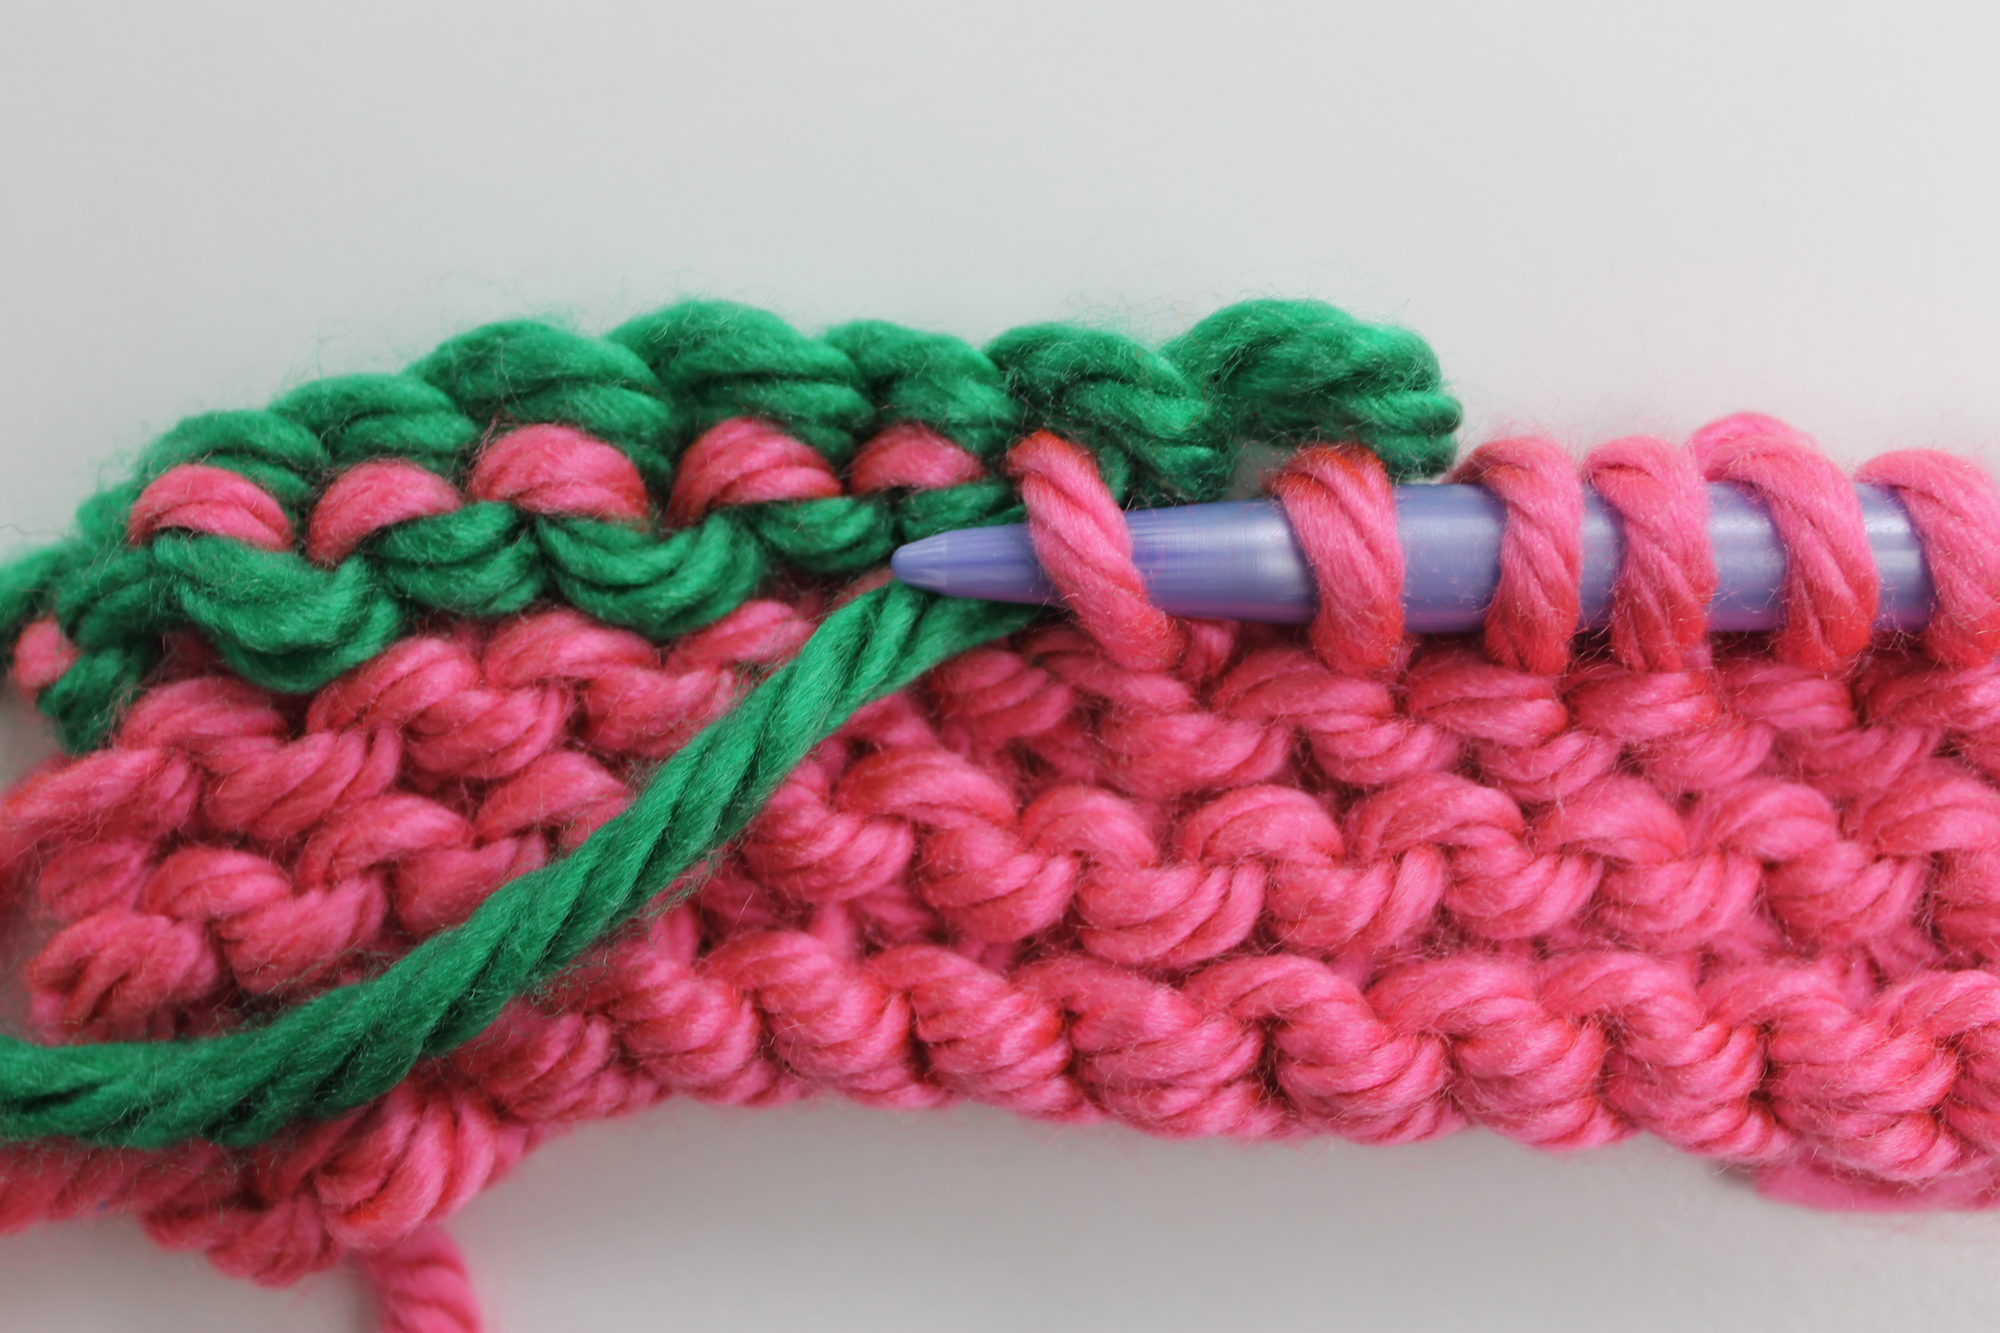
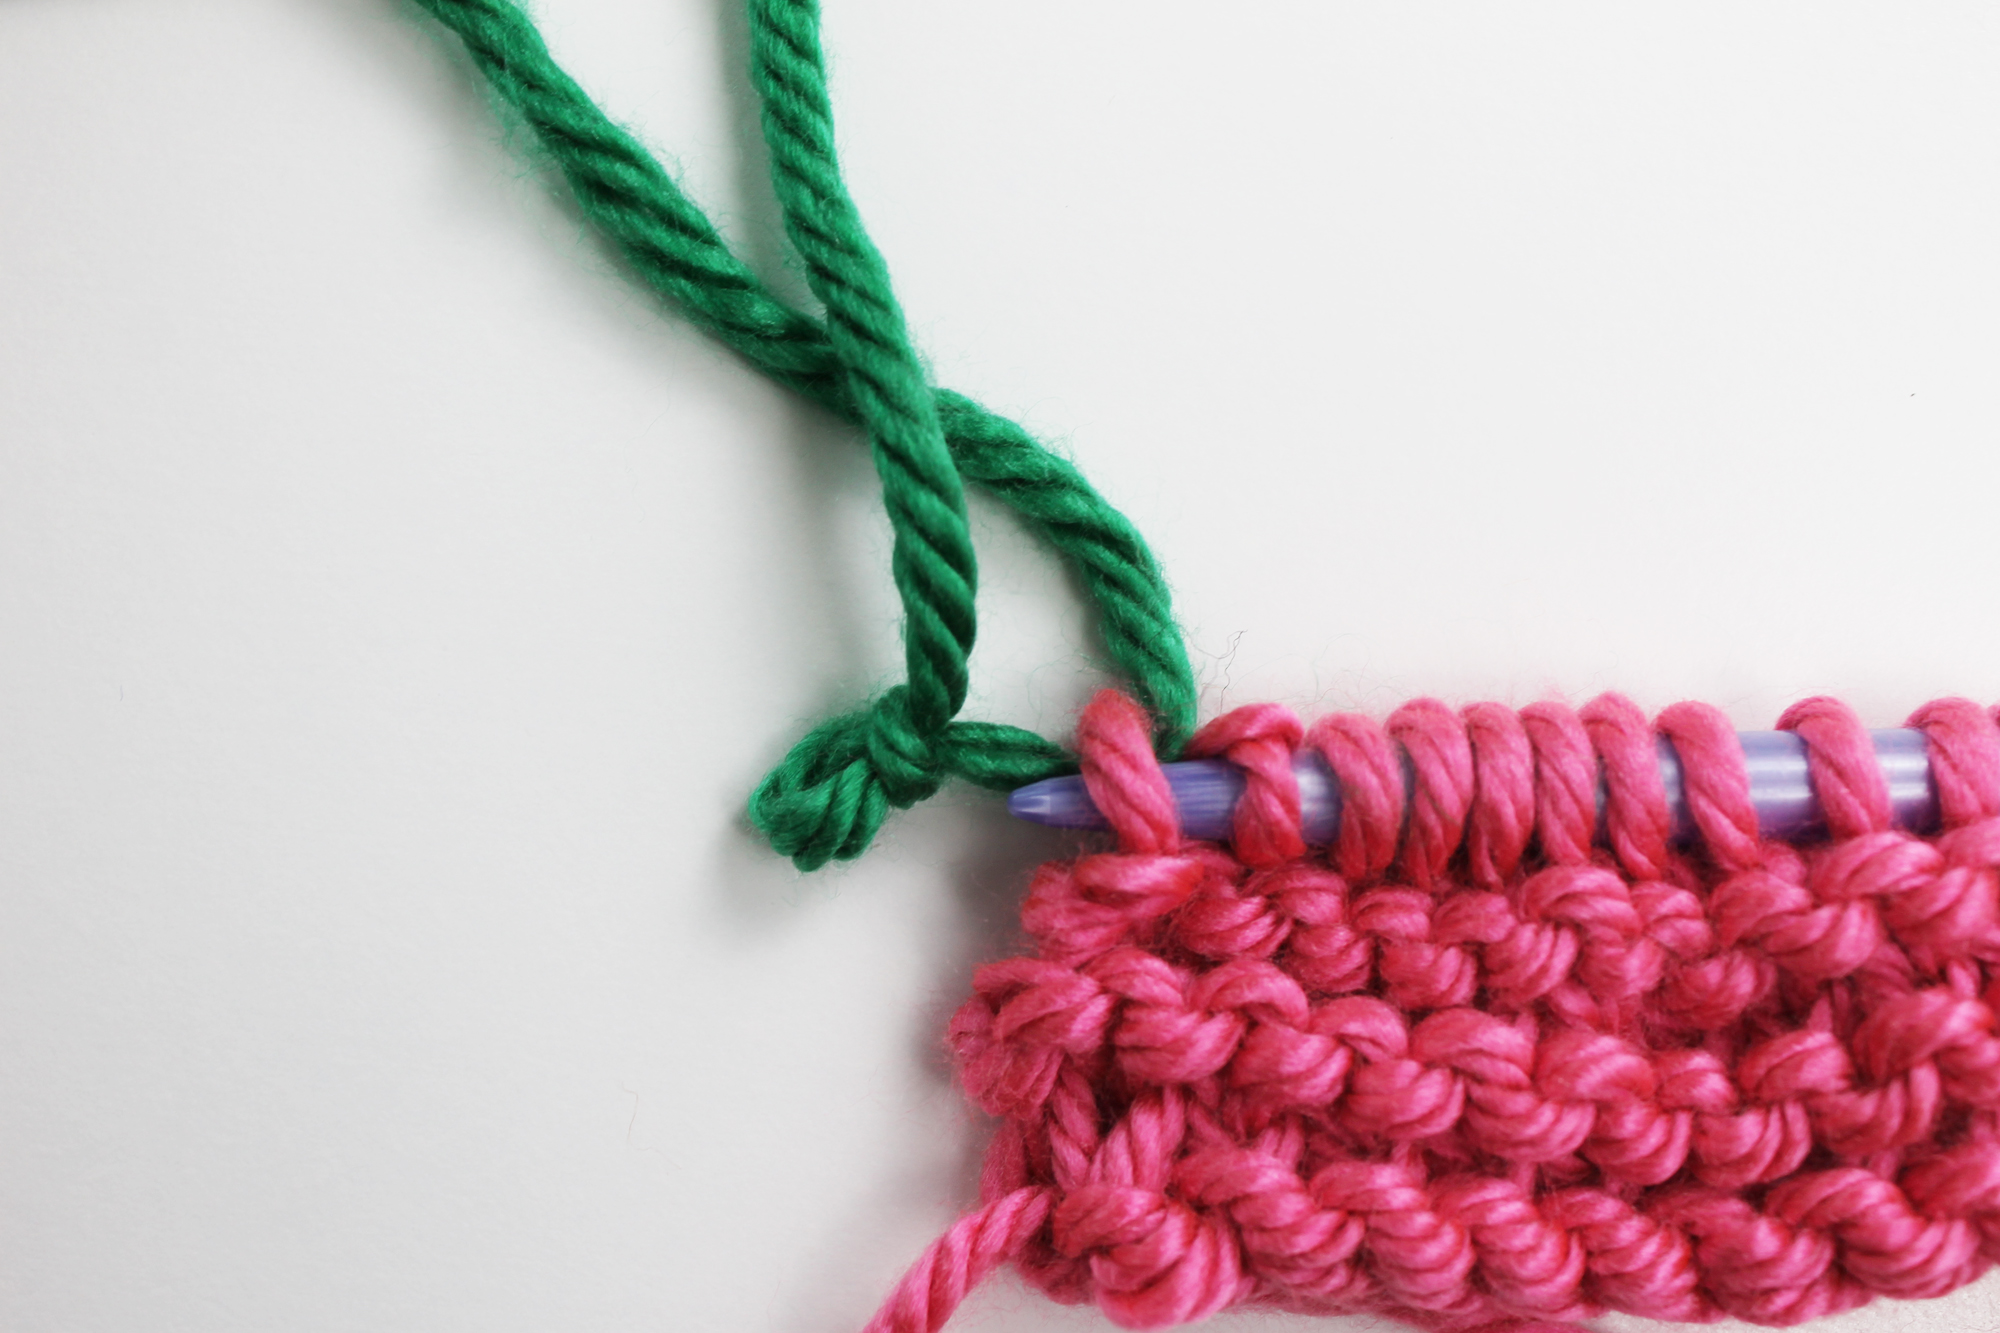
Pick up the other knitting needle and the working yarn. Start stitching with the working yarn color. Leave a long tail from the working yarn for weaving in later, just as you would if you were changing colors at the beginning of a new row.
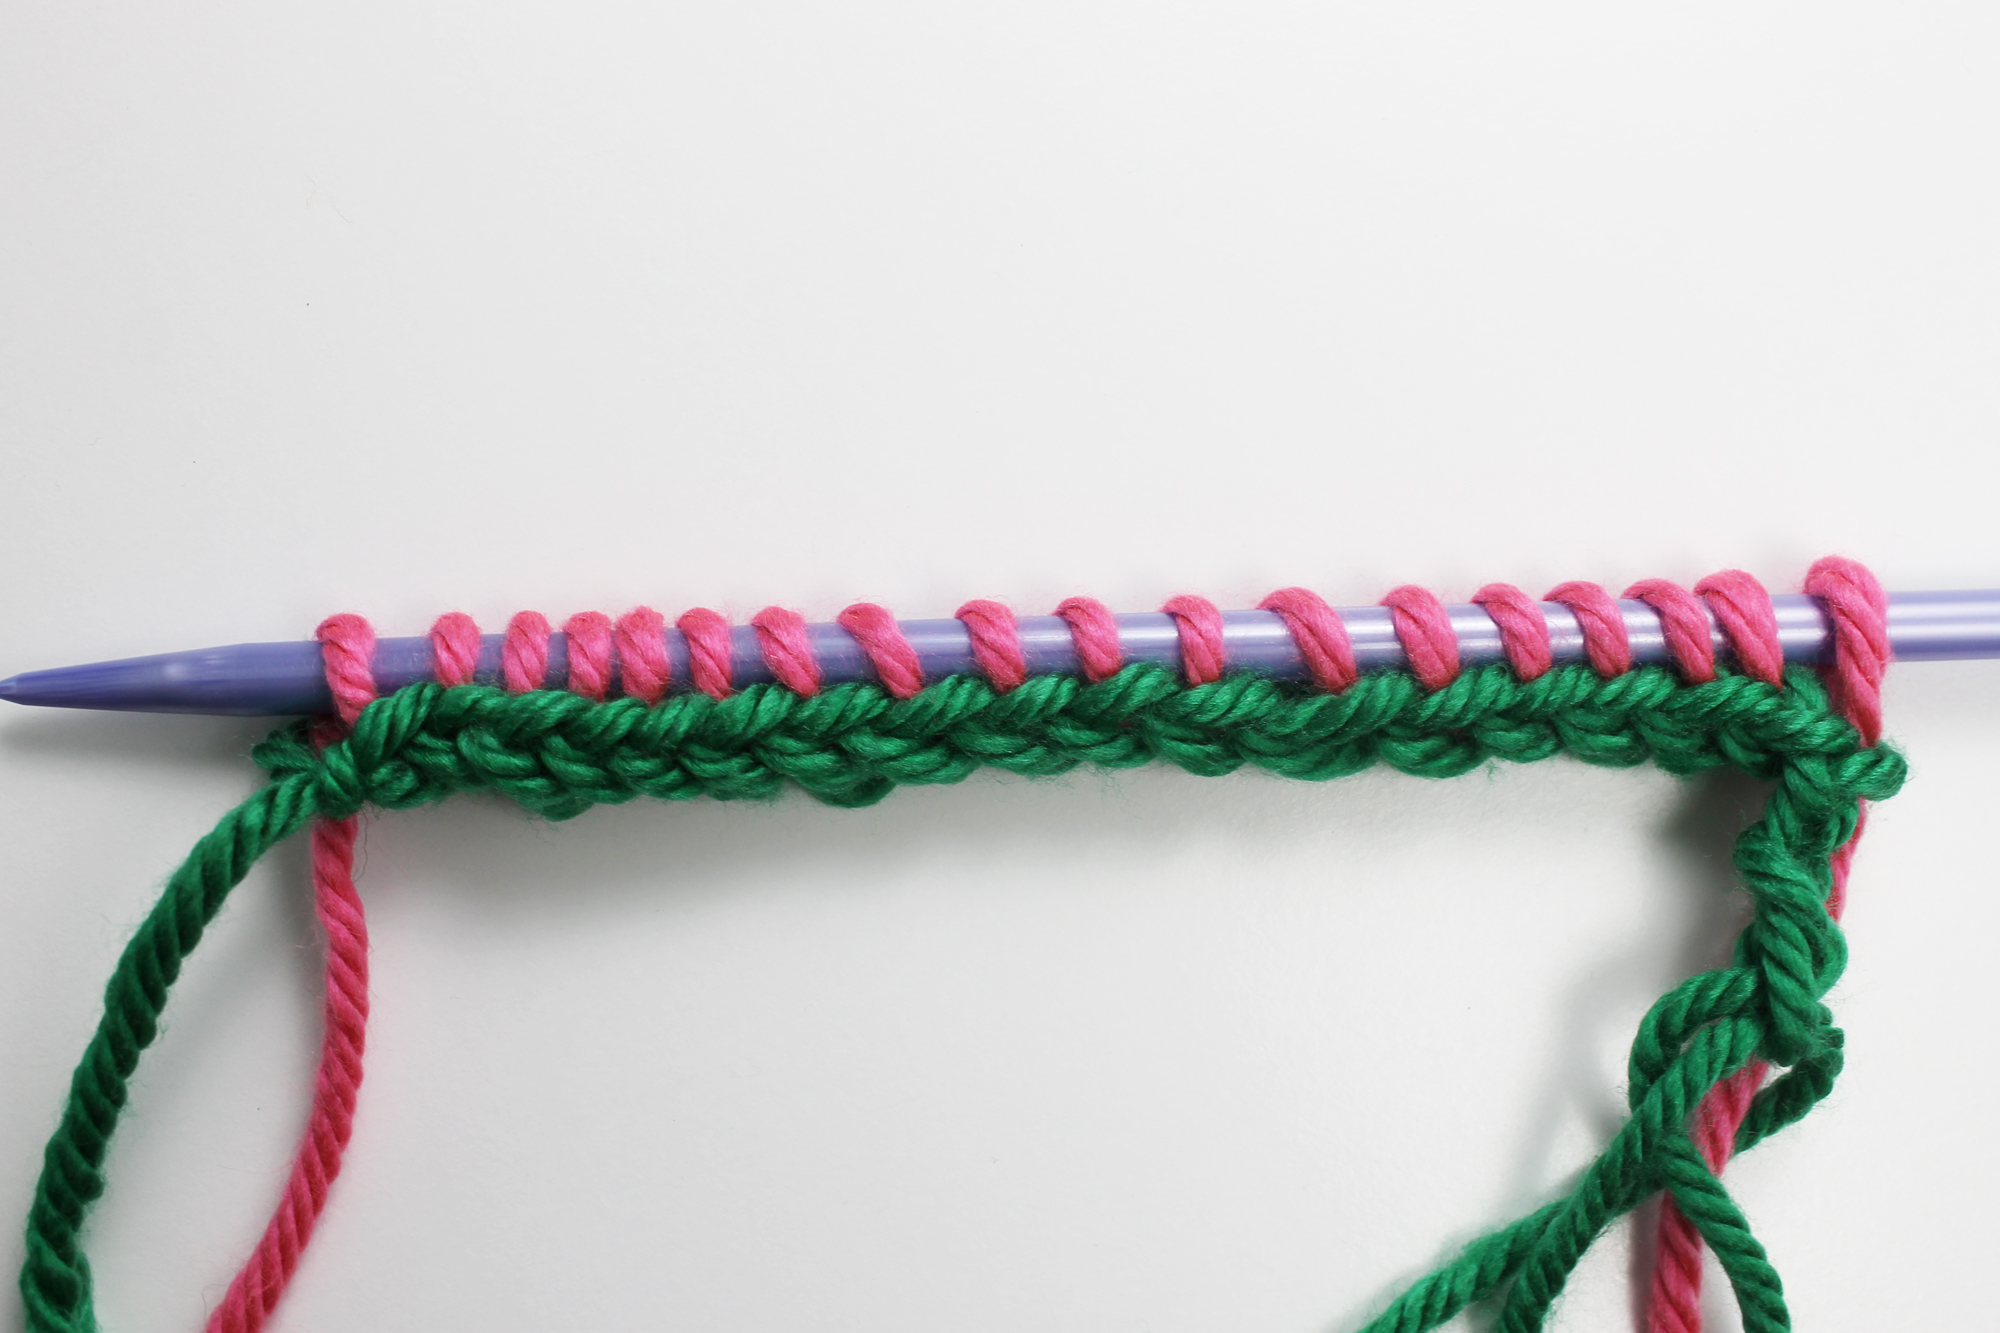
Knit across the chain, following the instructions for Row 1 of the pattern. If Row 1 tells you to knit across, then knit across.
Step 9:
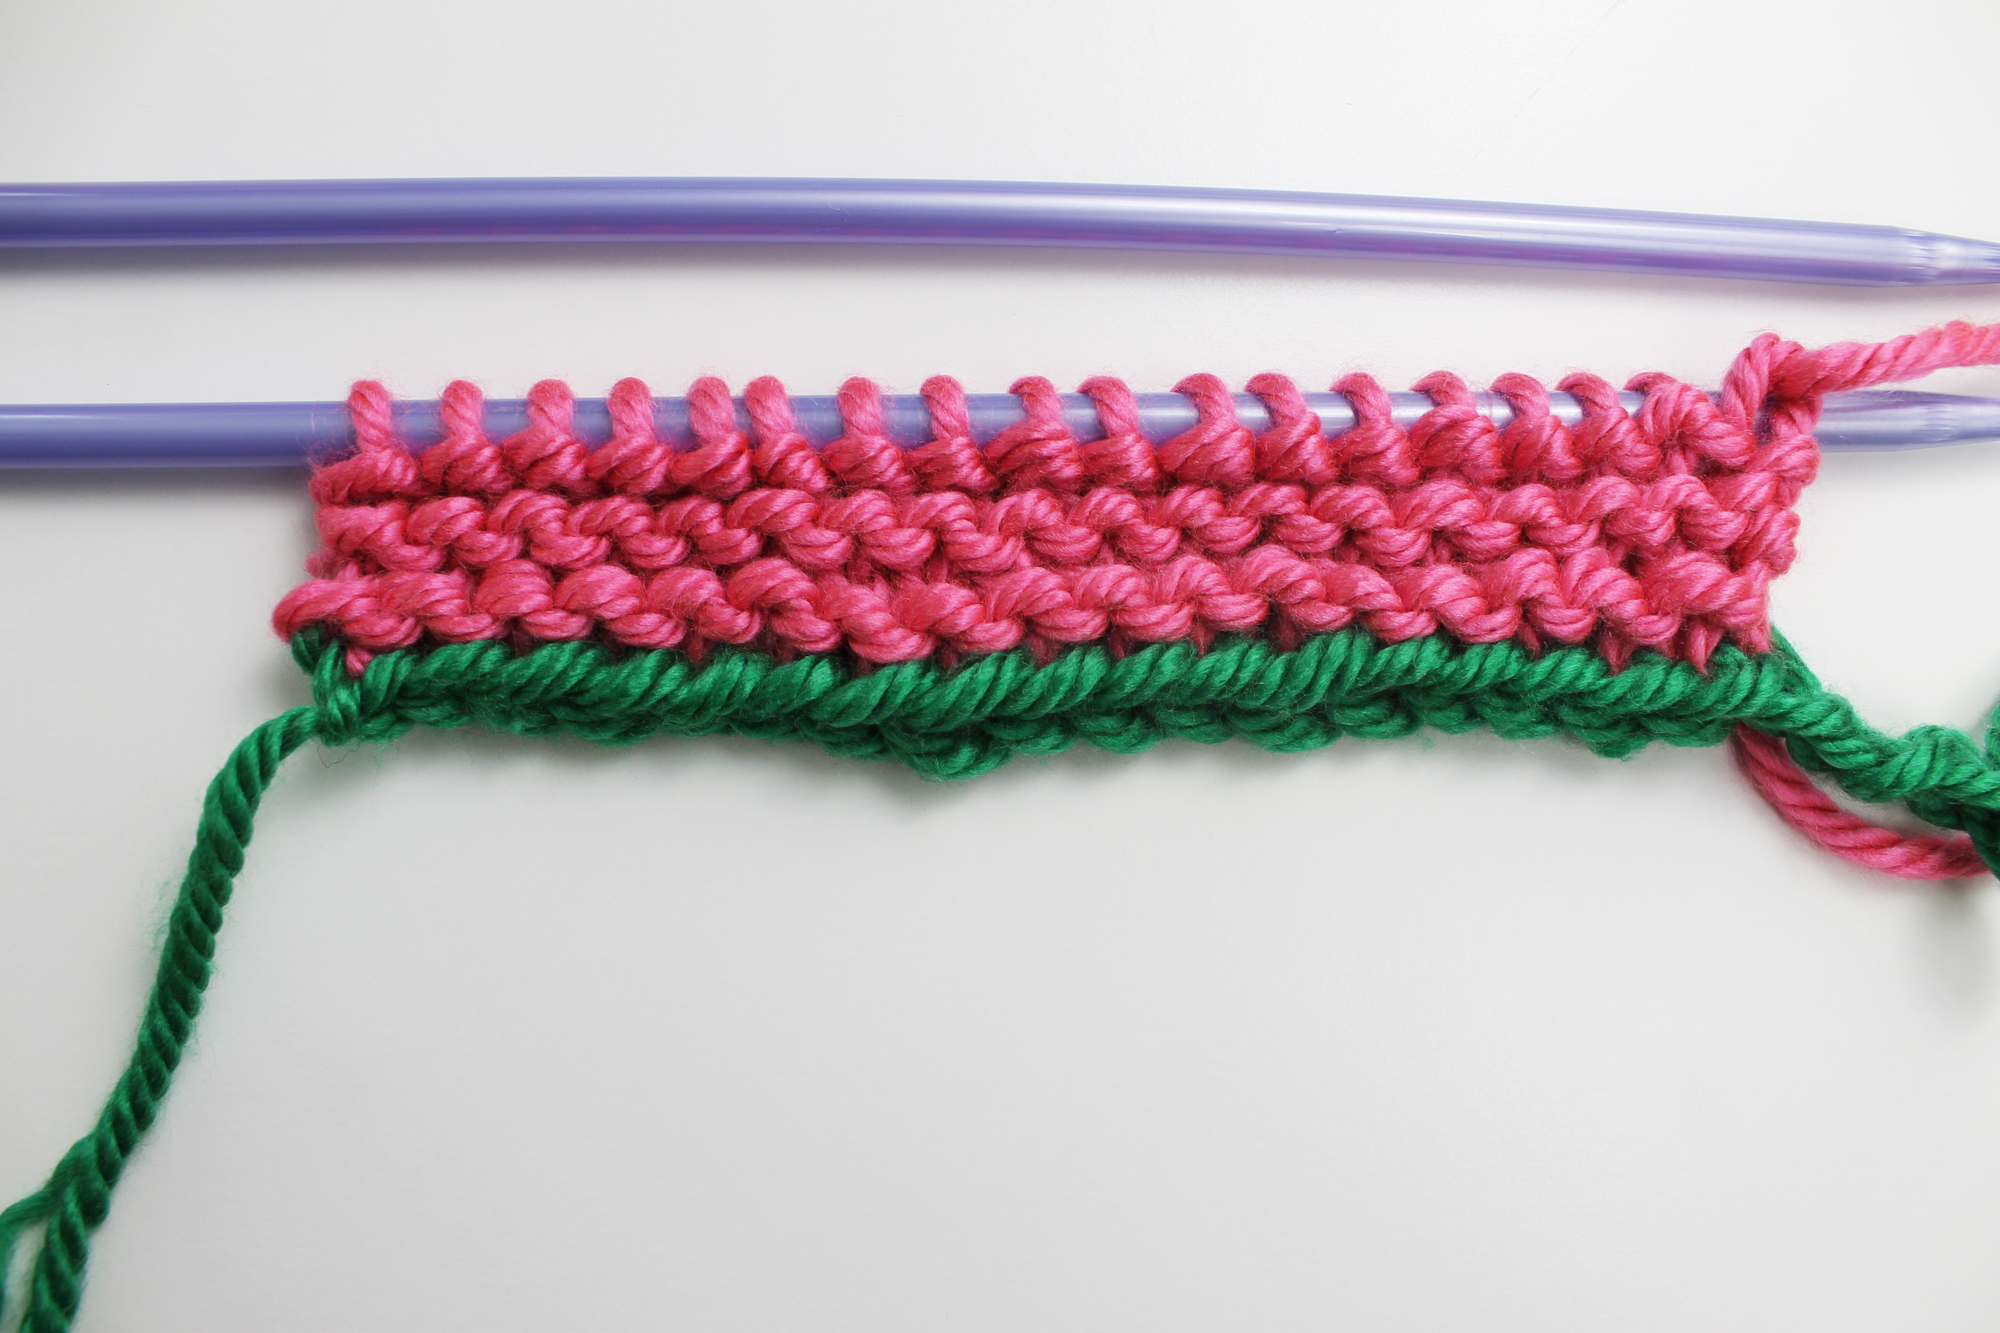
Complete your project just as you normally would, then bind off.
Step 10:
When you finish, you’ll need to remove the provisional chain. To do that, pull the yarn end out of the last chain stitch. Tug on it, slowly unraveling the chain until you start to see live stitches.
Yikes! But don’t worry; your knitting needle will come to the rescue…
Step 11:

Pause after you see one or two live stitches. As the scrap yarn chain unravels, slide your knitting needle into the live stitches so they don’t drop. Repeat this as you work your way across the chain.
If the live stitches make you panic, you can also flip the work over to the back and insert the needle into the stitch before you unravel it. That way there’s no chance of the stitch dropping.
Step 12:
When you reach the end of the chain, you’ll arrive at the slip knot you made in step 1. Just pull the slip knot to untie it, then remove the scrap yarn completely and put it to the side.
Once you reach the end of the chain, you’ll have all the stitches back on a knitting needle.
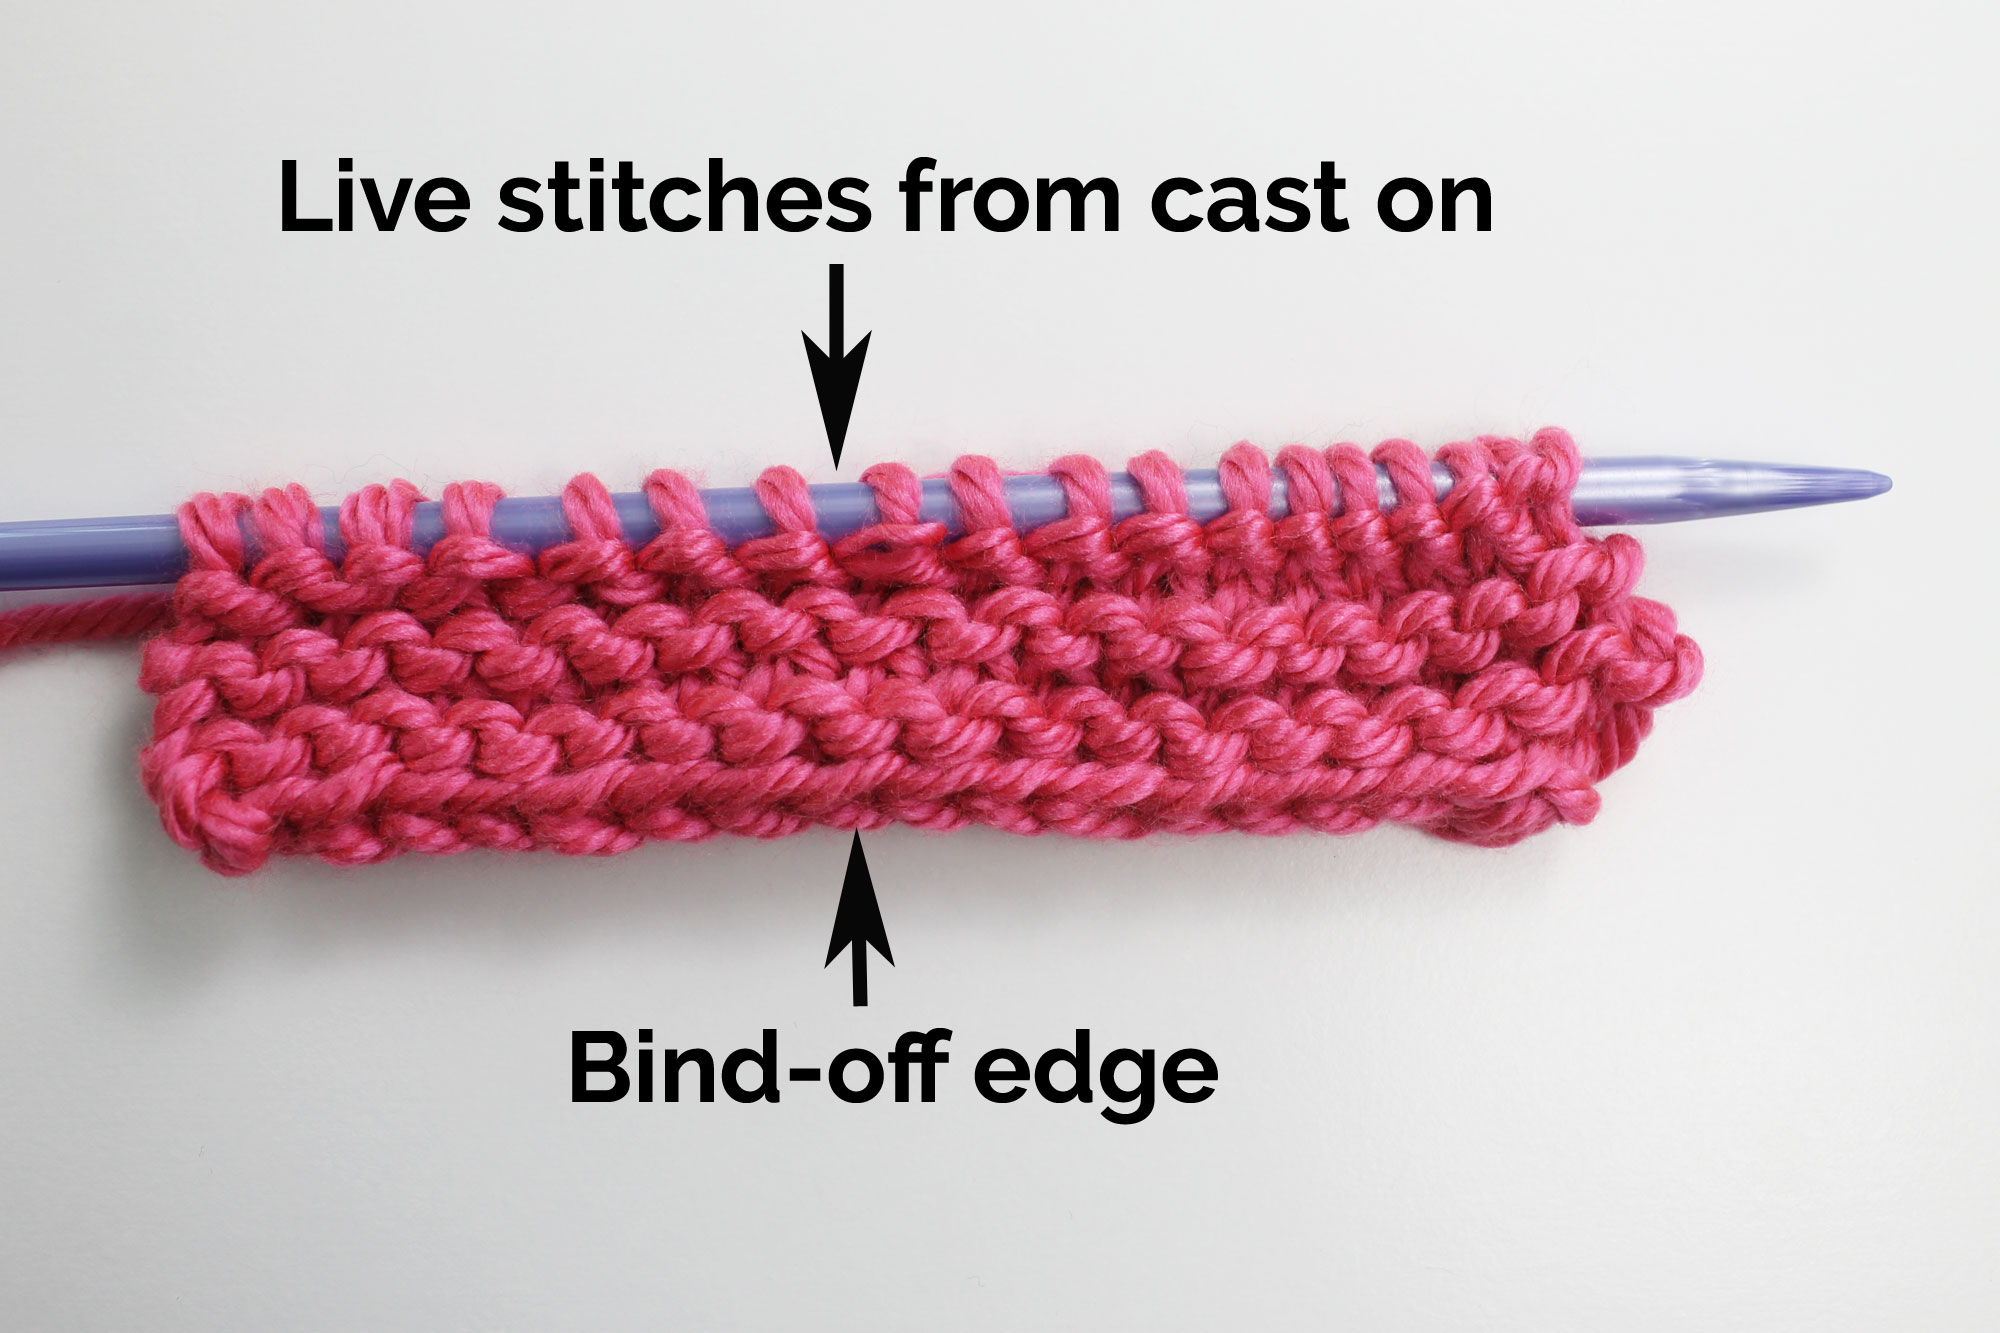
Notice that your bind-off edge is at the bottom of the work, and you’re working from the cast-on. It’s almost as if your work was flipped upside down.
You can now add length to your piece, or graft the piece to another set of live stitches. Yay!
Now that wasn’t so scary, was it?
I don't understand why I need a tail, it says to weave in later, but I'm going to be pulling it out, so there is no weaving in later?
What if you AREN'T working in stockinette or garter, but have a section of ribbing? I am working on a kit from previous version of Craftsy. When I pick up the provisional stitches in the ribbing, they come out off half a stitch and look odd.
I notice that you remove the cast on from the purl side. Usually I unravel from the knit side and experience difficulty. I understand the concept and the purl side might work better for the removal. What "bubble" do I look for to insert the needle?