
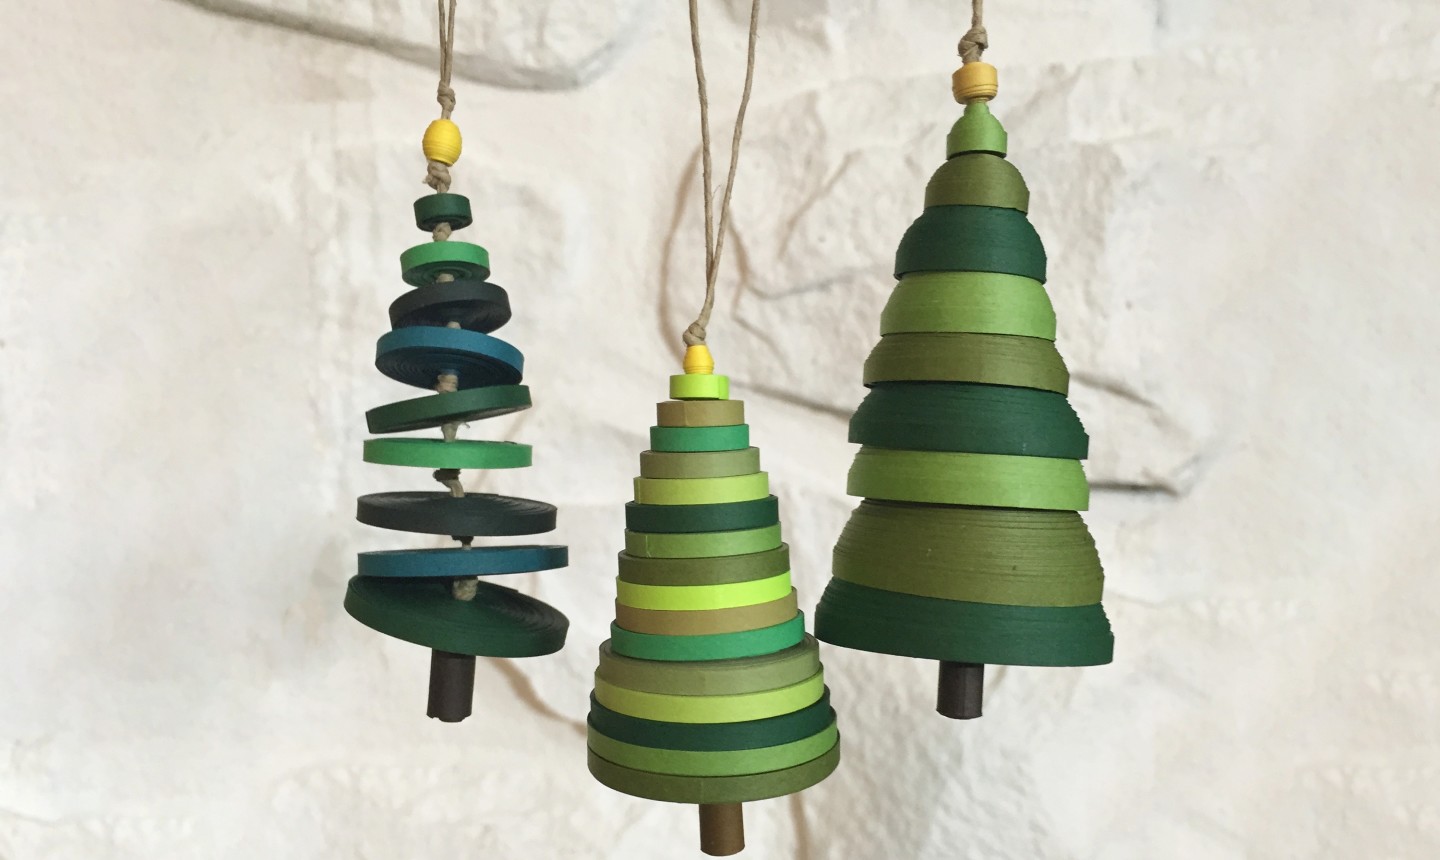
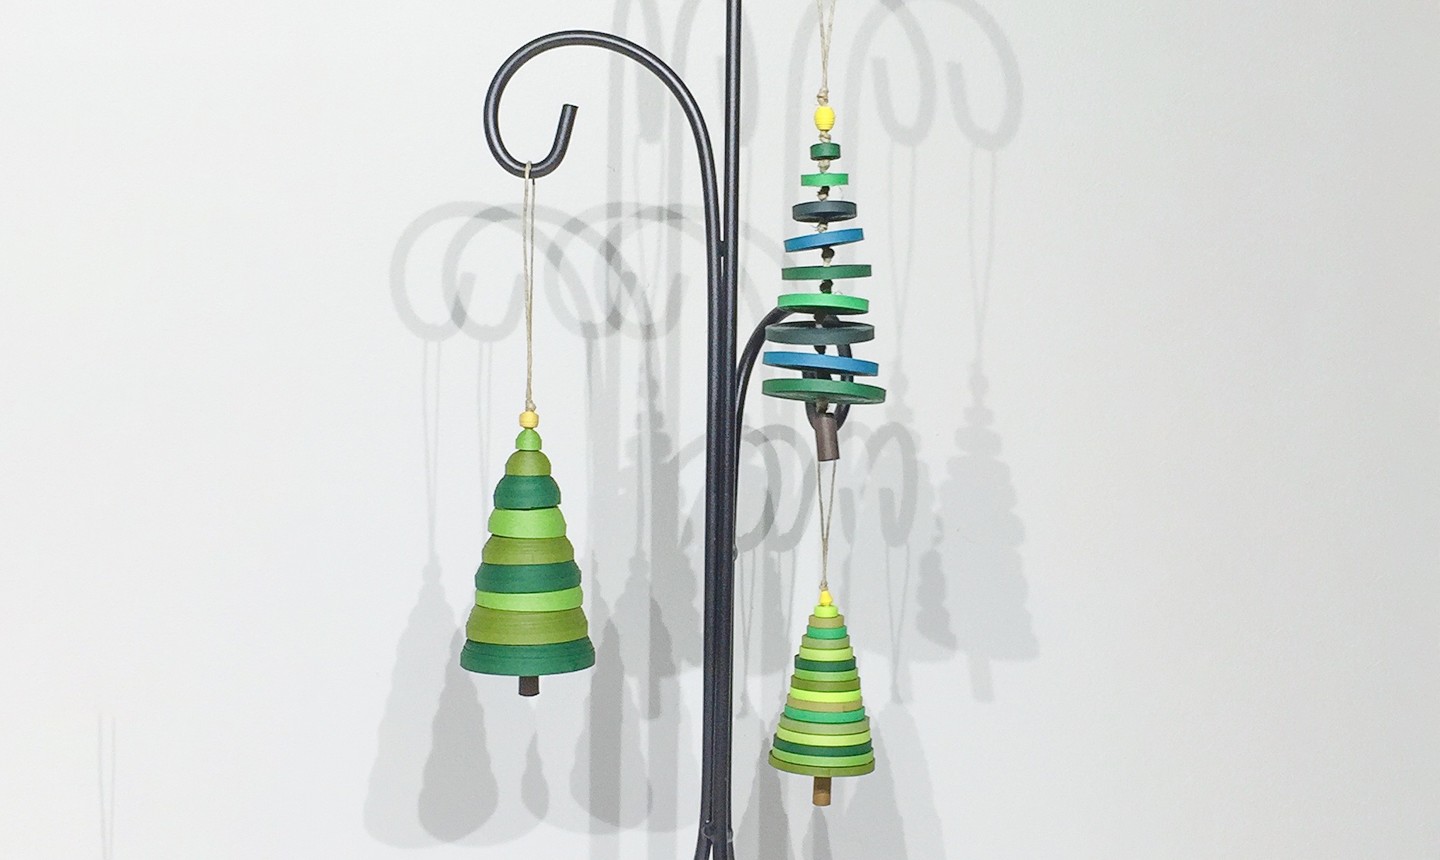
When it comes to holiday decor, there’s nothing better than going homemade. These ornaments are proof— they’re made quickly with paper quilling, look totally trendy and you can guarantee no one else will have ’em on their tree. Plus, you can make one in under an hour!
The Short Stack Tree
Level: Easy
What You Need
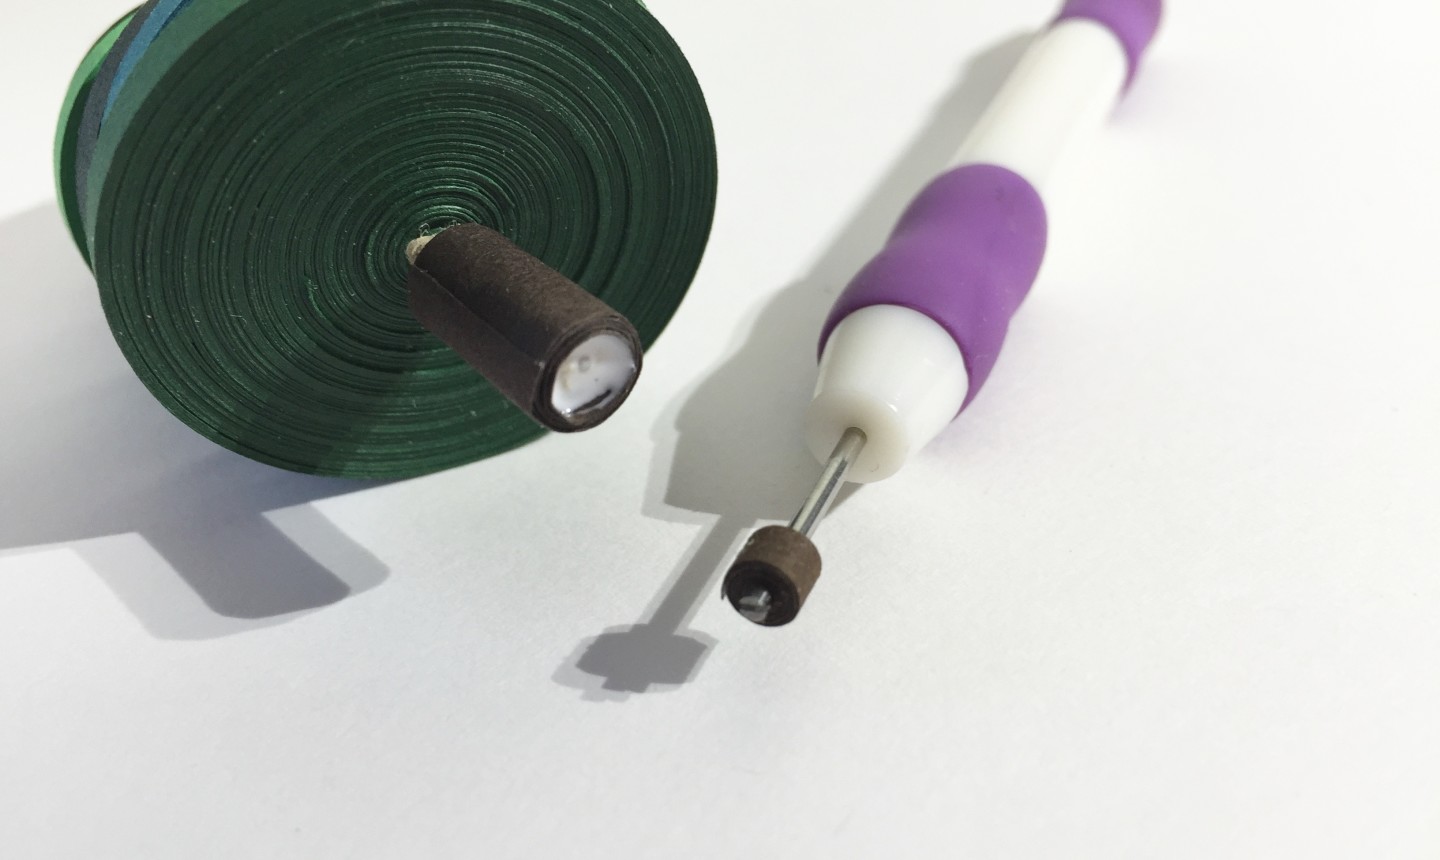
Good to Know: The beading tool will give you a larger center hole to string twine through.You can use a quilling needle form instead, but the process will take more time.
Instructions
1. Make the Coils

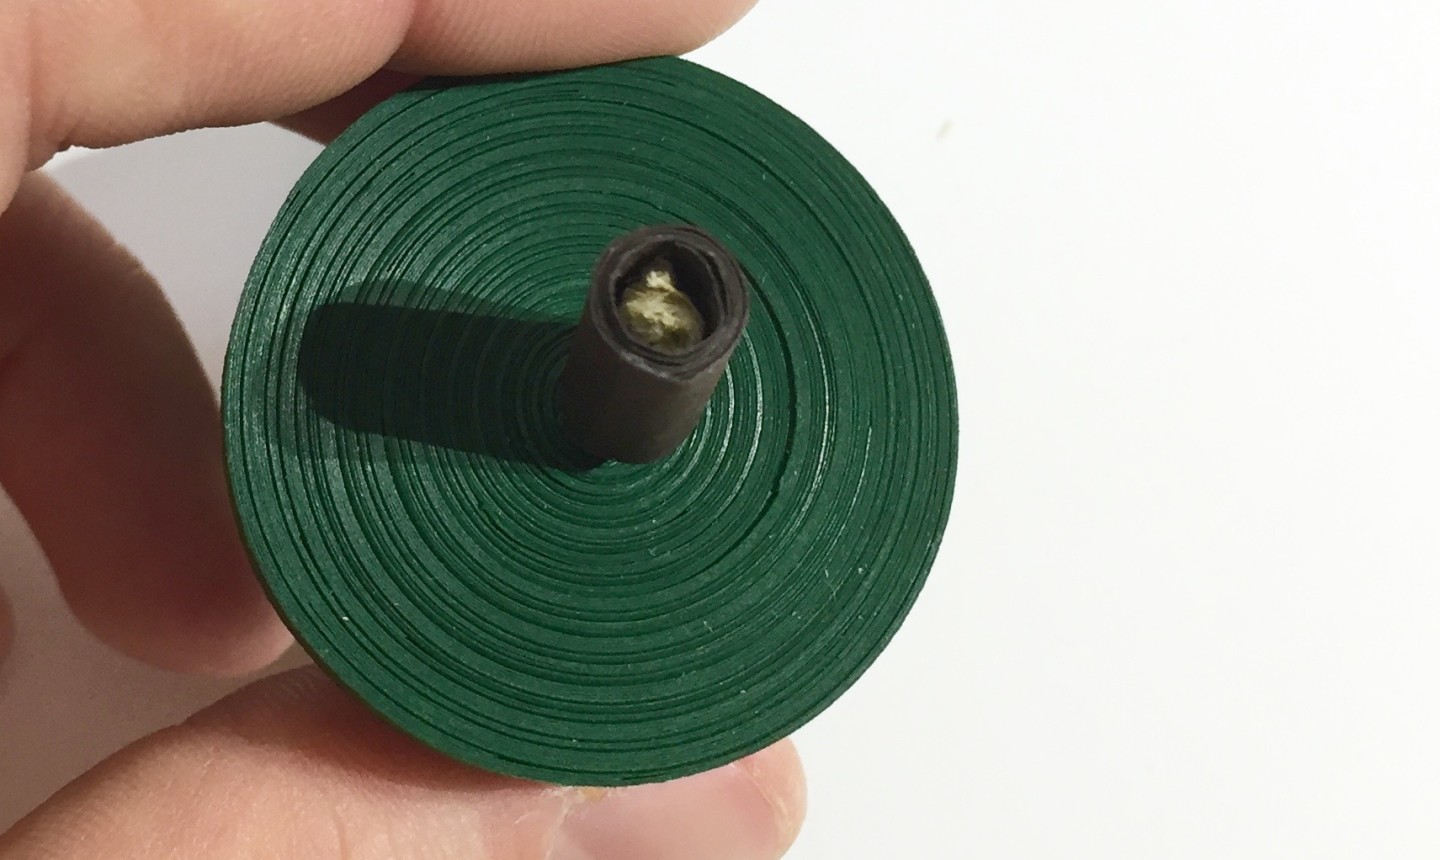
Use a beading tool to make a tight-closed coil with one strip of your first shade of green. Secure it with glue and carefully remove your tool.
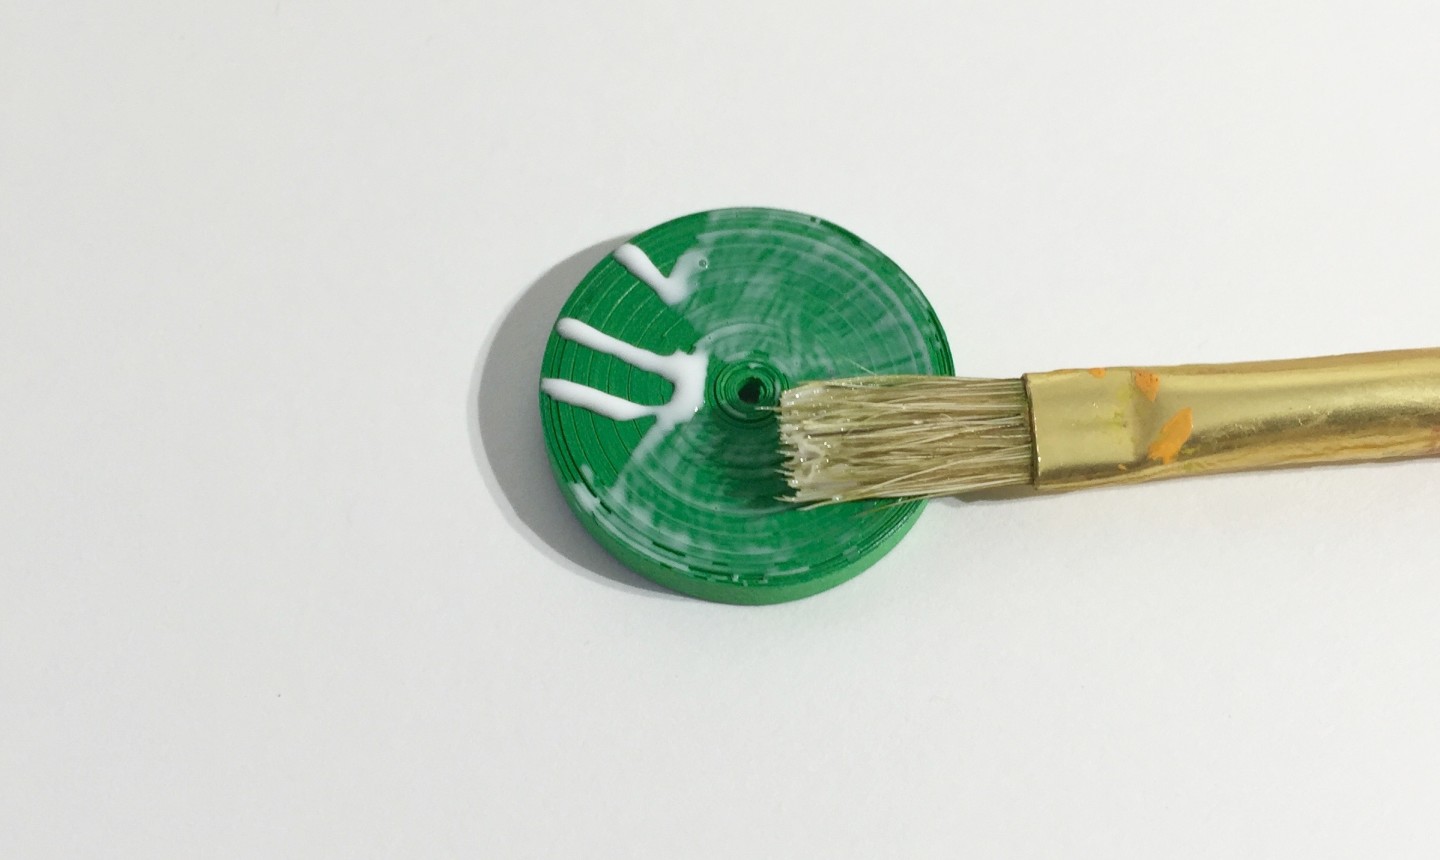
To glue your coils, apply a generous amount of glue on one face of the coil and use a paintbrush to evenly distribute. This will keep your coils from unraveling and add strength.

Make the next coil the same way, but with two strips and using a different shade of green. As you work, you’ll add an additional strip for each coil and use every shade. You want to make 16 coils total.
2. Make the Tree Topper

Cut a 4¼” yellow strip with a ¼” width. Cut the strip in half diagonally.
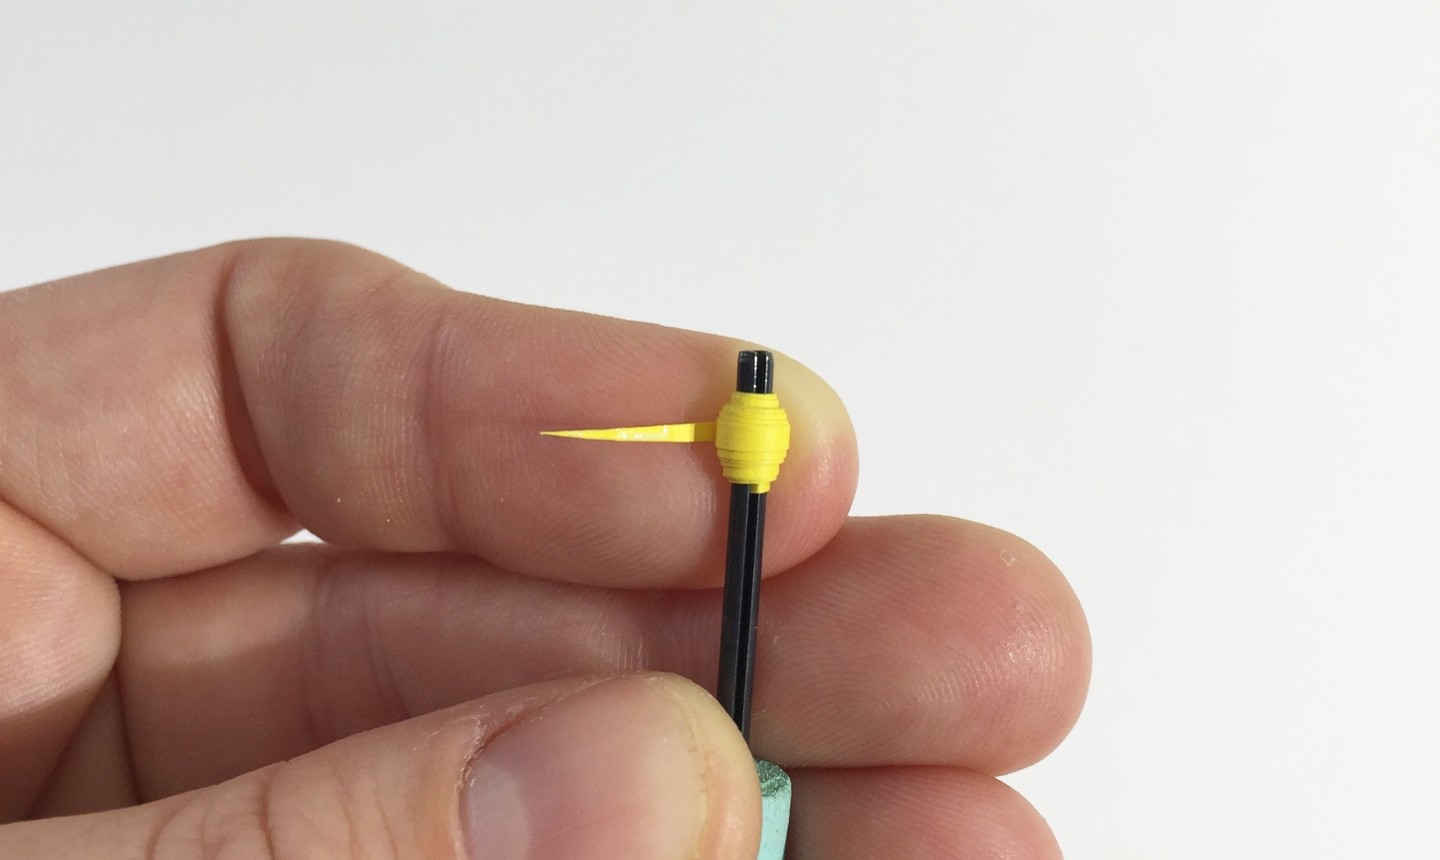
Insert the widest end into your bead tool and roll it toward the pointed side. Place a small amount of glue to secure it and remove the tool.
3. String the Ornament
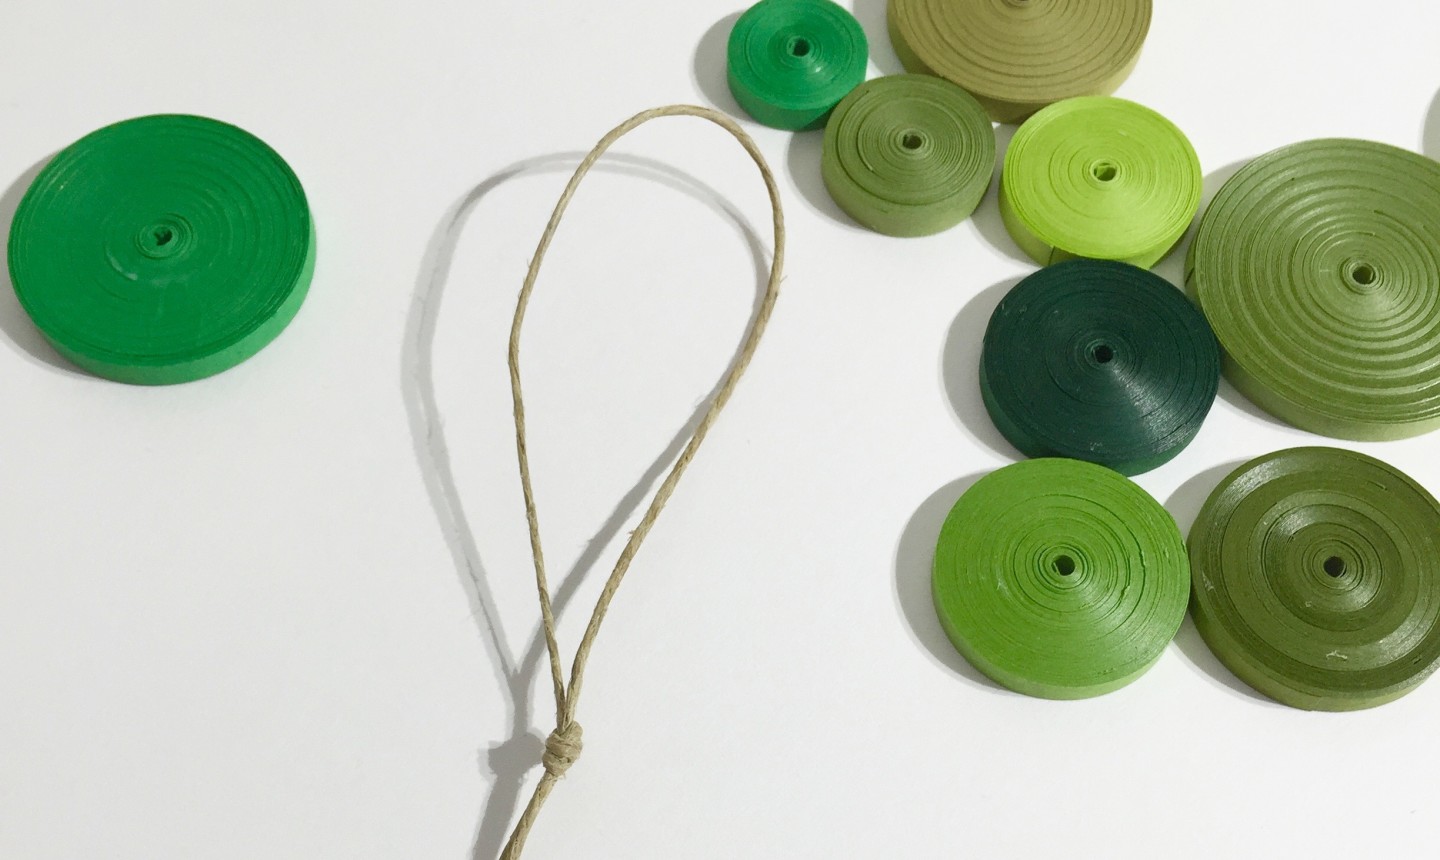
To turn your quilled pieces into an ornament, cut approximately 18″ of twine. Fold it in half and make a simple overhand knot. The loop will be used to hang your ornament, so use your best judgment on size.

Thread the twine through the hole in your tree topper. Follow with the smallest coil, glued side facing down. Stack the remaining coils tightly in an ascending order.
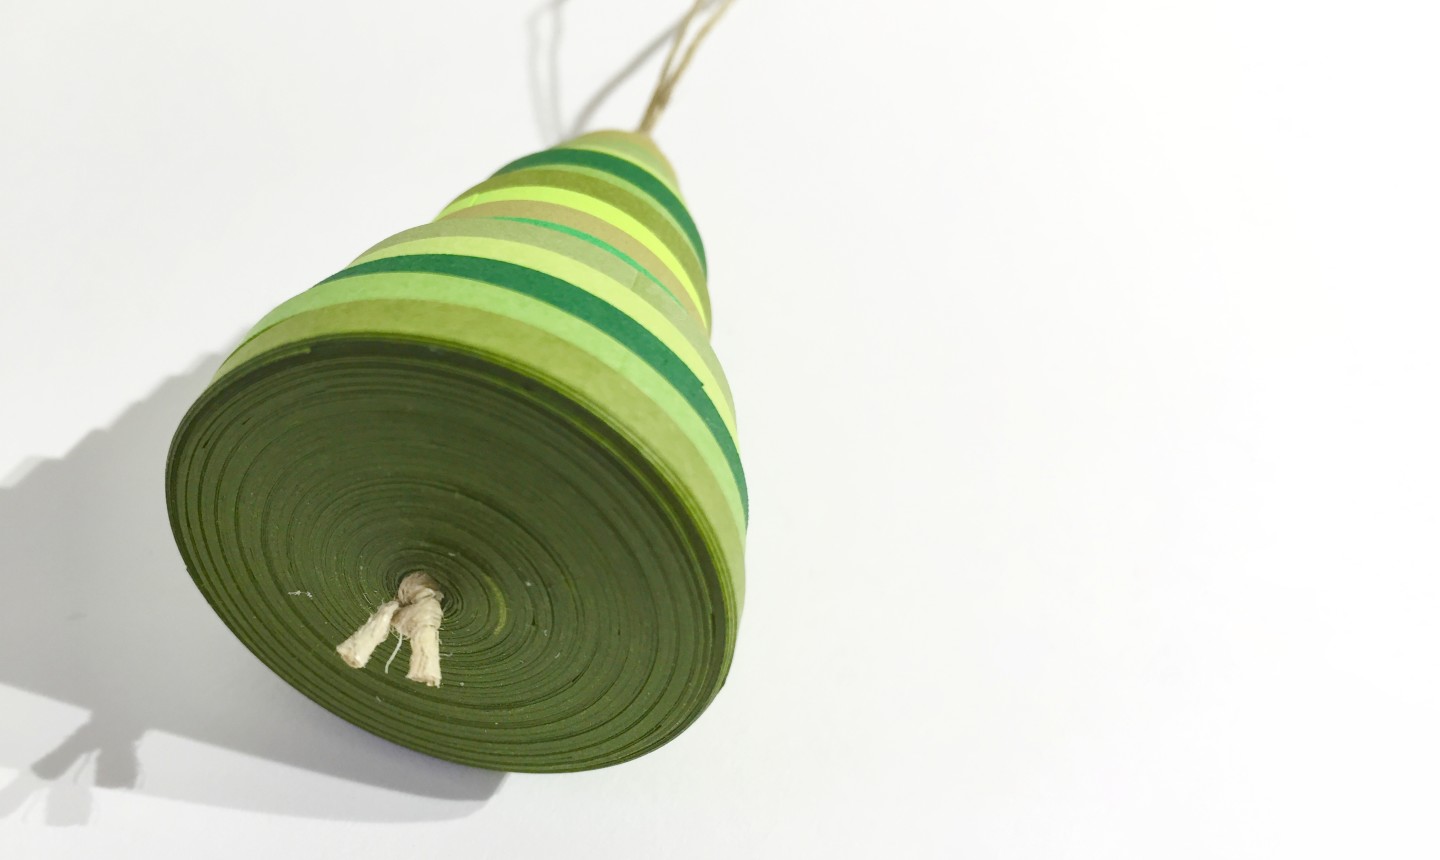
Tie the twine underneath the last coil and trim the excess.
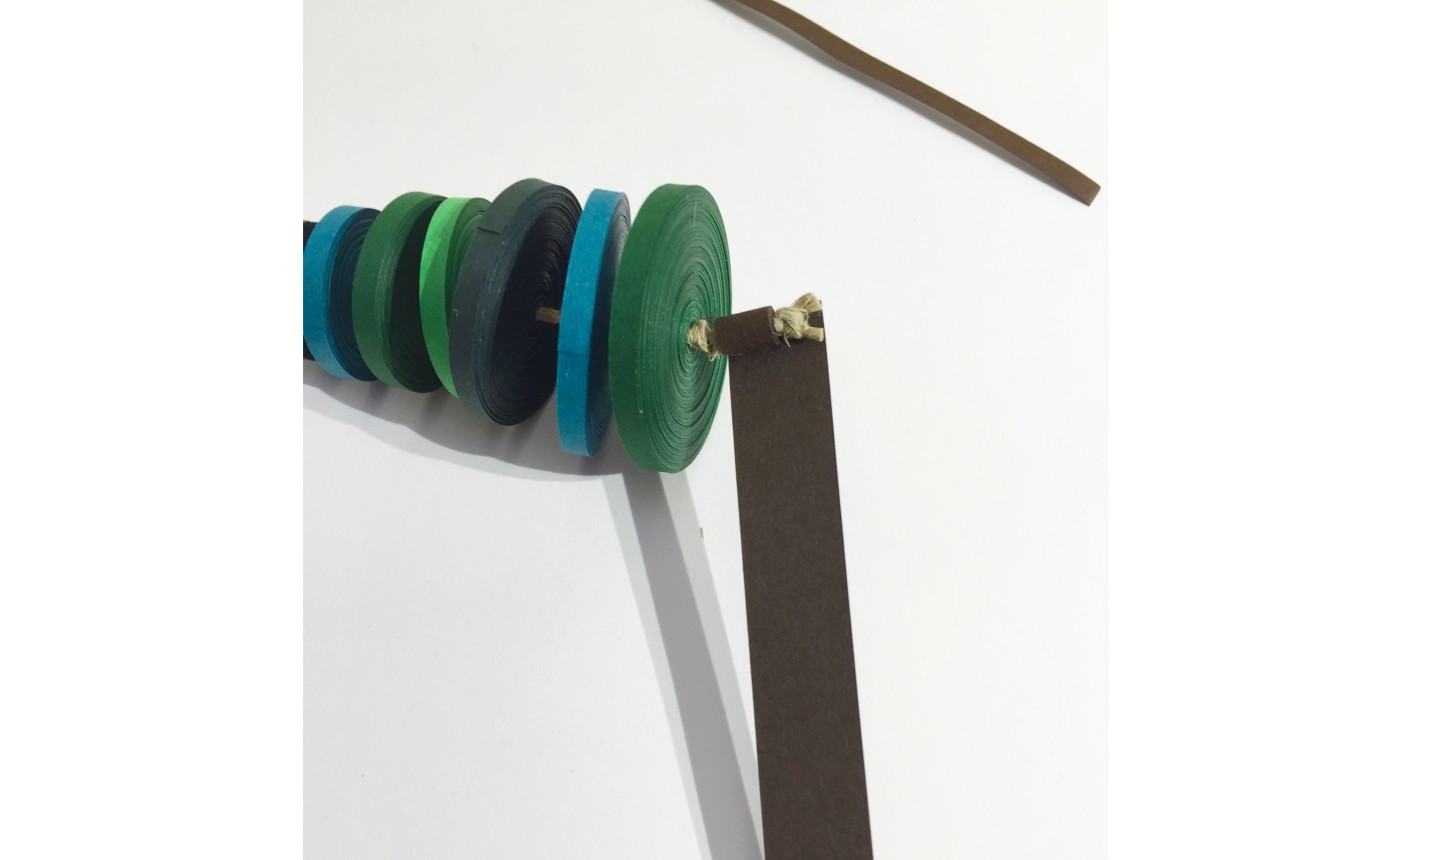
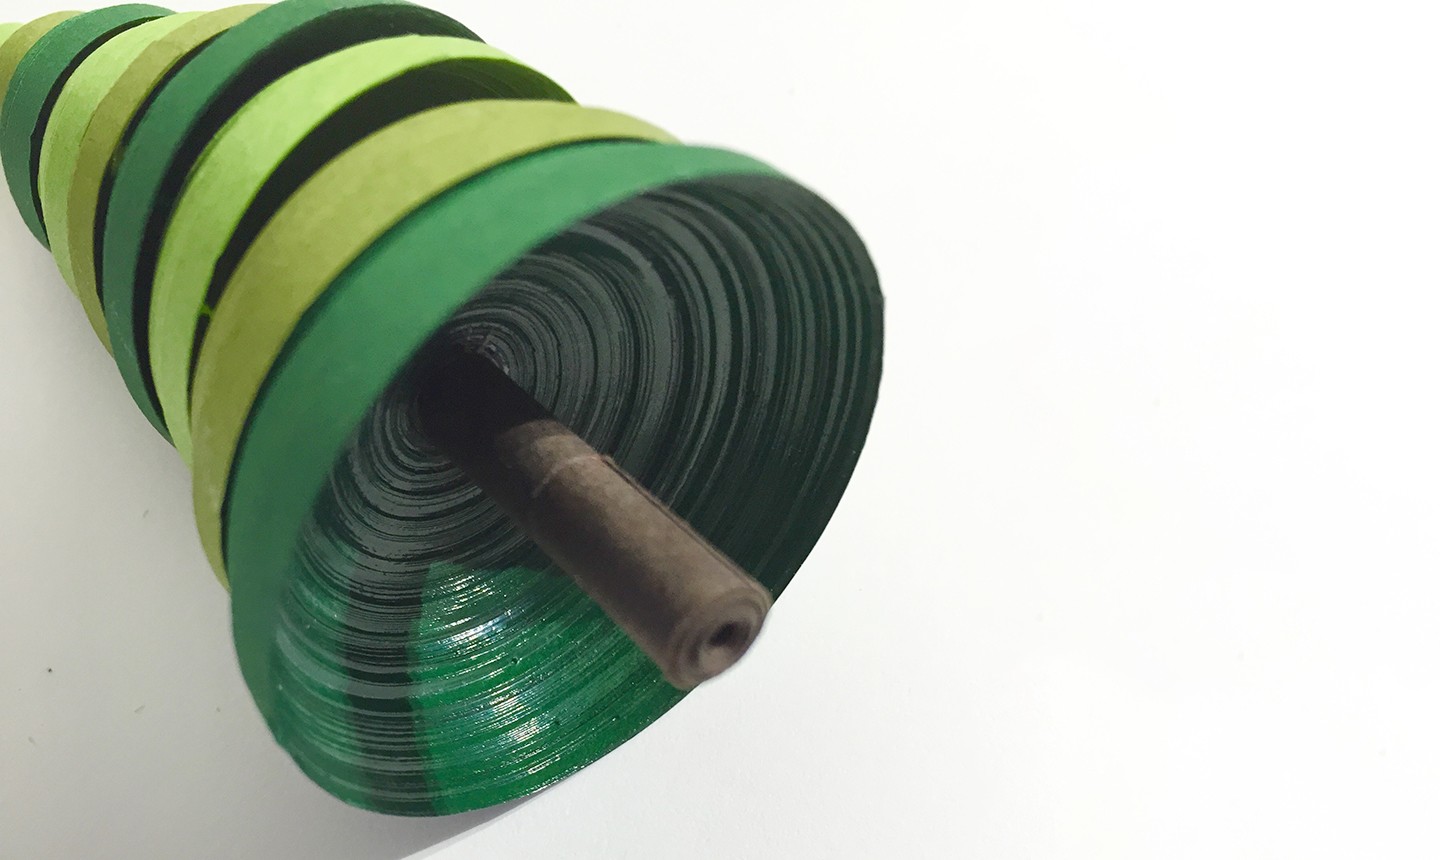
4. Make the Trunk

For the tree trunk, you need a quilling tool and a 4¼” brown strip in both ¼” and ½” widths. First roll the ¼” strip into a closed coil and glue to secure. Do not remove the piece from your tool.

With a small amount of glue, line up and attach the ½” strip. Let the glue dry, then roll the larger strip over the ¼” coil. Secure it with glue and remove the tool.

The trunk should have a hollow portion on one end. Fill this space with glue, then line the top with glue, too.

Place the hollow end of your trunk over the knot and hold in place until it’s secure.
The Staggered Tree
Level: Easy

What You Need
Instructions
1. Make the Coils
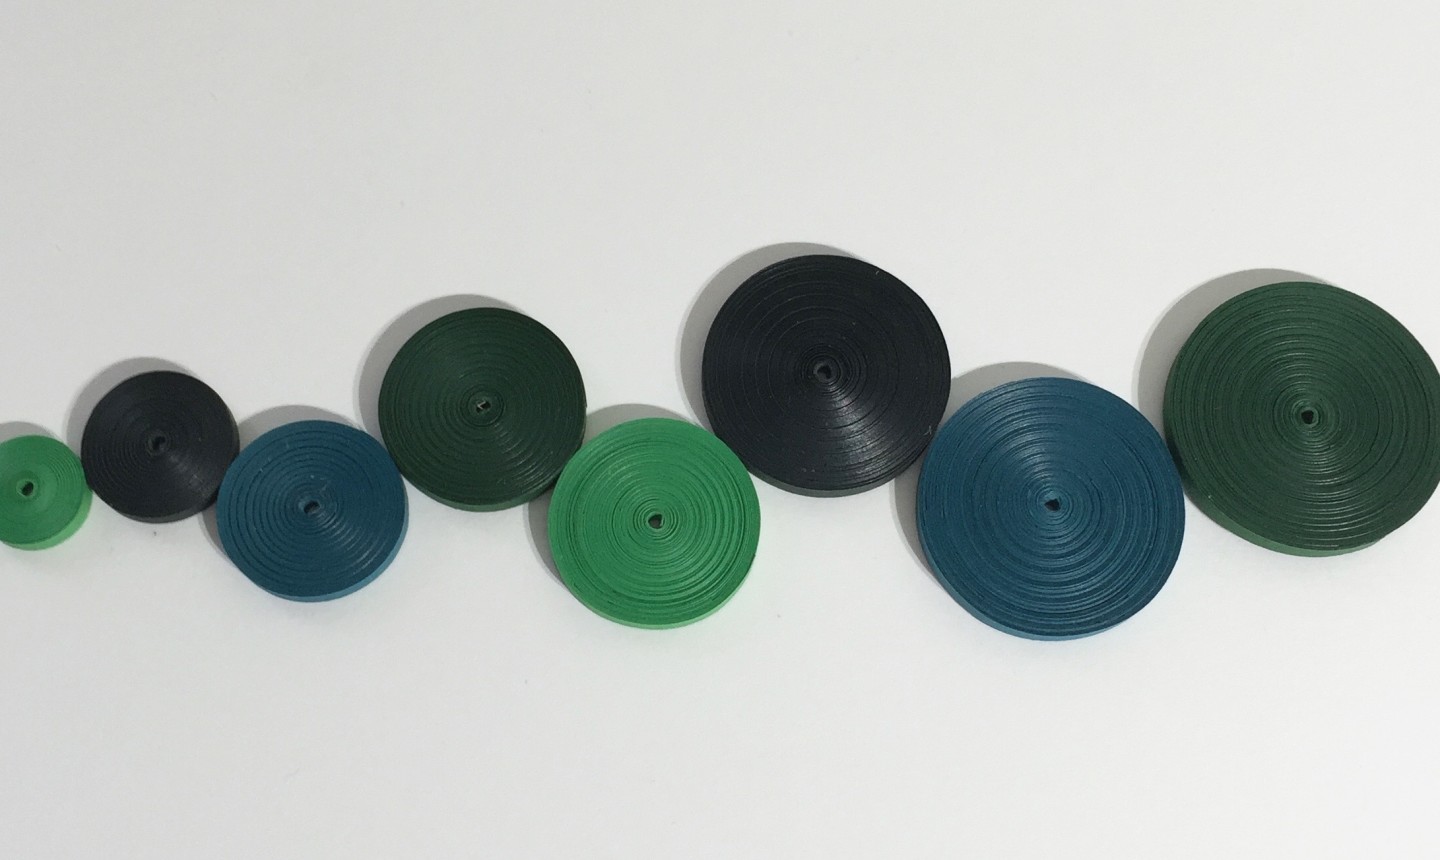
Make the coils in the same manner as above, by wrapping a strip around a bead tool and applying glue. Begin with one strip for the top tier and two for the second, then increase each additional coil by two strips. Pick a color pattern to repeat and make 8 or 9 coils total.
2. Make the Topper
Cut a 4¼” yellow strip with a ¼” width. Cut the strip in half diagonally. Insert the widest end into your bead tool and roll it toward the pointed side, securing it with glue and removing the tool.
3. String the Ornament

Using 18″ of twine, create a loop for hanging using an overhand knot and string on the tree topper. Once the topper is in place, secure another overhand knot directly beneath it.
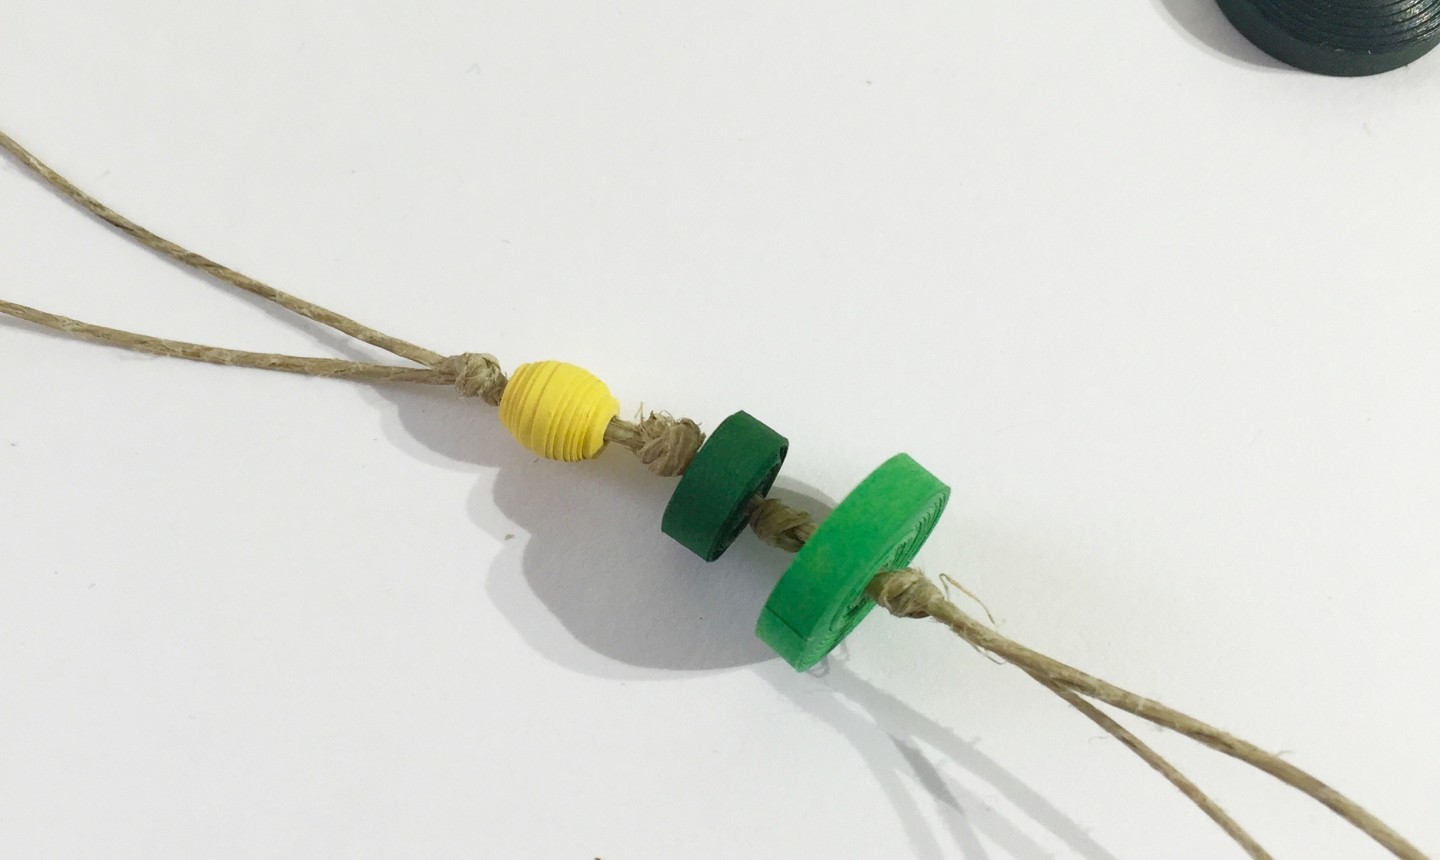
String your closed coils. Tie an overhand knot directly below each one.
4. Make the Trunk

For the tree trunk, you will need two ¼” width strips cut into 4¼” lengths and one ½” strip cut to 4¼”.
With your bead tool, roll up one of the ¼” strips into a closed coil and remove the tool. String the coil onto your ornament and make a knot securely beneath it. Cut the other ¼” strip in half lengthwise and set it aside.
Trim the excess twine below the knot. Place a small amount of glue on the strung coil and attach the ½” strip to it.
Roll the ½” strip around the coil and glue to secure once the end is reached.
With a quilling tool and one of the ¼” strips you cut, roll a closed coil.

Add glue to the hollow part of the trunk and insert the closed coil to complete it.
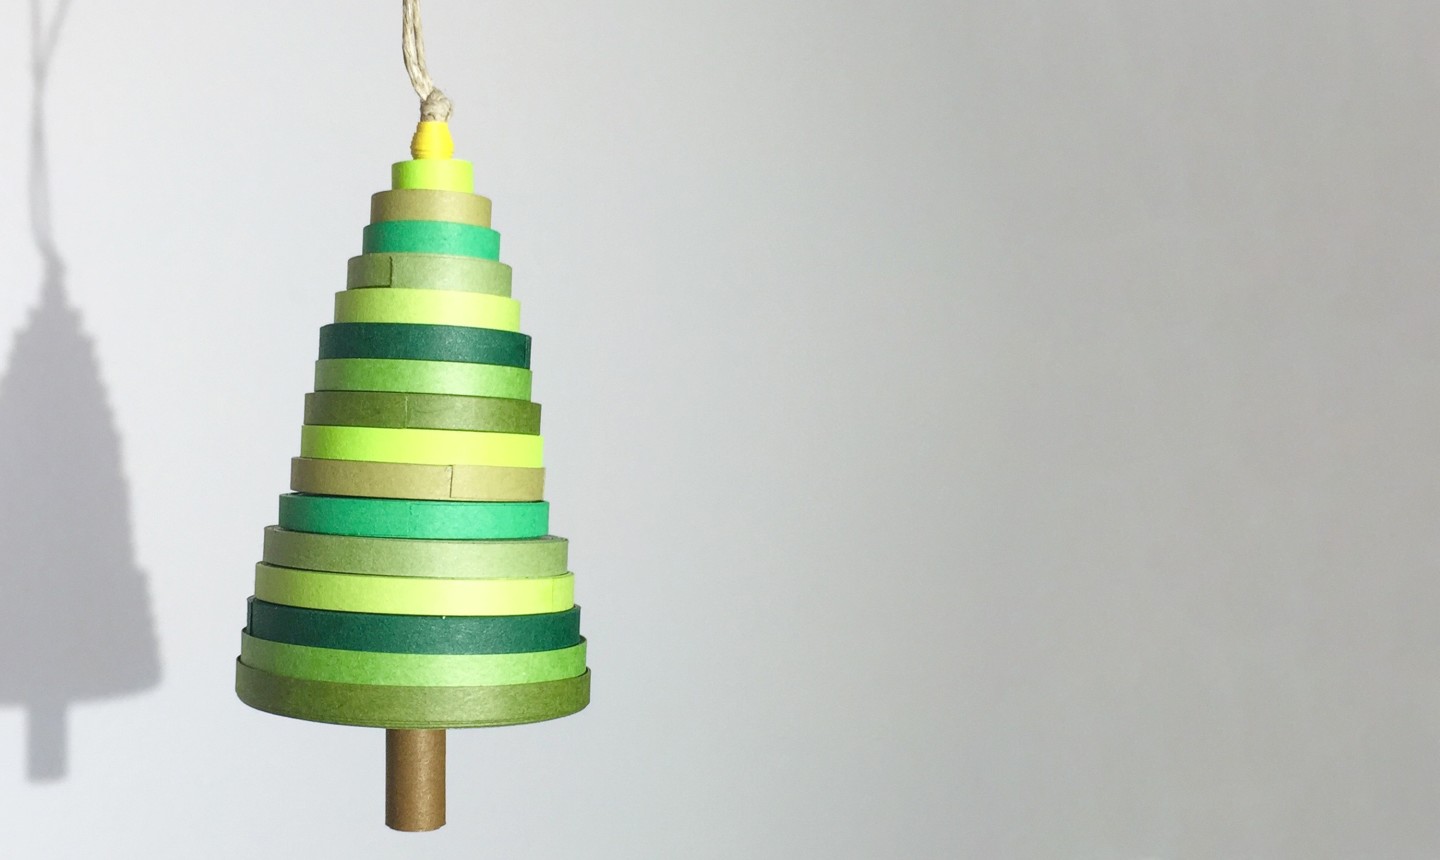
The Rounded Tree
Level: Easy

What You Need
Instructions
1. Make the Coils

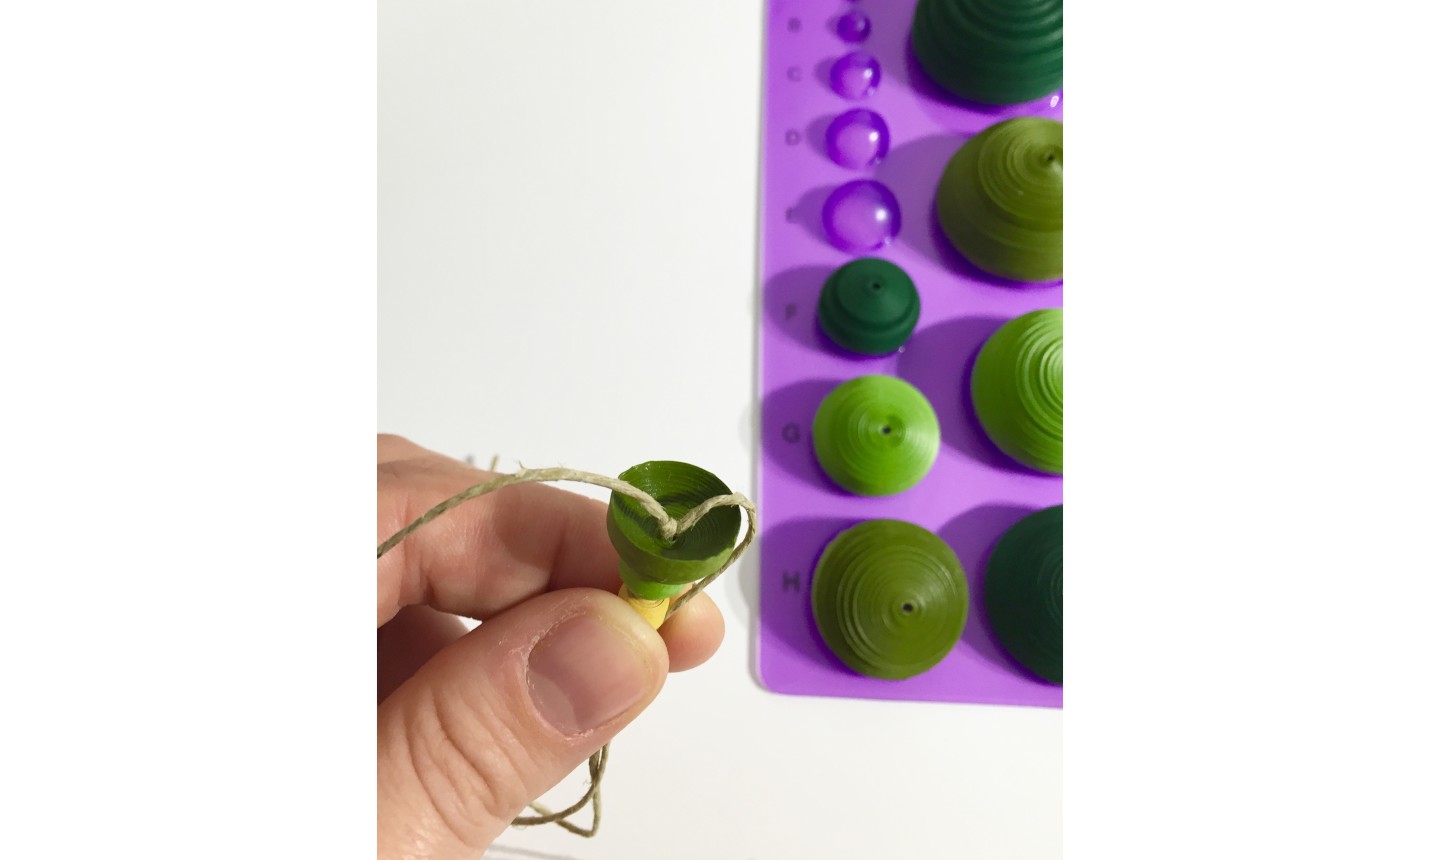
This last ornament is made with three shades of green repeated three times (nine coils total). The first coil is made with one strip, the second with three, and each additional coil is added on by three strips (6, 9, 12, etc.)
After you shape the coils — but before you secure them with glue — place each on a quilling mold and shape them into domes.

Once molded, paint the glue inside the dome. This will keep the shape and strengthen the coils. Allow them to dry completely before stringing the tree.
2. Make the Tree Topper
Cut a 4¼” yellow strip with a ¼” width. Cut the strip in half diagonally. Insert the widest end into your bead tool and roll it toward the pointed side, securing it with glue and removing the tool.
3. String the Coils
Fold an 18″ length of twine in half and make an overhand knot. String on your tree topper and the smallest coil.
Tie a small knot on the bottom of each dome before stringing on the next coil. Once you’ve added your largest dome and secured it in place with a knot, trim the excess twine with scissors.
4. Make the Trunk
For the tree trunk, you need a quilling tool and a 4¼” brown strip in both ¼” and ½” widths.
Roll the ¼” strip into a closed coil and glue to secure. Do not remove the piece from your tool. With a small amount of glue, line up and attach the ½” strip. Let the glue dry and roll the larger strip over the ¼” coil. Secure it with glue and remove the tool. Attach the trunk over your bottom knot.
Once in place, use your quilling tool to make a second closed coil from a 8½” strip of ½” brown paper. Glue this second coil directly to the bottom of the trunk.
Now your quilled Christmas tree ornaments are ready to display!
Fun and cleaver idea. Thanks for sharing.