
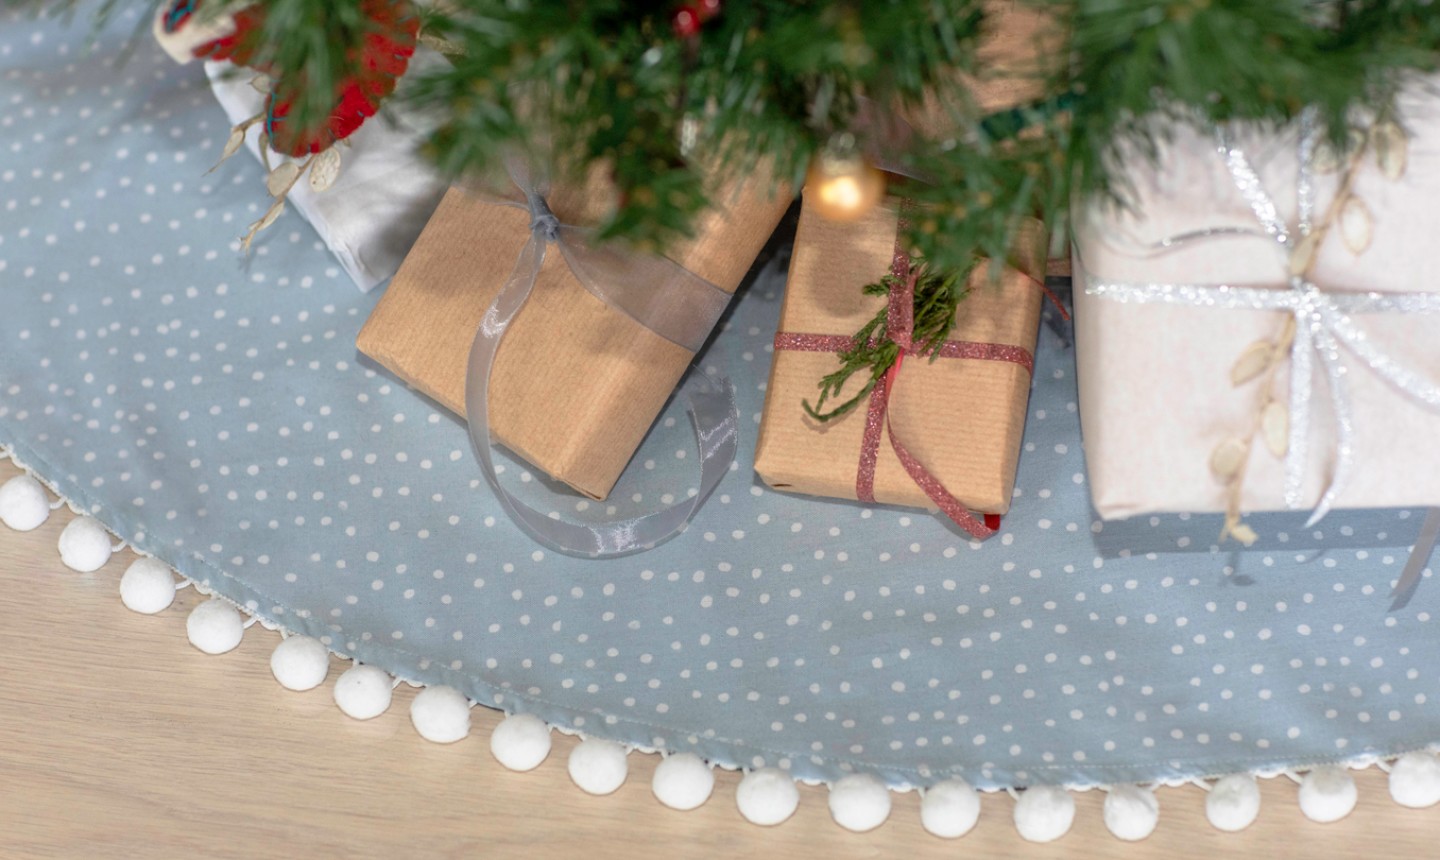
We love a good pom-pom fringe, especially when it’s peeking out from under your holiday gifts. We’ve got all the info you need to craft up this easy tree skirt right here!
DIY Tree Skirt
Level: Easy
What You Need
Instructions
1. Determine Size and Cut the Circle

The size of your tree skirt is totally up to you — it can even be as wide as the width of your fabric. My fabrics were 44″ wide, and I planned a finished diameter of 42″.
Fold the fabric selvedge edges together (as it comes off the bolt). You can cut the two skirt layers at once if you fold both fabrics and overlay one on top of the other, carefully lining up the folded edges. Or you can cut out one circle, place that on top of the lining fabric and use that as a guide to cut the second circle.
To measure and cut your fabric: lay your tape measure along the folded edge. Put three pins in place — one at the beginning of your tape measure, one at the end of your distance (so, if you’re like me and cutting a skirt with a 42″ diameter, pin at 42″) and one in the middle.
Place the tape measure at the center pin and pivot it, measuring out an an equal distance (again, 42″ for me) from the center pin and mark with a pen. Continue pivoting your tape measure and marking your distance until you’ve formed a circle. Follow these marks to make your cut.
2. Cut Out the Center Opening
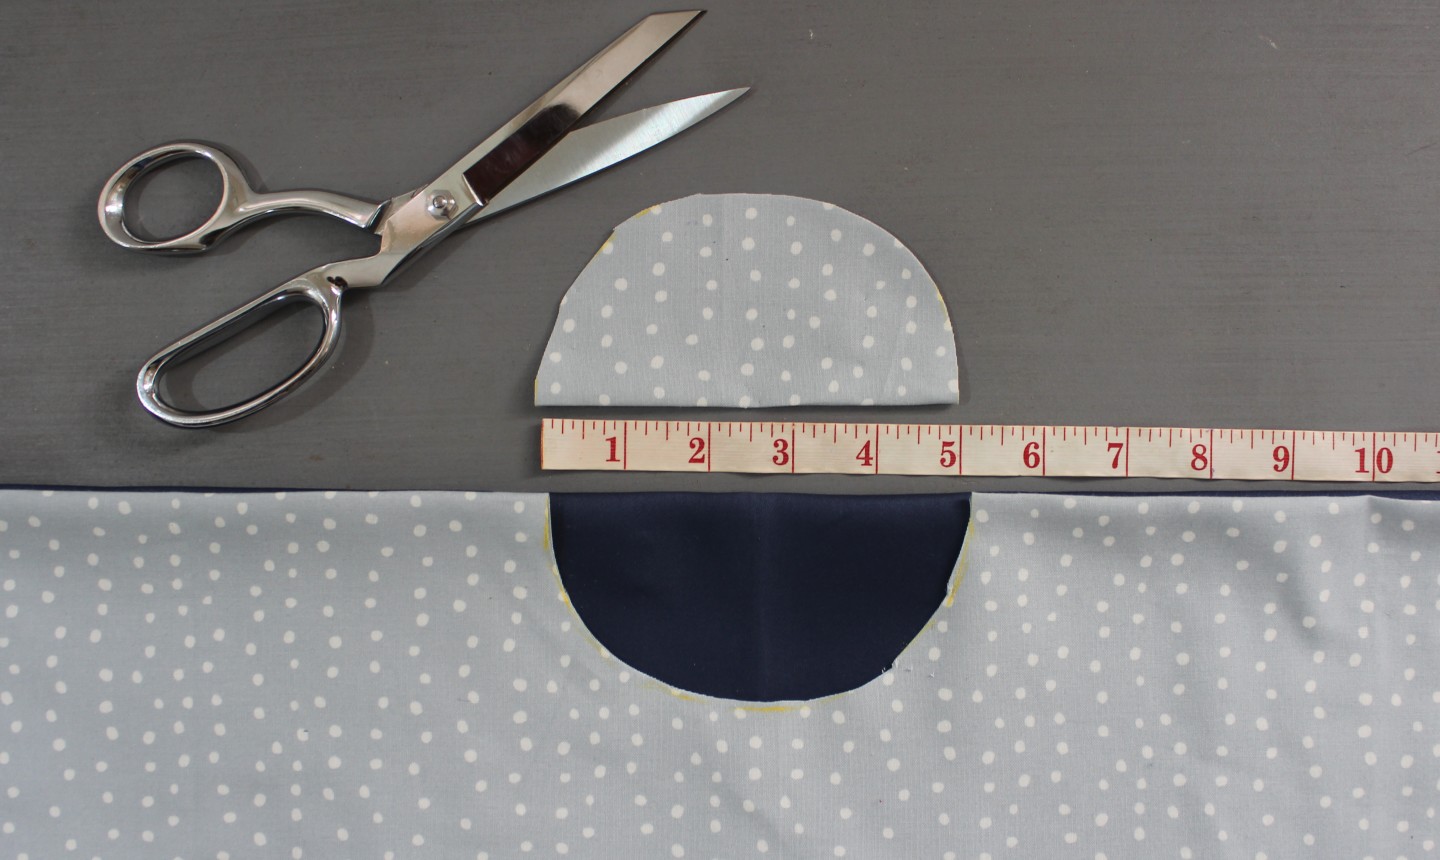
Next, cut out the center opening that will go around the tree trunk. By keeping the two folded edges aligned and the edges of the circles even, you can easily cut the center circle out of both fabrics at the same time.
Mark and cut a small circle using the same center pivot method as in the previous step. You want the tree skirt to cover the stand, so the opening circle doesn’t need to be too big — making the diameter about 5″ will work well (unless your Christmas tree is absolutely enormous).
3. Open the Circle
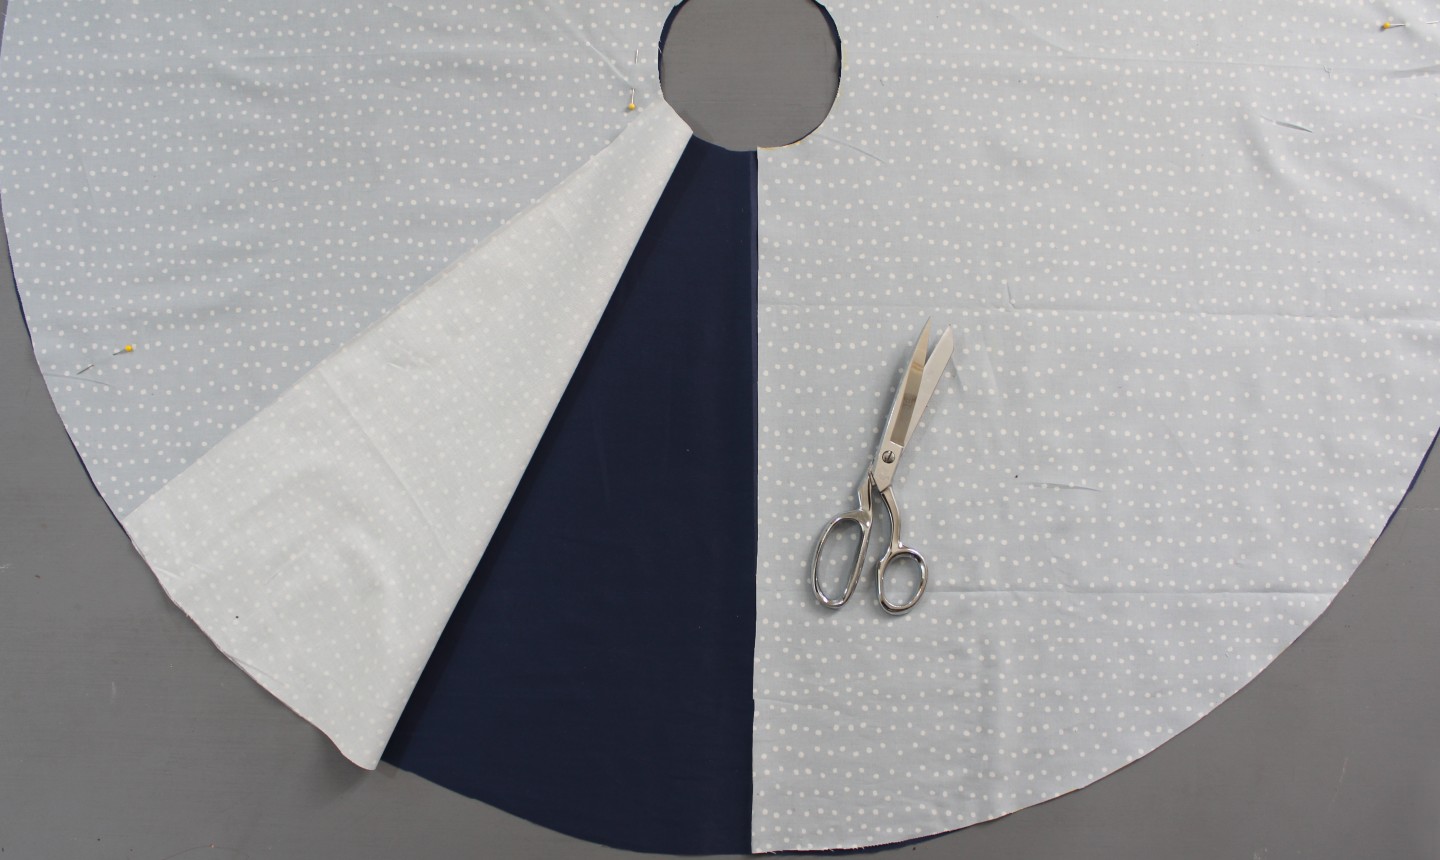
In order to wrap your skirt around the tree’s base, you need to have an opening. To make one, unfold the circles and keep them aligned exactly one over the other. Cut a straight line from the outer edge to the inner circle, cutting through both layers of fabric to open them up.
4. Add Some Ties
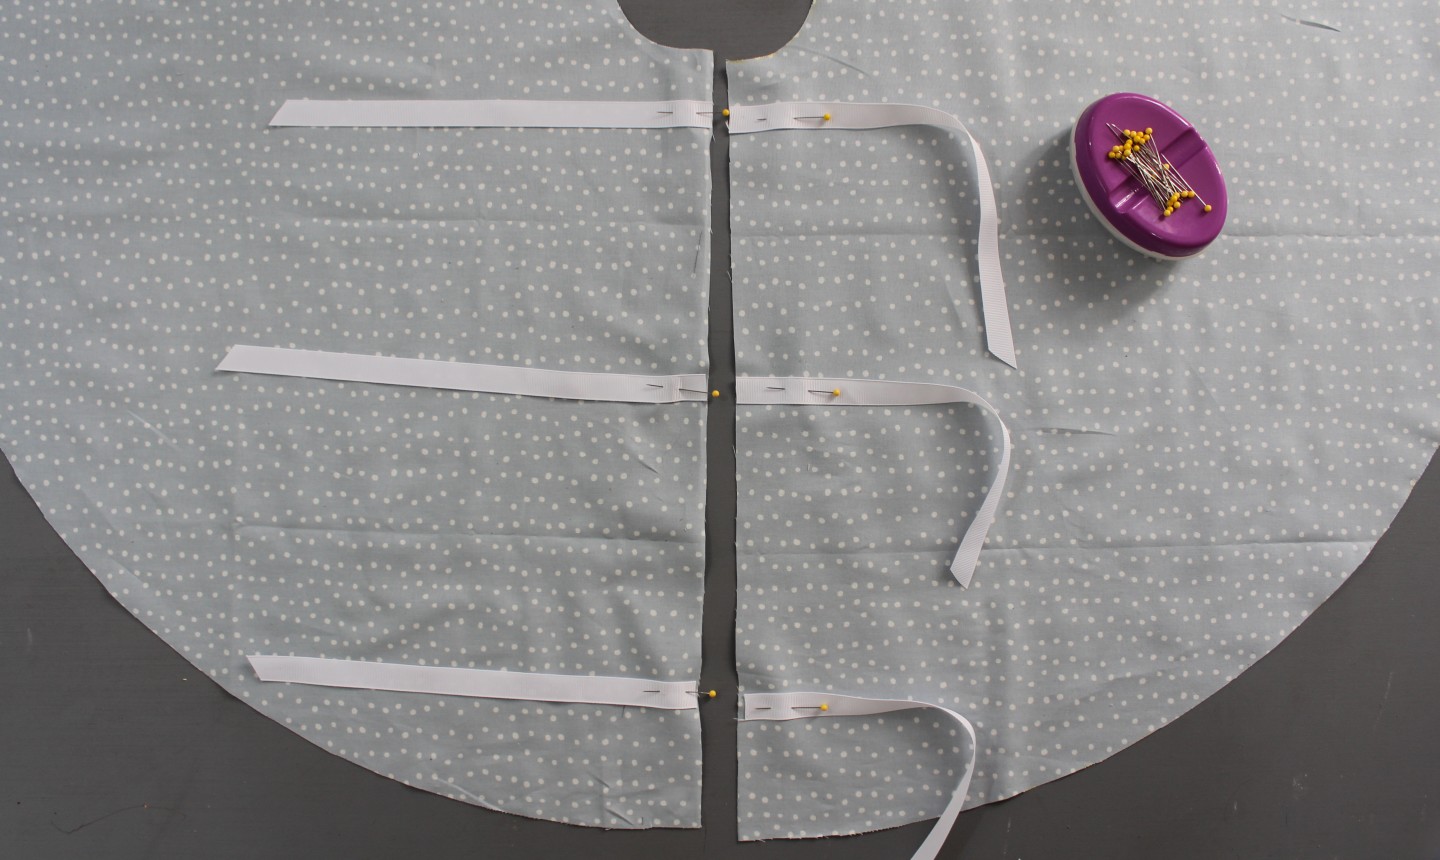
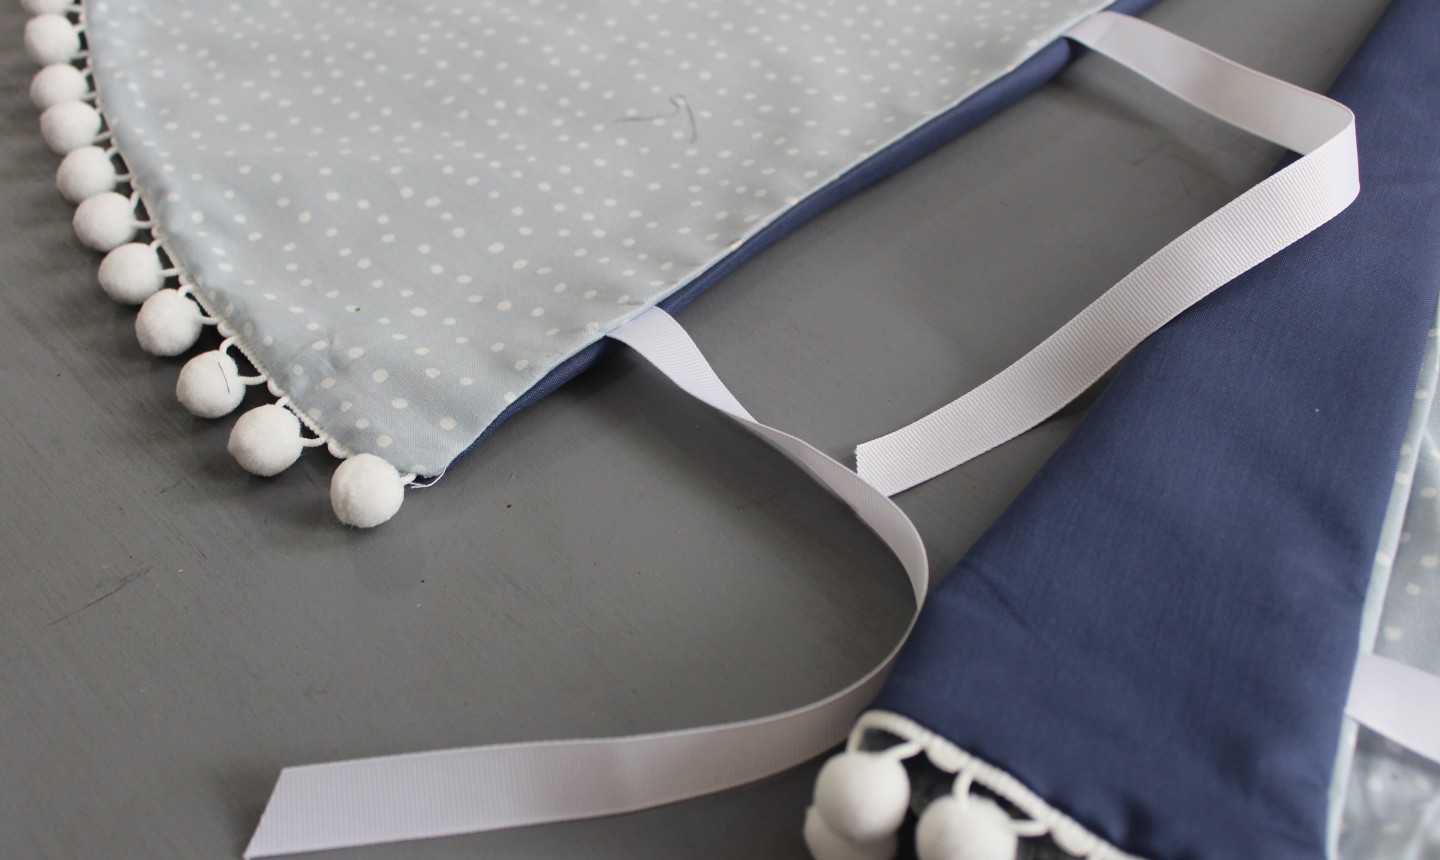
You can use ribbon, fabric, bias tape or anything similar for your skirt ties. For this skirt, I chose to use simple white ribbon. Just pin your closures at various points on either side of the opening so they can be tied in a cute bow once placed around the tree. But don’t sew them in place just yet — that comes in the next step.
5. Sew the Circles Together
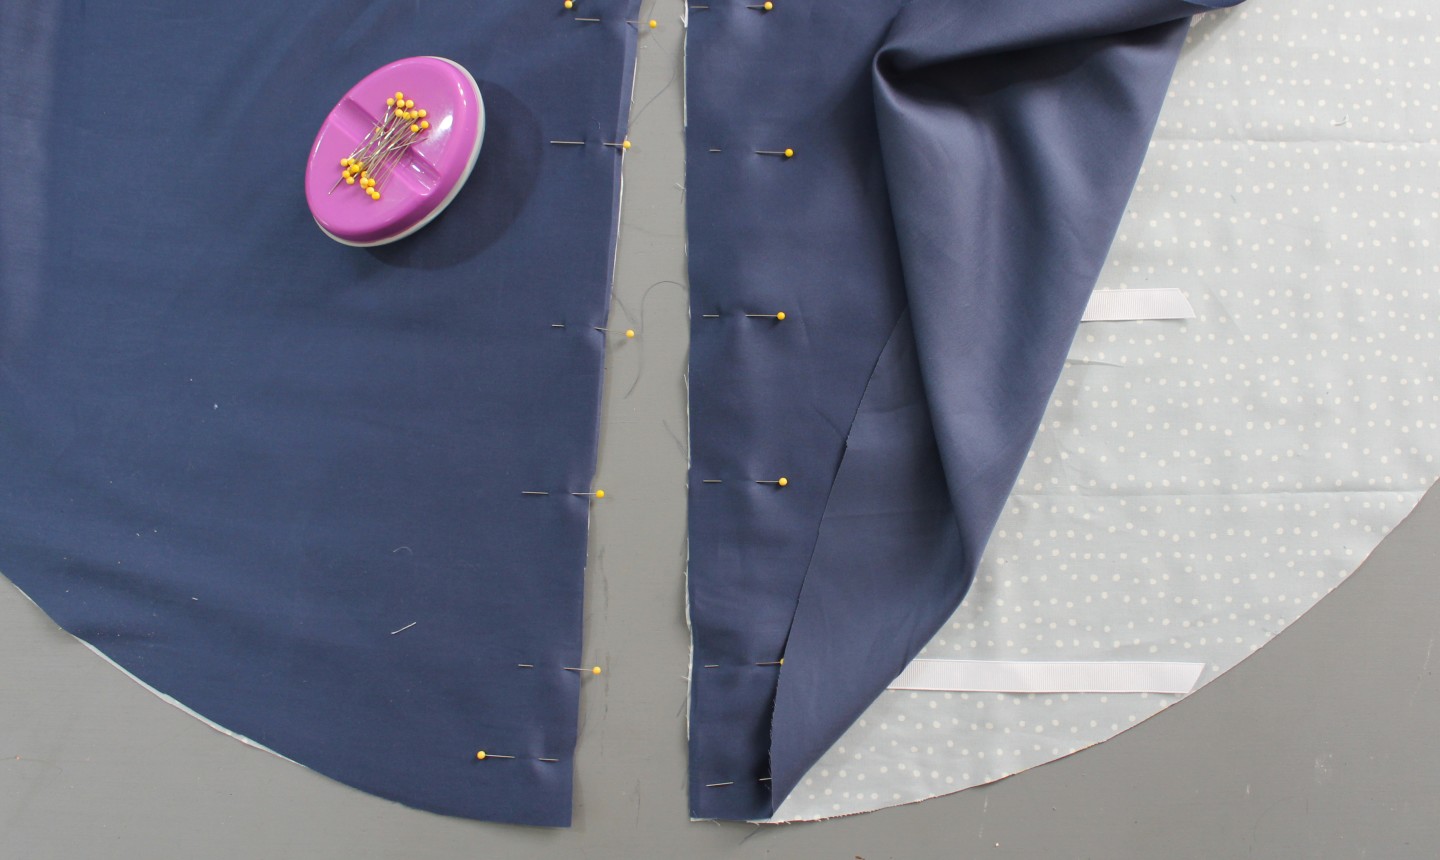
Once again, adjust your two circles so one is aligned on top of the other, making sure the right sides are together. Your ties should be on the inside. Pin the circles in place on either side of the opening.
Now it’s time to get stitching. Begin stitching 1/2″ up from the edge of the outer circle. Sew along one side of the the straight opening, pivot at the corner, continue around the center circle and then down the other straight opening. Again, leave a 1/2″ opening at the outer edge. This space will allow you to place your pom-pom trim.
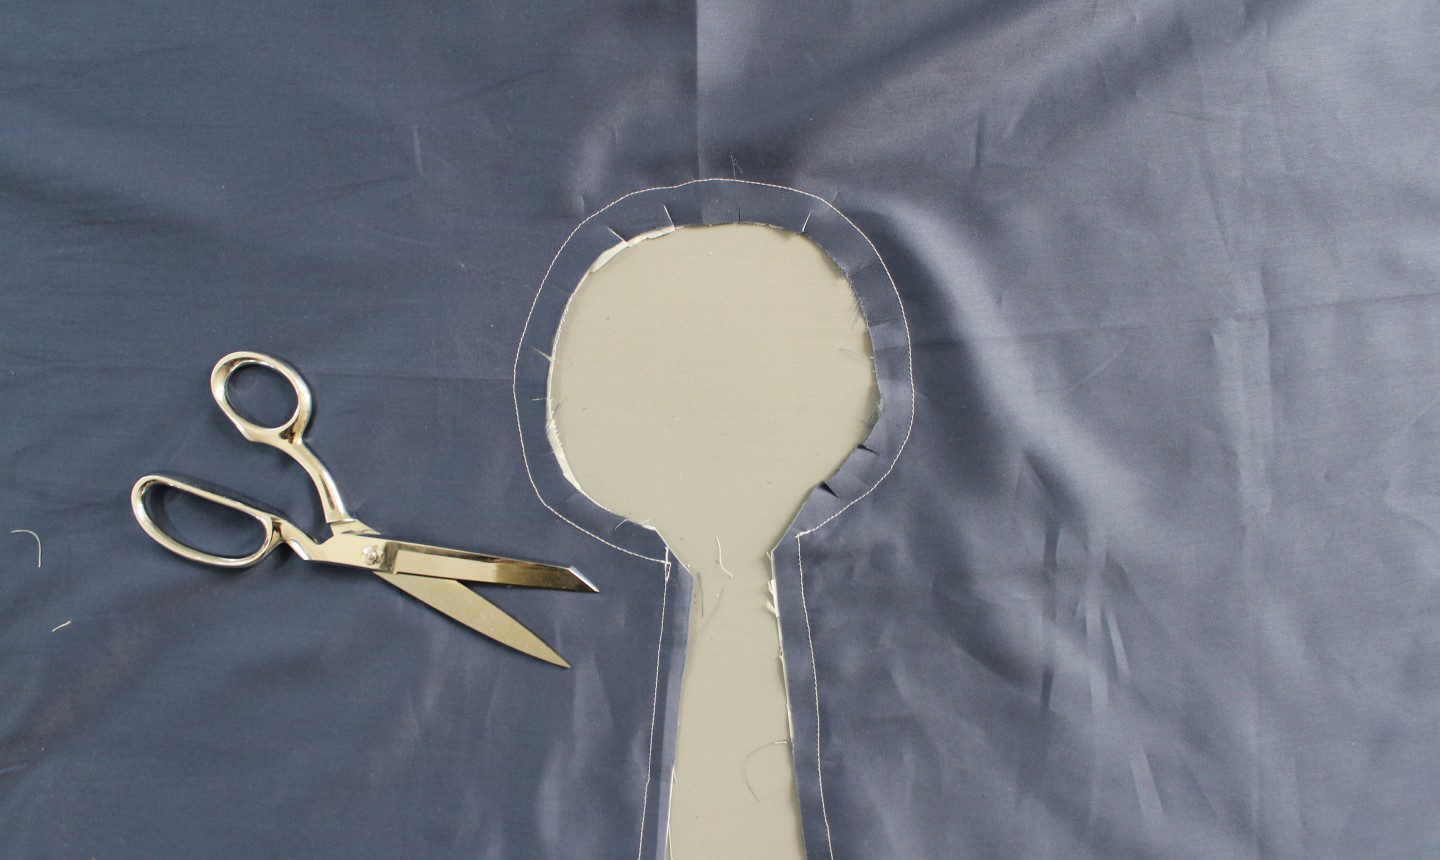
Now trim the corners and clip the circular opening so it can open up and lay flat when it’s turned right side out.
6. Add Pom-Poms
Working around the outer edge of the skirt, carefully pin your pom-pom fringe to the top side fabric with the pom-poms facing in. (They’ll end up facing outward when you turn your piece right side out.) Baste them in place along the fabric’s edge, taking care not to stretch or distort your fabric.
7. Seam It Up
Sew around the outer edge to complete your skirt. Leave an opening of about 5″, and use this to turn the piece right side out. Top stitch to seal your opening, press, and you’re done!
Photos by Marni Weaver.
Share tips, start a discussion or ask one of our experts or other students a question.
Already a member? Sign in
No Responses to “Forget Store-Bought Tree Skirts — DIY This Cute Version Instead”