
What if you could take the best parts of knitting and combine them with the best parts of crochet? It might sound like a dream, but this technique already exists. Often called afghan crochet, Tunisian crochet is the gorgeous craft that’s been here all along.
What you need to know to get started with Tunisian crochet
One of the biggest hurdles I find with students learning how to Tunisian crochet is grasping how this technique works. Like most yarn arts, it has a beginning, a middle, and an end.
- Begin by making a traditional crochet chain.
- Then pull up loops onto your crochet hook along that chain as part of the forward pass.
- Next, drop those loops from your hook as part of the return pass.
- Repeat the forward and return passes as desired and end by binding off, which will feel much like traditional crochet slip stitches or single crochet stitches.
This might sound like gibberish now, but it will be helpful when learning advanced techniques or trying to fix mistakes down the line.
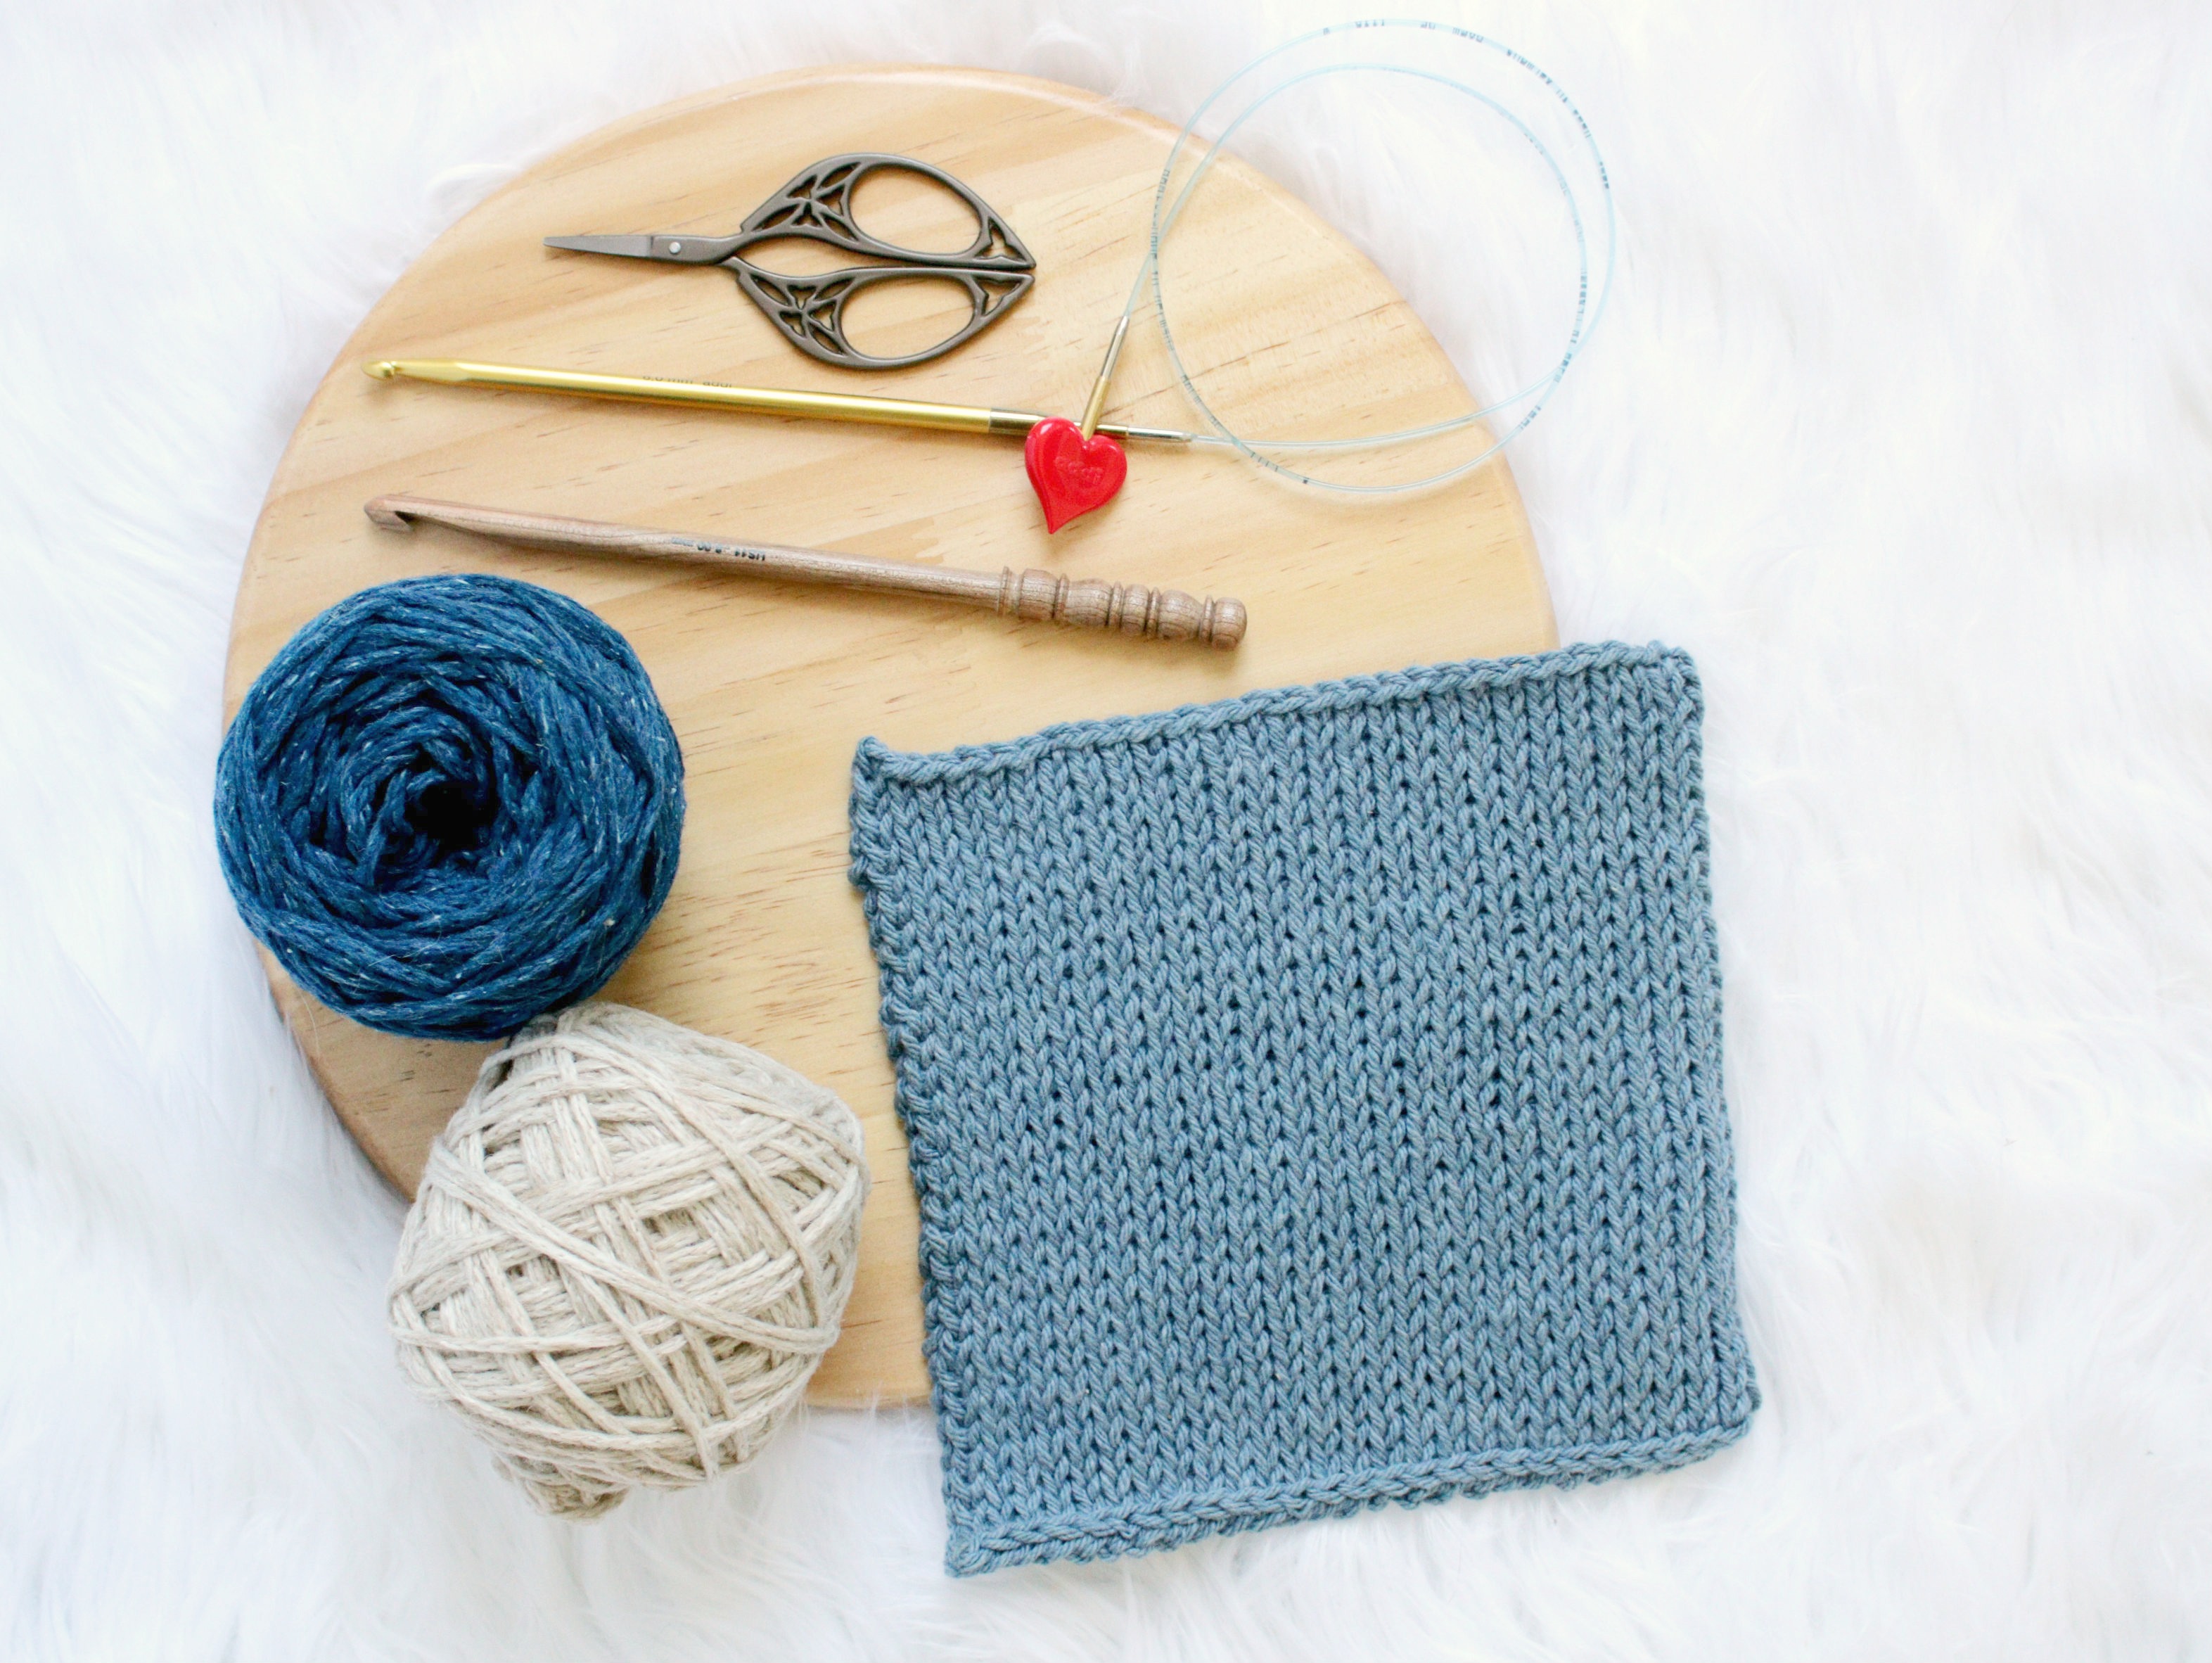
Tools of the trade
Another way that Tunisian crochet differs from traditional crochet is in the tools used. Since loops are worked onto and off of the hook, the length of a hook can limit how wide the resulting piece will be.
Smaller projects like my Simple Tunisian Ear Warmer are a perfect place to start before investing in specialty hooks and hook sets. When the time comes to grow that crochet hook stash (and it will), the possibilities of creating and designing with Tunisian crochet become endless.
Choosing the right hooks is a mix of preference and priorities.
Wood hooks offer style and tension while metal hooks bring speed to the table. For the sake of research (and to feed my obsession), I have tried just about every type of crochet hook currently available in the American market. Here are some of my favorites:
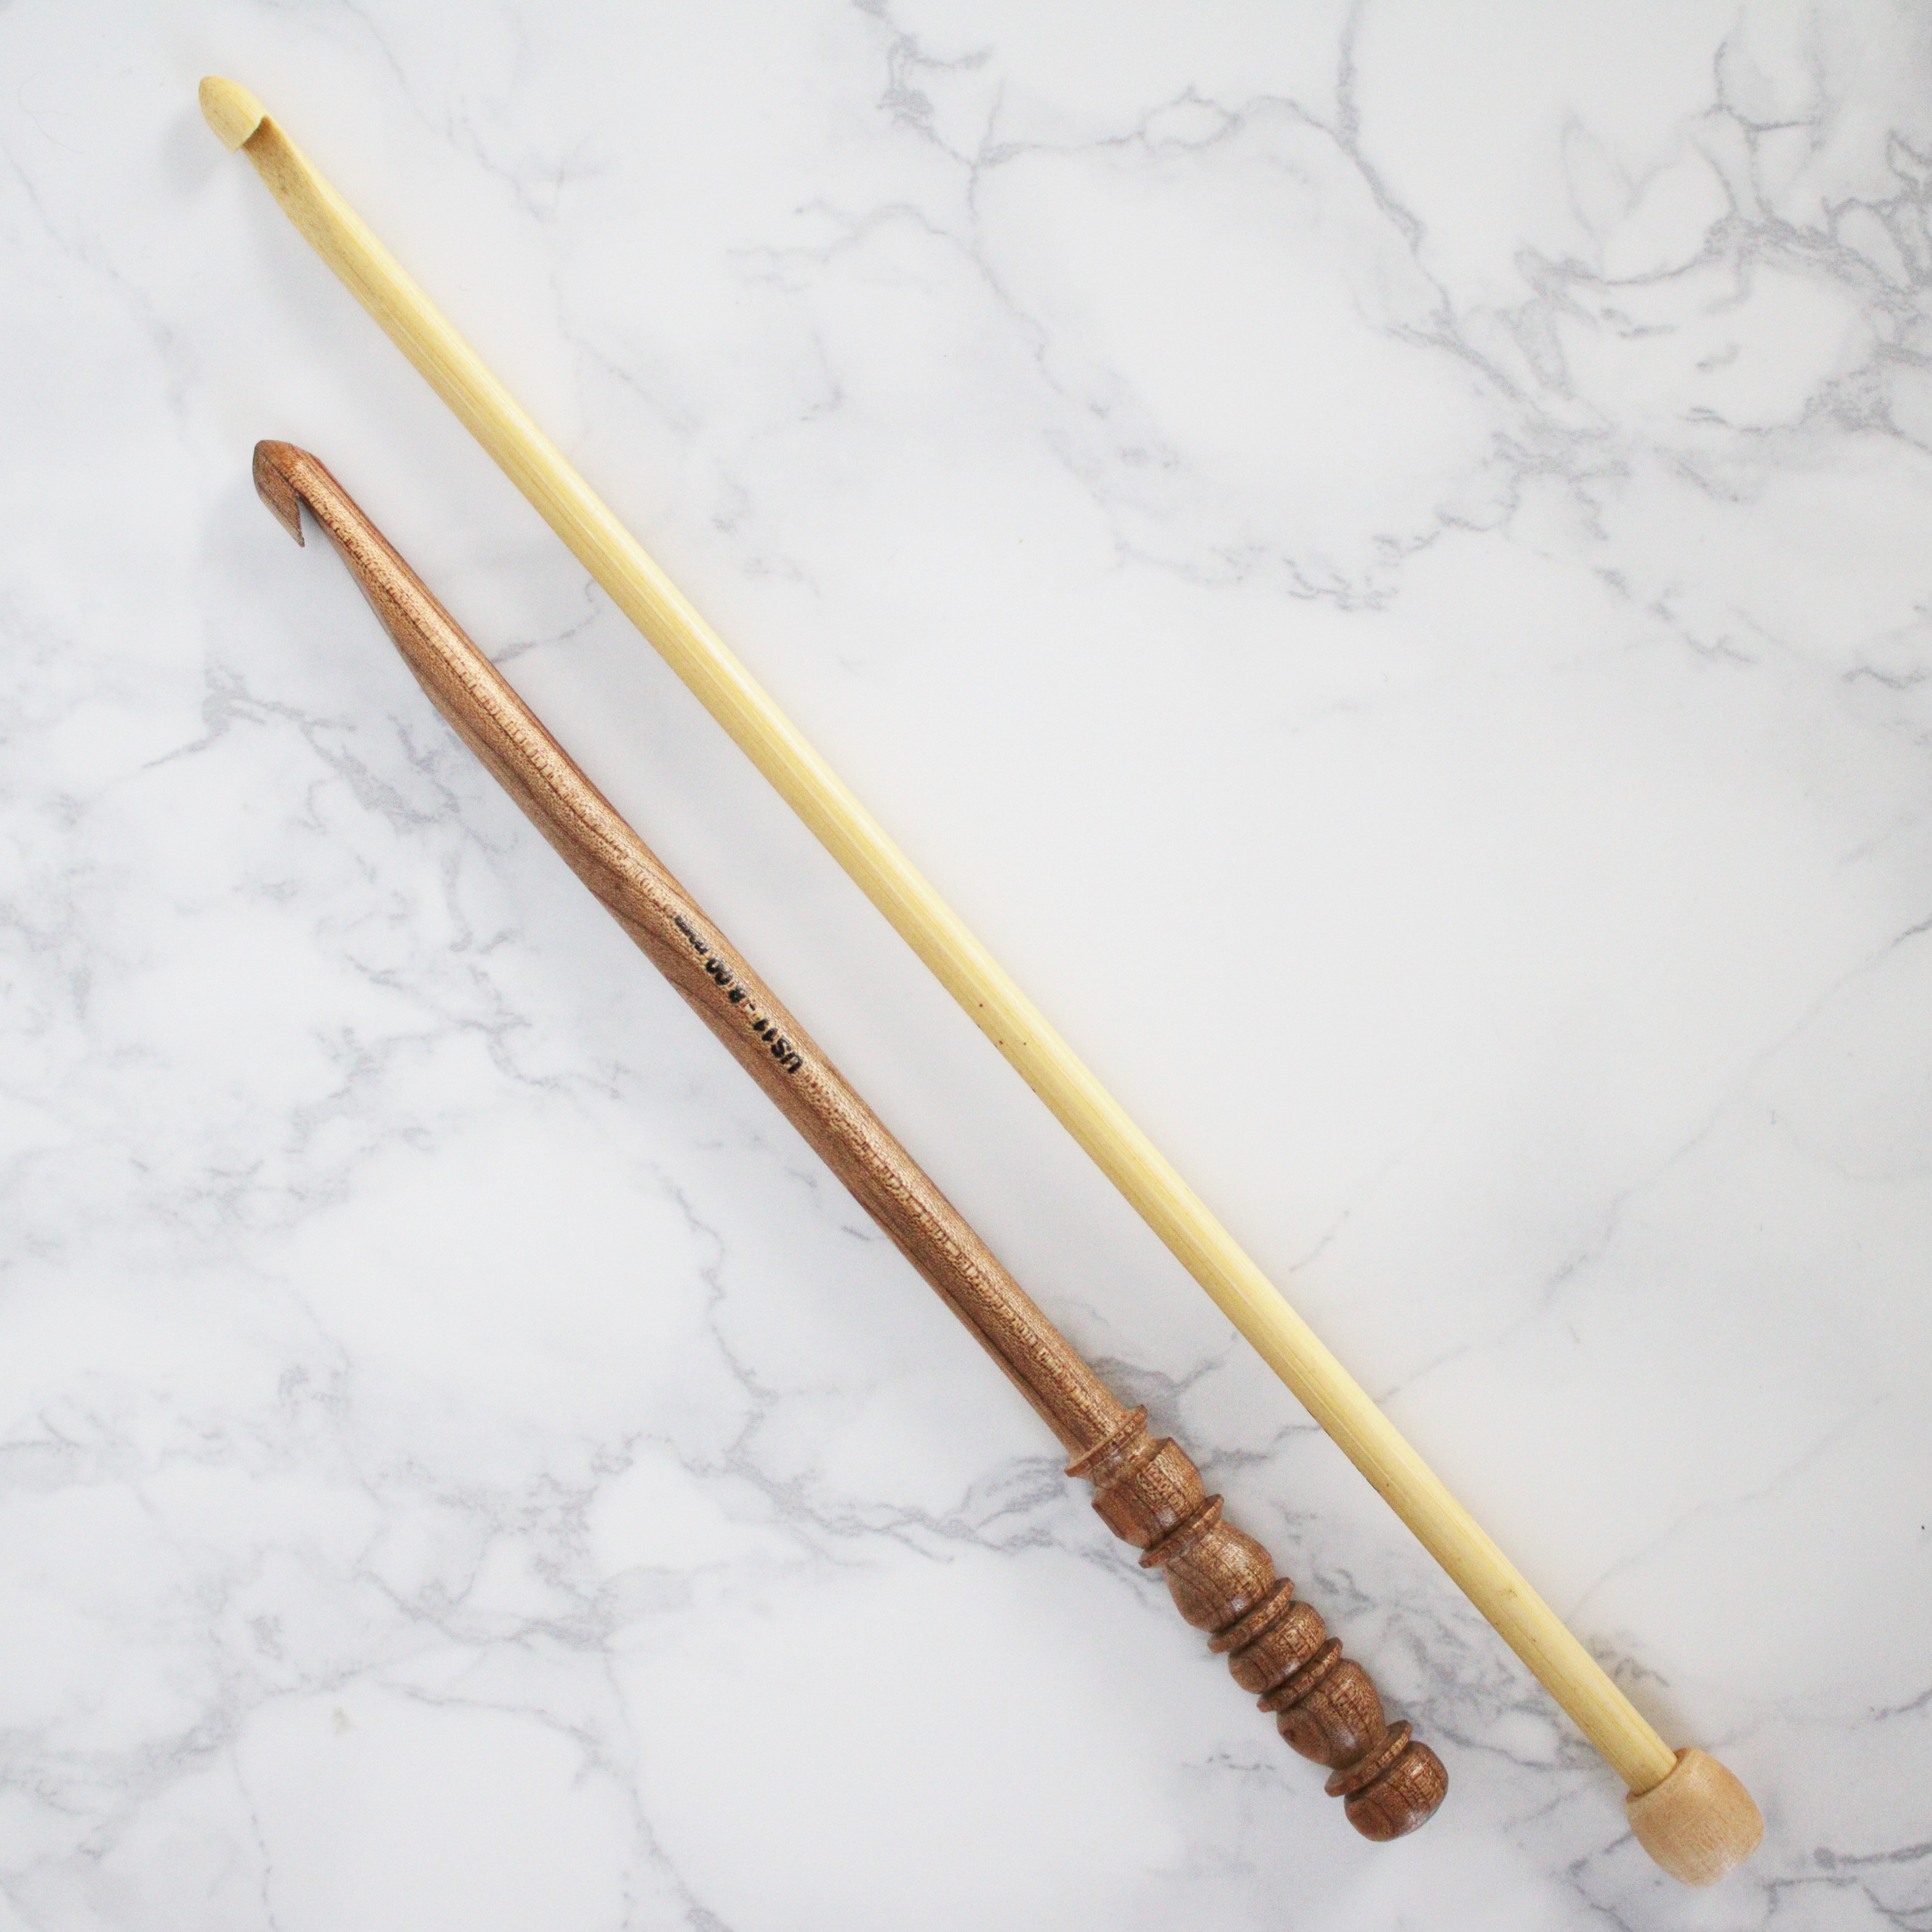
These Surina Wood 10″ crochet hooks were the first Tunisian crochet hooks I purchased many years ago. They came as a set and I have not been able to find them online or in retail since.
An inexpensive and easy to use option are the no-frills bamboo afghan hooks. These come up pretty quickly with a generic Tunisian crochet hook search on Amazon. Though they tend to warp they do make the perfect beginner’s set.
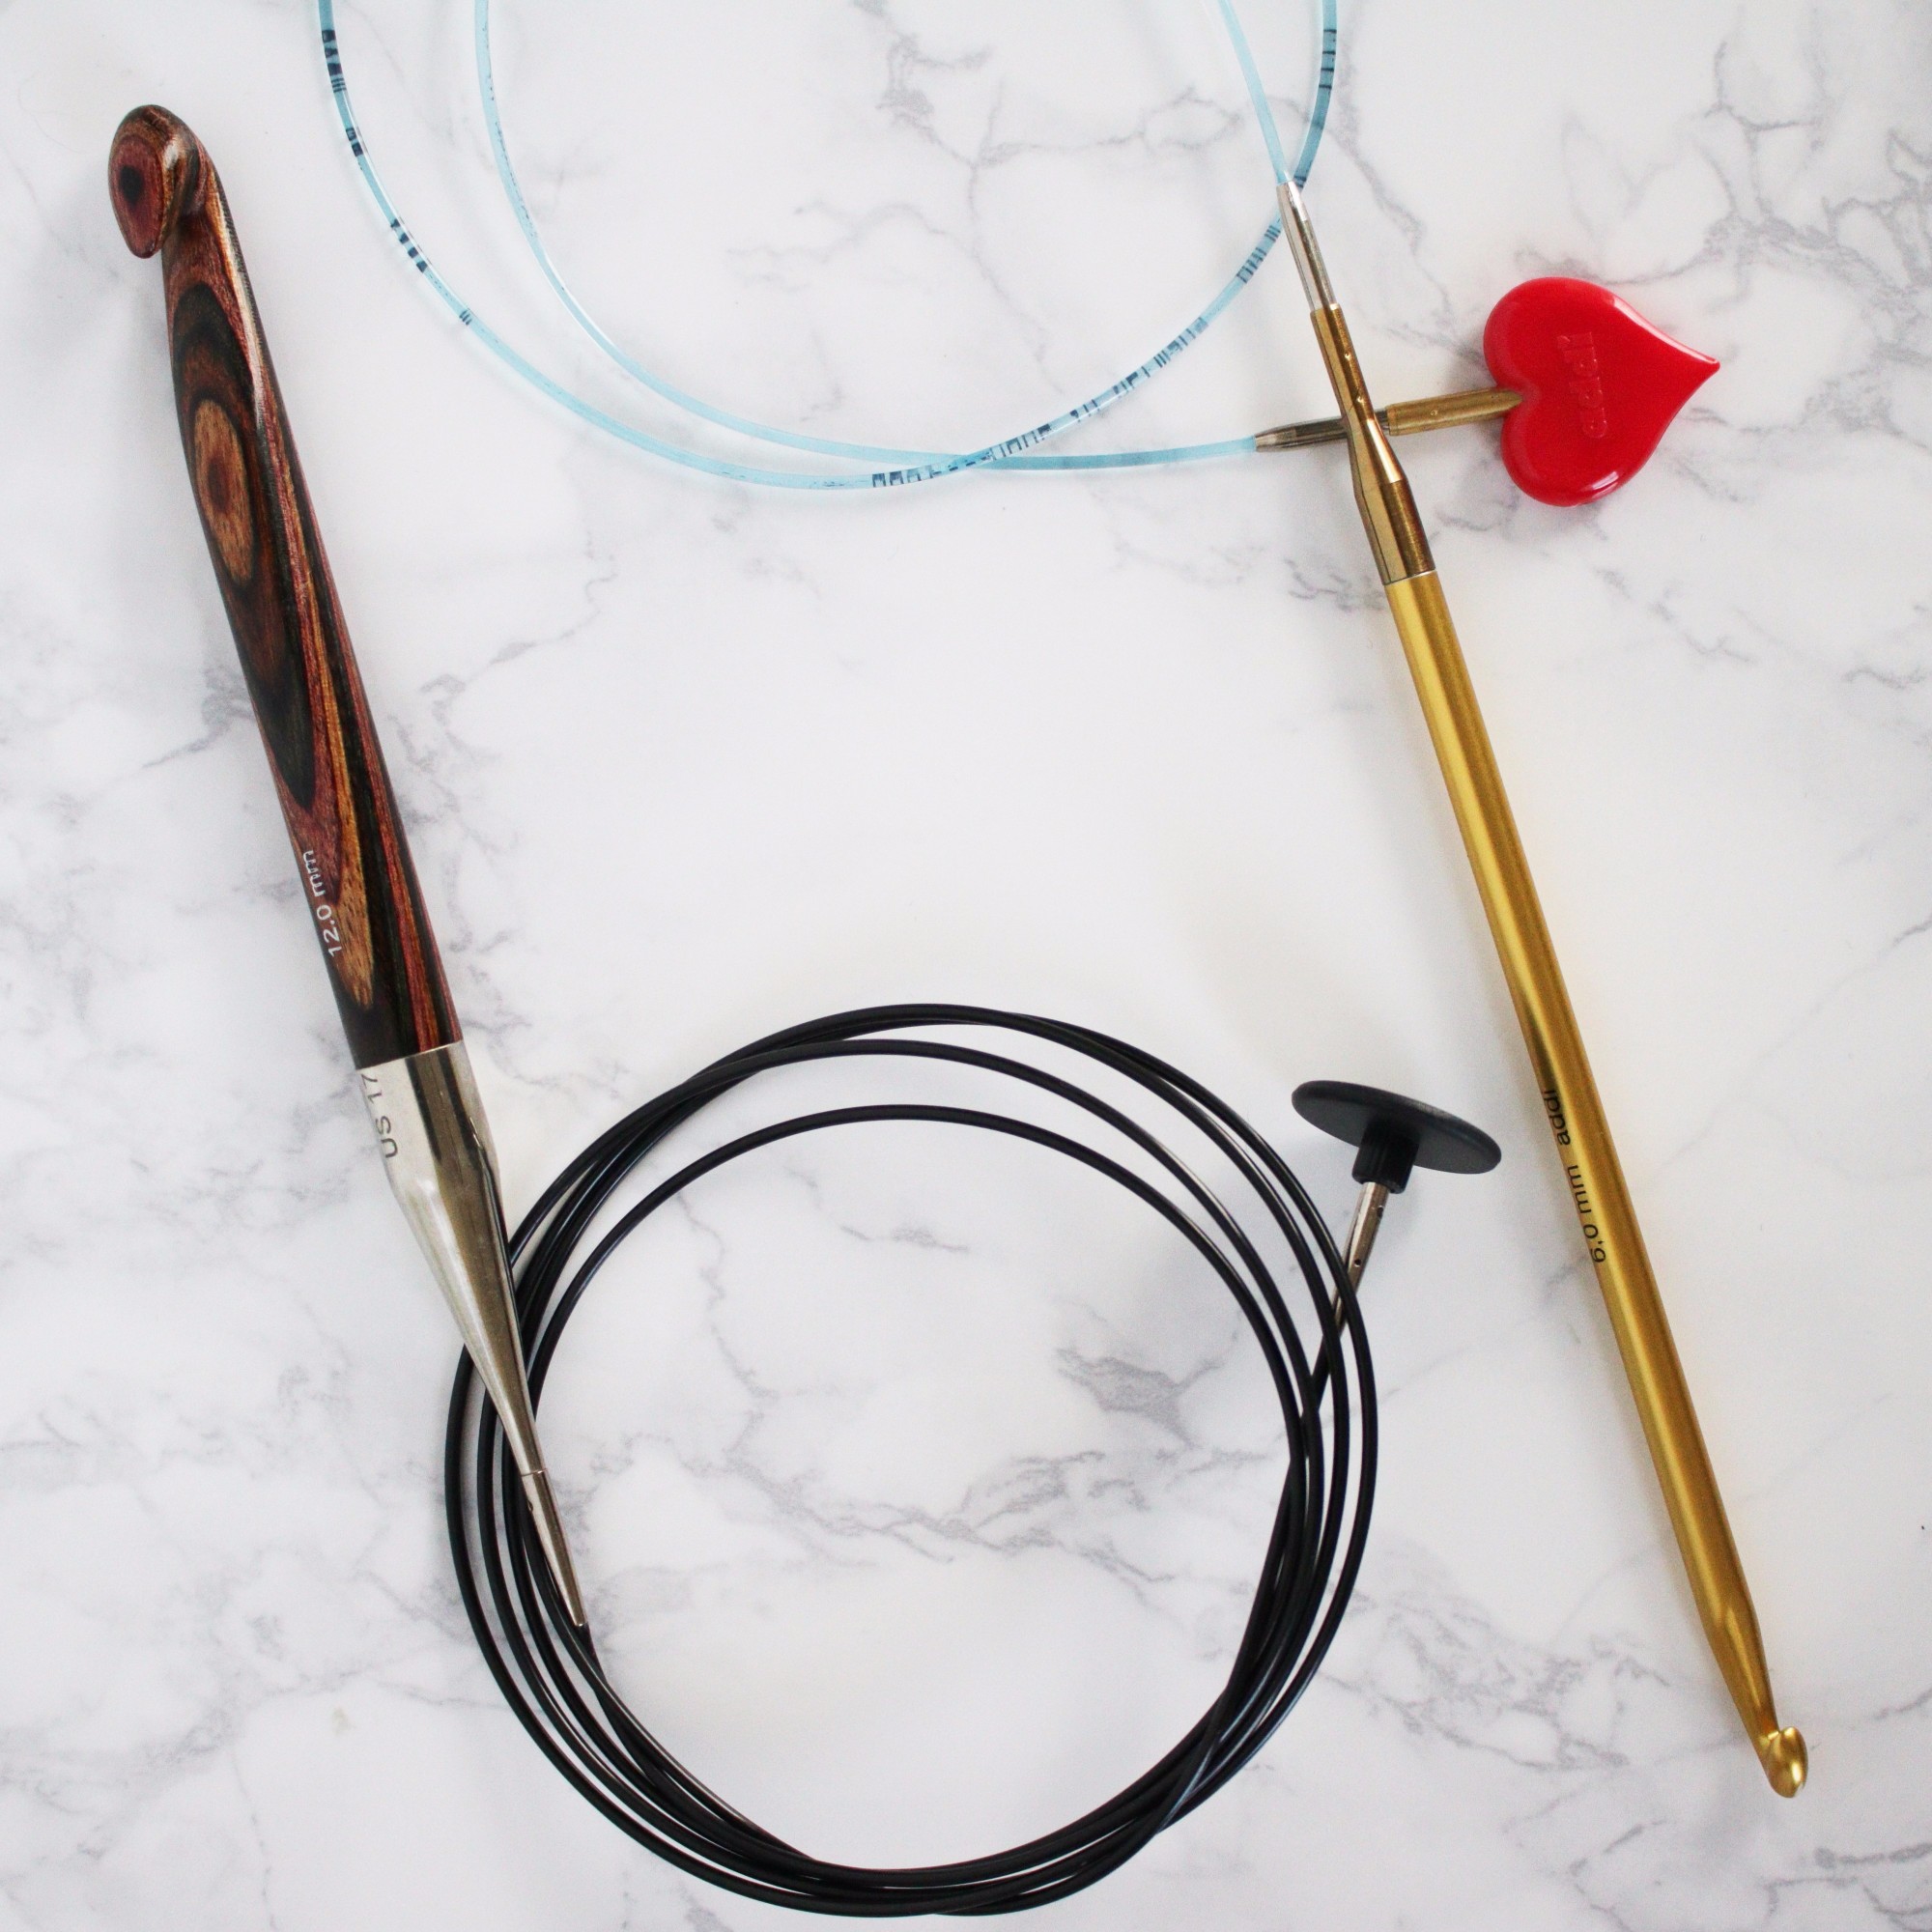
To my surprise, the Deborah Norville hooks from Premier Yarns offer versatility and function at a very reasonable price. I was not familiar with the brand before I tried Tunisian crochet and have only found these hooks online. Finding larger Tunisian style hooks sizes can be challenging, so these are a perfect solution for chunkier yarns.
The proverbial king of all Tunisian hook sets is the Addi Click Interchangeable System. But these hooks are hailed as the top tier tools for more than just their looks. Since they are made of metal, they make Tunisian crochet speedy. And for those with larger hands, the longer hook is much more comfortable than most other Tunisian crochet hook sets. I use my set almost exclusively when working on personal projects.
Pro Tip: Regardless of which material or length of hook used, try going up one to two full millimeters in size from what is suggested by the yarn’s ball band. Due to dense nature of Tunisian crochet, sizing up the hook makes for a more manageable fabric (and gives the hands a break!).
Read more about Tunisian crochet hooks here.
How to Tunisian crochet step by step
Tunisian crochet can be broken down in just a few easy steps. Depending on the stitch used, those steps might look a little different. The three basic Tunisian crochet stitches include the Tunisian simple stitch (abbreviated Tss), the Tunisian knit stitch (Tks) and the Tunisian purl stitch (Tps). For the sake of this tutorial, let’s walk through the Tunisian knit stitch from beginning to end.
The foundation row: forward pass
With a crochet hook and yarn, make a slip knot and chain any number of stitches. I used a traditional crochet hook and just 10 stitches. A longer hook or a hook with a cord will allow for a longer starting chain, but you can get started with your regular hook.
Instead of working in the front loops of the chain, rotate the chain so the back bumps or back stitches are visible. Insert the hook under the back bump of the second chain from the hook, then yarn over and pull up a loop. Continue this last step until the number of loops on the hook matches the number of chains made.
Here is how it should look:
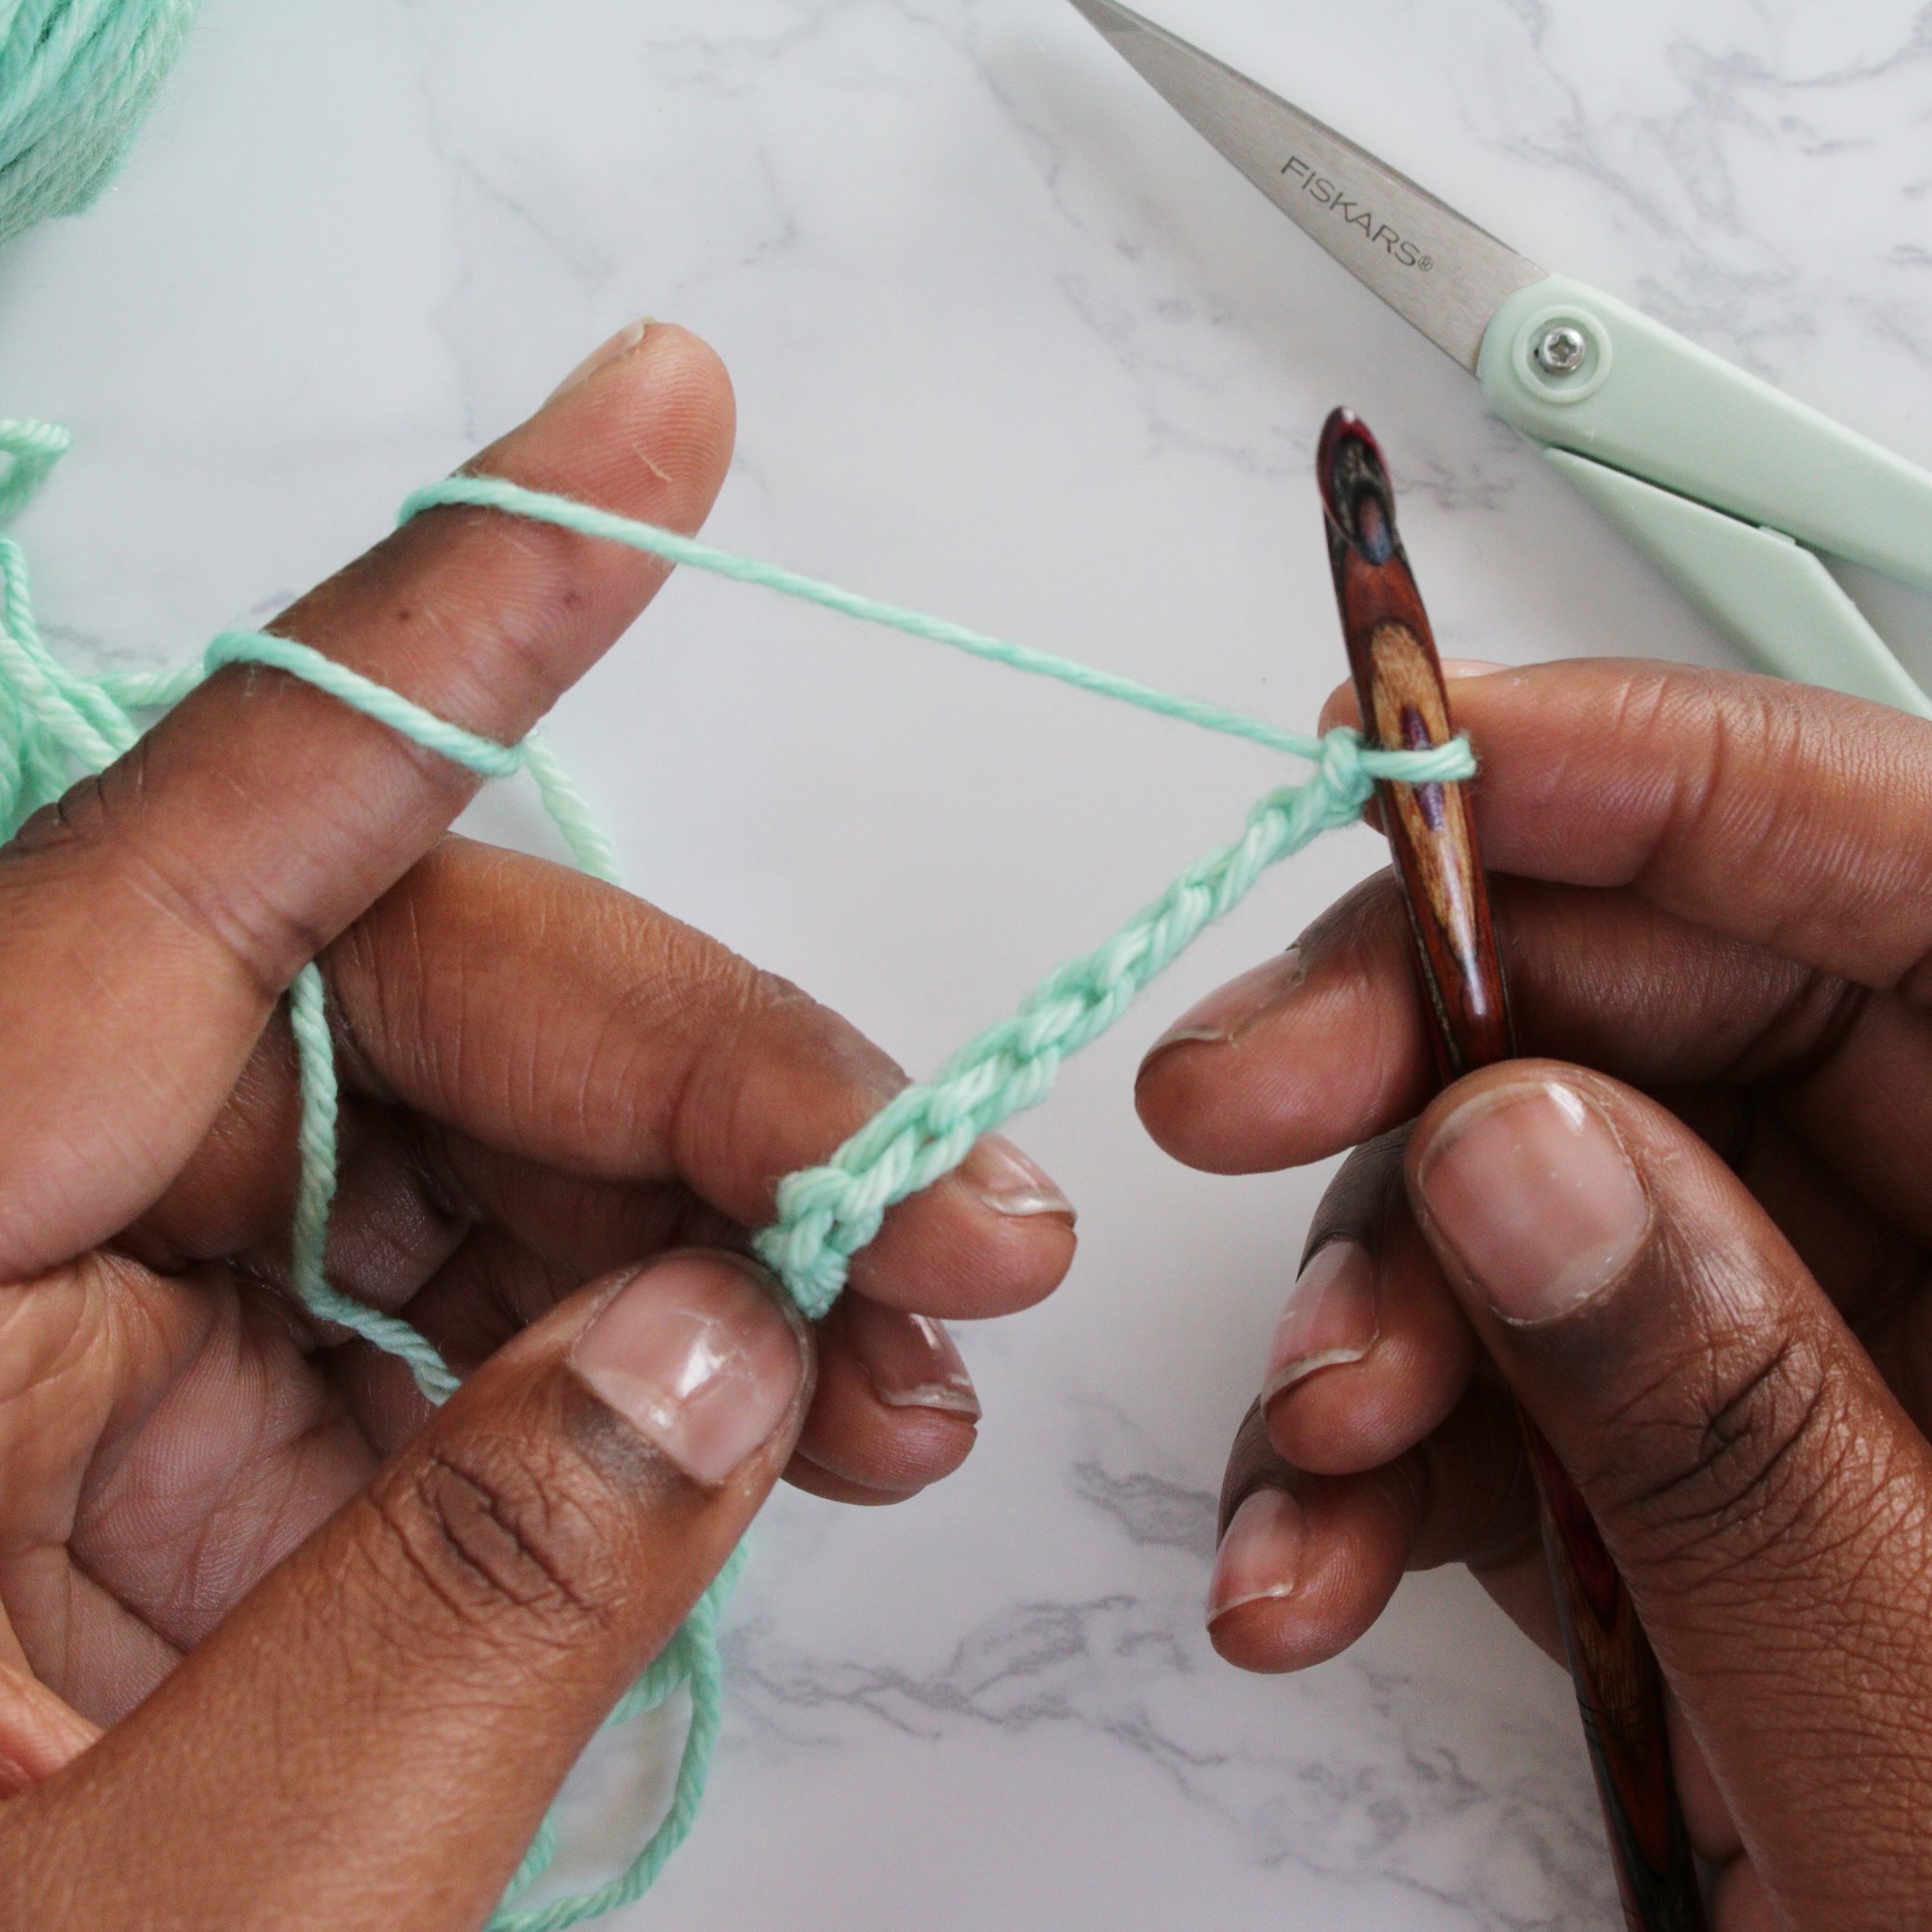
1. Turn your chain over so you see the bumps on the back.
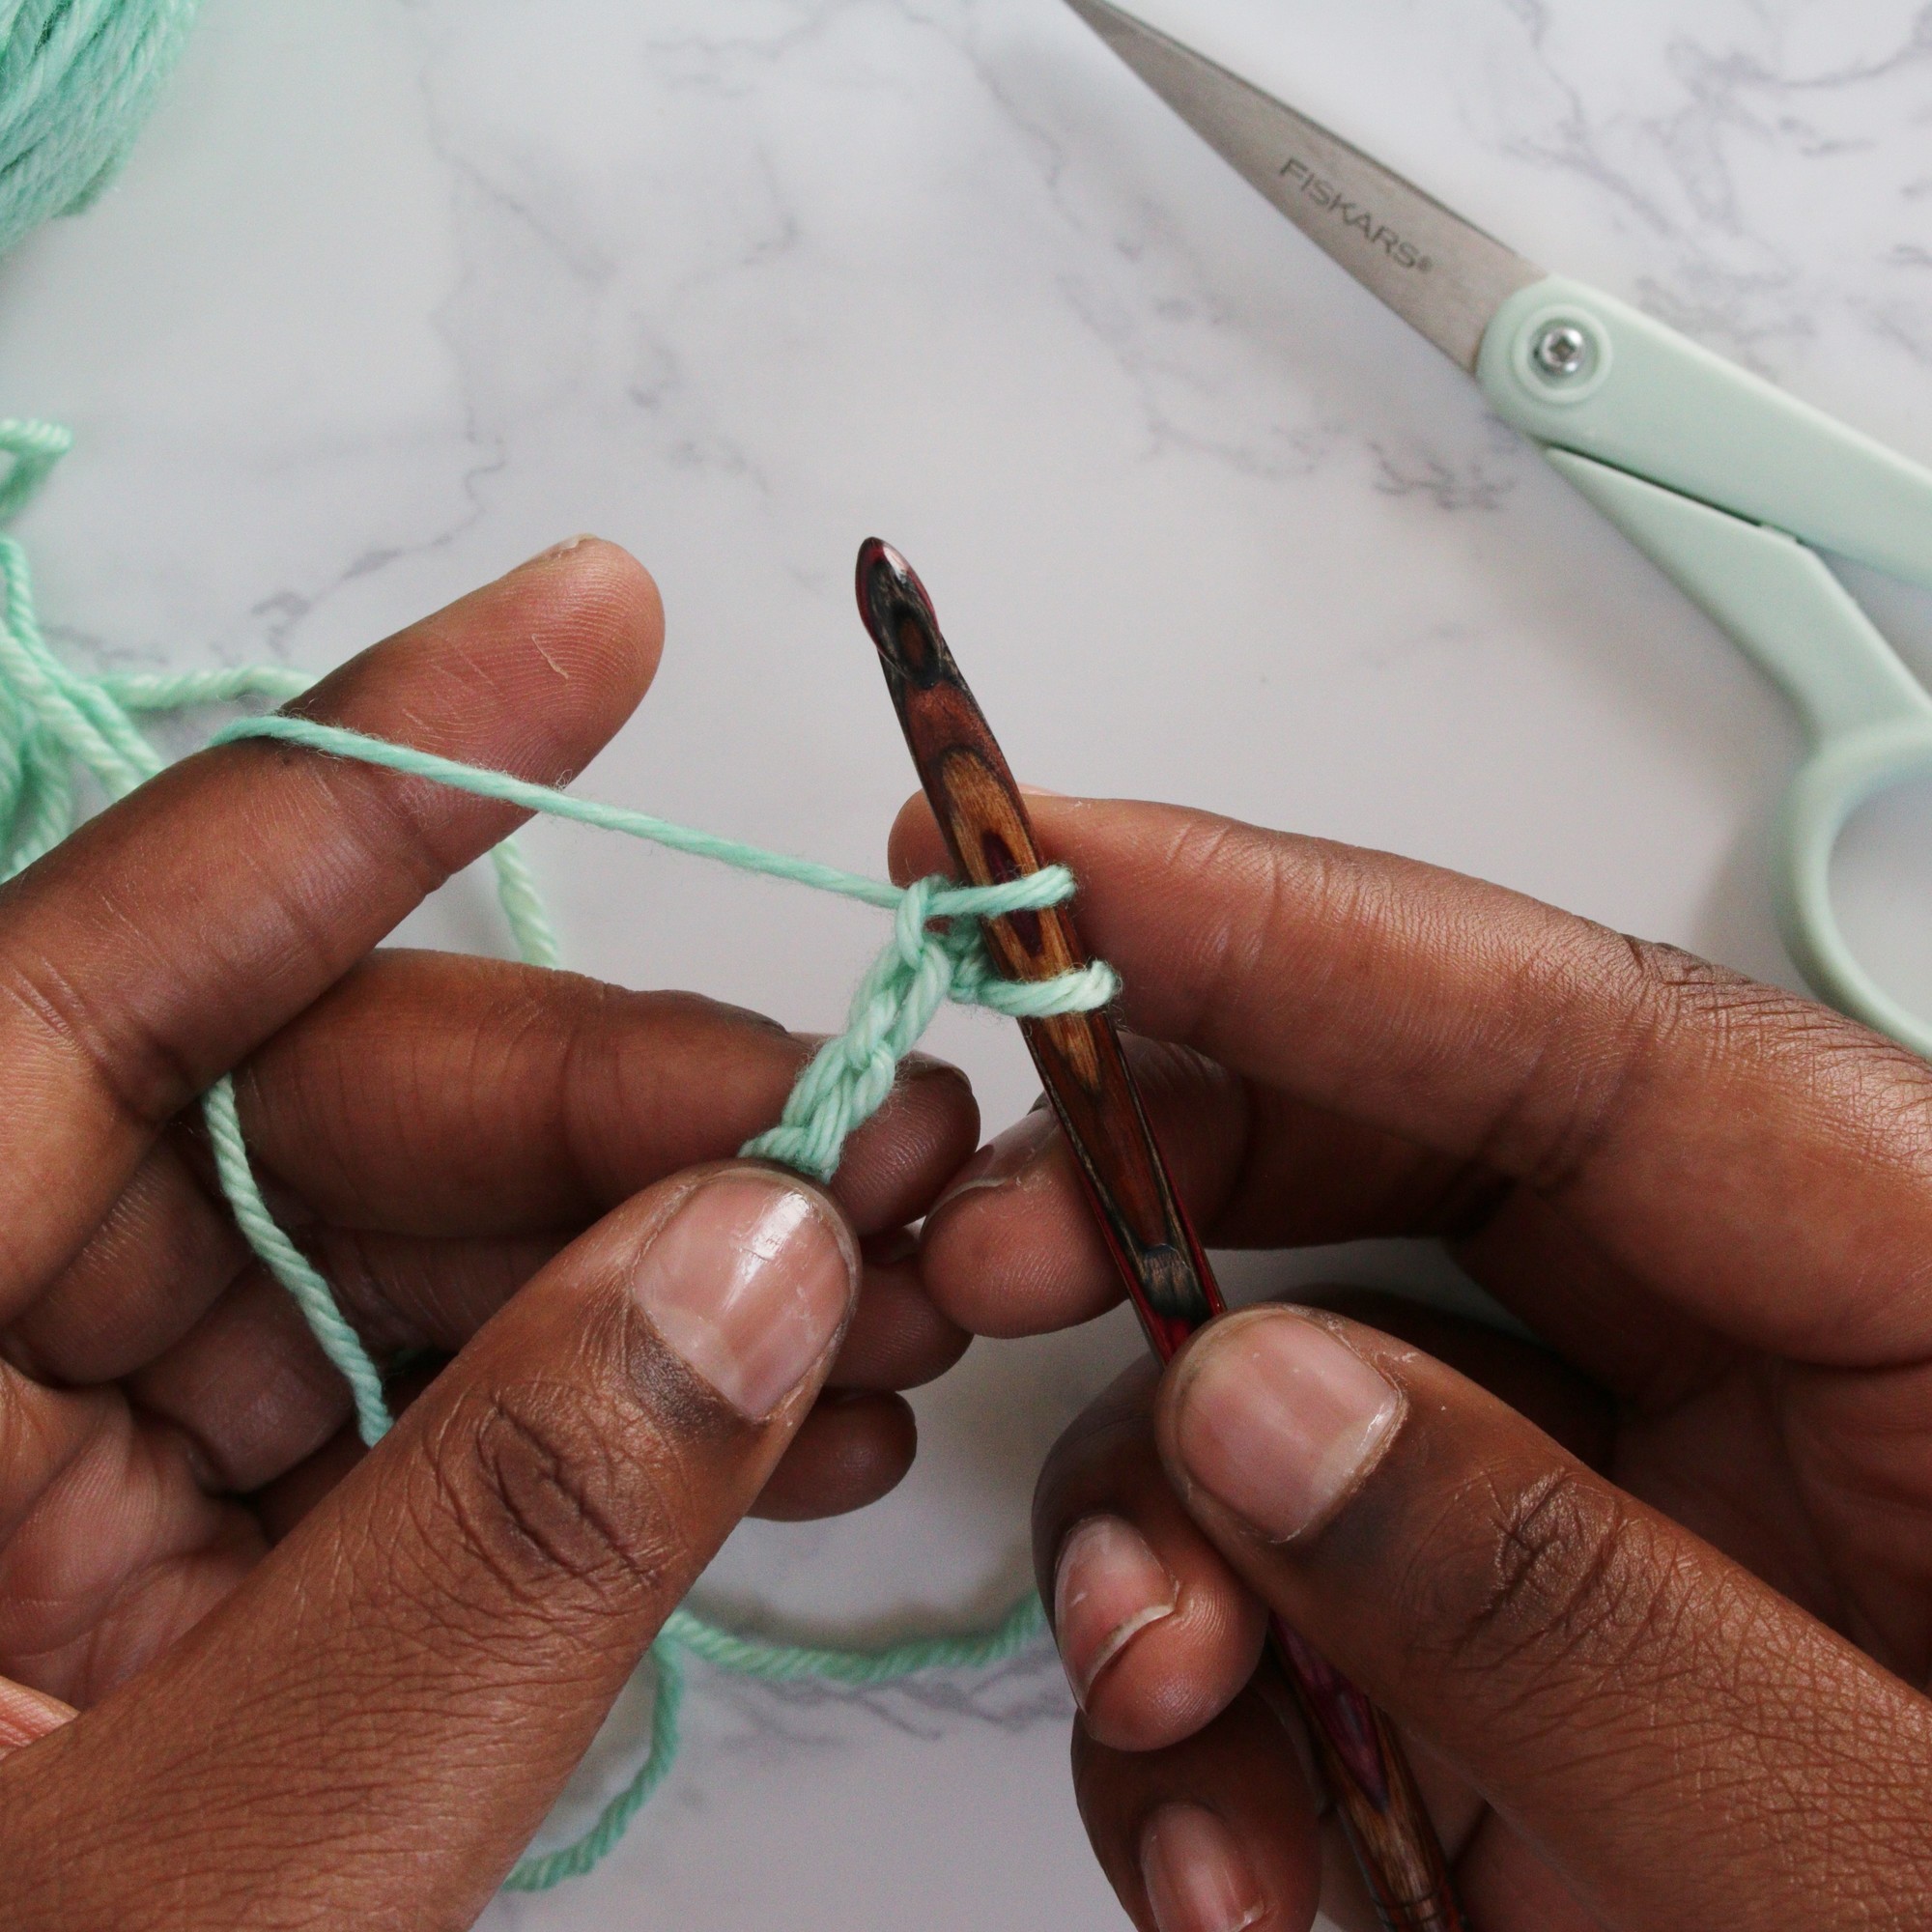
2. Insert hook into the back bump of the second chain from the hook, and pull up a loop.
3. Continue the previous step until the number of loops on the hook is the same as the initial number of chains made.
The foundation row: return pass
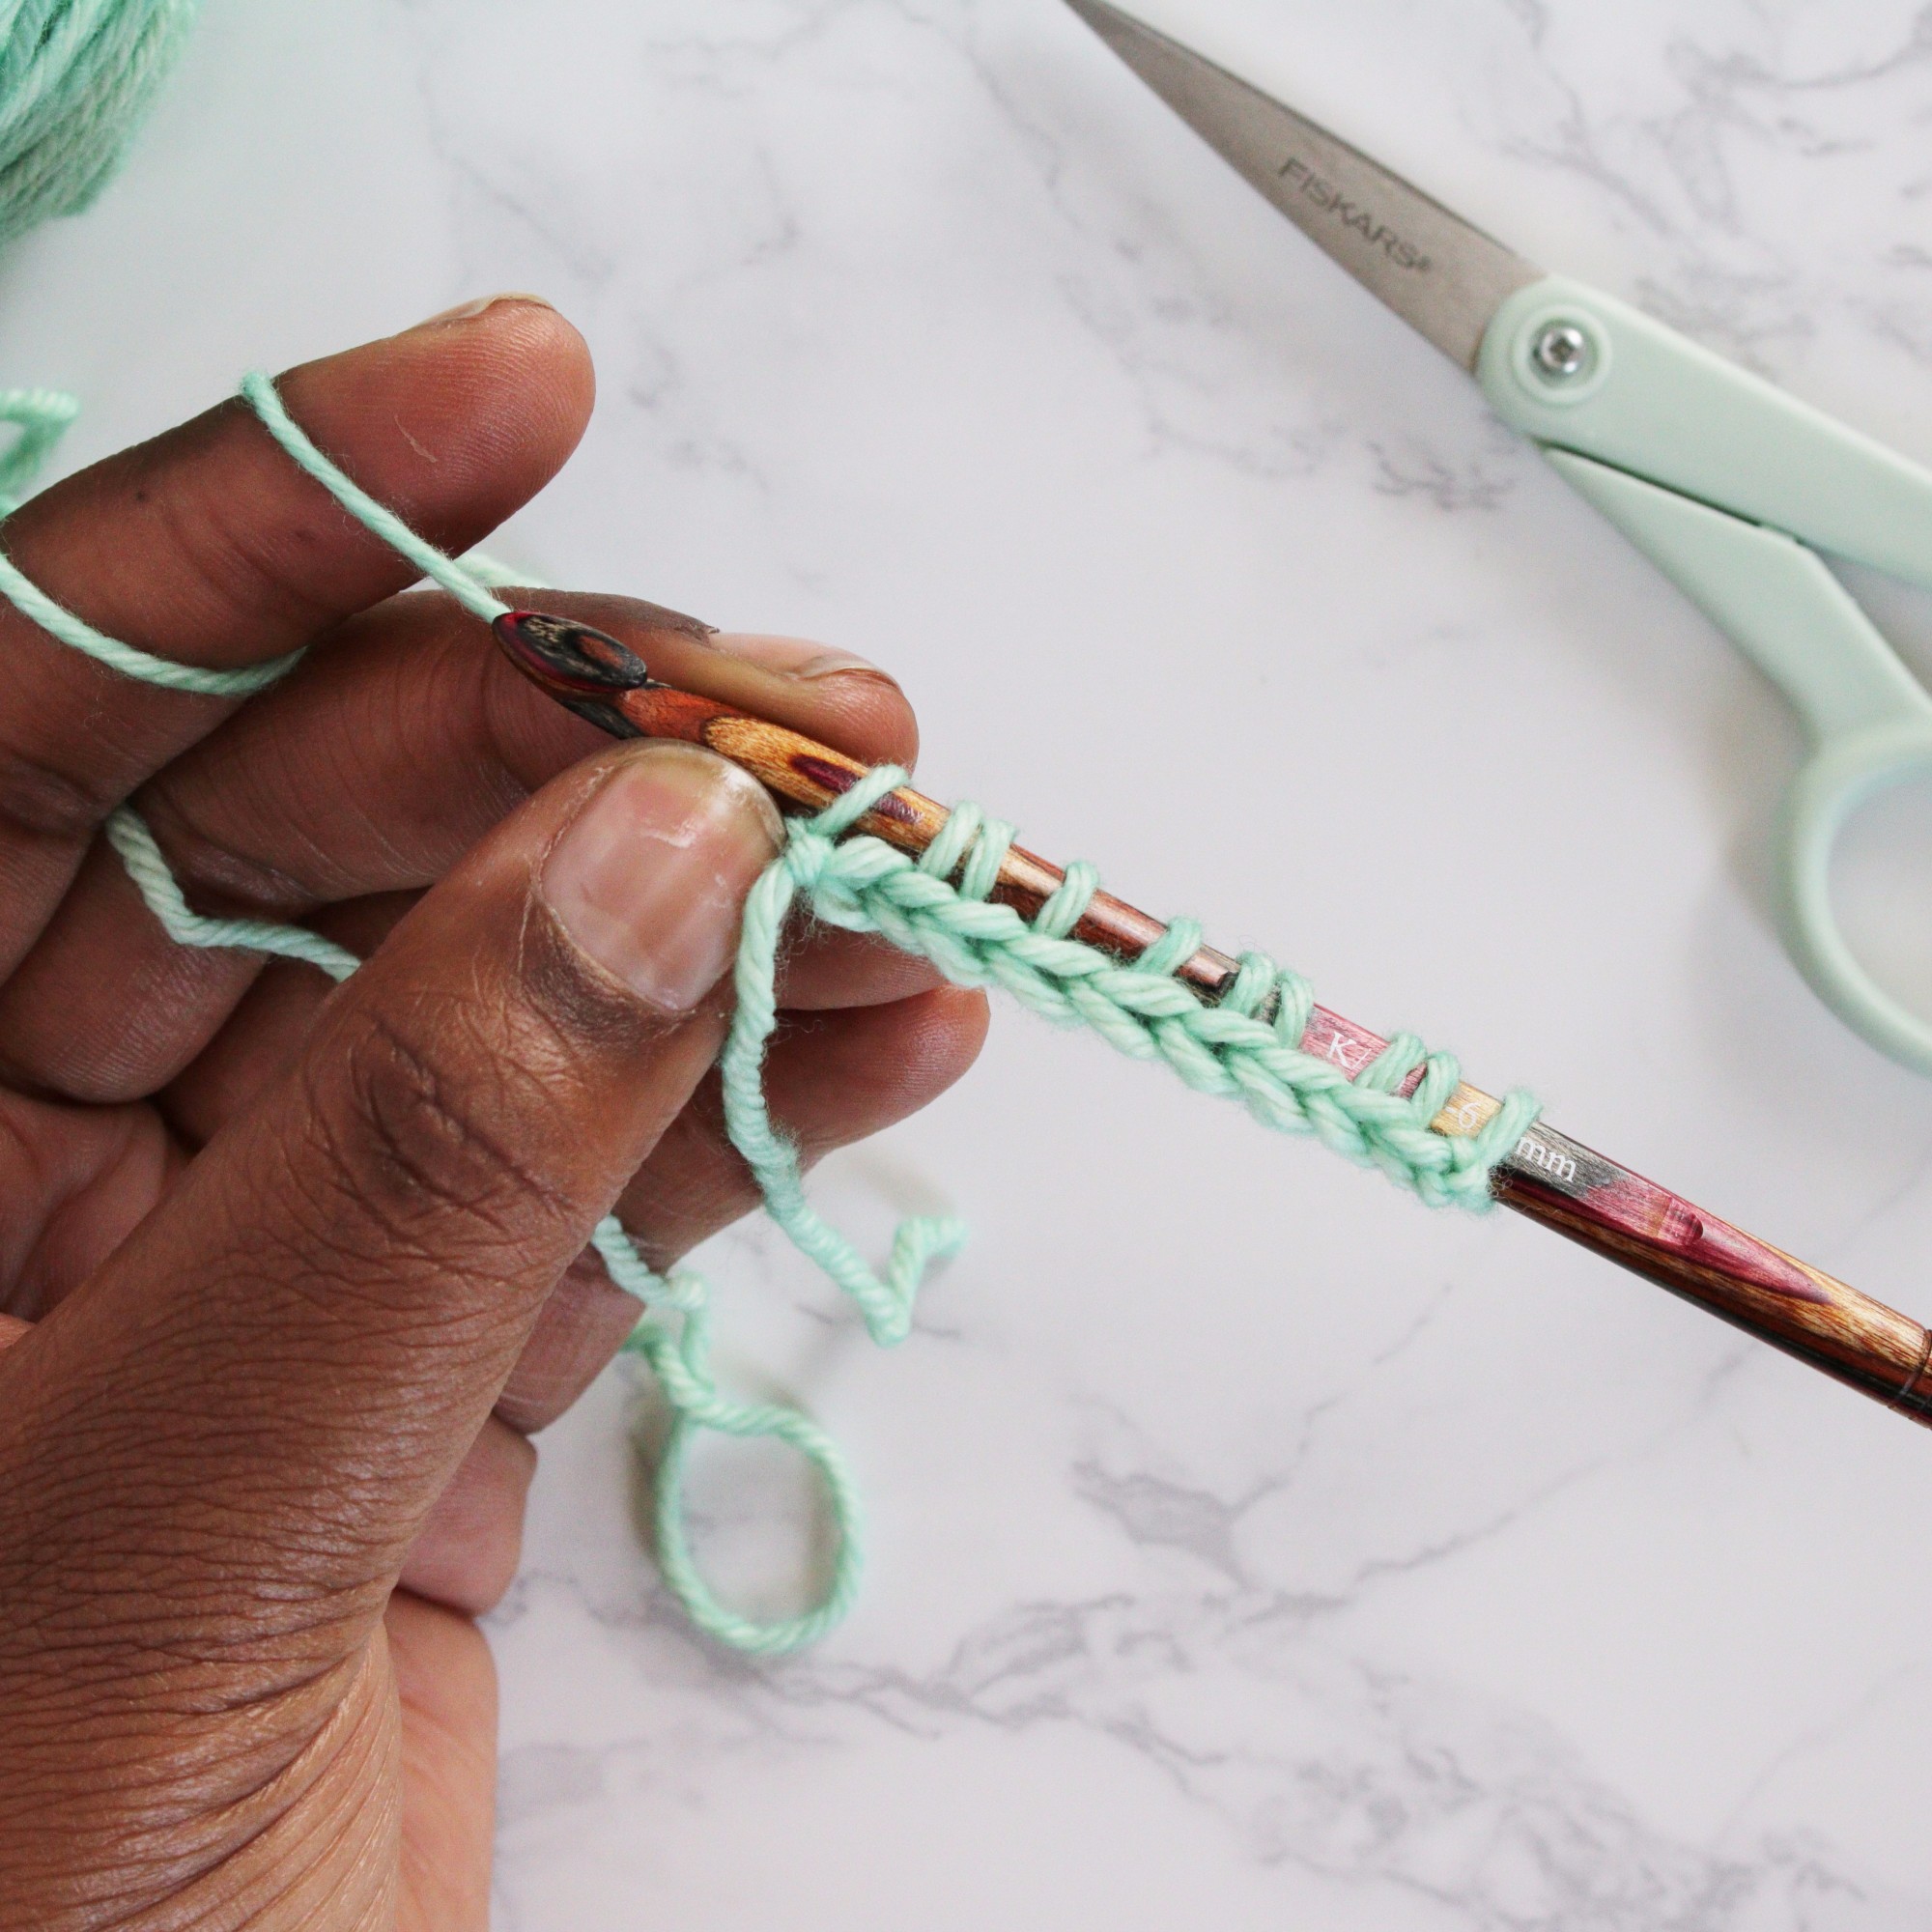
In Tunisian crochet, a forward pass is always followed by a return pass. This is when the loops on the hook are worked off the hook.
Always start a return pass with a chain 1 (yarn over and pull through one loop on the hook). Starting the return pass with a chain 1 helps maintain the height of the crochet work, much like starting a traditional crochet row with a chain 1 stitch.
Next, work the loops off the hook by starting with a yarn over, then pull through two loops on your hook. Repeat this step (yarn over, pull through two loops) until there is only one loop on the hook. This completes the foundation row.
Here is how it should look:
1. Chain 1.
2. Yarn over, pull through two loops on the hook.
3. Repeat the previous step until there is only one loop on the hook.
4. When there is only one loop left on your hook, move onto the next forward pass.
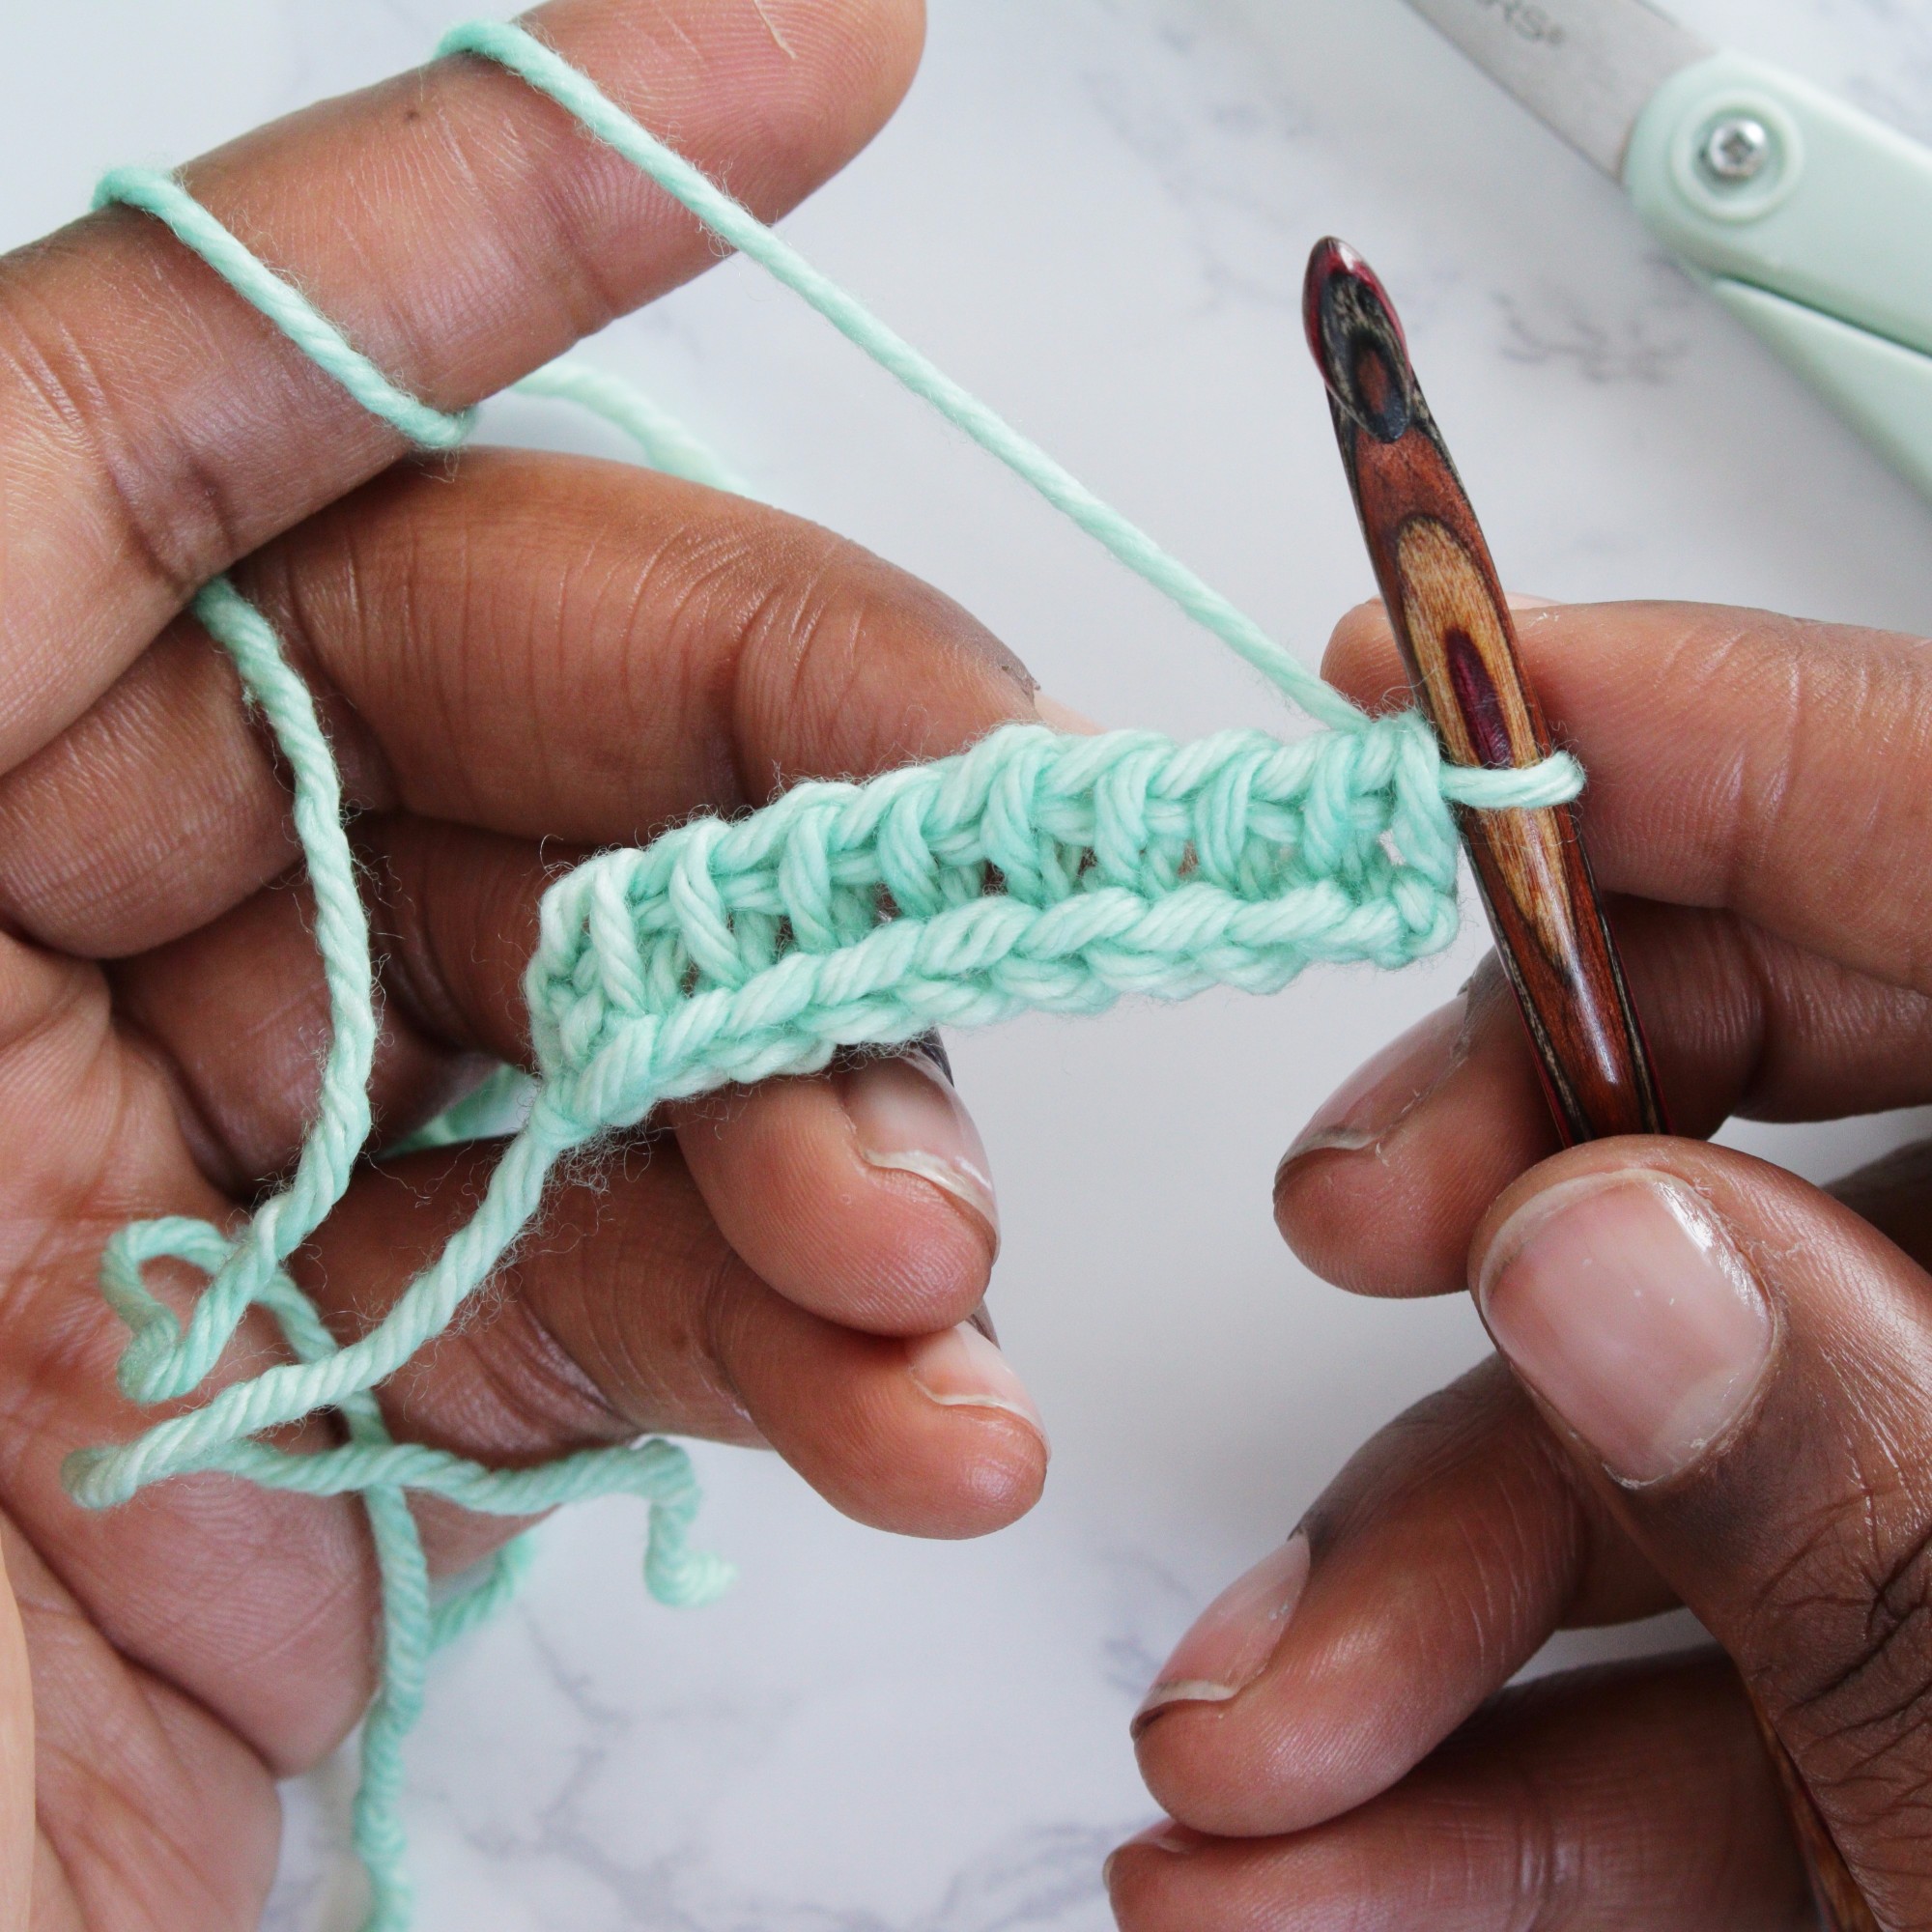
The knit stitch: forward pass
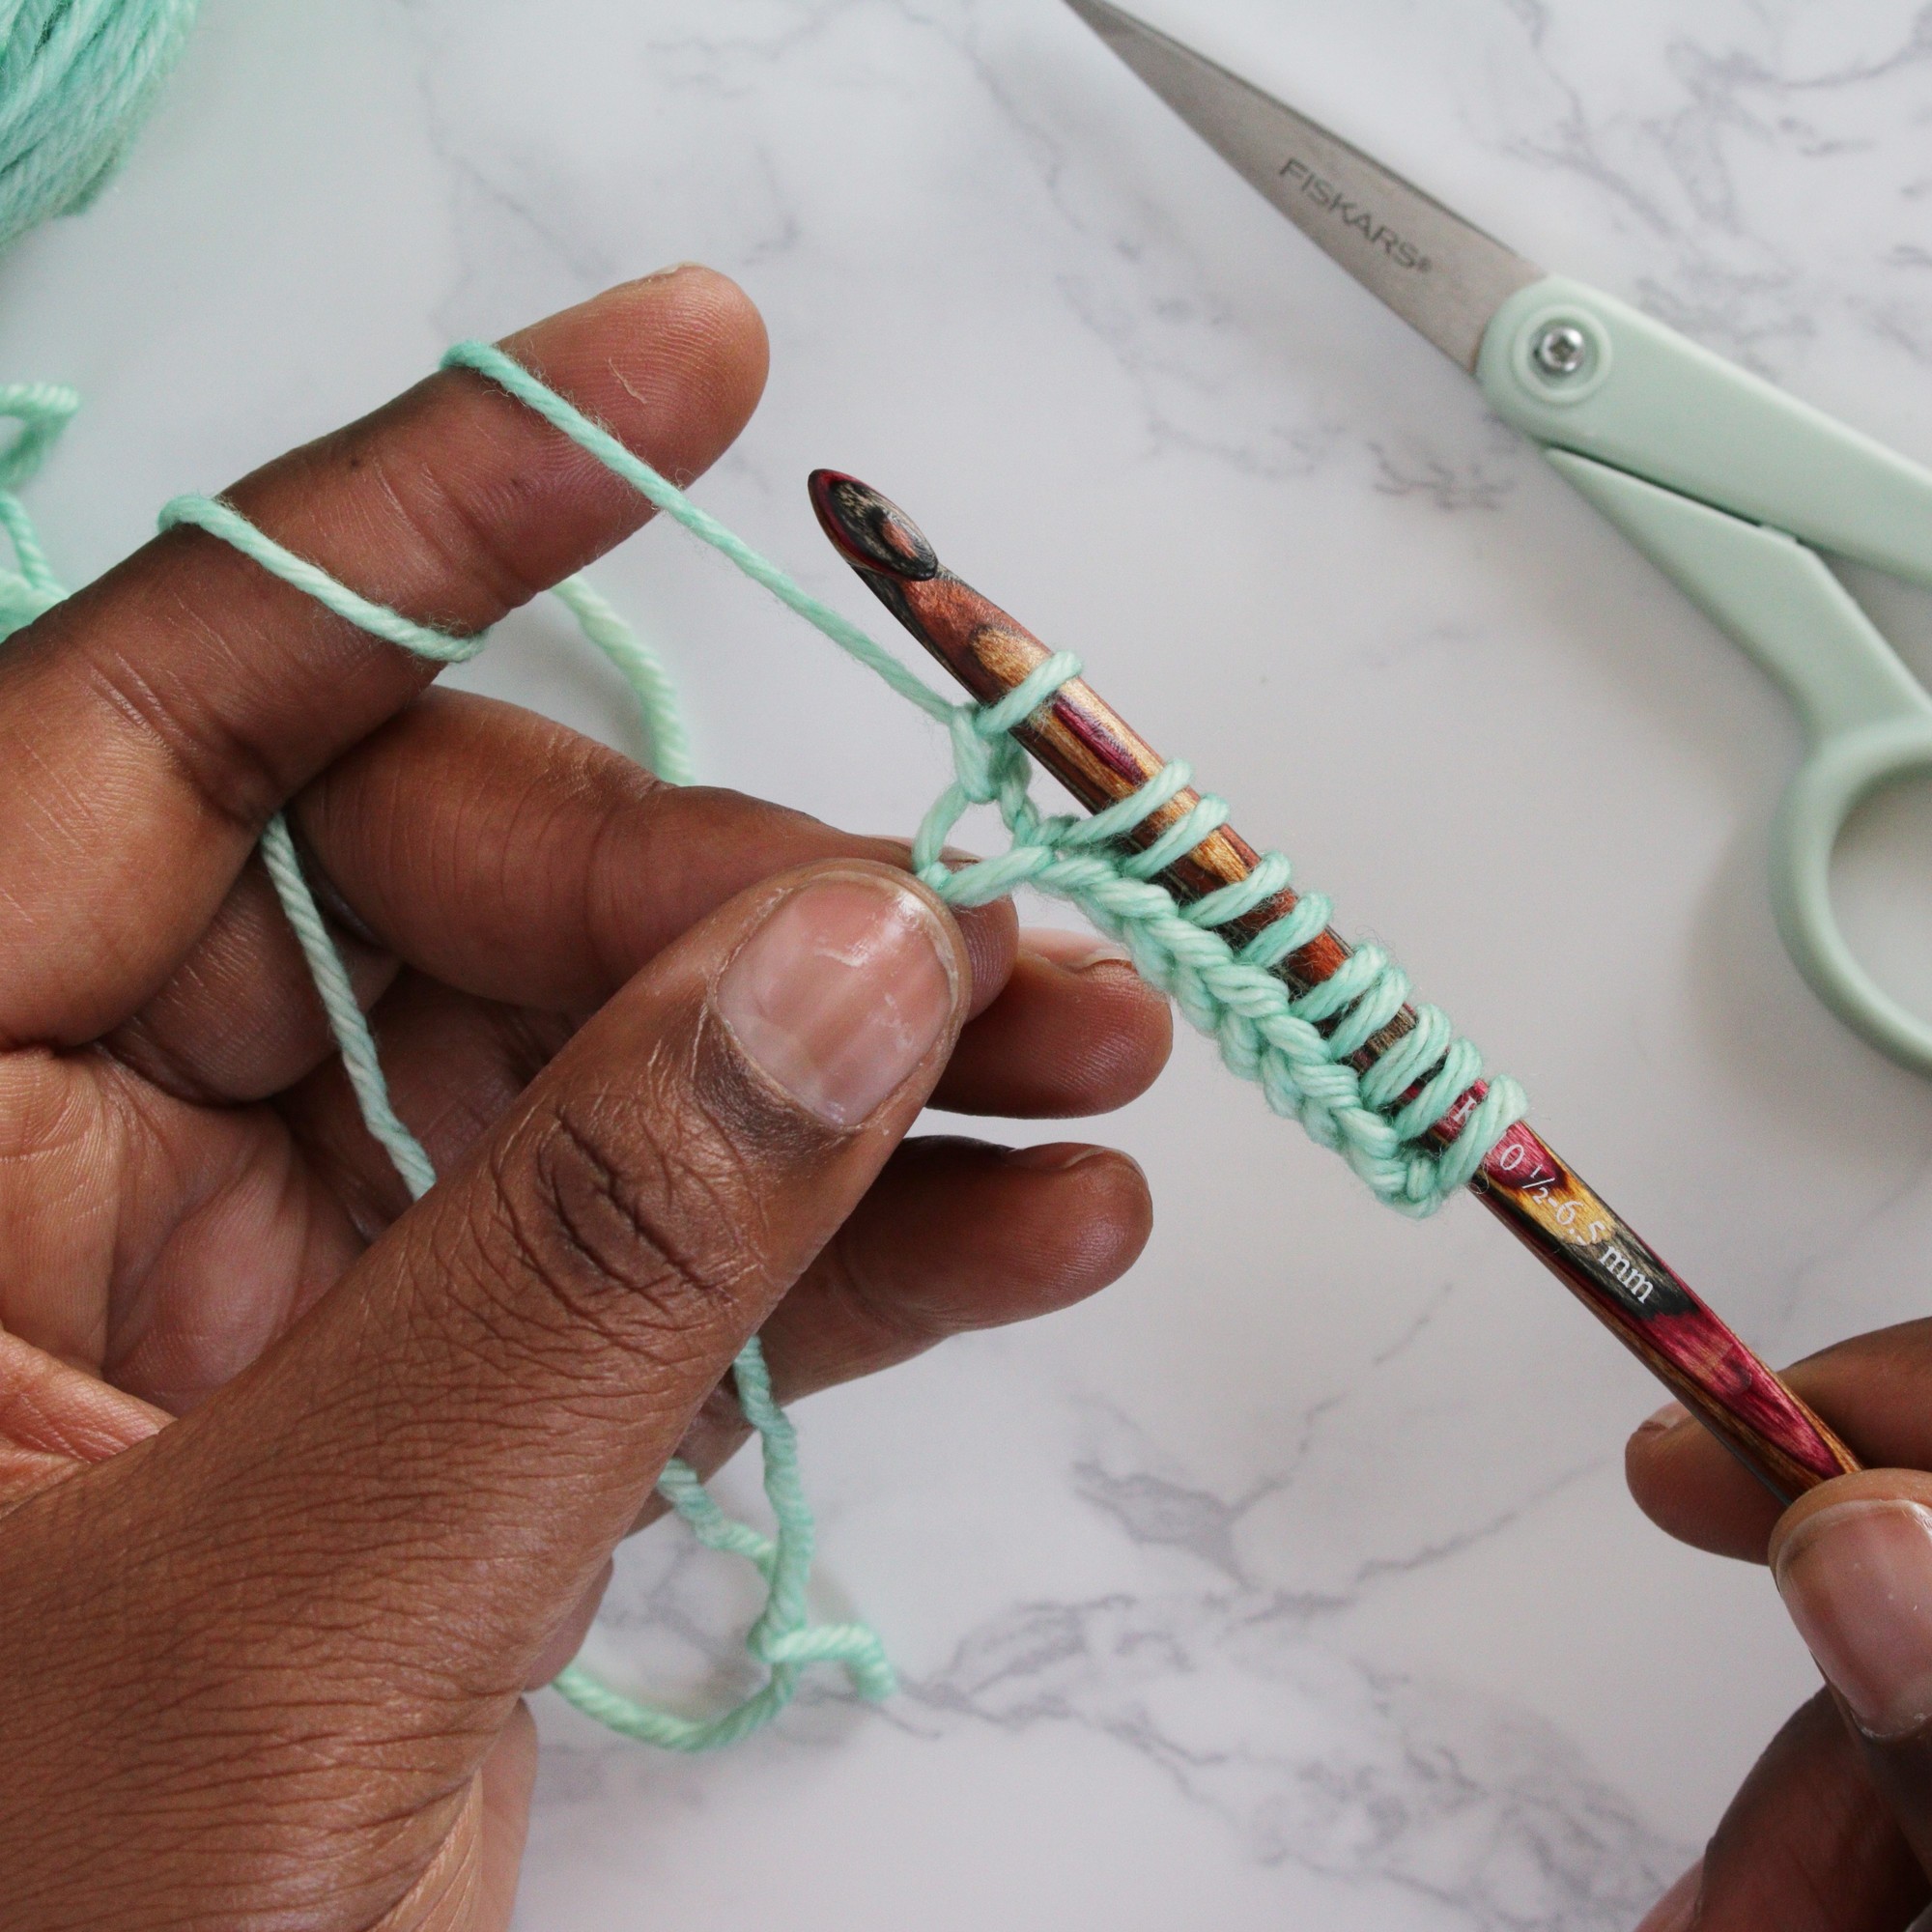
Begin the forward pass of the knit stitch by identifying the first stitch to work into. The loop on the hook compensates for the first stitch of the forward pass. Instead of working in the stitch farthest to the right, insert the hook between the two vertical bars of the second stitch.
Here’s how it should look:
1. Insert your hook between the vertical bars of the second stitch.
2. Yarn over and pull up a loop to complete the stitch.
3. Repeat the previous step (yarn over, pull up a loop) in each stitch across the row until there is only one stitch to go.
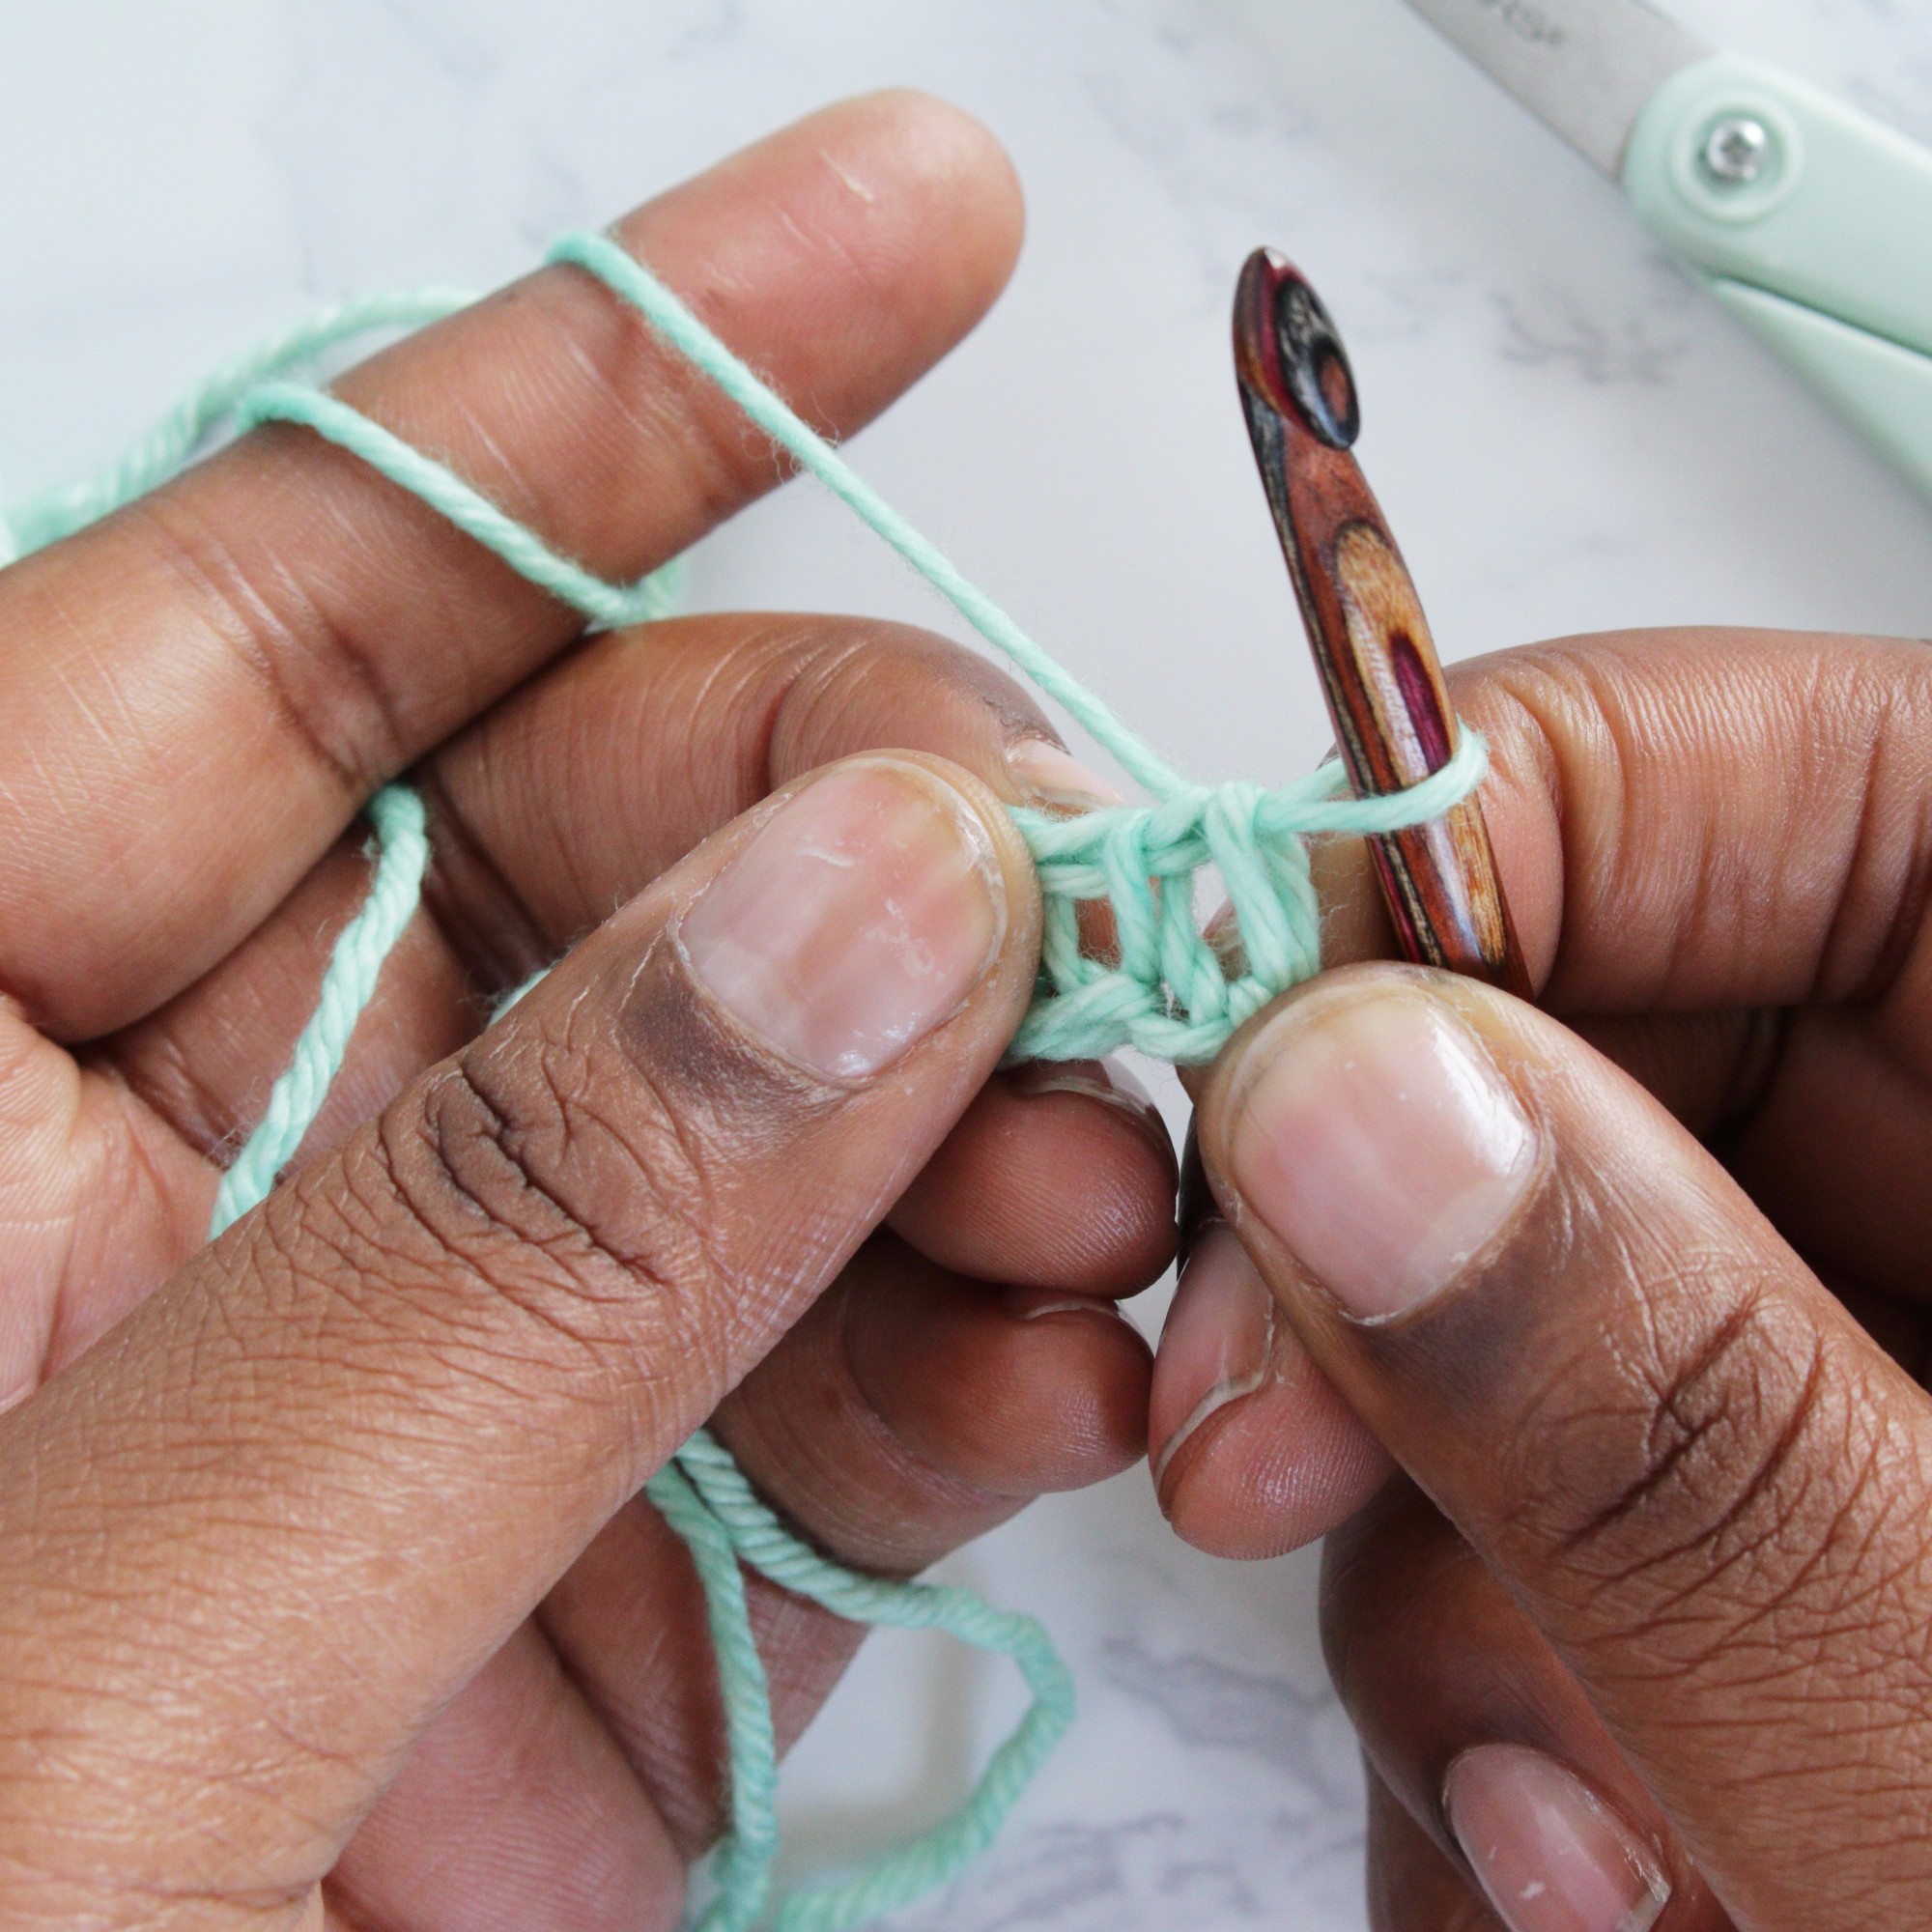
Pro tip: Working the last stitch of a forward pass in Tunisian crochet can be a little tricky. To keep it neat, pinch the edge of the work between your thumb and forefinger, rotate the stitch between your fingers toward you, and insert the hook under both loops of the last stitch. Yarn over and pull up a loop to complete the stitch. (You can find my video tutorial of this step here.)
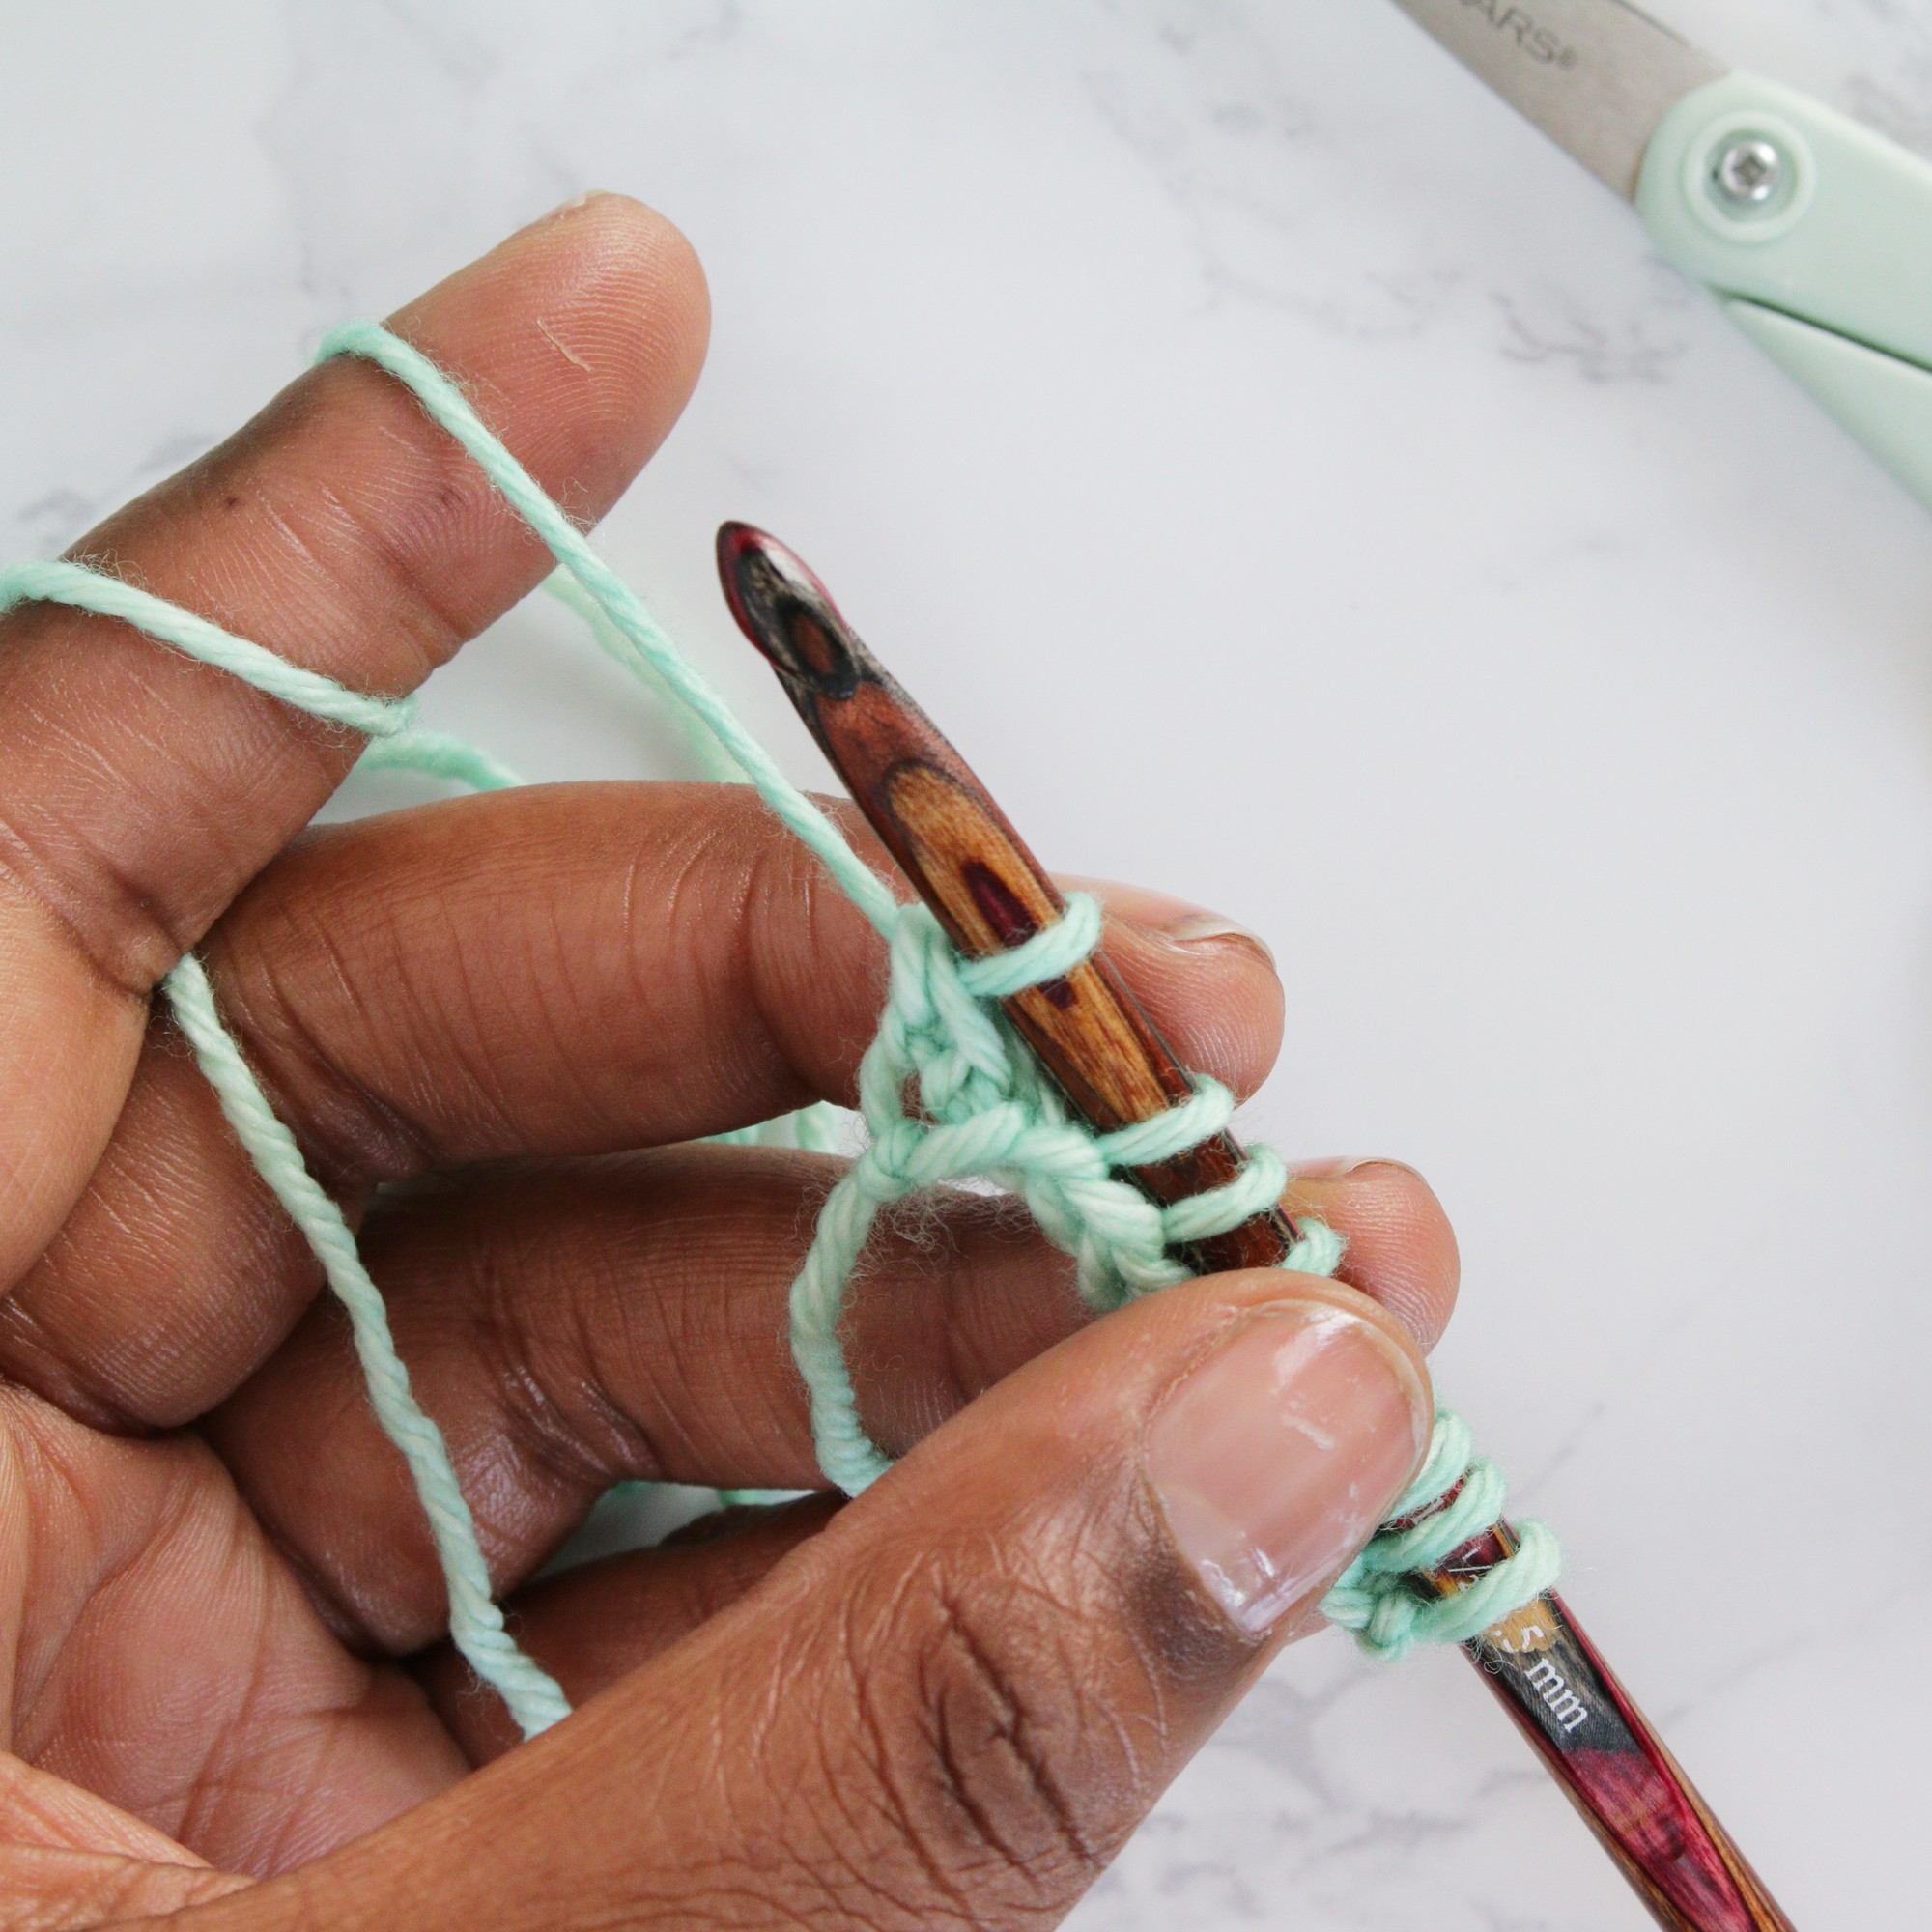
The knit stitch: return pass
Complete the return pass of the Tunisian knit stitch the same as explained for the the foundation row: Begin with a chain 1. Yarn over and pull through two loops. Repeat this step (yarn over and pull through two loops) until there is only one loop on the hook.
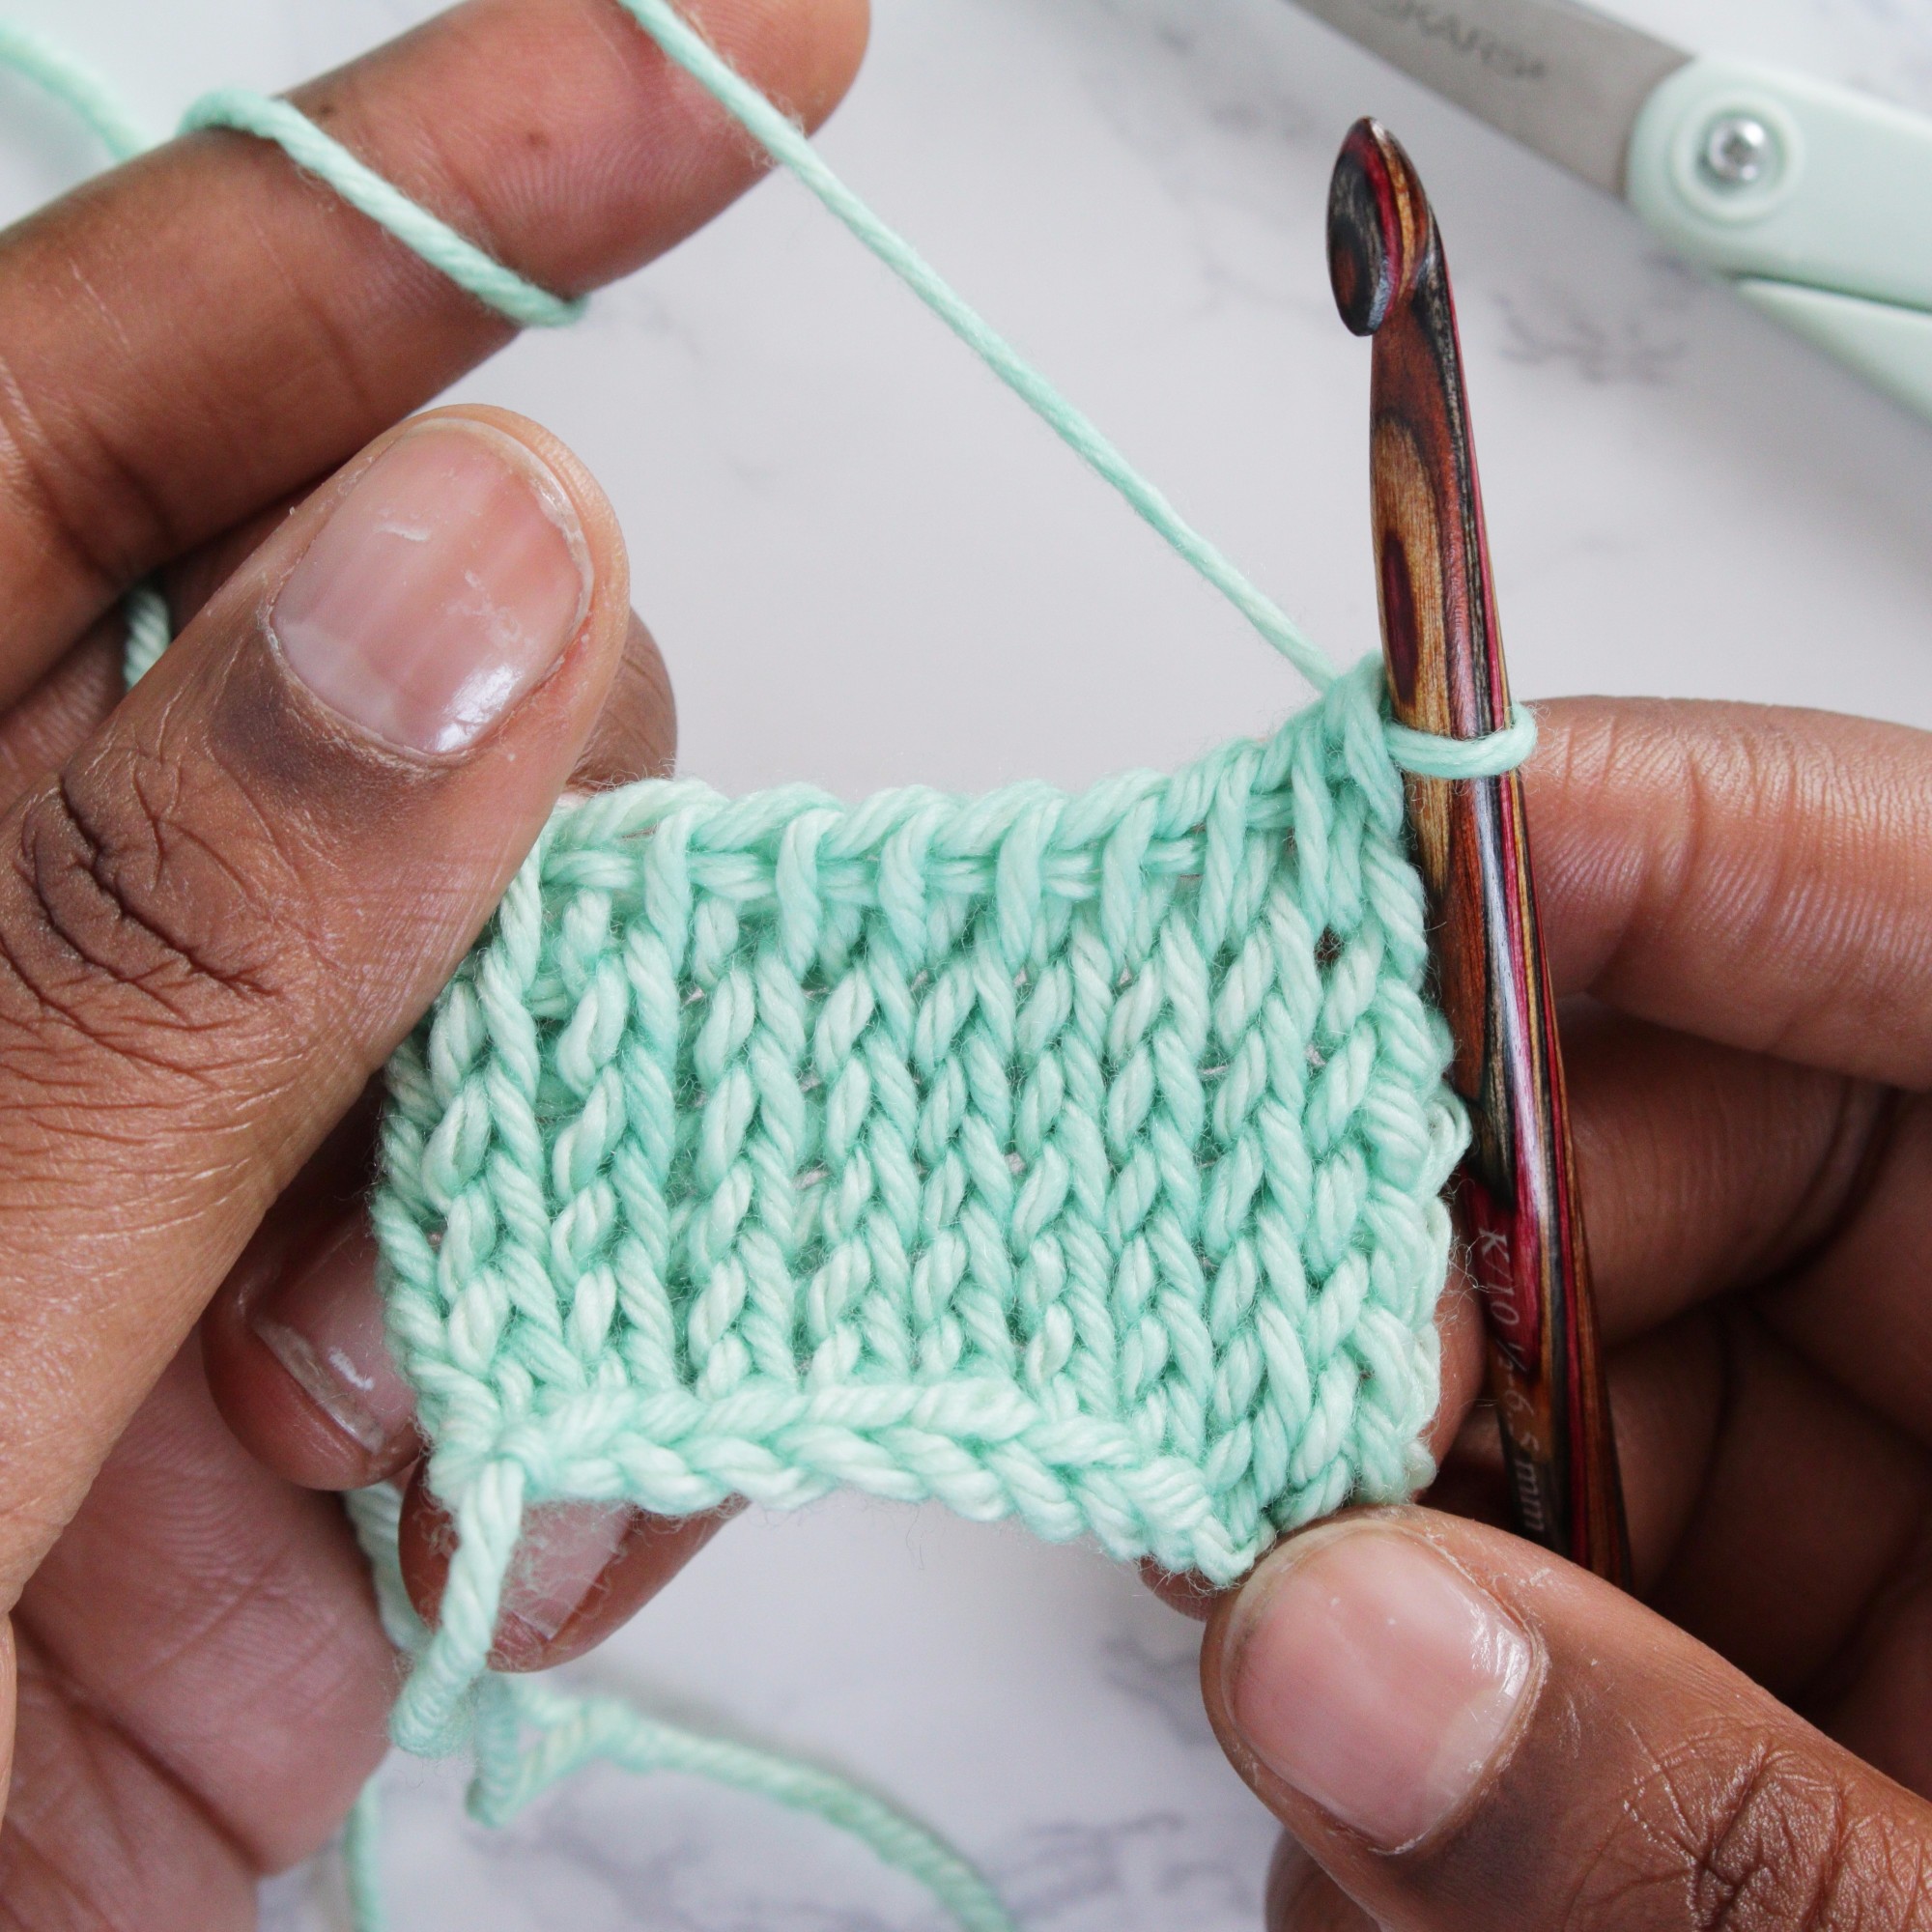
Repeat the forward pass and return pass of the Tunisian knit stitch to the desired length. Isn’t it amazing how these simple steps make something that looks just like the traditional knit stitch?
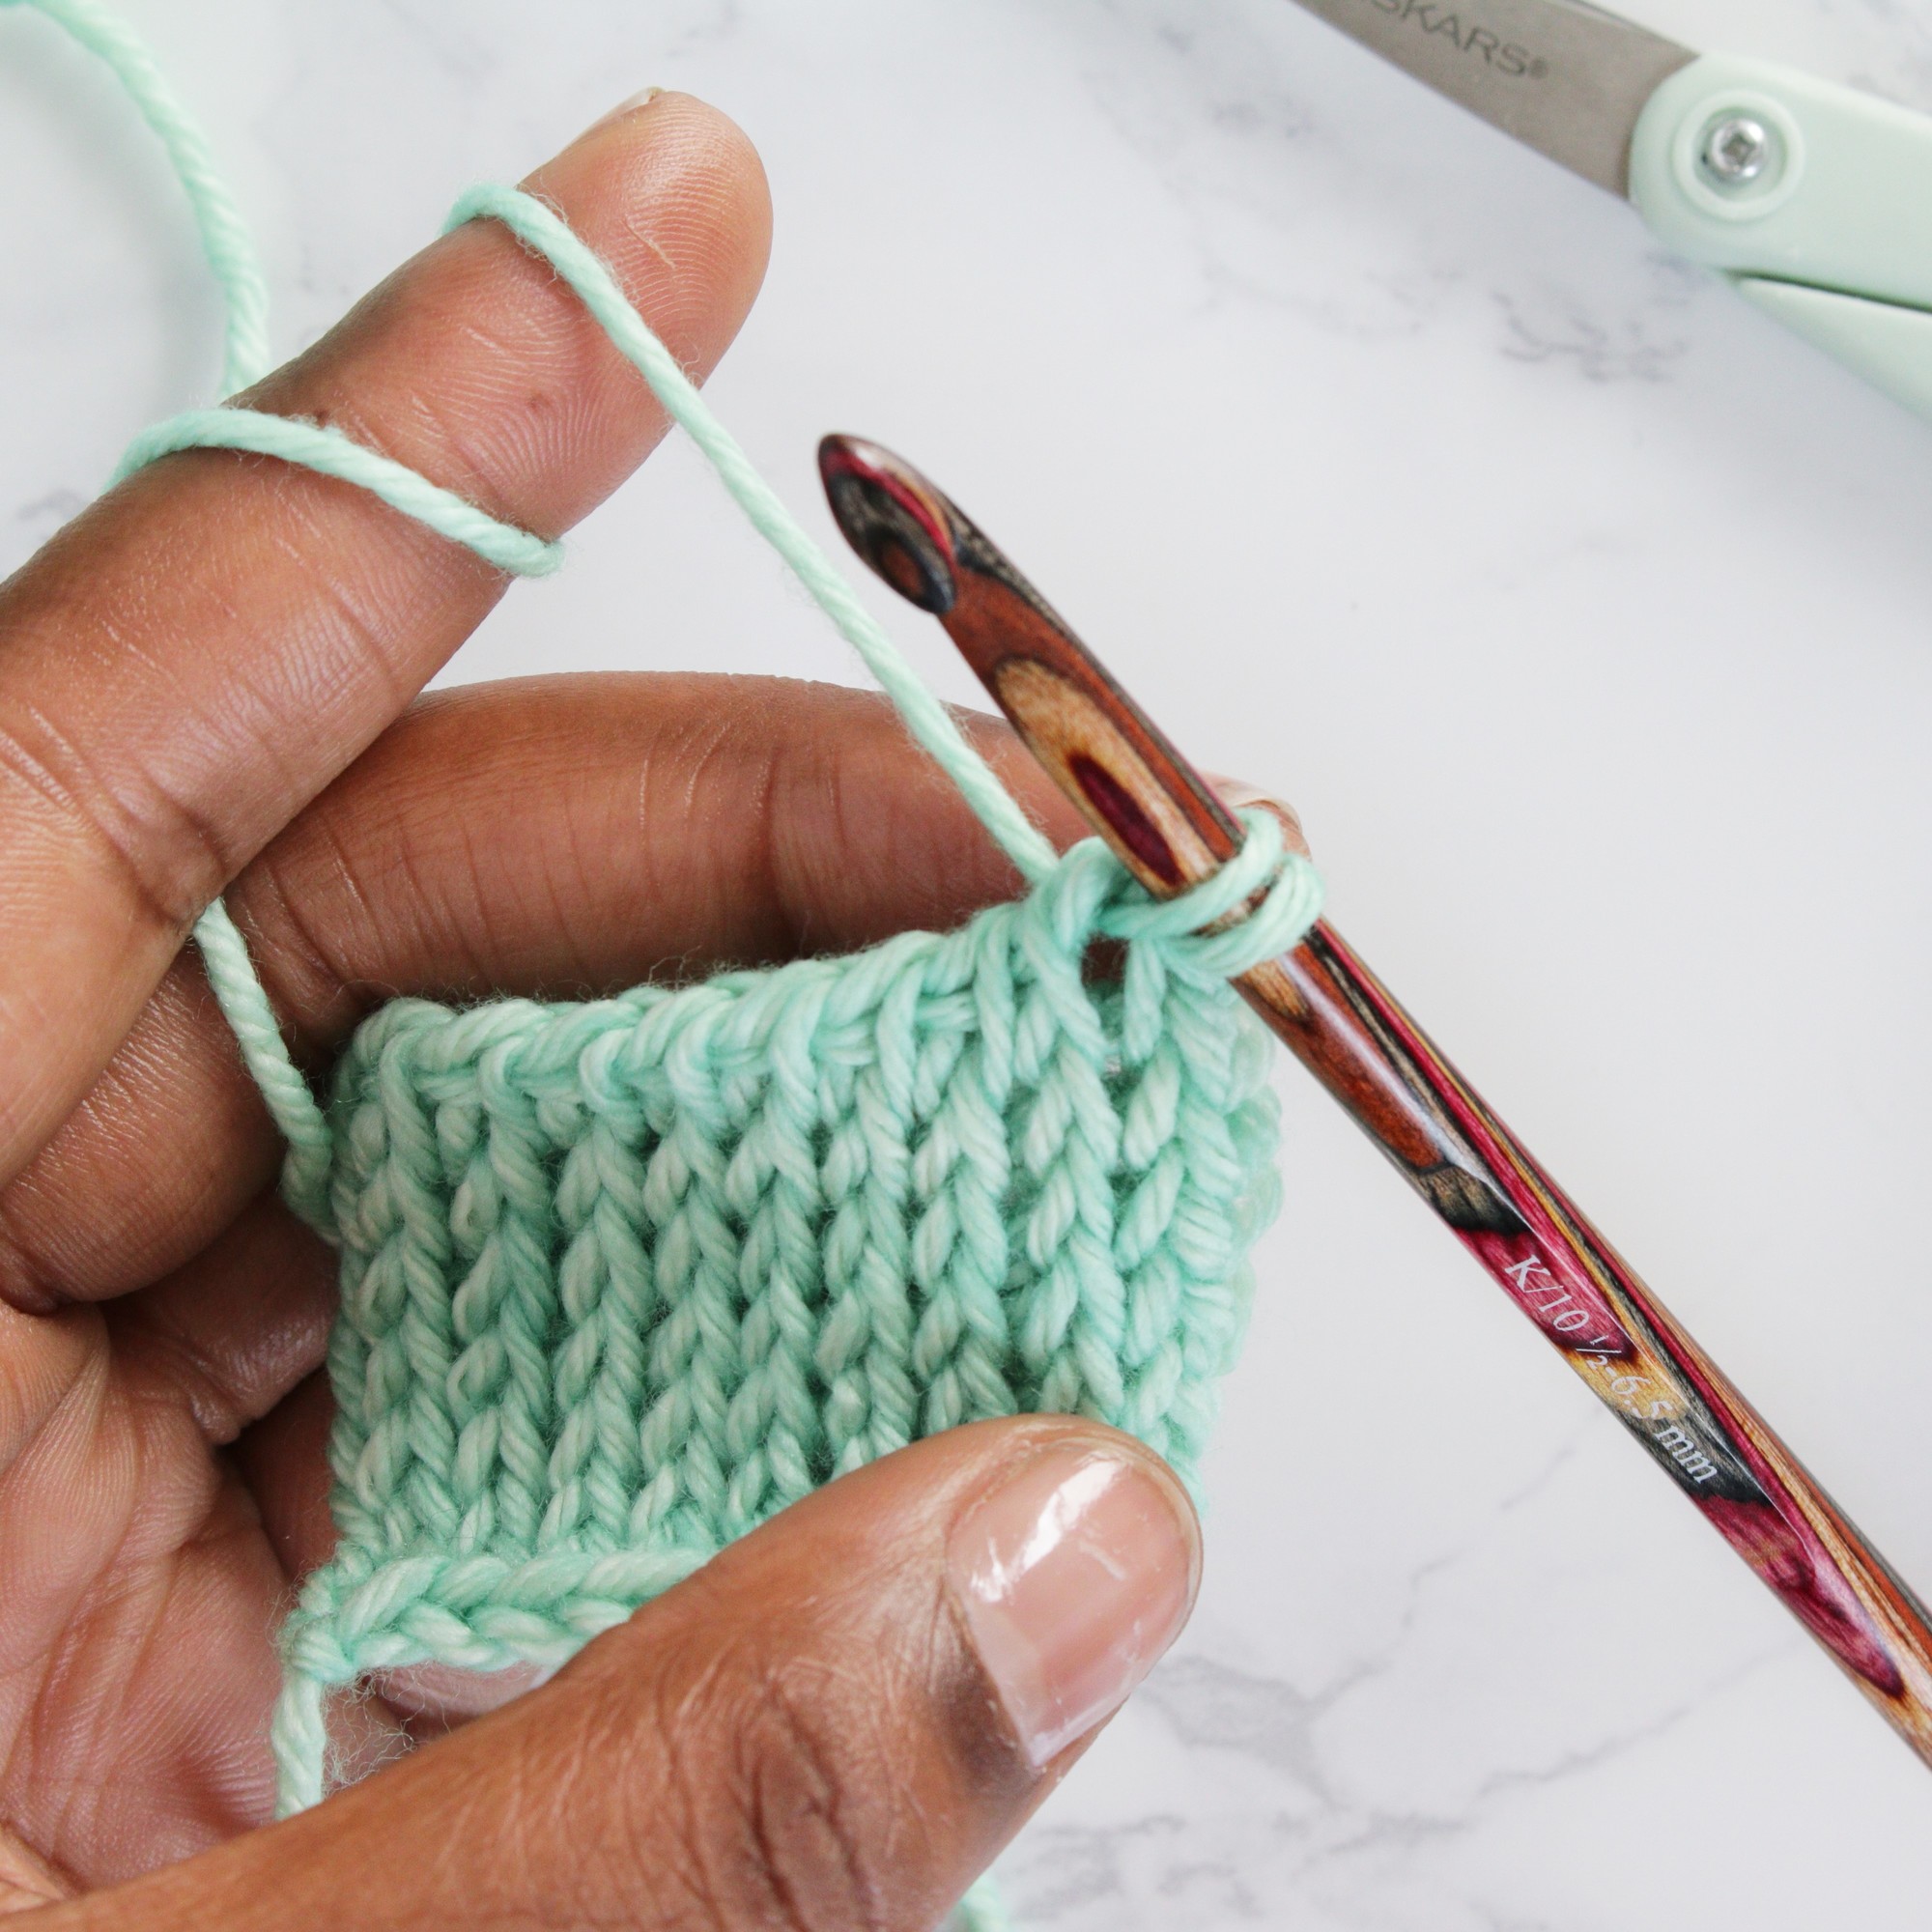
Binding off
Like knitting, Tunisian crochet requires a bind-off row to secure live stitches and produce a neat edge.
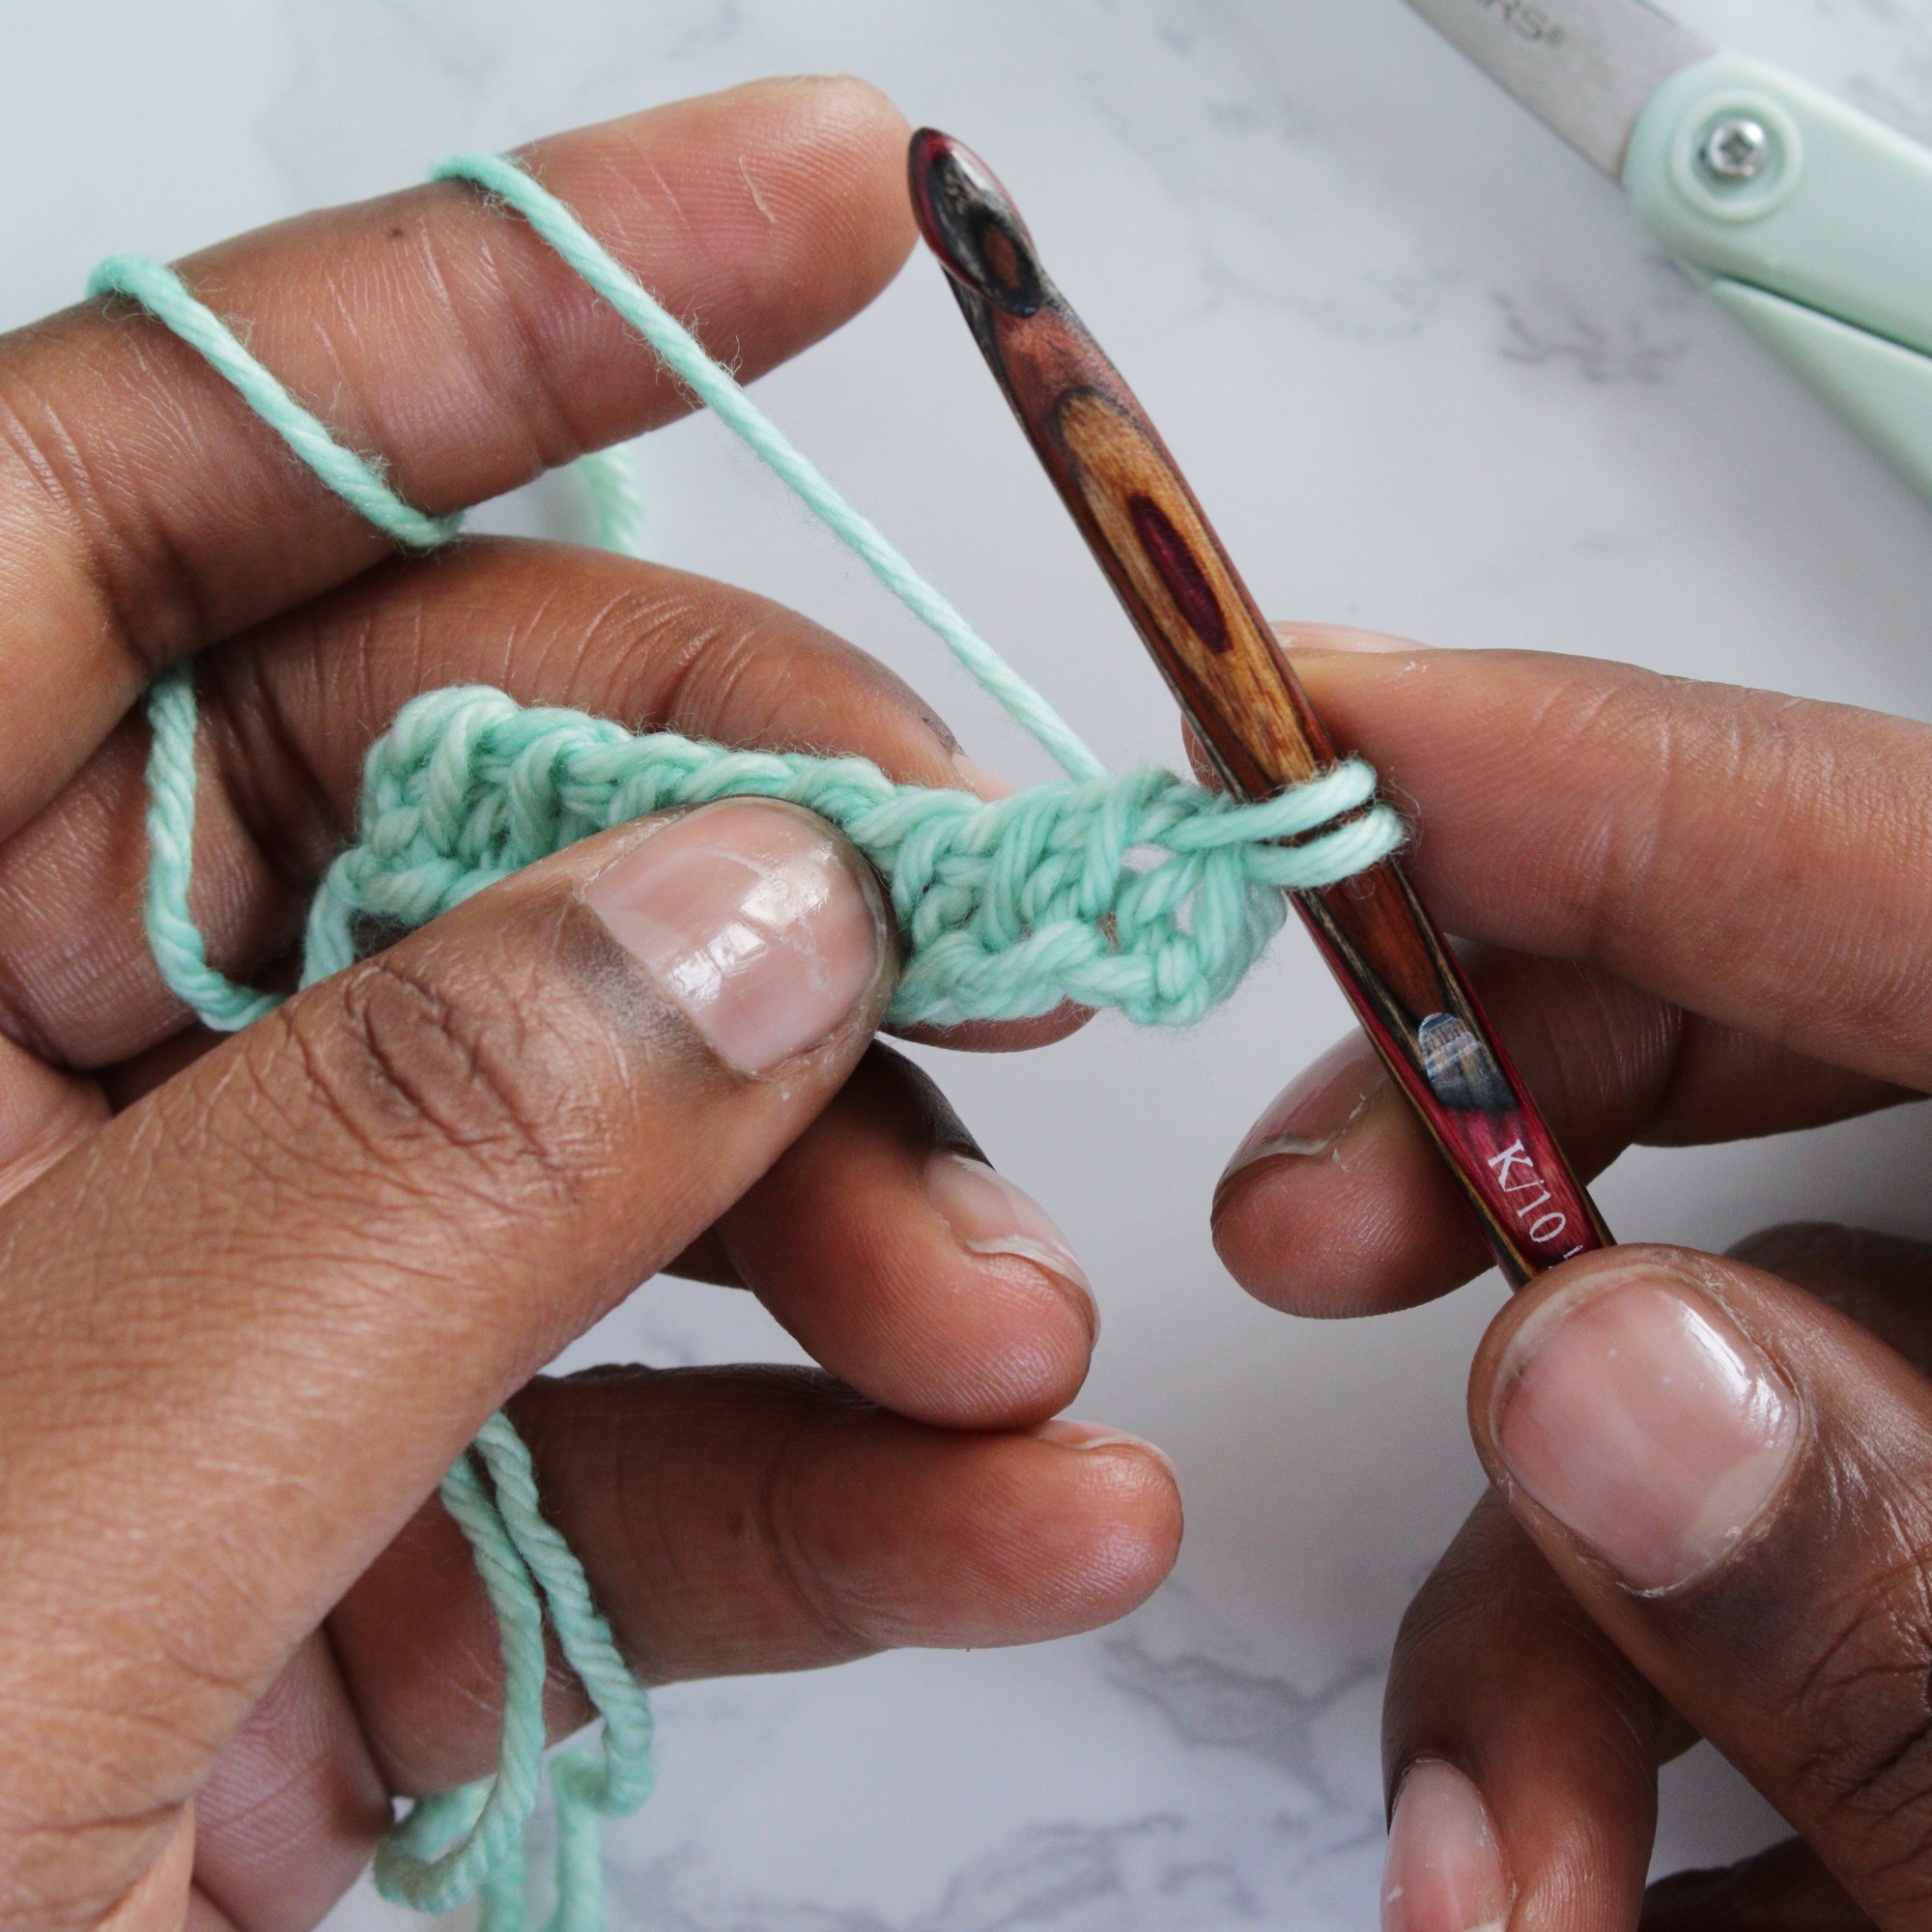
To complete the bind off edge of the Tunisian knit stitch, insert the hook between the two vertical bars of the next stitch, as in previous steps. Instead of continuing on, yarn over, pull up a loop, then pull through the loop on the hook. This completes a slip stitch, thus securing the live stitch.
Repeat this step (insert hook between two vertical bars, yarn over, pull up a loop and complete a slip stitch) for each stitch until the end of the row. Insert the hook under both loops of the last stitch as in previous steps, but complete a slip stitch here as well. Pull up the loop on the hook, cut the yarn leaving a long tail, and weave all tails into the work.
Here’s how it looks:
1. Insert the hook between the two vertical bars of the next knit stitch. Pull up a loop.
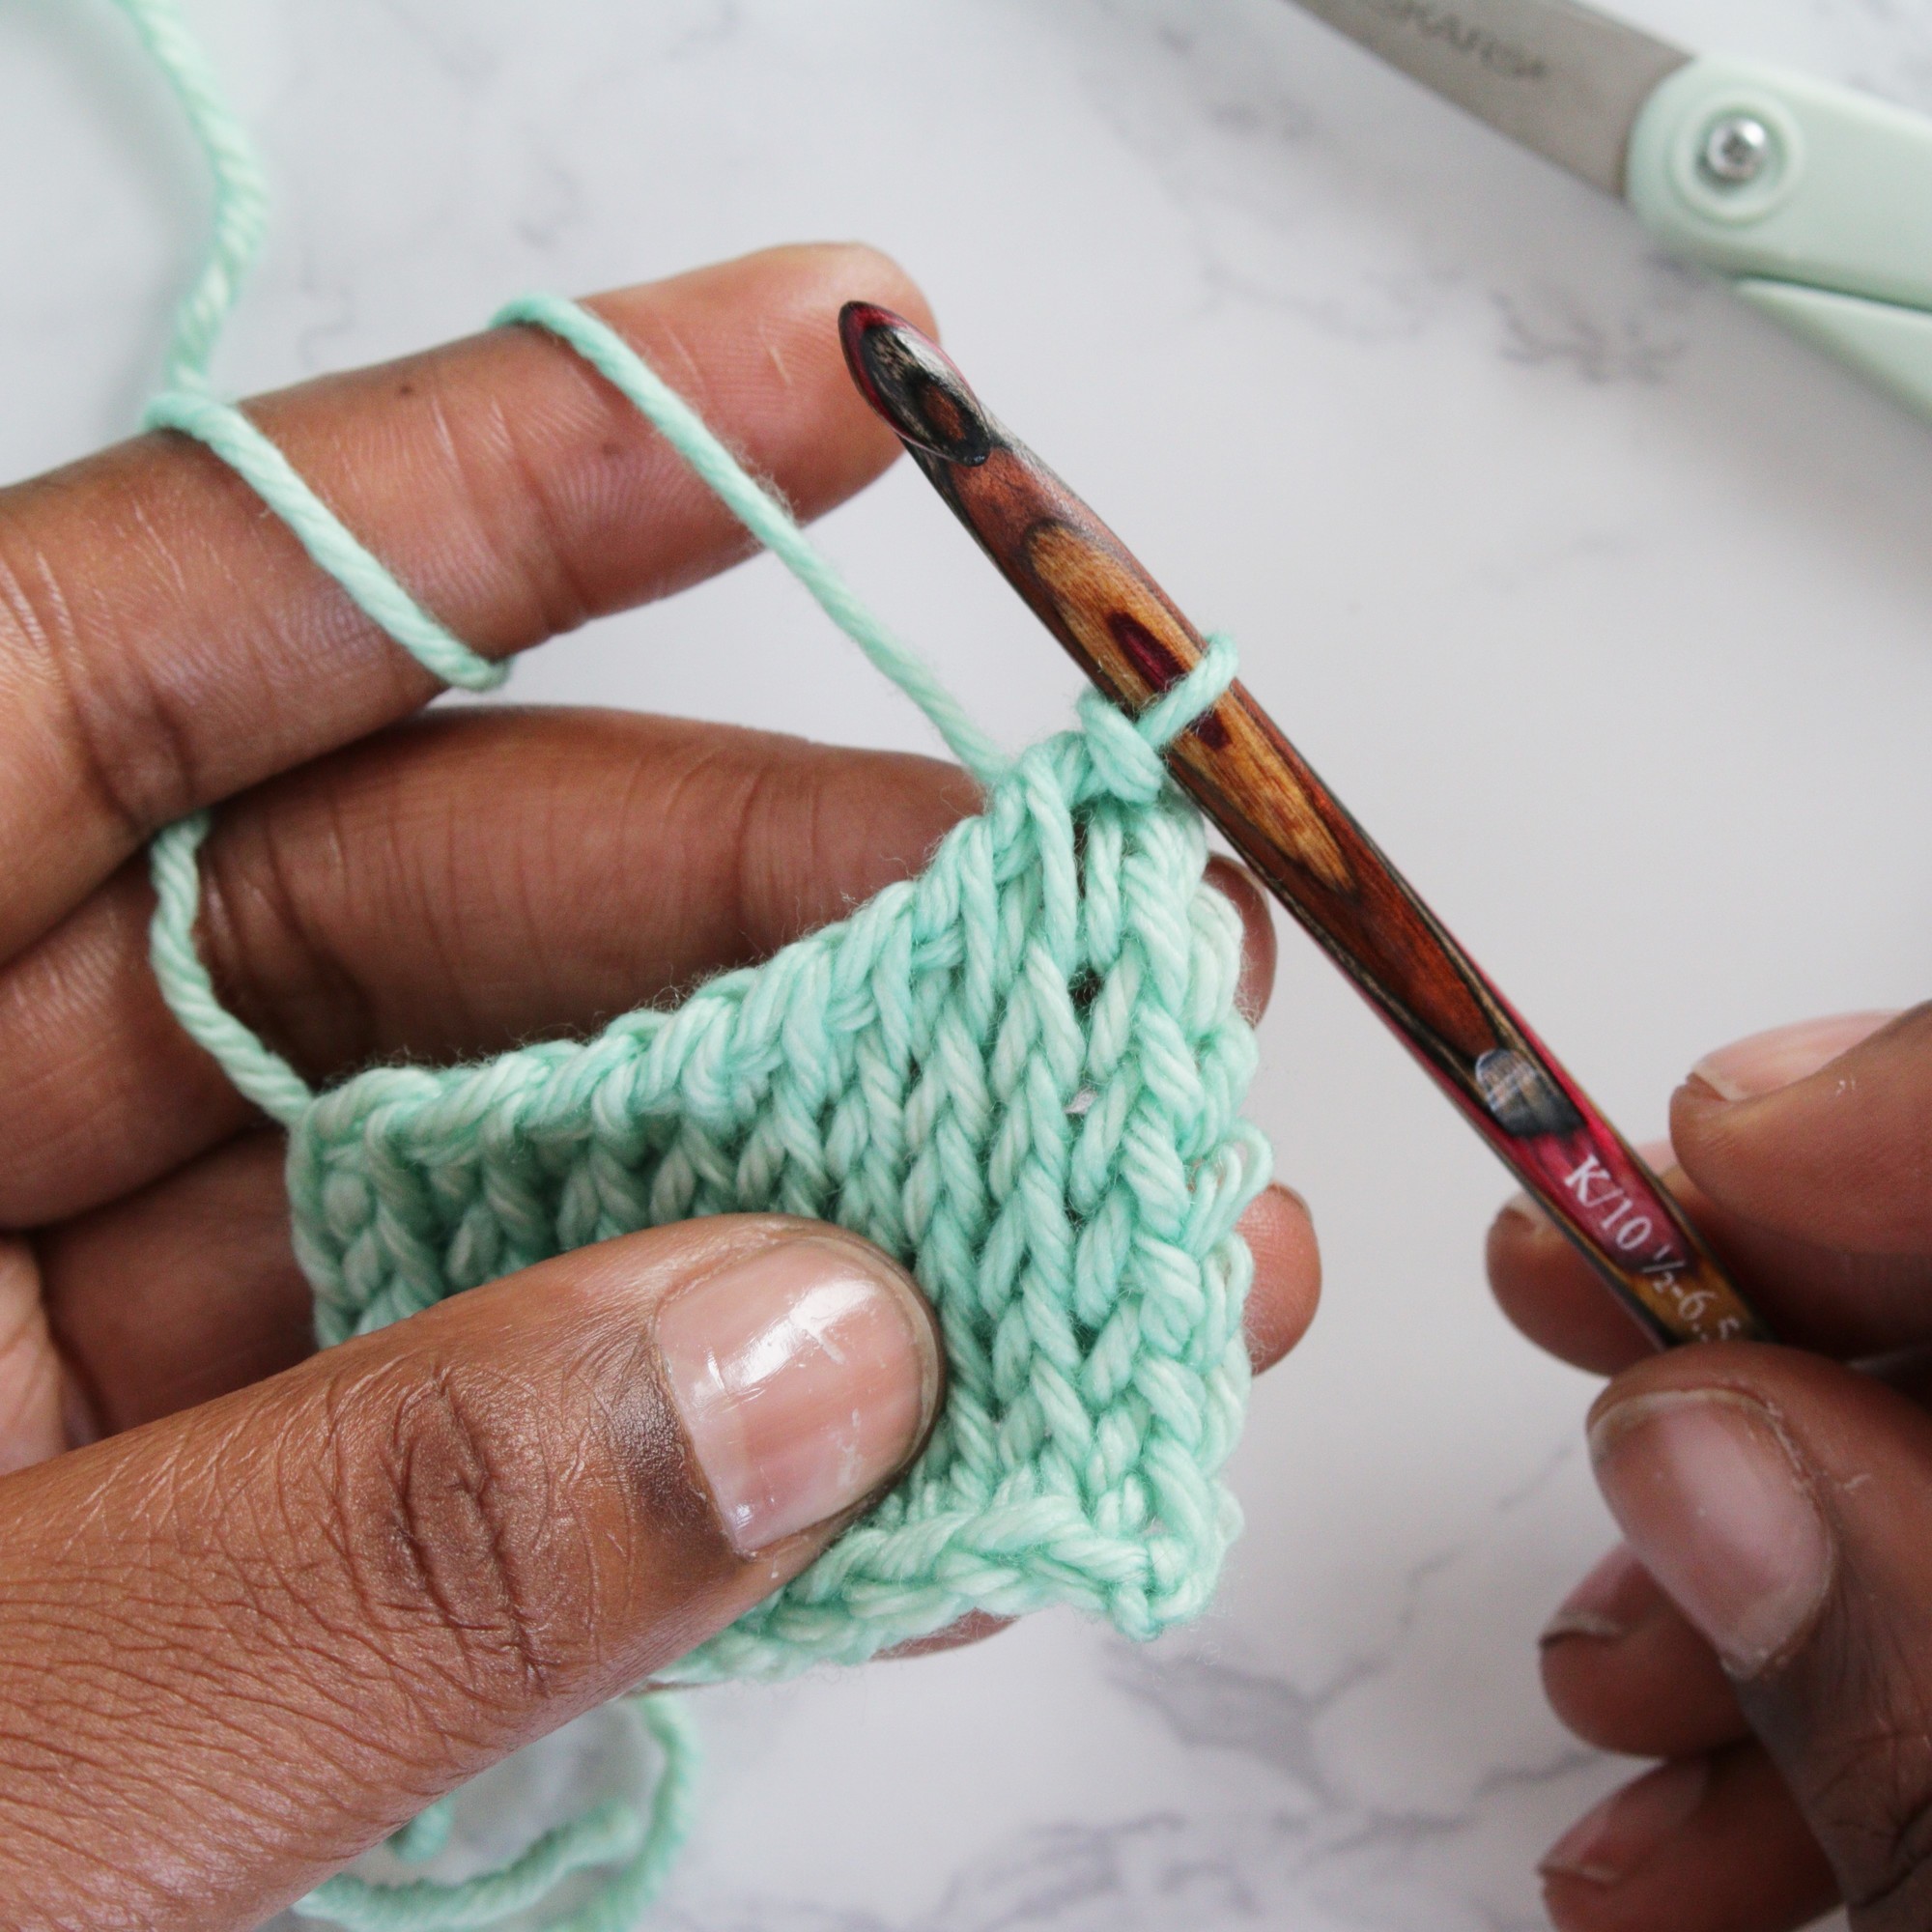
2. Pull through the loop on the hook to complete a slip stitch.
3. Repeat the previous two steps for each Tunisian knit stitch. Insert the hook under the two loops of the last stitch and complete a slip stitch to finish the row.
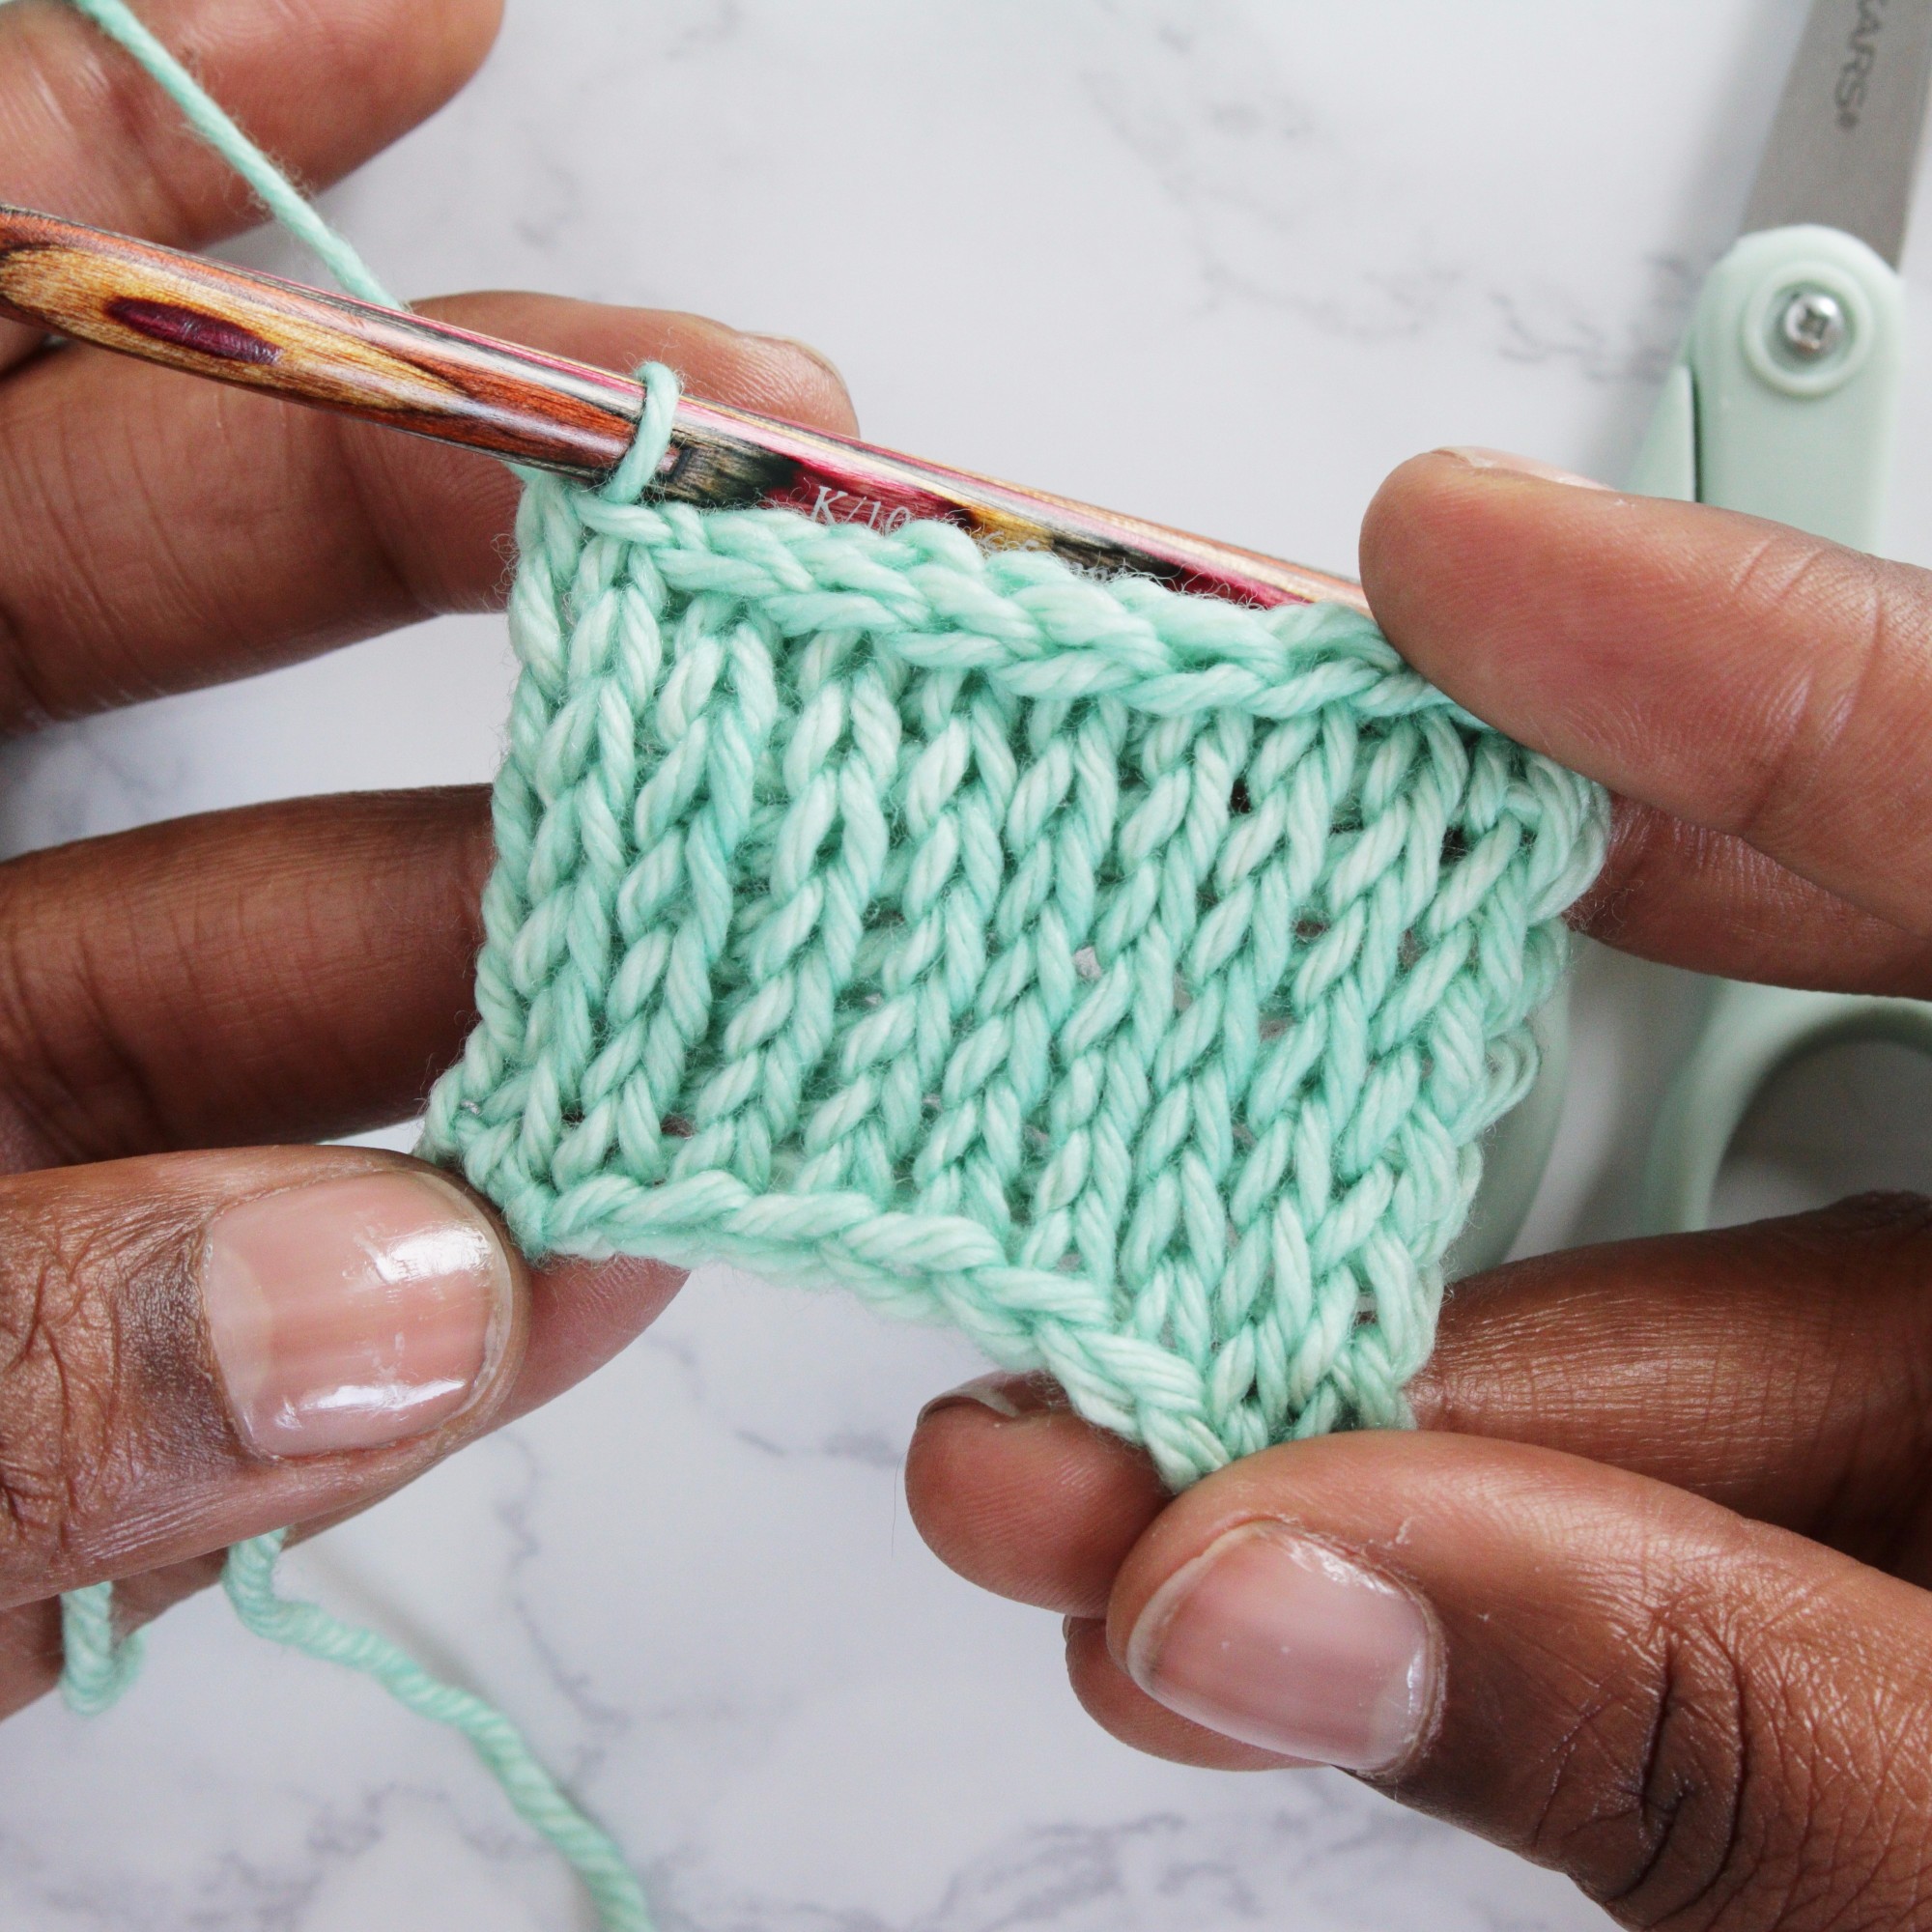
Nothing to it but to do it!
Like any other craft, learning comes from trial, error and repetition. After many hours of trying different projects and techniques, I have completely fallen in love with Tunisian crochet.
Traditional crocheters can use it to build their skills and knitters might see it as a smooth transition into crochet. Whatever the excuse, you owe it to yourself to try Tunisian crochet.
Share tips, start a discussion or ask one of our experts or other students a question.
Already a member? Sign in
No Responses to “Tunisian Crochet 101: Learning the Basics”