
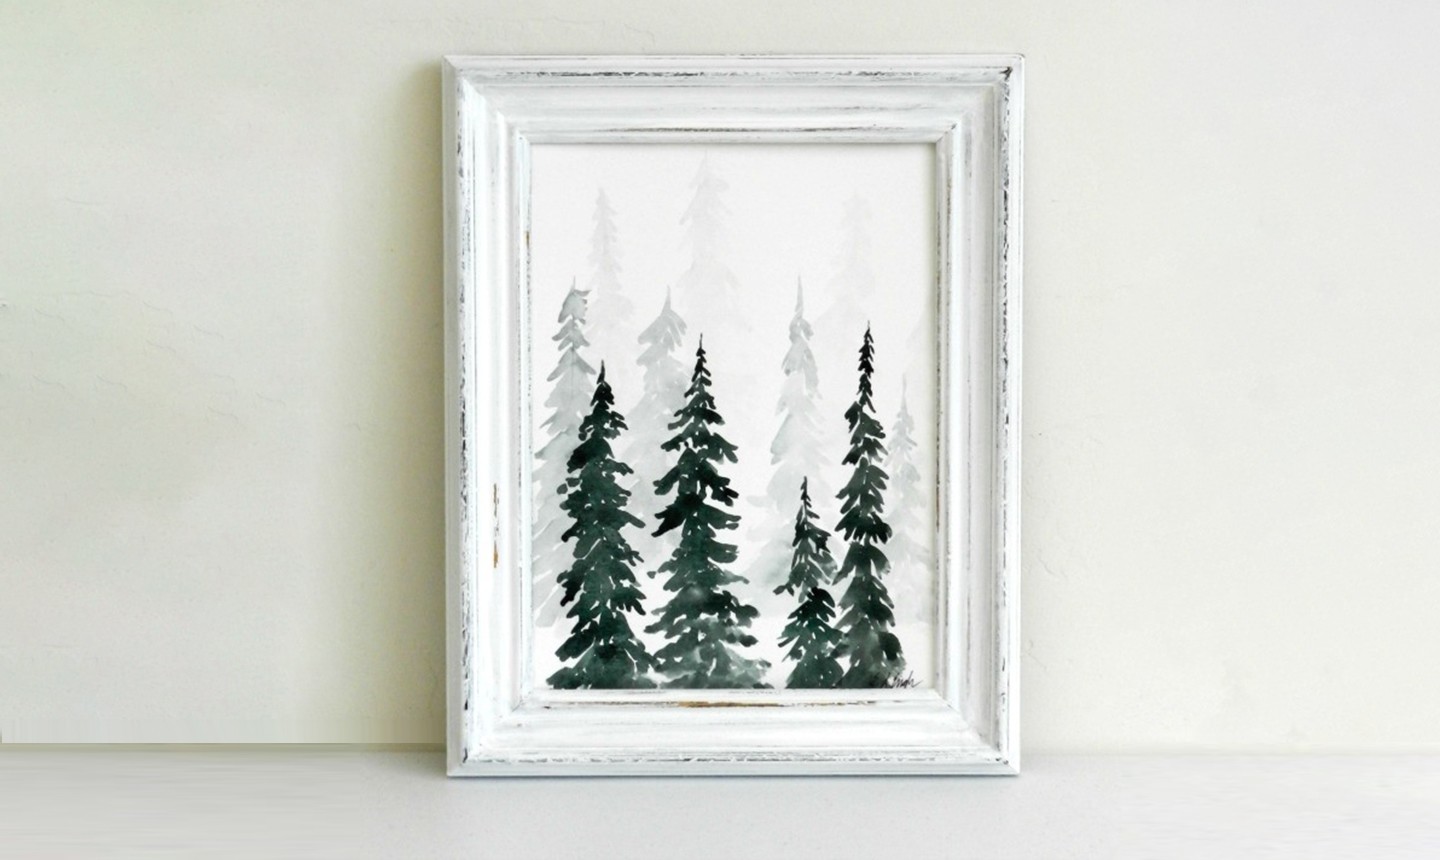
‘Tis the season to wear all the sweaters, eat all the carbs and remember just how stunning a winter landscape can be. So whip out those watercolor paints. When you’re done with the fun and easy project below, you’ll have a pine forest worthy of a wintry reverie.
Watercolor Pine Trees
Level: Easy
What You Need
First, Paint a Pine Tree

1. Mix Your Color
Combine Phthalo green and ivory black to get a dark green.
2. Paint the Top of the Tree
Starting at the top of your watercolor paper, paint a thin, short line down. This is the top of the tree.
Paint some short branches just below the top of the tree. First, place a loaded brush near the top of the tree, then sweep your brush slightly down and out, curving back up a little at the ends. Do this on each side of the tree, painting branches a short distance down the tree but staying well above the middle. Think about making a triangle shape with a little flare at the ends.
3. Fill in More Branches
Work your way down the tree in sections, making each series of branches a little longer than the ones above. Leave some space between sections. Pine trees look more realistic if they’re not packed with branches all the way down.
Make sure to add some branches around the trunk of the tree too. Vary the direction and thickness.
4. Create the Trunk
Paint a short, thick line at the bottom for the trunk.
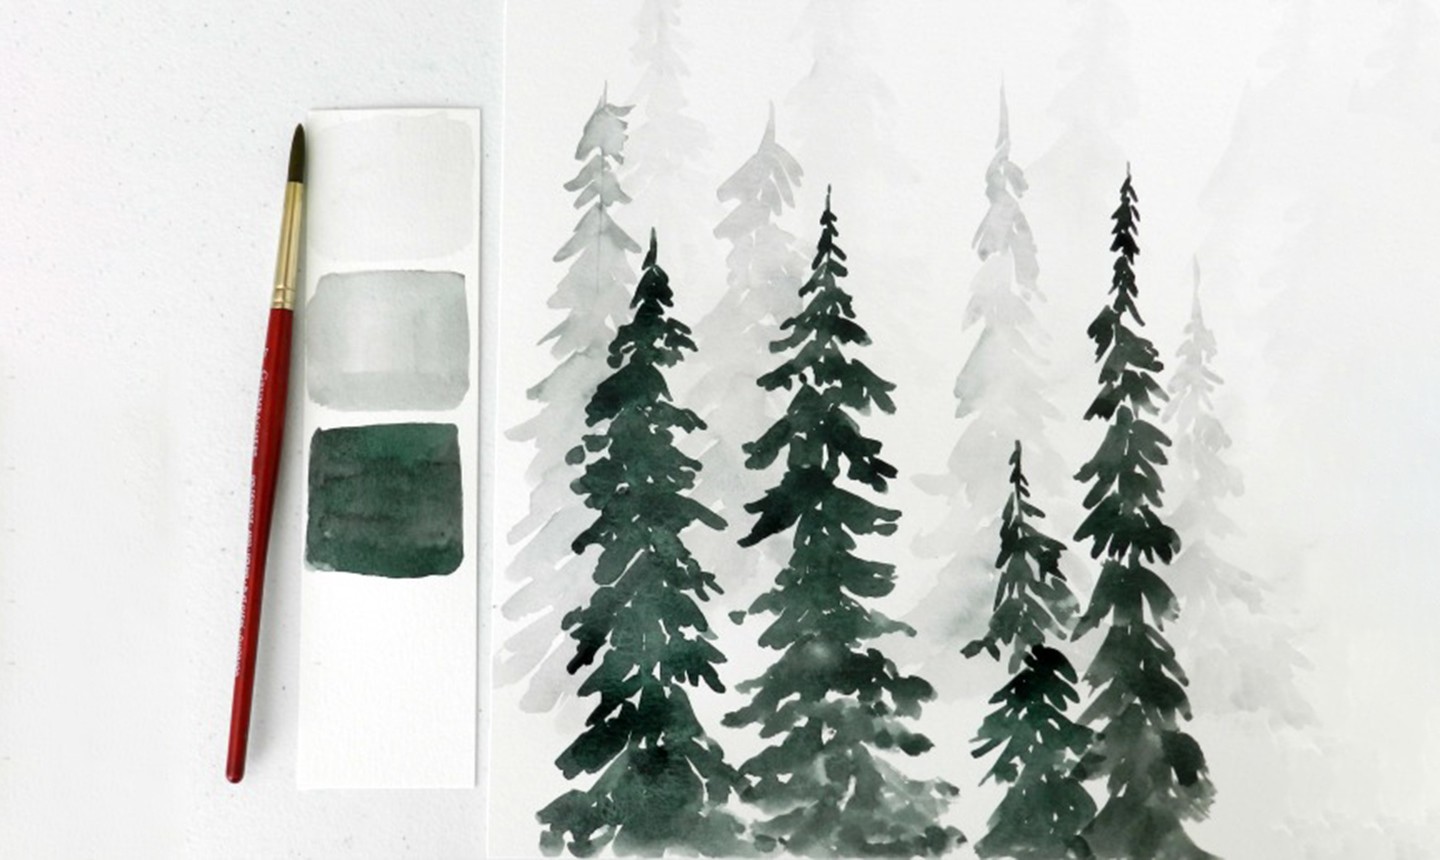
Create a Value Scale

It helps to create a value scale on a scrap piece of watercolor paper before you start painting an entire forest. Keep it and use it as a reference as you paint, to keep your values on track.
To make a value scale, divide your paper into three equal sections. In the first section, paint a very light wash . In the second section, paint a medium wash and in the third, paint a dark wash. Let all the areas dry.
Now Paint Your Forest
1. Start With the Light Wash
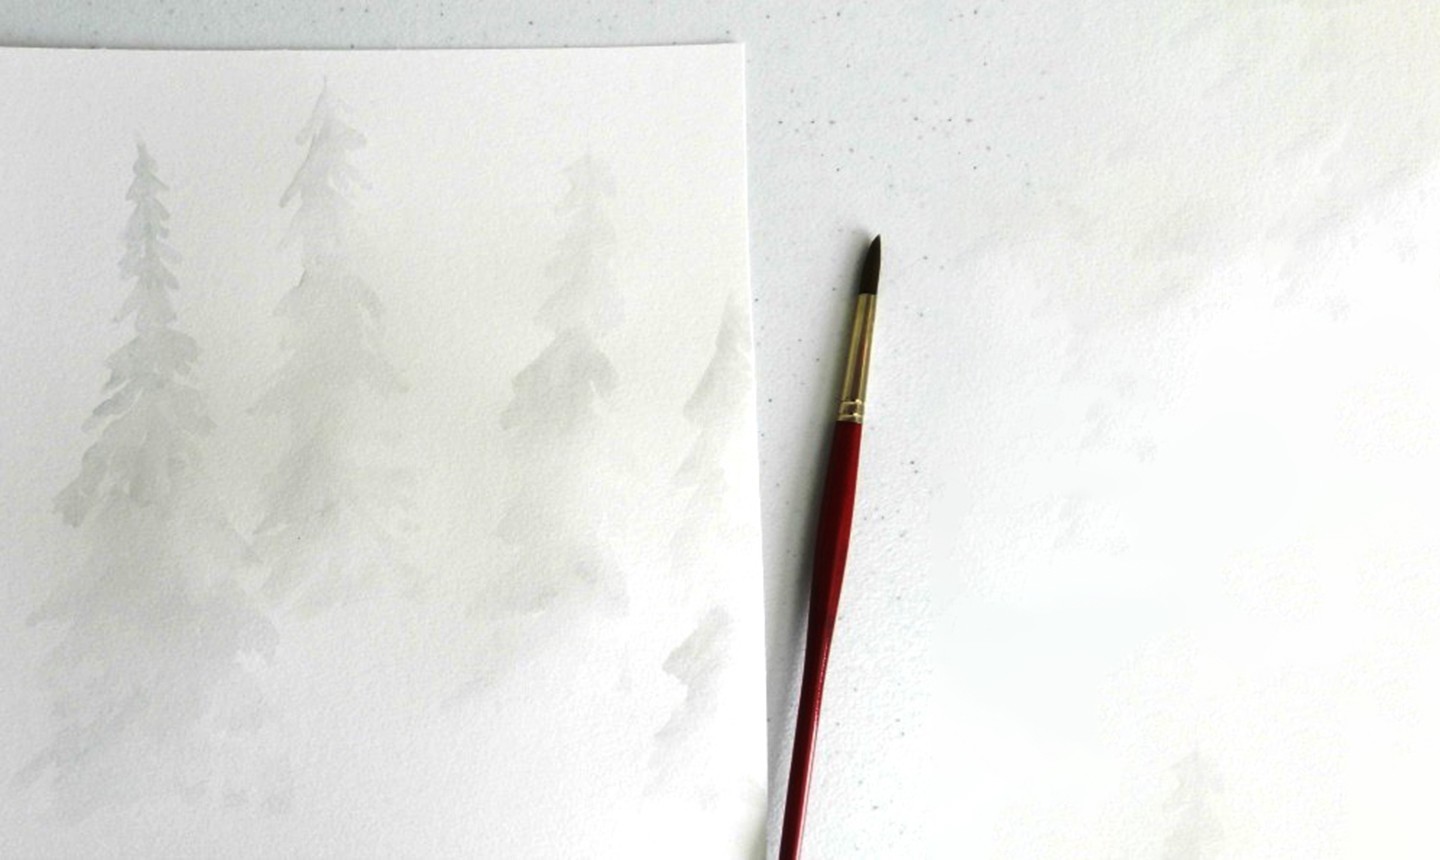
Using the first and lightest value from your scale, paint a row of trees. These trees should be so subtle, they’re barely visible. Start these trees near the top of your paper and end them somewhere in the bottom third. Let dry.
2. Go to Your Medium Wash
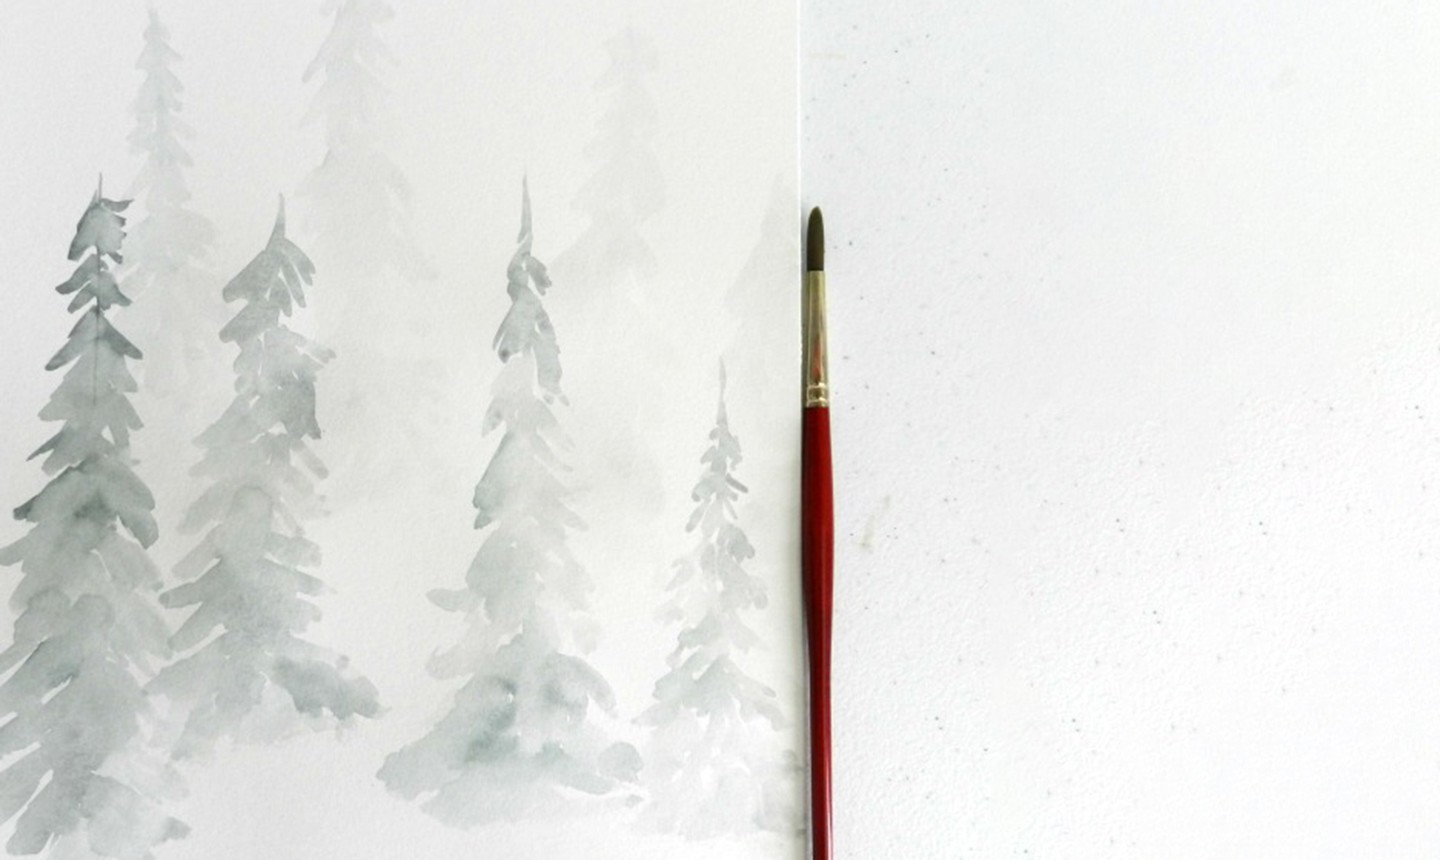
Using your middle value, paint another row of trees on top of the first row. This row is darker and should stand out against the lighter first row. Start the tops of these trees slightly below the tops of the first row, and end the trees near the bottom of the paper. Let dry.
3. Finish With Your Dark Wash
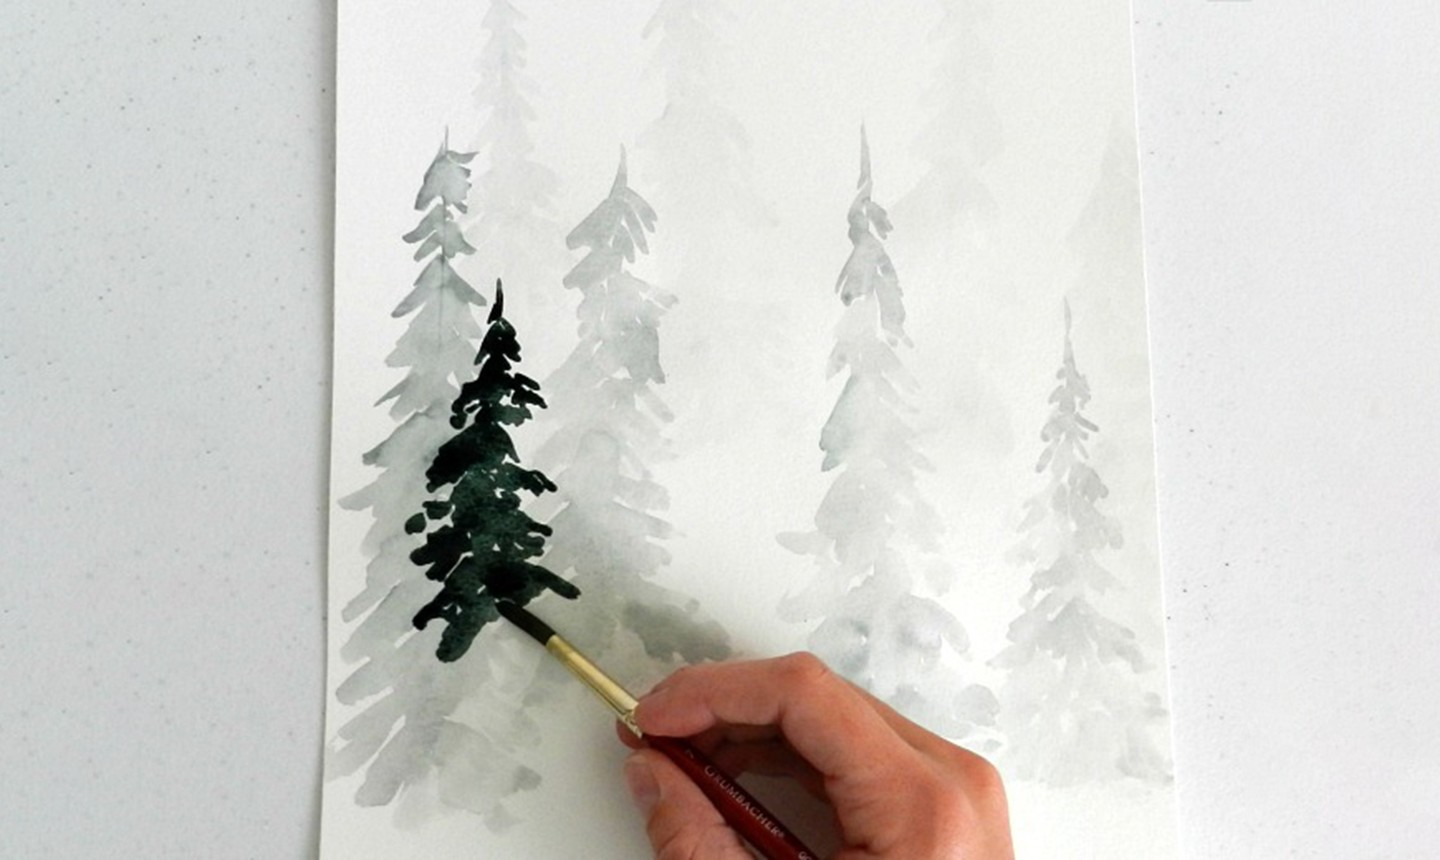
Using your darkest value, paint a third row of trees on top of the first two, with the tops starting below the tops of the second row. This row should be much darker than the other two rows and will stand out. Paint these trees all the way down to the bottom of the paper.
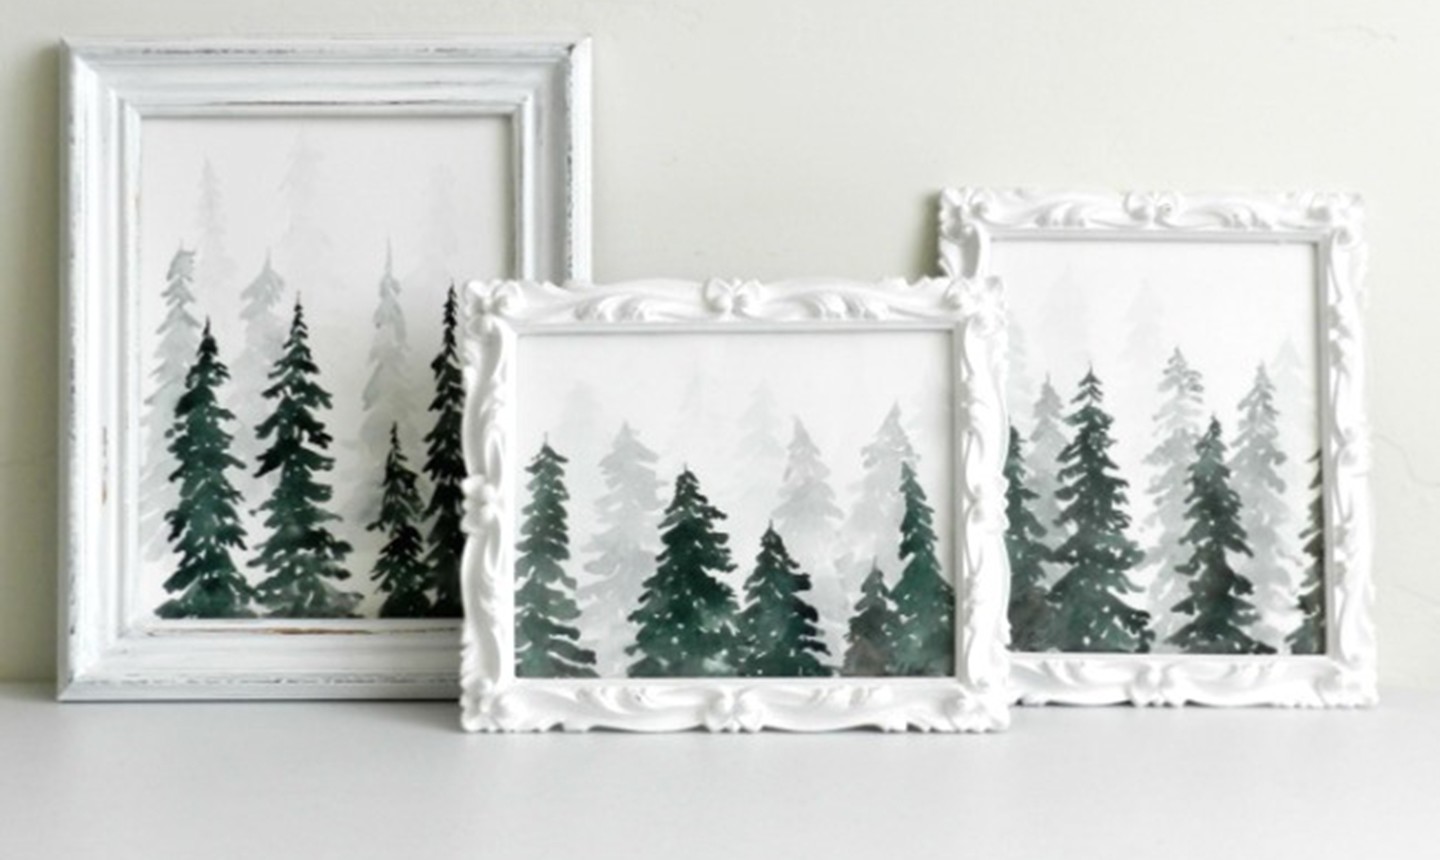
And… there’s your pine forest. Stare at it and daydream about winter wonderlands, or get to work painting the next pine forest, and the next.
Looking to get started with watercolors? Check out the class Startup Library: Watercolors below!

Share tips, start a discussion or ask one of our experts or other students a question.
Already a member? Sign in
No Responses to “Paint This Fast and Fabulous Watercolor Pine Forest”