
When you finish your crochet project, it’s hard not to get excited and just kind of, um, snip off those ends. Resist the urge! If you want your piece to last a long time — and look professional — you need to properly weave in those yarn ends.
It’s easy to weave in your ends. It’s so easy, in fact, that the task can actually get a little tedious. I like to weave in my crochet ends while I watch a movie or listen to an audiobook.
While weaving in ends doesn’t take a lot of time or concentration, you need to do it the correct way in order to make sure the ends don’t poke out or unravel. And how you do it can depend on a lot of things, from what type of crochet stitch you’re using to whether your project has seams or not.
Test these three options for weaving in your crochet ends!
1. Weave through the stitches
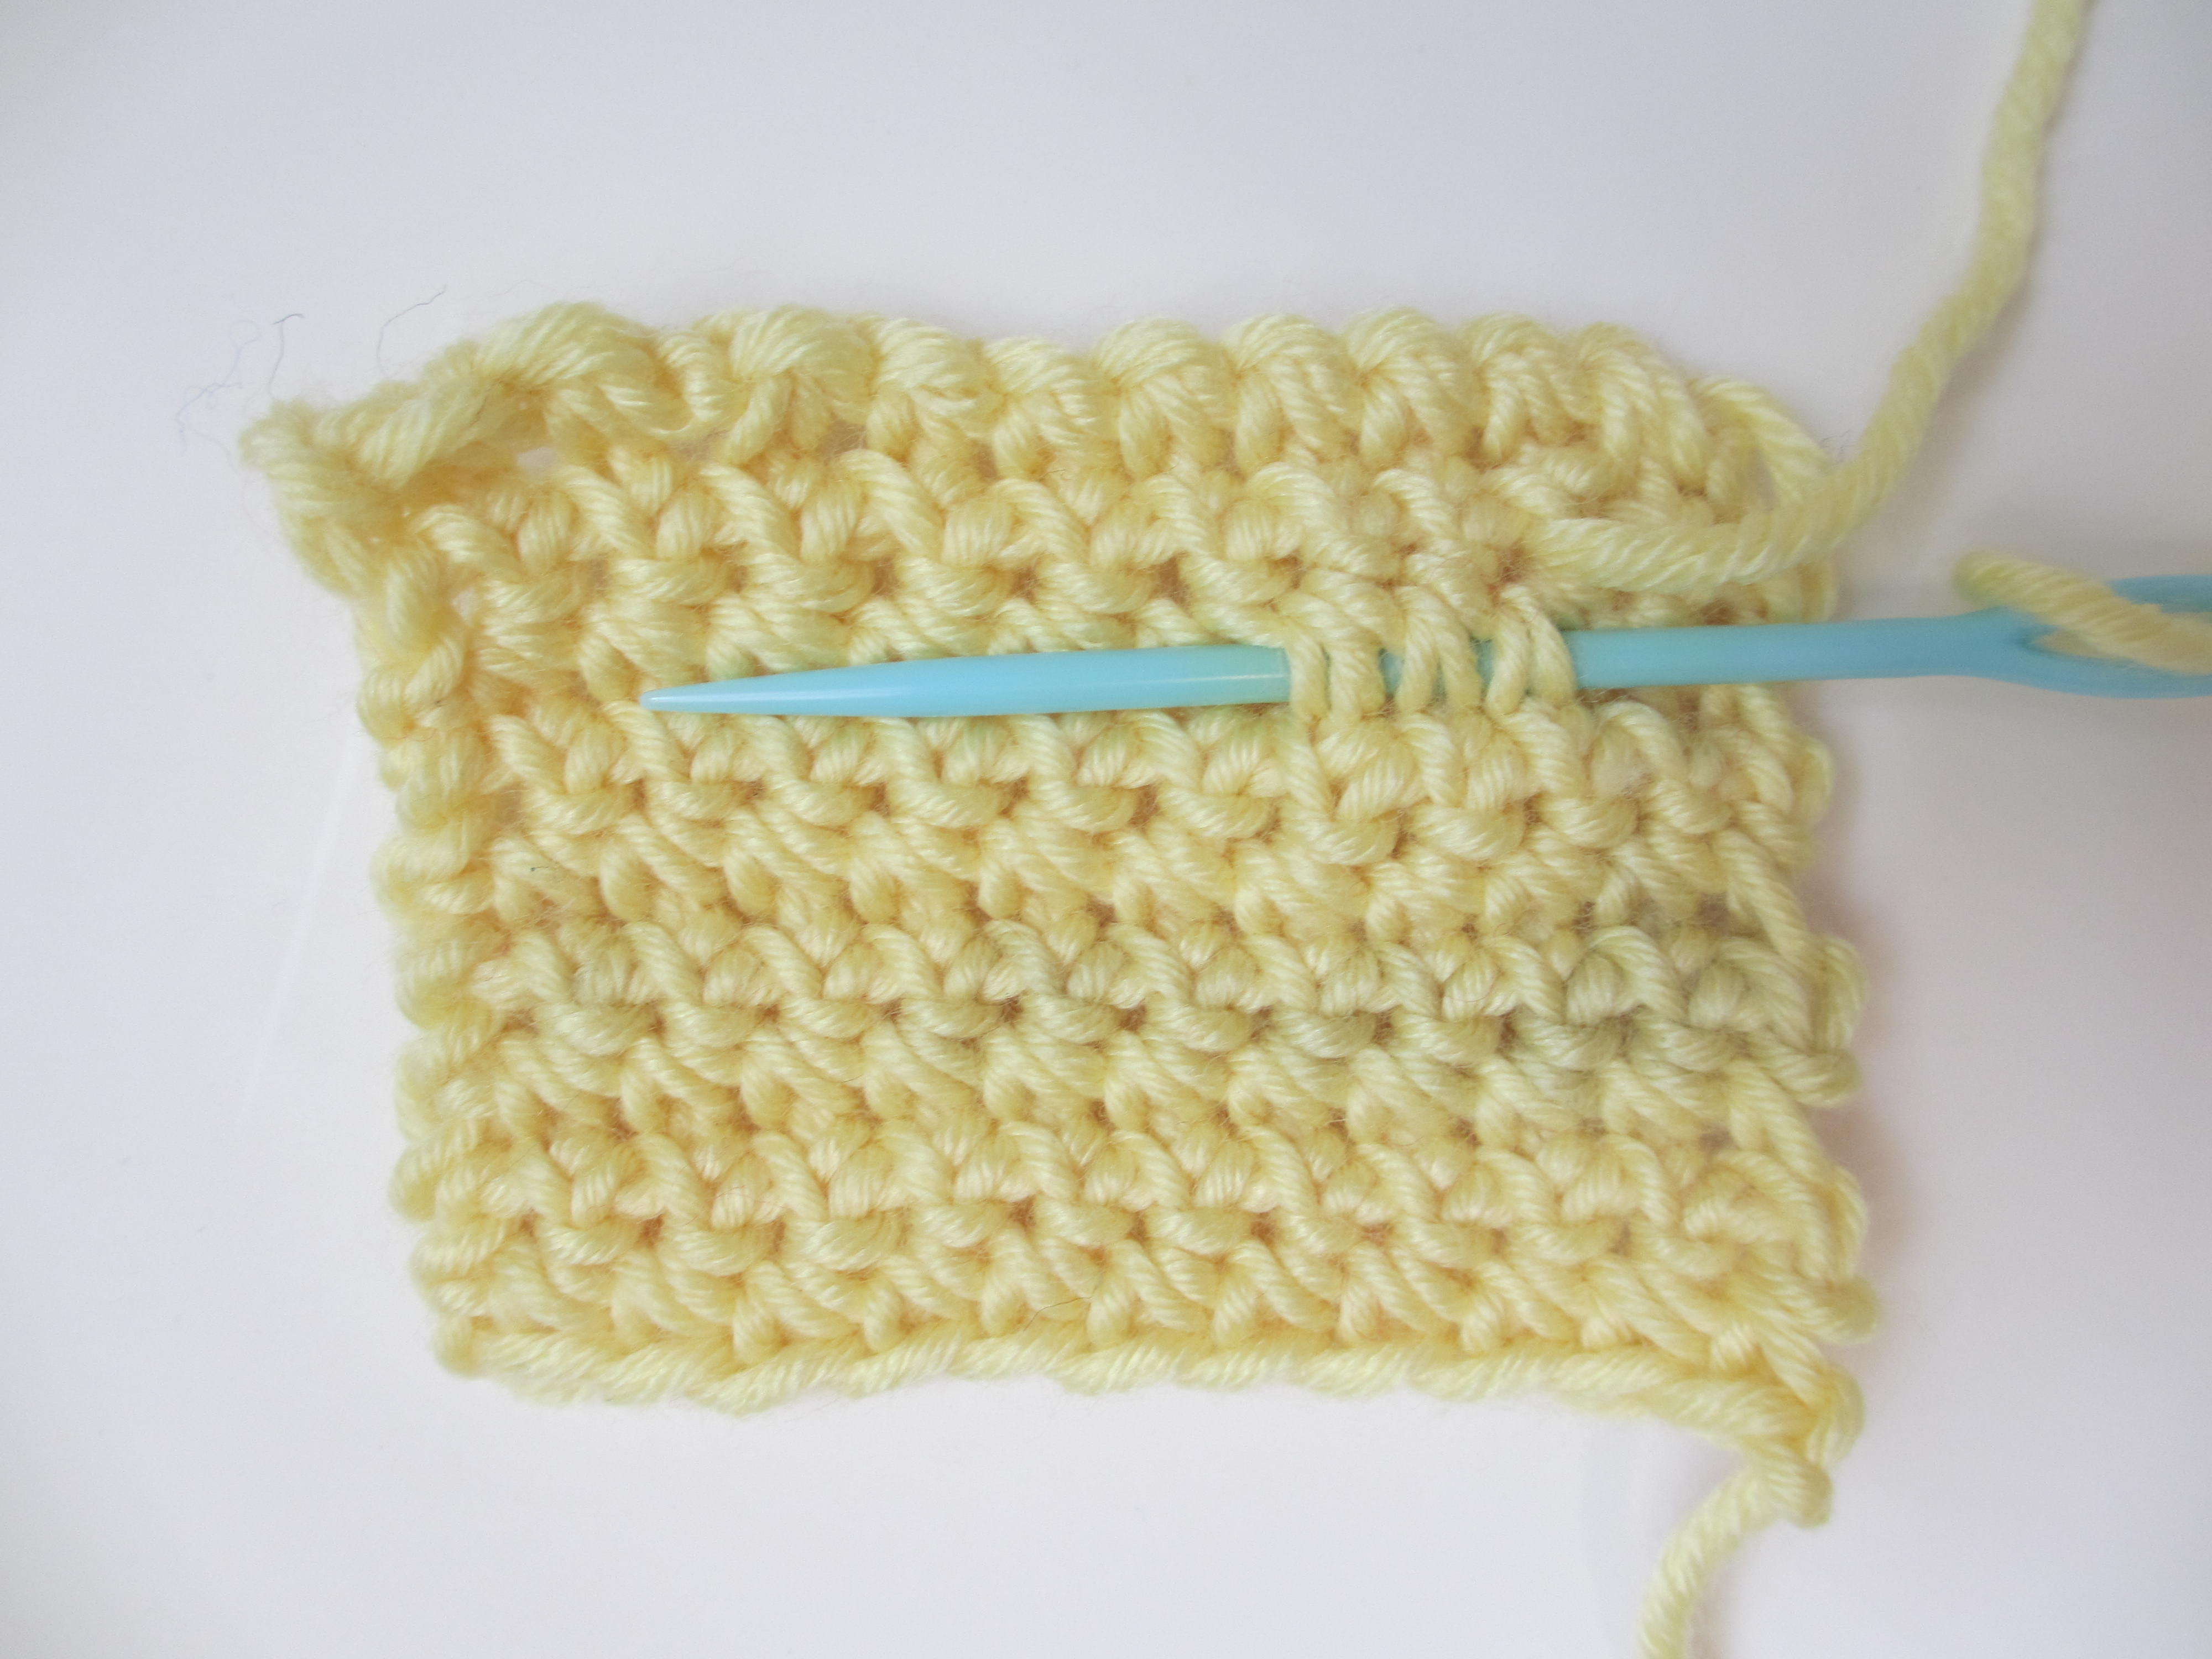
Run that needle through a couple stitches, change directions and run it vertically, then weave it in the opposite direction. Going up and down and side to side will help to lock that baby in. Remember to always weave on the wrong side of the work. If you’re working with something like a scarf that doesn’t have a wrong side, just do your best to hide the ends as much as possible.
2. Whipstitch the stitches
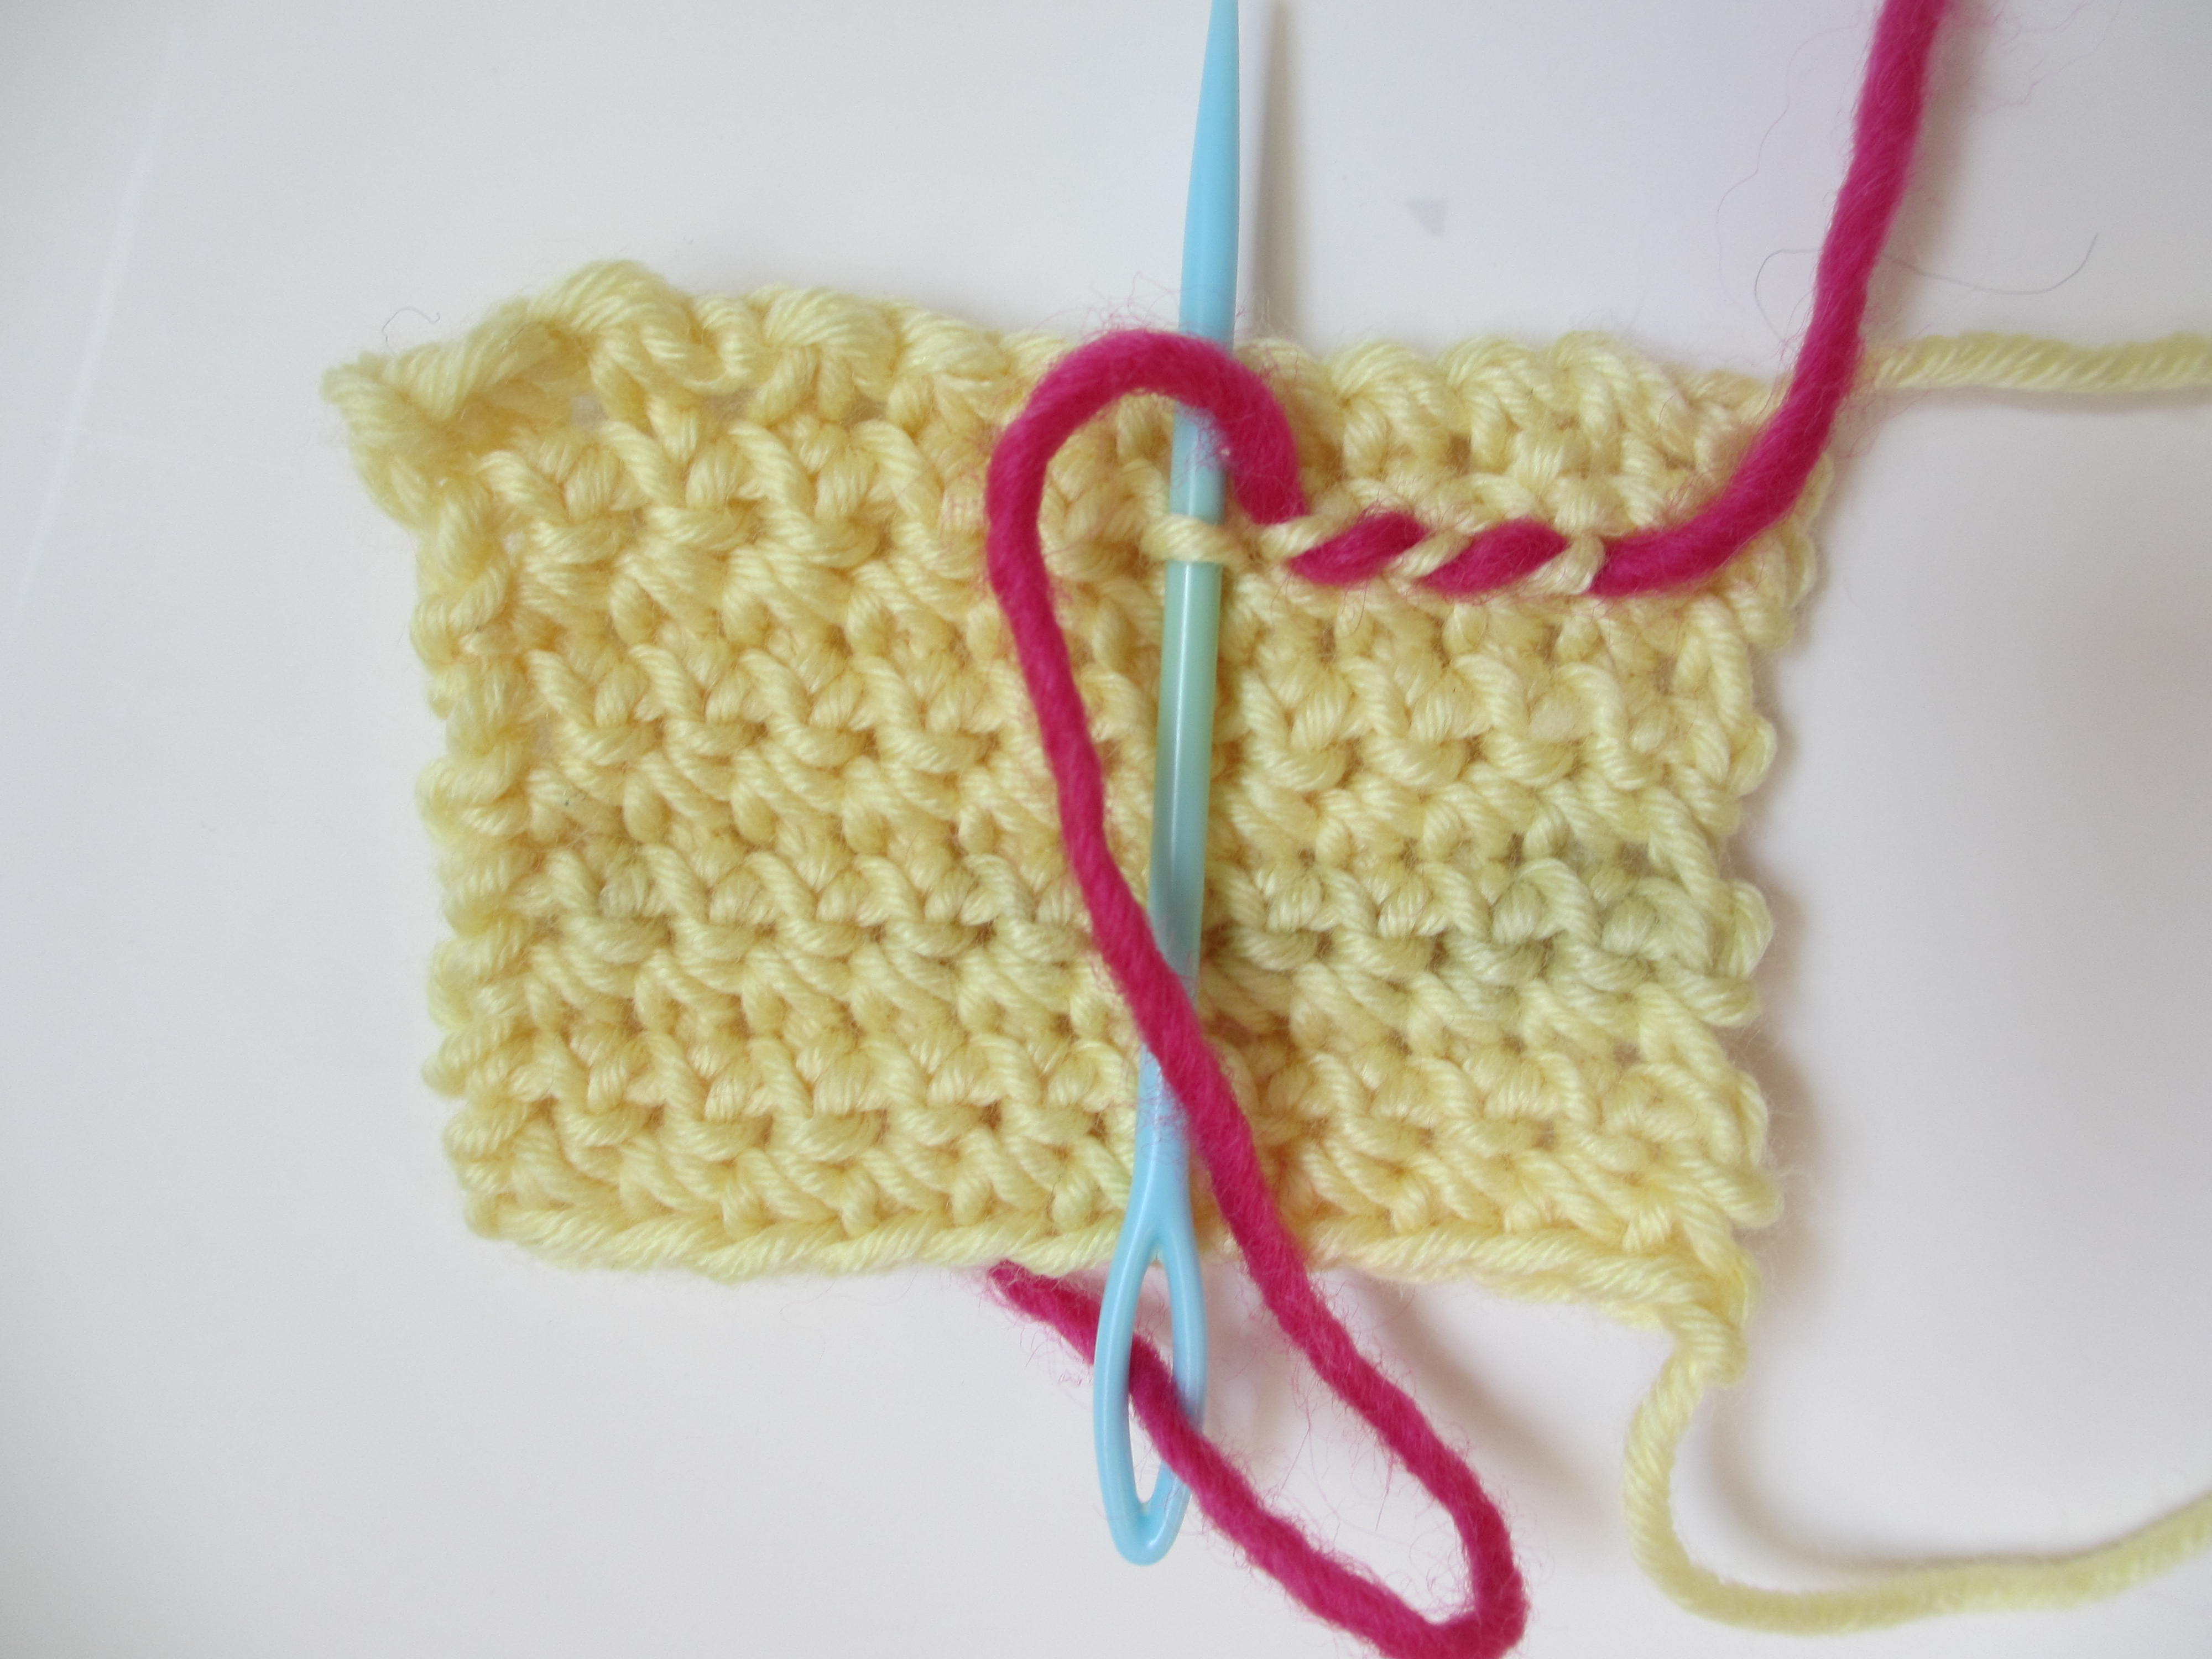
Whipstitch around the stitches on the wrong side of the work. I’ve used pink yarn above to show you how that whipstitch looks. Normally, of course, you’d use the same color yarn when you’re weaving. Use the same technique as you would if you were weaving right into the stitches, changing directions to secure the end as much as possible.
3. Weave as you crochet
Double up your yarn and take the loose end with you as you crochet. This works well if you’re crocheting with the same color. (Carrying a pink yarn with a yellow yarn might look awesome, but I doubt it’s the look you’re going for!) It’s also a relief to finish a project and have most of the ends already taken care of.
General tips for weaving in ends
- Sometimes, I like to pull my end taut, snip it off, and then let it spring back into the stitches just to make sure it’s really hidden in there — and because I don’t want to risk cutting too close to the piece. Could you imagine accidentally cutting the project? Heart attack.
- Remember to weave the ends in before you block. This makes doubly sure that everything stays in place and keeps its shape after blocking.
- If your piece has seams in it, use them to your advantage. Weave the yarn in and out of the seam, where it’s guaranteed that no one will ever spot it.
Of course, weaving in ends is one of many basic crochet how-tos a beginner needs to be familiar with. If you need even more basic help — or just a refresher — check out Kim Werker’s Crochet: Basics and Beyond class. Kim will walk you through all the basic stitches, including crocheting granny squares. (These things sound much more exciting than weaving in ends, don’t you think?)
Sorry I hit a “s” in my original email address question It should be an “a” ’ve never done it this way before but it shows on a you tube video to cut off length of original colour and lay it along your work and crochet over the 2 loose ends original colour and end of new colour for a few stitches when changing colours at end of row. I’m worried it will come out some day in the wash etc. will it stay together as good as a knot
I’ve never done it this way before but it shows on a you tube video to cut off length of original colour and lay it along your work and crochet over the 2 loose ends original colour and end of new colour for a few stitches when changing colours at end of row. I’m worried it will come out some day in the wash etc. will it stay together as good as a knot