
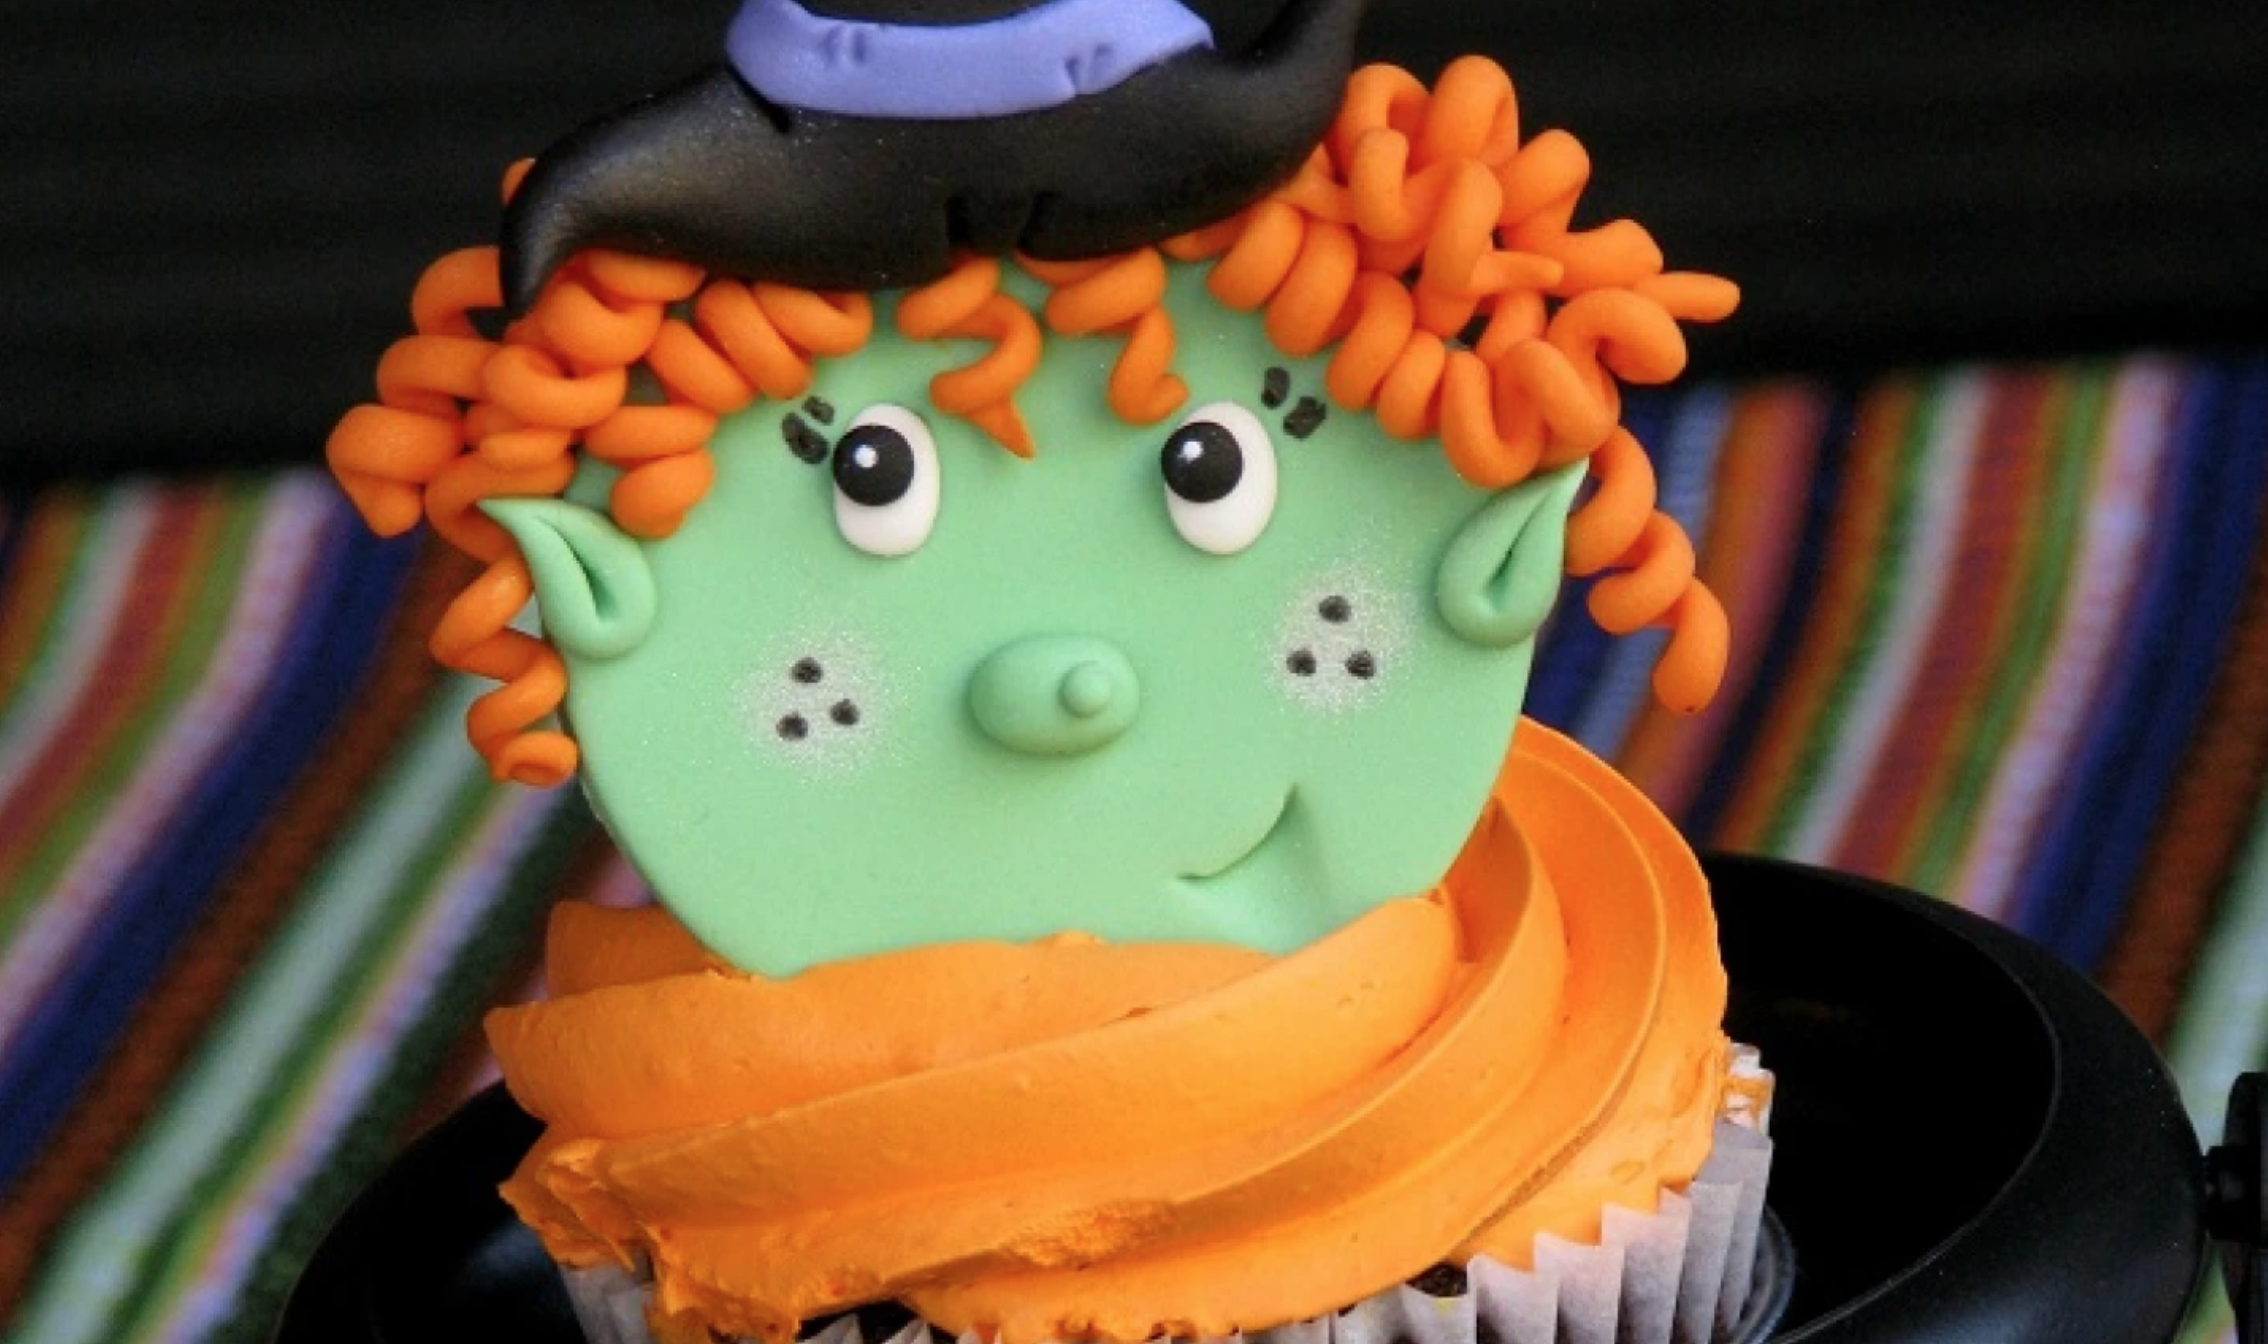
Witch, please! Have you ever seen a cooler cupcake topper? You might love fondant or hate it, but there’s no denying it’s the best for fancy decorations. And Halloween might just be prime time to bust it out. Gather your tools and prepare to get down with some serious hocus-pocus. Broomstick optional.
Witch Cupcakes
Level: Easy
What You Need
Instructions
Step 1
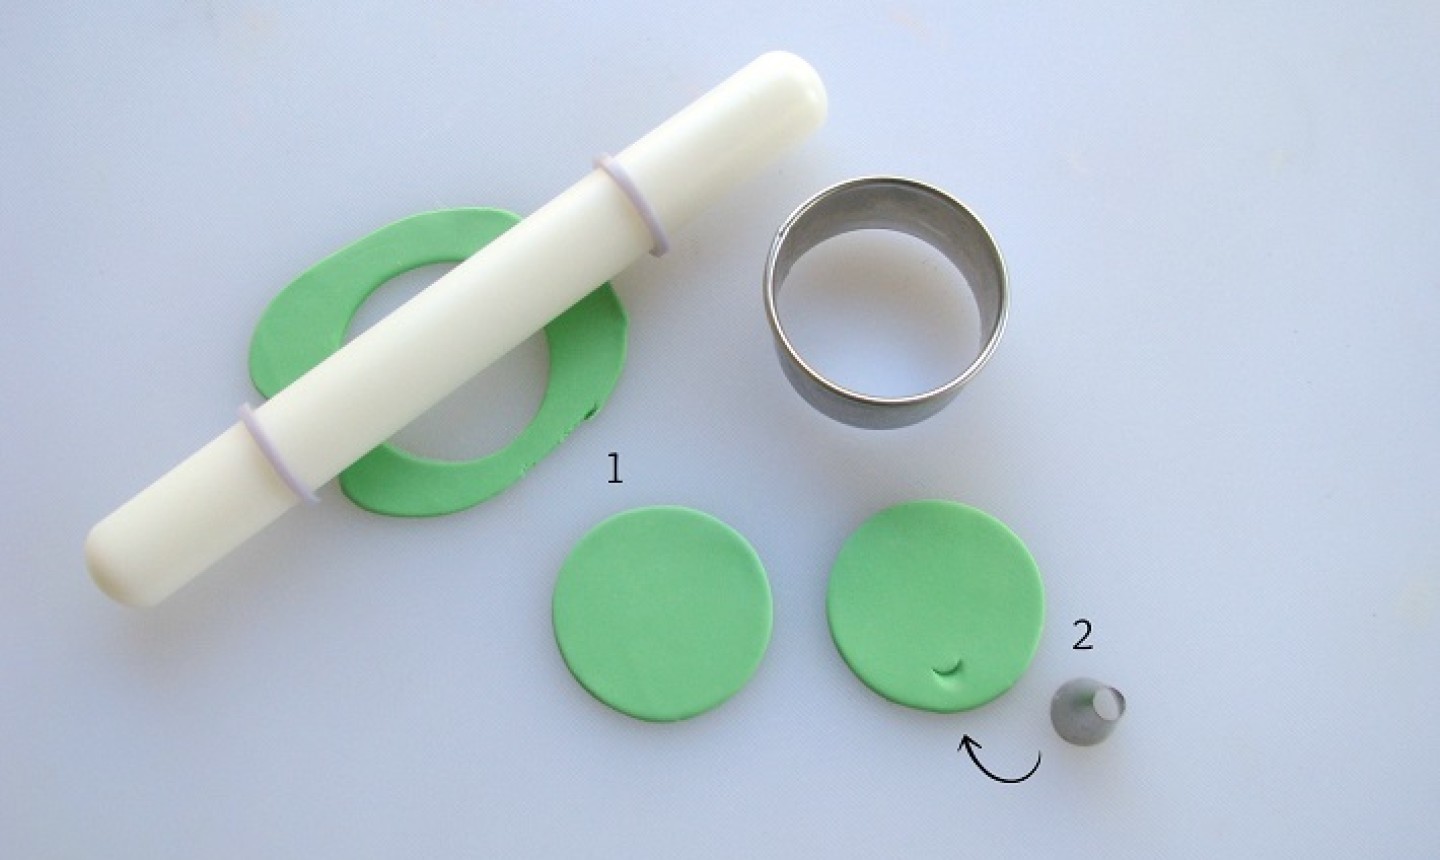
Roll out green fondant with the rolling pin and ⅛” guide rings. With the round cutter, punch out a circle for the witch’s face.
Step 2
With round decorating tip No. 12 held at a 45-degree angle, make an indentation towards the bottom of the face for the witch’s mouth.
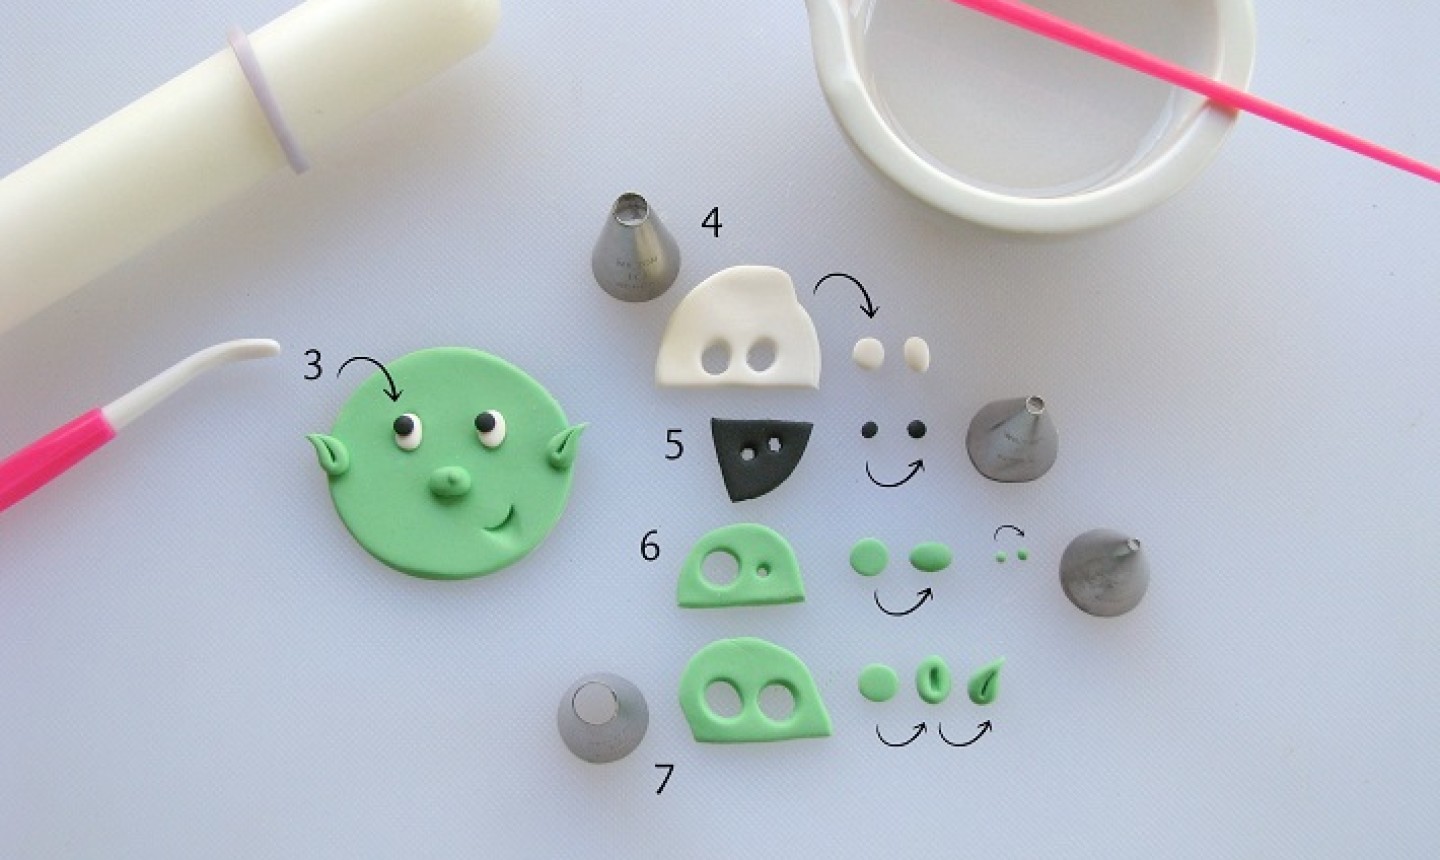
Step 3
With the modeling tool, make two oval indentations for the eyes on the witch’s face.
Step 4
Roll out white fondant with the rolling pin and ⅛” guide rings. With round decorating tip No. 10, cut out two circles, then shape them into ovals. Glue them into the eye cavities on the witch’s face.
Step 5
Roll out black fondant with the rolling pin and ⅛” guide rings. Cut out two circles with round decorating tip No. 5. Roll the circles into two separate balls and flatten them with your fingers, creating the pupils. Glue them to the witch’s eyes.
Step 6
Roll out green fondant and cut out one circle with round decorating tip No. 12 and one with tip No. 3. Shape the larger circle into an oval to create the witch’s nose. Roll the small circle into a ball to make a small, cute wart! Glue the nose and wart to the witch’s face.
Step 7
Cut two more circles with round decorating tip No. 12 out of the rolled out green fondant. Shape one circle into an oval and indent the center with your modeling tool. Pinch and shape the top of the oval to create an ear. Repeat this step to create the other ear, remembering to shape it going the opposite direction. Glue the ears in place.
Step 8
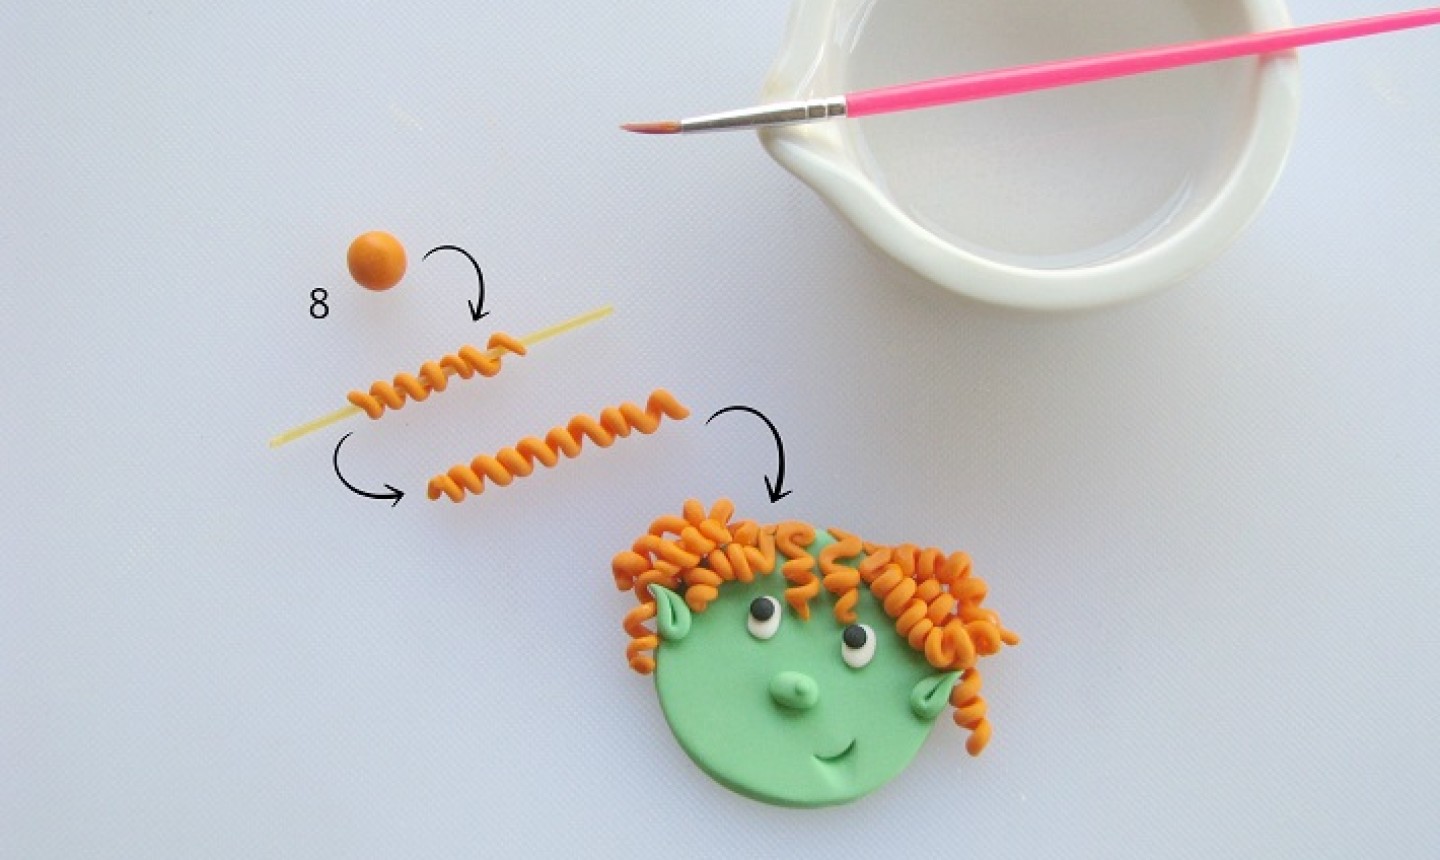
To create the witch’s curly hair, start by rolling a piece of orange fondant into a ball. The size can differ, but the bigger the better because you’ll have more to work with.
Roll the orange fondant ball onto your work surface into a narrow, snake-like shape. Wrap the orange fondant all around a piece of raw spaghetti. Allow the fondant to dry just a bit on the spaghetti, until it can hold its shape but is still malleable (approximately 1-2 minutes).
Make about 9-10 pieces of hair, then strategically place them on the witch’s head, coming down from the top. Once you’re happy with the placement, glue the hair to the witch’s face, then onto each other. It’s imperative to allow these pieces of hair to dry sufficiently so that they hold their shape and adhere properly. You might have to flatten the top a bit to make room for the witch’s hat.
Step 9
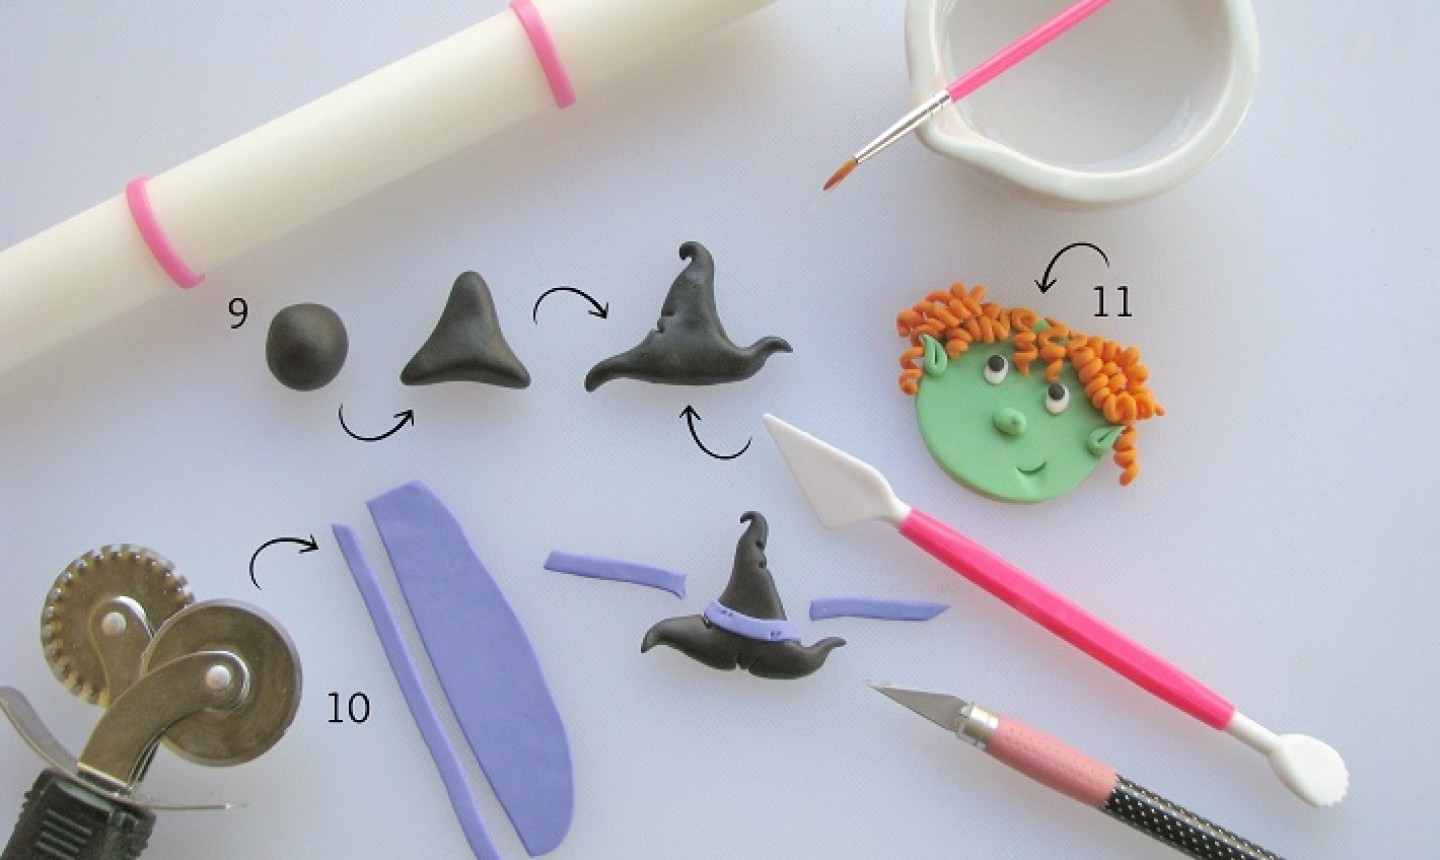
Roll black fondant into a ball approximately ½” wide. Dip your fingers into the vegetable shortening and mold the black fondant into a triangle. Then, carefully pull and shape all three points of the triangle into a witch’s hat shape. Use the knife tool to make small indentations for creases on the hat.
Step 10
Roll out purple fondant with the rolling pin and 1/16″ guide rings. With the rolling pastry cutter, trim a narrow strip for the witch’s hat. Shape it over the hat, trim the excess with the precision knife and glue it in place. Use the knife tool to make a couple of little indentations on the purple trim.
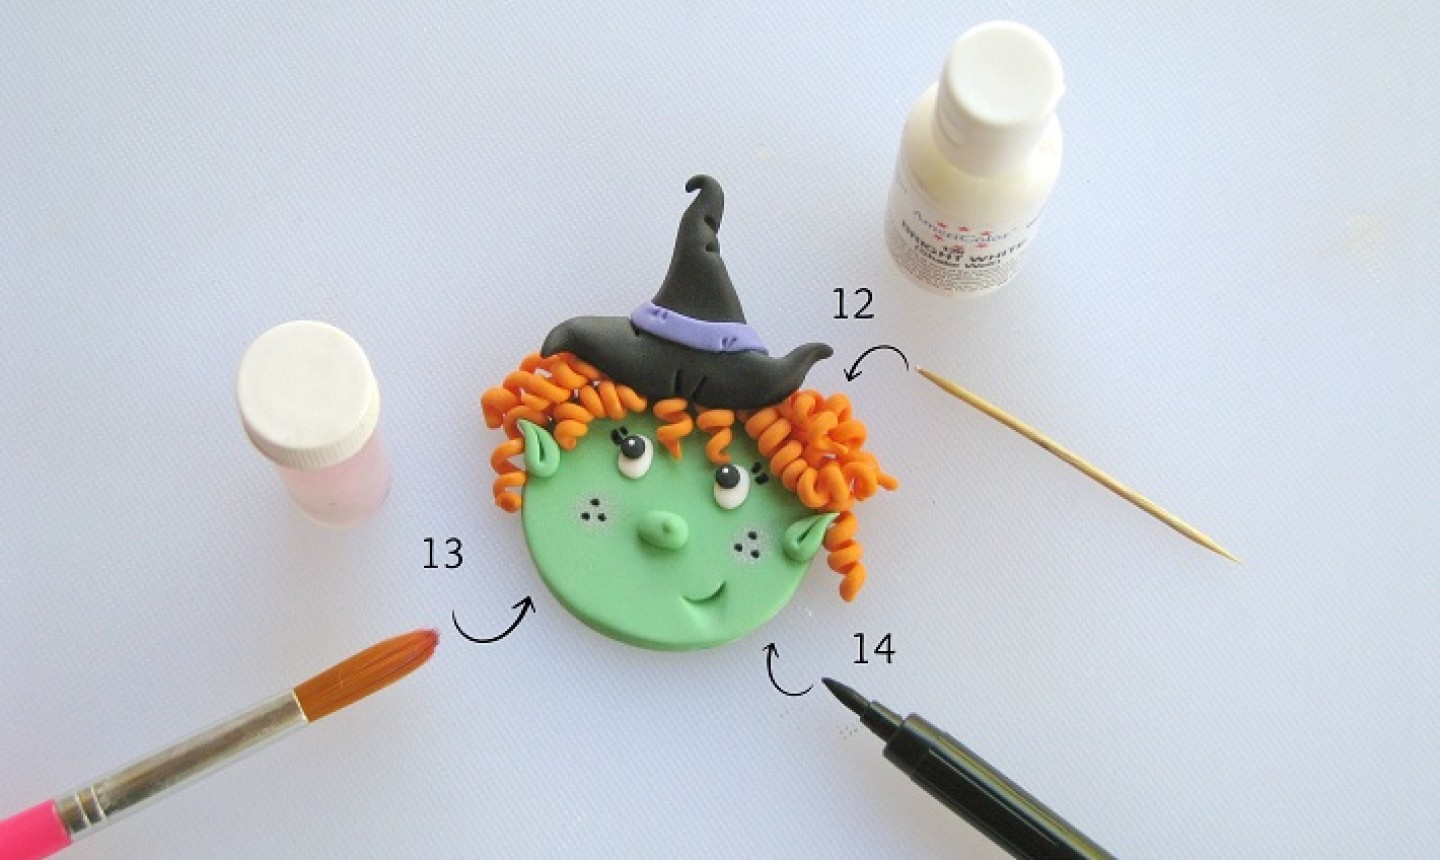
Step 11
Carefully glue the hat to the witch’s head. You can help to prop the hat up by placing something underneath, such as decorating tips turned on their sides. Allow the witch to dry thoroughly overnight.
Share tips, start a discussion or ask one of our experts or other students a question.
Already a member? Sign in
No Responses to “Cast a Spell with These Wickedly Fun Witch Cupcakes”