
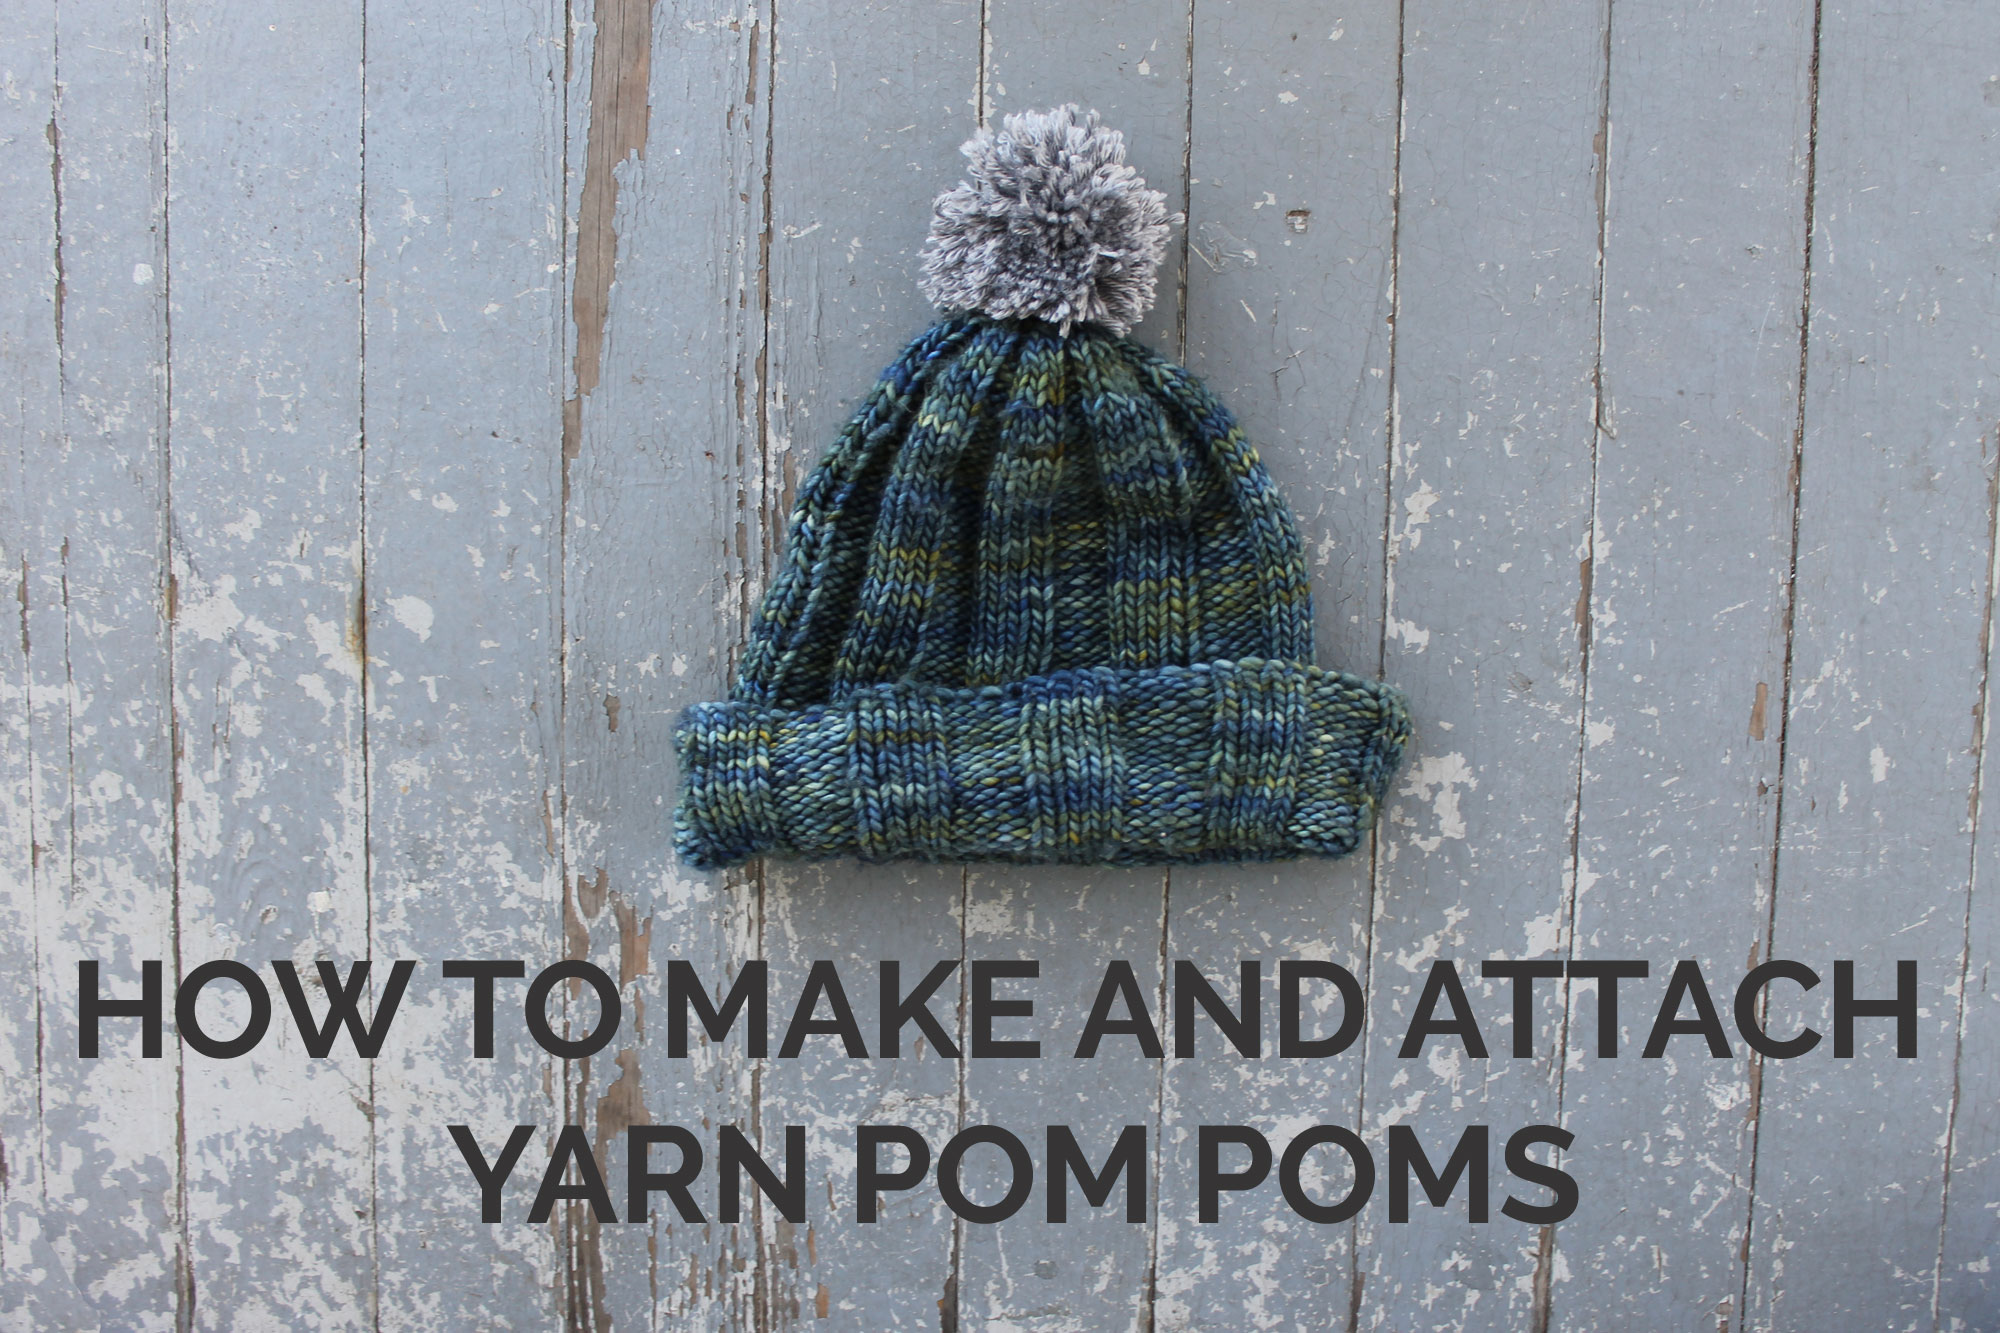
Pom-pom emergencies are real. Sometimes you need a yarn pom-pom pronto when you’re knitting a hat, scarf, tea cozy or anything else that needs a little cheer.
If you don’t own one of those handy pom-pom-making gadgets, don’t fret: You can make one just as easily with supplies you already have at home. The below tutorial walks you through exactly how, with extra details on how to attach it to something you stitched yourself or bought at the store.
How to Make a Yarn Pom-Pom
What You Need
- Small scrap of cardboard
- Scissors
- Yarn
- Tapestry needle
Instructions
1. Choose Your Size
Decide how big you’d like your pom-pom to be, then cut a rectangular piece of cardboard that’s about 6″ tall and the width you want. For instance, if you’d like your puff to be 2″ wide, cut the cardboard so it’s 6″ x 2″.Pro Tip: If you’re making mini pom-poms, use a fork instead of cardboard. Just keep in mind that the width of your pom-pom will be the same as the width of the fork.
2. Create an Opening in the Cardboard
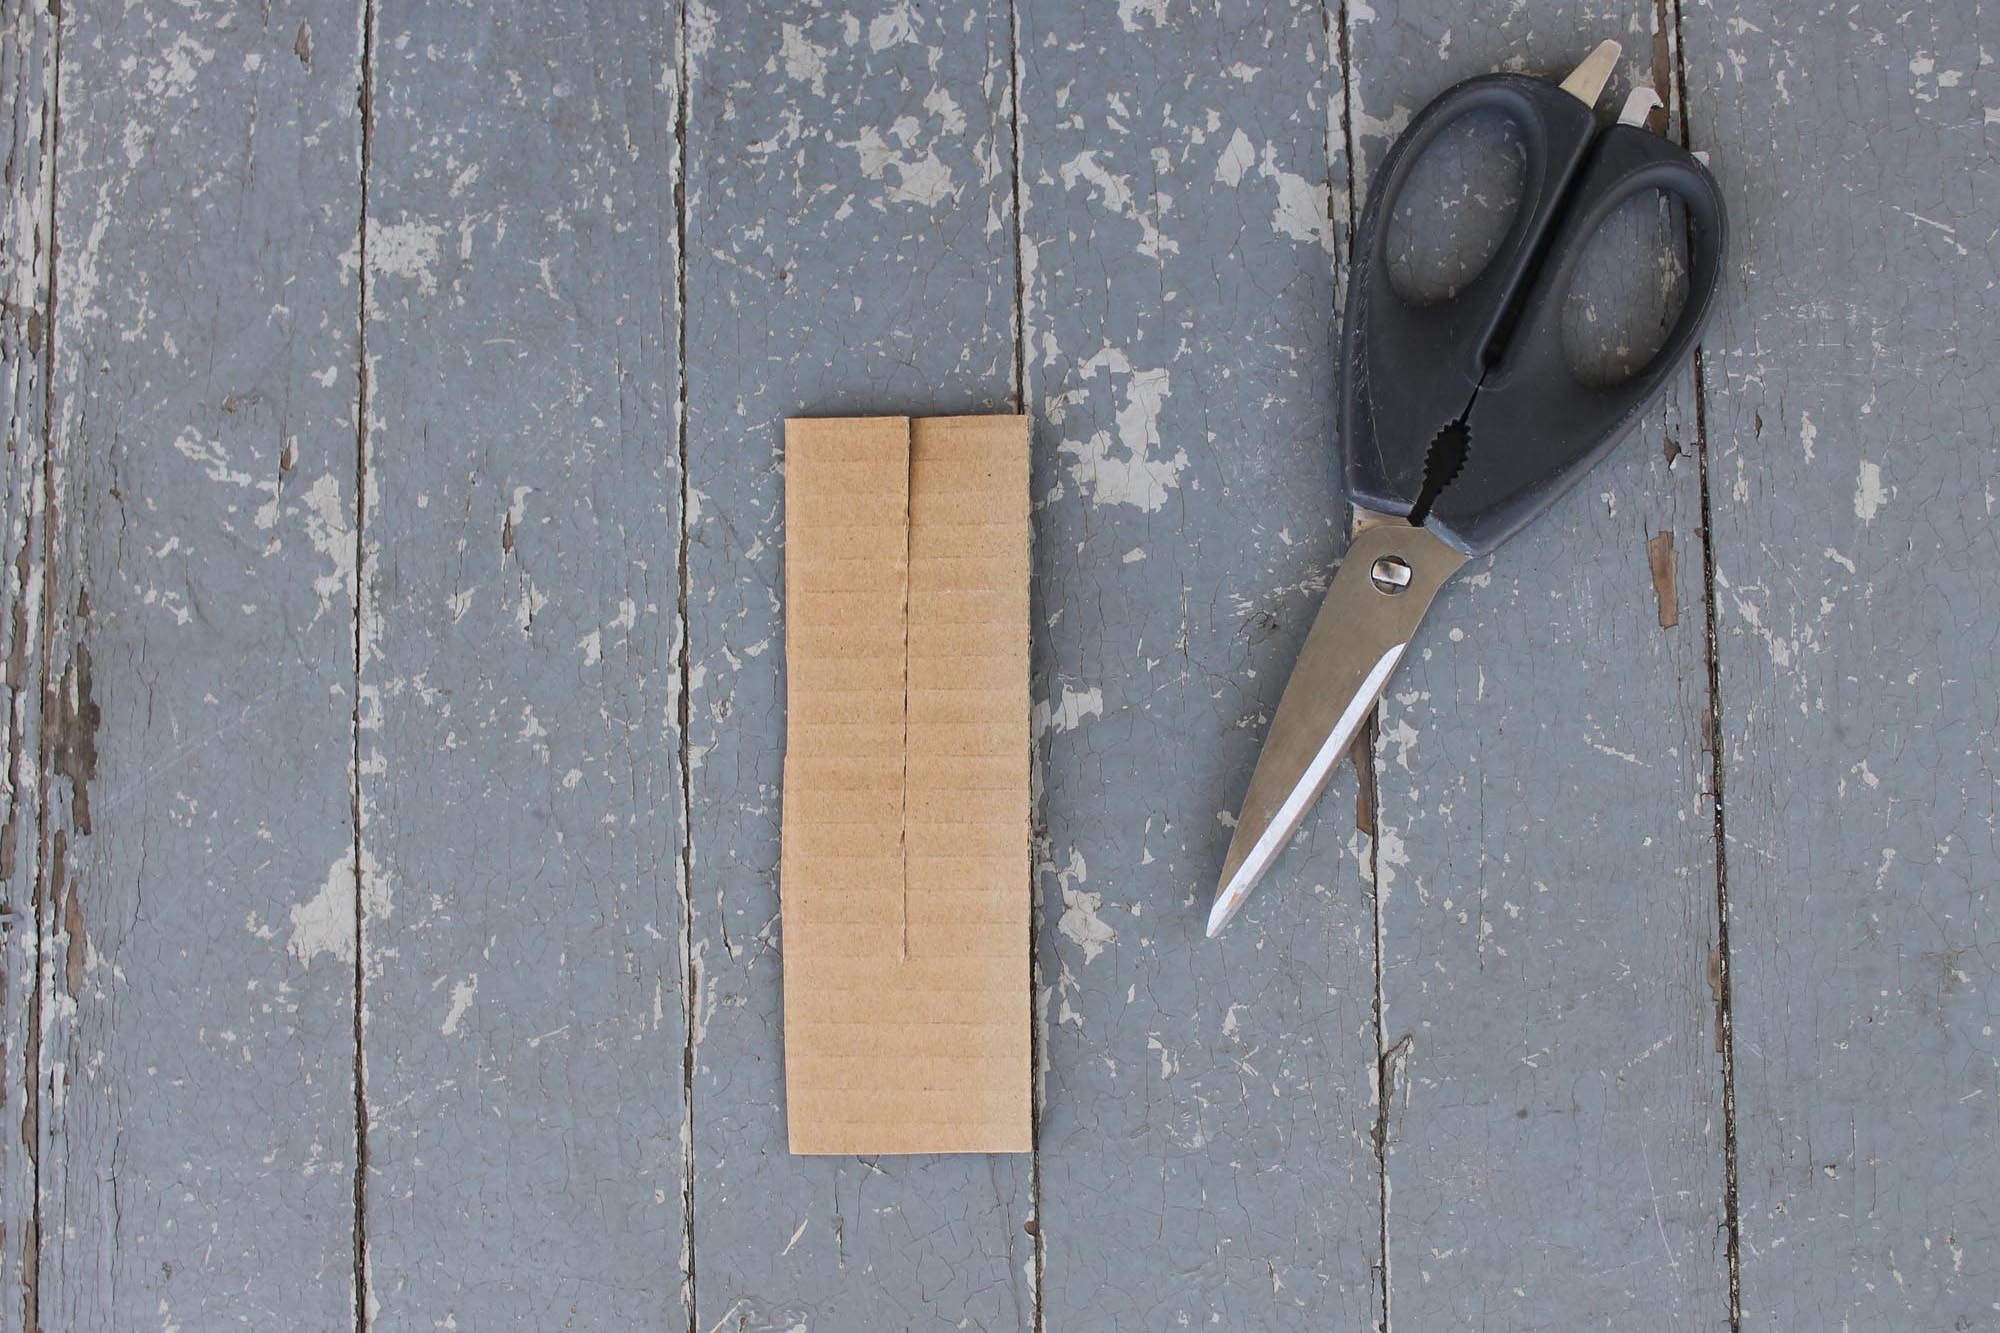
Use your scissors to make an opening down the center of the cardboard. The cut should be about three-quarters of the way down the length.
3. Cut the Yarn
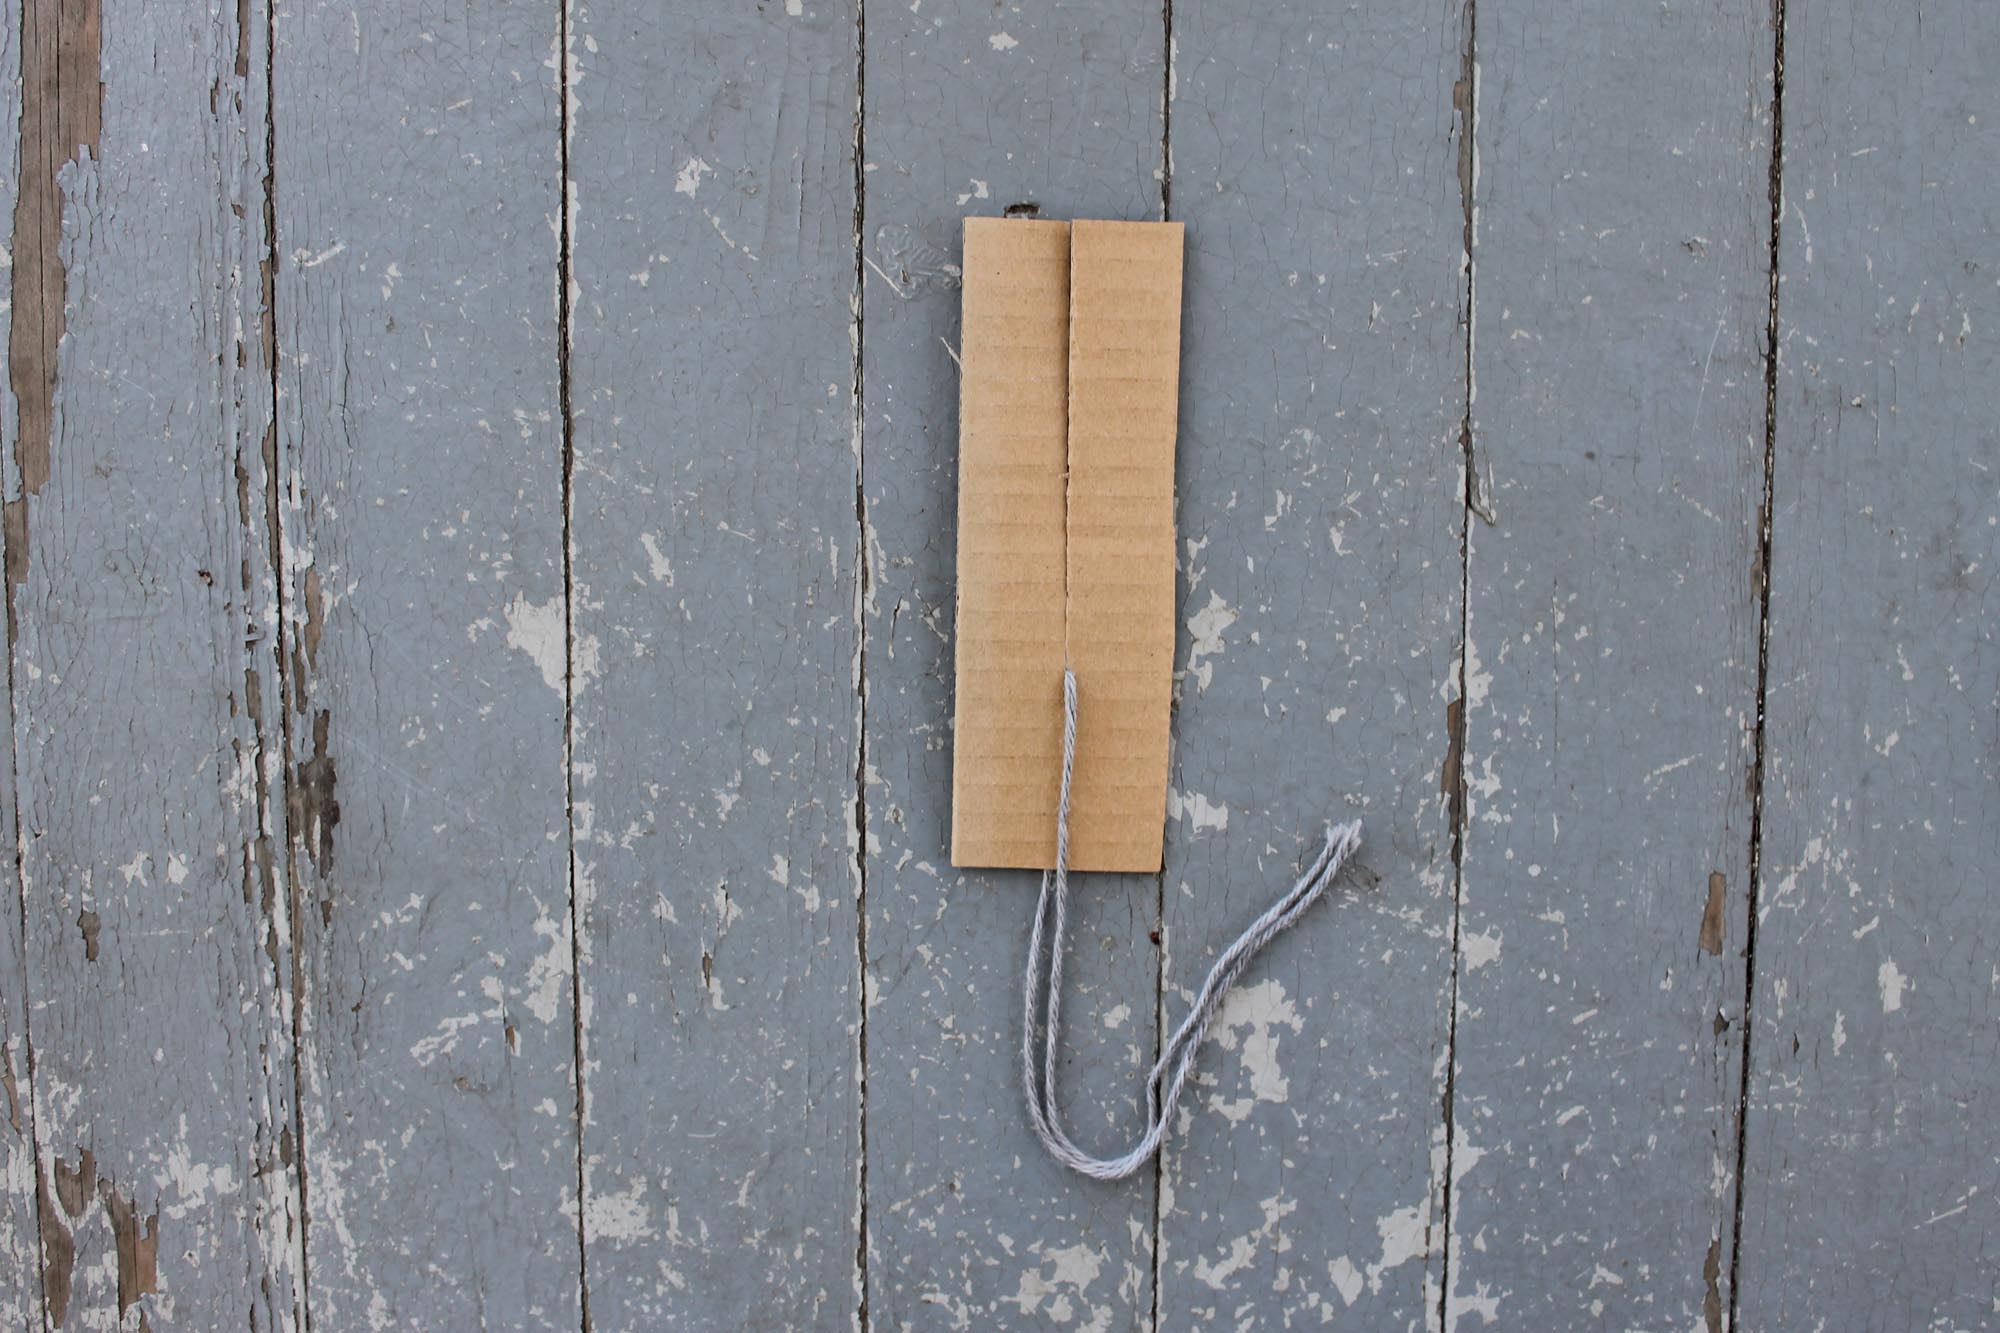
Cut a 10″ length of your yarn and insert it into the opening in the cardboard, making sure to space it evenly on each side. Leave the piece of yarn where it is for now while you move on to the next step.
4. Wrap the Yarn Around the Cardboard
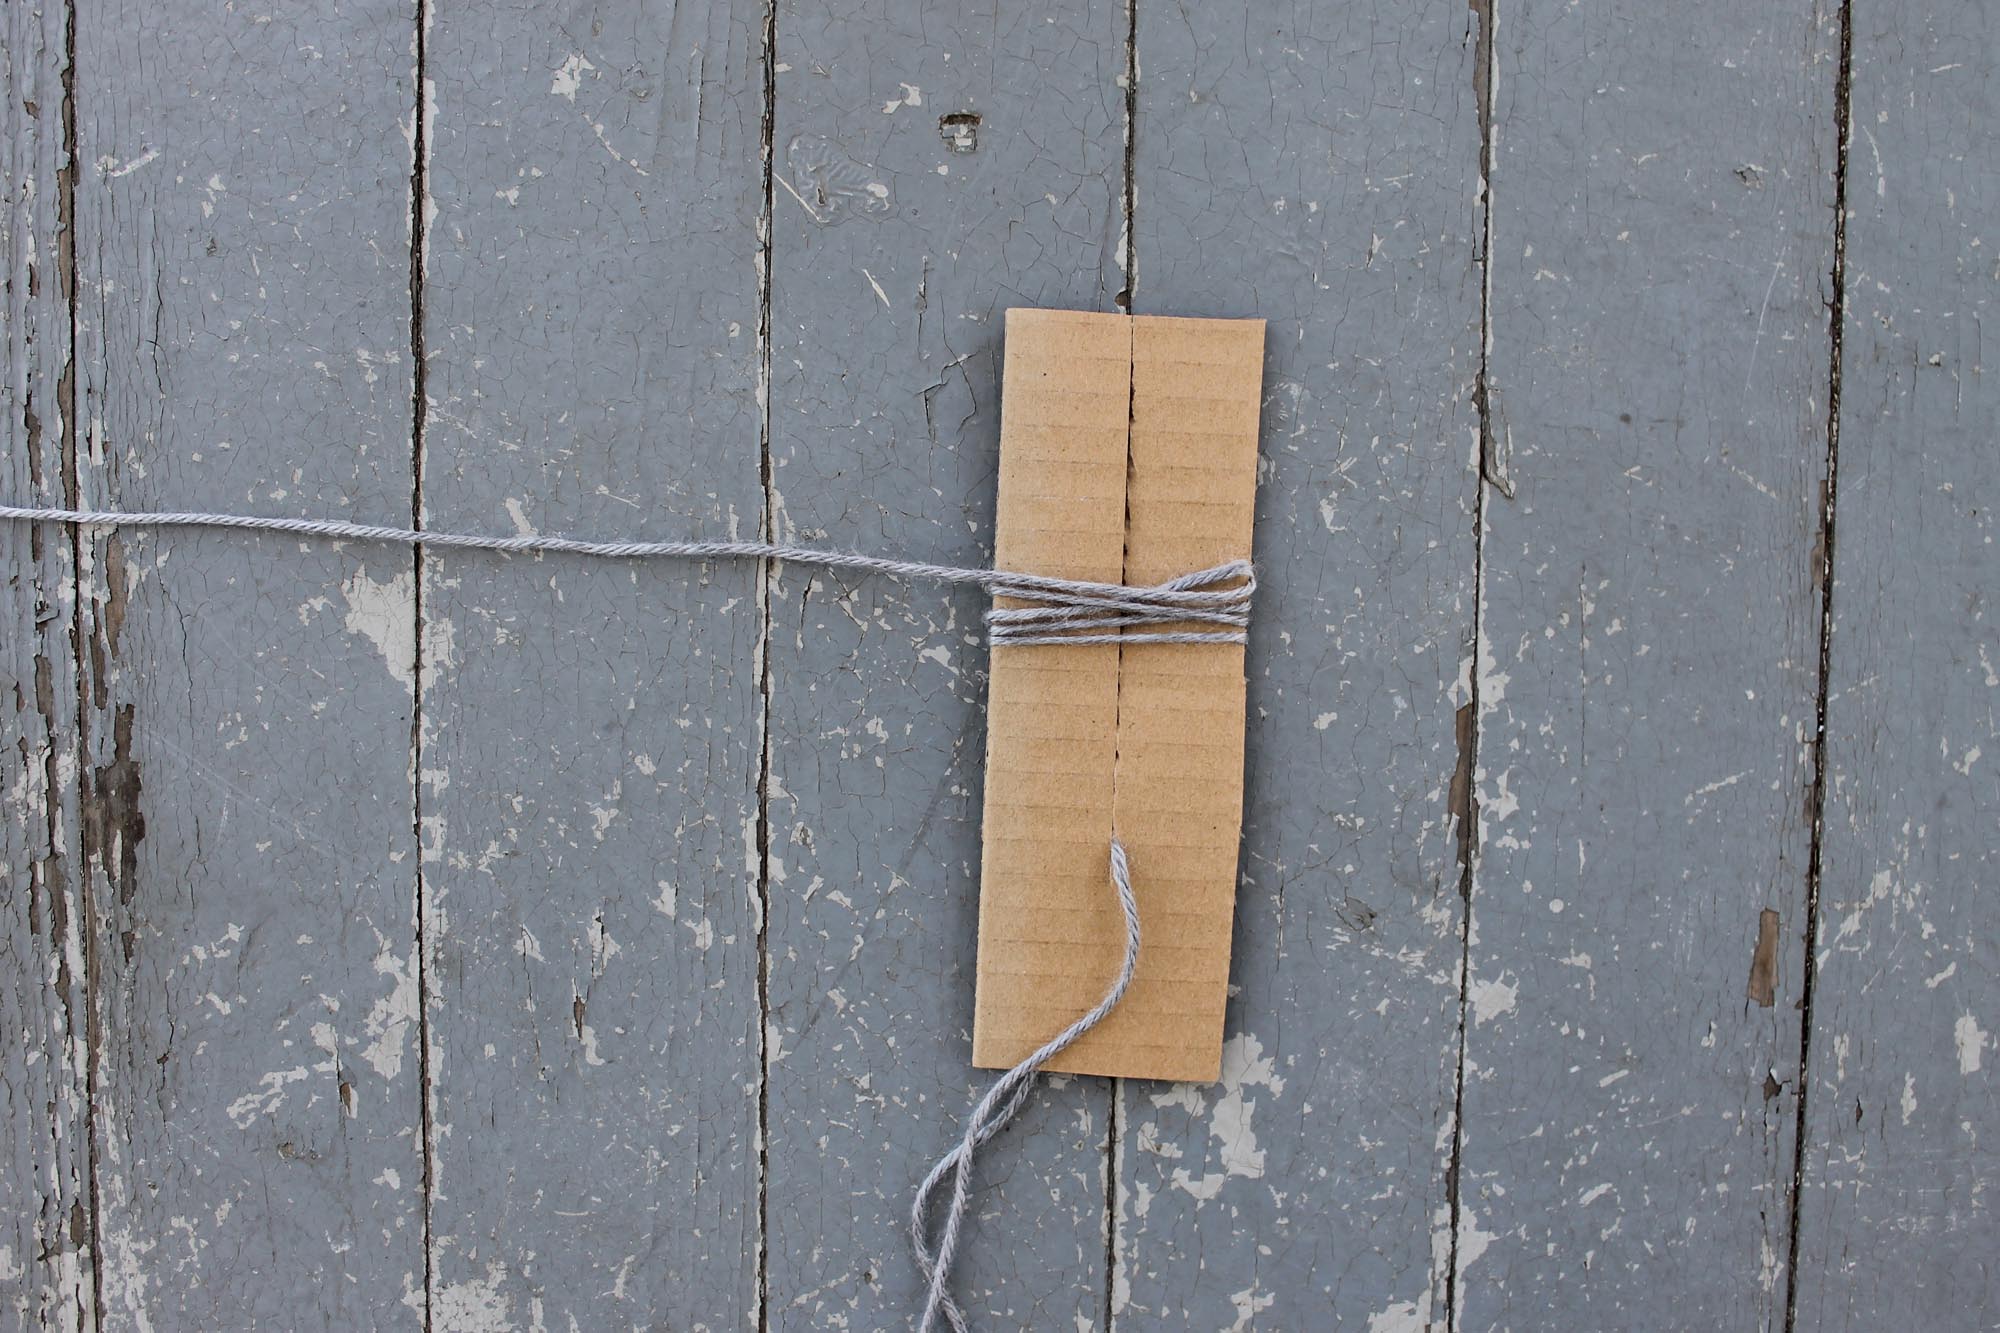
Lay the end of your working yarn on the edge of the cardboard, stretching it across the width of the cardboard. Hold that end of yarn in place with your thumb as you begin wrapping the yarn around the cardboard, width-wise.
Try to wrap the yarn evenly around the cardboard as you go, keeping the same amount of tension and not pulling too tightly. If you pull too tightly, the yarn may stretch, making the yarn pom-pom smaller after you cut it. (We’ll get to that in a sec.)
5. Stay the Course
Keep wrapping the yarn around the cardboard. Do as much of this as you want, but remember that the more you wrap, the fuller the pom-pom. For this tutorial, we wrapped the yarn around the cardboard about 100 (!) times.
6. Tie the Yarn
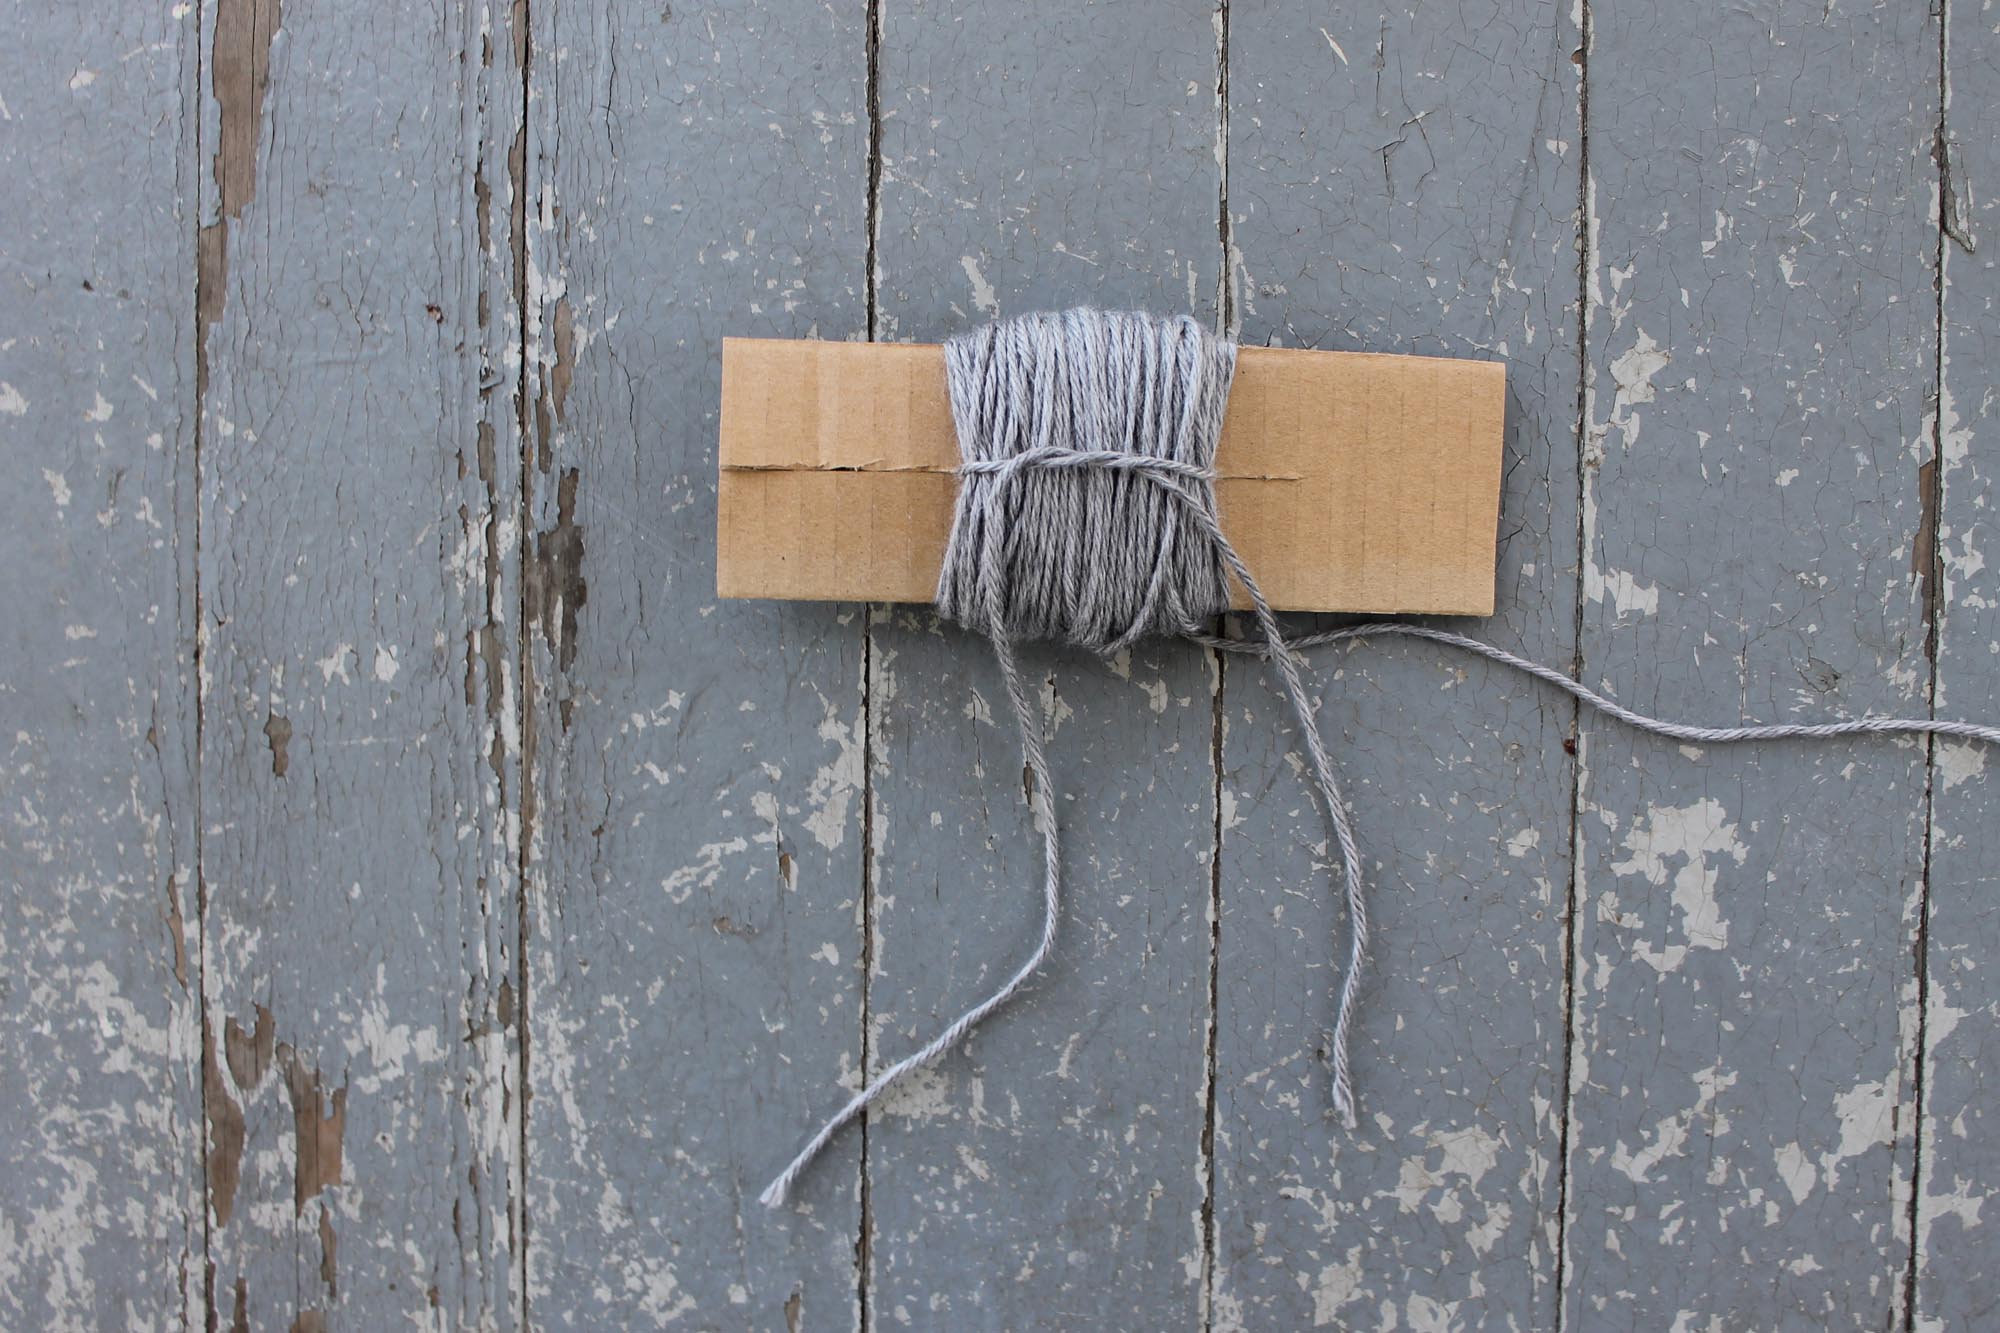
When you feel like you’ve wrapped enough of your yarn, pull up on the length of yarn that you inserted into the cardboard in Step 3. Tie it tightly around the wraps you just made, then knot.
Pro Tip: If you’re worried about your yarn being too loose, cut another length of yarn and tie it around the wraps for extra security. If the wraps (aka your future pom-pom) aren’t secure, the strands of yarn will fall out after you cut the pom-pom.
7. Slide the Pom-Pom Off the Cardboard
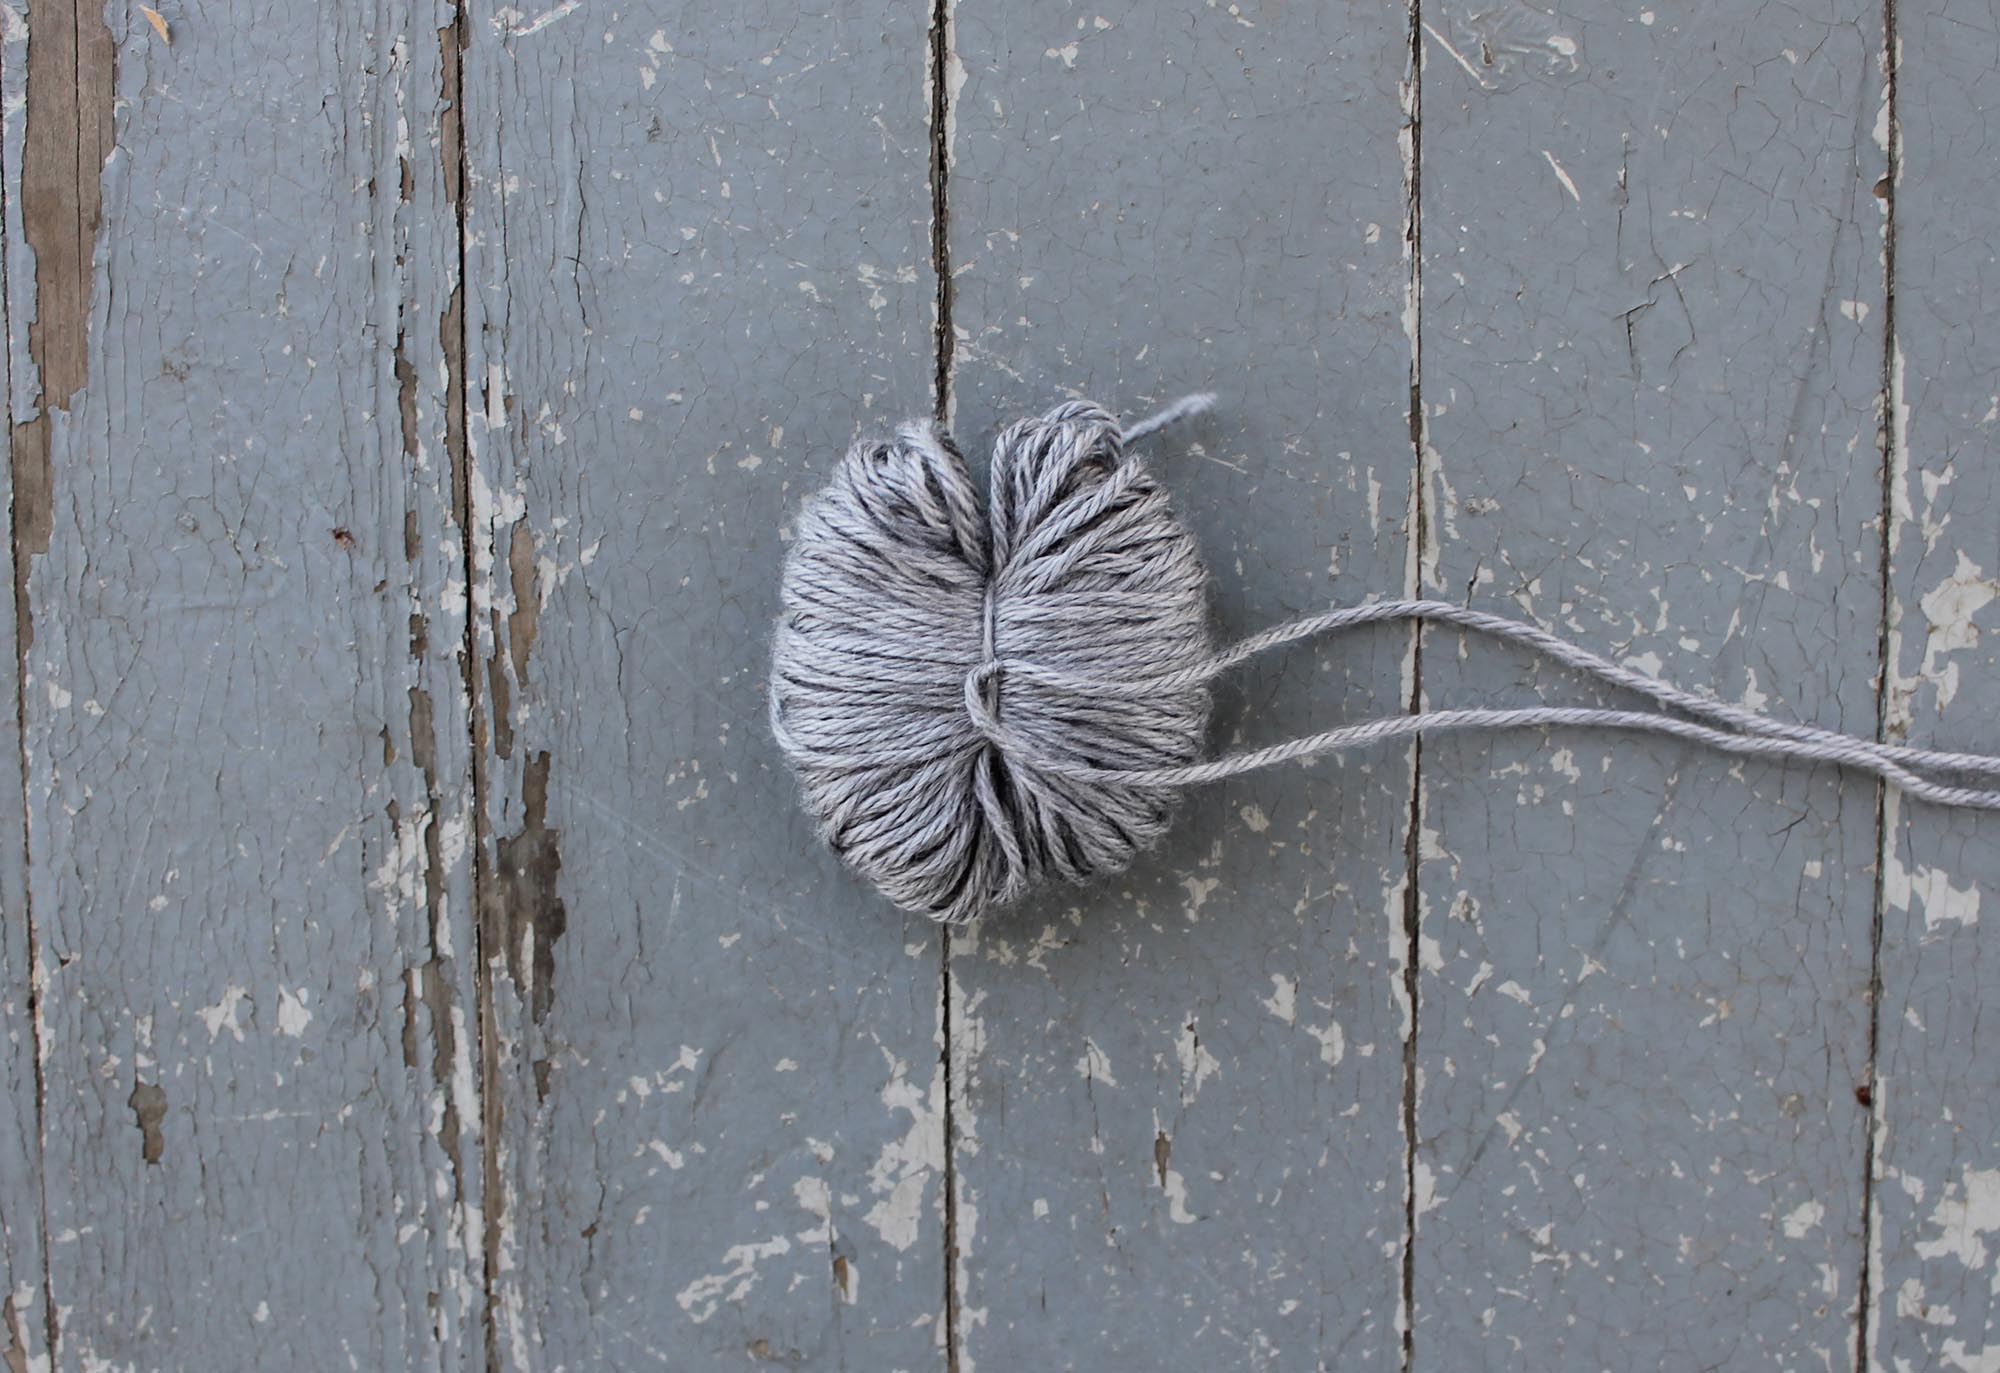
When you feel the wraps are secure, slide that whole clump off the cardboard. Stay tuned: It’s on the verge of turning into a pom-pom.
Pro Tip: Some people prefer to cut the yarn pom-pom before slipping it off the cardboard. If you’re more comfortable with that, go for it! Doing so can be easier for some, and can create a cleaner, more even cut.
8. Cut the Pom-Pom
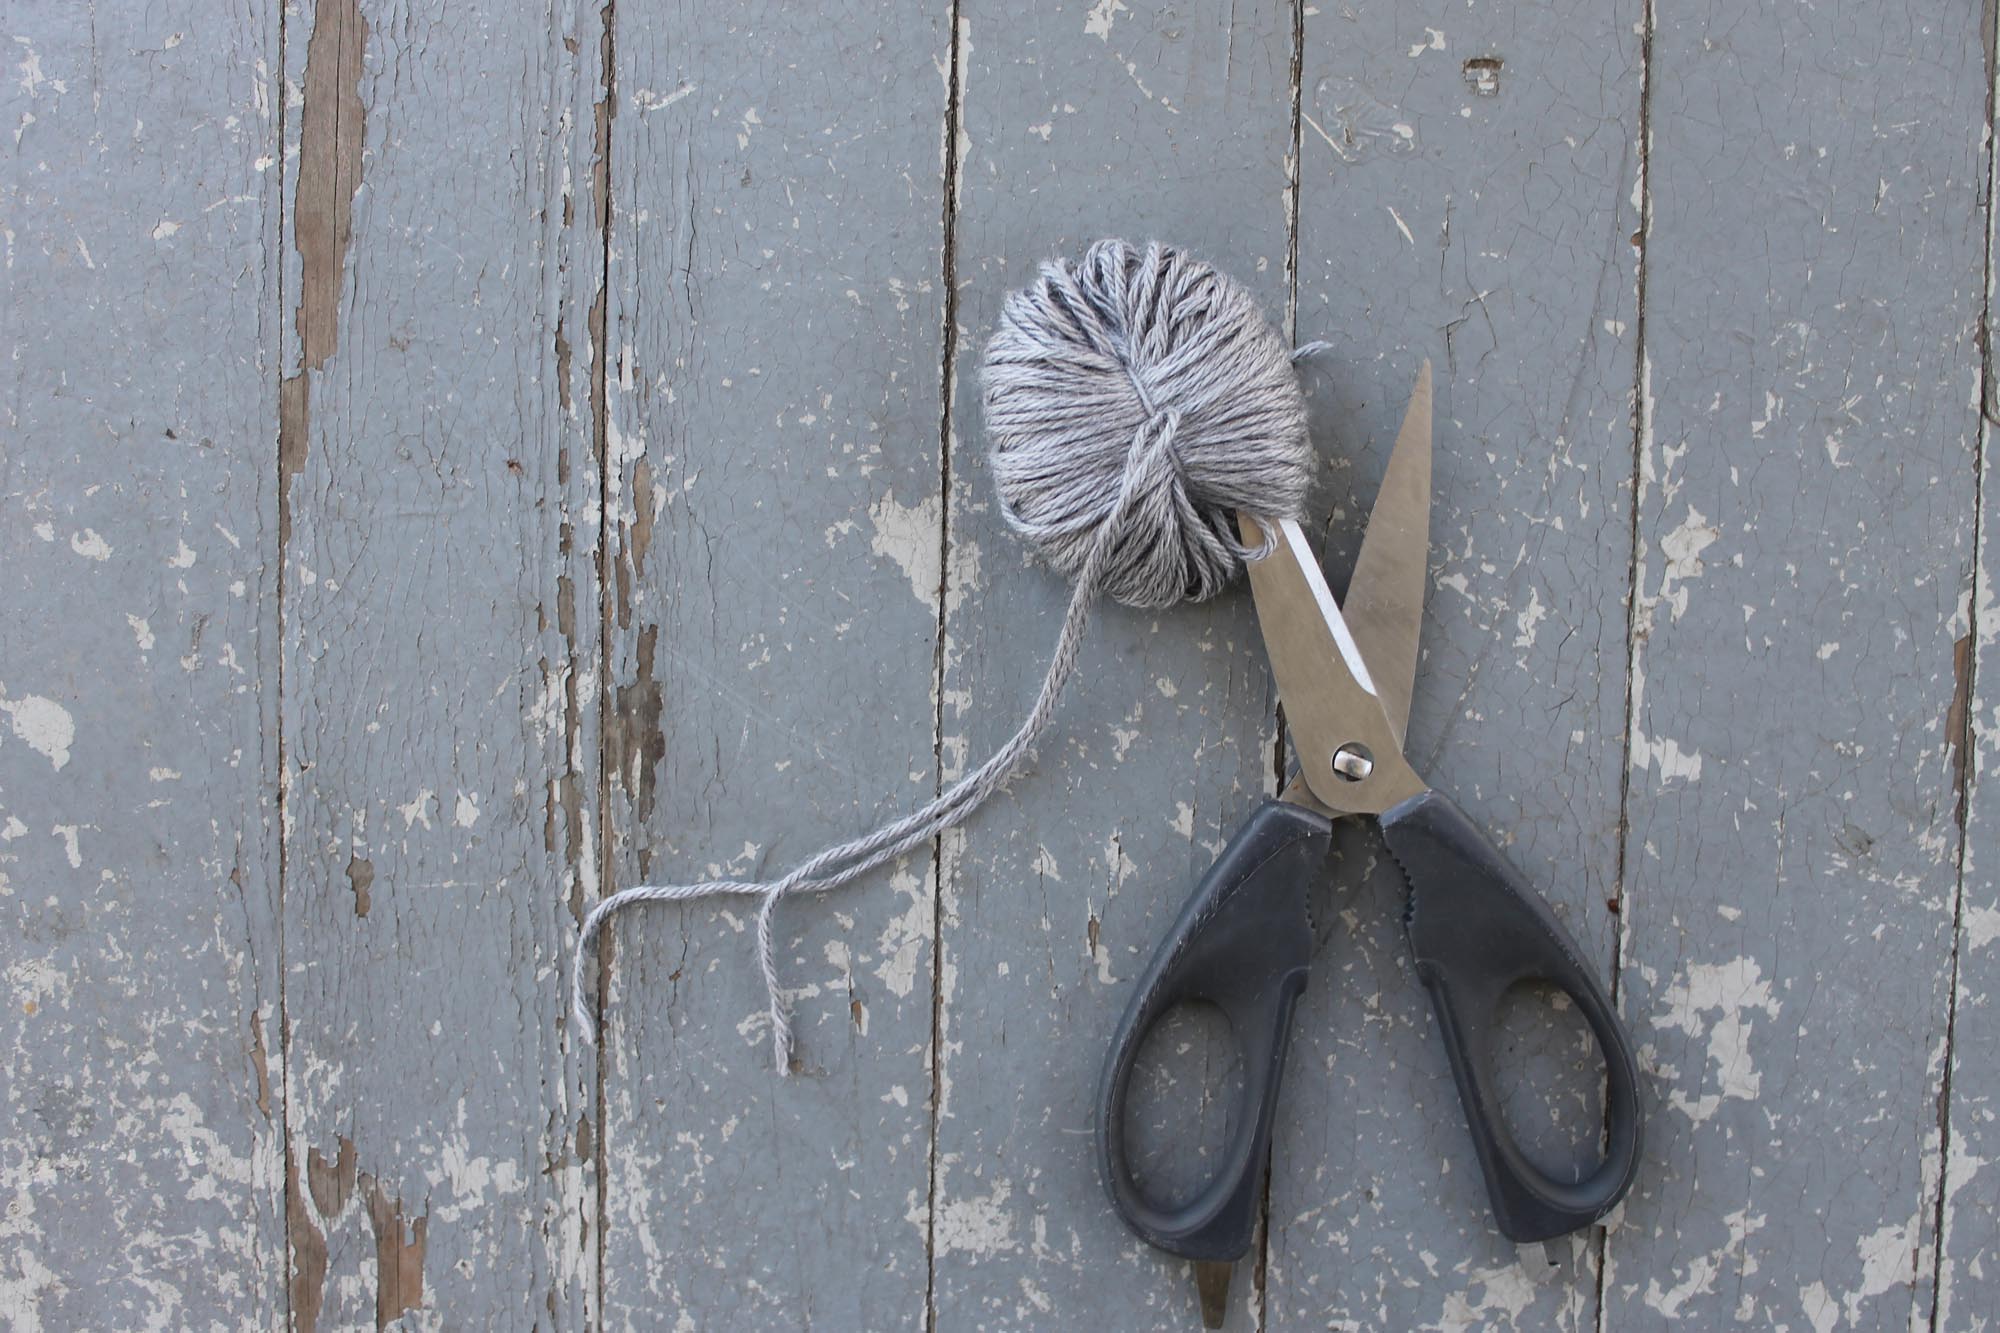
Whether your pom-pom is on or off the cardboard, use your scissors to cut the loops on one side. Cut as evenly as possible, so all the strands end up the same length.
Pro Tip: When you’re cutting, make sure those long yarn tails are out of the way so you don’t cut them by accident. You’ll need them later to attach the pom-pom to your project.
When you’ve completed half the pom-pom, move on to the opposite side and repeat the same steps.
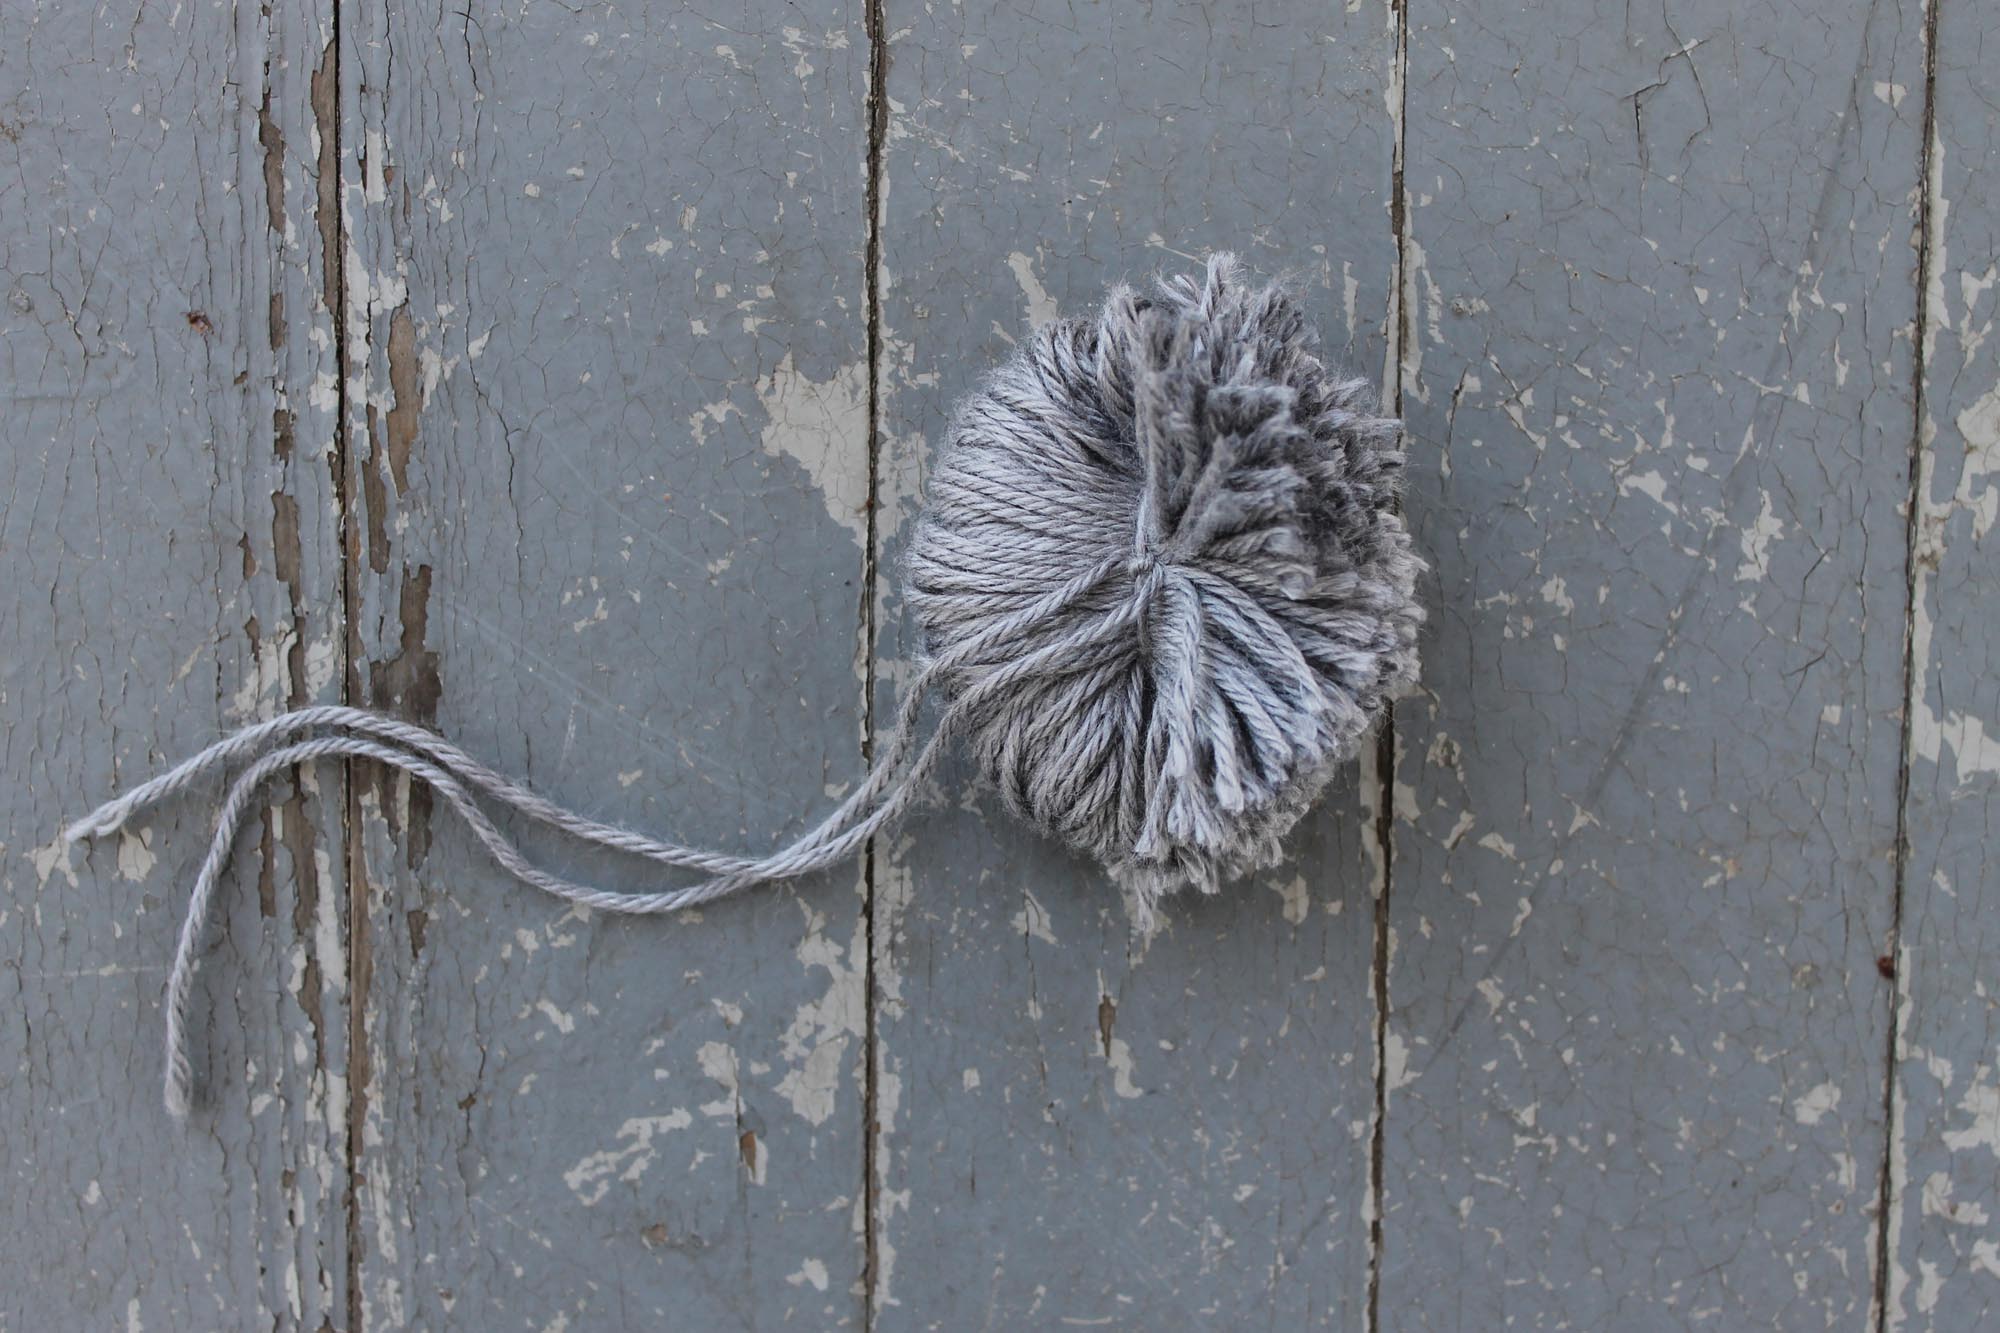
After cutting all the loops, fluff the pom-pom and trim around it to even out the edges. Then, stop and admire your finished puff!
How to Attach Your Pom-Pom
Here’s how to attach a pom-pom to a hat or anything else that could use a little pizzazz.
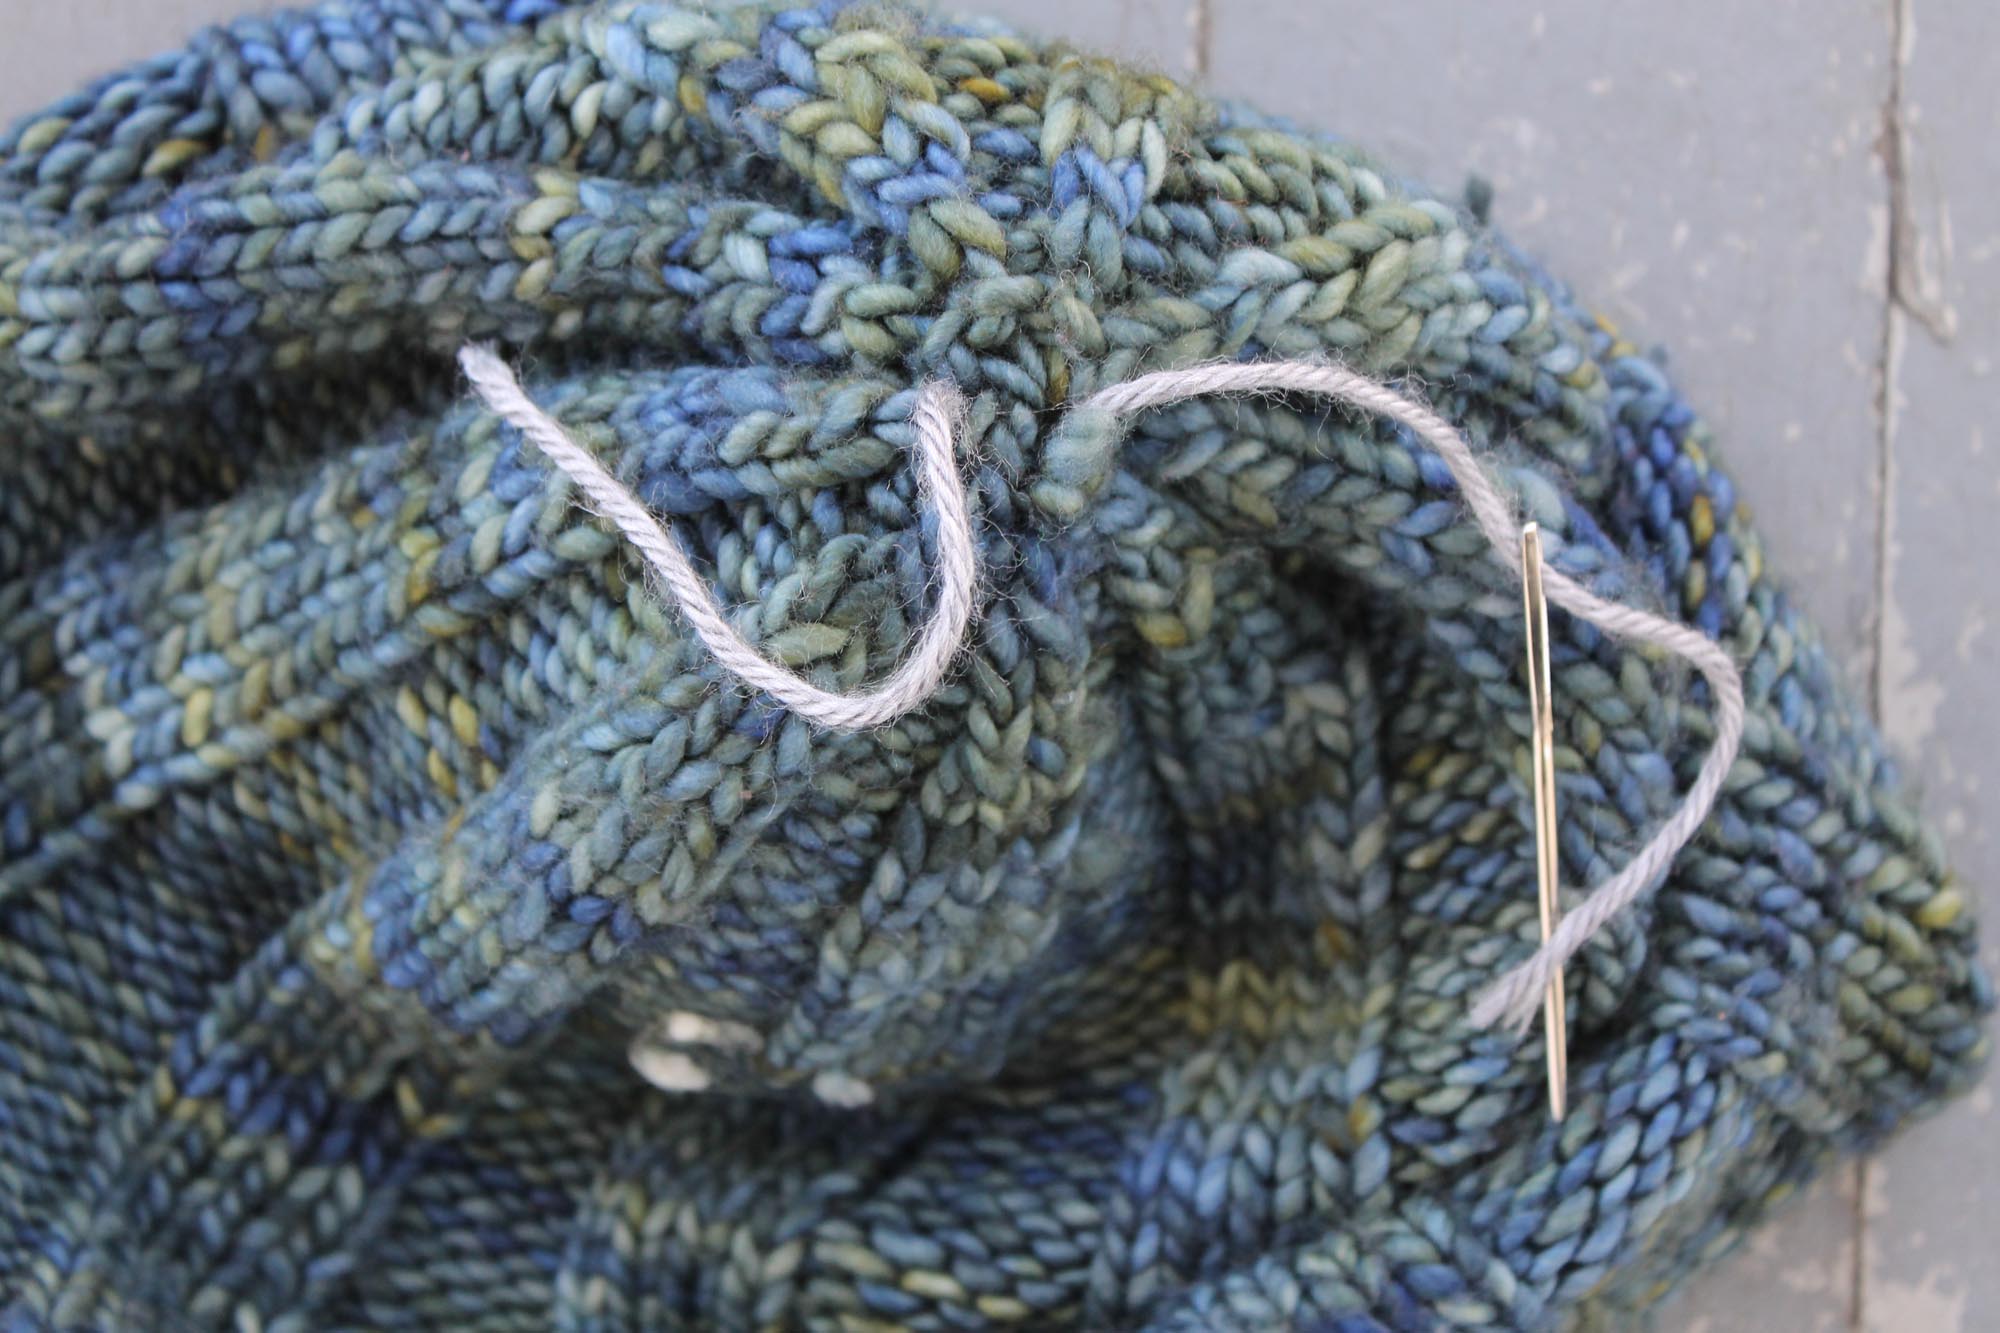
1. Thread a Yarn Tail Through a Needle
Push one end of a long yarn tail through the eye of a tapestry needle. Now insert the needle through the project from the right side to the wrong side. Repeat with the other yarn tail. Both yarn tails should be on the wrong side of the work.
2. Sew the Yarn Tails to the Hat
Pull on the tails so that the pom pom is secure on the right side. Then begin sewing one tail securely to the hat: Go back up to the right side, sew through the pom-pom, then come back through the wrong side. You’ll want to sew the tail through the loop that holds the pom-pom together to really secure it.
Repeat this process with the other tail, then weave in the loose ends with the tapestry needle.
Pro Tip: You can knot your pom-pom yarn tails together to make sure they don’t fall off. If you’re totally against knots in your projects, just be sure your sewing is secure.
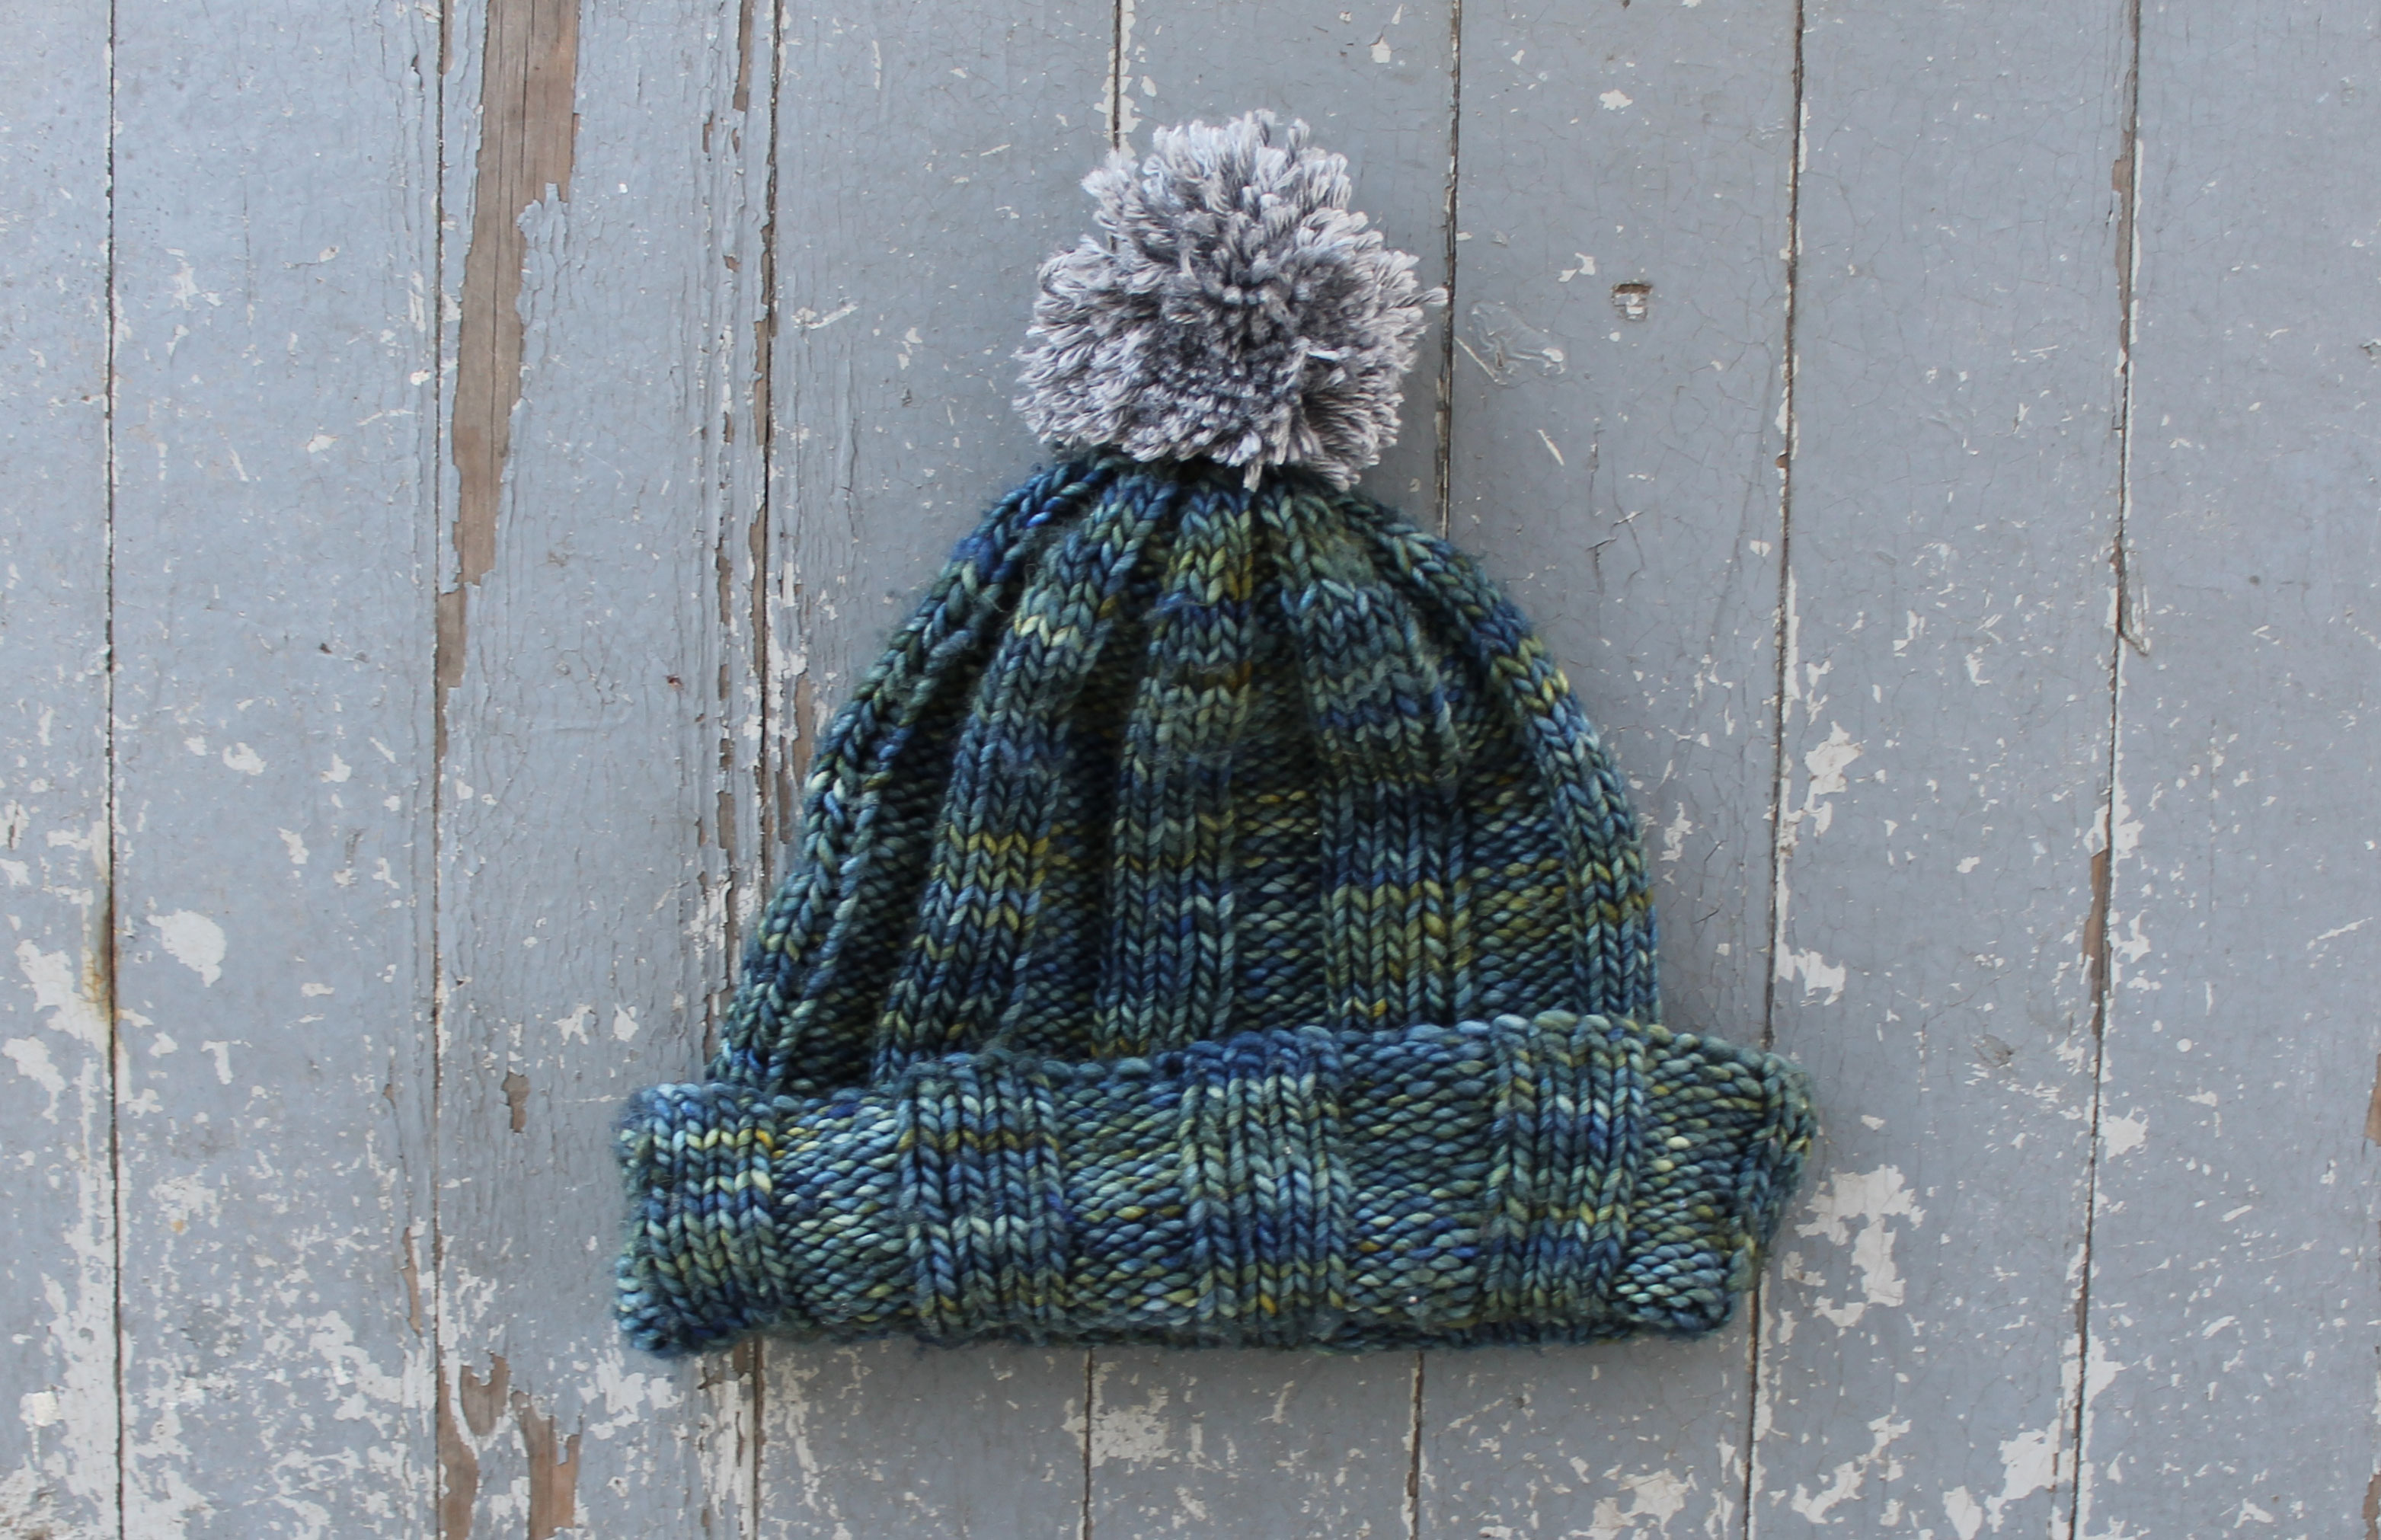
Remember, pom-poms look great on hats, but they’re also fun on scarves, jeans, throw pillows, even gift wrap — basically anything!
Made today. Wrapped 150 times. Cardboard 3"X7" made a nice pom pom for an adult hat
Merci
Hope that when I try this that it will turn out as even as yours. Thank You
I love Crafts. They have such great idea’s.
Thank you for sharing
<strong>Good to know when traveling Thank you
Hats need washing periodically, do you remove the Pom Pom to wash hat, then reattach, or does it all go in the wash? I had one Pom Pom come totally apart in the wash.
Thanks for all your great suggestions
Ty for the refresher course. Been over 50 years since i made one for my ice skates!
I love this