
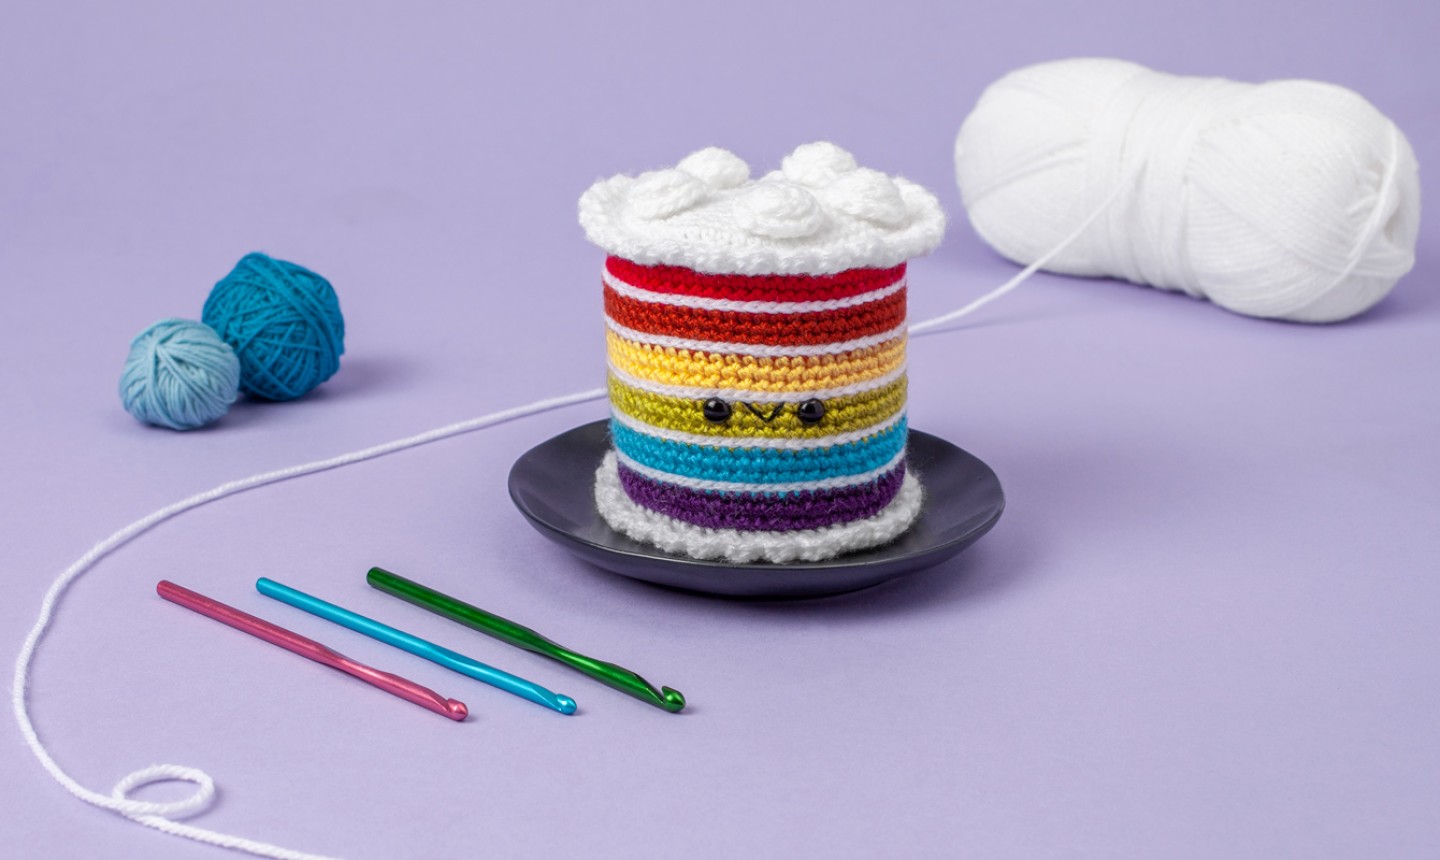
Every day is the right day for rainbow cake! Clever color changes and dollops of faux icing make this the easiest layer cake you’ve ever made. Put down your fork, pick up your hook and dig in!
Amigurumi Rainbow Cake
Pattern by Lauren Espy
Level: Easy
Finished Size: About 5 inches tall
What You Need
Gauge
Gauge is not critical to this project: just make sure the fabric you’re making is on the tighter side with no holes, so your stuffing doesn’t peek through.
Notes
Abbreviations
Instructions
With White,
Rnd 1: 6 sc in magic ring. (6 sts)
Rnd 2: Inc in each st around. (12 sts)
Rnd 3: *Sc 1, inc* 6 times. (18 sts)
Rnd 4: *Inc, sc 2* 6 times. (24 sts)
Rnd 5: *Sc 3, inc* 6 times. (30 sts)
Rnd 6: *Inc, sc 4* 6 times. (36 sts)
Rnd 7: *Sc 5, inc* 6 times. (42 sts)
Rnd 8: *Inc, sc 6* 6 times. (48 sts)
Rnd 9: *Sc 7, inc* 6 times. (54 sts)
Rnd 10: *Inc, sc 8* 6 times. (60 sts)
Change to Scarlet.
Rnd 11: In BLO, sc 60. Rnds 12-13: Sc 60.Change to White.
Rnd 14: Sl St in each st. (60 sts)Change to Flame.
Behind the row of sl sts you will see a row of stitches in scarlet that we will use for the next round of color. A new color will appear with each color change leading up to purple.
Rnds 15-17: Sc 60.
Change to White.
Rnd 18: Sl St in each st. (60 sts)
Change to Sunshine Yellow.
Rnds 19-21: Sc 60.
Change to White.
Rnd 22: Sl St in each st. (60 sts)
Change to Grass.
Rnds 23-25: Sc 60.
Change to White.
Rnd 26: Sl St in each st. (60 sts)
Change to Lagoon.
Rnds 27-29: Sc 60.
Change to White.
Rnd 30: Sl St in each st. (60 sts)
Change to Purple.
Rnds 31-33: Sc 60.
Add safety eyes between rounds 13 and 14, 5 stitches apart. Embroider a smile in between the eyes.
Cut two circles out of the cardboard, the size of your cake, and place one at the top of the cake. Add fiberfill stuffing. For the bottom piece of cardboard, insert once you have complete round 36 below. Make sure to add enough fiberfill before you place the cardboard, since once it’s in place you can’t add any more.
Change to White,
Rnd 34: In BLO, *Inv dec 1, sc 8* 6 times. (54 sts)
Rnd 35: *Sc 7, inv dec 1* 6 times. (48 sts)
Rnd 36: *Inv dec 1, sc 6* 6 times. (42 sts)
Rnd 37: *Sc 5, inv dec 1* 6 times. (36 sts)
Rnd 38: *Inv dec 1, sc 4* 6 times. (30 sts)
Rnd 39: *Sc 3, inv dec 1* 6 times. (24 sts)
Rnd 40: *Inv dec 1, sc 2* 6 times. (18 sts)
Rnd 41: *Sc 1, inv dec 1* 6 times. (12 sts)
Rnd 42: Inv dec around. (6 sts)
Fasten off and leave a tail to close the piece.
Icing: Make 2
With White, ch 55.
Row 1: In 2nd ch from hook, *3 dc then sl st in next stitch* 27 times.
Fasten off and leave an extra long tail for sewing.
Using pins, pin icing in place around the top rim. With the tail from the icing, begin weaving through the front loops left over from Rnd 11 and the chain from the icing. Once the end is reached, secure the tail inside the cake. Repeat the same technique for the bottom rim of icing, this time using the front loops left over from Rnd 34.
Dollops of Icing: Make 5

With White, ch 27.
Row 1: In 2nd ch from hook, sc in each ch across. (26 sts)
Fasten off and leave a tail for sewing.
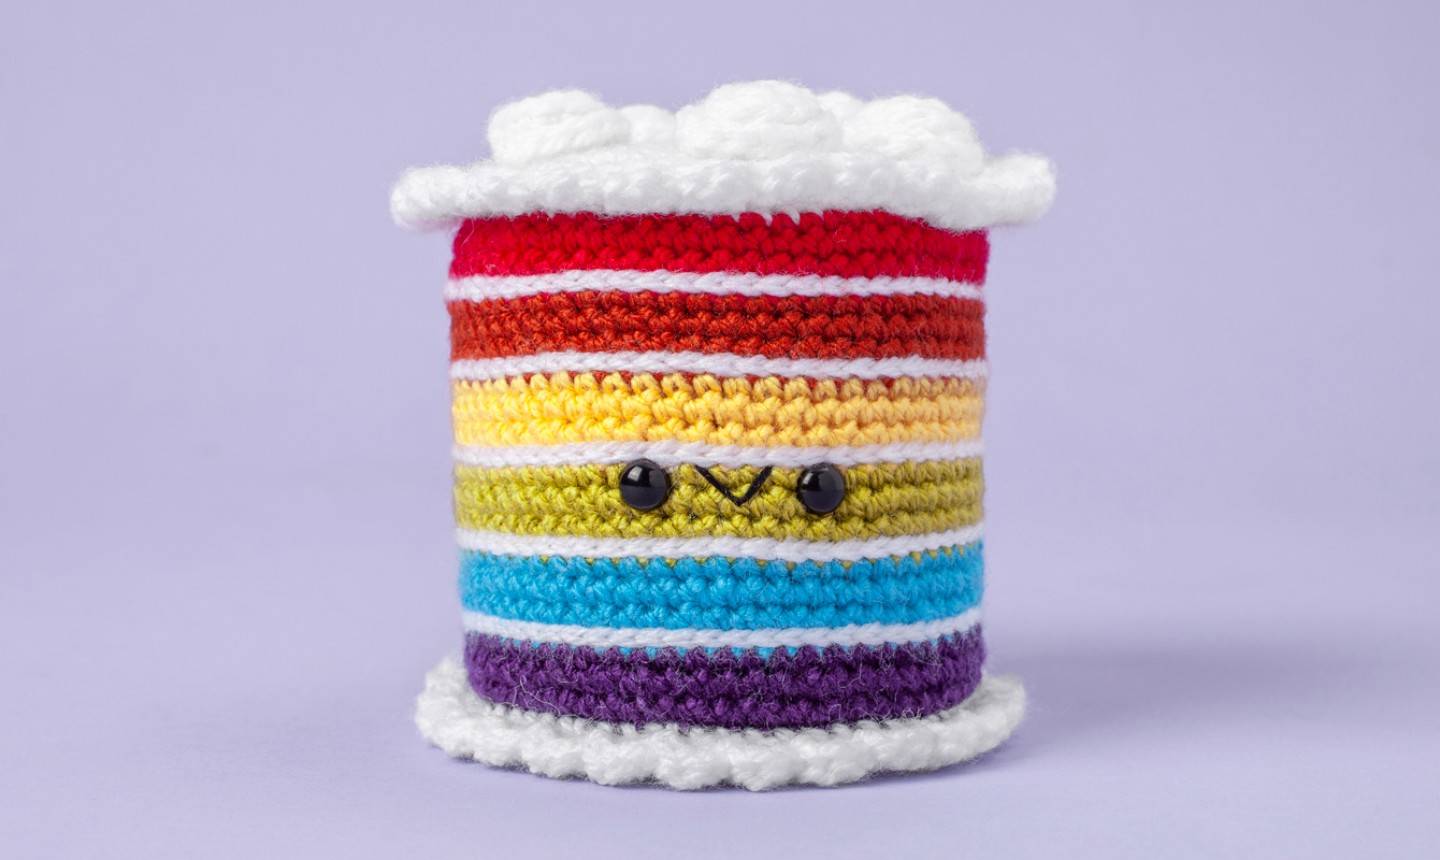
To make the dollop, begin by rolling the end that does not have the tails towards the tails. Wrap around until you have formed a circle. With one of the tails and a tapestry needle, weave through the icing and make sure all sides have been sewn together: you don’t want the icing to come unwrapped. Leave the tails and use them to sew the dollops to the top of the cake. Sew evenly around the rim.
Share tips, start a discussion or ask one of our experts or other students a question.
Already a member? Sign in
No Responses to “This Crochet Rainbow Cake Makes Every Day a Party”