
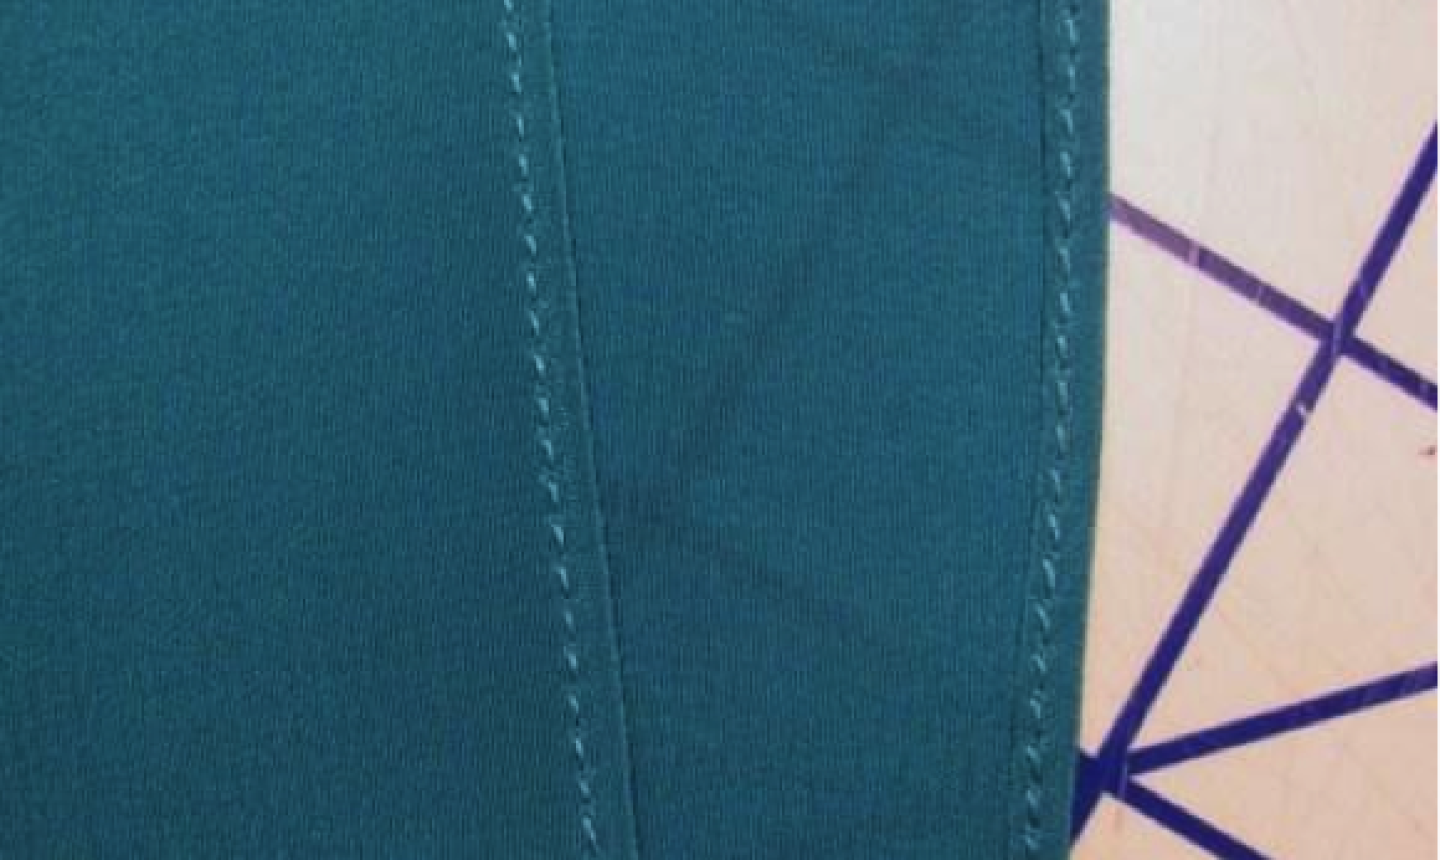
Real talk: If you want that homemade scarf you’re sewing to look a little less homemade, you need a rolled hem. A smooth, even-looking rolled hem is where it’s at — but how do you get one?
The first part of the answer is easy: You use a rolled-hem presser foot. The second part is a little more challenging. You need to learn exactly how to use that presser foot to get your hem to look right, especially if you’re working with lightweight, delicate fabrics that tend to shift around or fray.
It’s not that hard once you find out how. Read on for tips on how to create perfect, designer-worthy rolled hems using your own sewing machine.
Why Use a Rolled-Hem Presser Foot?

First of all, forget the idea of using a conventional presser foot. To pull off a professional-looking hem on one of those, you’d need an extra-sharp eye, a super-steady hand and ultra-precise measuring. Too tricky!
Use a rolled-hem presser foot instead. The name says it all: That foot will get your rolled-hem job done right.
You can find a rolled-hem presser foot just about anywhere, in a variety of sizes that produce different hem widths. You can use them with any type of fabric, but they’re a spot-on choice for hemming sheer or lightweight fabrics like chiffon and charmeuse. You’ll end up with beautiful, narrow hems and an elegant finish.
Keep in mind that a rolled-hem presser foot will work best on straight hems. Use one to finish the edges on a scarf, for instance. But for curved hems, which are cut on both the bias and the straight-of-grain, feeding the fabric on the straight portions takes more finesse.
Still, it’s pretty easy to use a rolled-hem presser foot. The key is getting the fabric to feed correctly into the foot at the start. If you pay extra attention to stabilizing the first couple of inches of the hem, and you maintain a steady hand as you fold and evenly guide the fabric into the foot as you sew, you’ll be golden.
How to Use a Rolled-Hem Presser Foot
Level: Intermediate
What You Need
Instructions
1. Prepare the First Couple Inches of Fabric
If you’re working with a lightweight fabric that’s a bit tough to handle, stabilize the first inch or so with some fusible interfacing. That will help the edge feed into the foot more easily. To do this, cut a narrow strip of ultra-lightweight or sheerweight fusible interfacing: The strip should be anywhere from 1/16″ to ⅛” wide (depending on how narrow a hem you want), by 1—2″ long. Fuse the strip to the edge of the fabric.
2. Fold the Hem Over
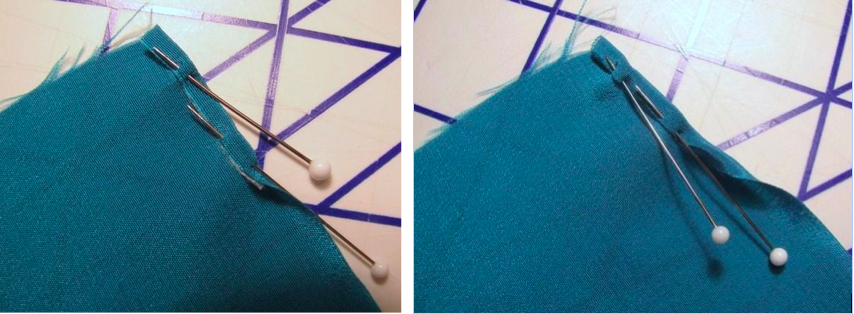
First, fold your hem by the width of the interfacing strip. Then fold it over again by the same width, and pin it. You’ll pin the first 1—2″ of the hem in place in this way.
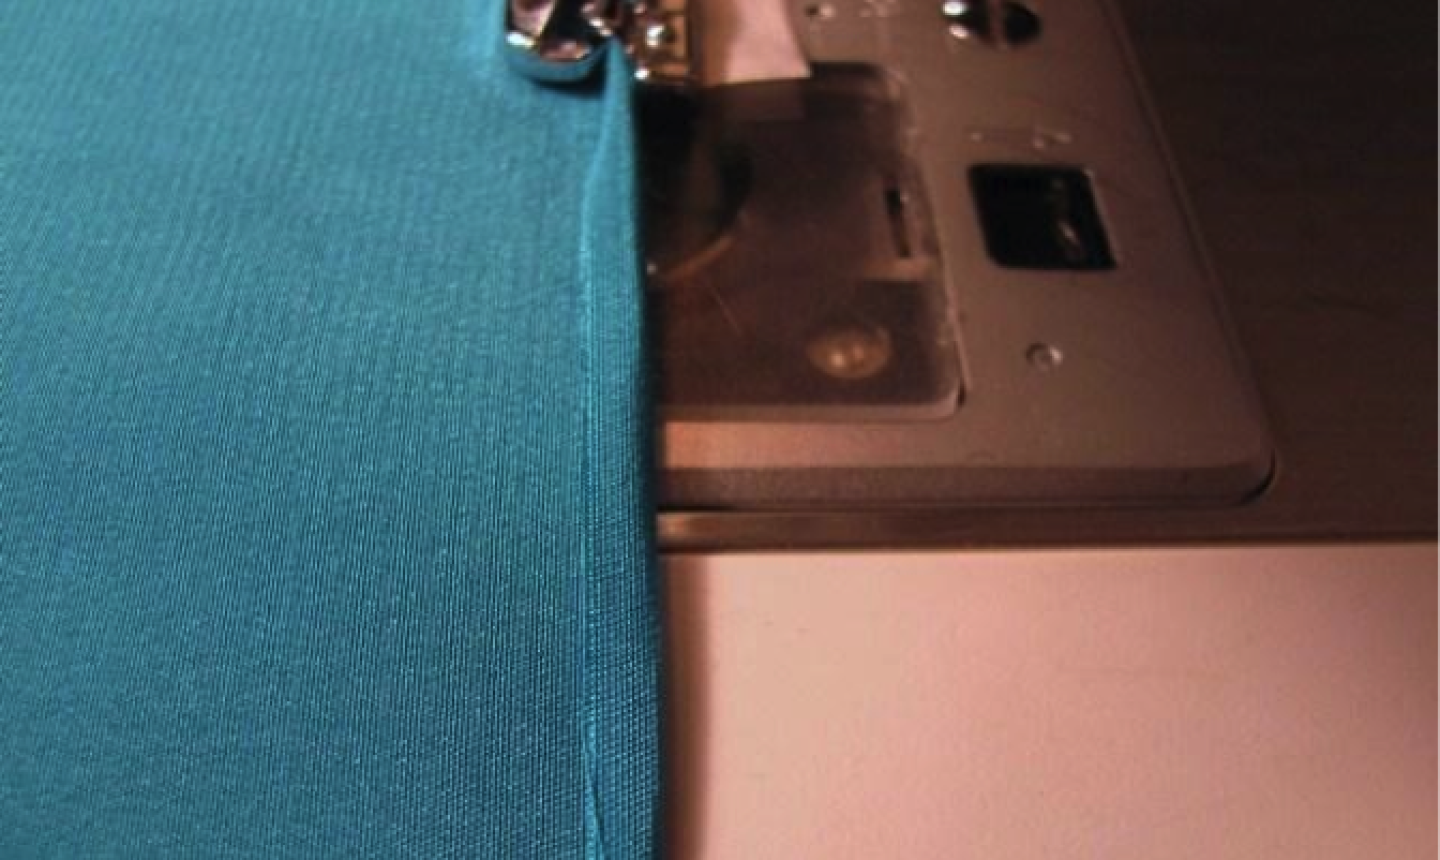
3. Stitch the Hem
Start by placing a small strip of tissue paper under the presser foot. This will keep the fabric from sinking into the throat plate when you begin to sew. Now place the pinned hem over the tissue paper, and carefully line up the folded outer edge of the rolled hem to the inner edge of the presser foot’s right leg. As you gently pull the thread tails away from the machine, slowly stitch 2 to 3 stitches into the hem to secure it in place.
4. Feed the Folded Hem Into the Presser Foot

Begin by removing the first pin, and with the needle inserted into the fabric, raise the presser foot. Remove the second pin and begin to feed the folded hem into the curled portion of the presser foot.
5. Finish Your Rolled Hem
While you gently pull the narrowly folded hem edge towards you, slowly stitch the hem in place. Make sure you keep the fold positioned over the curled portion of the presser foot. With your hands, continue to fold down the edge of the fabric about 1/16″ to ⅛” as you sew, feeding the folded edge into the curled guide as evenly as possible.
When you’re done, just tear away the tissue paper, press — and gawk at that perfect, pro-looking rolled hem you just made!
Thanks for keeping this article up, because it really helped
With clothes, there are two main steps, one is to match the color, and the other is to match the style. The importance of color speaks for itself, to figure out the color match, you must first figure out the basics of clothing color.How do we match our clothes to make us more elegant and fashionable in life and work: https://sunnsky.com/ Clothing matching needs to be based on our body shape. It is important to modify our weaknesses and show our strengths. The matching of clothing colors also requires some knowledge.