

You gotta love zombies: the spooky trope that just won’t die. Get it? Here’s everything you need to know to turn an ordinary portrait into an image of the living dead… if you dare.
Zombified Portrait
Level: Intermediate
What You Need
Instructions
1. Draw the Portrait
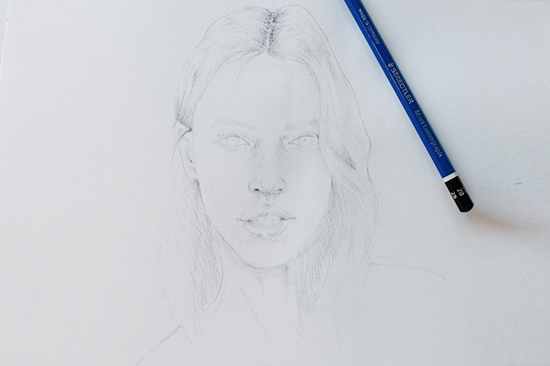
To create a zombified portrait, you first need to draw a portrait just as you normally would. Outline the basic features in pencil and add a little detail as if your subject were living instead of undead.
When drawing the facial expression, it’s best to keep it pretty blank (when was the last time you saw a zombie smile?). At this stage you can also go ahead and add small pinpoint pupils in the eyes. This will later contribute to the portrait’s chilling lifeless stare.
2. Add the Cuts

Now it’s time to bring on the gore. Lightly draw some cut and torn areas on the skin. You have a ton of freedom here. If your zombie is a bit fresher (aka newly turned), you can keep the cuts subtle. Or go for full-on facial decay. Your choice.
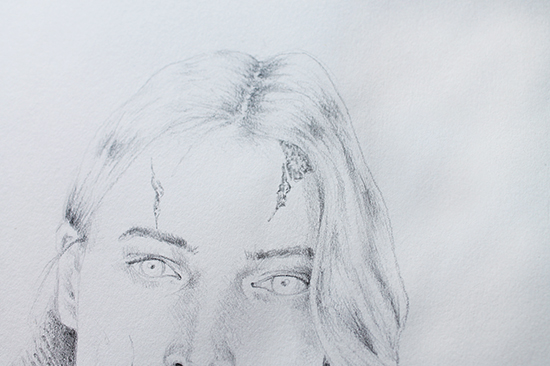
In each cut, shade in some tiny spots and leave other sections bare to create flesh-like texture. You can also leave thin strips of skin across the cut to enhance the torn look.
3. Draw its Breakfast
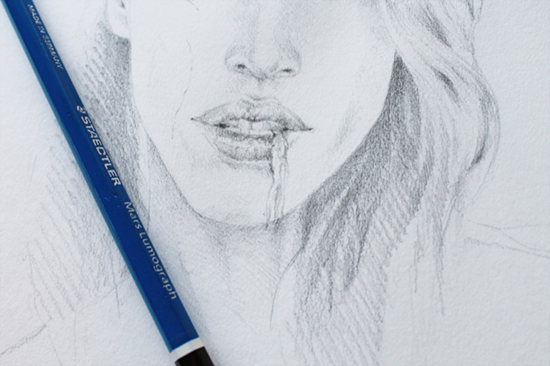
What’s a zombie without its all-consuming need for human flesh?
Draw a long strip of skin hanging from the zombie’s mouth. Include plenty of texture and irregularity for that realistic “torn off” look.
4. Detail the Eyes and Finish the Skin
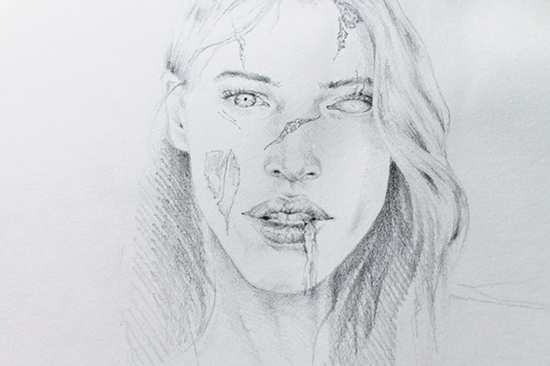
Now, you can either keep those pinpoint pupil eyes we drew in the first step, or you can erase one (or both) to make the eyes look like they’re rolled up into the zombie’s head. Cute, right?
If you’re not satisfied that your portrait is peak scary, add a classic trait of the living dead: A torn cheek exposing the teeth underneath. Draw this large tear similarly to how you drew the first cuts, but instead of adding texture underneath, draw in some dental work.
5. Add Color
Zombie portraits are pretty cool in simple black and white, but if you want to make it even more gory, add a splash of color (obviously, red). Grab your colored pencils, watercolors, or any medium you prefer and paint the areas of exposed flesh to look blood-soaked. Smear a little blood in her hair and on her skin, too, to show that she’s been through a few scrapes.
Finish your portrait by painting a little red around the eye to make it look bloodshot, and use a little bit of yellow inside the eye for max creepy factor.
And you done! Good luck getting to sleep.
Share tips, start a discussion or ask one of our experts or other students a question.
Already a member? Sign in
No Responses to “How to Zombify Your Portraits”