
Bears are so popular with all ages. Imagine a cute cuddly teddy bear that you could eat! Now that’s a pretty irresistible combination, if you ask me!
Did you know that bears are very sweet? Well, these bear cake pops are!
You’re about to find out exactly what I mean with just seven simple steps. These cake pop bears are sure to overpower your guests, leaving them wanting more!

You’ll need:
- Cake pop dough
- Light brown candy wafers
- White candy wafers
- Dark brown candy wafers, about 6 pieces
- M&Ms candies
- Lollipop sticks
- Waxed paper
- Zip-top bags
- Toothpicks
- Cake pop stand or styrofoam block
Prep
Line your work surface waxed paper.
Step 1:
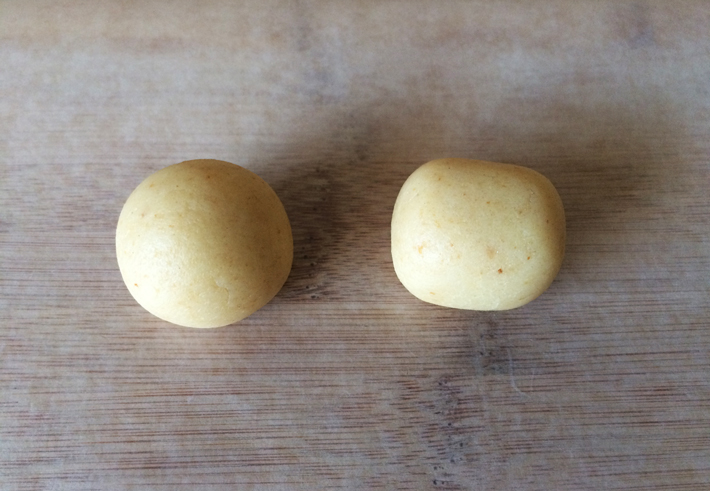
Always use a cookie scoop to portion the dough so all pieces are uniform in size.
First roll into a ball and then into a log. Place the pieces on a wax paper-lined cookie sheet and refrigerate.
The cake pop dough consistency is the key to creating smooth cake pops. Please refer to this tutorial for making your cake pop dough, if you’re not familiar with the process.
Step 2:
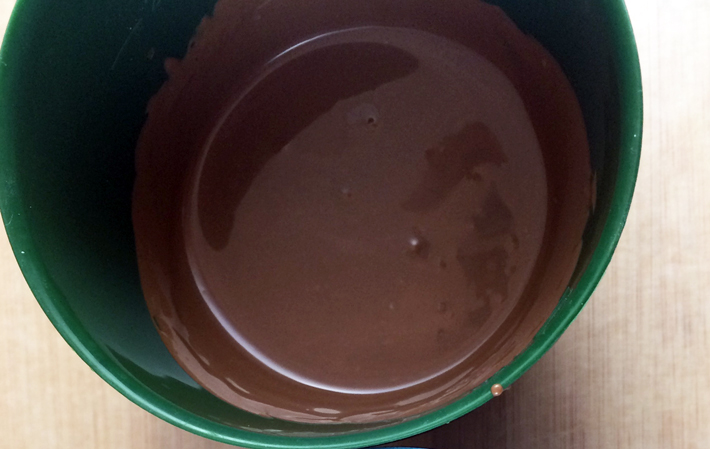
In a small microwave safe bowl, melt light brown wafers. For instructions or troubleshooting with melting and dipping with candy coating, please refer to this excellent dipping tutorial.
Step 3:
Dip ⅓ inch of a cake pop stick into candy coating and push it into the bottom of the logs until it’s about halfway through. Do this for all the pieces.
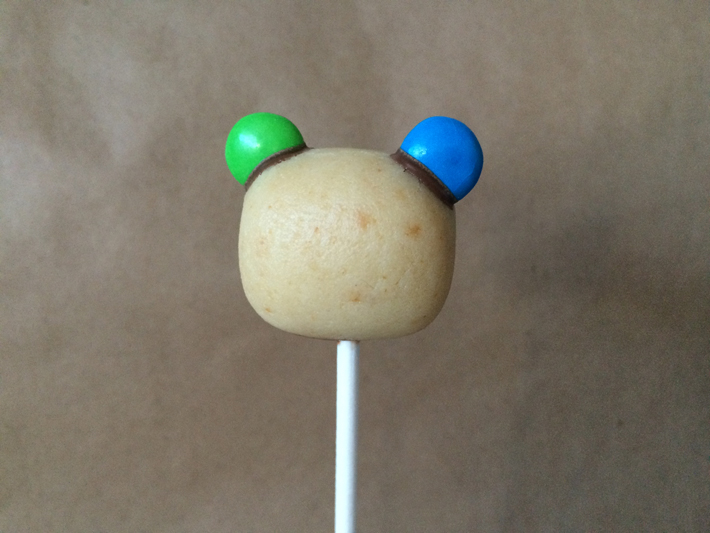
Step 4:
Next, we’ll add the ears. Dab an M&M in the candy coating and and push onto the top of the head. Please do not refrigerate these uncoated cake pops after this step, otherwise the condensation will cause the M&M’s colors to run and when you dip it into the candy coating, there’s a good chance they will cause the candy coating to “seize”, rendering it unusable.
Step 5:
Once all the pieces have ears, dip them into the light brown coating. Reheat the candy coating for only a couple of seconds if necessary throughout the process. Place on a cake pop stand and let dry completely. Do this for all the pieces.
Step 6:
Melt about a dozen white wafers in a ziplock bag by microwaving at 50% power in 20-30 second intervals until melted. Make sure the candy coating is not hot or warmer than body temperature before piping, otherwise the temperature difference will cause cracks on your dipped and dried cake pops.
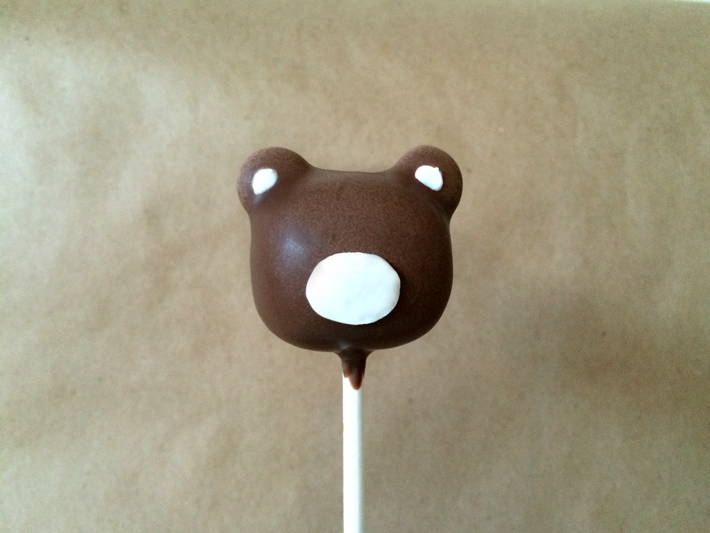
Snip the tip with scissors and work quickly to pipe a solid oval in the middle of the face. Pipe a semi circle in each ear as well.
Tip: Pipe a puddle and use a toothpick to extend the puddle out to form an oval.
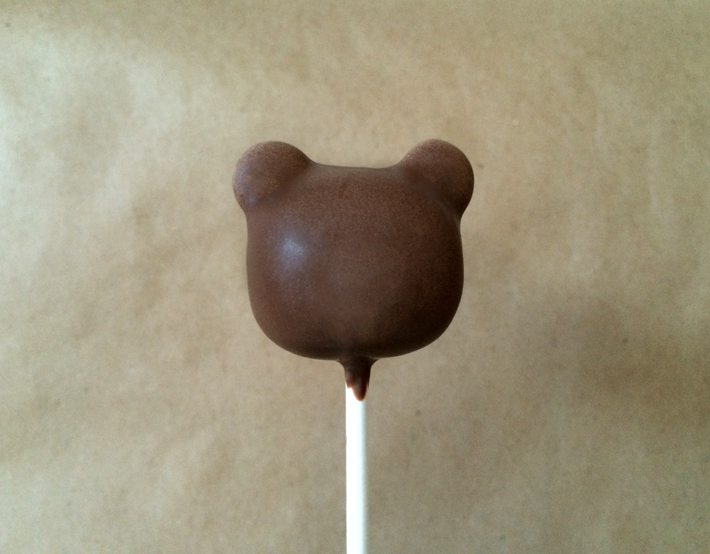
Step 7:
Melt dark brown candy wafers in another ziplock bag using the same method in step 6. Pipe eyes and nose.
I hope you enjoyed this bear tutorial! Keep an eye out for other cake pop ideas from my Woodland Cake Pop Series.
Share tips, start a discussion or ask one of our experts or other students a question.
No Responses to “Woodland Cake Pops: You Must Make These Sweet Bear Cake Pops!”