
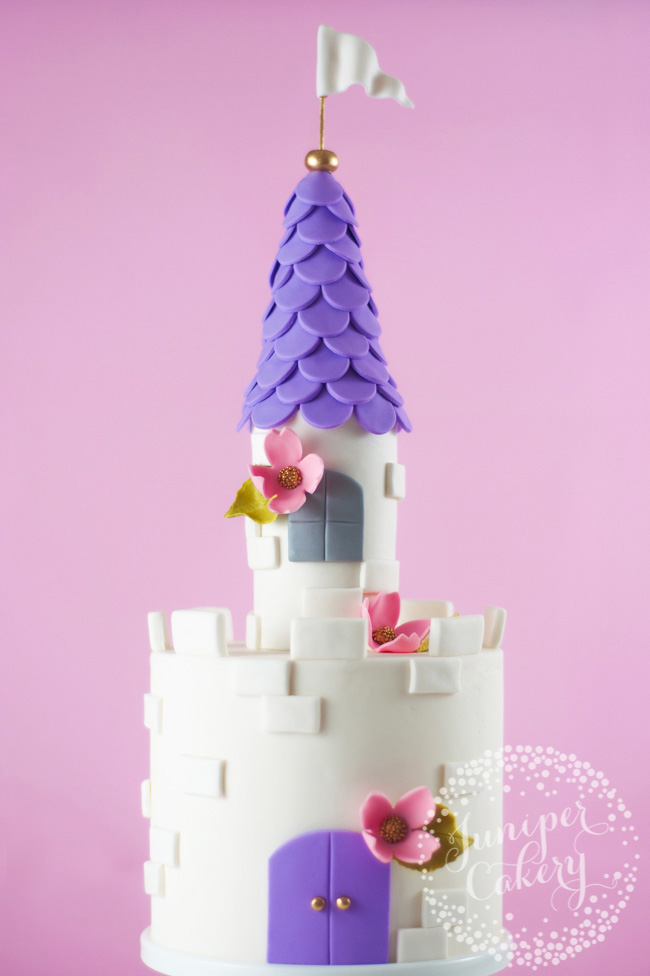
Elaborate castle cakes are stunning, of course, but they can be very time consuming to design and create. If you don’t have time to make a giant show-stopper or are working with a client who has a restricted budget, this easy shortcut comes in handy! Keep reading to find how you can transofrm a plain cake with an easy-to-make castle cake topper.
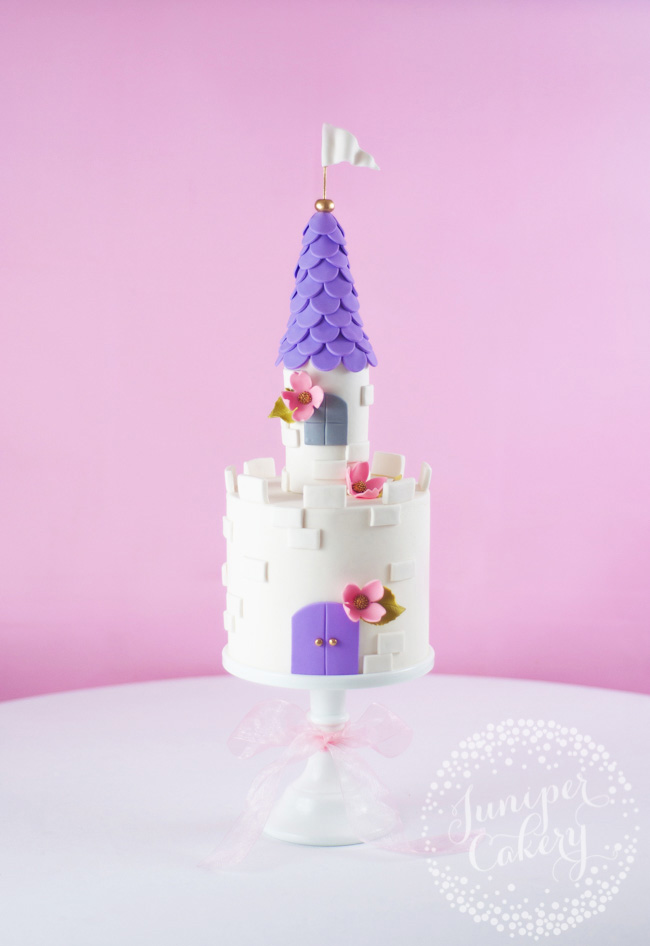
How to make a quick and easy castle cake topper
What you need:
- An iced layer cake
- White gum paste
- Fondant rolling pin
- Toilet paper or cut-down paper towel roll
- Small knife, precision knife or pastry cutter
- Edible glue
- Waffle ice cream cone
- Colorful fondant (we used purple)
- Piping tip (to use as a cutter)
- Cocktail stick or toothpick
- Gray fondant
- Small and large circle cutters
- Veining tool
Optional tools:
- Edible silver or gold paint
- Food-safe paintbrushes
- Small pre-made sugar flowers and leaves
Step 1: Make the tower
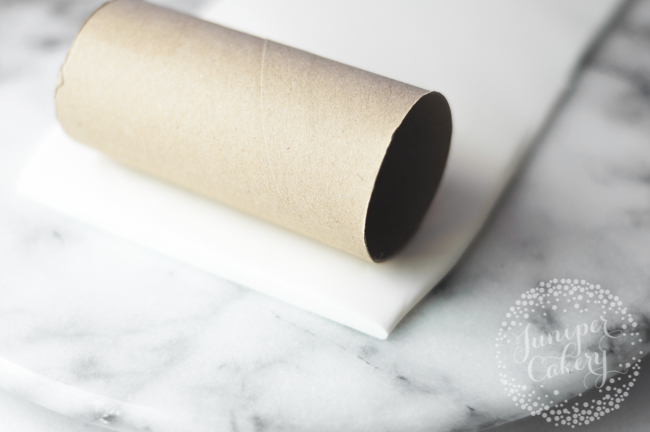
Roll out your white gum paste to be about 6mm or about ¼” thick.
Now use a small, sharp knife or a pastry cutter to cut out a rectangle that’s the right height and width to fit around your cardboard tube. (Save any excess white gum paste for a later step.)
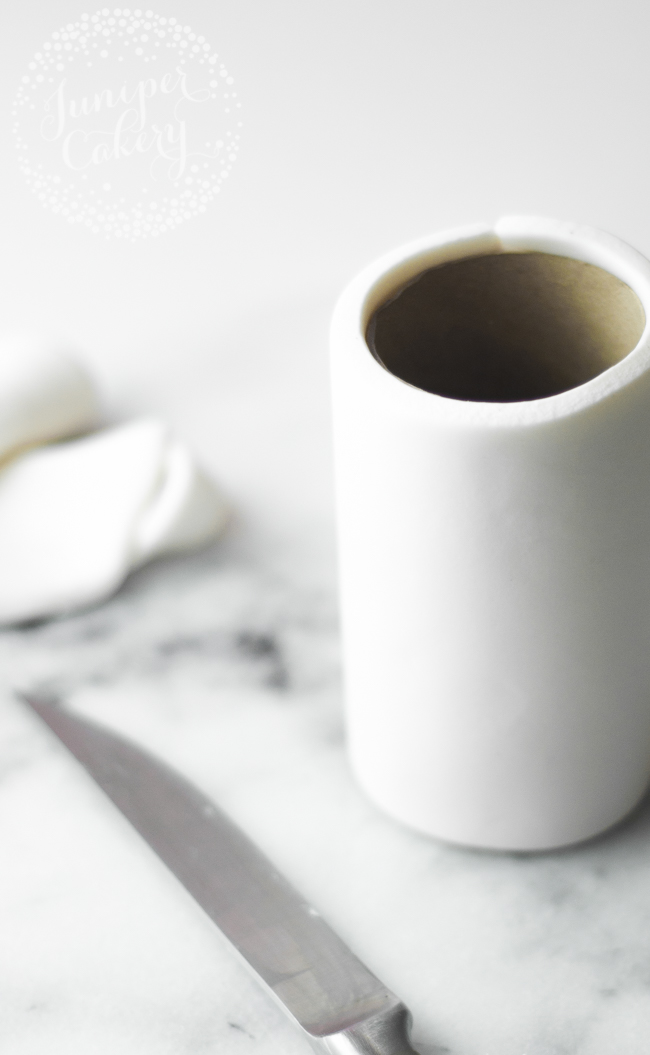
Wrap the gum paste around the cardboard tube. Fix the ends together with a little edible glue.
Step 2: Make the tower’s roof
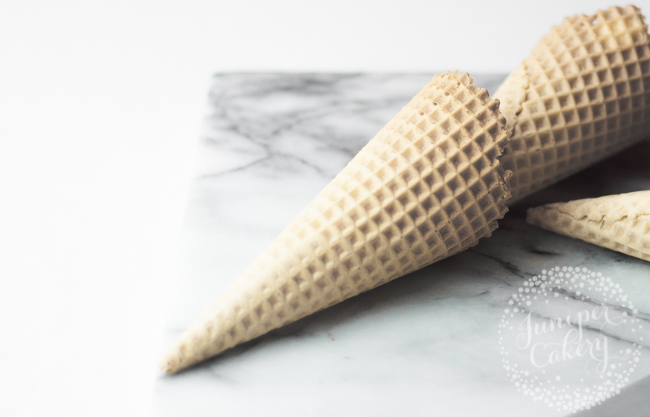
Place a waffle ice cream cone on top of the covered tube, and mark where it sits perfectly on top. Gently cut the cone down to size. Start small, cutting away piece by piece, instead of trying to cut the cone down all in one try.
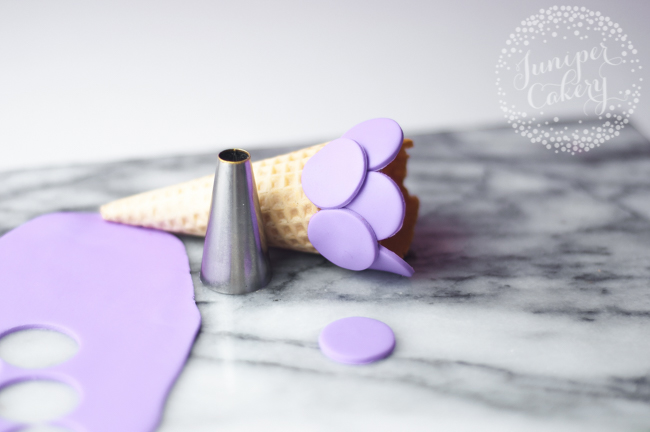
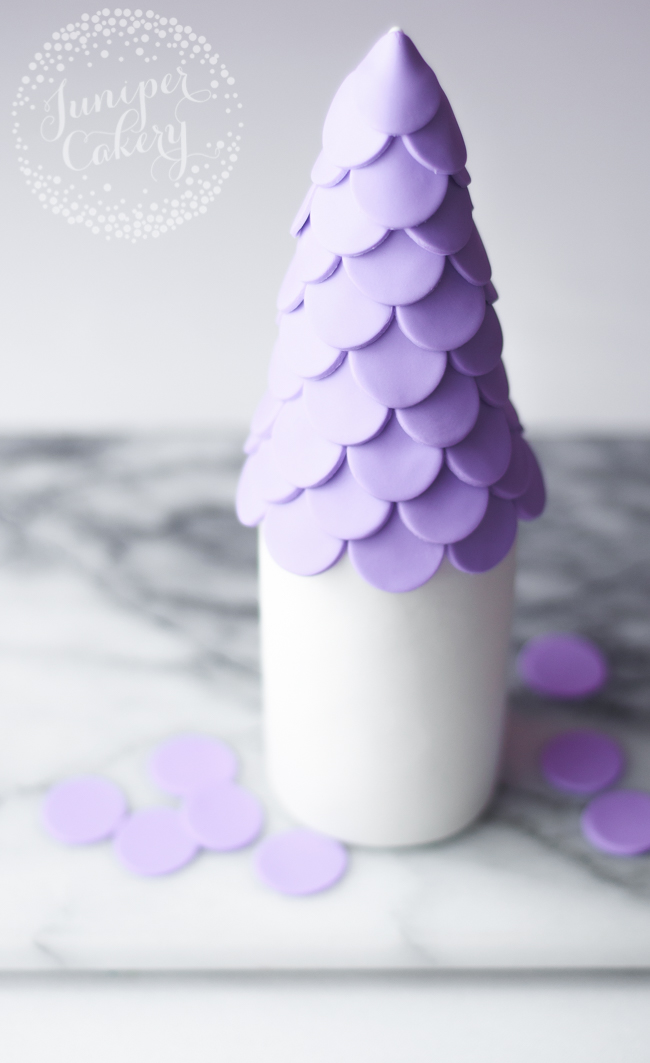
Roll out colored fondant about ¼” thick and cut out circles using the wrong side of a piping tip. Starting at the bottom of the cone, attach a row of circles with edible glue. Work your way up the cone in the same manner, overlapping rows to create shingles.
When finished attach the roof onto your turret with edible glue.
Step 3: Make a flag
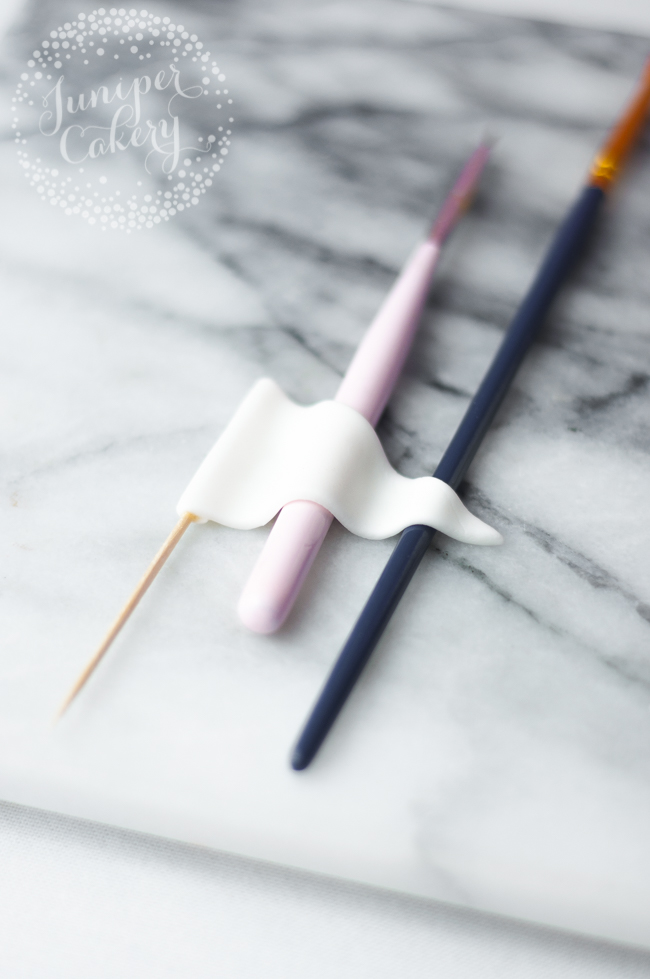
Roll your white gum paste even thinner, about 2-3 mm or 1/8″, then cut out a long triangle. Apply edible glue to the short side of the triangle, then gently roll it around a cocktail stick or toothpick.
Leave to fully set atop doweling rods or paintbrushes for a wavy finish.

To attach the flag to the cake, roll a small ball of fondant and flatten it a bit. Stick the toothpick or cocktail stick into the fondant, then attach the base to the top of the tower. If desired, you can paint this fondant and the stick with edible metallic paint.
Step 4: Add a window to the tower
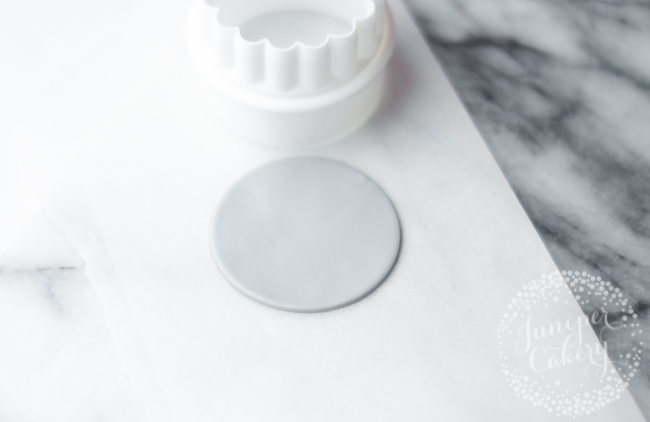
To add a window onto your tower roll out gray fondant to a thickness of around 3mm (1/8″) and cut out a circle using your smaller circle cutter.

Now use a small sharp knife to trim two sides and the bottom of the circle fondant piece. You should now have a rectangle with a rounded top — a Medieval-style window!
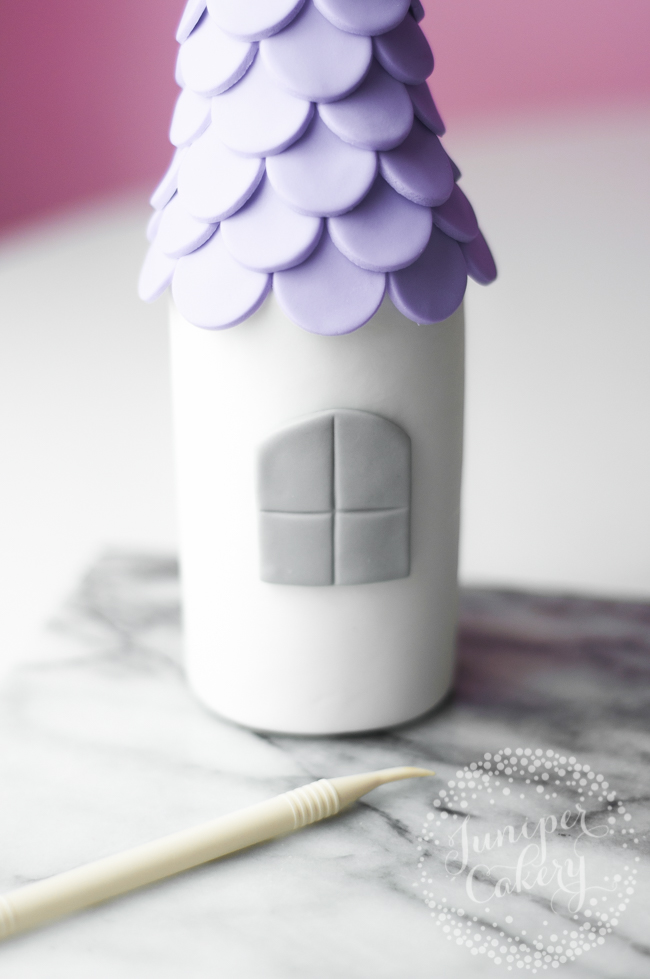
Attach the window to the tower with edible glue. Then use a veining tool to etch in a cross-like window detail. If you’d like more windows on your turret just repeat this step.
Tip!
If you want to give your windows a decorative trim your windows, use an extruder gun to pipe out a rope of fondant surround your window with tiny gum paste flowers and leaves.
Step 5: Decorate the tower and cake with bricks
Roll out more white gum paste to 3-4mm (1/8″) thick and cut out lots of similarly sized rectangles with a sharp knife. We cut our bricks to approximately 3 cm by 1.5 cm (1.18″ x 0.59″).
Attach the bricks with edible glue in random place around your turret and on the cake. We even used some bricks to add a battlement around the top of our cake.
Step 6: Make a door for the castle
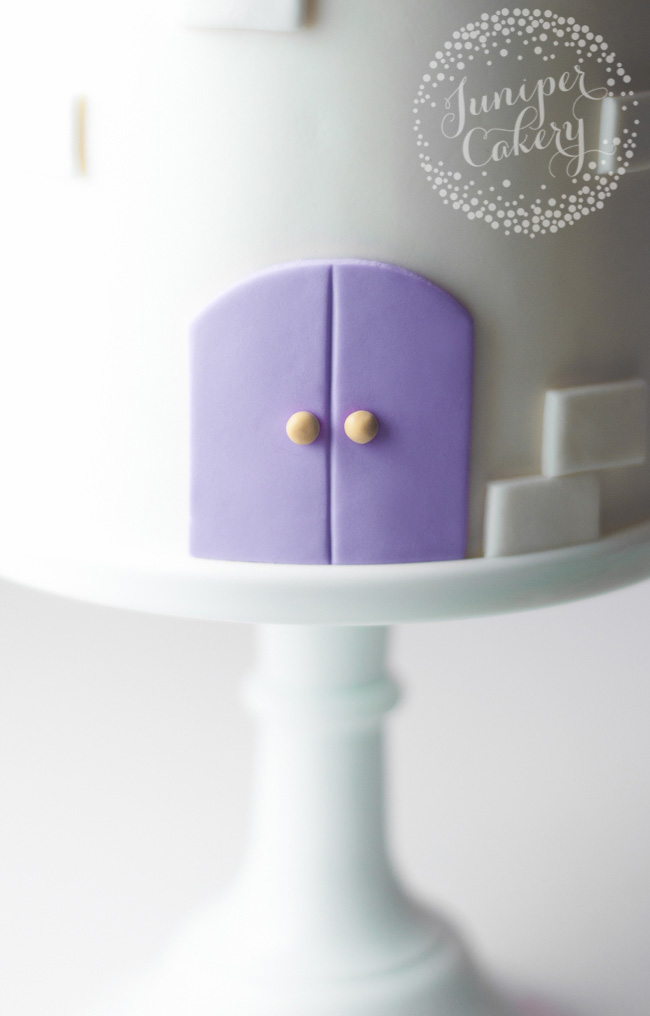
Roll out colored fondant about 3mm (1/8″) thick and cut out a circle with a larger circle cutter. Trim two opposite sides and the bottom of the circle, just like when you created the window. Using a veining tool, scour a line vertically down the center of your fondant door.
To create the handles, attach two small balls of fondant (in whatever color you like) or sugar pearls with edible glue. Attach the door onto your cake and surround with pre-made florals and leaves if you like.
Share tips, start a discussion or ask one of our experts or other students a question.
No Responses to “Turn a Simple Cake Into a Fairytale Castle With This Shortcut!”