
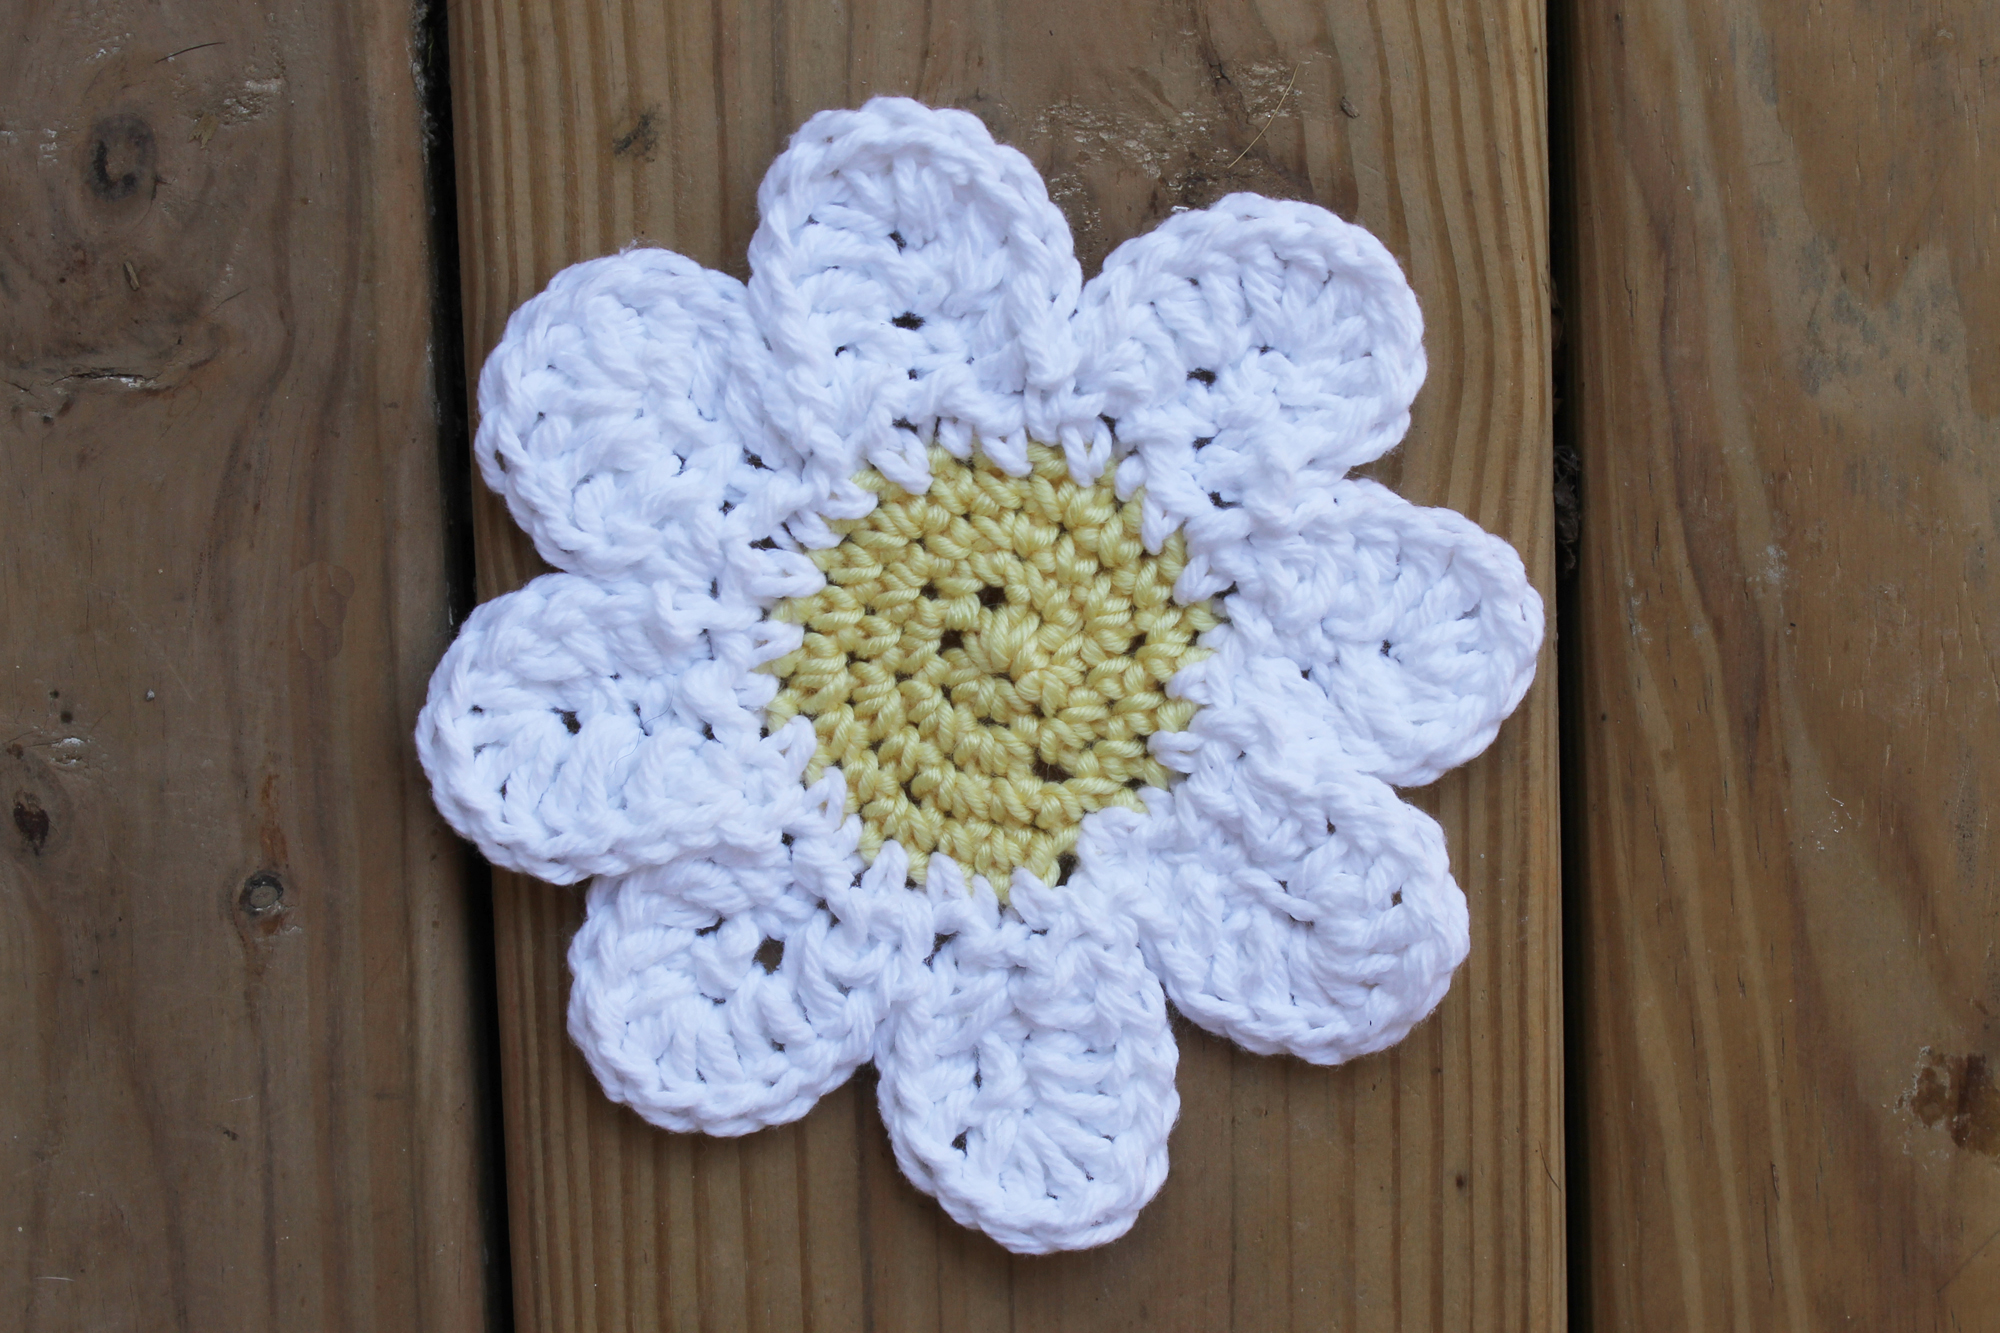
Give any project or room a touch of cheery style by adding a crochet daisy! These flowers will never wilt away, and best of all, you don’t have to water them! Follow along with our step-by-step tutorial to make your own.
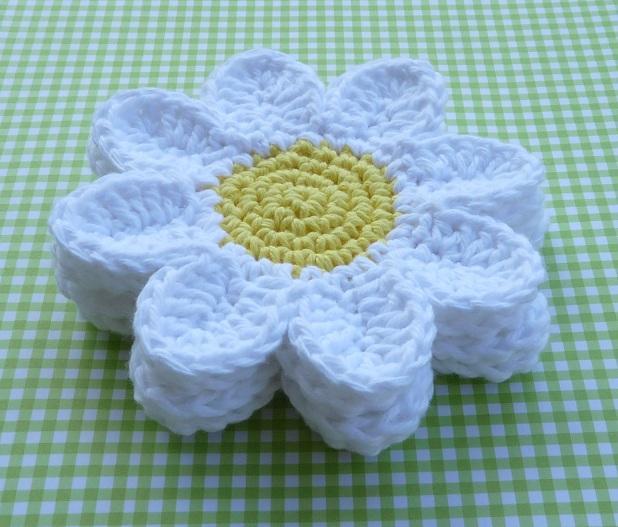
Photo via Doni S
Getting started on your crochet daisy
Before you get started, download the FREE Daisy Coaster crochet pattern from Whiskers and Wool Crochet Patterns right here on Craftsy.
This tutorial is perfect for beginners who want to give some new techniques a try but might be a little hesitant. (Come on, we know you can do it!)
This crochet daisy pattern was designed as a coaster, but there are plenty of other things you could do with it. It can be used as appliqué that you attach to a garment or accessory. You can even layer several daisies and create framed wall art. Let’s get started!
Supplies
What I love about this project is that you can use even the smallest amount of yellow (or any color!) yarn for the daisy center. For this tutorial, I’m using a worsted-weight acrylic yarn that I found in my stash.
You’ll also need white yarn in the same weight of your yellow yarn.
You also have the option to make your daisy larger or smaller depending on the yarn and hook you use. If you’re creating bold wall art, for instance, you might want to stick with a larger hook and bulky yarn. For a smaller, more delicate daisy, try a fingering-weight yarn and hook. (Check out your yarn’s label if you’re not sure what hook will work best.)
A stitch marker is super helpful for keeping track of the rounds when you’re making the daisy center.
Crochet daisy tutorial
Part 1: Make the yellow center
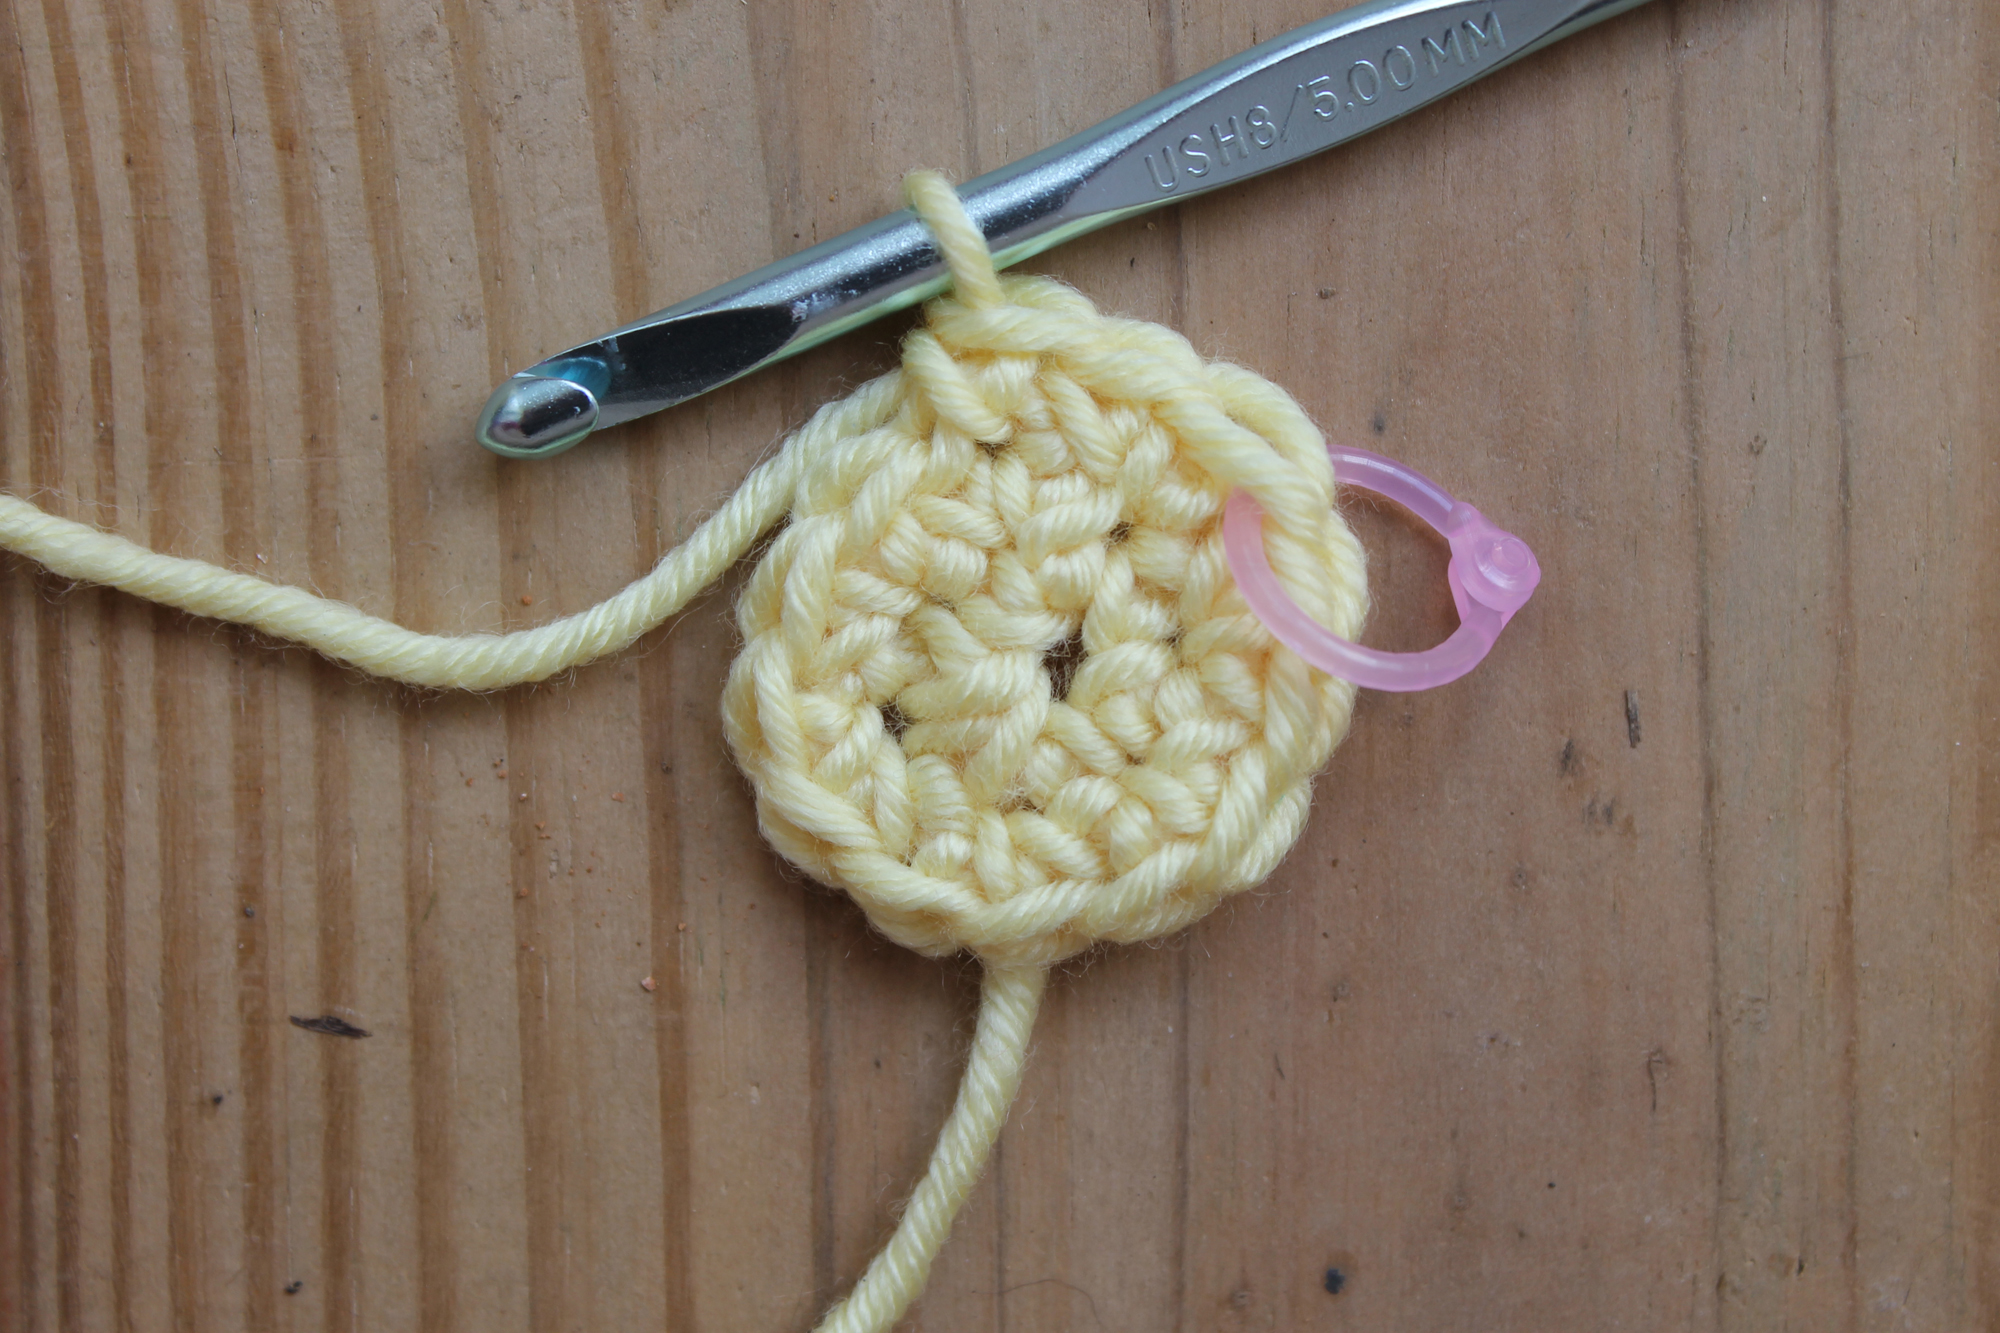
Round 1:
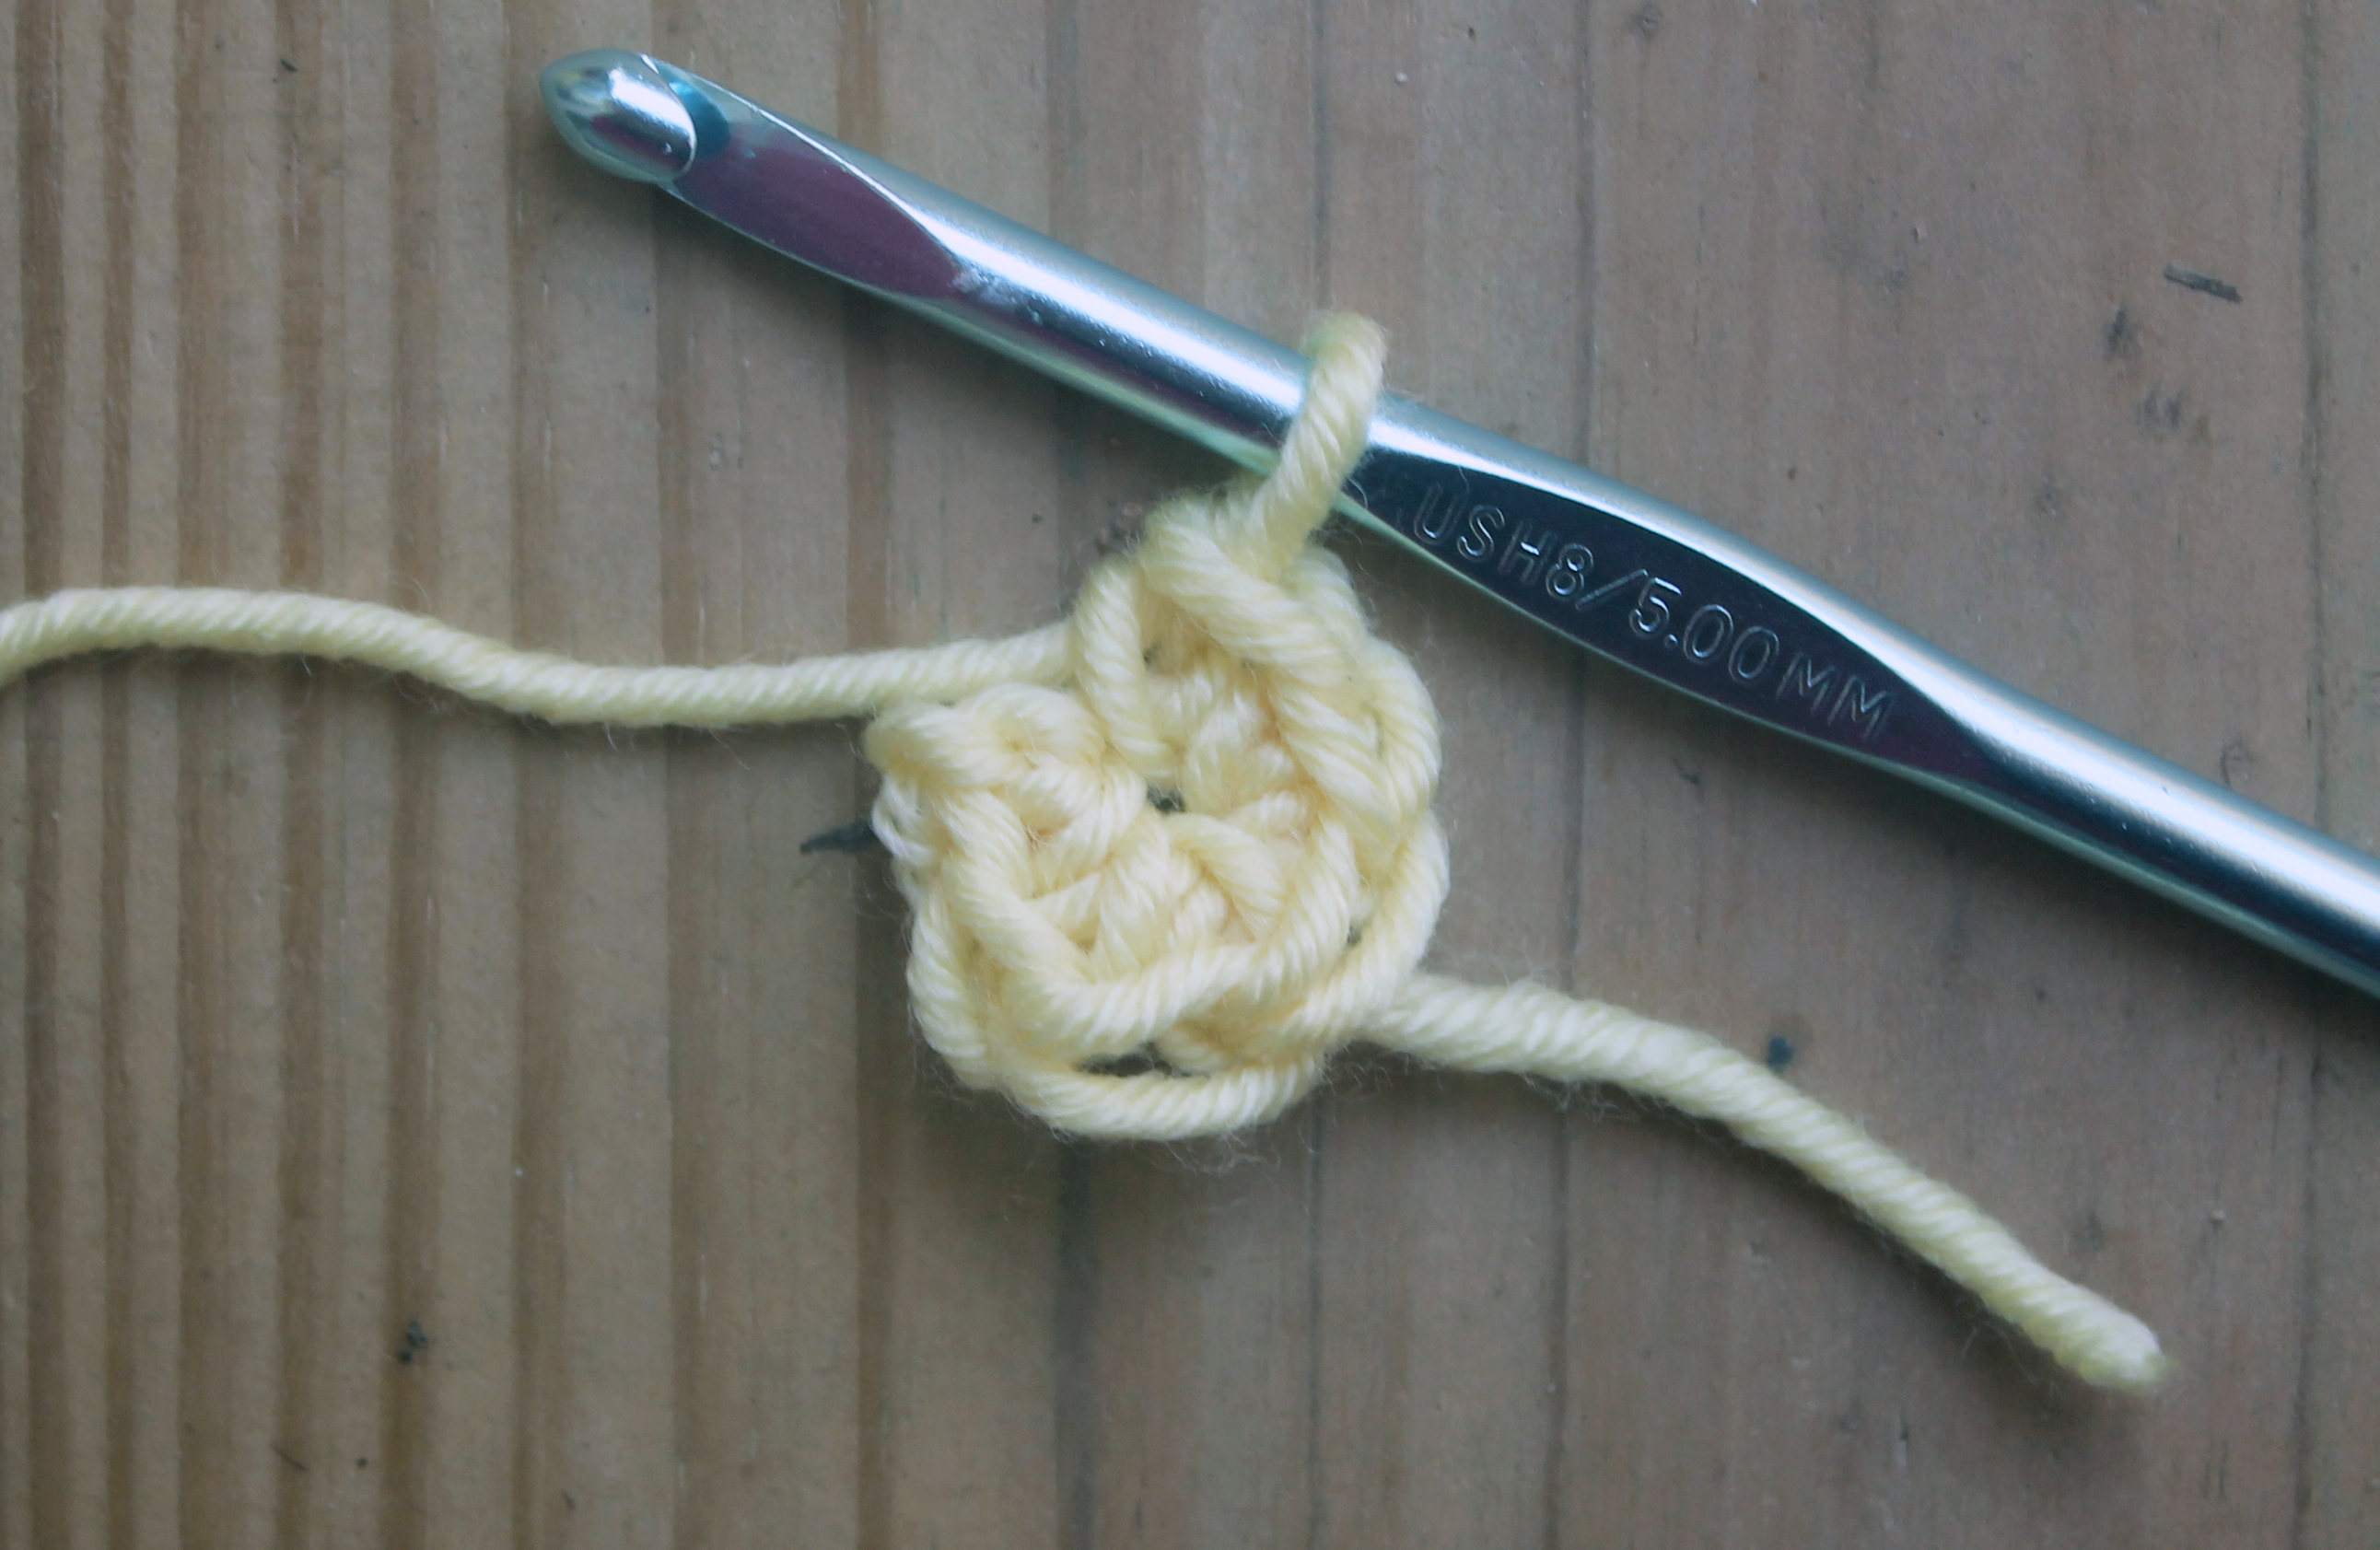
Begin by chaining 2 and single crocheting into the the second chain from the hook six times.
The daisy center is worked in continuous rounds, so there’s no need to slip stitch to join the rounds. Your first round might have a little gap between the last stitch and the first stitch, like mine does here. Don’t worry! We’ll close that gap in the next round.
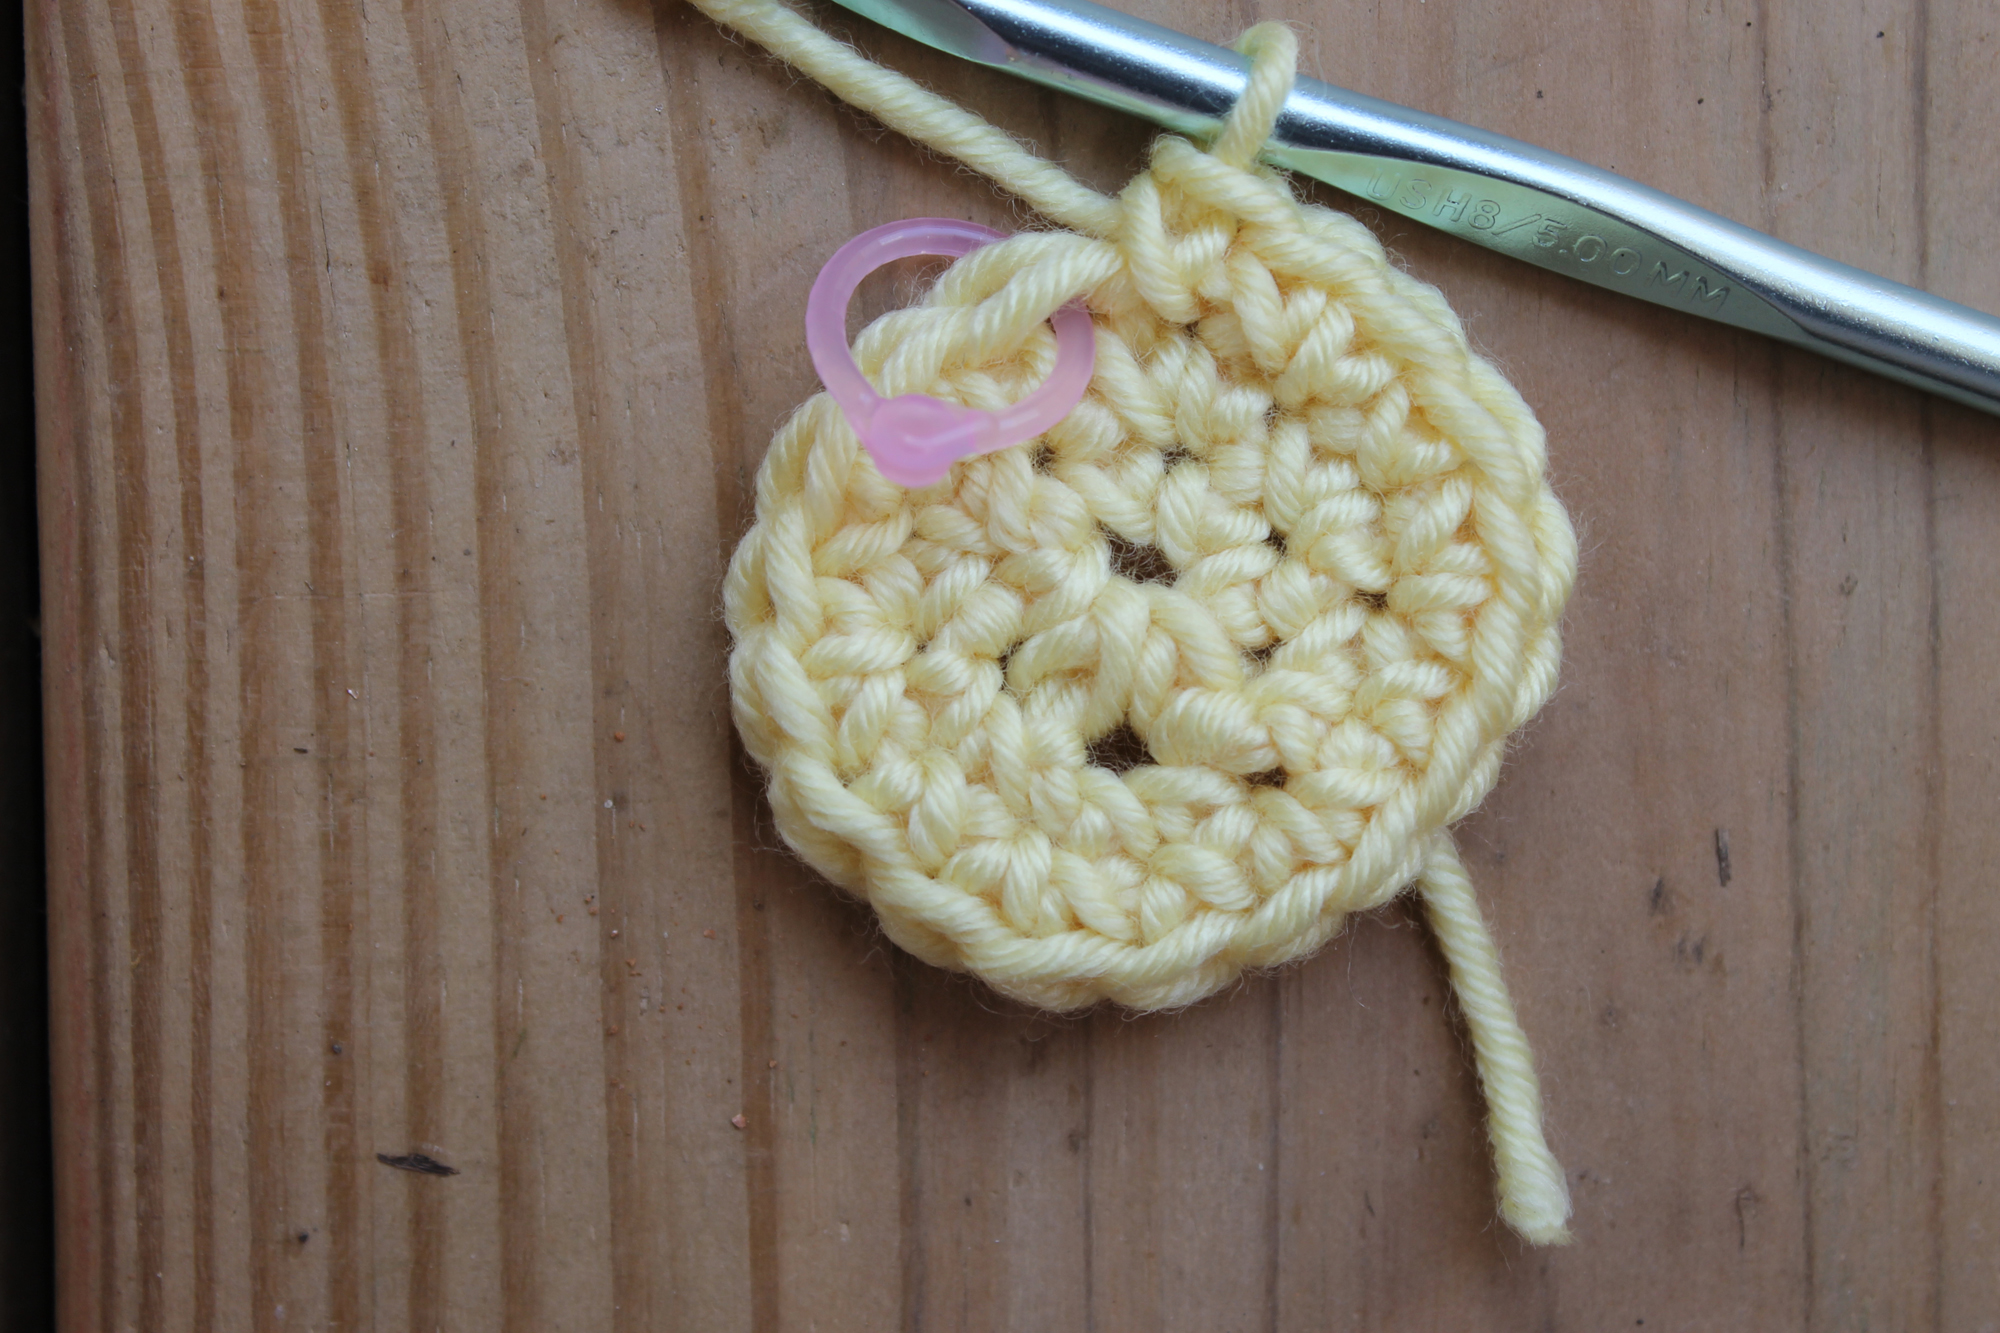
Round 2:
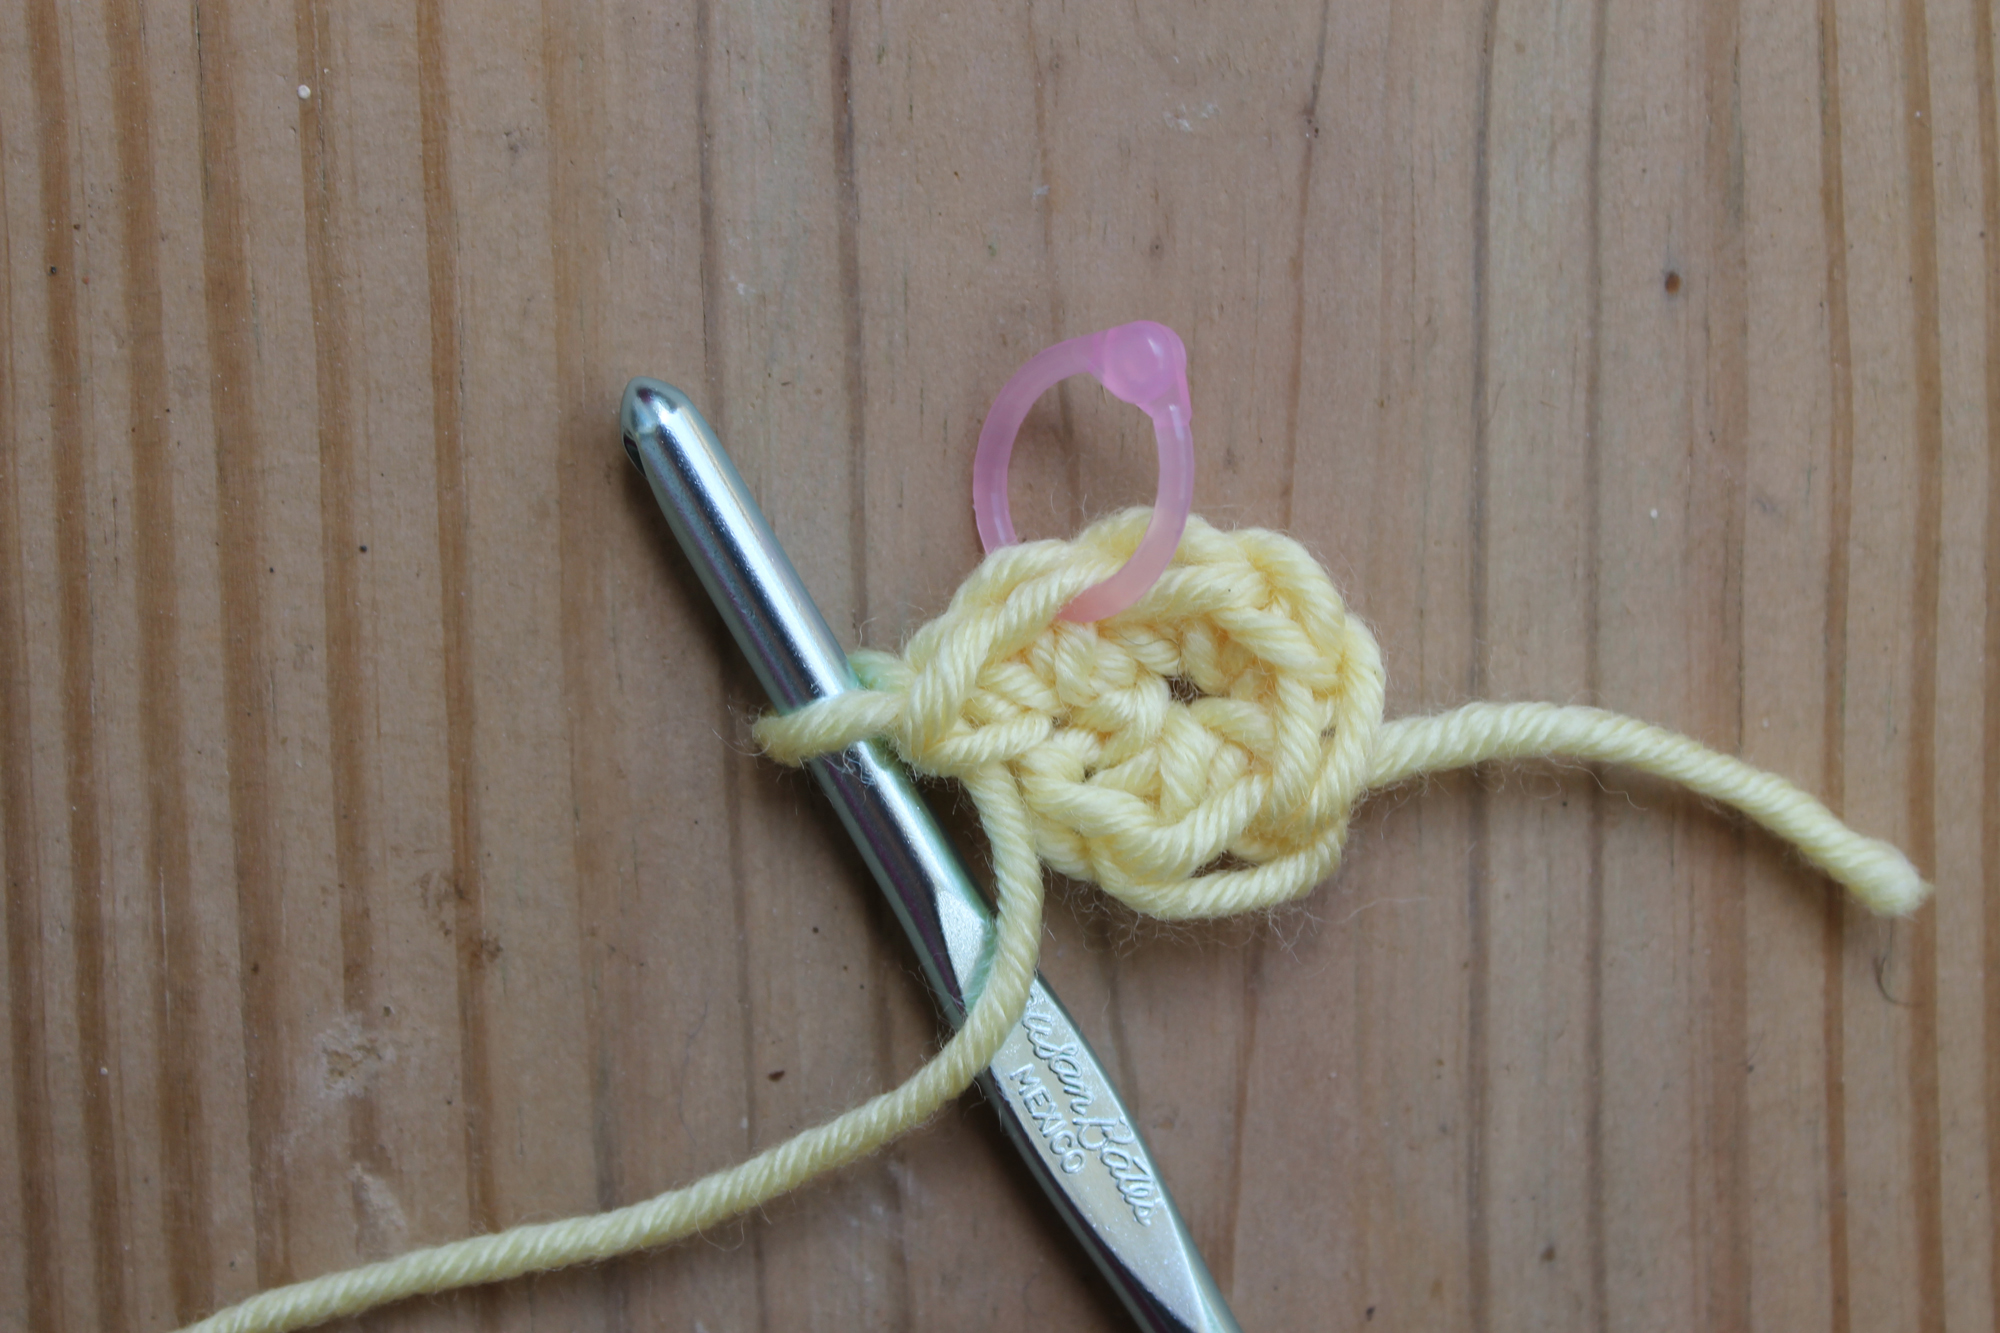
Stitch two single crochets into the first single crochet of the previous round. Since the center is worked in continuous round, it’s helpful to insert a stitch marker to mark the first stitch of the round.
Continue around, stitching two single crochets into each stitch of the previous round.
When you finish the round, you should have 12 single crochet stitches. If you stitched that round accurately, the next stitch will be the stitch that’s marked.
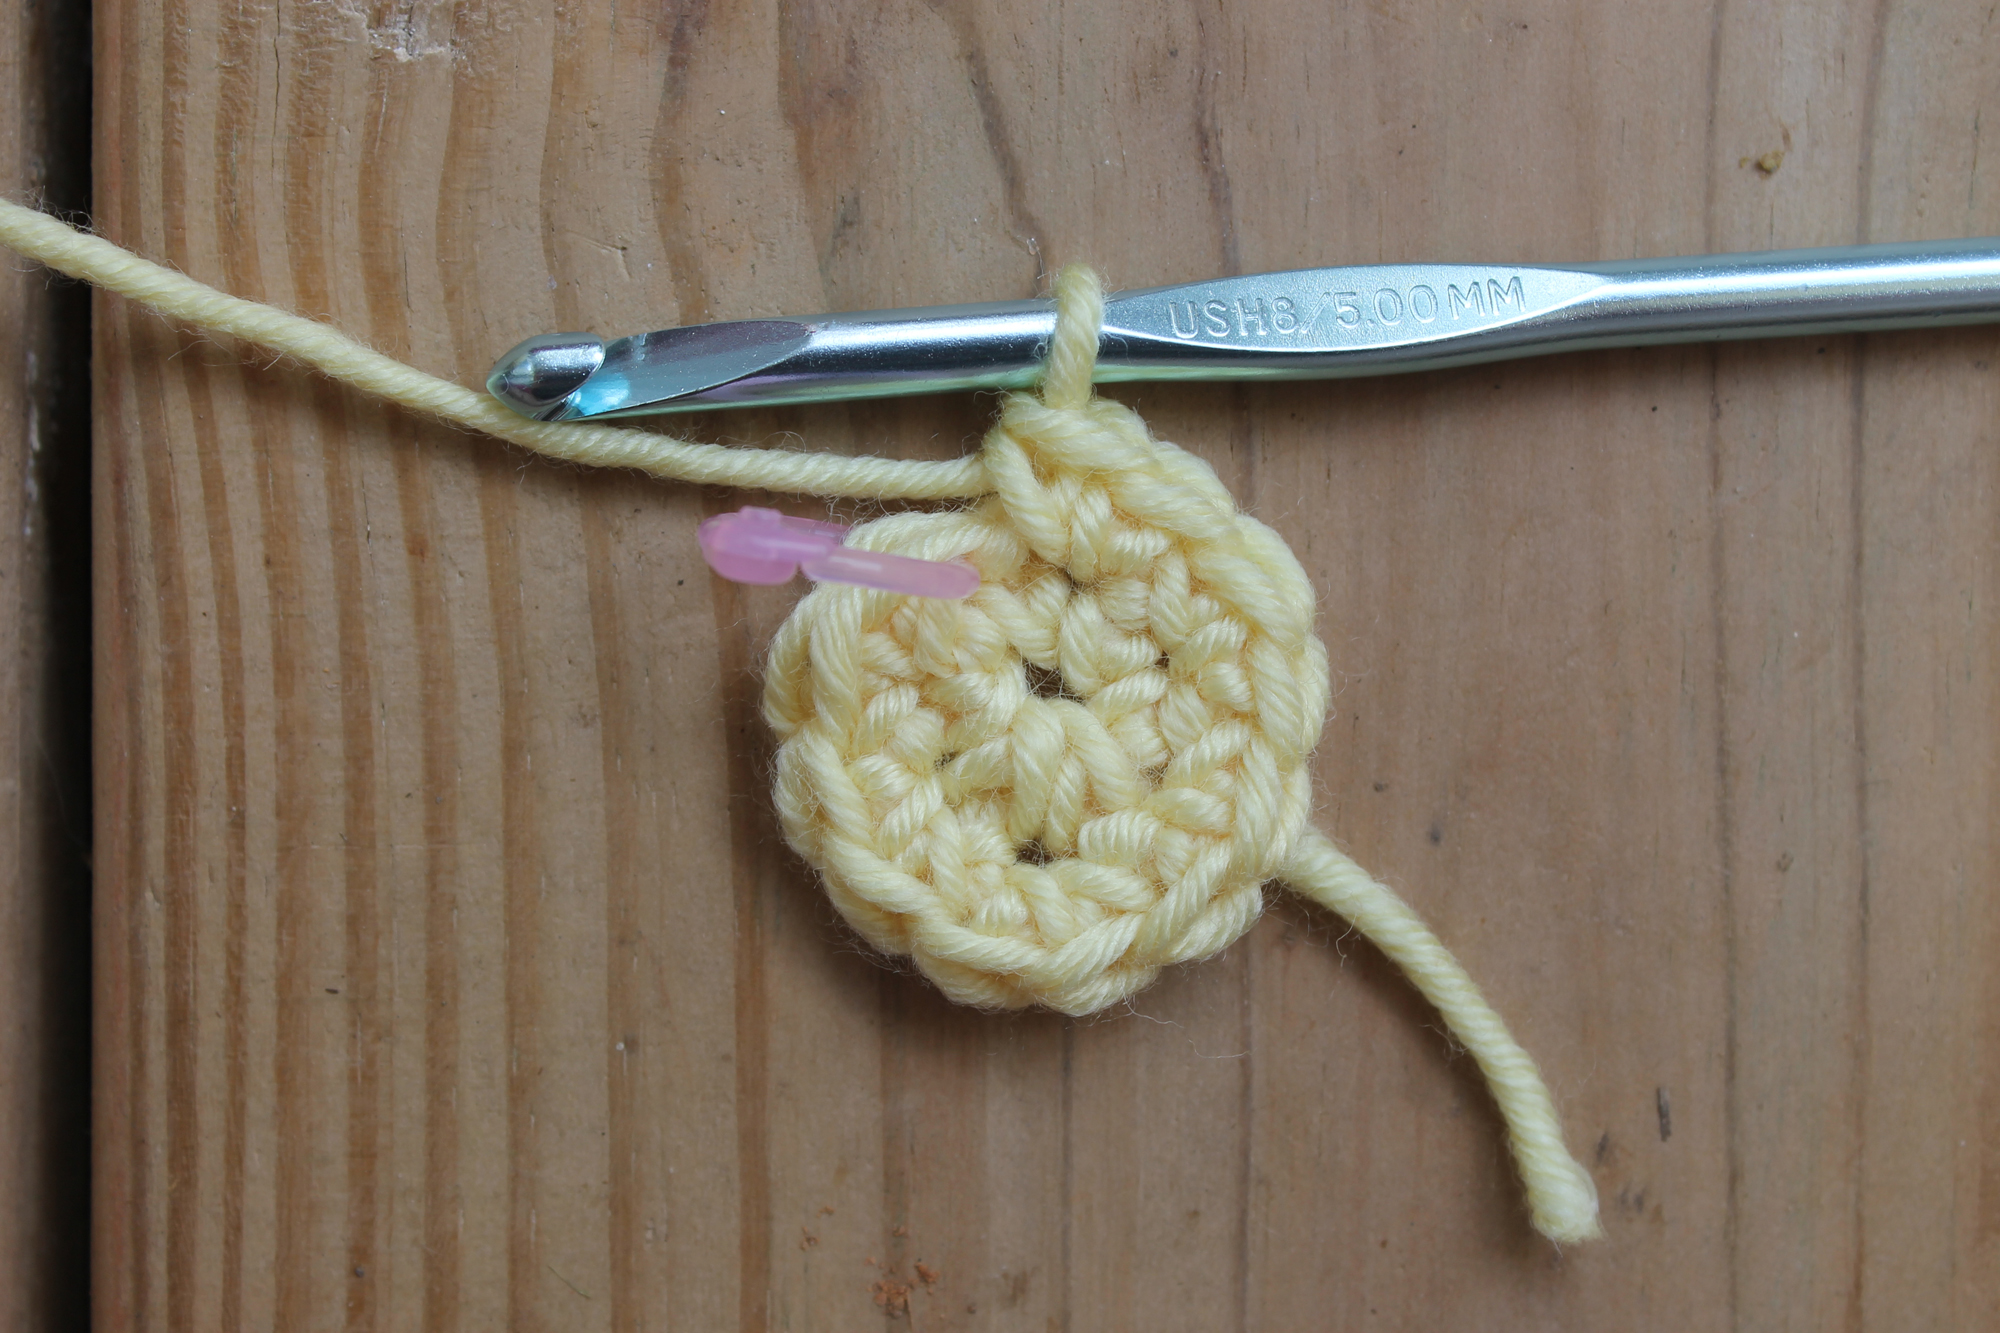
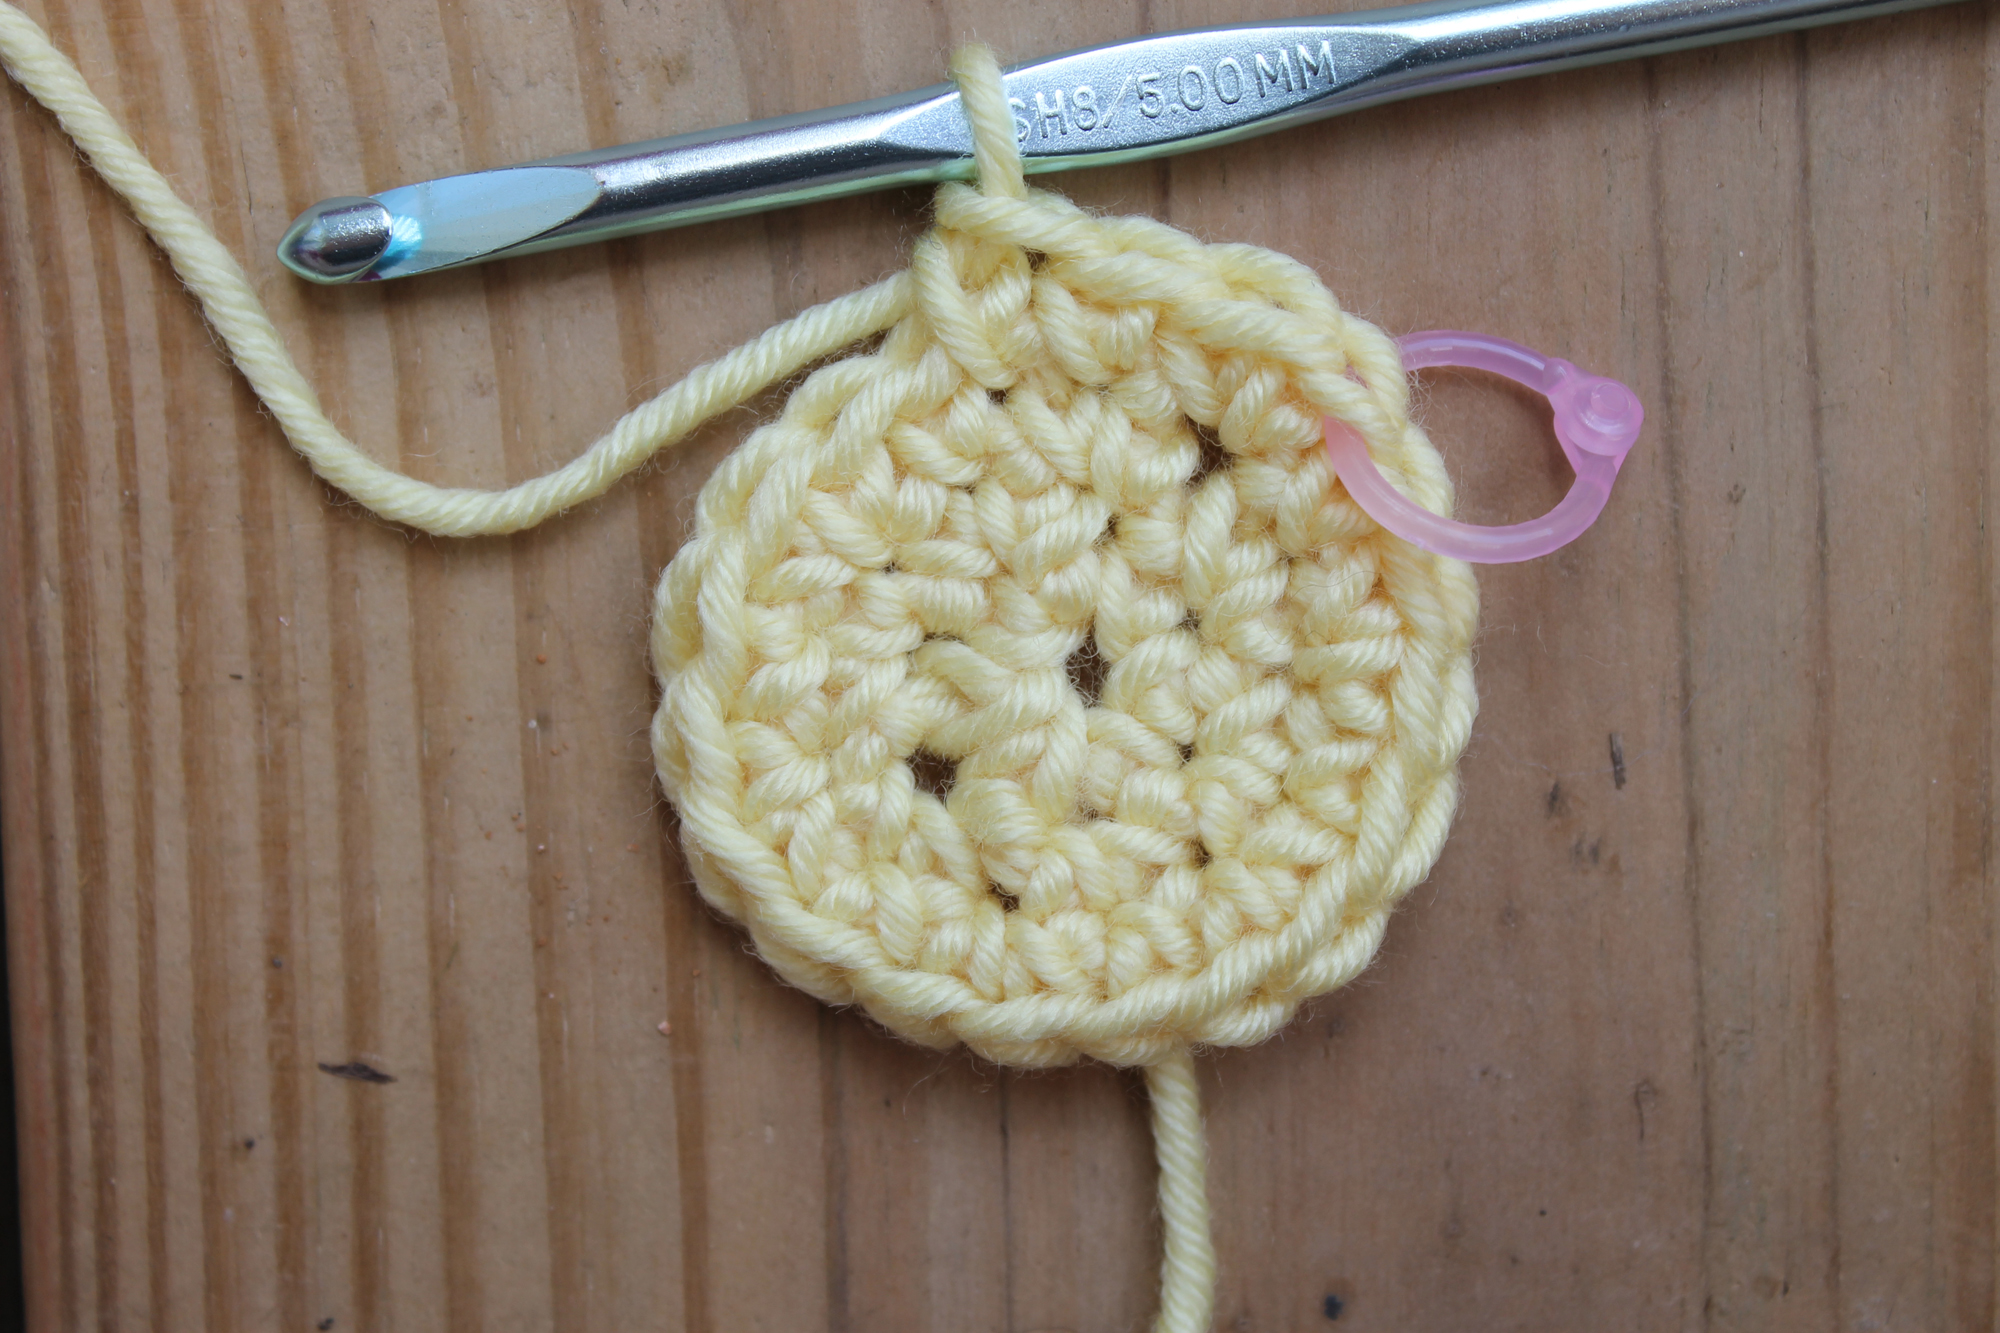
Round 3:
Stitch 2 single crochets into the next stitch, then single crochet in the next stitch. Repeat this pattern around. Don’t forget to move that stitch marker into the first stitch of the new round, too, so you’ll know where Round 3 begins. When you finish, you should have 18 single crochets.
Round 4:
Stitch 2 single crochets in the next stitch, then single crochet in the next 2 stitches. This round is similar to Round 3 except that you are only increasing in every three stitches instead of every other stitch.
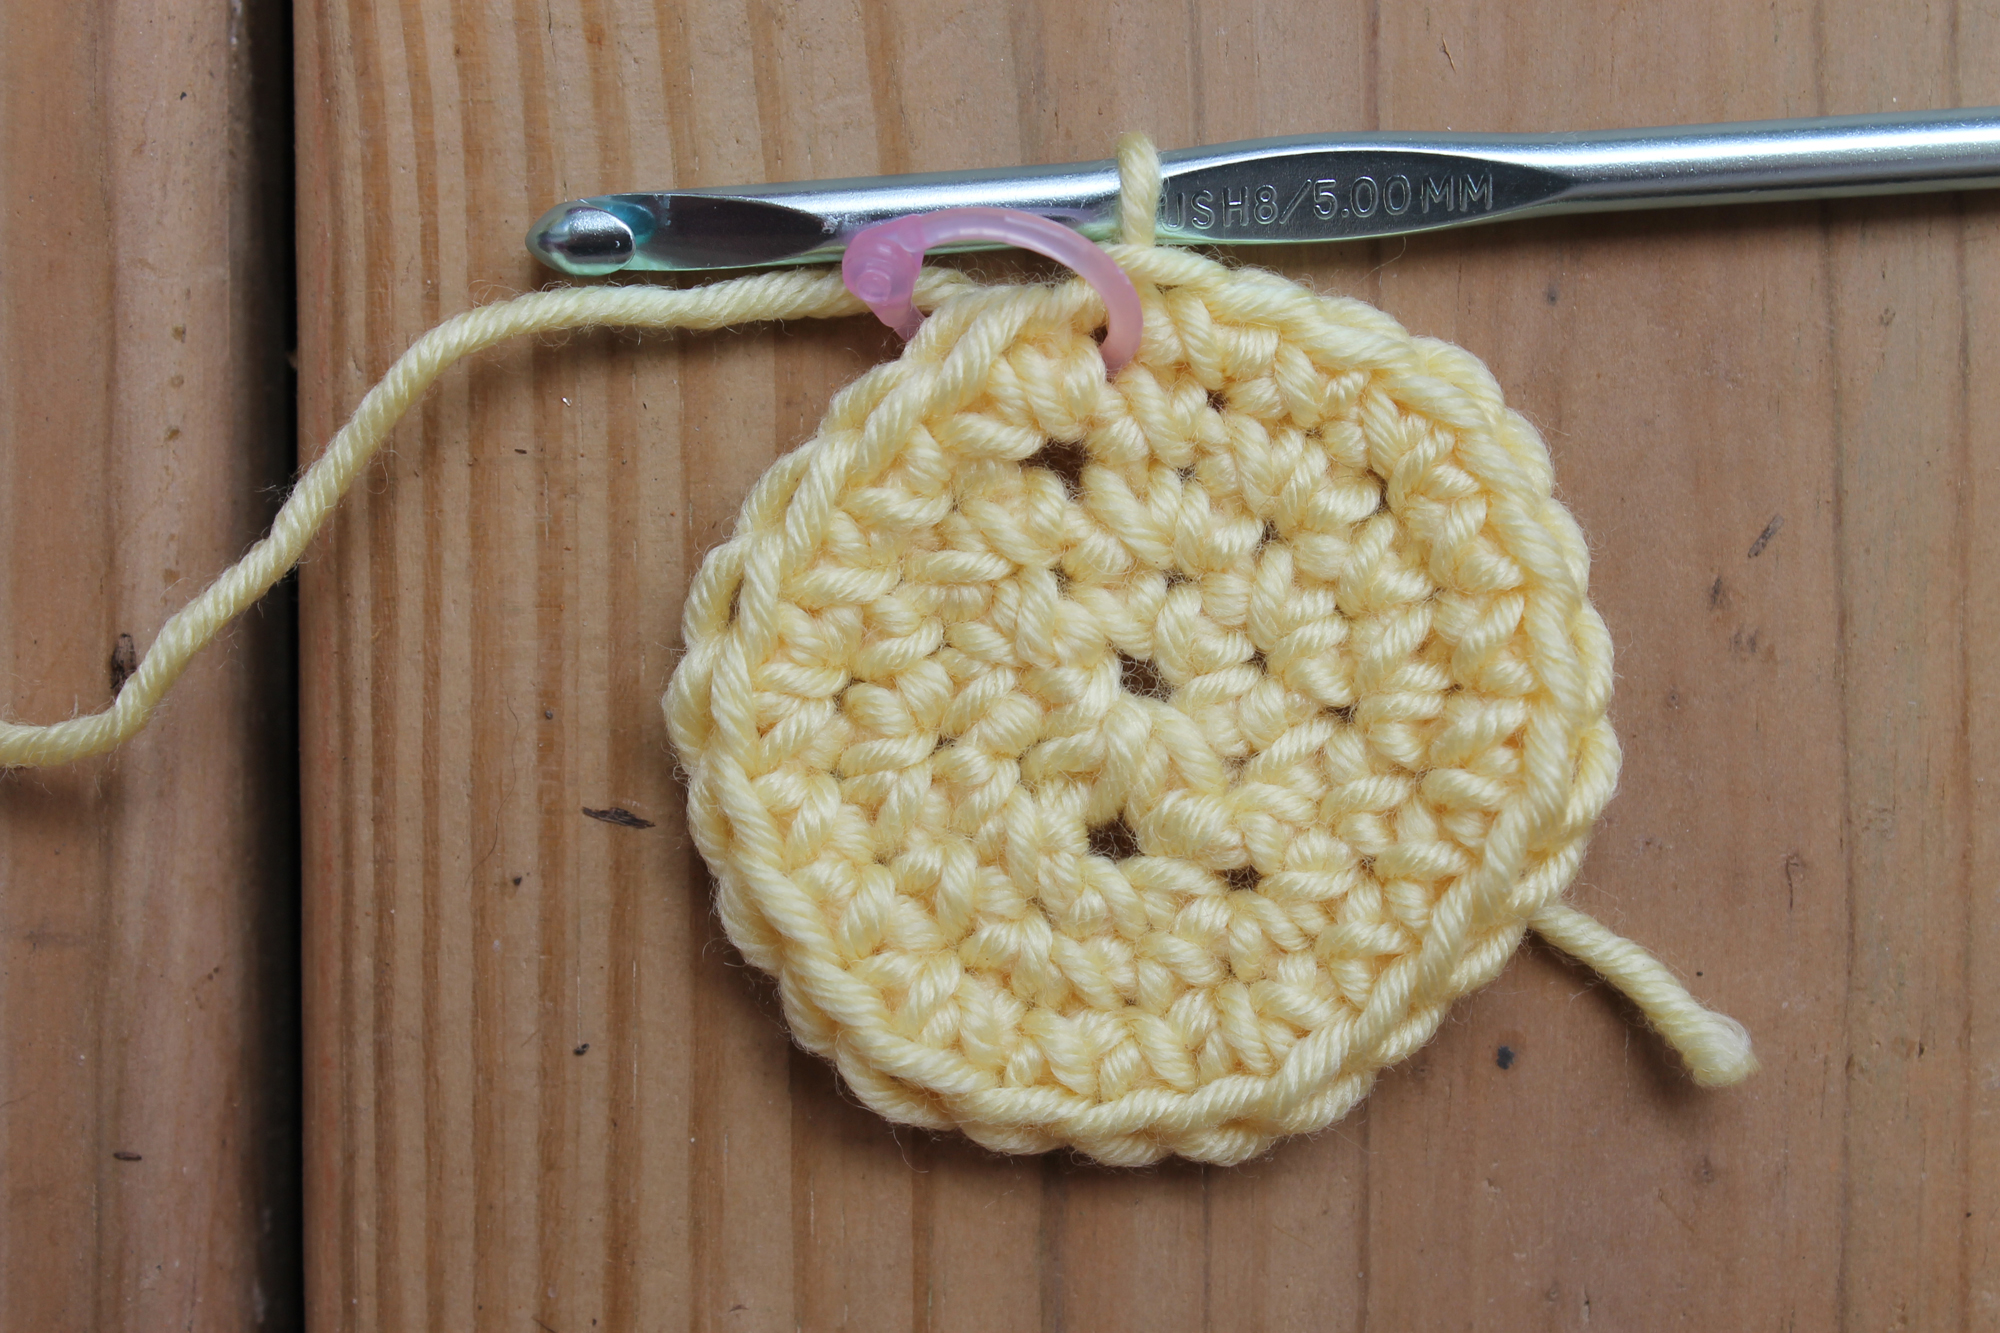
Continue this increase pattern around. This time, when you get to the end of the round, join the last stitch to the first stitch of the round with a slip stitch.
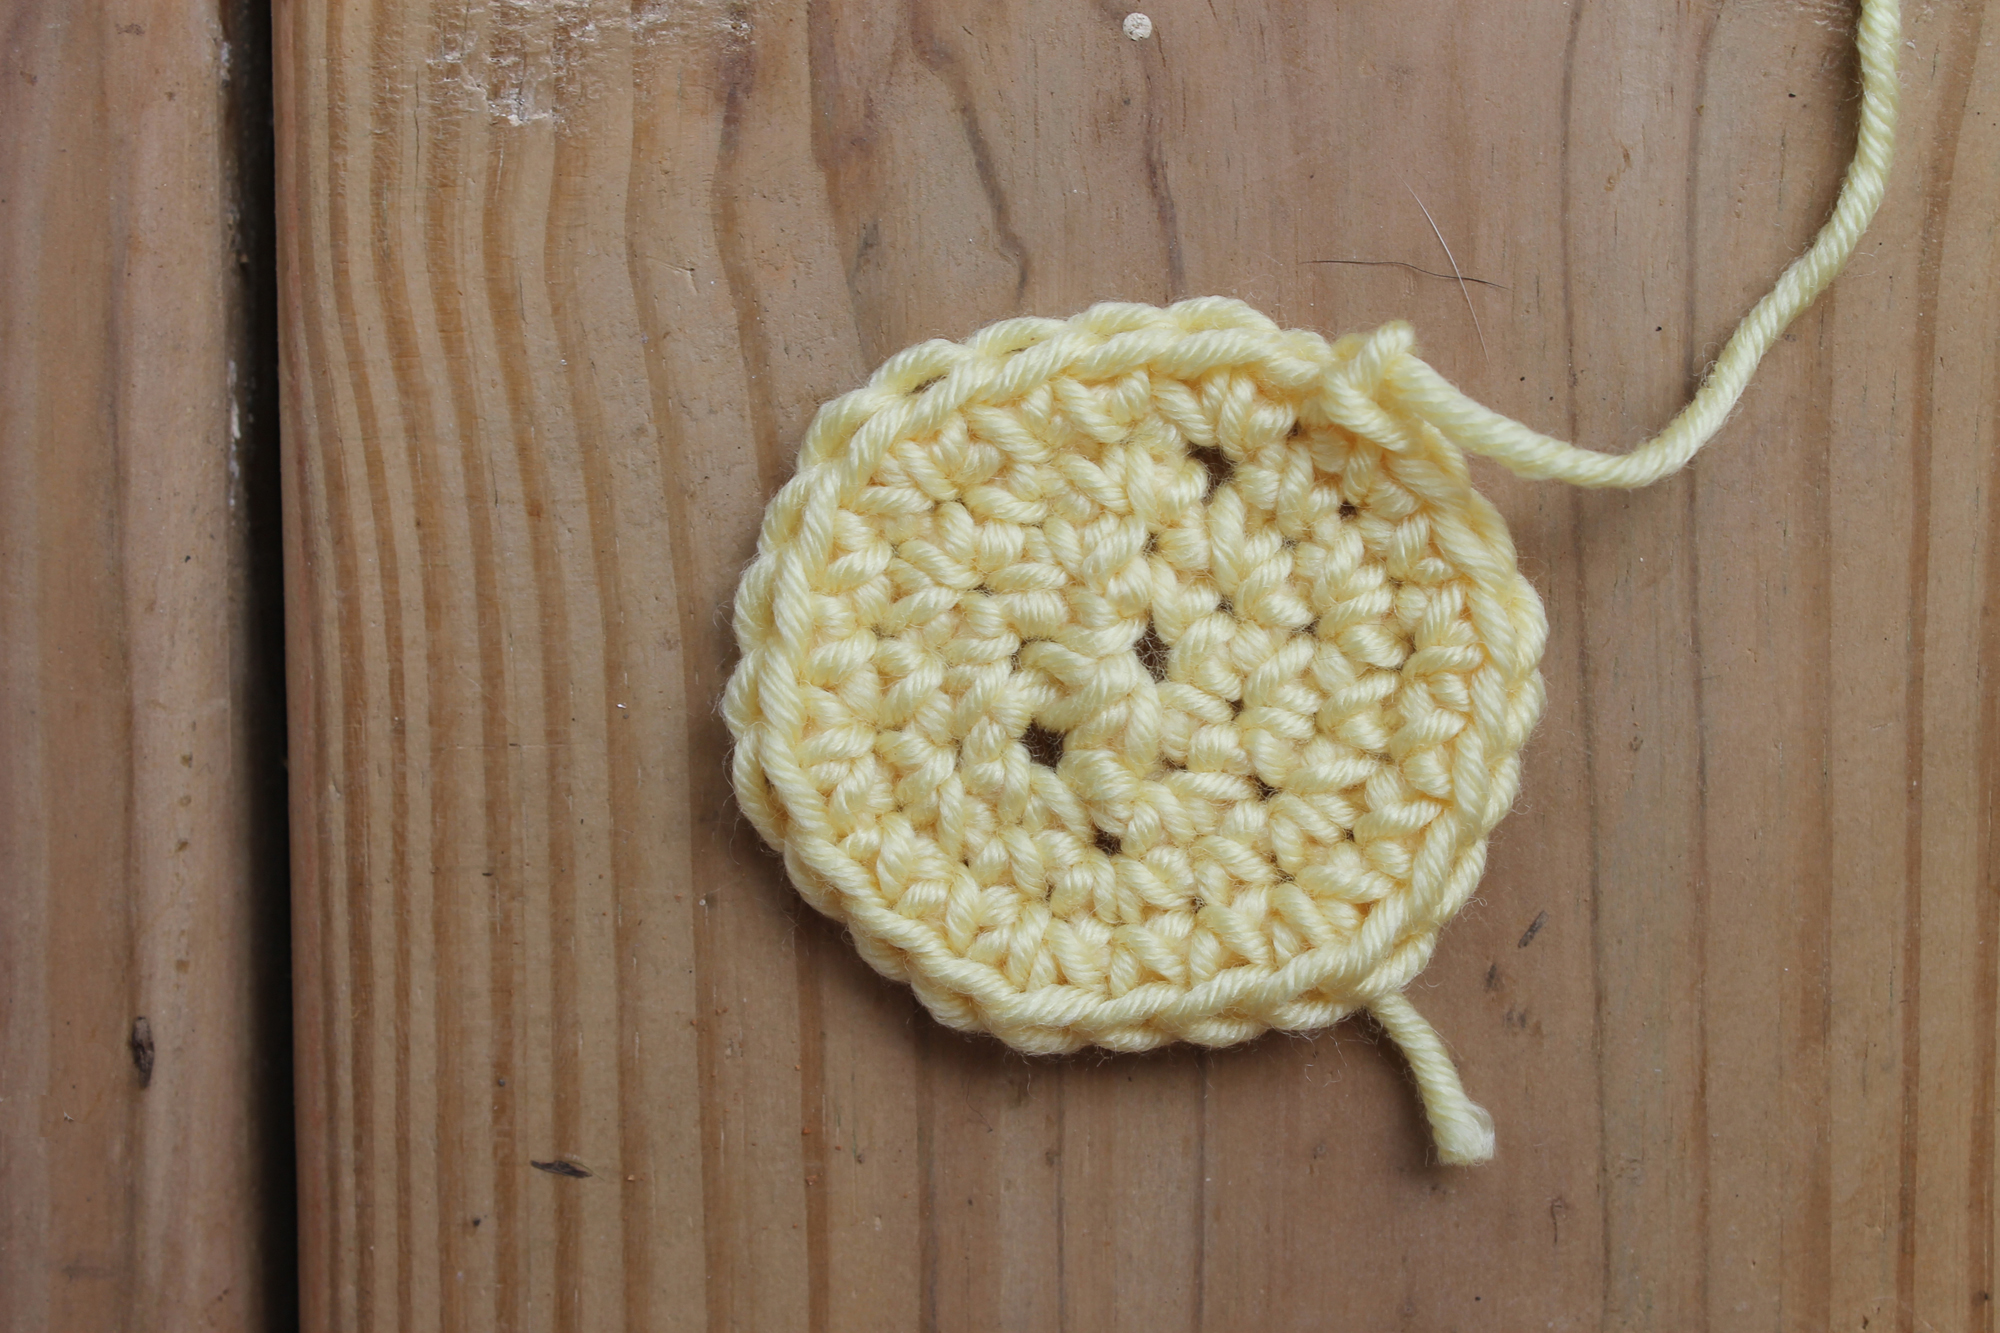
Break off the yellow yarn. You’re finished with the daisy center now! You can set the stitch marker aside.
Part 2: Make the white petals
Now that you’ve finished the center, let’s add some pretty petals!
Round 5:
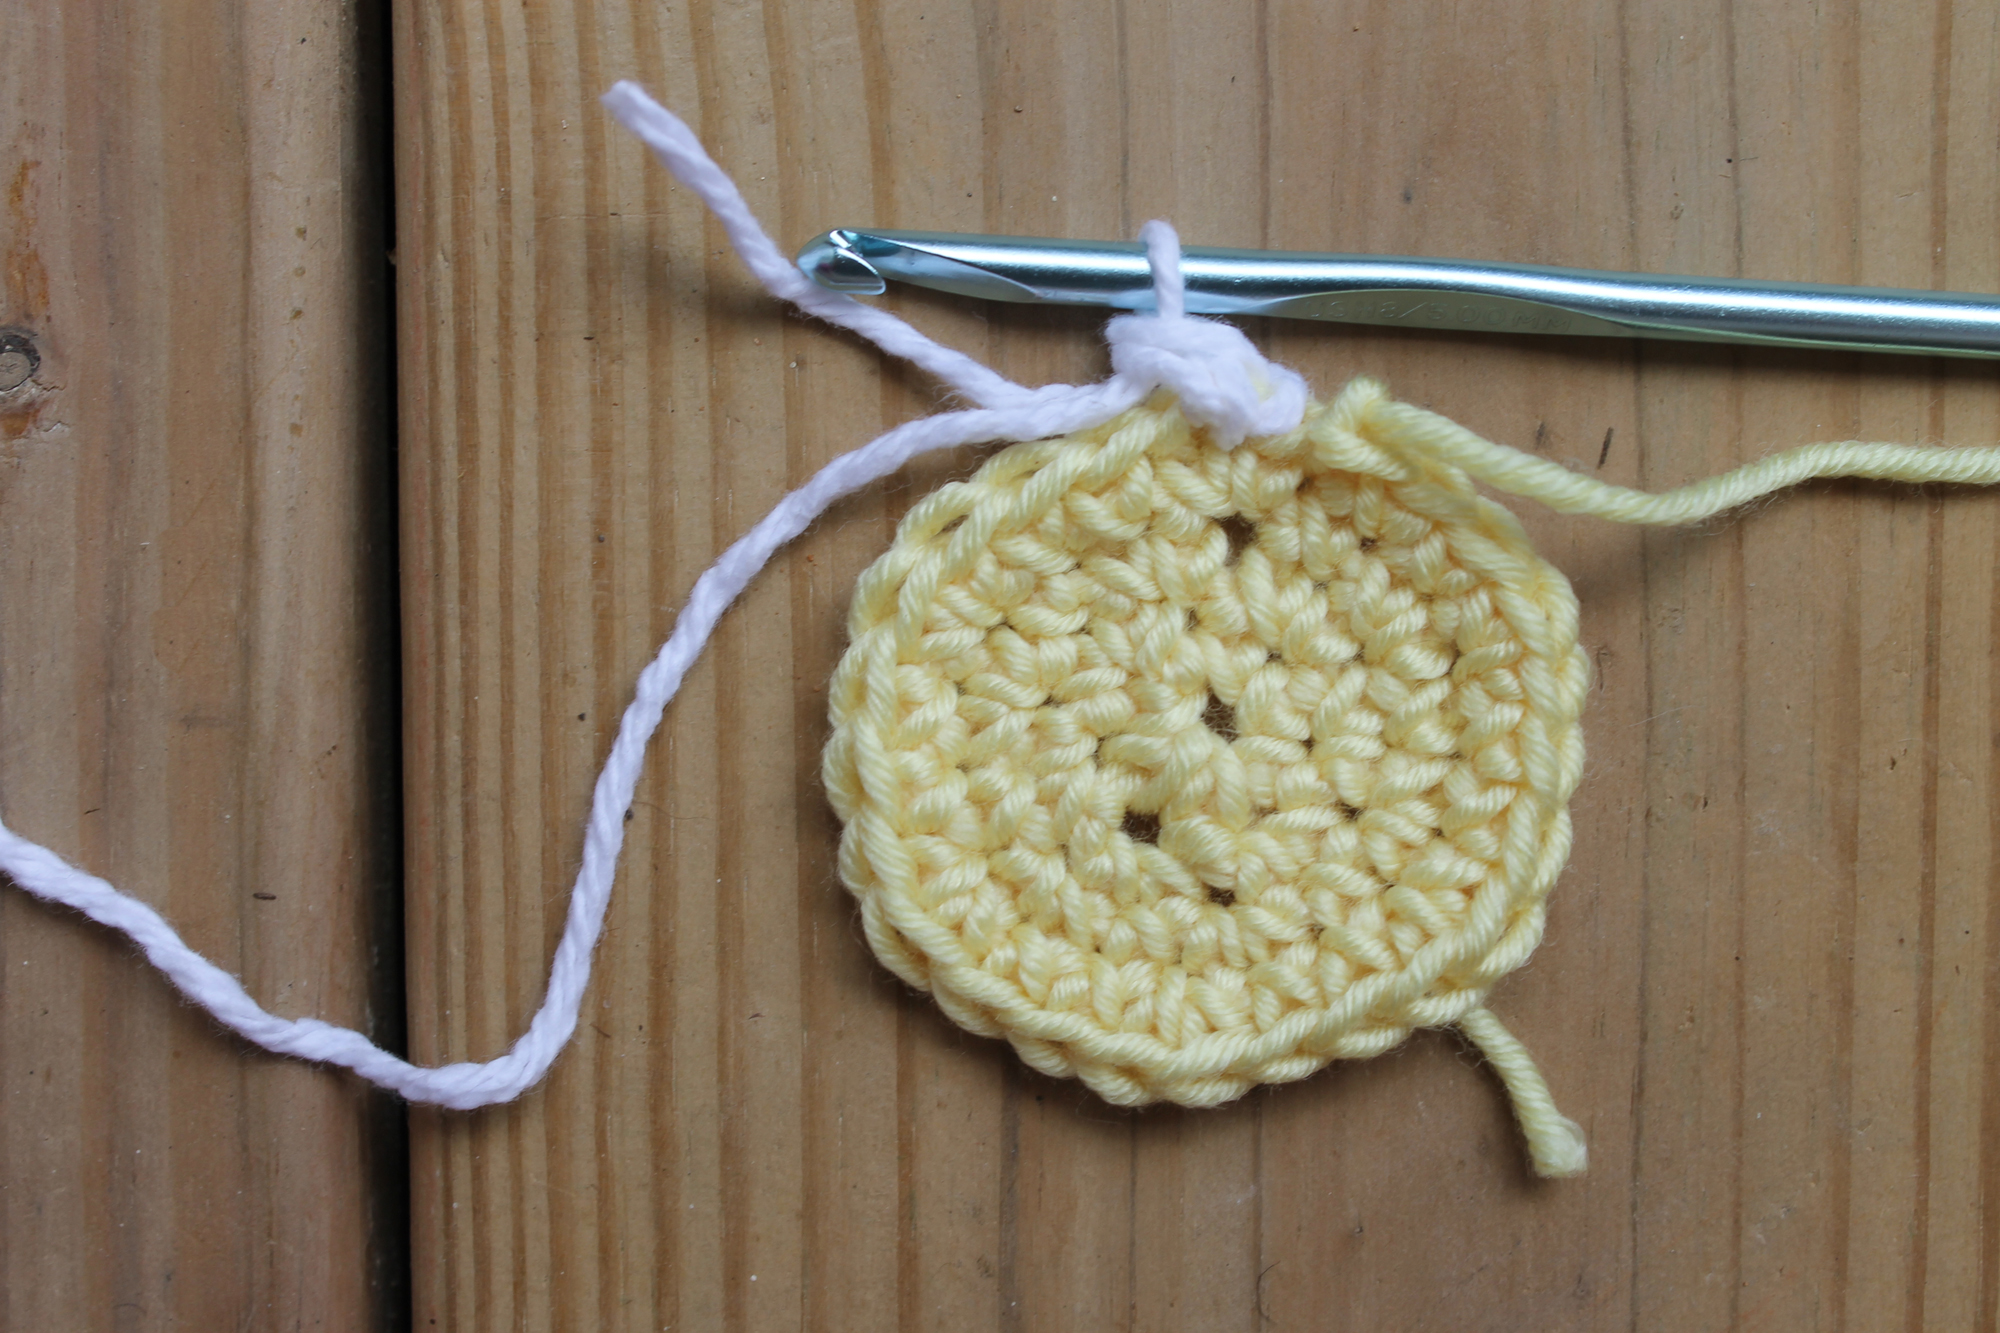
1. Use a slip stitch to join the white yarn into any of the yellow stitches. It doesn’t matter which stitch, since we’ll work our way around the entire daisy center.
Chain 1, then single crochet in the same stitch in which you joined the yarn.

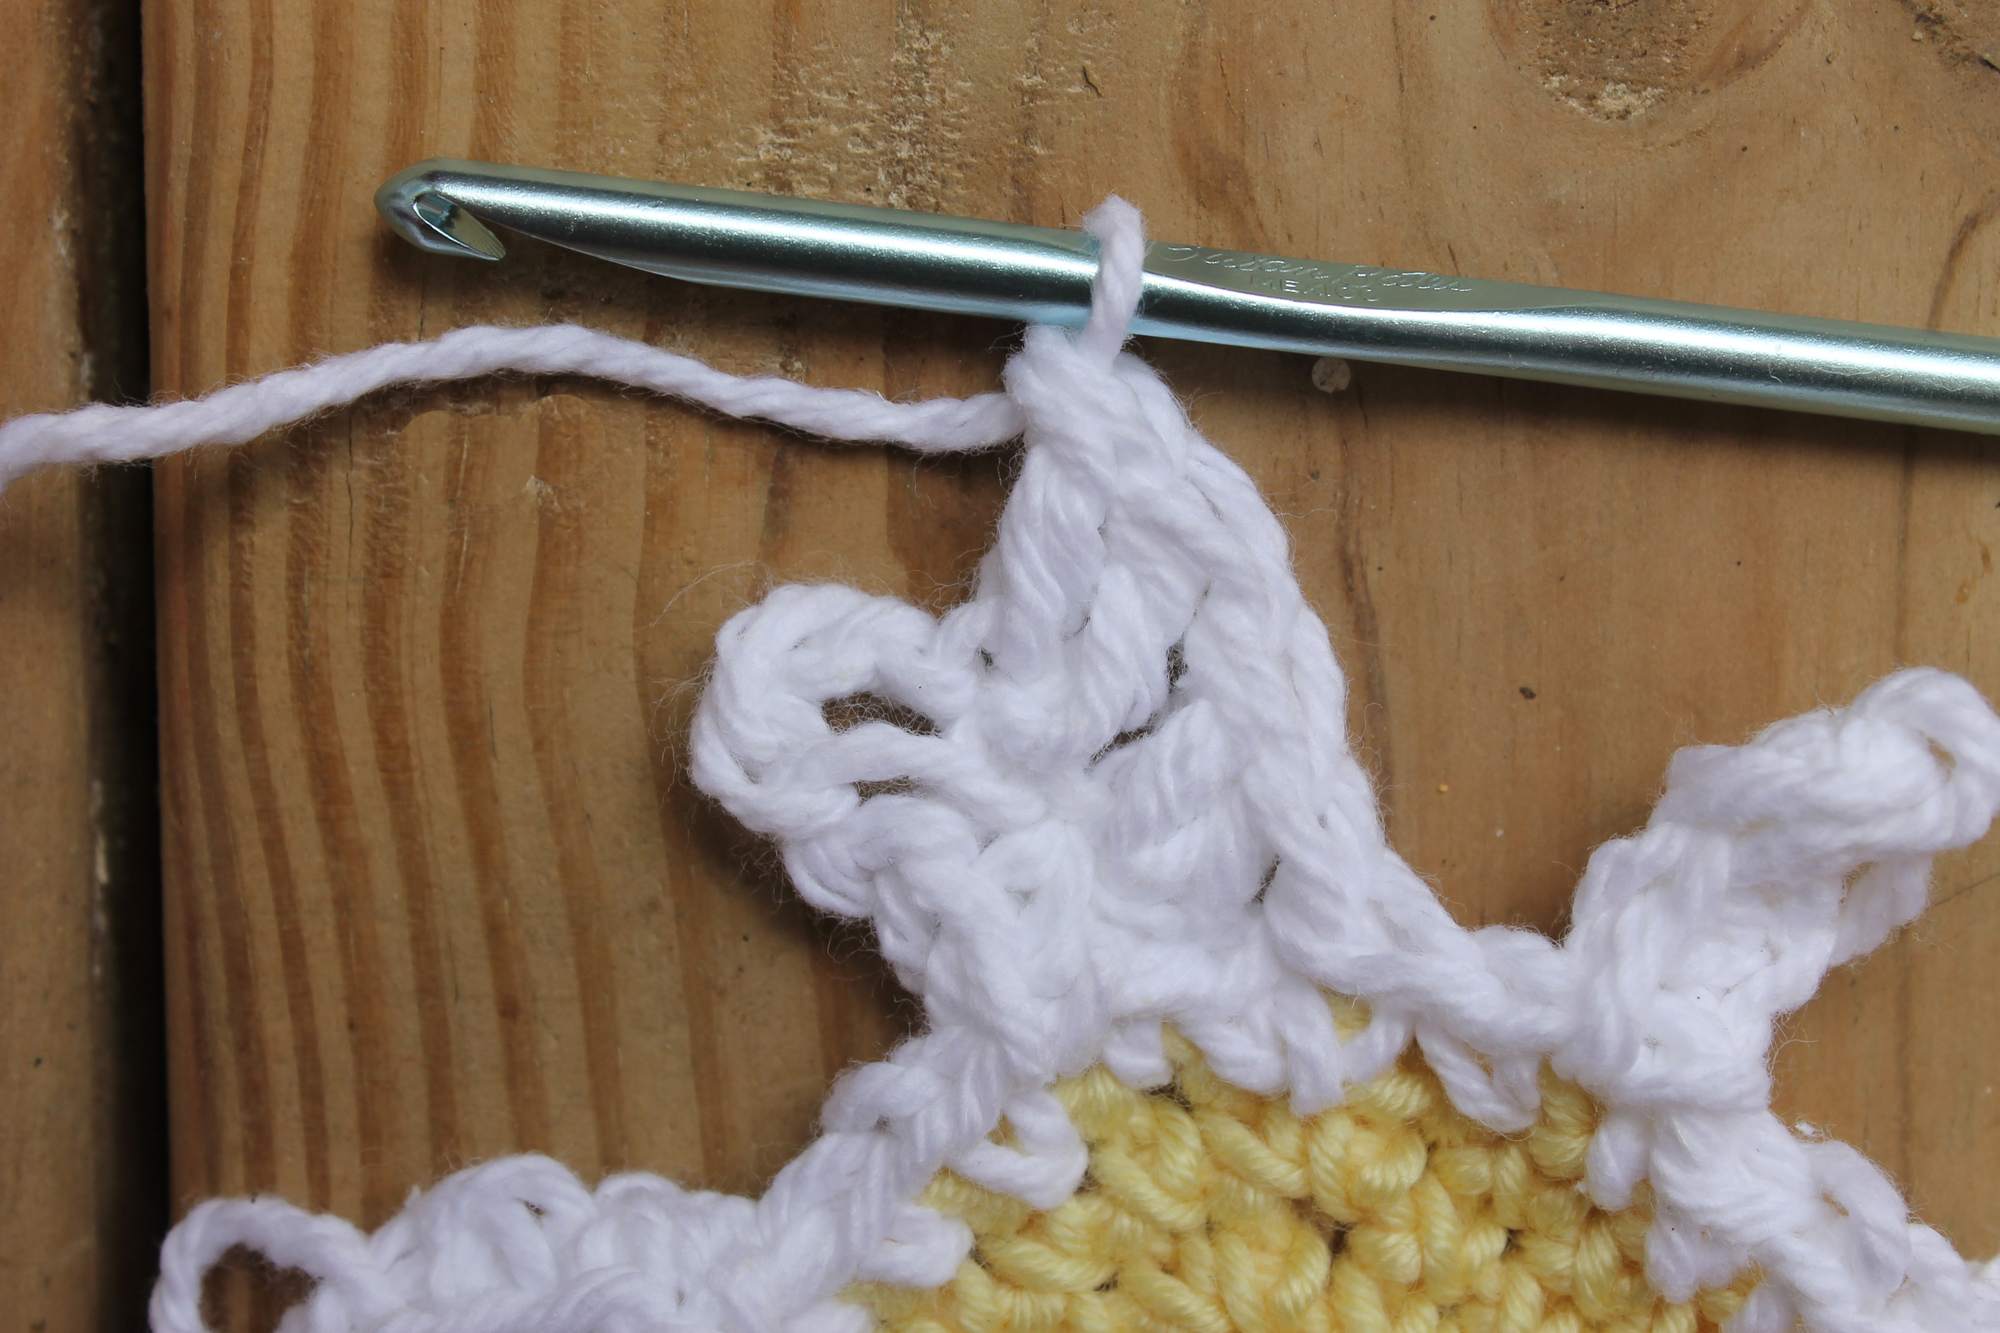
2. In the next stitch, single crochet, then chain 5. We’re going to work back down this chain to form the petal points.
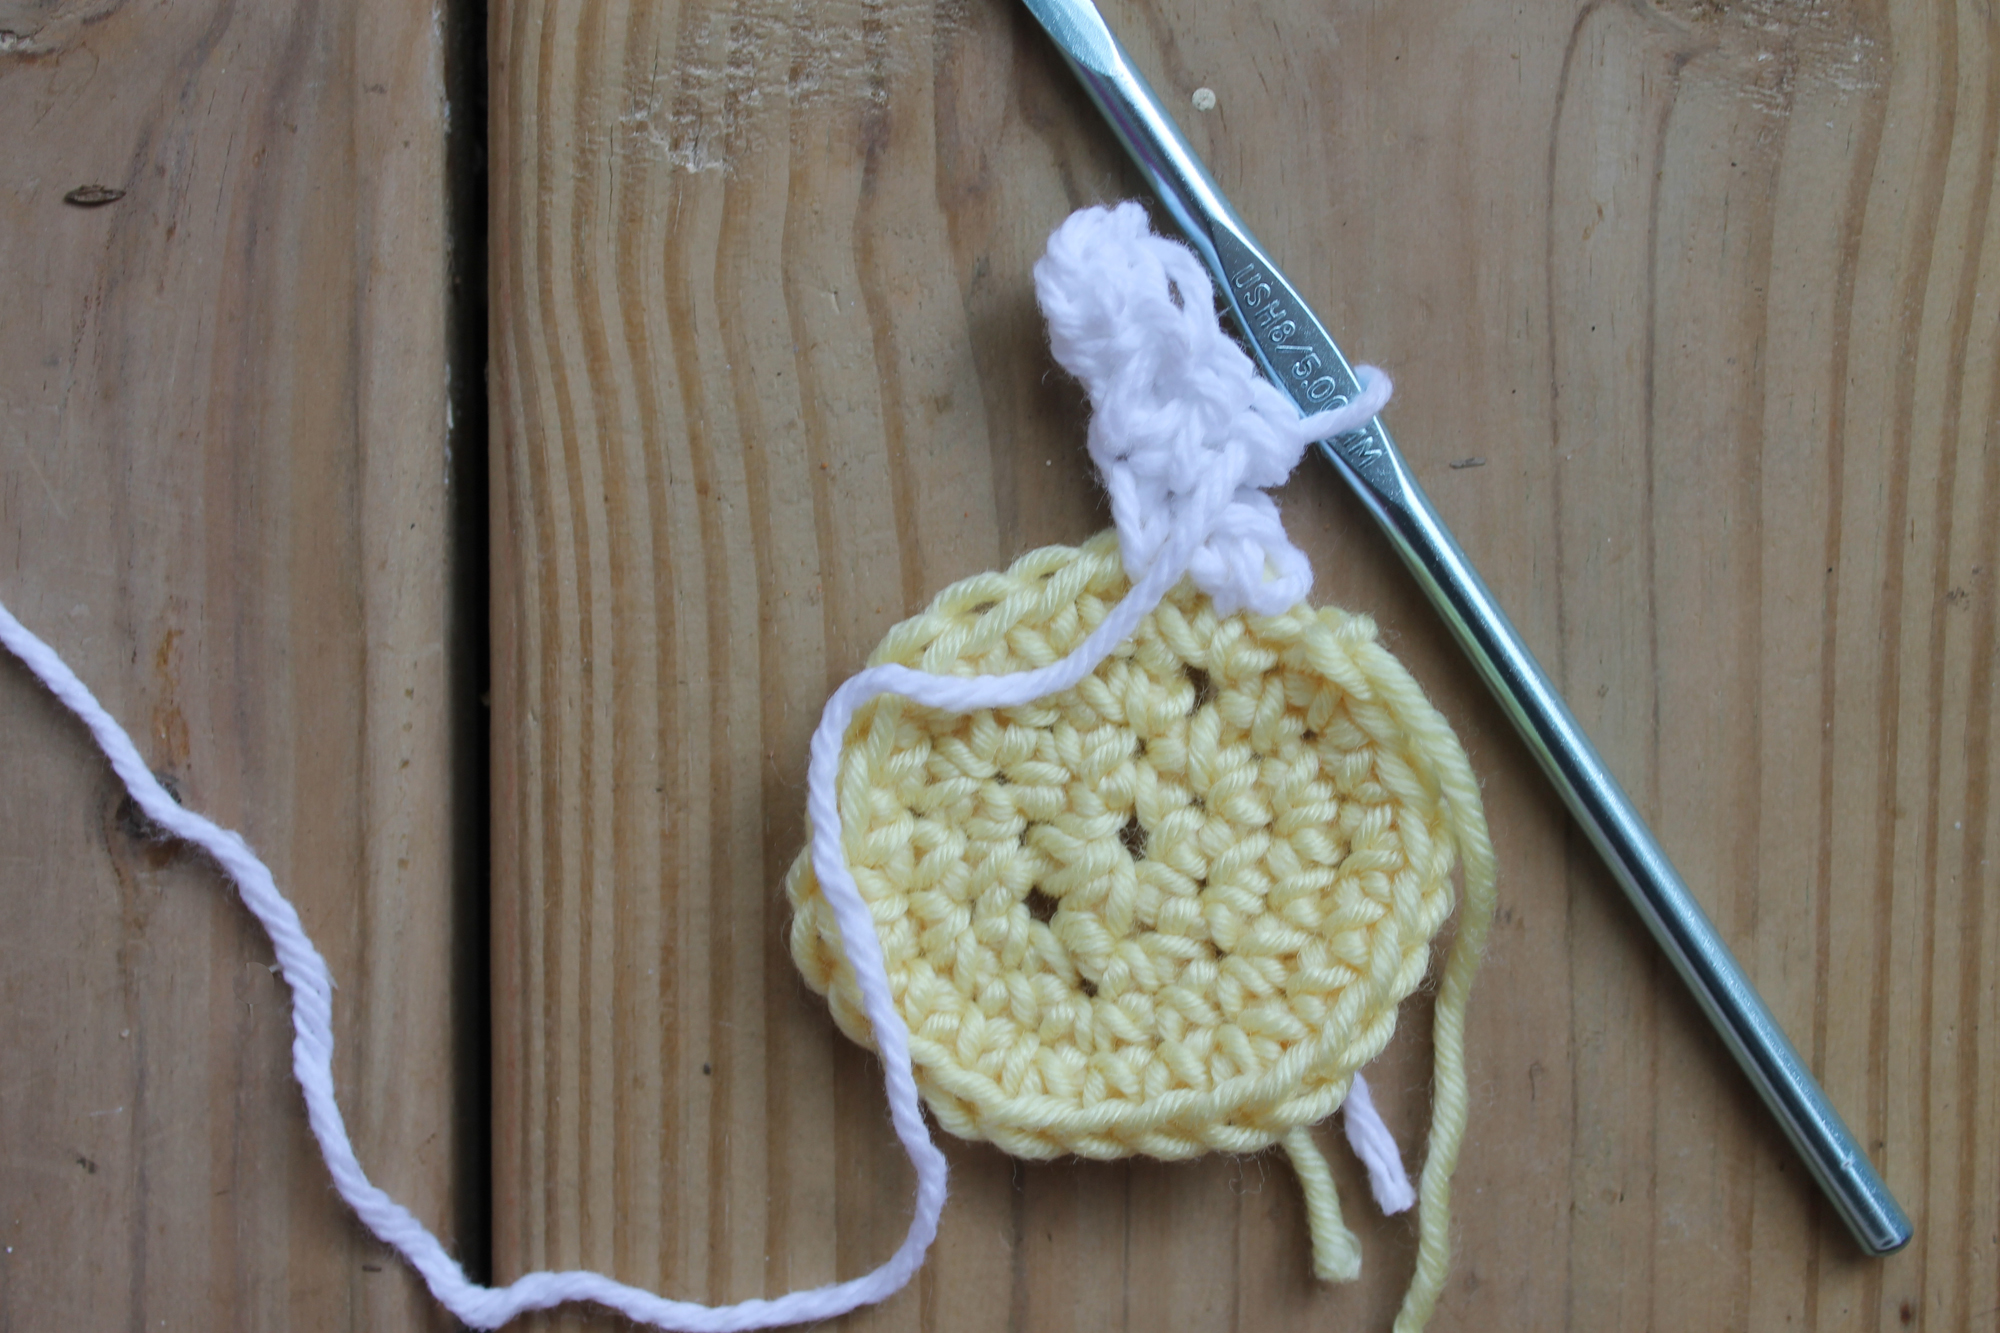
3. Single crochet in the 4th chain from the hook and in the last chain.
4. Single crochet in the same stitch as that first single crochet from Step 2. This creates the first point of the daisy.
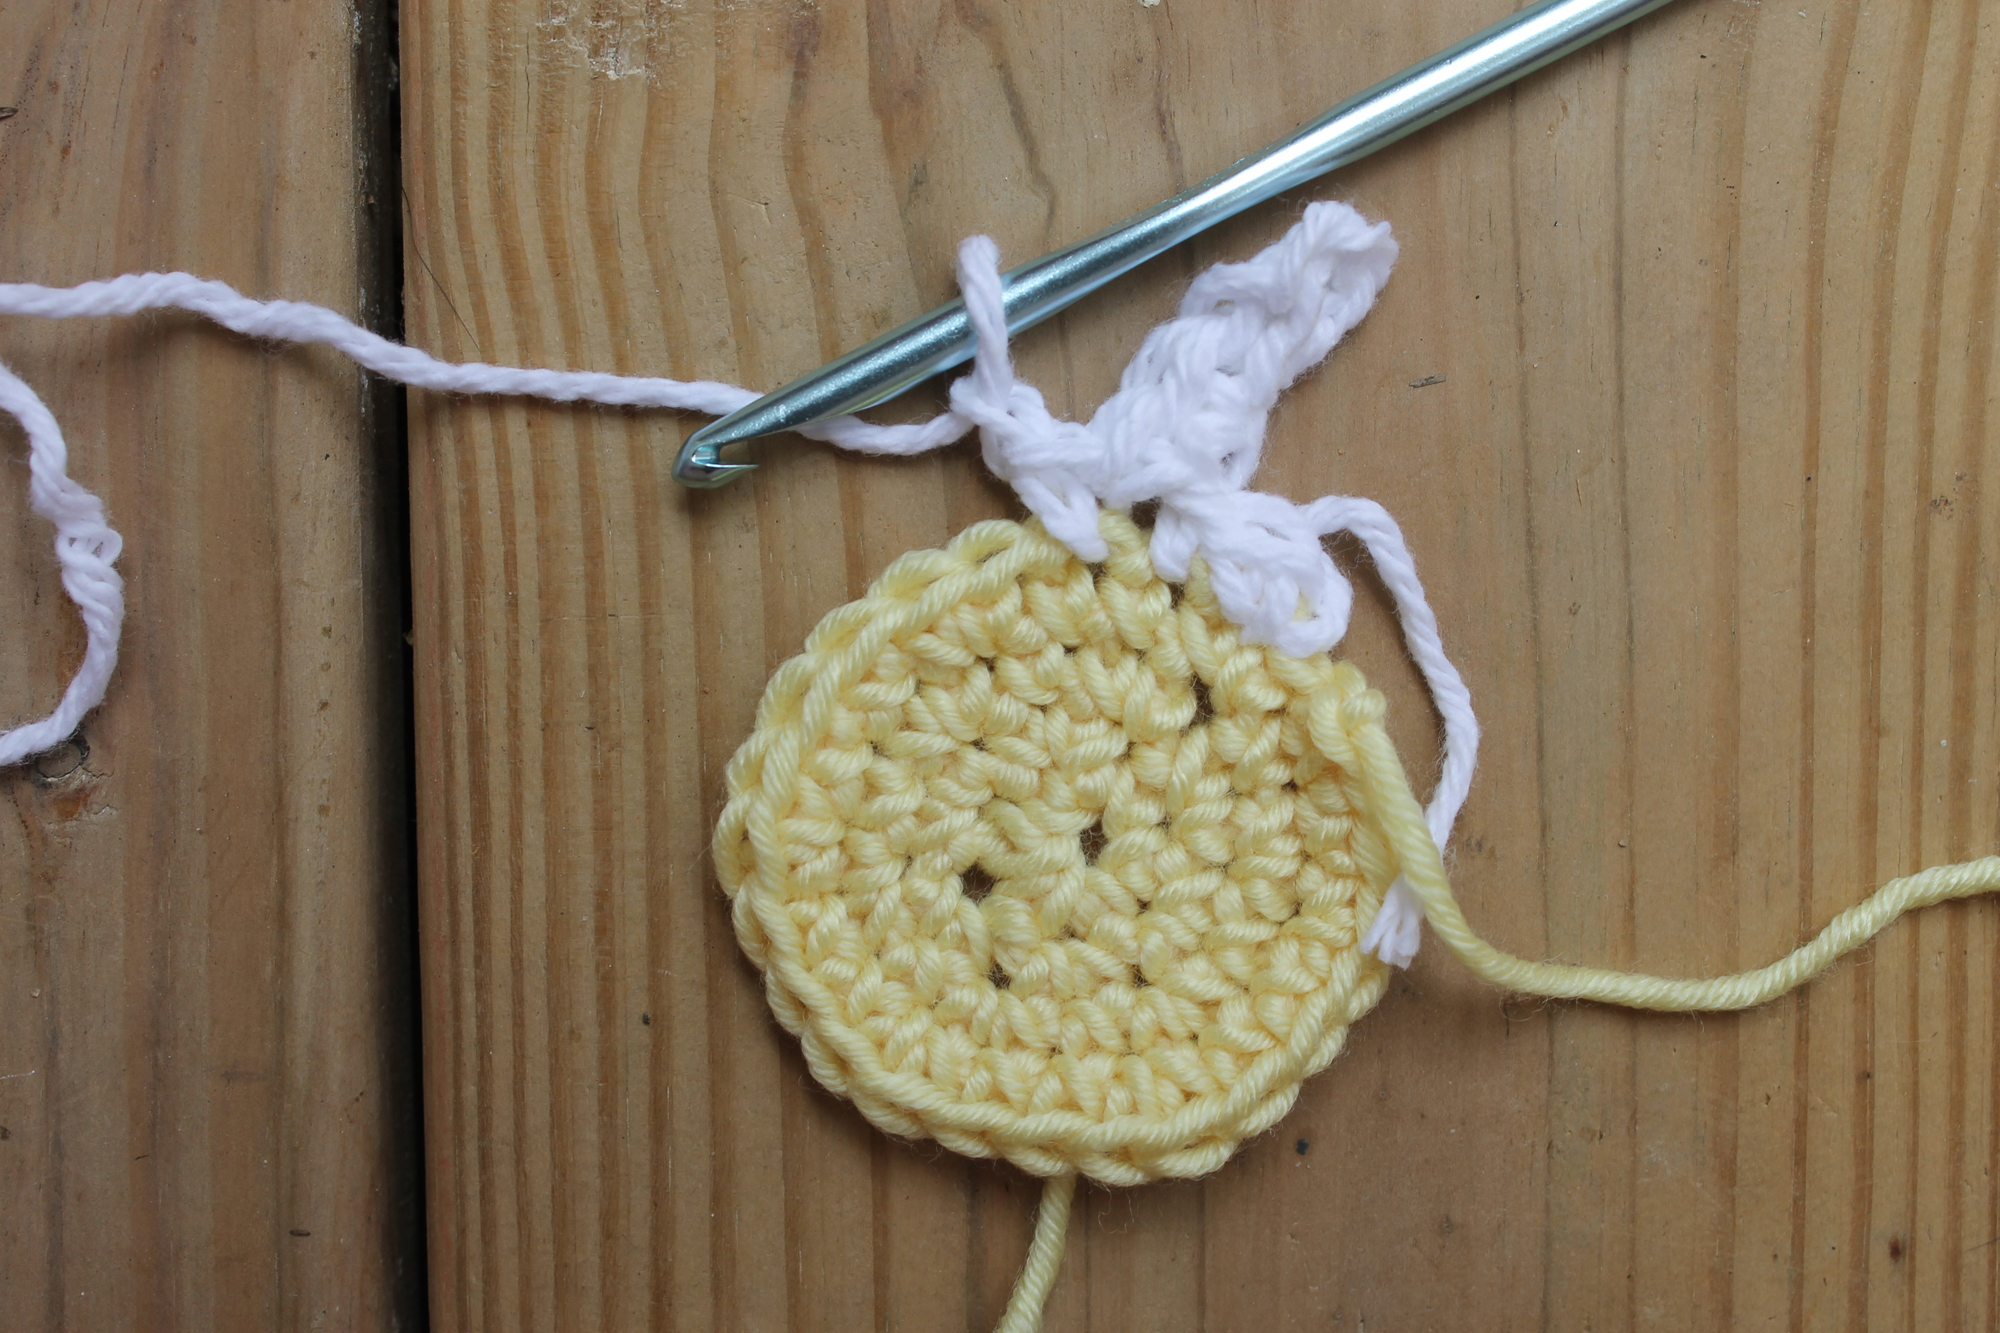
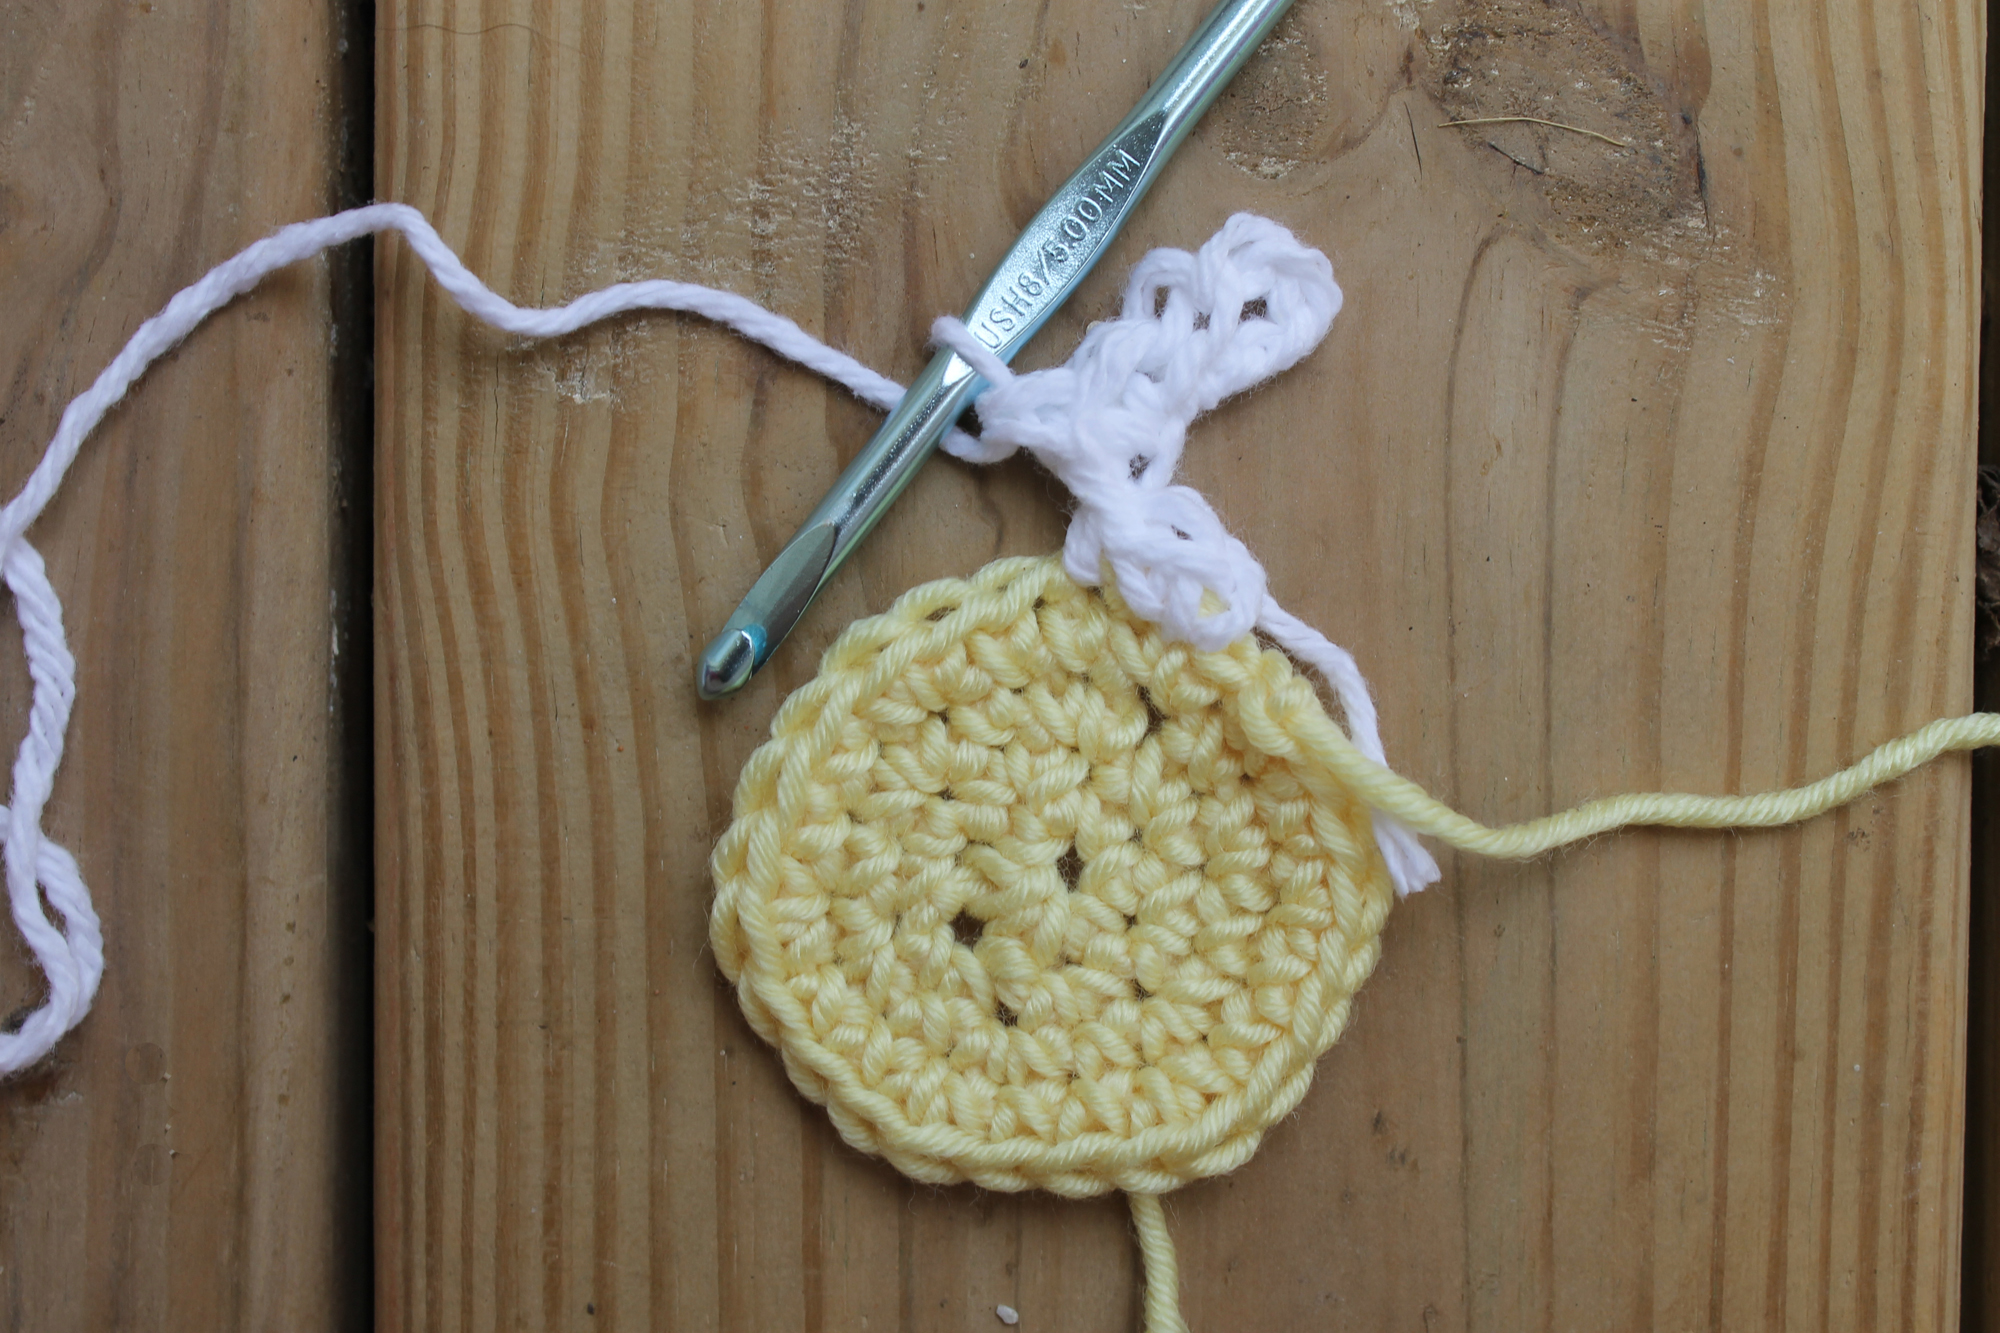
5. Single crochet in the next stitch, then chain 1 to get ready to create the next daisy point. Notice we worked down the chain, then just to the left of the chain.
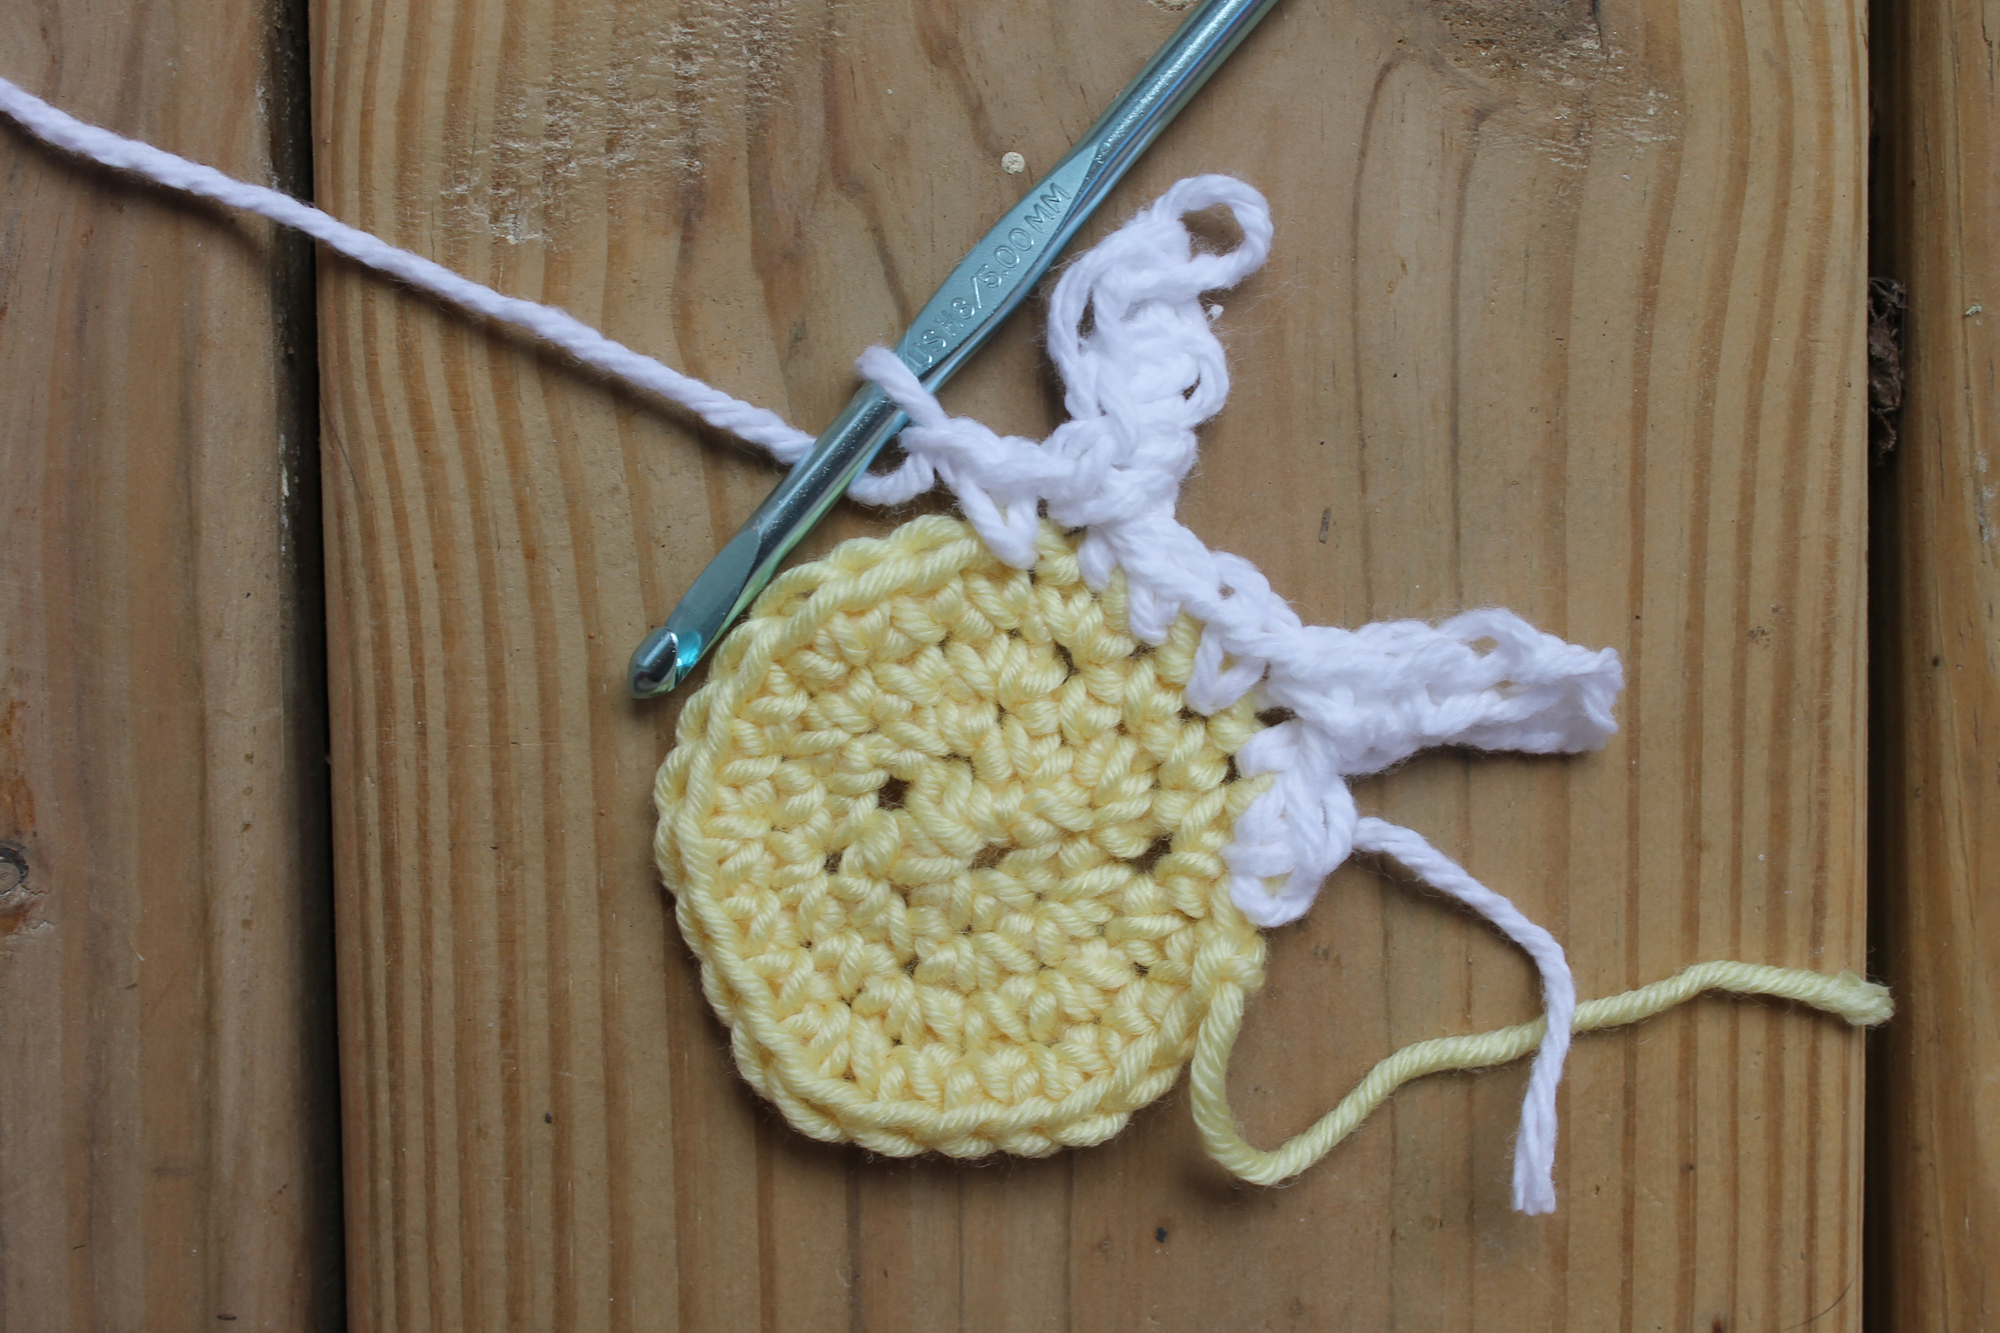
6. Repeat steps 2-5 until you have eight white petals.
7. Join the eighth petal to the first petal with a slip stitch to the beginning single crochet.
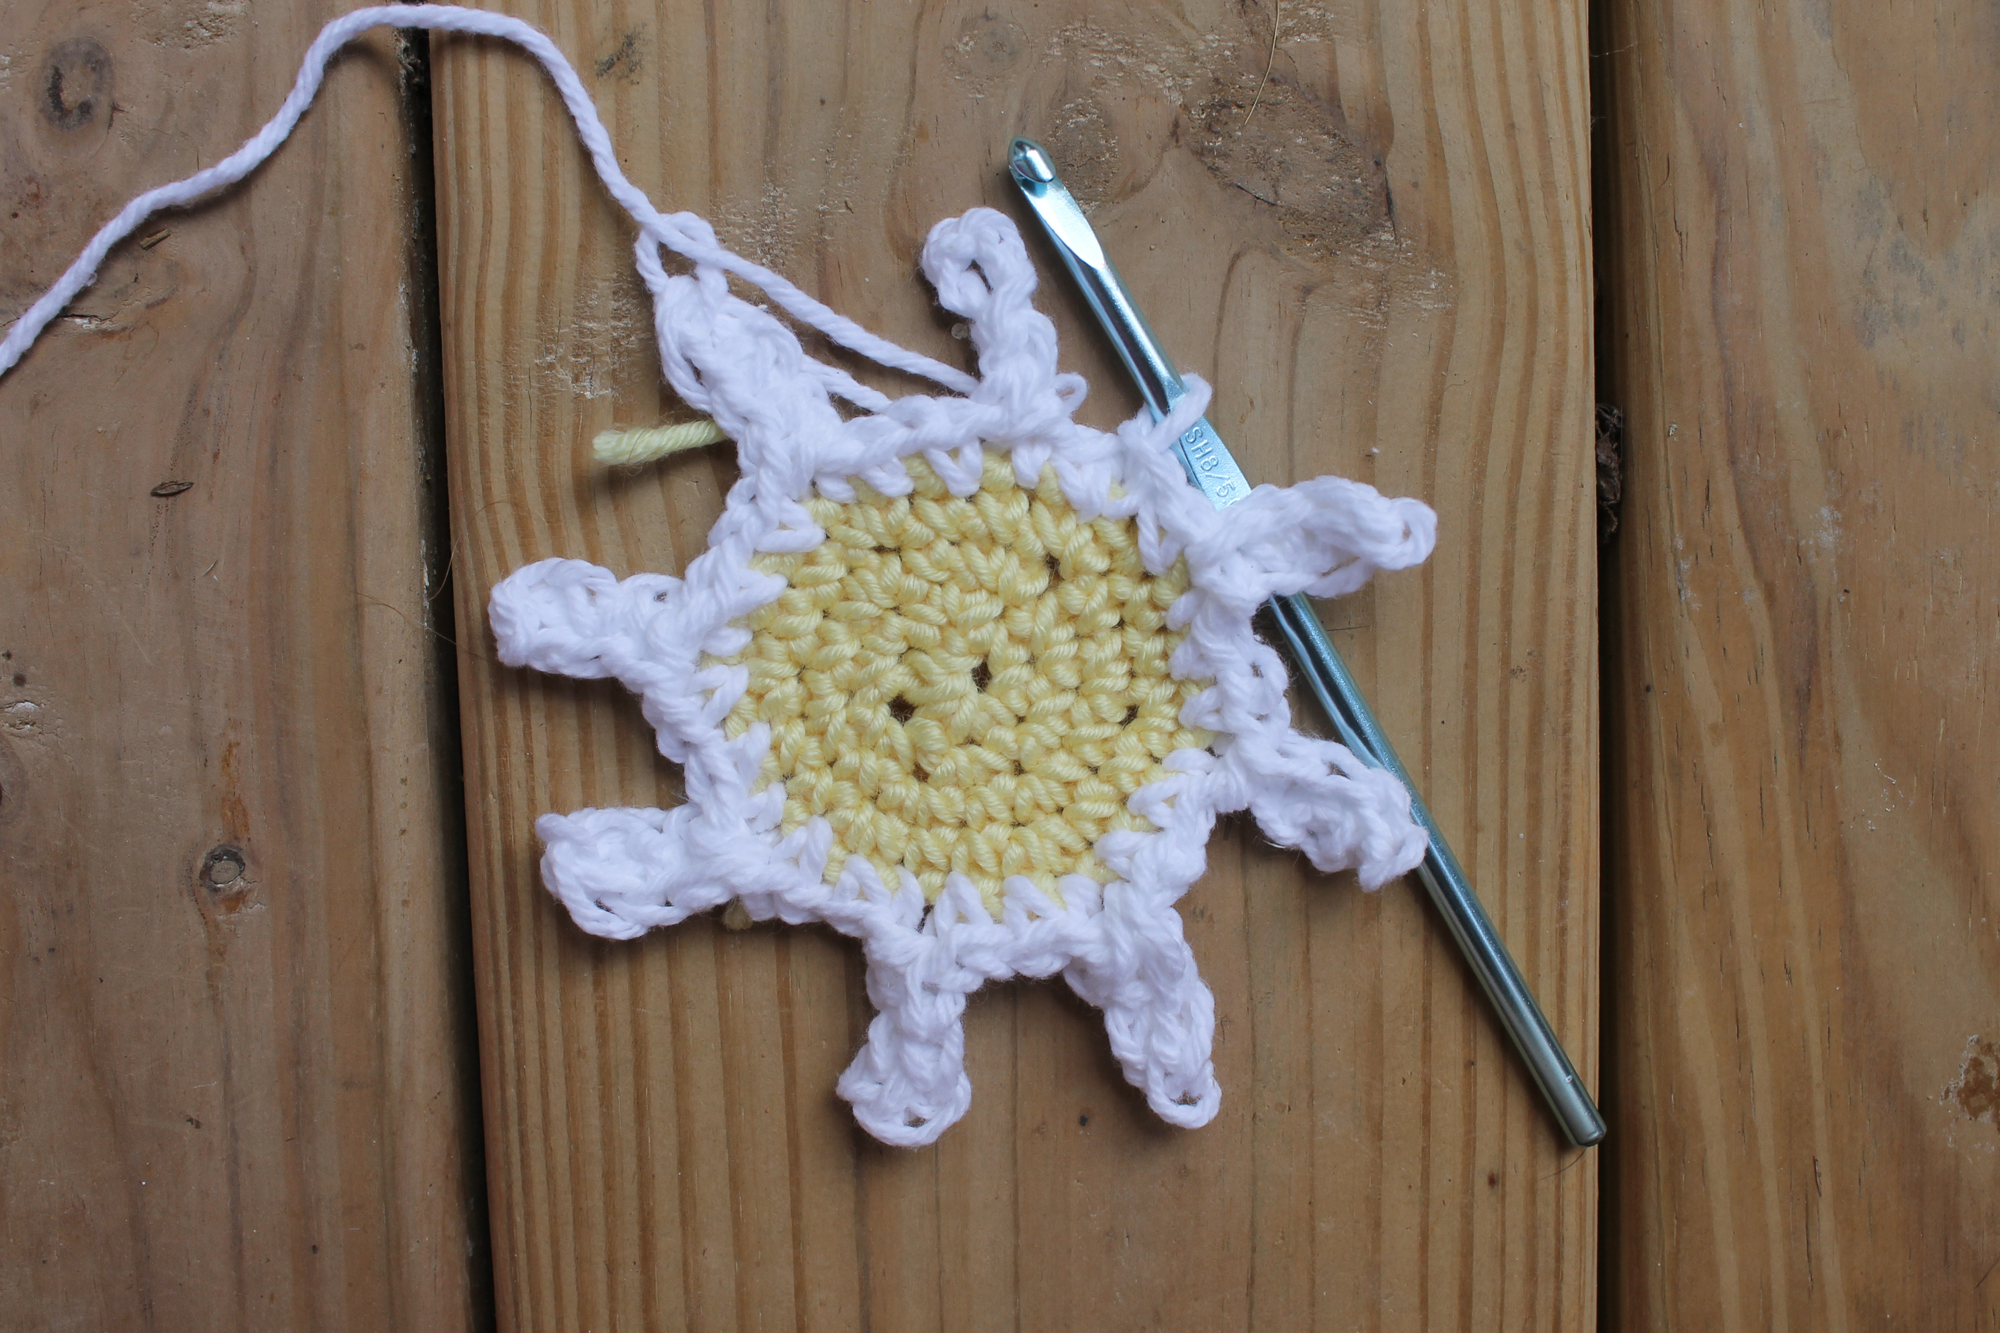
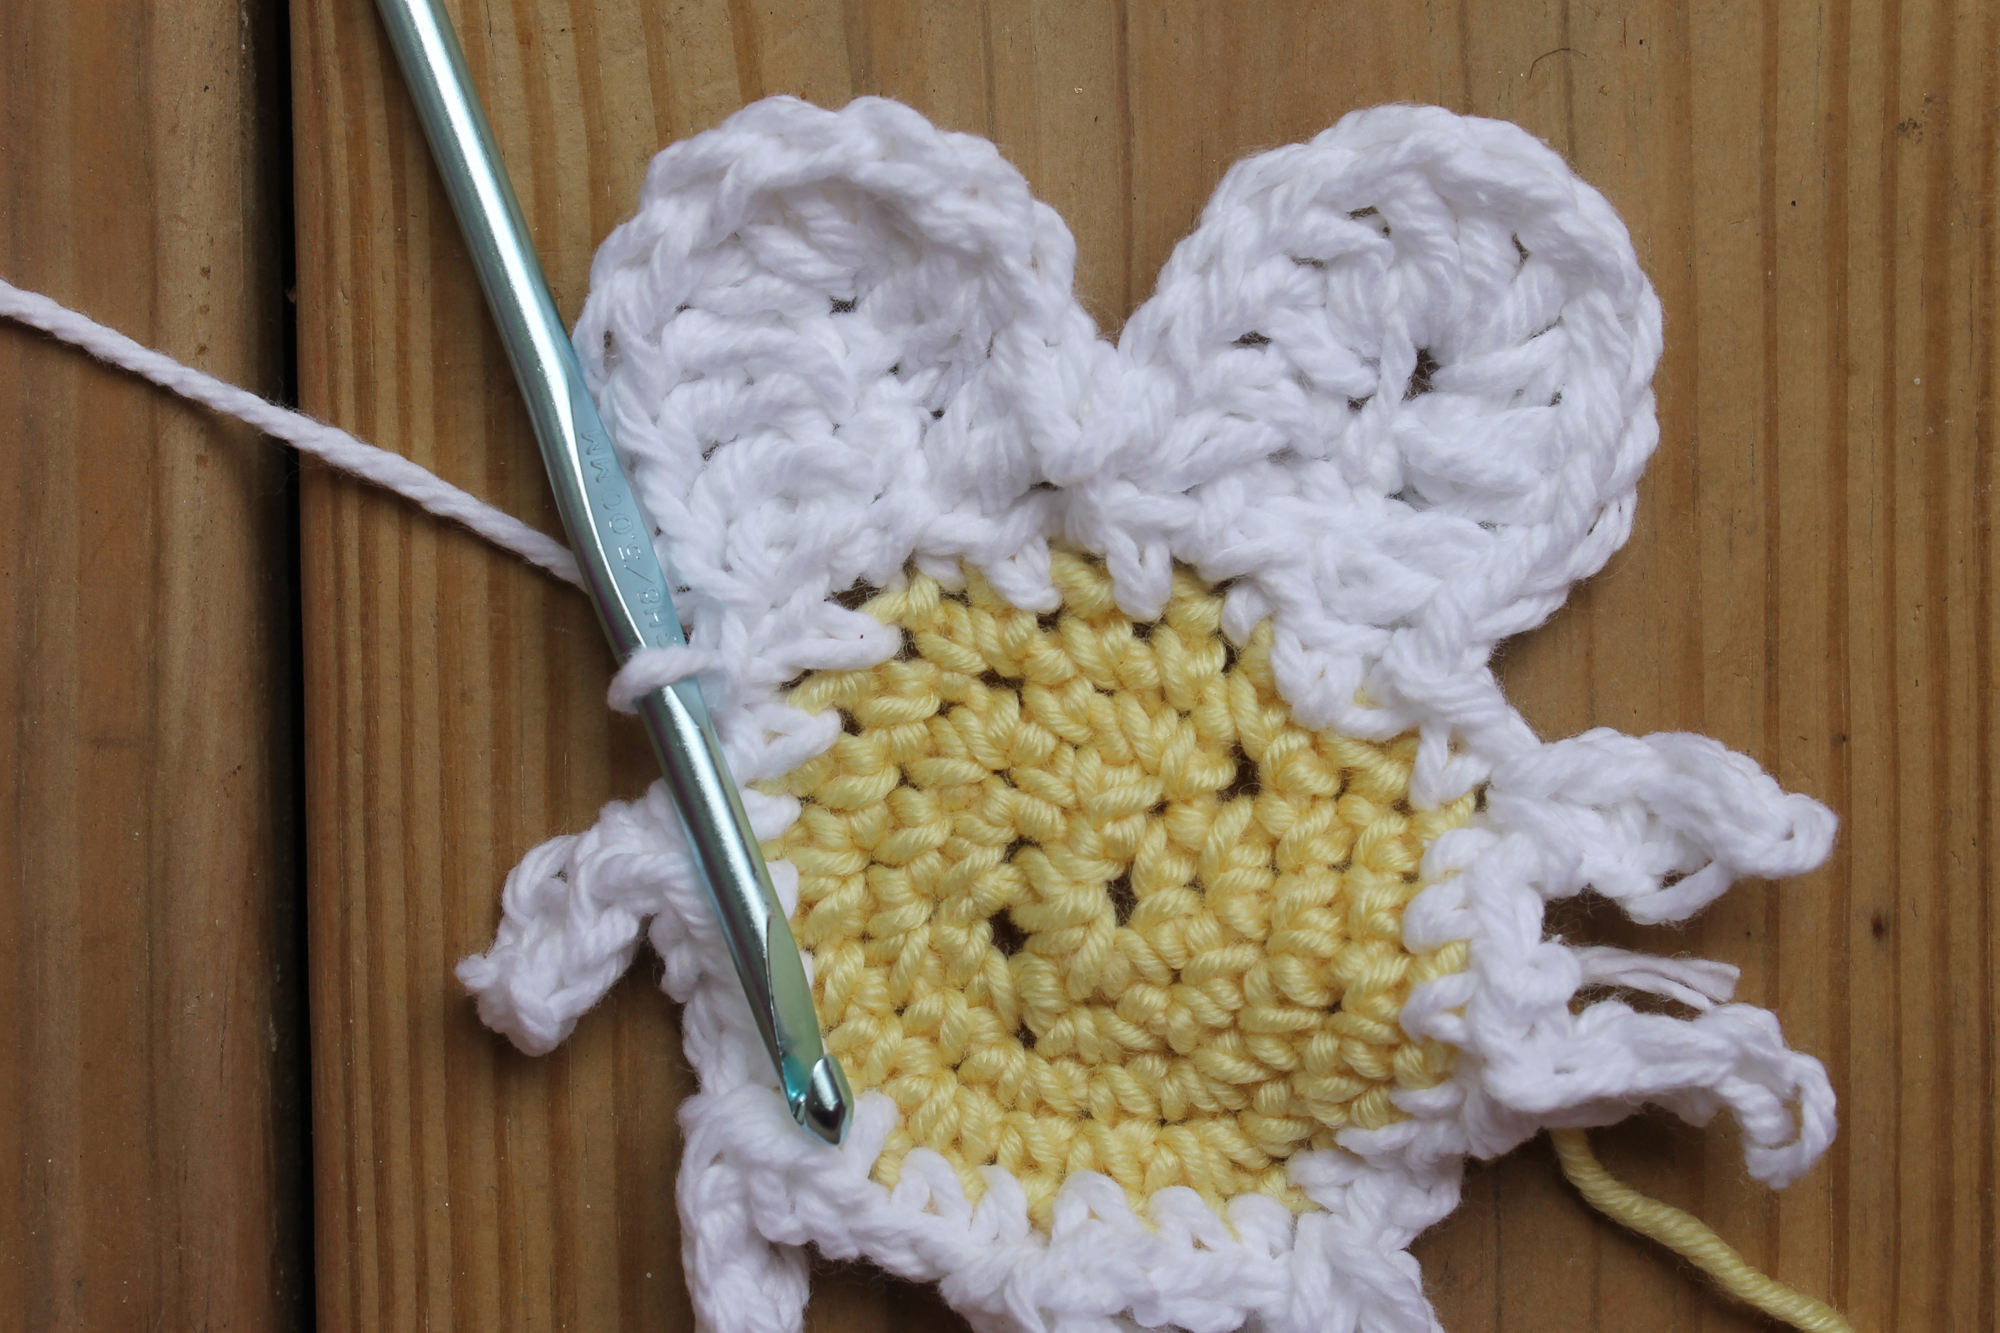
Round 6:
Now we’ll work around each point to create a fuller petal.
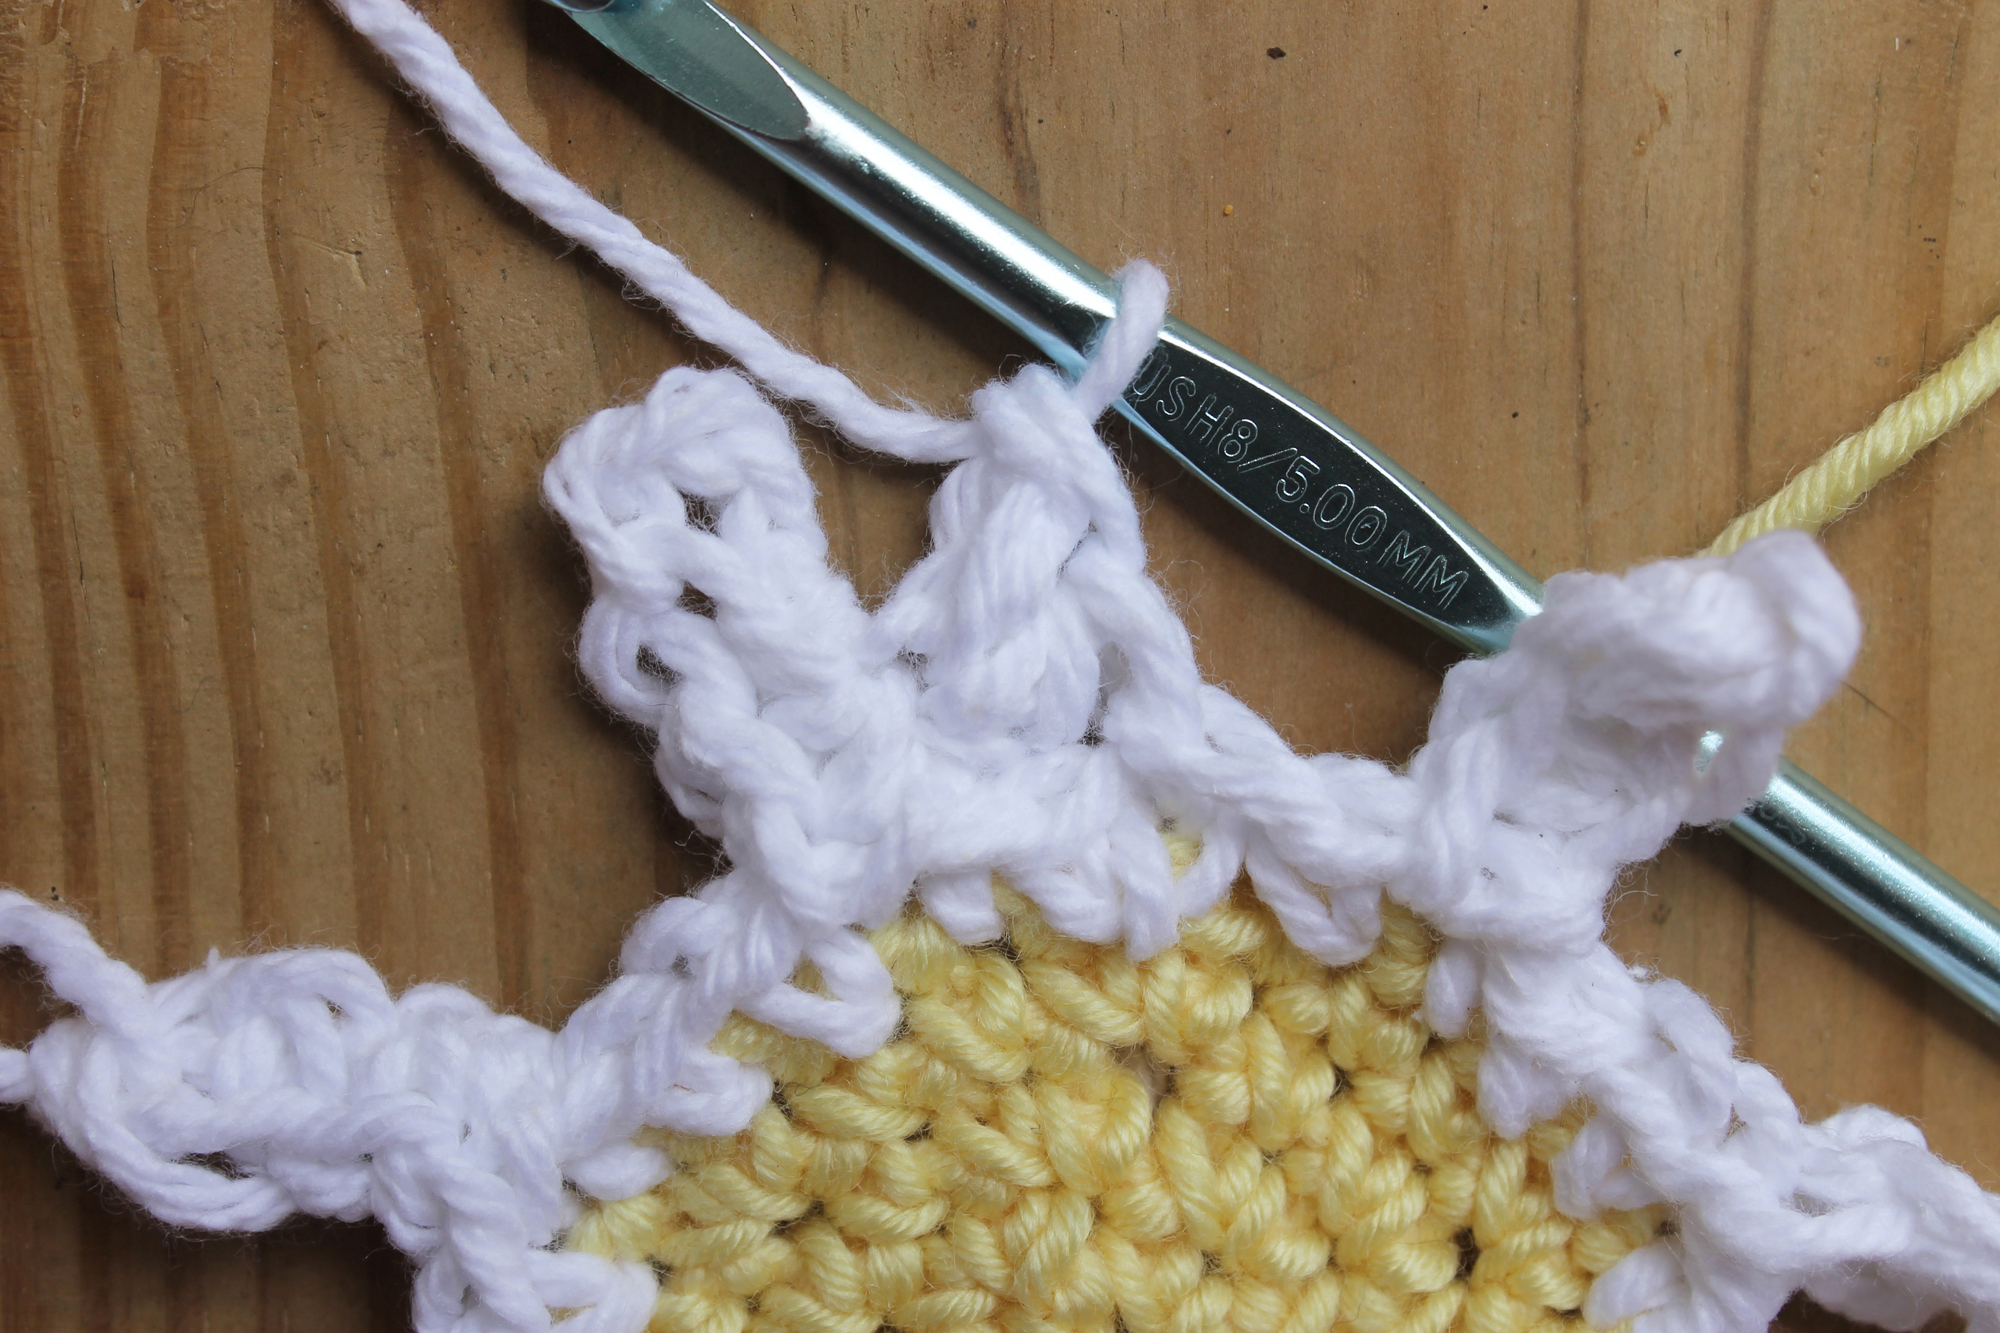
1. Skip the first 2 single crochet stitches. Then, working up the right side of the first point, work both a half double crochet and a double crochet into the first stitch.
2. Continuing up the right side of the petal, work 2 double crochet into the next stitch.
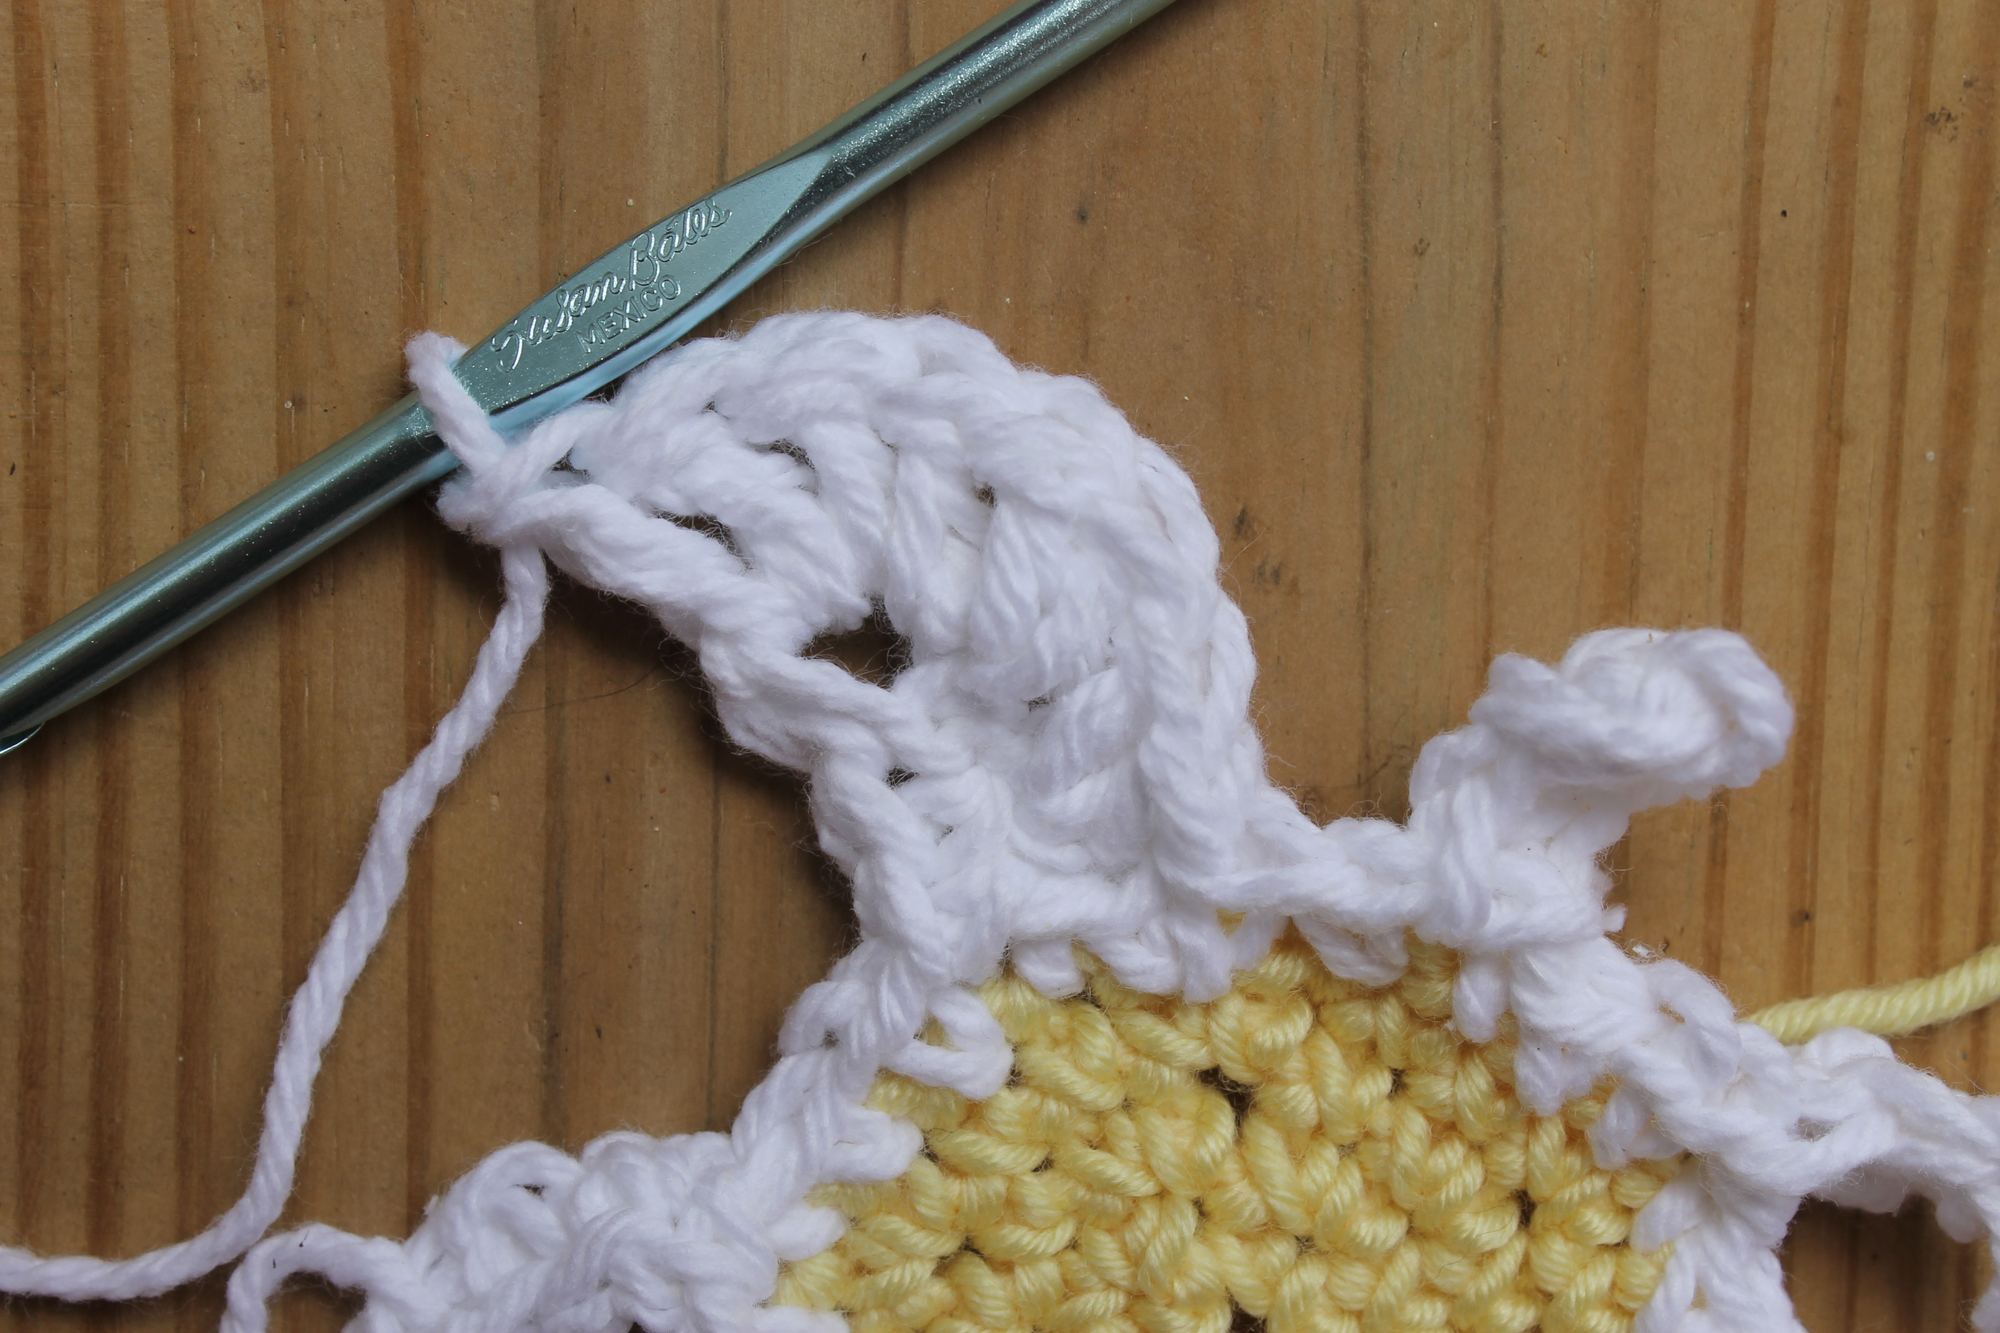
3. Work 4 double crochets into the space at the top of the petal, where you have a space from those extra chain stitches.
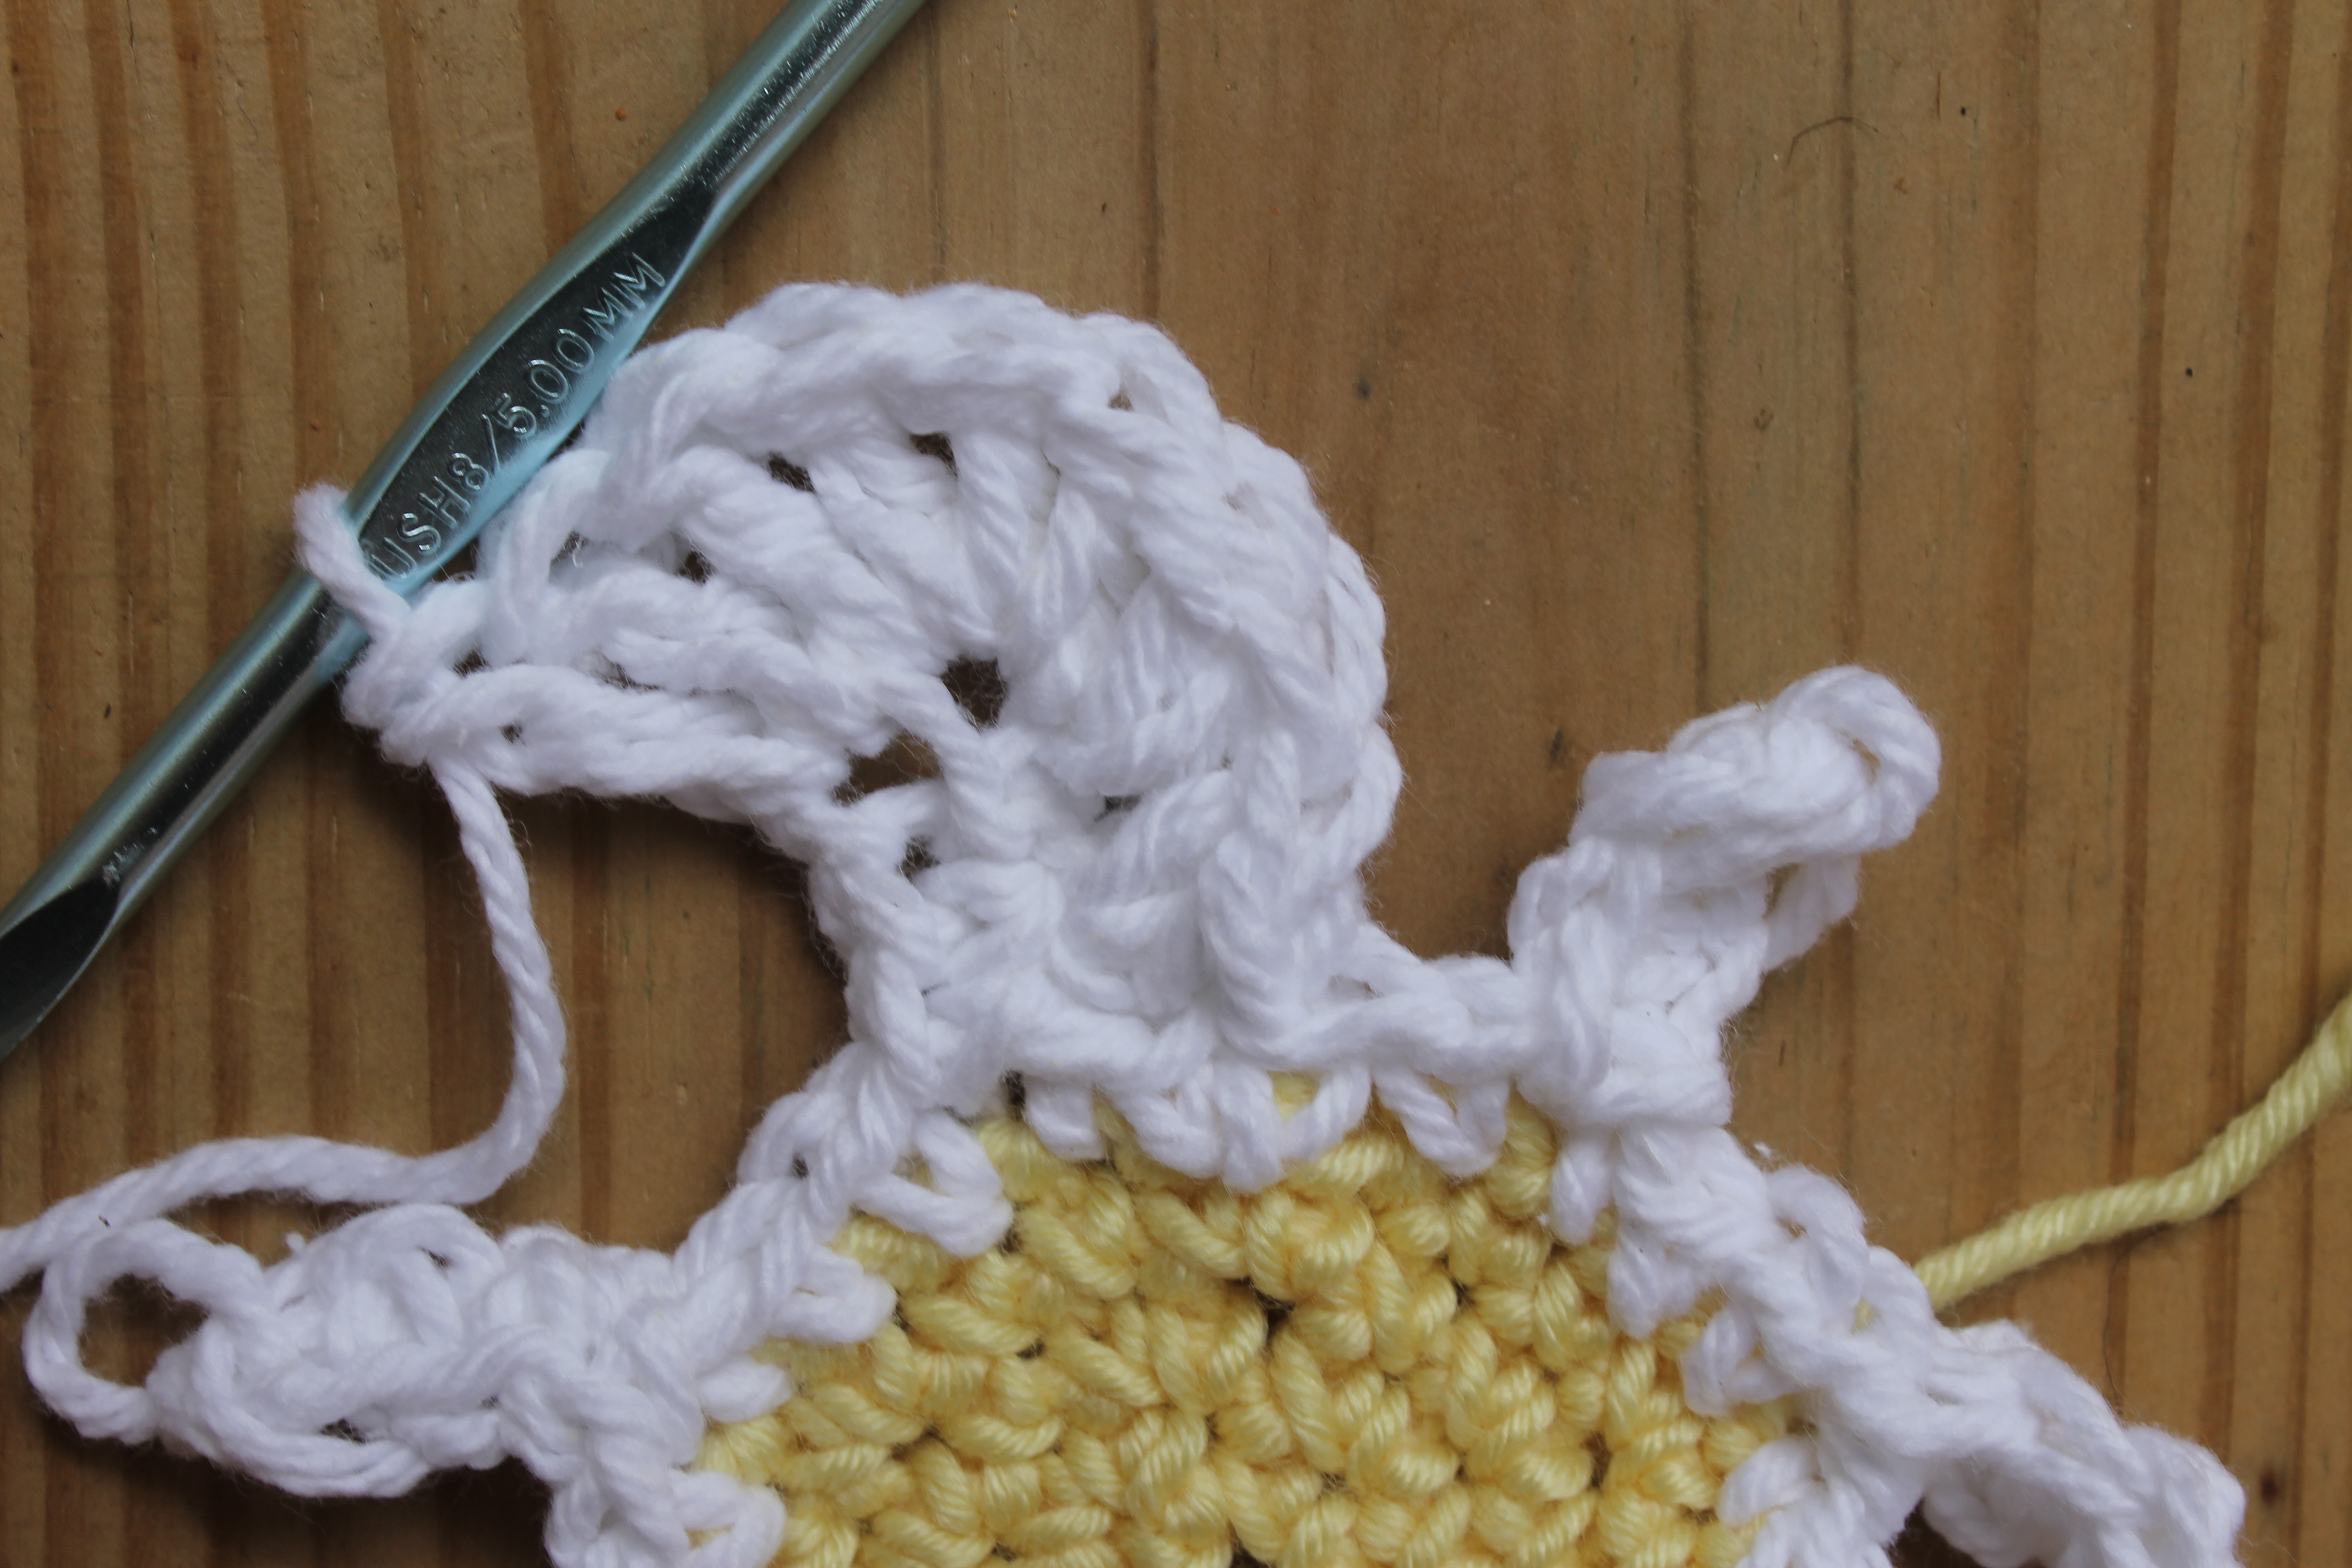
4. Now we’ll work down the left side of the petal. This is the reverse of what we worked on the right side of the petal. First, work 2 double crochet into the next stitch.
5. Work a double crochet and half double crochet into the last stitch on the left side of the petal.
6. Skip the next 2 single crochets, then slip stitch into the ch-1 space.
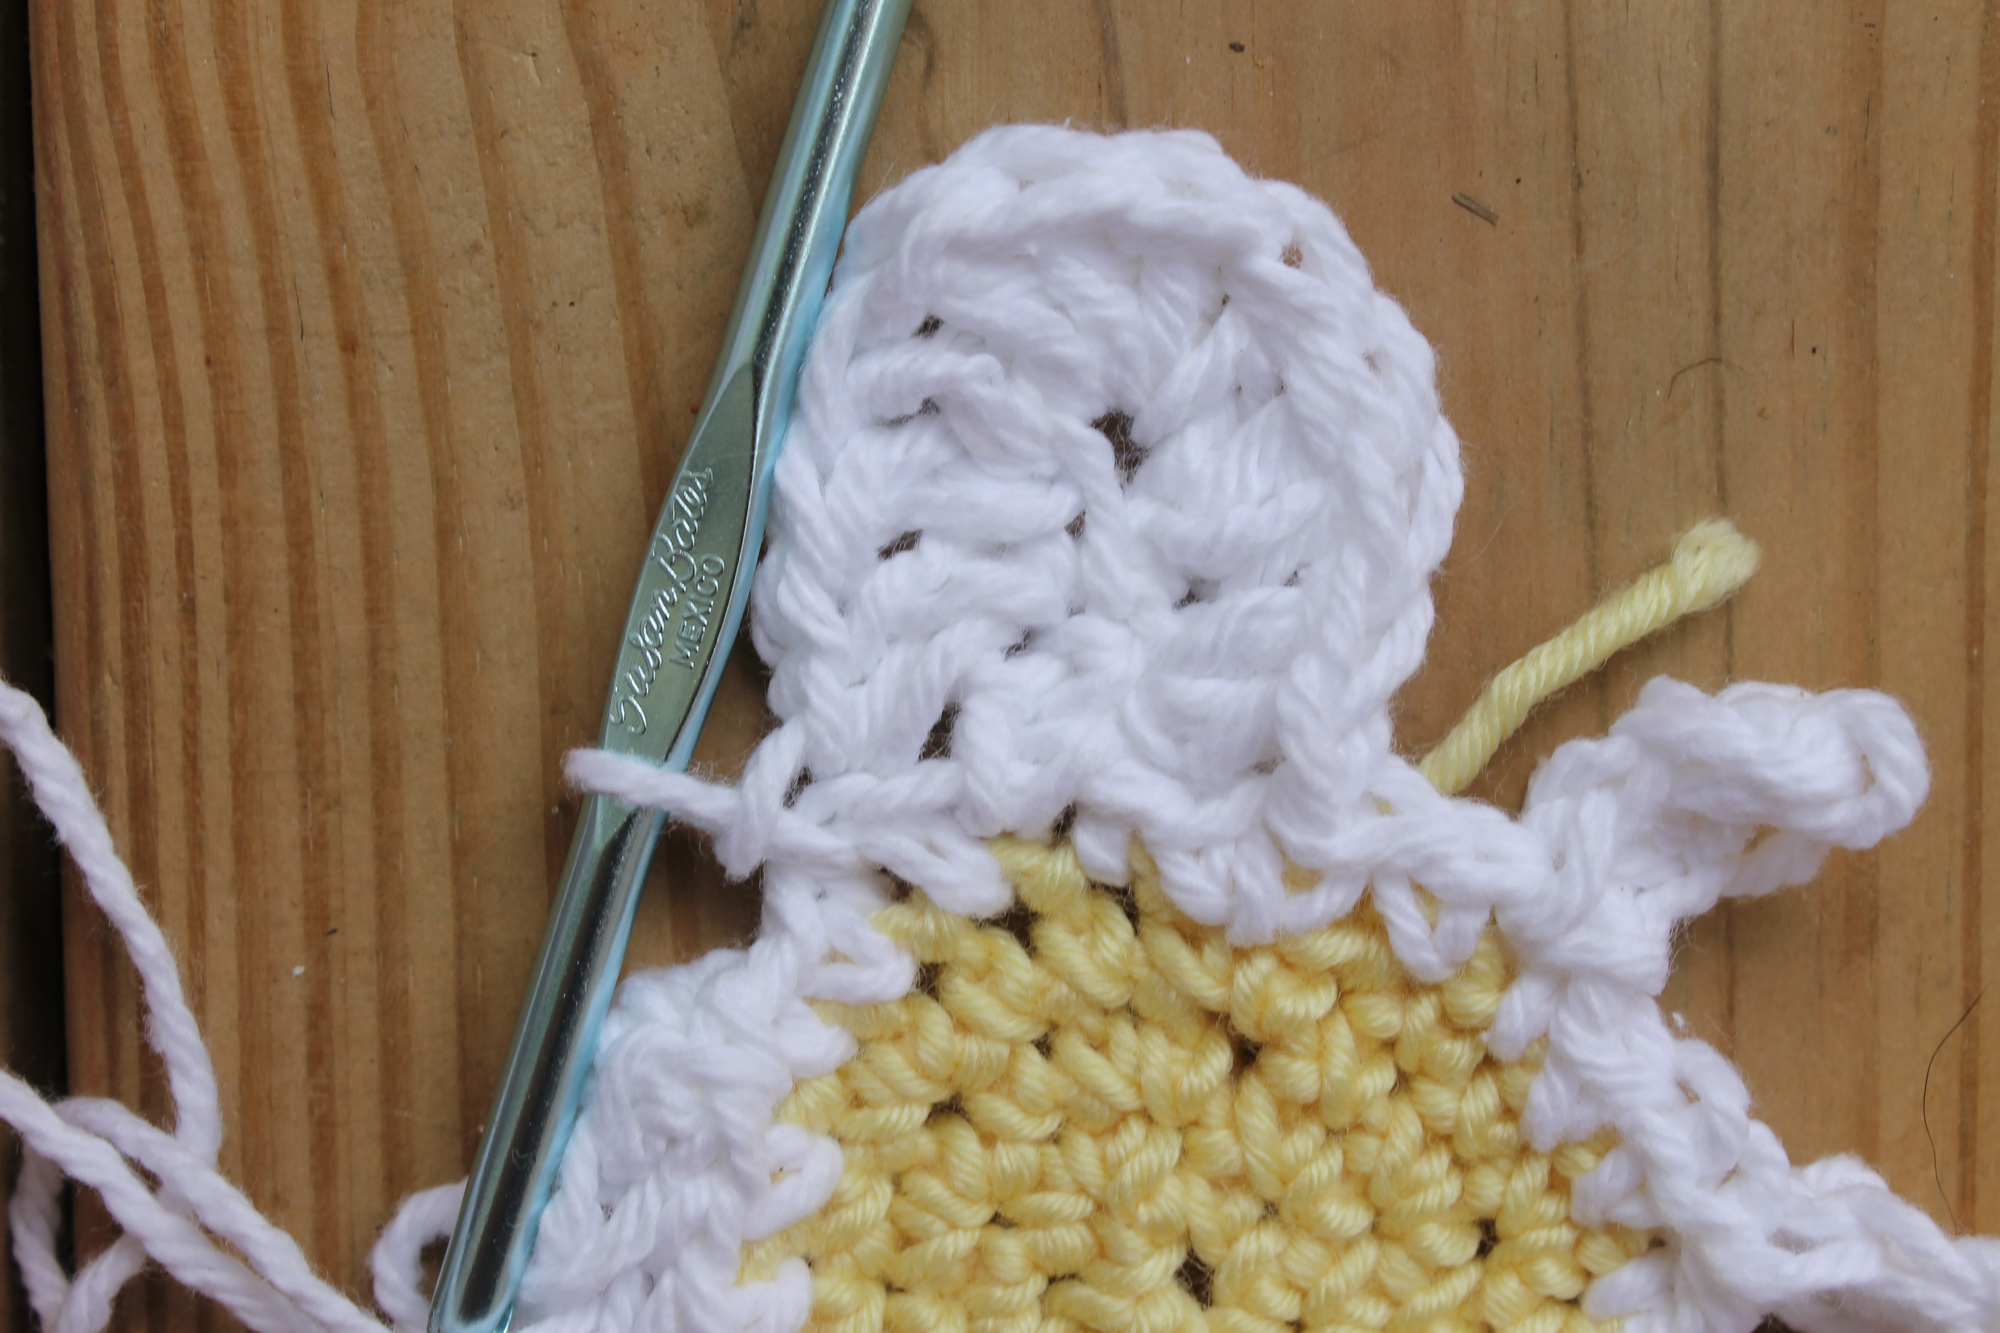
7. Repeat Steps 1-6 for Round 6, working around all 8 petal points.
8. Fasten off, then weave in all the loose ends with a yarn needle or your crochet hook.
Please email me the pattern
Please email me the pattern Thank you.
please send me the patten
Please email me the pattern, thank you!
Proszę o wysłanie wzoru na adres e-mail. Bardzo dziękuję🙂
Please email this pattern. Thank you
Thank you. I made it a scrubby!
Please email me this pattern. Could you tell me how I can make a large one? Thank you
The download link doesn't appear to be valid :(</strong>
there is an error in this pattern. when you start the white petals it should say sc in the next stitch not the same stitch or you will end up with 10 petals. not 8.