
Flip-flops, the quintessential footwear – you find use from them for every season, from summer beach trips to wintertime spa days. Plus, they make great DIY projects. Buy them cheap at the dollar store and doll them up to create a look that’s all your own!
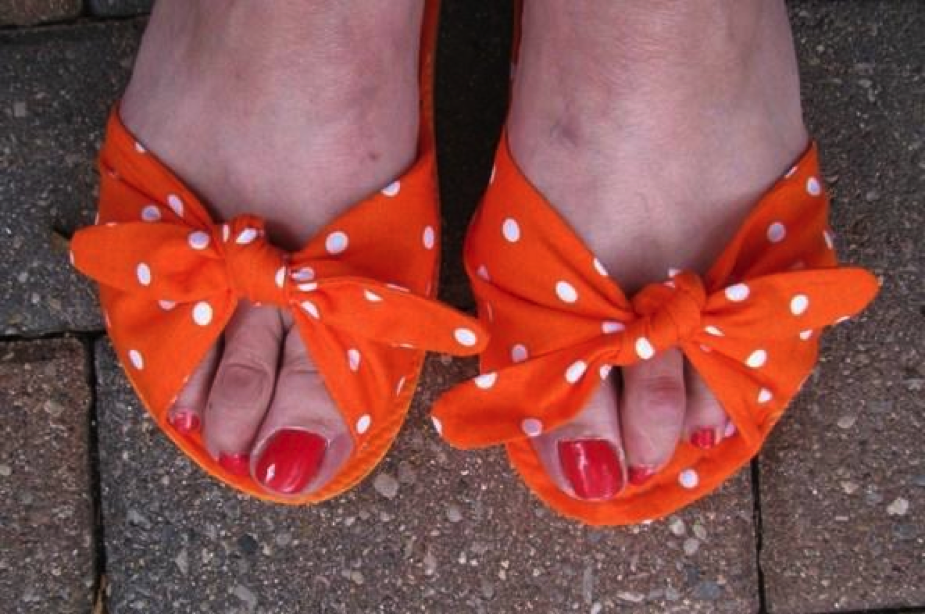
Dressing up a plain pair of flip-flops can be easily done by wrapping the thong straps with pretty ribbon and gluing a silk flower or jewel on the top, but, frankly, been there, done that. Here’s a way to convert them into a pretty fabric slip-on sandal that can coordinate with a special outfit or simply reflect any given season. Try red polka dots for a fun end-of-summer flair or even use some fuzzy fabric for a DIY slipper!
Use this tutorial to turn inexpensive flip-flops into classy sandals.
The conversion starts with a pair of standard flip-flops. Nothing fussy or elaborate as only the platform with be used. Next, pick a cotton fabric in a pretty print. I like using cotton verses a synthetic, as it feels cool and comfy underfoot and won’t make your feet sweat. Add some fusible interfacing, some batting material, strong nylon or upholstery thread and you have the makings for a fun, flip-flop upcycle.
You will need:
● Approximately ½ yard of cotton fabric for the new sole and ties
● ¼ yard of light to medium weight fusible interfacing (optional). The fabric weight will dictate the weight of the interfacing needed, if using
● ⅛ yard batting material for the inter sole
● Strong nylon thread for securing the fabric sole to the flip flop platform
● Craft paper for drafting the patterns for the fabric pieces
● Strong embroidery needle that can easily penetrate the flip flop platform
● Thimble to help push the needle through the platform and fabric sole
Here are the steps to converting the flip-flop into a slip-on sandal:
1. Cut off the straps at the base of each flip flop platform. Drop some glue over the stumps and holes to seal them in place, if desired.
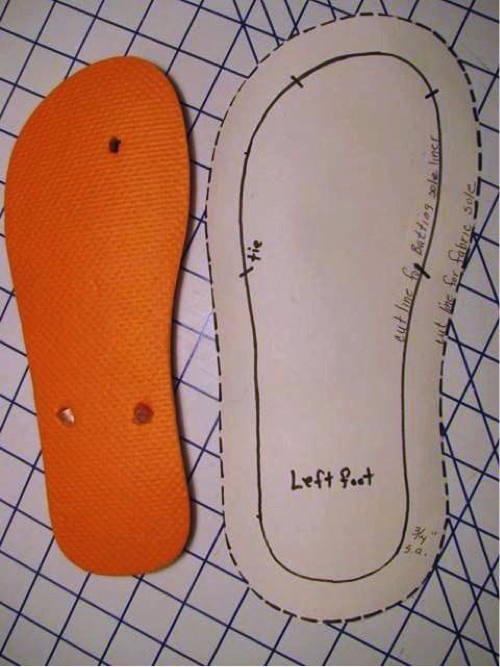
2. Draft a pattern for the new fabric sole by tracing the shape of each flip flop onto craft paper. Make sure you have a right and left foot tracing. Add a ¾” allowance around the traced shape. Place onto the fabric and cut out a left and right foot.
3. Trace the shape of the flip flops onto some batting material. Do the same for the fusible interfacing, if using. No extra allowances are needed here. Make sure to cut two pieces of both the batting and interfacing.
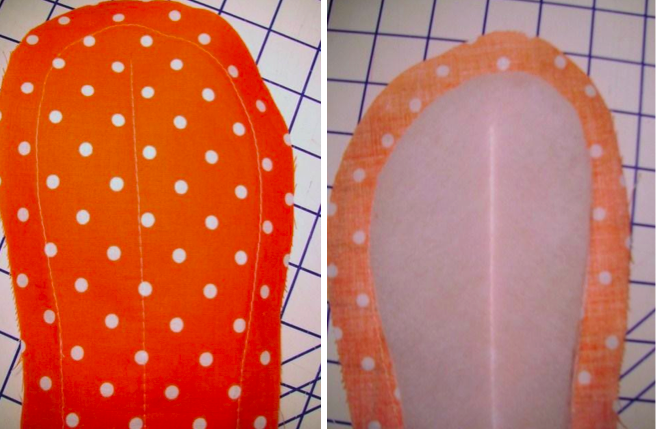
4. Carefully center the interfacing onto the underside of each fabric sole and fuse in place. Baste stitch around the fabric sole using a ¾” seam allowance.
5. Now lay the batting over the interfacing and baste in place.
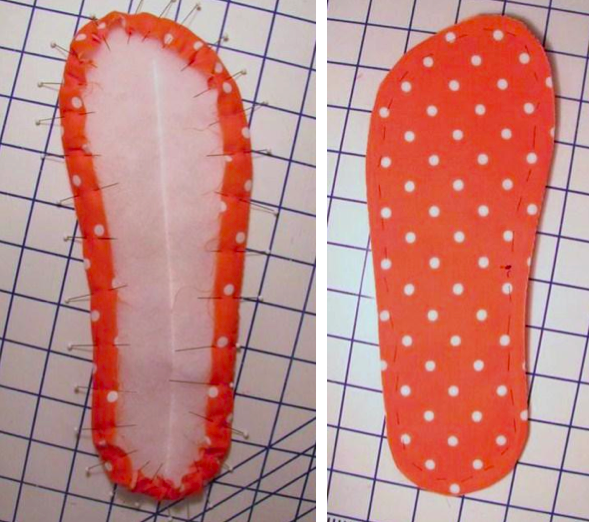
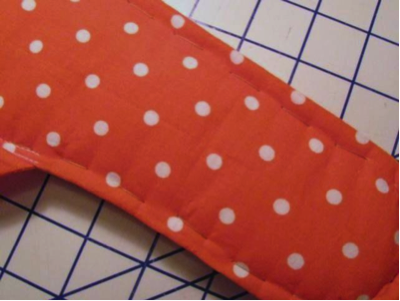
6. Turn the seam allowance to the underside of each fabric sole, pulling the basting stitches around the heel and toe areas to help them turn under. Pin in place and then hand baste in place.
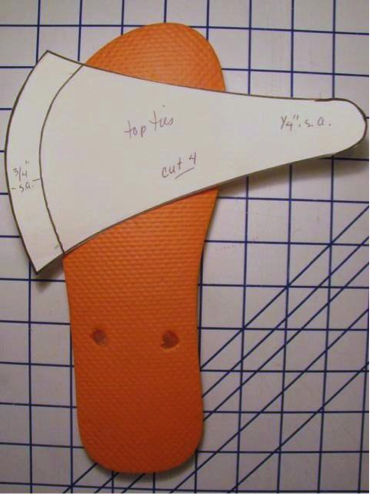
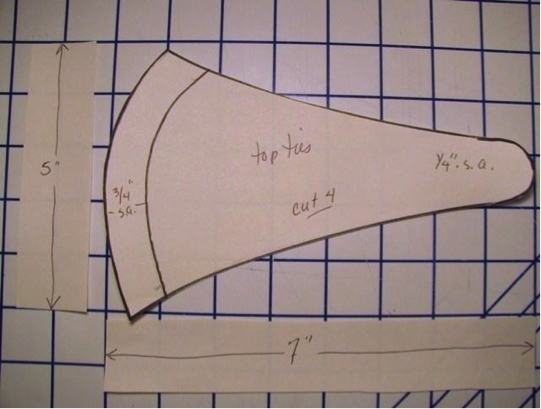
7. Draft the ties for the top portion of the slip-on using the dimensions and shape in the illustration as a guide. Cut out eight pieces — four for each foot.
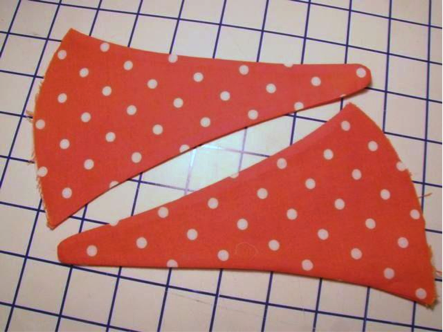
8. With right sides, together stitch around each tie using a ¼” seam allowance and leaving the wide ends unsewn. Trim the curved portion to ⅛”. Turn right side out and press flat. You should have 4 sections, two for each foot.
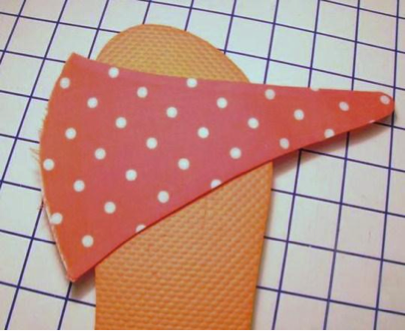
9. Lay the right tie onto the fabric sole with the raw edge extending ¾” beyond the sole. Turn the extension to the underside of the sole and pin in place. Stitch the right tie onto the fabric sole, as shown. Repeat the process for the left side. Repeat for the other foot. The new fabric sole is now complete and ready to be attached to the flip-flop platform.
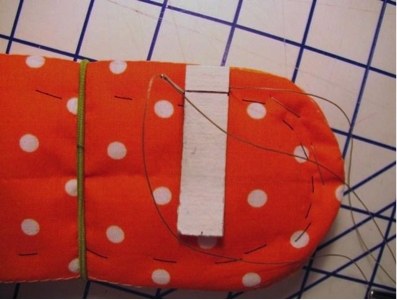
10. Thread a large embroidery needle with nylon thread and begin sewing the new fabric sole to the platform. A thimble helps push the needle through the flip-flop platform. Also, working of the edge of a work surface makes pushing the needle through easier.
A simple template made out of cardboard makes the stitching more consistent and even. Sew completely around the sole. Tie the thread ends together, tightly, and snip off the excess thread. A bead of glue here will help seal the stitching.
11. Step on the new sandal and tie the top portions to fit your feet!
Love upcycling? Try out our online Bluprint class Project Upcycle: Thrifty Sewing Projects for even more fun ways to recycle clothing into better than ready-to-wear pieces!
Share tips, start a discussion or ask one of our experts or other students a question.
No Responses to “Sewing Upcycle: DIY Sandals from Flip-Flops”