
The granny stripe crochet pattern has been popular for several years now, especially for making blankets. It’s a lovely, soothing and easy project that can be made in virtually endless color combinations. It was one of the first blanket projects that I ever made:
In this post, I’ll walk you through the basic granny stripe crochet pattern, tips and tricks and plenty of inspiration.
Getting started with a granny stripe
You can make the granny stripe crochet pattern in any size, width-wise, by changing the number of starting chains. All you need to remember is this simple rule:
Starting chain should be a multiple of 3, then add 2
To work out if a number is a multiple of 3, add together the digits. If the number you end up with divides by 3, so does your starting number.
For example, say you want to start with 250 chains. Add the digits: 2 + 5 + 0 =- 7, which doesn’t divide by 3. But, try 252 chains — that’s 2 + 5 + 2 = 9, which does divide by 3. Then add two. So, 254 chains.
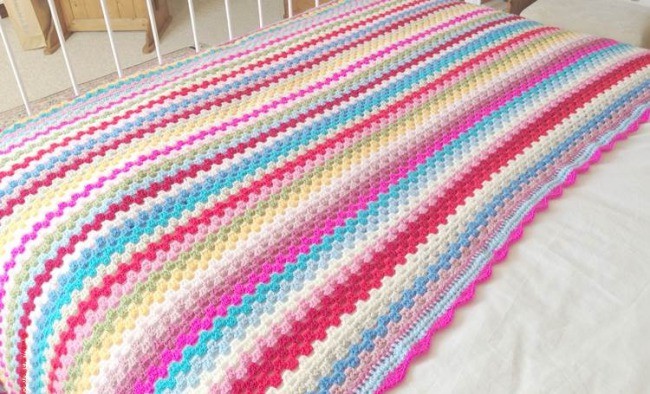
If you want to make a blanket that’s six feet wide, you need to start with around 302. For a narrower blanket maybe start with 164. That’s the starting number I used for my granny stripe lap blanket:
You can use this same principle if you choose to make a granny stripe scarf or cowl, too.
The granny stripe pattern
Foundation chain & row
Using a hook size larger than you will use for the main body of the blanket, make a foundation chain with the required number of stitches (a multiple of 3 + 2). Turn your work.
To give the blanket a firm start, DC into the second chain from the hook and then into every chain that follows.
If you prefer, you can make your foundation row in SC or HDC. It doesn’t really matter as long as you have an entire row of firm stitches to start before you go into your granny stripe pattern.
Row 1
Turn your work. Ch 3, then DC into the base of those chains. *Skip the next 2 stitches, then make 3 DC stitches all into the next stitch.* Repeat the step between the *, until you have just 3 stitches remaining. Work 2 DC into the last sc.
Row 2
Turn your work. Ch 3, then make 3 DCs into the first space (between the 2 DCs that end Row 1 and the next DC cluster). Continue along the row, making 3 DC into each space between the clusters of Row 1. When you have worked 3 DC into the last space, DC into the top of the turning chain at the start of Row 1.
If you want to complete the next stripe in a different color, cut your first color and secure your tail end.
Row 3:
Join in the next color into the first space between the DC clusters and ch 3. Then make 2 DC stitches into that same space. Continue along the row, making 3 DCs into each space until you reach the last space. Work only 2 DC in here.
Row 4
Turn your work again. Ch 3, then work 3 DC stitches into the next space. Work 3 DC into each space along the row until you reach the end. Then work 2 DC into the top of the turning chain at the start of Row 3.
Rows 3 and 4 make up the granny stripe pattern repeat , so just keep going to create as many stripes as you like.
Granny stripe inspiration
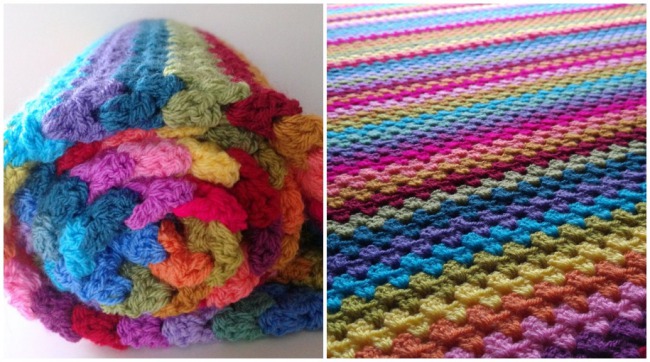
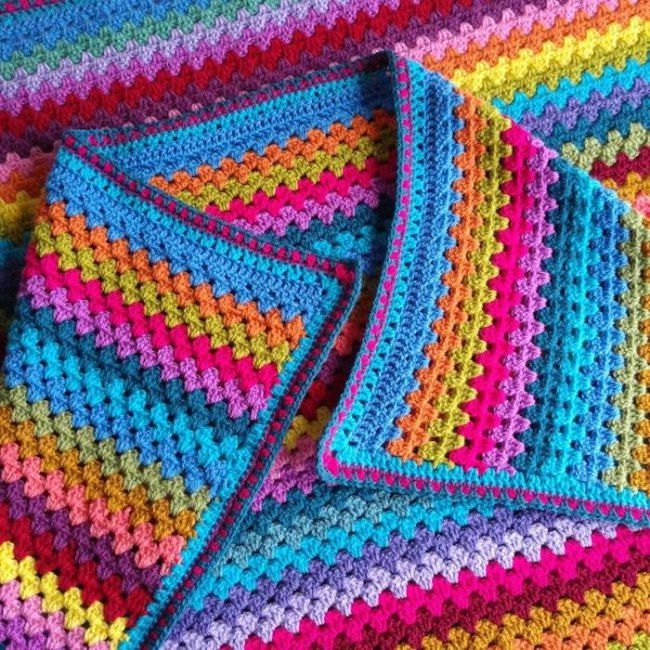
This pattern is so flexible — you can make a wide, short blanket, a small square baby blanket, a giant scarf, lap blanket, a King sized bed blanket. It’s totally up to you.
And this is a great project if you want a stash-buster — you can make every stripe a different color, or even every row. You will find it easier to use the same weight of yarn throughout though. Mixing different yarn thicknesses, or sometimes yarn brands, can lead to your work looking uneven.
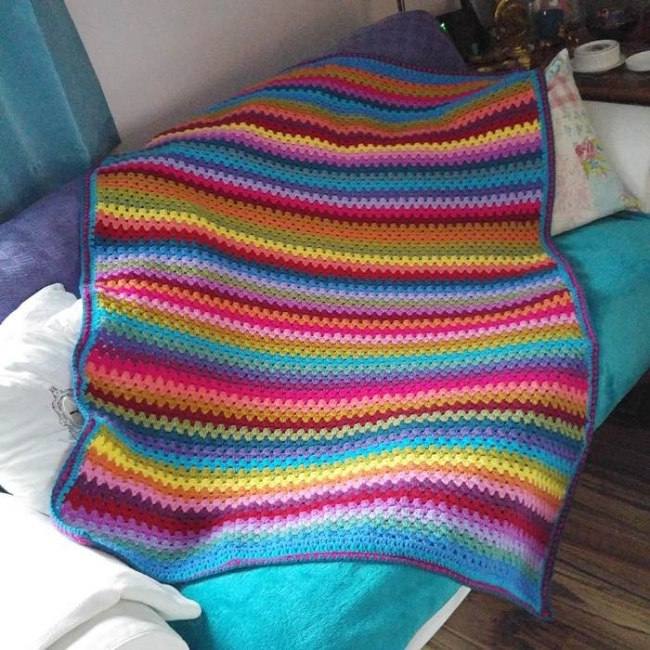
Recently I made a smaller throw to brighten up the sofa, and the bright, bold stripes were a pleasure to work.
Of course, you don’t have to go bright and bold. You can make your granny stripe blanket in more muted colors, with perhaps only two or three subtle tones of the same color for a completely different effect — like this granny stripe baby blanket below by Freya Esme Designs.
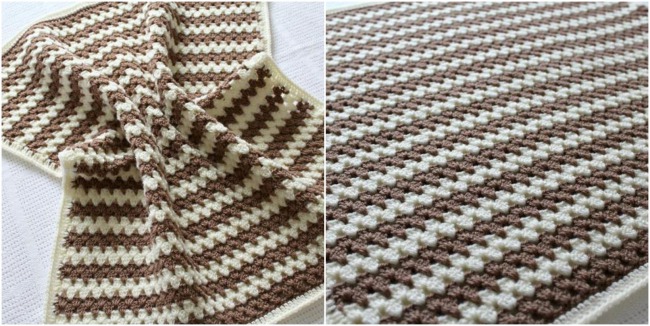
Photo via Freya Esme Designs
Many crocheters choose acrylic yarn for their granny stripe blankets because it’s so practical and cost effective. But a few podcasts and YouTube channels (such as A Homespun House, AndreSueKnits and LegacyKnitz) have featured granny stripe patterns using leftover scraps of sock yarn.

Photo courtesy of AndreSueKnits
The combination of variegated and tonal yarns produces blankets that are just stunning.
More tips and tricks for making a granny stripe
Although the pattern is easy, there are a few tricks that you can use to make sure your granny stripe is trouble free:
- Choose a hook size that matches the weight of yarn you’re using — but go up a half size or a whole size if you want a better drape. For a more hard-wearing blanket, keep the hook size the same or even go down half a size.
- For your foundation chain, use a hook one size bigger than the hook you’ll use for for main project. This prevents your foundation chain from being too tight and bowing like a banana.
- Follow the pattern carefully at the end of each row to make sure the edges are as straight as possible. You might find it helpful to count the DC clusters in each stripe until you gain confidence. You should have the same number in all of your Row 1s and all of your Row 2s.
- Plan your color combinations carefully if you are using a set number of skeins of yarn in different colors. You need to space the colors out evenly throughout your project.
- Weave the ends in as you go — there is nothing worse than not being able to snuggle into your blanket until you have woven in over 100 yarn ends!
Try making up a sample before you get going on your project
The granny stripe pattern is very straightforward, but if you a new crocheter, it’s always a good idea to practice a new pattern with a small sample. Try starting with just 26 chains and following the pattern above until you have successfully completed the foundation row and three different color stripes.
Then ask yourselfe: Do you have the same number of clusters in Rows 1, 3 and 5? How about rows 2, 4 and 6? Are your edges straight? (There will be a little bit of waviness, but this is not noticeable when you add a border at the end).
If all looks good, it’s time to get started on your next big project!

I want to crochet a temperature blanket and use the granny stripes.
I love to crochet different things
How do you get smaller gaps? I’m using a smaller hook, but still big gaps. Would skipping just one stitch in row one make for smaller gaps? Thanks!
Want to learn granny stripe blanket
I am starting a stash busting blanket and appreciate your advice here! Thank you
The blanket in the photo looks like it has a border all the way around after all the rows are finished. Yet there's no directions listed for the border.