
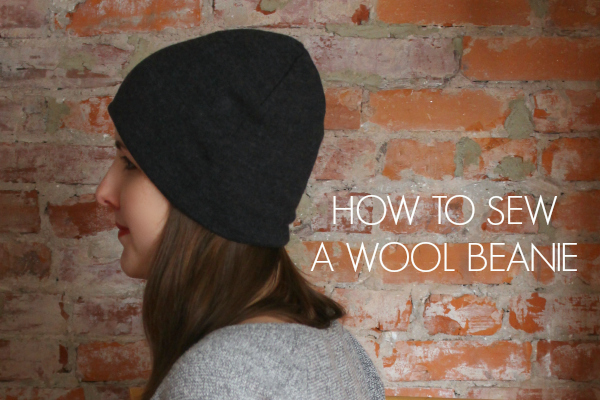
As winter settles in, fight off the cold by layering up with wool accessories. A cozy hat is the best way to keep your ears warm and hair dry in the snow. Luckily you don’t have to be a knitter to make a wool beanie. Save some time and sew one yourself! Using old sweaters as fabric, you can make multiple hats in no time.
Follow along for how to draft and sew a fitted beanie.
Supplies needed:
- Tracing paper and pencil or marker
- Ruler
- Adult-sized sweater. Make sure the sweater is stretchy and not too scratchy or thick. If you don’t want to cut into an existing sweater, you can also use sweater knit, fleece, wool jersey, or double knit fabric. You will need about 3/4 yard.
- Matching thread
- Sewing machine or serger
Pattern Instructions:
This tutorial is for making a fitted hat for an adult with an average-sized head. You can easily adjust the width and height of the hat after understanding the basic pattern and construction method. Step 1. On some tracing or pattern paper, draw a straight line that is 10 inches long. In the middle of this line, connect a perpendicular line that is 9 inches long total. Mark with a small dot where the six inch mark is. 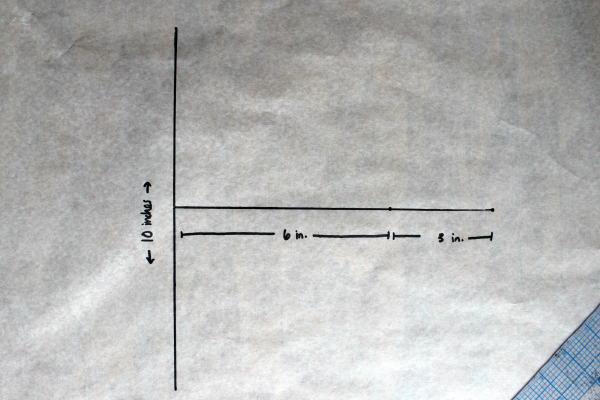 Step 2. At the two ends of the 10 inch line, draw two perpendicular lines that are each 4 inches long. Connect the top of the 9 inch line to the tops of these 4 inch lines with a sloping curve. You may use a French curve for this part, or trace the top of an existing beanie if that helps. Blend the curve where it meets the straight lines so you don’t have any points.
 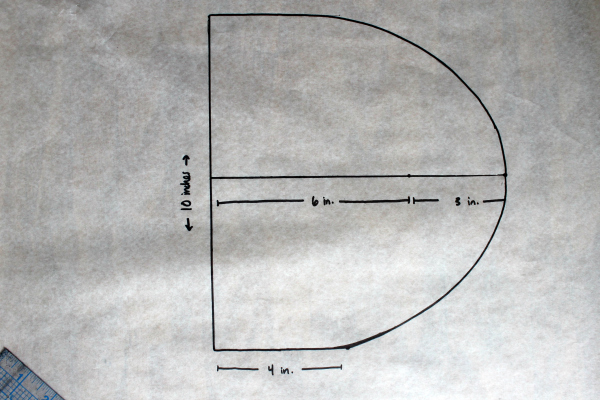 Step 3. At the top of the curve, mark 1/2″ on either side of that 9 inch line you drew. Connect those points to the 6 inch mark to form a wedge.
 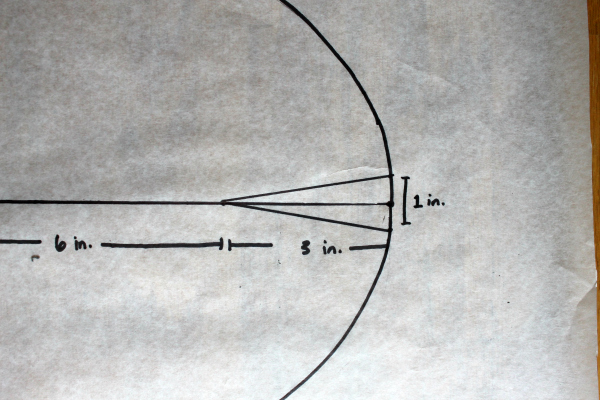 Step 4. Cut out your pattern, including that wedge, but do NOT cut off the bottom 10 inch line yet.
 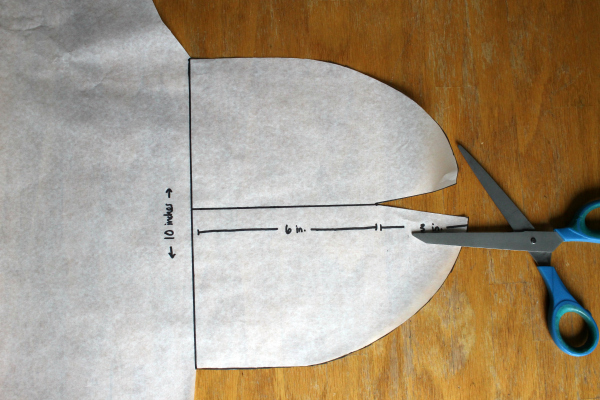 Step 5. Fold your cut pattern along the 10 inch line and flatten. Trace the shape to complete the other half of your pattern piece.
 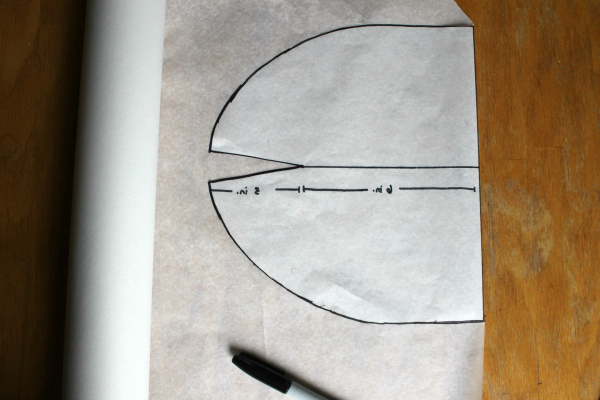 Step 6. Cut out your weird-looking pattern! Label that 10 inch mark as the fold line, and remind yourself that you will need to cut two of this piece on your actual fabric.
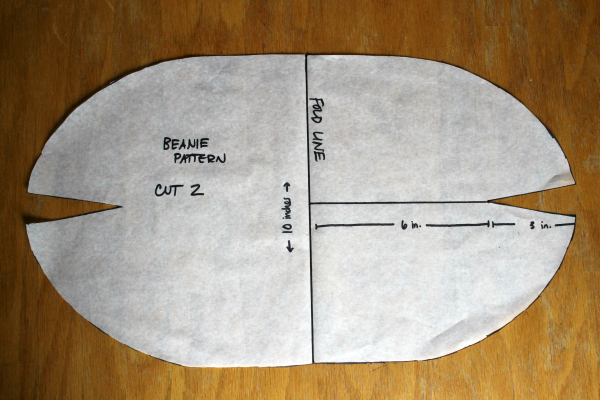
Sewing Instructions:
Step 1. Prep your fabric. If you are using a sweater as your fabric, it helps to cut open the side seams and shoulder seams so the fabric lays flat. You can keep the layers together, too, since you will eventually cut two pieces from your pattern. However, I find that I like to cut one piece at a time to ensure the fabric is on grain and that I don’t accidentally include the sweater neckline or other seams in my pieces. 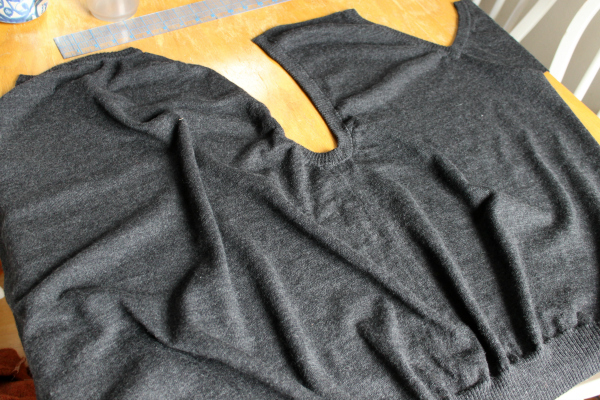 You may need to remove the ribbing at the bottom of the sweater to help the body of the sweater lay flat.
 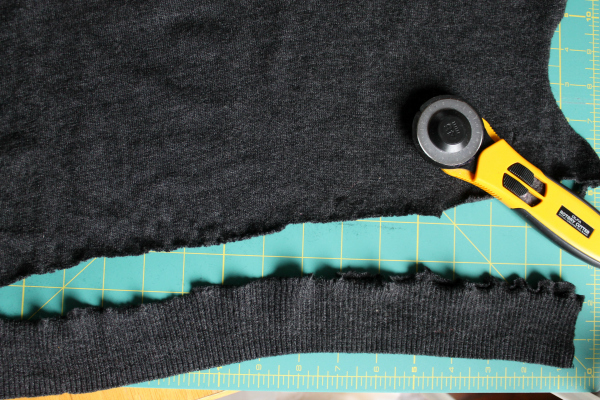 Step 2. Lay the pattern piece on your fabric. The width of the pattern needs to align with the maximum direction of stretch of the fabric (which, in the case of a sweater, is across the body). The length of the pattern will align with the grainline, or the length of the sweater.
 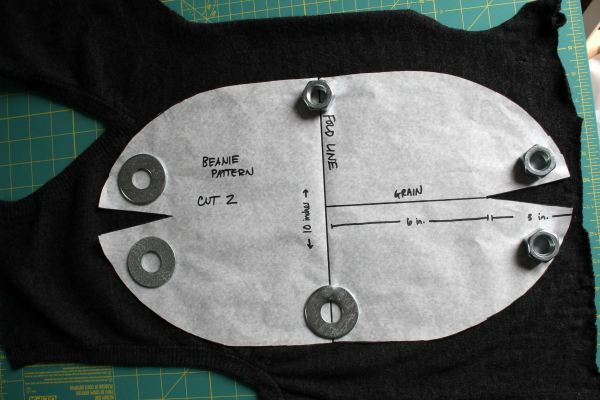 Step 3. Cut out two pieces.
 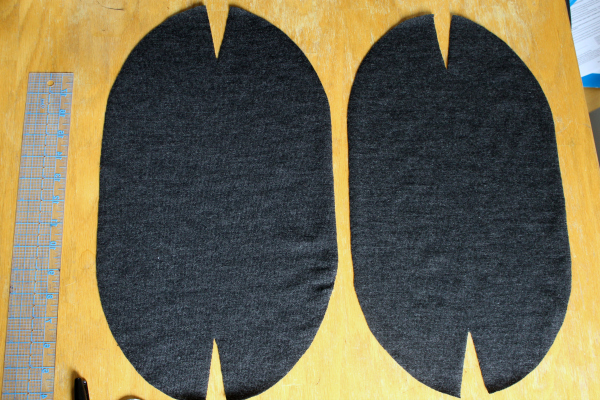 Step 4. Place the two pieces right sides together and sew the curved edges together at 1/4″ seam allowance, leaving the wedges open. You can use a serger for this part or a narrow zig zag stitch. This is forming the side seams of the hat.
 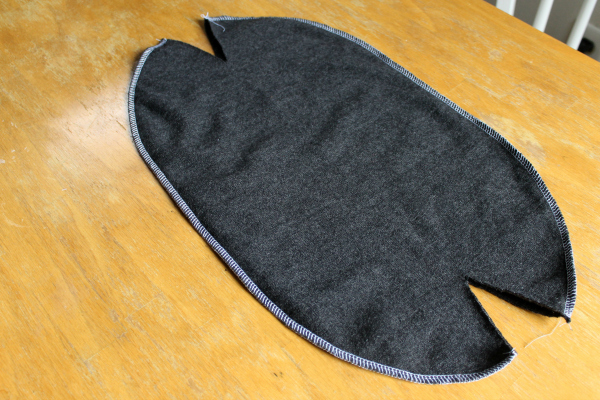 Step 5. Turn the hat right sides out through one of the open ends.
 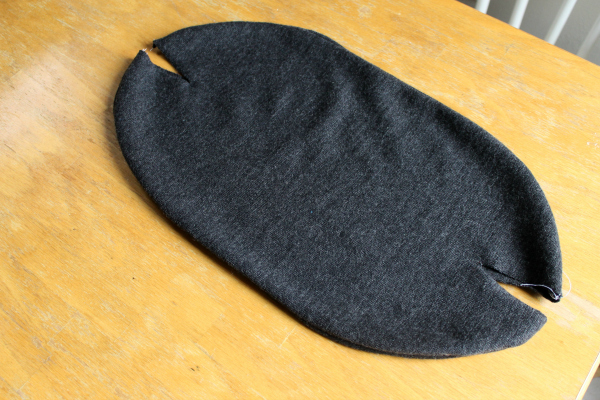 Step 6. Squish one half of the hat inside the other so the hat is doubled up.
 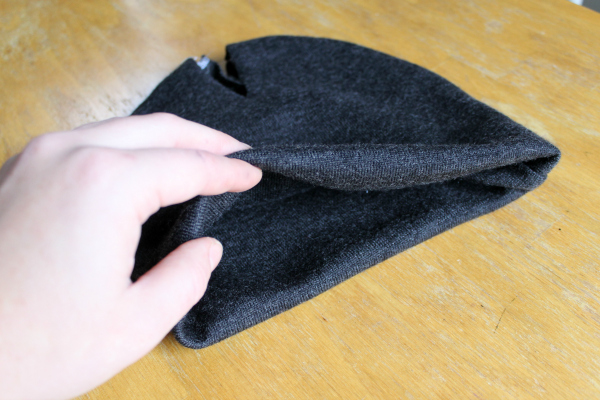 Step 7. Align the raw edges of the wedges together at the top of the hat. You will have four layers of fabric that need to be sewn, so it may help to first baste those layers together at the seam intersection to make sure they perfectly match up.
 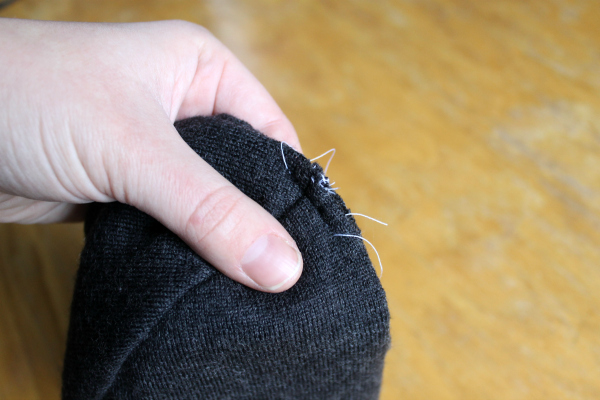 Step 8. Serge or sew these edges together, being careful to sew a tapered seam that blends in with the curve of the hat. Trim threads.
 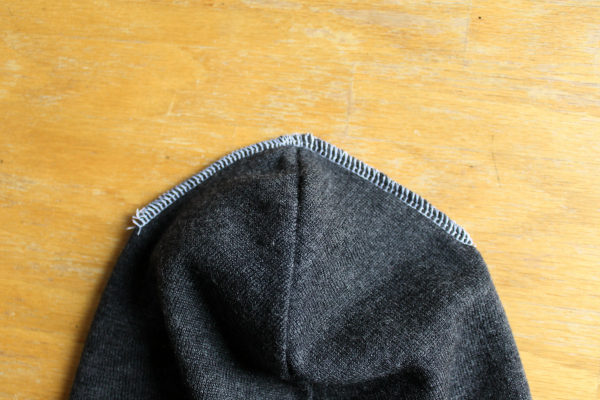 Step 9. Turn the hat right side out and pop it on your head. The long seams will sit on the sides of your head, and the shorter seams will lay on the top front and top back of your head.
 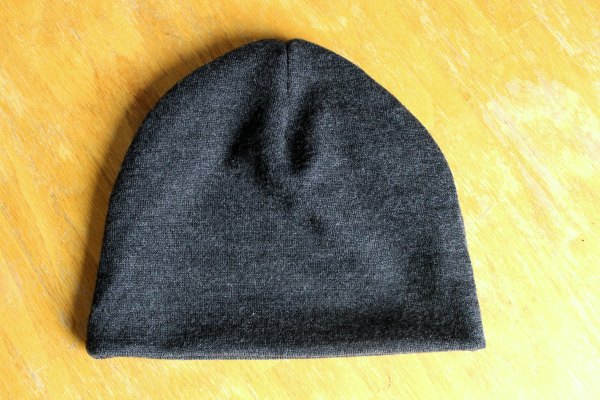 You’re done! For your next versions, you can lengthen the pattern piece if you want to be able to fold up the brim of the hat or if you want a slouchier style. You can also shorten and narrow the pattern piece to make a child’s hat. What else can you make from an old wool sweater?
Share tips, start a discussion or ask one of our experts or other students a question.
No Responses to “How to Sew a Wool Hat from a Sweater”