

A beautiful handmade bag truly is the perfect accessory. This one-of-a-kind zippered pouch is great for traveling, a night on the town, brunch with your girlfriends — it even works for stashing cosmetics or those little-kid essentials mom always has to have on hand. Best part: you can whip it up the same day you want to show it off!
The Carry-All Pouch With Pockets
Level: Intermediate
Size: 10″ x 7″ x 4″
What You Need
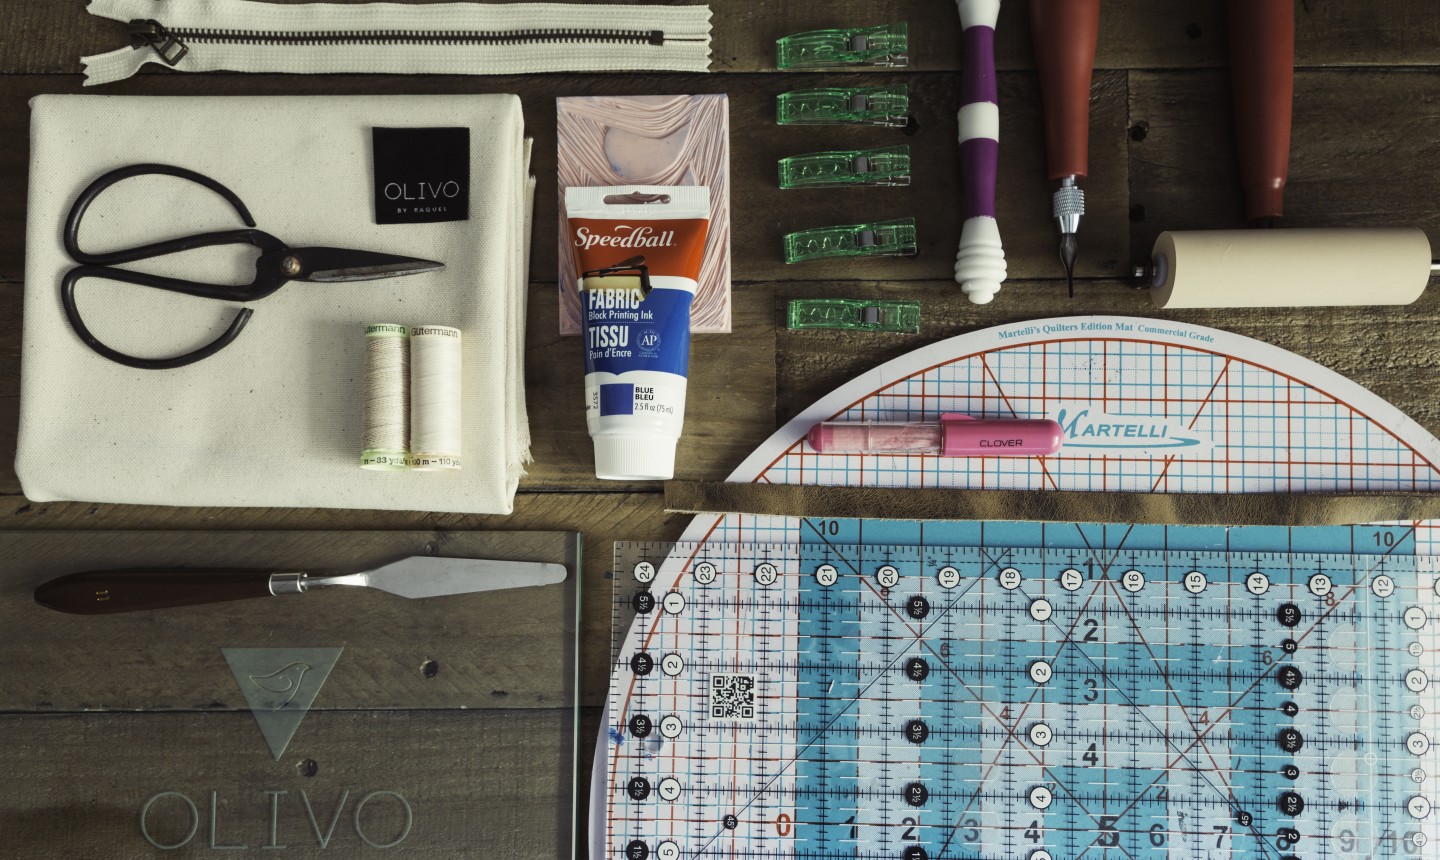
Good to Know: For this pattern, we used lightweight canvas as the main fabric. (No interfacing needed!) If canvas isn’t your thing, you can use something else — just make sure it’s a heavier weight, otherwise you’ll need to add interfacing.
Instructions
1. Prep Your Materials
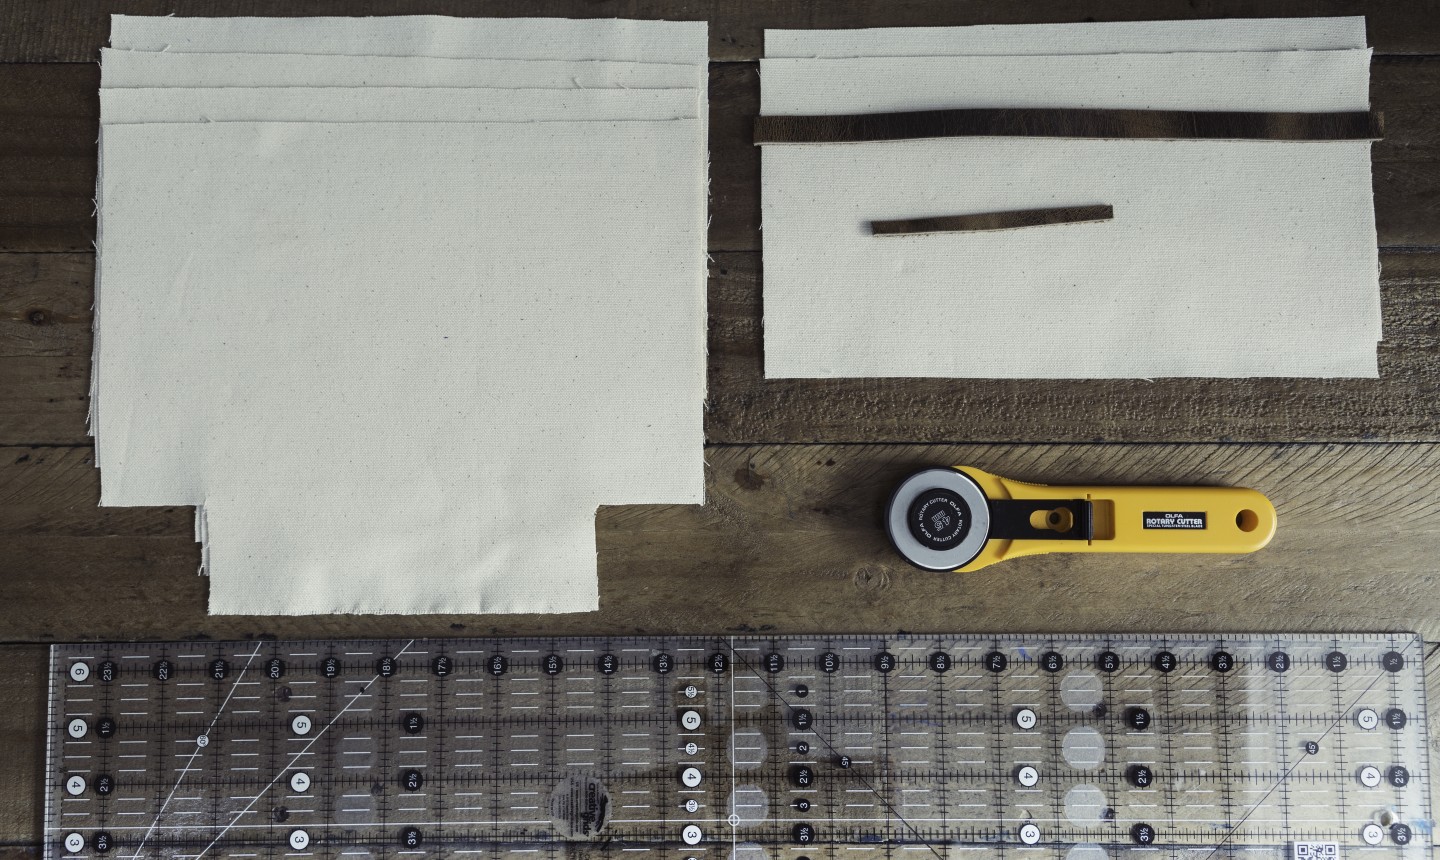
Cut two pieces of main fabric and two pieces of lining fabric to 11″ x 9″. On the bottom corners of each piece of fabric, cut away a 2″ square.
Cut another piece of main fabric and lining fabric to 11″ x 6″. These will be your pocket fabrics.
Cut two pieces of leather: one 11″ x ½”, and one 5″ x ¼”
Good to Know: Block printing is totally optional for this project, but if you decide to give it a whirl like Raquel does in the video, our class Fabric Design: Block Printing shows you how to do so on your pocket fabric before moving to step 2.
2. Make the Pocket
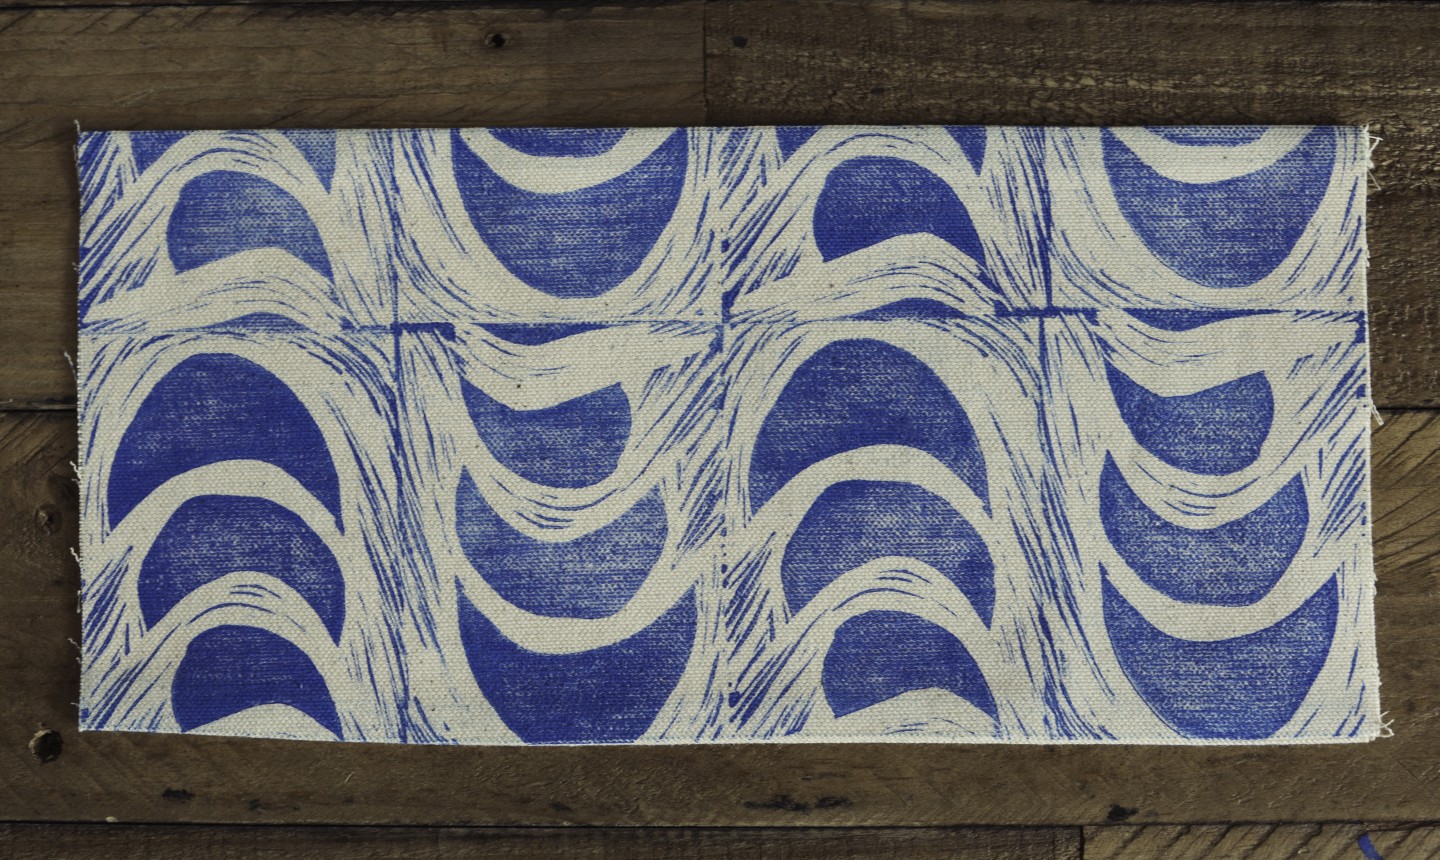
Pin the right sides of your pocket fabric (we block printed ours) and pocket lining together. Using your ¼” foot, sew the long side with a ¼” seam allowance. Press those seams open, turn the fabric over and press again.
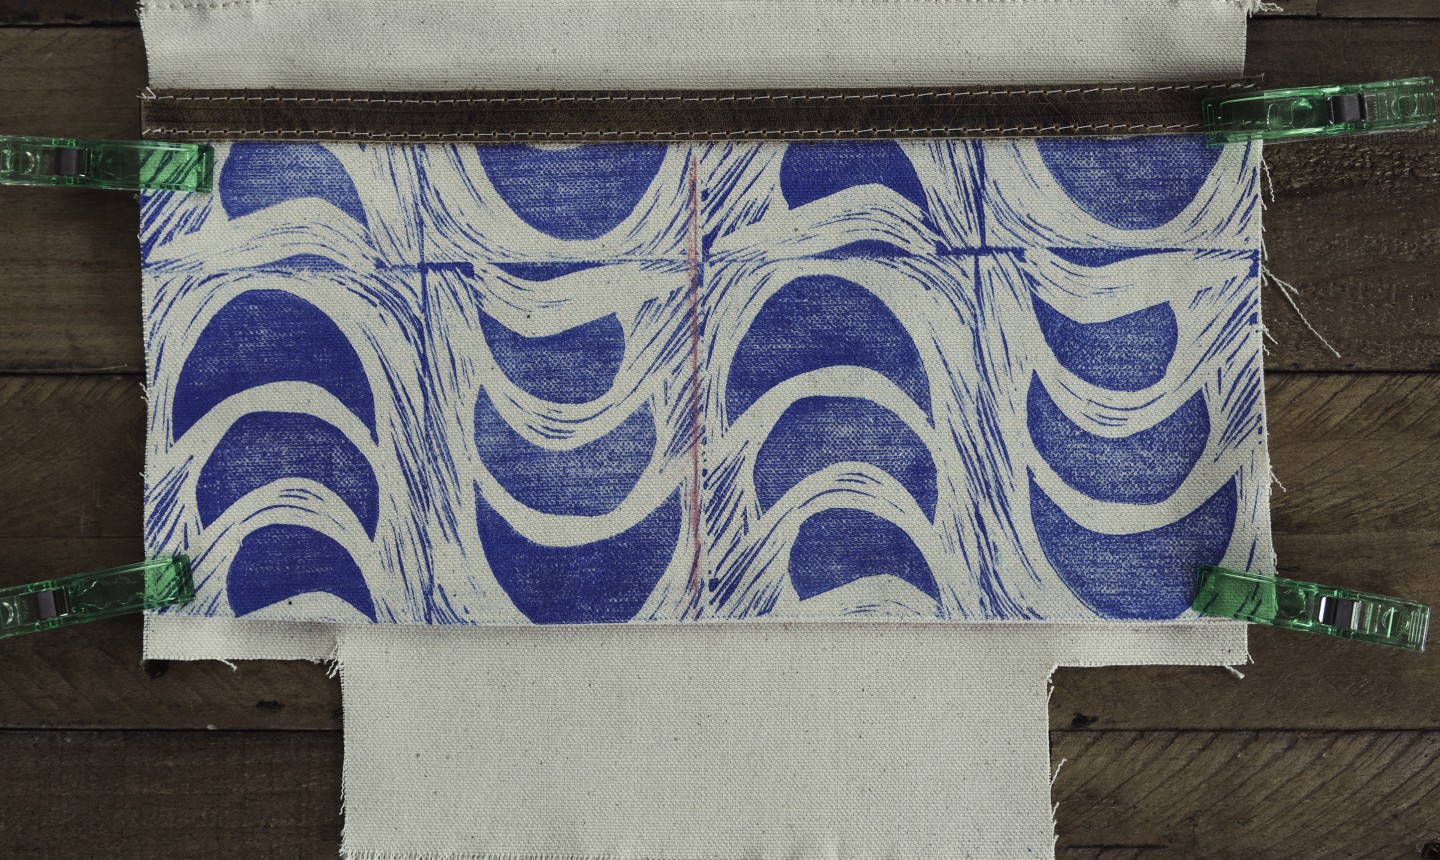
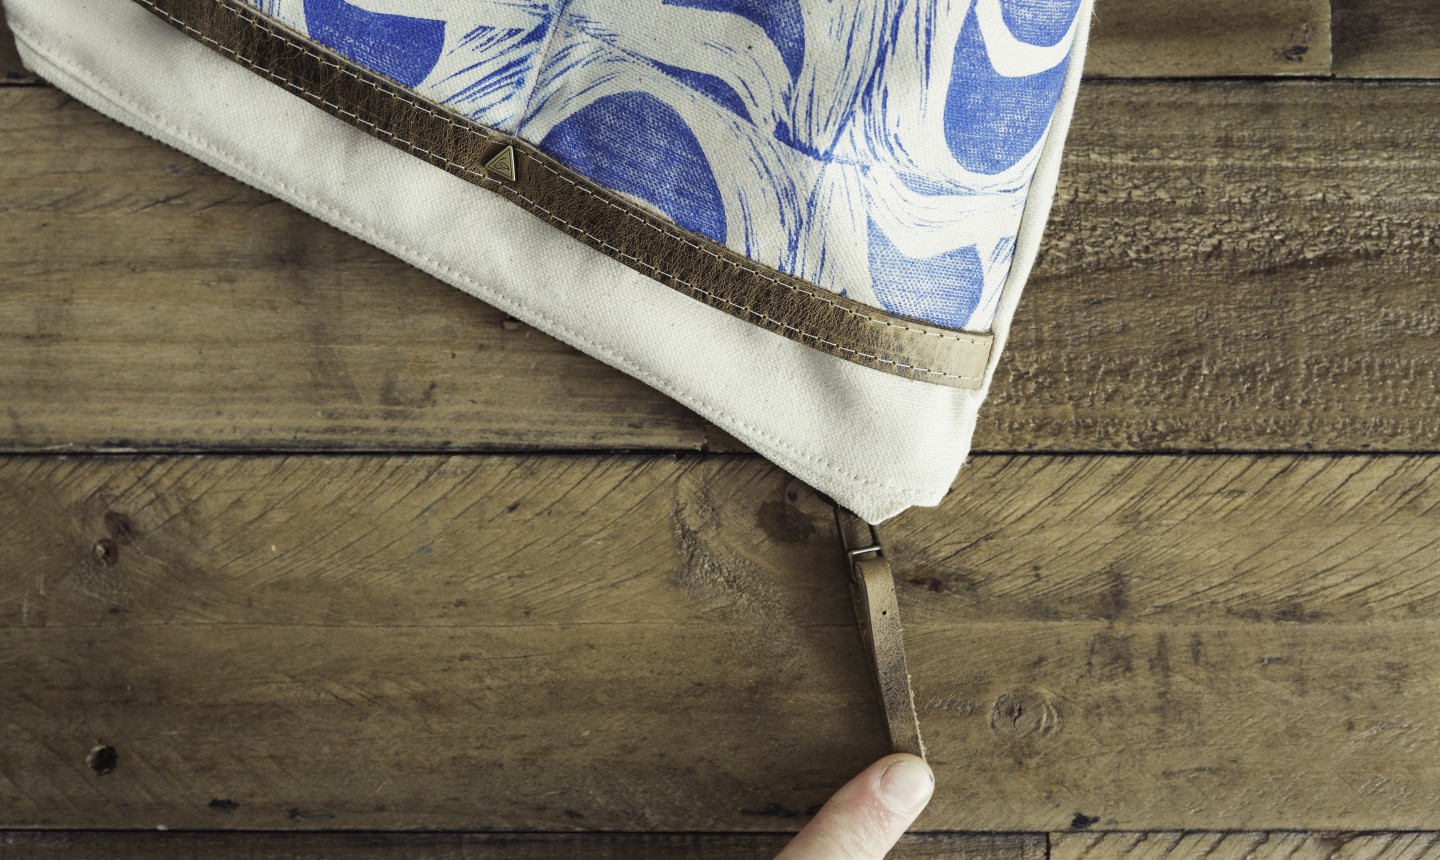
3. Add the Leather Trim (Optional)
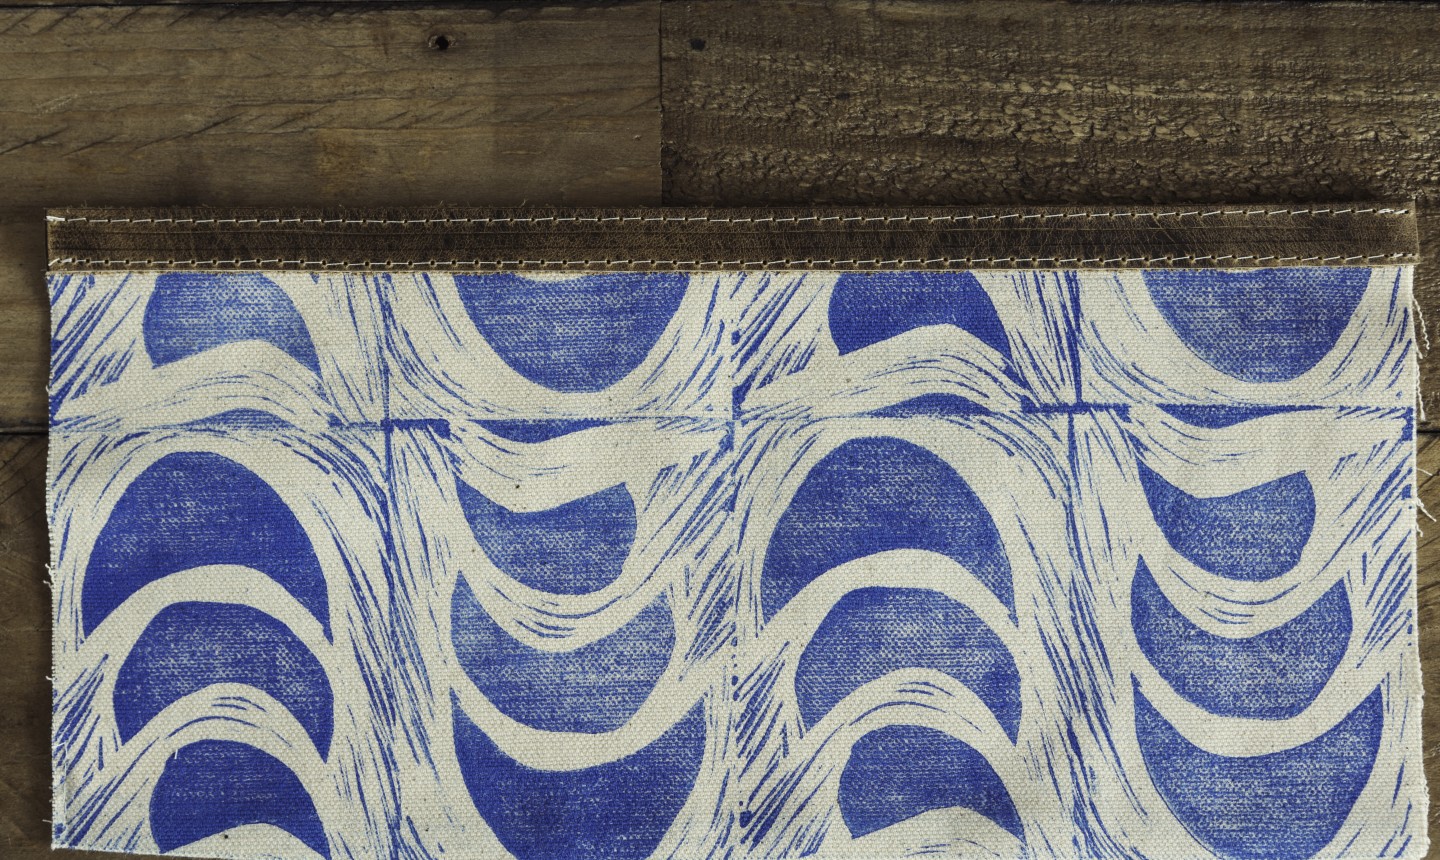
Place your 11″ x ½” leather strip at the top of your pocket and secure it in place with binding clips. Topstitch it with either your zipper foot or edge stitch foot, using a ⅛” seam allowance on both sides.
Pro Tip: Before topstitching your leather strip, test your machine needle on a piece of scrap leather to make sure your machine can handle the material’s thickness. And stitch carefully; once that hole is made on leather, it’s permanent!
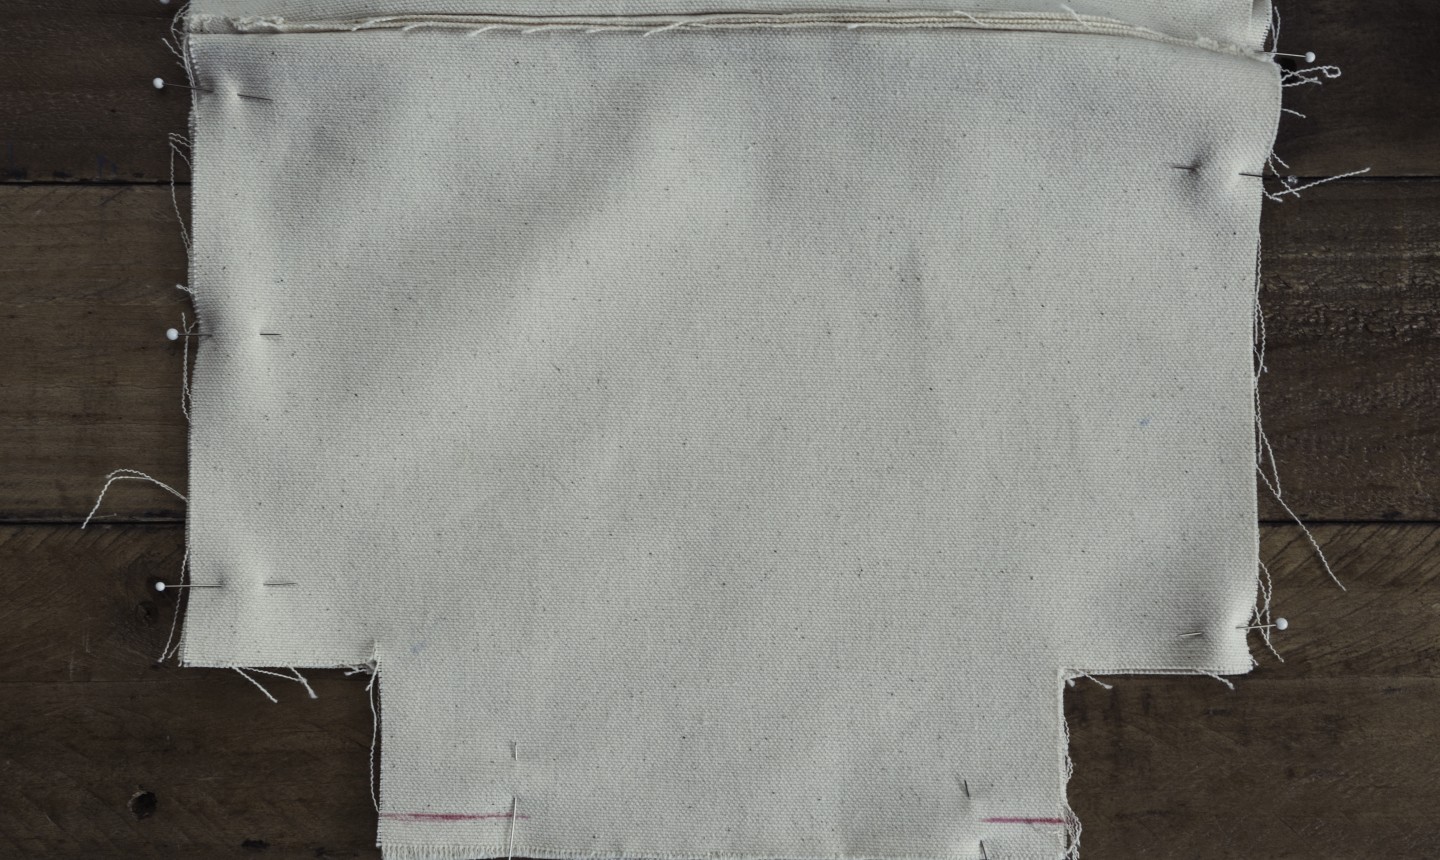
4. Attach the Pocket to Your Main Fabric
Measure 2½” up from the bottom of your main fabric. Mark a horizontal line across the front, then place the bottom of your pocket along that line with binding clips. Take it to your machine and edge stitch the bottom of the pocket. (Be sure you’re not attaching to the other layers of fabric.)
5. Divide the Pocket
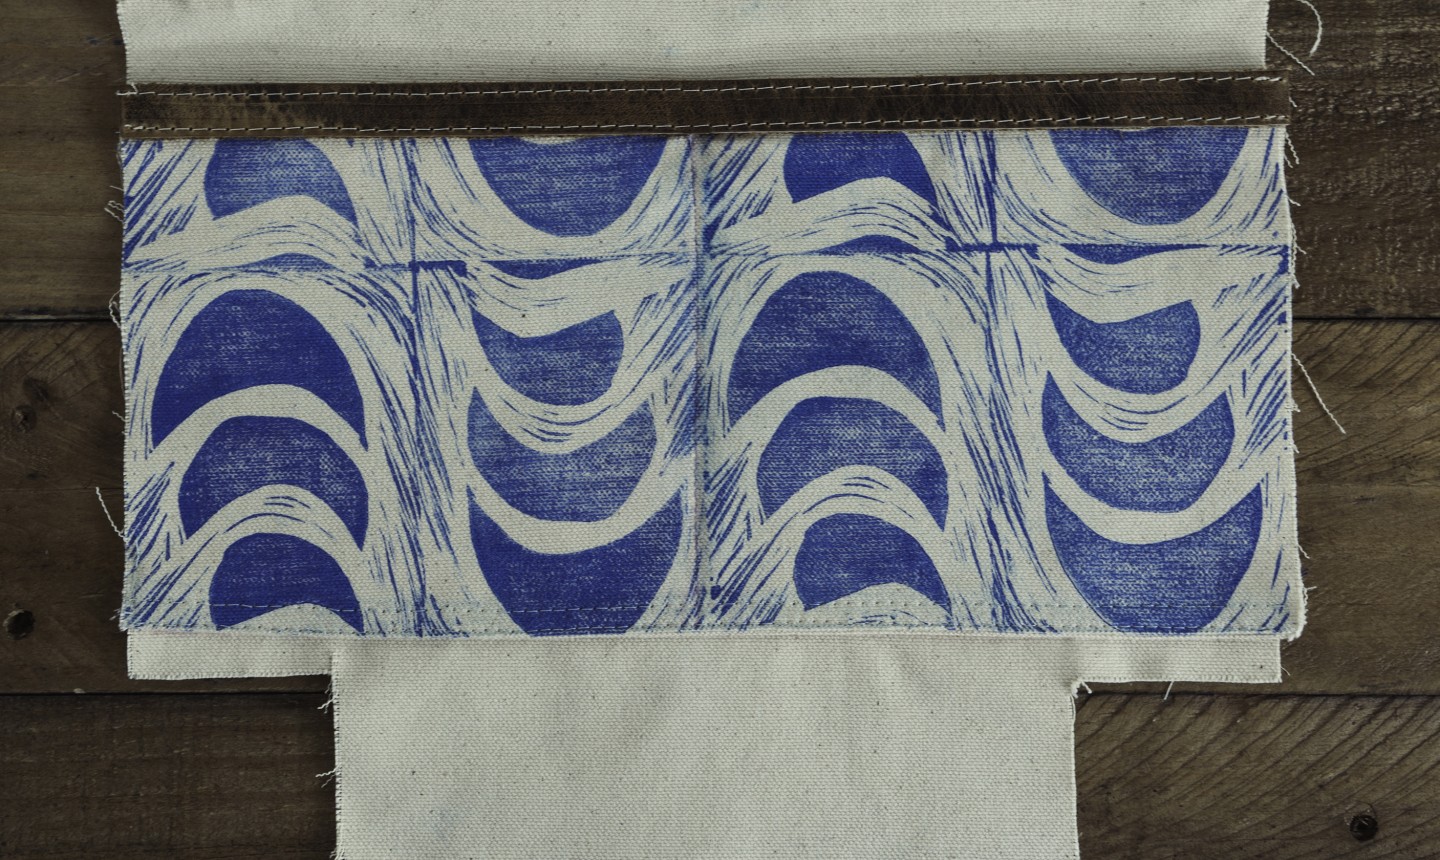
To divide the pocket — which you need so the pocket functions and doesn’t become flimsy — mark a vertical line 5½” from the left side of your pocket (this should put you right at the center of your bag). Topstitch the pocket fabric down to the main fabric along that line.
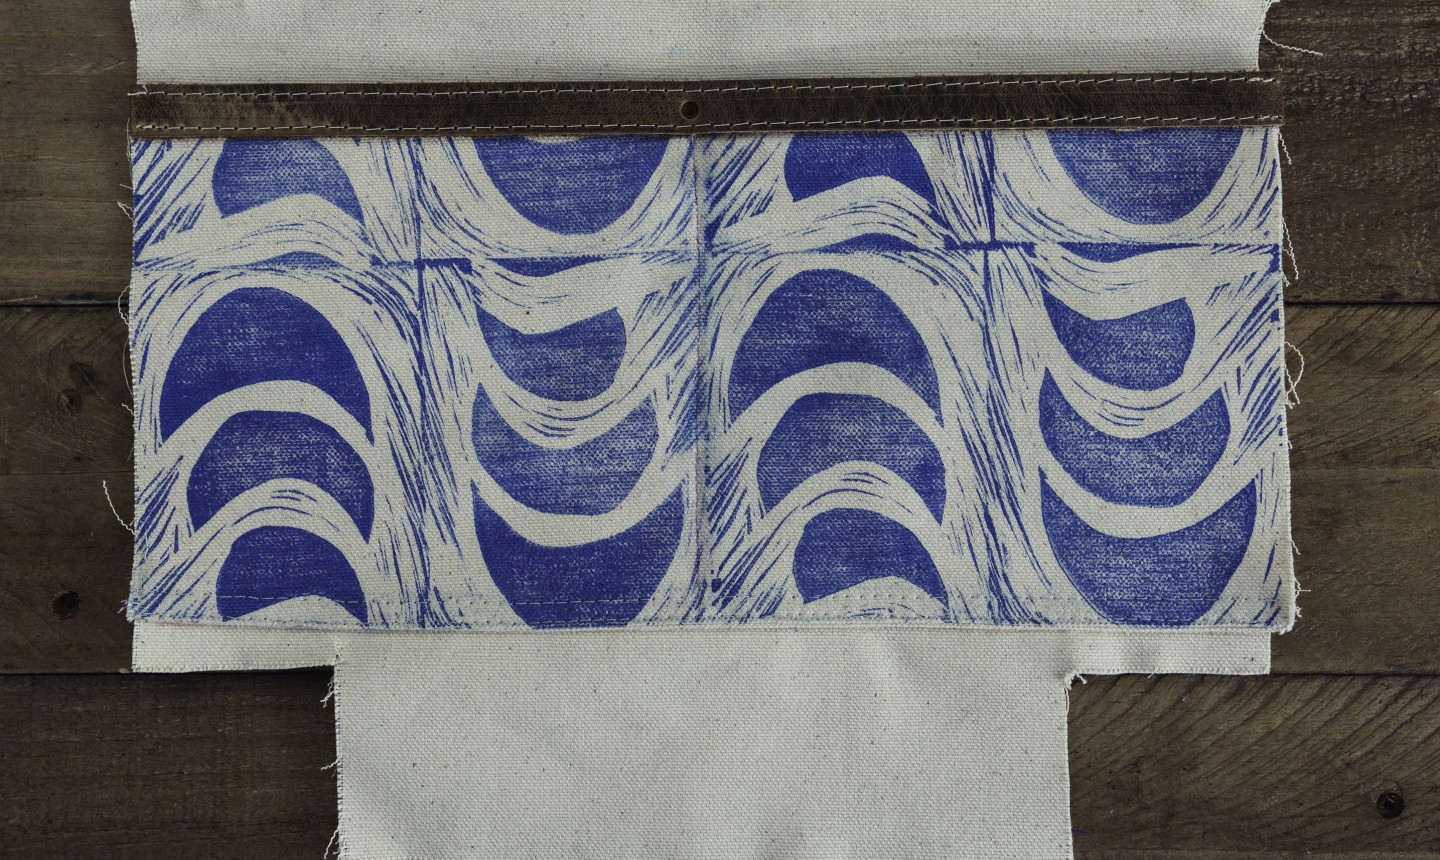
Pro Tip: It’s optional, but recommended that you baste the raw edges down once your pocket is attached and divided. It’ll help keep the fabric from flapping around when you sew your bag together.
6. Add a Rivet (Optional)
If you’re using a rivet, make a hole with your hole punch tool at the top of the pocket, right where your center divide topstitching is. Set your rivet in place (you’ll need a consumer-grade rivet setter for this), like in the photo below.
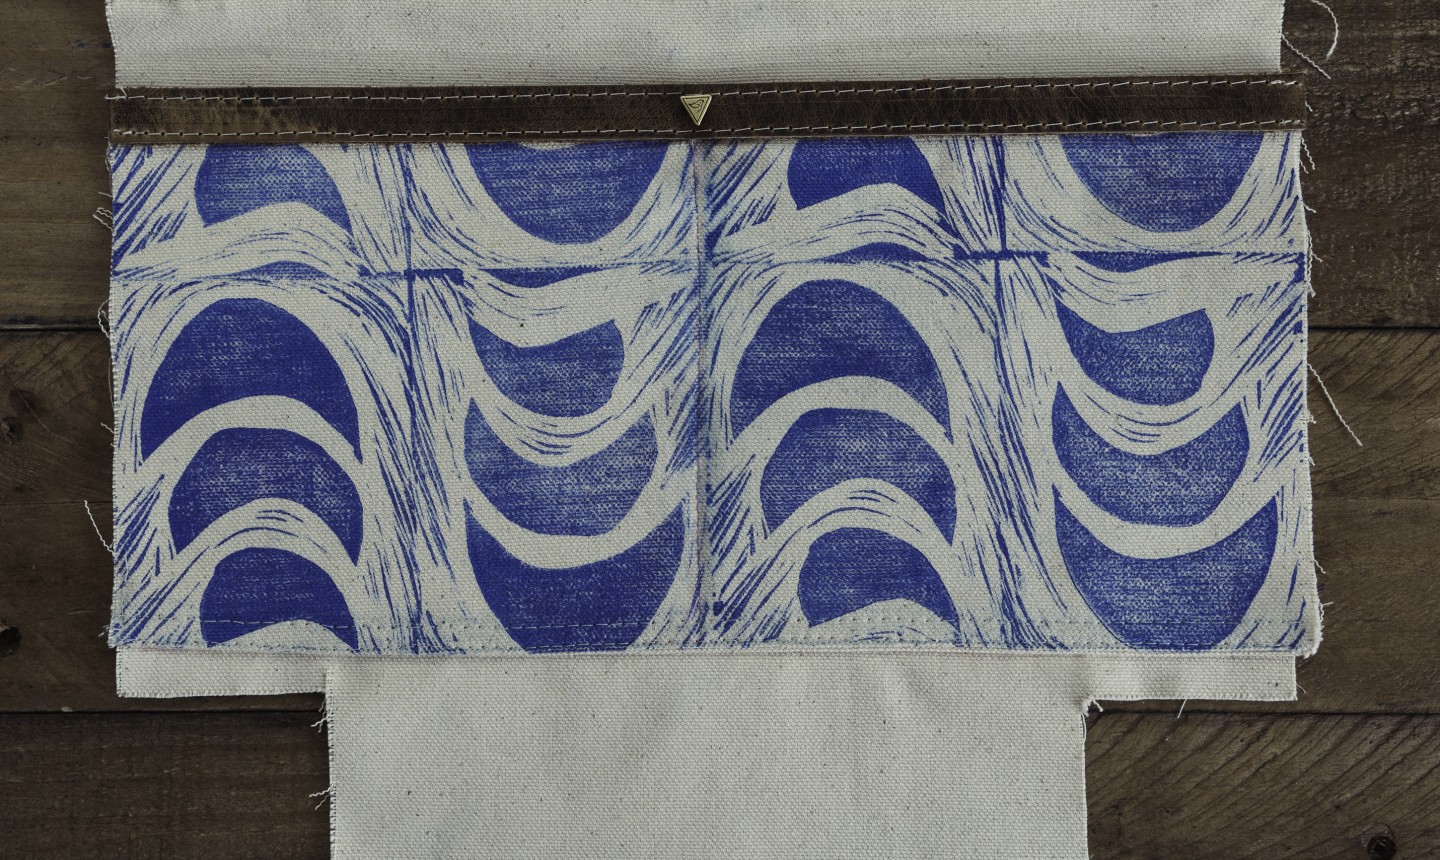
Good to Know: Rivets can add security to stress areas (places that bear weight or get lots of handling), which makes your bag sturdier, longer. They also add a fun texture element, and serve as a pretty accent!
7. Attach the Zipper
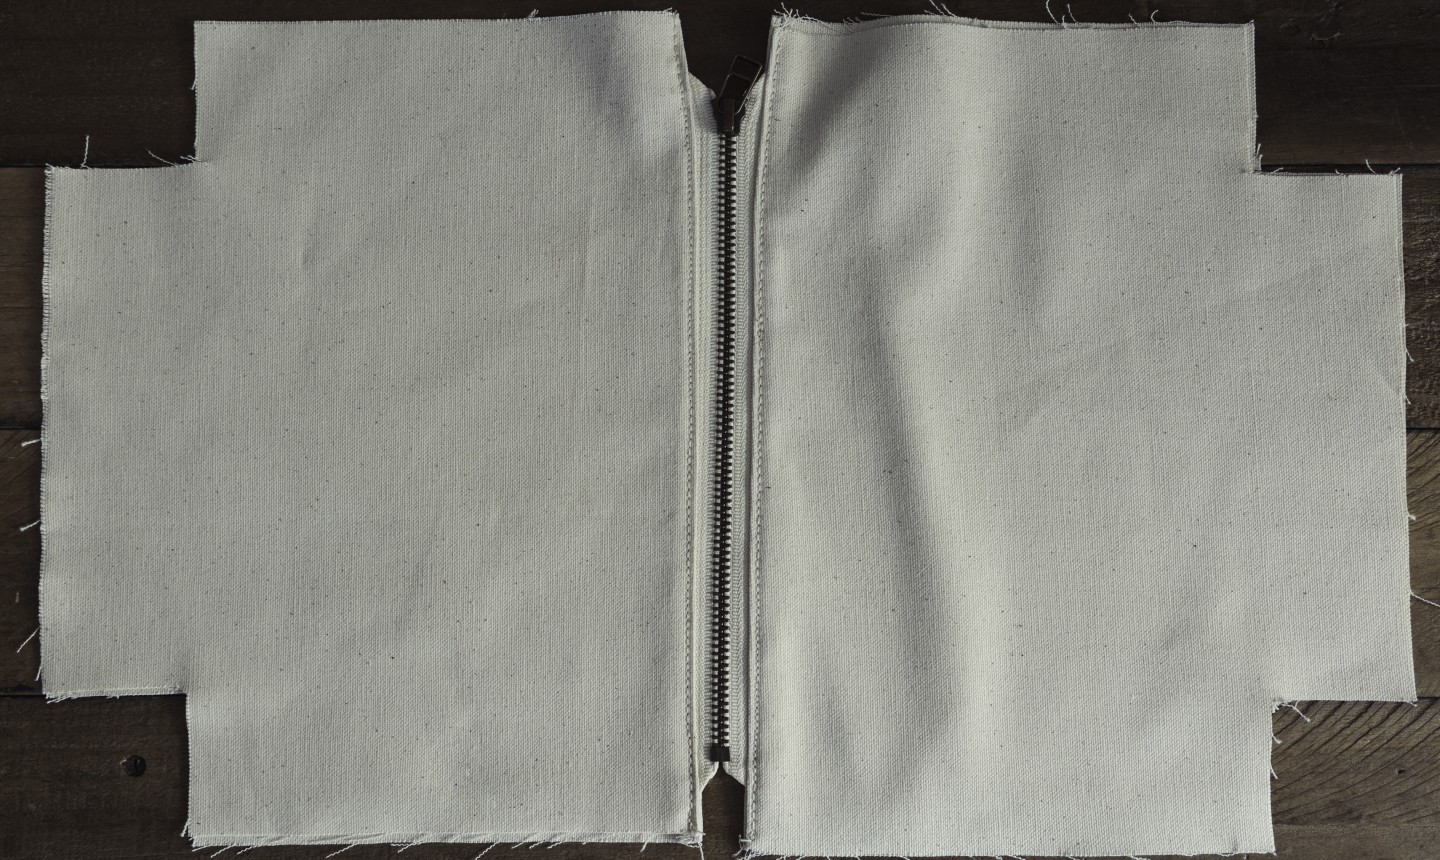
Place the zipper on top of a piece of main fabric, right-side down. Make sure the edge of the zipper is aligned with the edge of the fabric. Then, place the lining fabric on top, right-side down, sandwiching the zipper. Pin together, then use your zipper foot to sew together. Repeat on the other side of the zipper with the remaining main and lining fabrics.
Once it’s all connected, press both sides before topstitching where you attached the zipper for a more professional look.
8. Sew It All Together
Open your zipper halfway so that you can flip the purse right side out later. Lay your pouch, with the main fabrics and linings still right sides together, and pin all the way around (you can also use binding clips). Mark 5″ across the bottom of the lining that you’ll keep open, so that you can pull the bag through. Sew all around the pouch with a ¼” seam allowance, leaving the 5″ across the bottom open. (Note: Your seam allowance may change based on your zipper size.)
9. Box the Corners
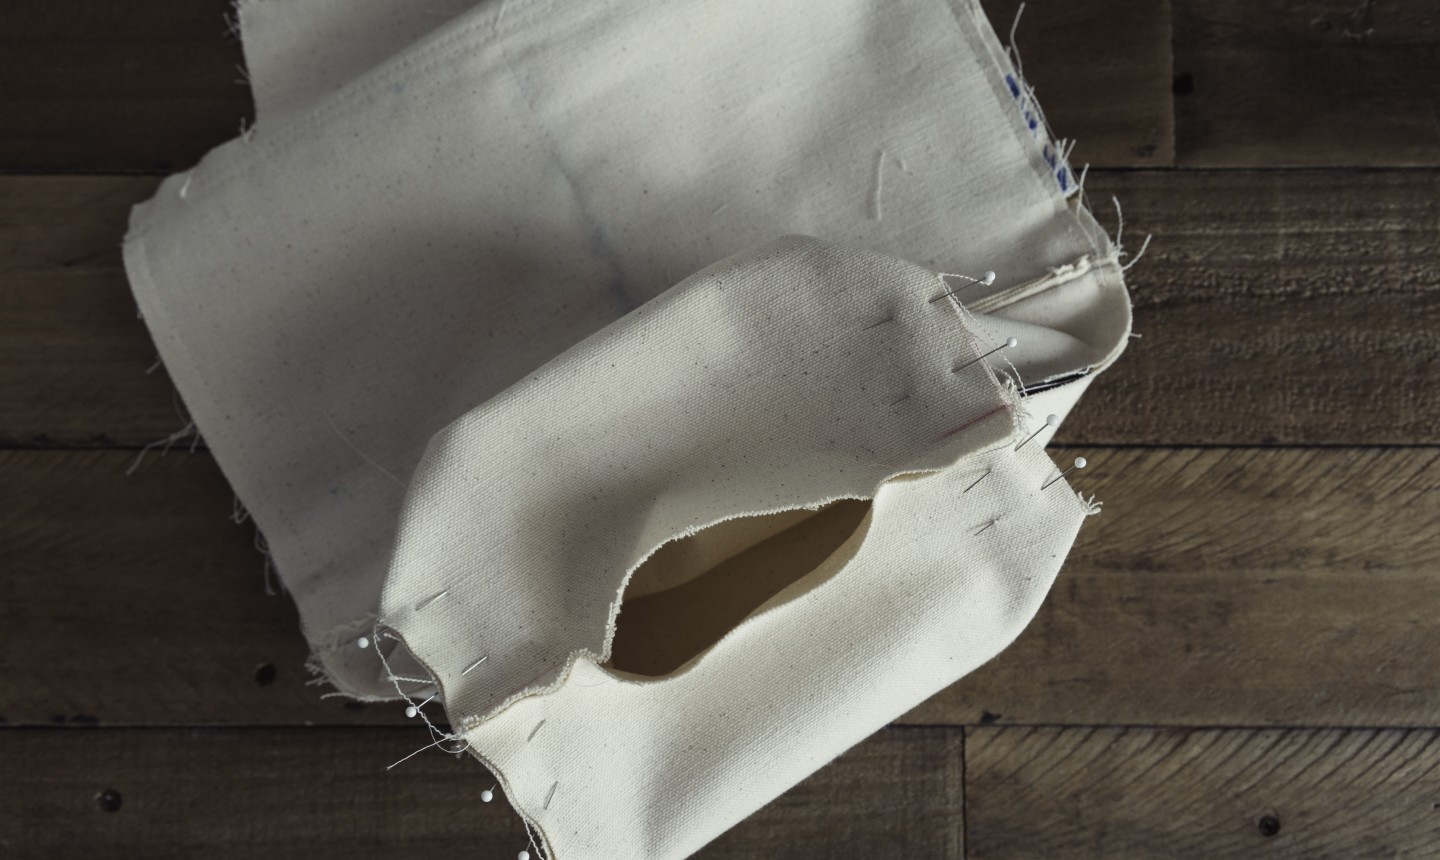
Pinch each of the pouch corners together, as shown in the photo. Sew each corner with a ⅜” seam allowance.

When each corner is done, stick your hand through the hole you left open in the lining and pull the pouch through so that it’s right side out!
10. Seal the Lining Closed
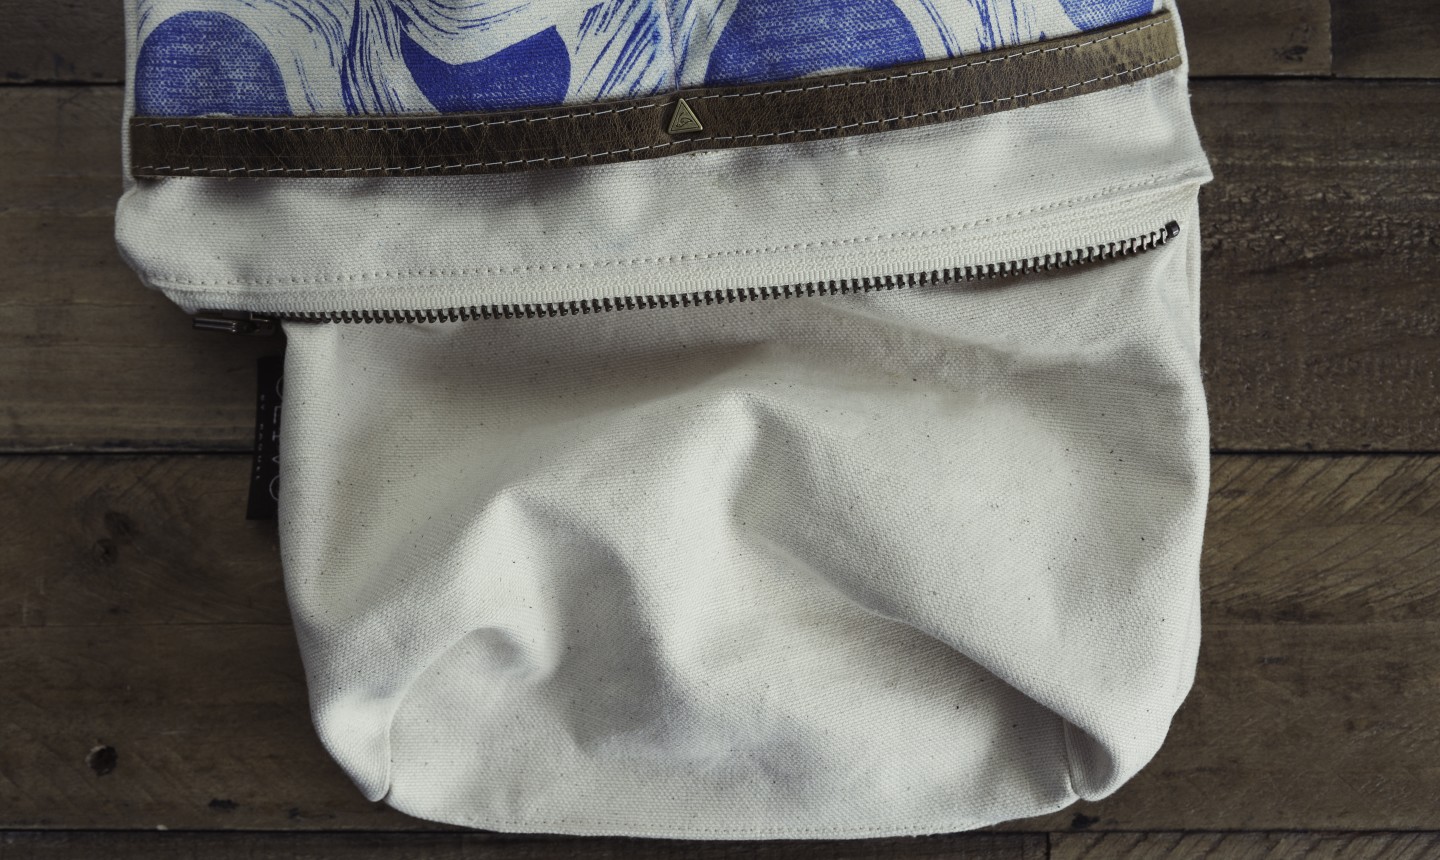
Iron the lining, then edge stitch it shut with a ⅛” seam allowance.
11. Add a Leather Zipper Pull (Optional)
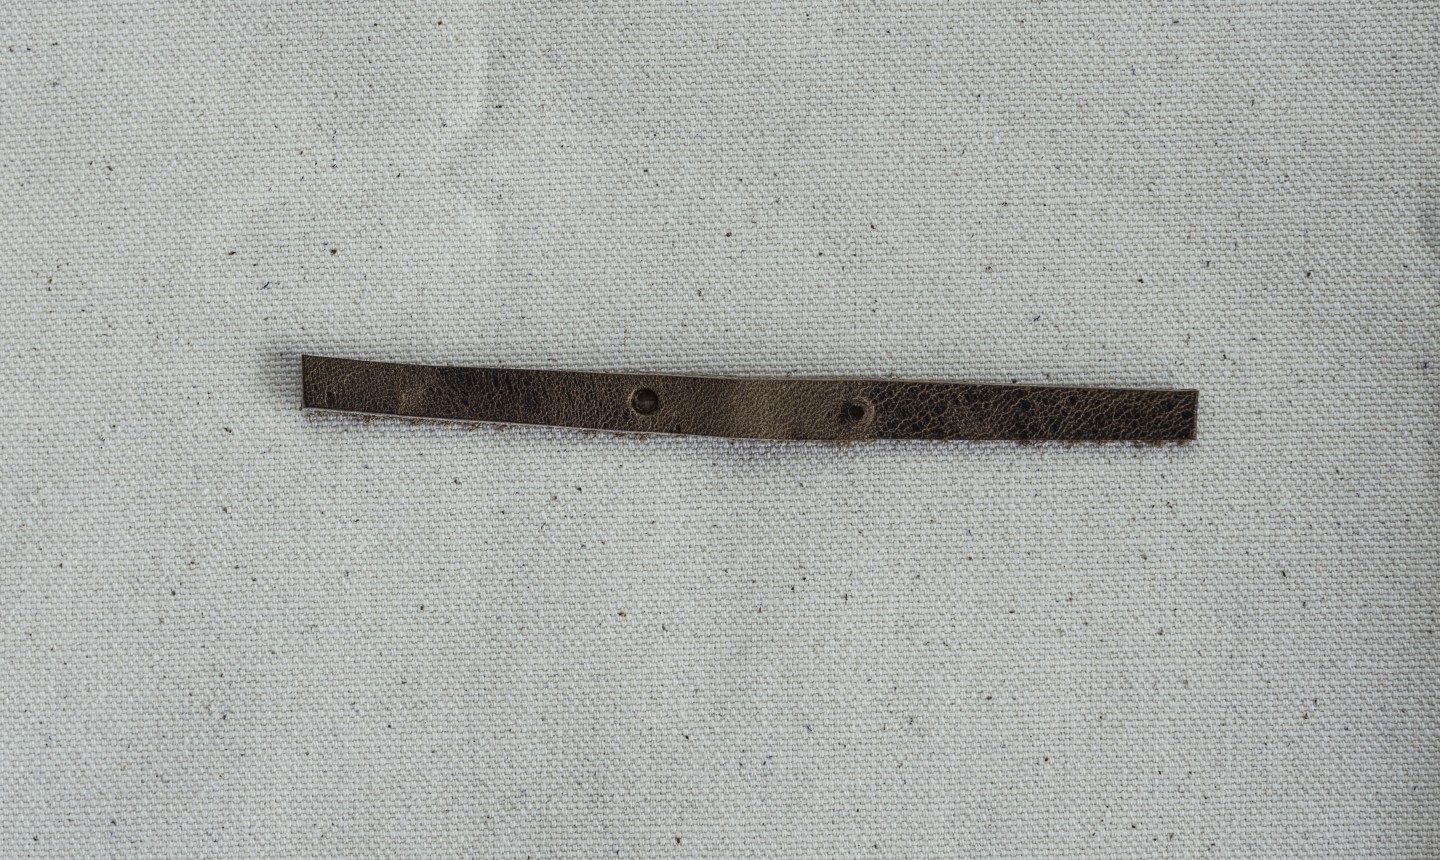
On the 5″ x ¼” leather pull, mark two holes where your rivet needs to be set. Make the holes using your hole punch.
Place the leather pull on your zipper, then fold the leather over itself so the holes line up.
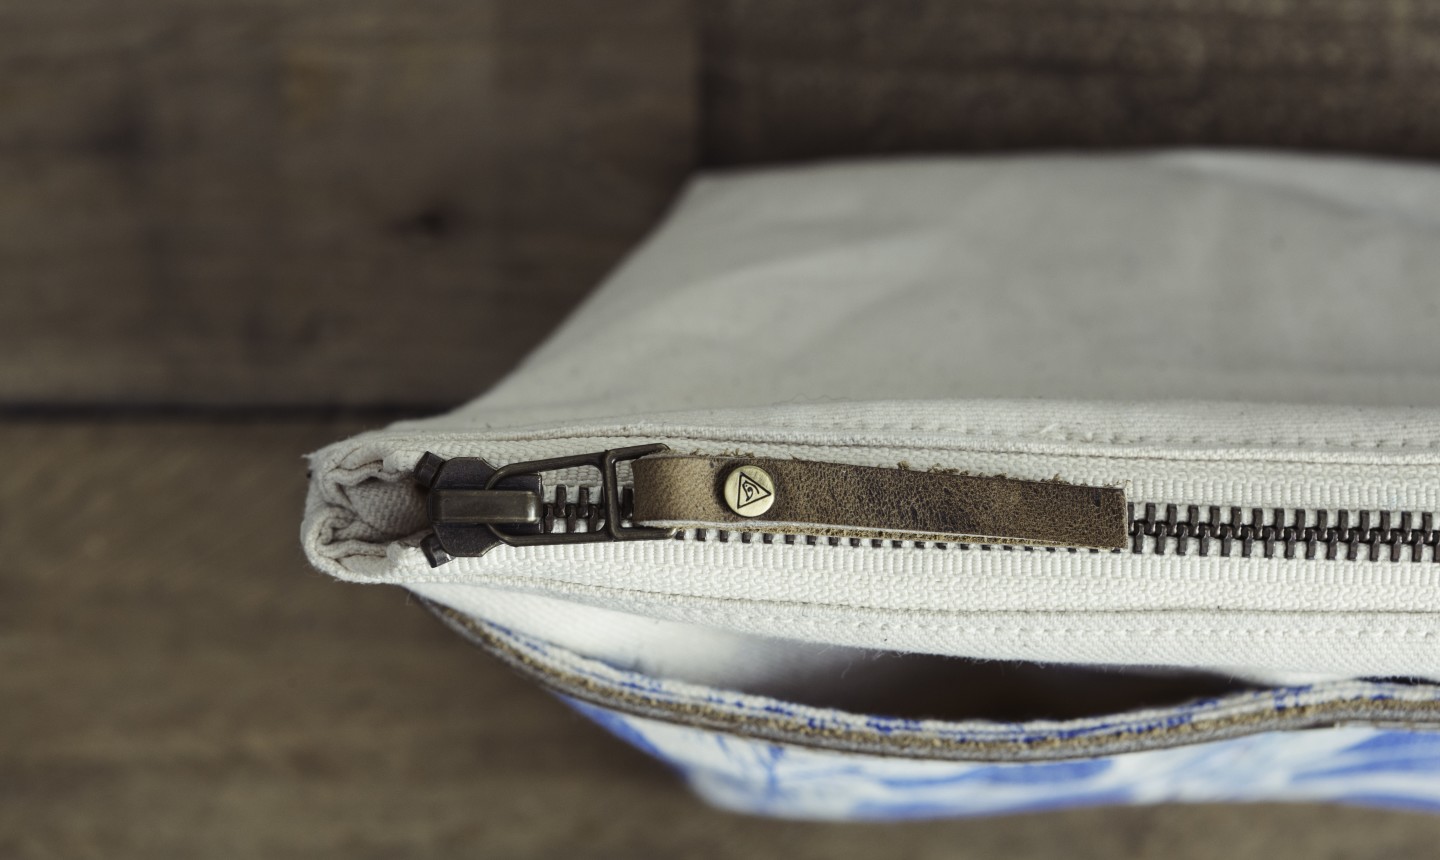
Place your 6mm rivet in the holes and set it in place to secure the leather pull.
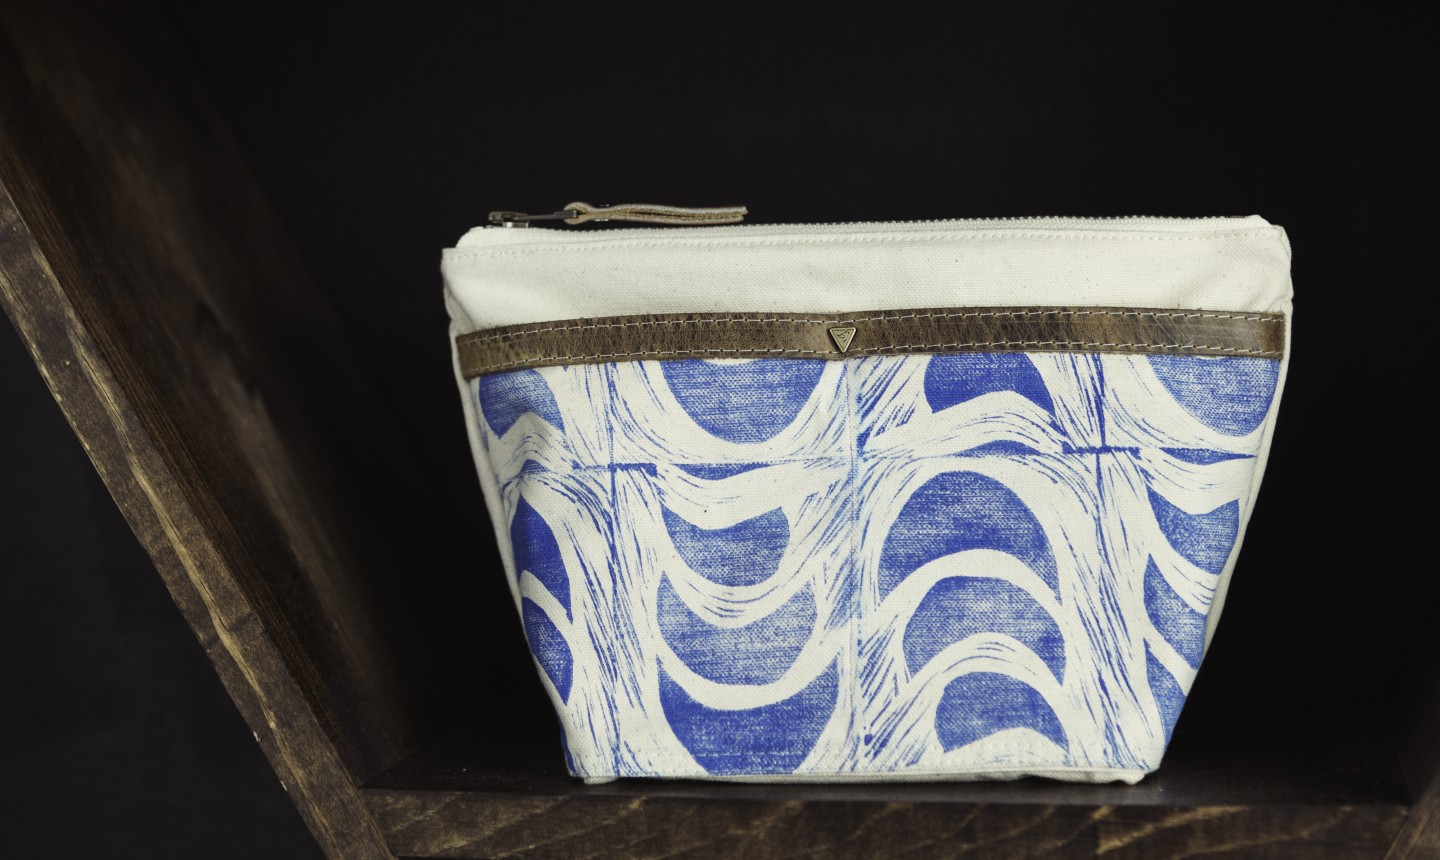
That’s it — say hello to your gorgeous new pouch!
Photos by Raquel Olivo
This is a very nice project. Thank you!
I was thrilled to see this pattern added to your "Articles" section. Keep up the good work.