
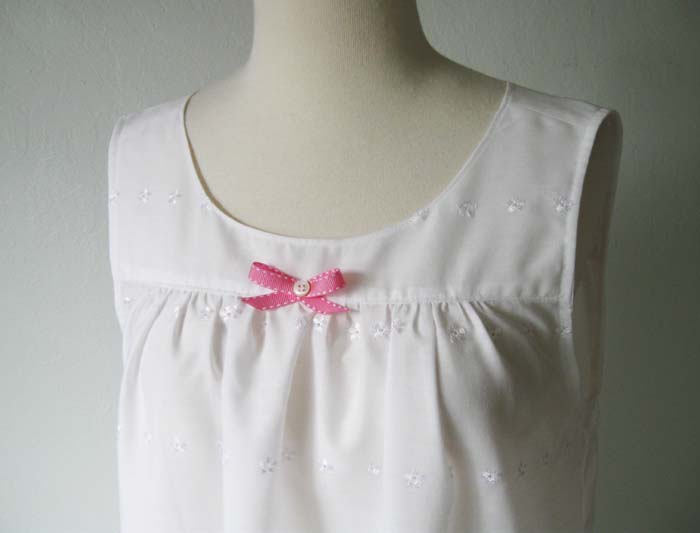
Ready for some sweet dreams in a lovely handmade nightgown? Read on to learn how to make a vintage-inspired nightgown pattern custom fit for you. Use a pretty lace-edged fabric for a Victorian style or perhaps a modern cotton lawn to create a more current look. The best part is that you can use a dress pattern from your stash to create your one-of-a-kind nightgown.
Make a custom nightgown pattern with this tutorial
Step 1: Select a dress pattern
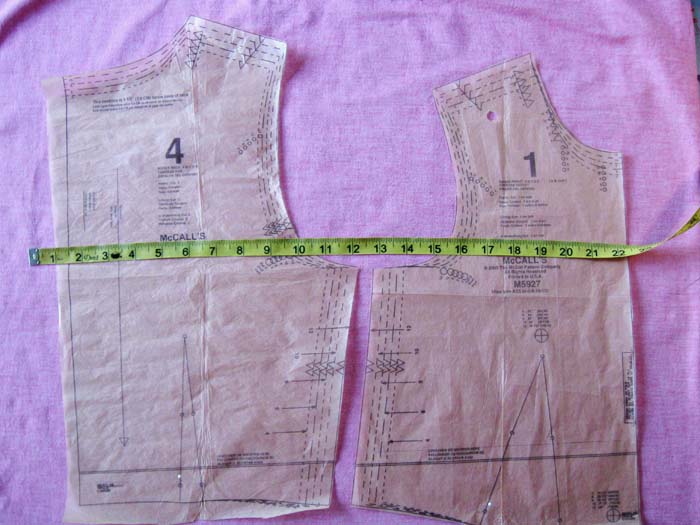
First, gather the front and back bodice pieces of a very basic dress pattern. We’ll use the pattern pieces as guidelines, so look for a pattern and size of a dress or top that fits your neckline and shoulders. It doesn’t have to fit exactly right, as nightwear is generally more roomy than daytime clothing. We will use the pattern pieces to create the yoke portion of the nightgown.
Here are some options for a dress pattern that can be used for the bodice portion of this nightgown design:
- Women’s Summer Dress by Petronela (this one’s free!)
- Cali Dress by Afternoon
- Lilium Dress by Magdalena Langa
Step 2: Create the yoke pieces
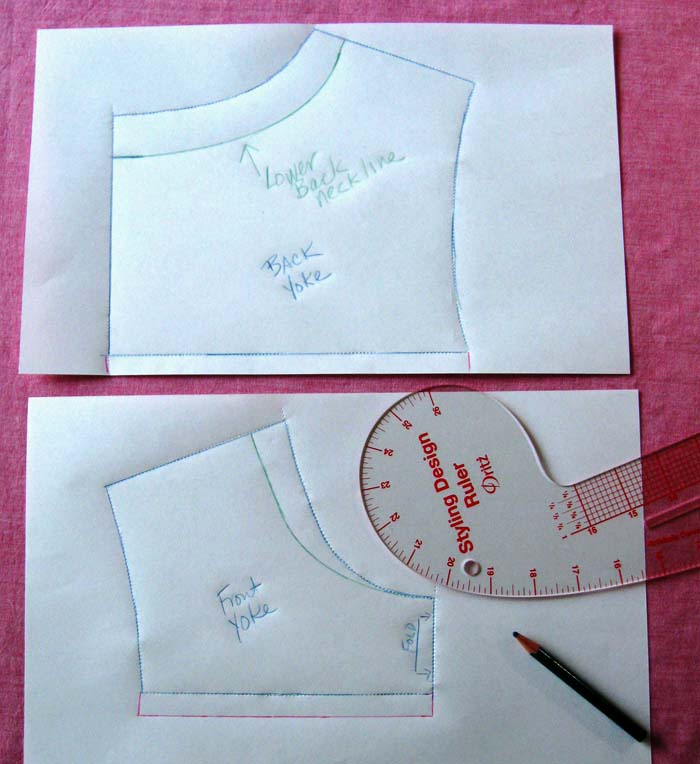
Trace the front and back neckline and shoulders. (The yellow measuring tape in the image for Step 1 shows about where to trace on the pattern piece to create the bottom edge of the yoke, both front and back.)
Next, measure the total neckline circumference on your pattern pieces. You need to be able to pull the gown over your head, as we are not adding any closure. On the dress pattern I used, the neckline seemed a bit high so I used the French curve to adjust it. If you’d like, now’s the time to change the shape of the neckline.
This also creates a comfortable neck opening to allow you to pull it on over your head. Measure your shoulder seams to make sure they match up and true up those seams if they don’t.
Step 3: Cut and sew yoke
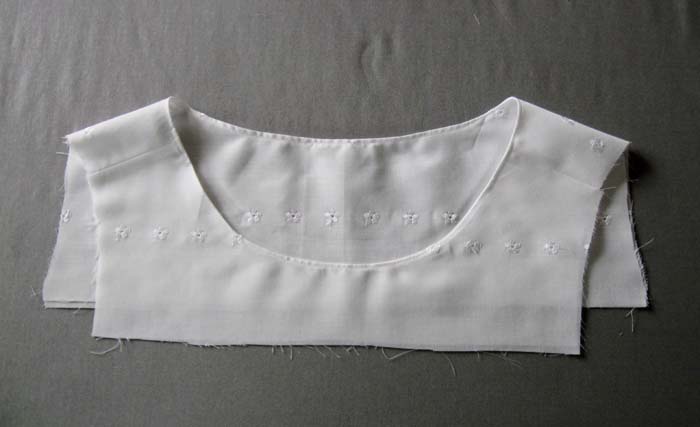
Cut out the front and back yoke pieces. For this version, I wanted a clean finish on the inside and out, so I have cut out two of each yoke and then sewed them together to create a facing and a nicely finished neckline. If you are working with a knit fabric or don’t want two layers, you can omit the facing piece and finish the neckline with bias binding. Leave the bottom of the front and back yokes open so the skirt portion can be attached there.
Step 4: Measure and cut the skirt pieces
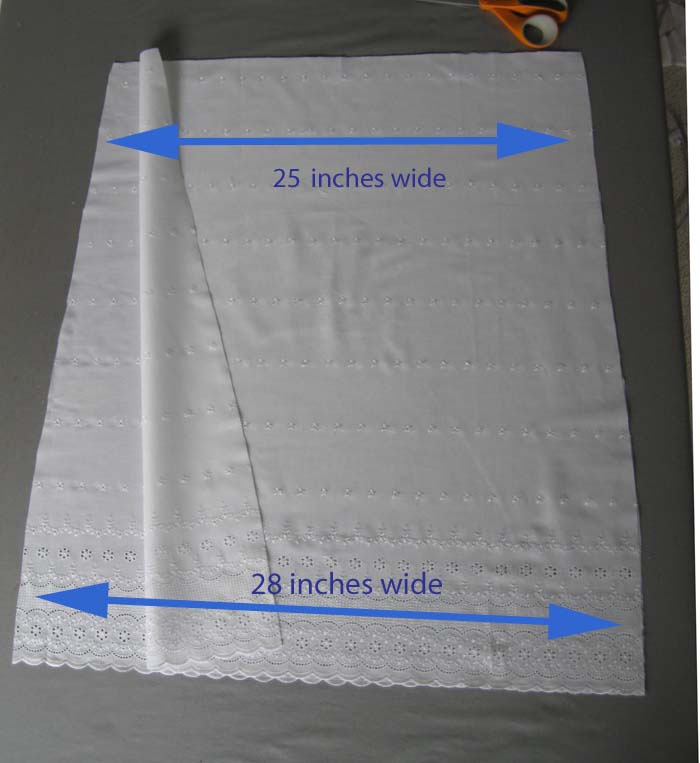
This nightgown will be around knee length, so the skirt pieces are approximately 30 inches long. For the width, use your bust measurement plus about 10 inches, and then divide by two for the width of each piece. This will allow for the gathers and create a comfy fit. The skirt shown here is a little wider at the hem but you can have it be straight or A-line. In a different fabric it would be cute with a wide ruffle at the hem.
Step 5: Attach the skirt to the yoke
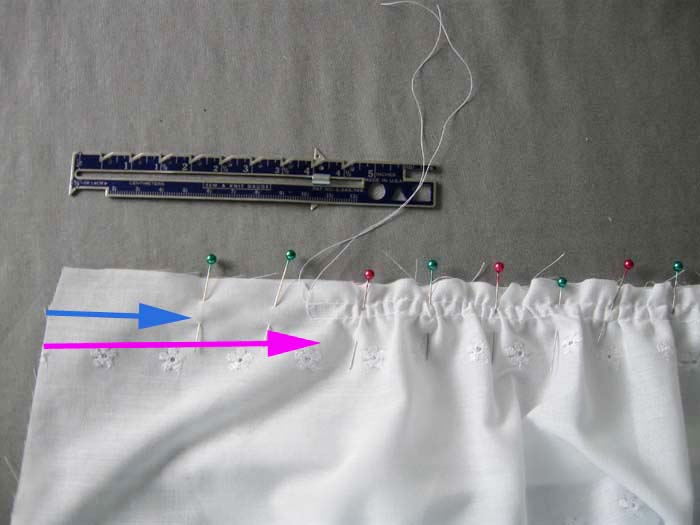
Fold the skirt pieces in half and mark a notch at the center top, as well as a notch about 4 inches in from the side edge. Run some gathering stitches across the top of both skirt pieces.
Pin the skirt to the front yoke, starting with the yoke spaced about two inches from the skirt-side edge (blue arrow) and then having the gathers start about 2 inches farther in (pink arrow). This is to allow some space at the side for the next step of creating the armhole curve. Sew the skirt portion to the front yoke and then repeat the same steps for the back yoke.
Step 6: Create and trim armholes
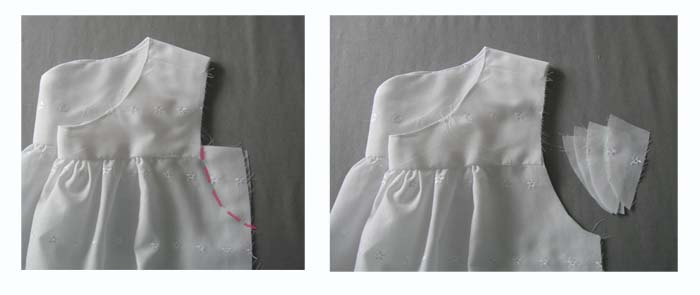
Fold the nightgown so that all four side edges are even, and then trim out an armhole shape as shown. For the depth of the armhole ,you can measure your own body, an existing nightgown or other sleeveless item, or measure the pattern you originally used. Note that on a nightgown, for comfort you will probably want the armhole to be a bit larger or lower than on a dress or top.
Step 7: Sew down yoke facings

Now that the skirt and yokes are attached and the armholes are cut, if you included a yoke facing, sew that down.
Next, sew the side seams of the nightgown. A nightgown is a great time to use French seams as they are quite simple to sew on these straight edges and give a lovely finish on the inside of the garment.
Lastly, finish the armhole edges with bias binding. My eyelet nightgown doesn’t need a hem, but if you have used a different fabric, then finish the hem edge or add a ruffle or lace.
Step 8: Put a bow on it!
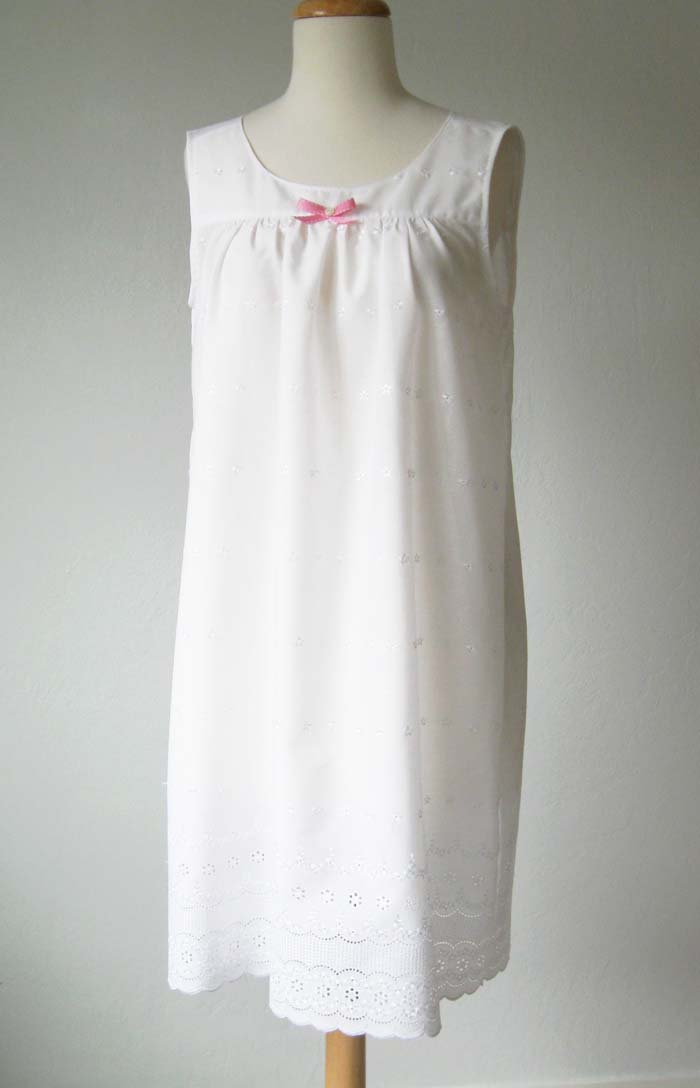
While it’s certainly not essential, a pretty bow or other embellishment completes the look. If you want a nightgown with sleeves, try the same method using a dress or top pattern with sleeves. For comfort, go up a size or two from your standard pattern or add some ease by sewing a smaller seam allowance.
A sew along would be super perfect
What type fabric are you using? Knit or woven or either 🤔
Good work
Thank you for this pattern. The finished product looks very elegant. Can you give me an idea of how much fabric to buy? (Bust 32, length 33). Also, I intend to make just like you have, with facings, but don’t know how to bind the bottom sections of the armholes. Is there a link to instructions? Thank you.
I really like this and will be giving it a try as I need a new nightgown this summer. Thanks for showing me how to use a dress for the bodice top.
Nice work