
Let’s be real: you can make the most gorgeous kitty drawing, but if you don’t get the eyes just right, the whole thing can look a bit off. Don’t be a scaredy cat — perfecting feline eyes is easy if you know how to tackle the task.
Cat Eyes
Level: Easy
What You Need
Instructions
1. Know the Anatomy
Essentially, a cat’s eye has the same anatomy as a human’s: each eyeball sits back in the skull and is partially covered by the eyelids. So, just as you would when drawing a human head, sketch out the placement of features using guidelines first.
To place the eyes, divide the face in half vertically and horizontally. The eyes should go along a horizontal line halfway between the top of the head and the center horizontal guide. Use the center vertical line to space the eyes apart. Usually, the distance between the cat’s eyes is the equivalent of one eye — again, just like a human.
2. Sketch the Basic Shape
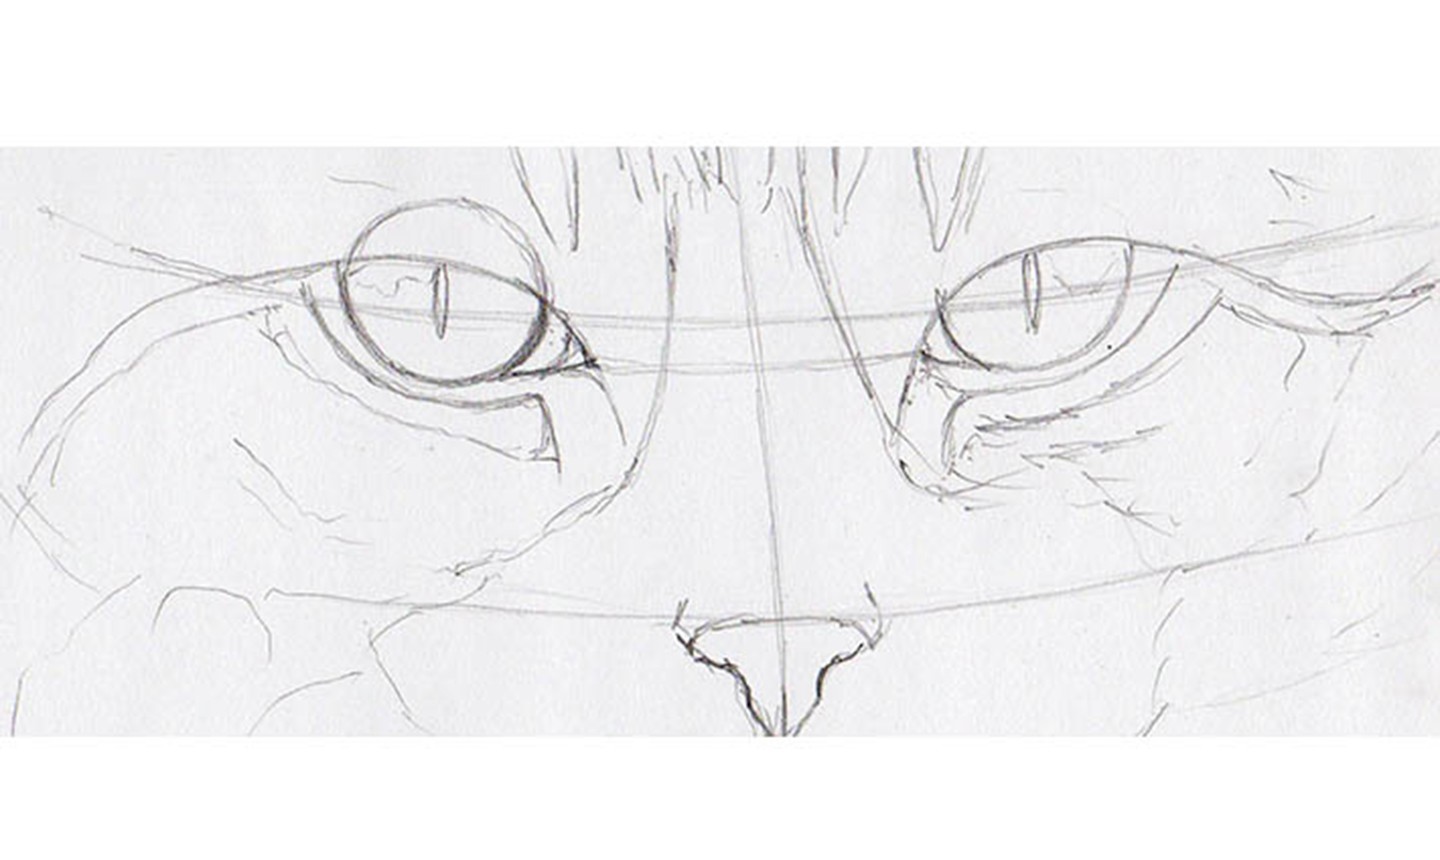
Now start drawing the eyes. Remember to use light pencil strokes; you’ll erase some of these marks as your drawing progresses.
Begin with a circle, then turn your attention to the shape of the eyelids and how each covers the eyeball. The upper eyelid considerably covers the eye, while the lower lid curves around it (refer to the left eye in the image above).
The inside corner of the eye is normally lower than the outside corner. You can draw more horizontal guidelines to make sure these corners are aligned. When your lids are sketched, erase the excess circles above the top eyelids.
3. Draw the Details
Start blocking in the details — this is when it’s super important to pay close attention to your reference photo. Draw the cat’s pupils (these can range from skinny capsule-shaped lines to big, round, black circles) and lightly sketch in any highlights.
Pro Tip: When the basic features are in place, rotate your drawing upside down to check for mistakes. Awkward or uneven shapes become much more noticeable from this POV. Fix them before you start shading.
4. Shade the Eyes
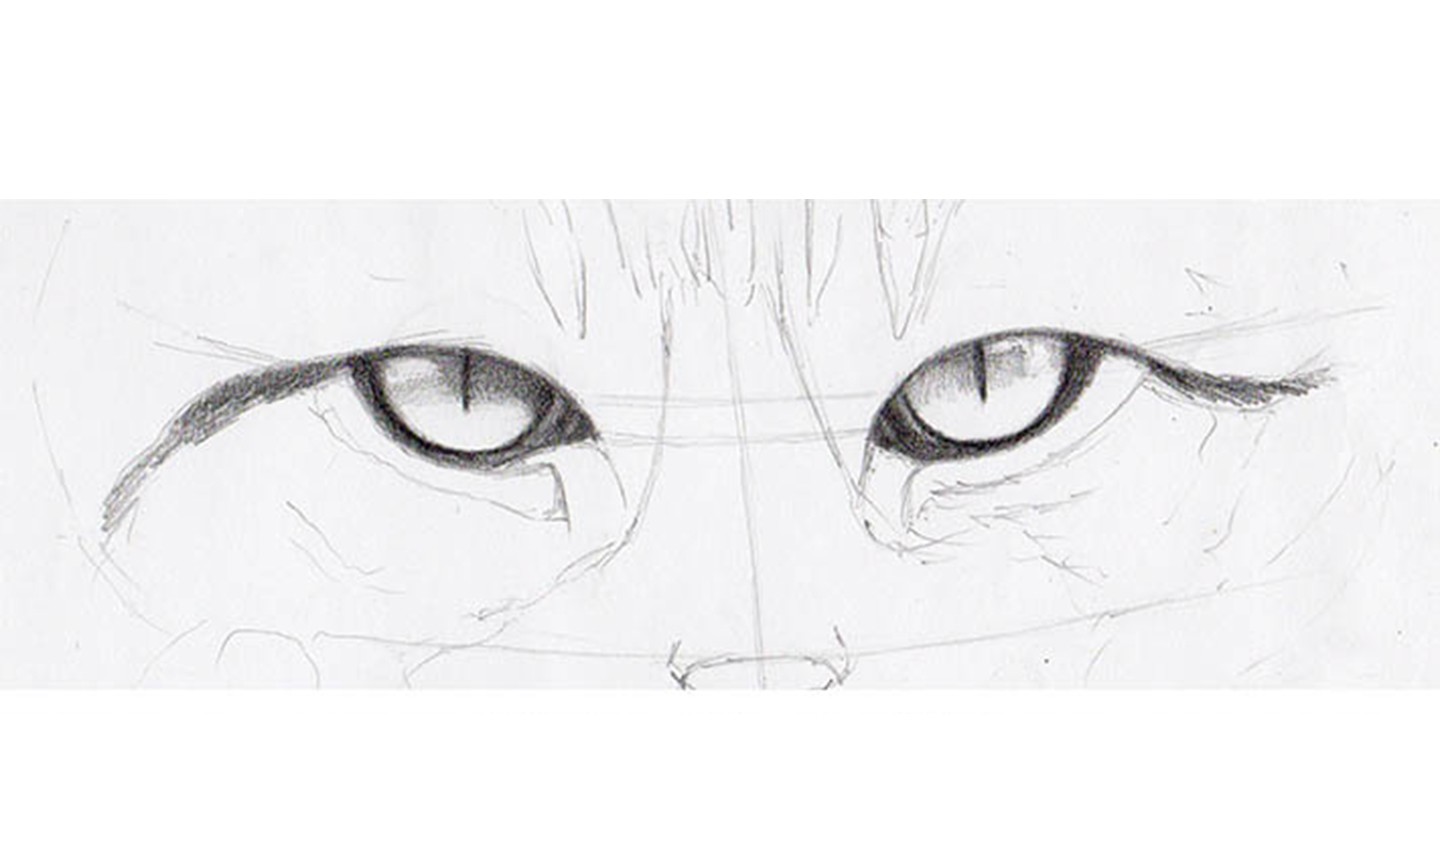
When you’re happy with the basic sketch, begin shading with a 4B graphite pencil and a kneaded eraser. Start by shading the pupil, then add a shadow many first-time cat eye artistes might not think about: a cast shadow from the upper eyelid. It may be subtle, but this detail adds so much realism to your drawing. It’s actually the key to making the staring cat eyes look lifelike and appealing and not like a zombie cat staring into your soul.
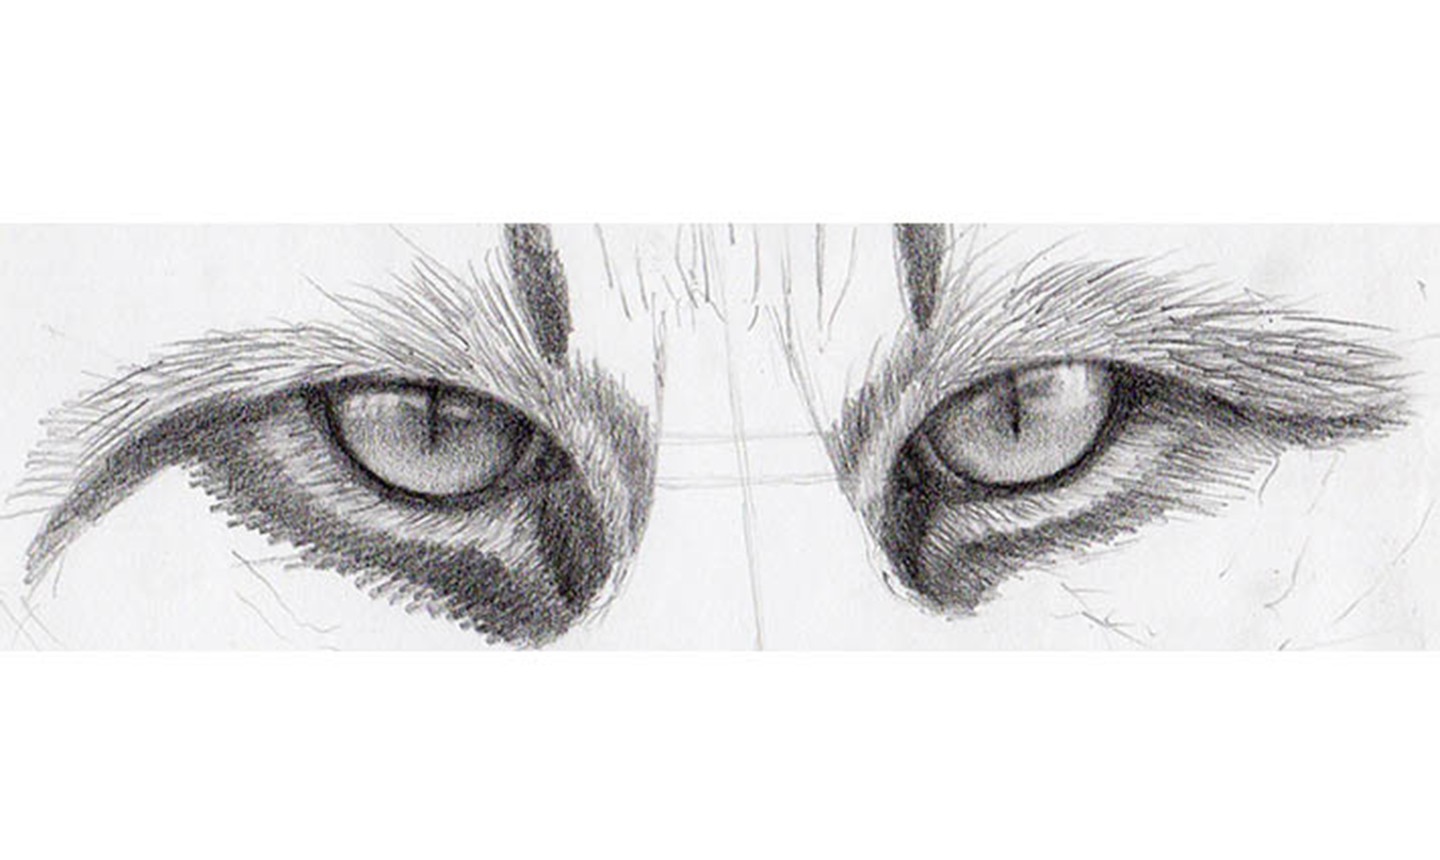
When you’re done with the eye itself, shade in the tones along the bottom lid using dark, soft strokes. Make sure to shade along the curvature of the lid so you don’t lose the roundness of the eye. Shade around the top eyelid as well. Then use your kneaded eraser to lift areas of the inside corners to add details with soft light. Don’t forget to define the highlights and reflections in your cat’s eye with the eraser as well!
Check your drawing against the reference photo and make any necessary adjustments before moving on.
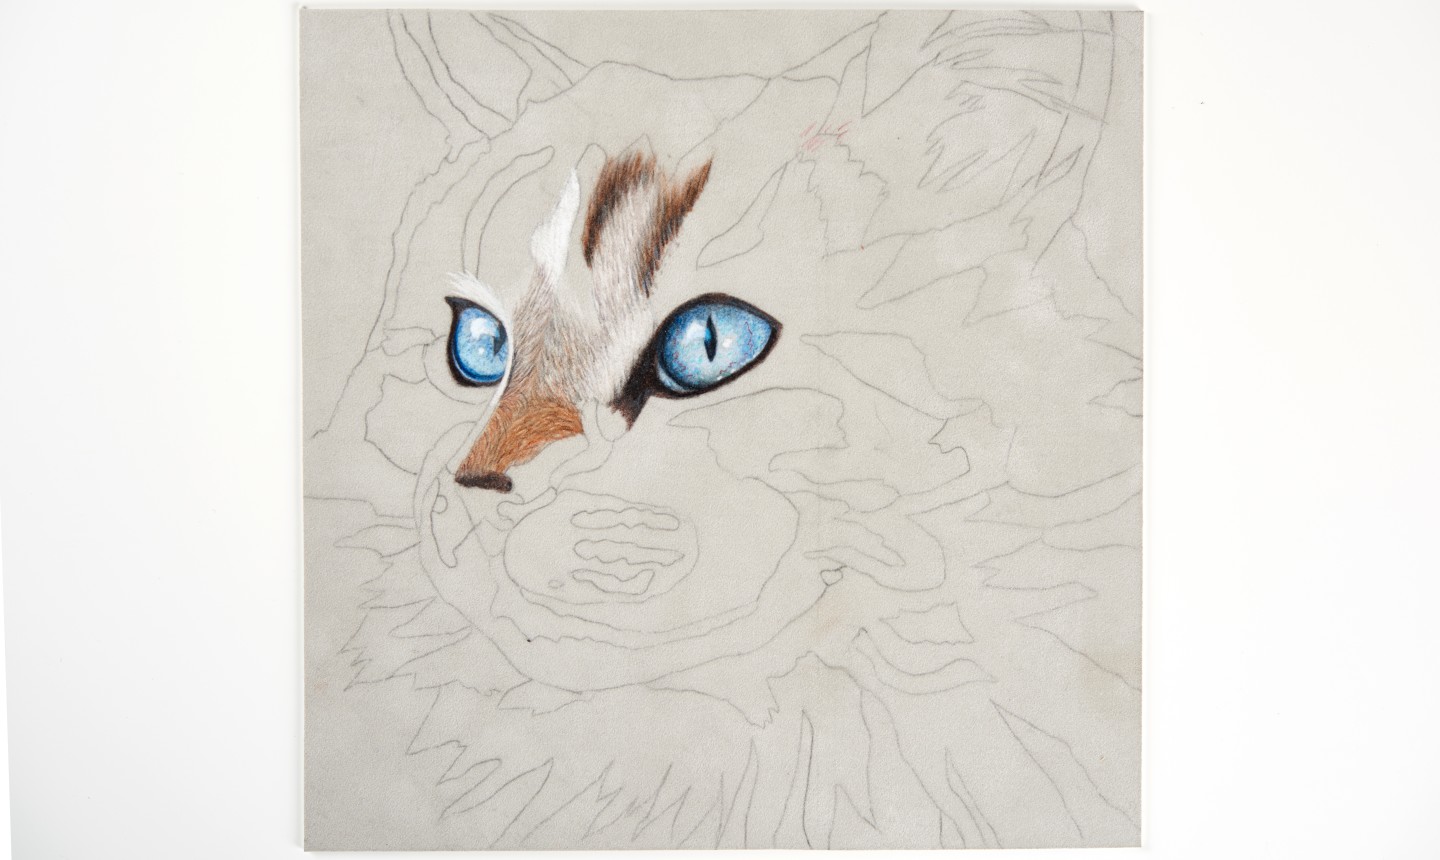
5. Shade the Surrounding Fur
Successfully shading the eyes is just the beginning! You need that soft, fuzzy surrounding fur to complete the effect. Work with these special strokes to get the most realistic depiction.
Pay attention to the length, color and direction of the fur. Work slowly and keep the direction of your strokes consistent with what you see in your reference photo. Alternate between using your pencil and kneaded eraser to achieve the values and details. When you’re satisfied with your progress, keep building and sketch in the entire face. Purrrfect!
Good to Know: The rules for sketching cat eyes are the same, no matter your medium. Things only differ when it comes to shading or adding color. Watch the our class Pet Portraits in Colored Pencil for a detailed step-by-step!
hard