
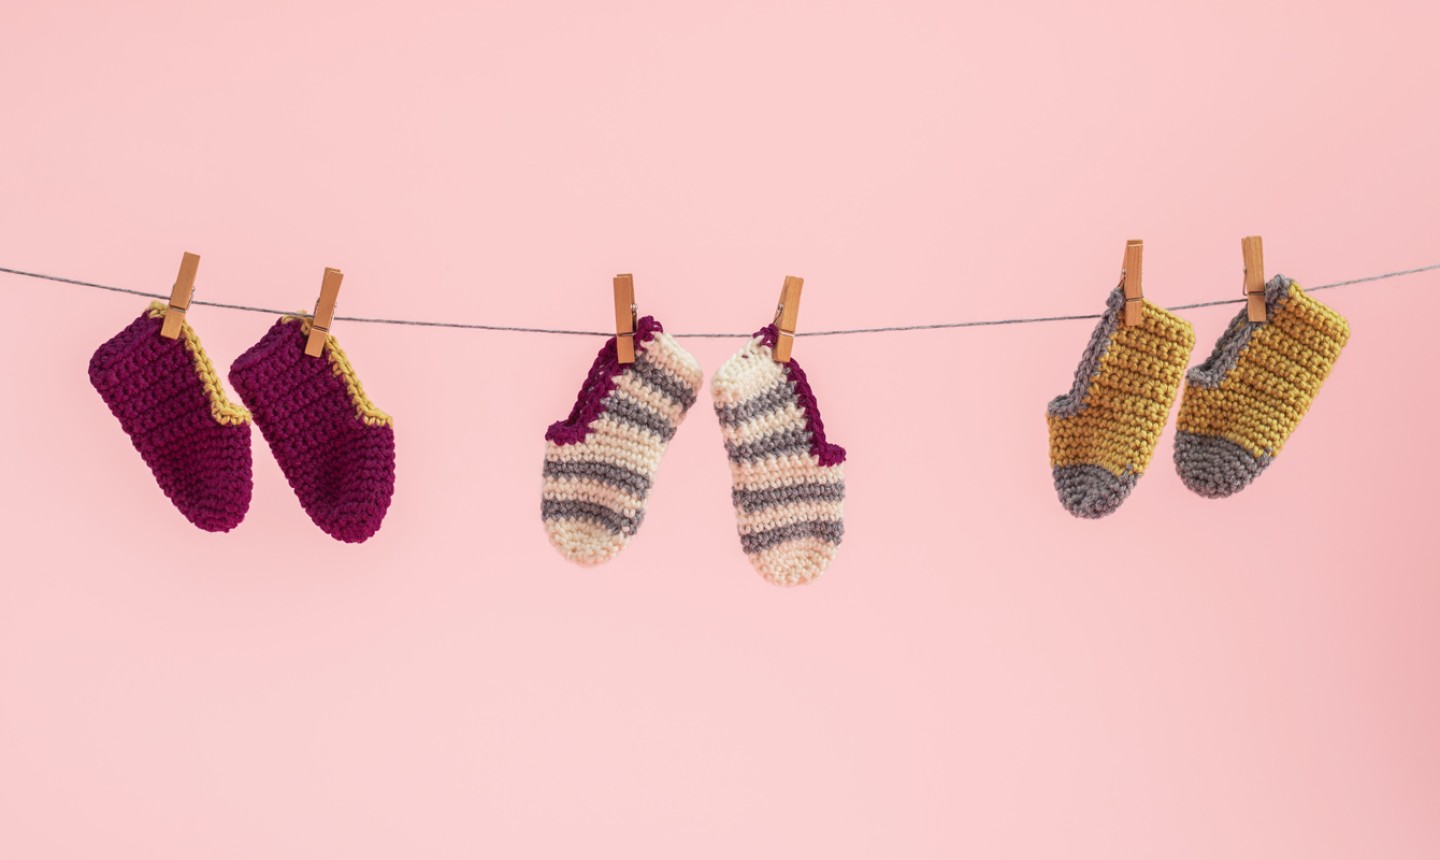
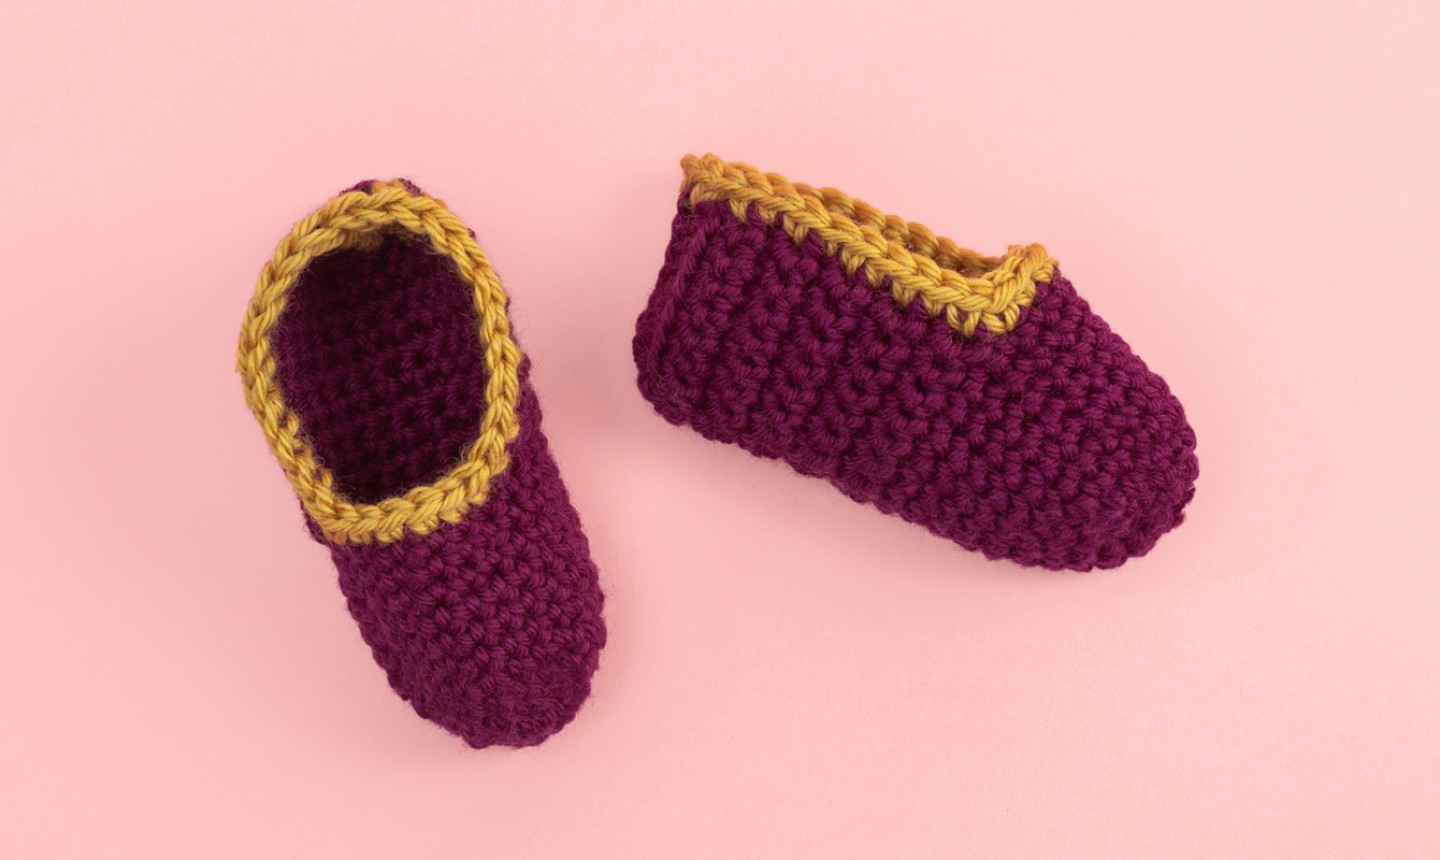
Fact: babies can never have enough booties: And since those little wiggly toes grow so fast, you’re going to want to make a bunch. Lucky for you this pattern is super simple and super fast. So simple, in fact, that the pattern stays the same, regardless of which size you’re making: just switch up your yarn and hook to whip up different sizes.
Crochet Baby Booties
Level: Easy
Size: 0-3 months, 3-6 months, 6-12 months
What You Need
0 – 3 Months
3 – 6 Months
6 – 12 Months
Finished Measurements
Keep in mind that the booties will have a bit of stretch. The measurements below are for the booties “at rest.”
Gauge
Abbreviations
Instructions
Work the Toe
This part of the pattern is worked in a spiral.
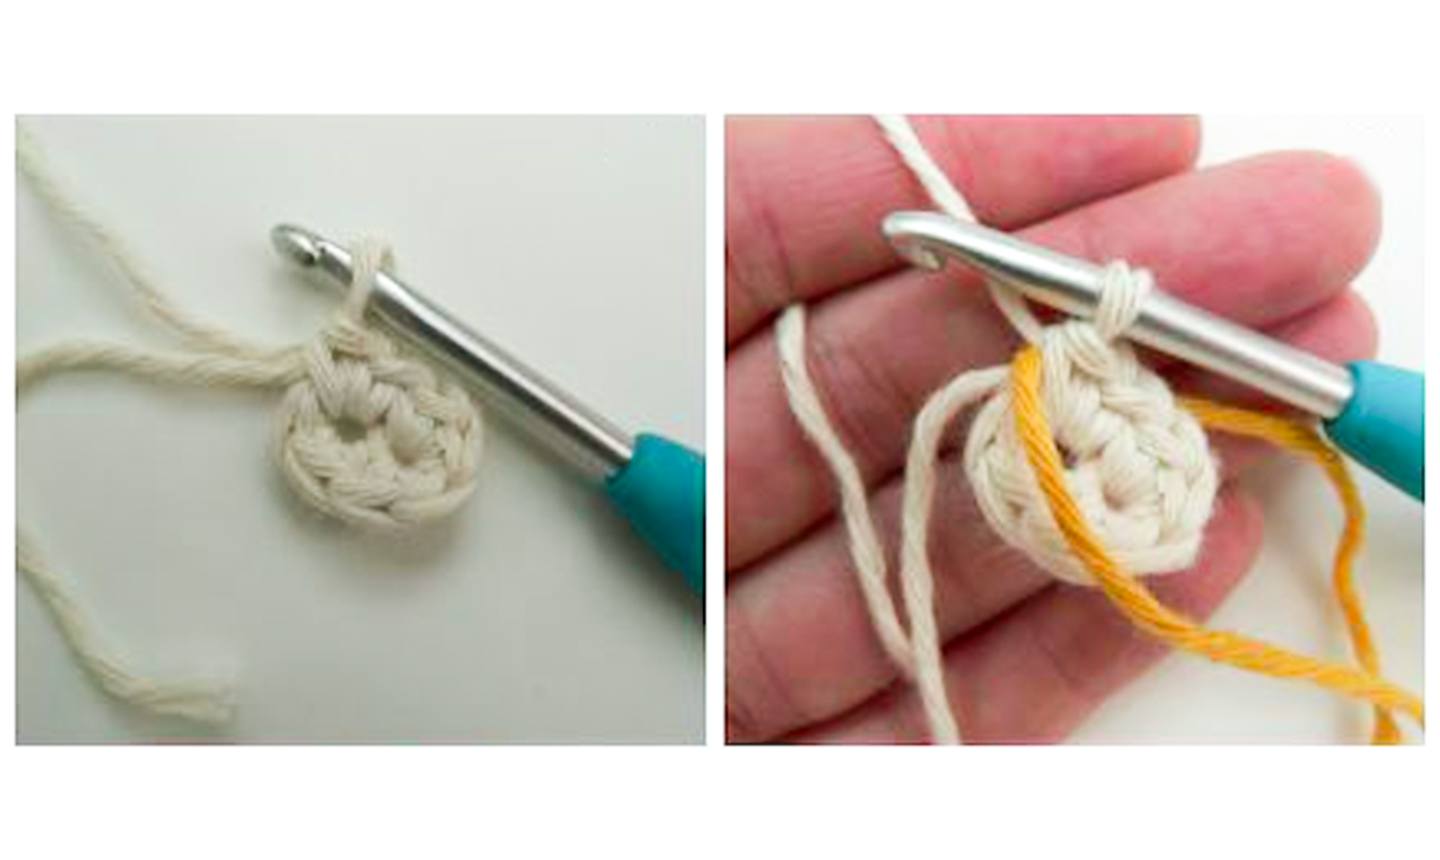
Rnd 1: Ch 3. Make 2 sc in the second ch from the hook. Make 4 sc in the next chain.Working into the opposite side of the chain, 2 sc in the chain that already contains the first 2 sc. (8 sts)
Pro Tip: When you work in the round, it’s easy to lose track of where you started. Use a piece of scrap yarn to mark the start of each round (as we’ve done here), and just flip it back and forth at the start of a round. Then pull it out when you’re done. If you’d rather use stitch markers, you totally can — just mark the first stitch of the next round.
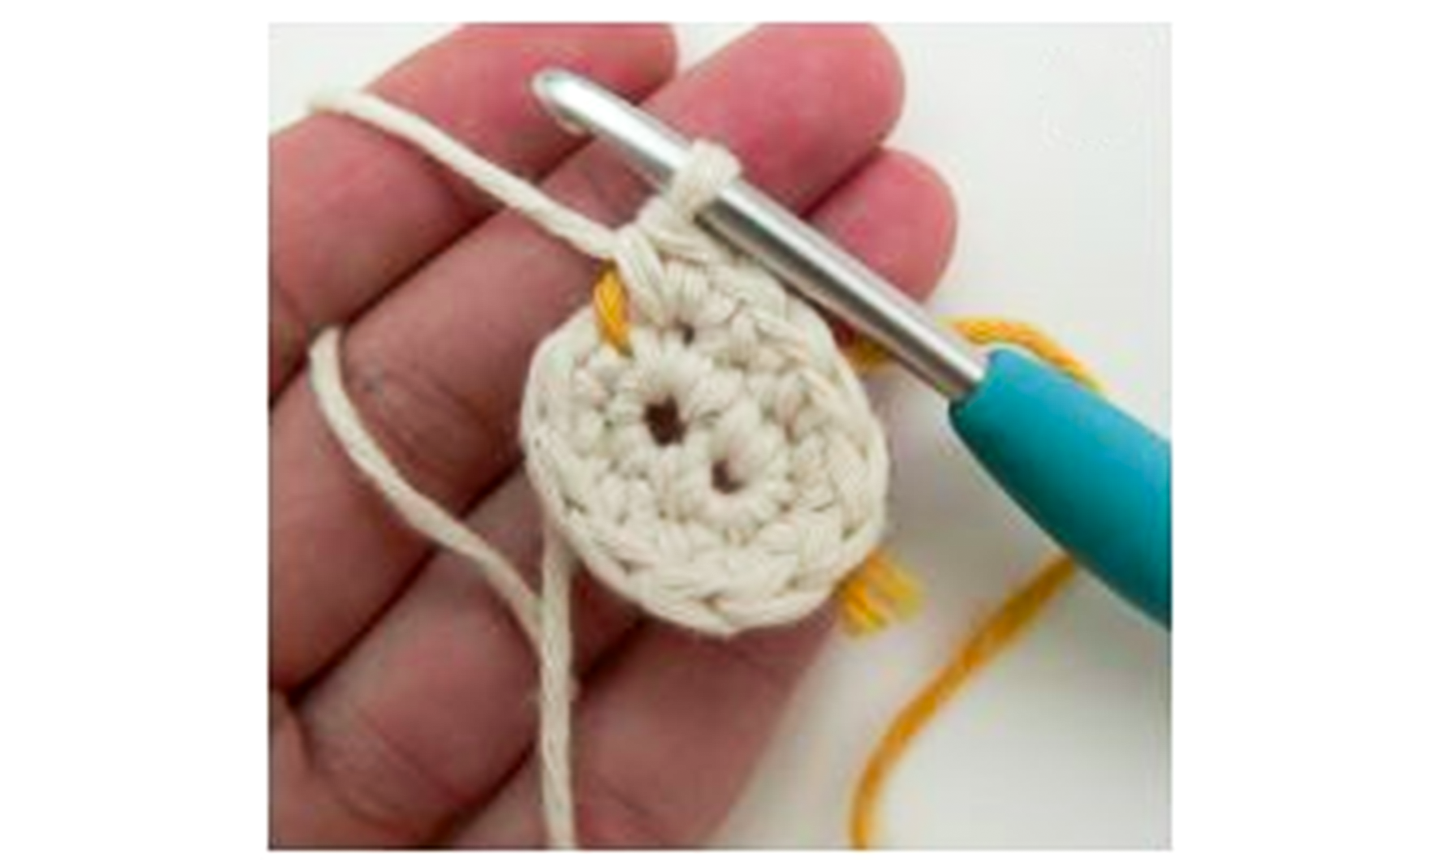
Rnd 2: 2 sc in the first st, sc in each of the next 2 sts, 2 sc in each of the next 2 sts, sc in each of the next 2 sts, 2 sc in the last stitch. (12 sts)
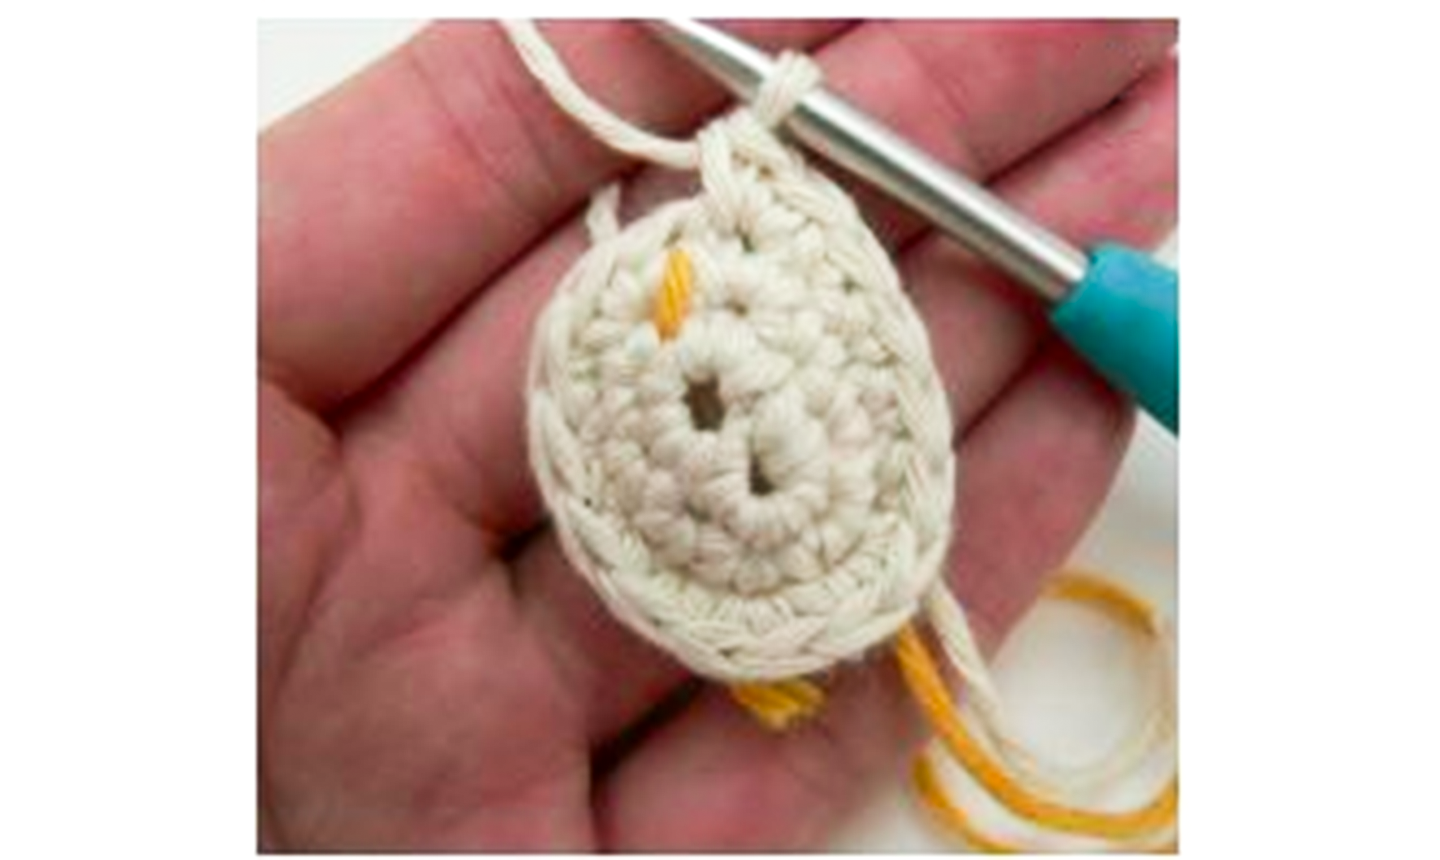
Rnd 3: 2 sc in the first st, sc in each of the next 4 sts, 2 sc in each of the next 2 sts, sc in each of the next 4 sts, 2 sc in the last st. (16 sts)
Rnd 4: 2 sc in each of the first 2 sts, sc in each of the next 6 sts, 2 sc in each of the next 2 sts, sc in each of the next 6 sts. (20 sts)
Rnd 5: Sc in each st. (20 total stitches)
Rnds 6 – 10: Repeat Round 5. (20 sts)
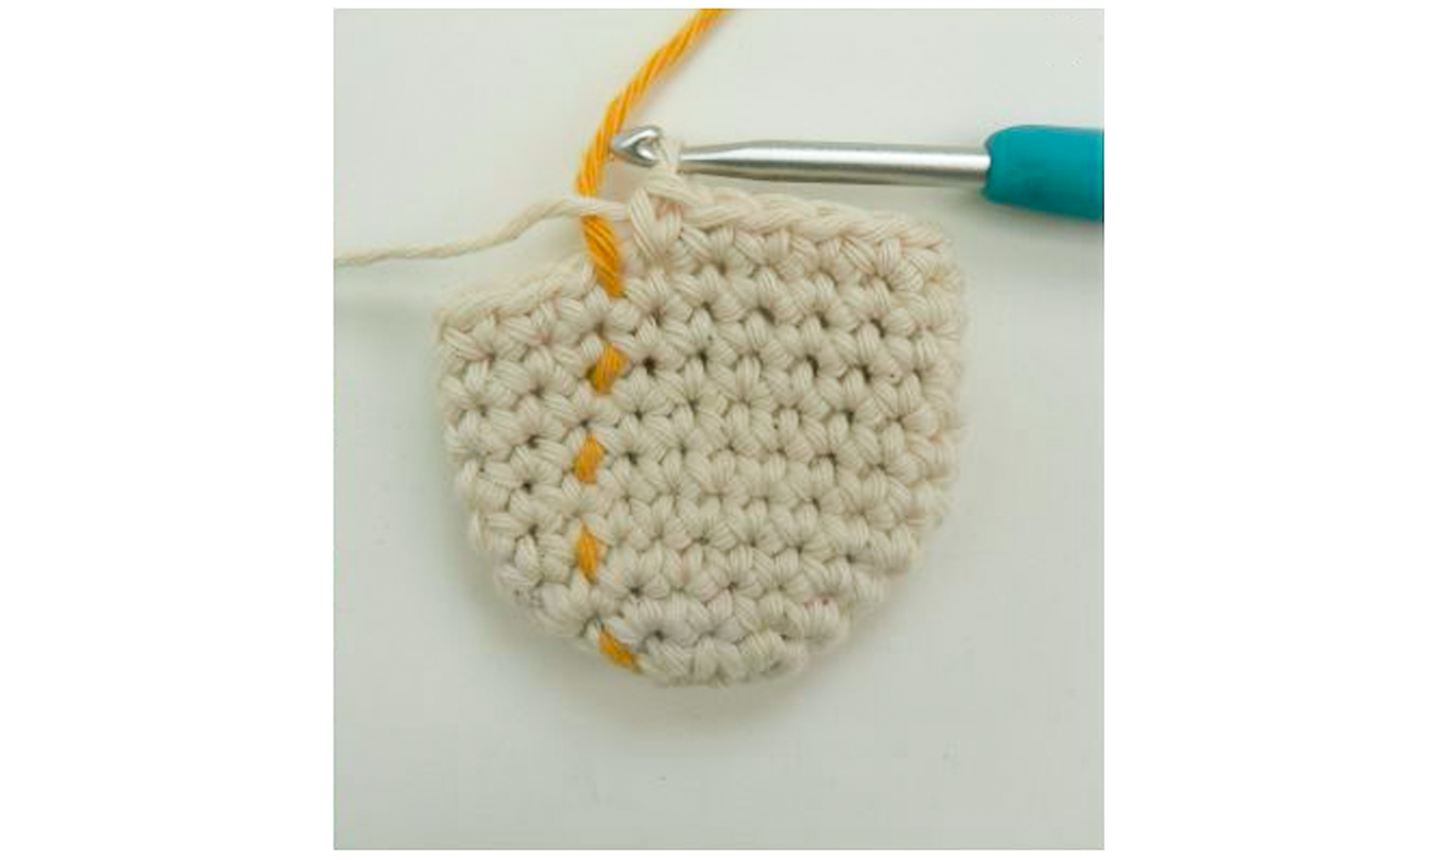
Make the Body
This part of the pattern is worked in rows.
Row 1: Sc in each of the next 16 sts. Ch 1 and turn, leaving the remaining 4 stitches unworked. (16 sts)
Row 2: Sc in each of the next 15 sts, leaving the remaining st of Row 1 unworked. Ch 1 and turn. You should now have 5 unworked sts in total. (15 sts)
Row 3: Sc in each st. Ch 1 and turn. (15 sts)
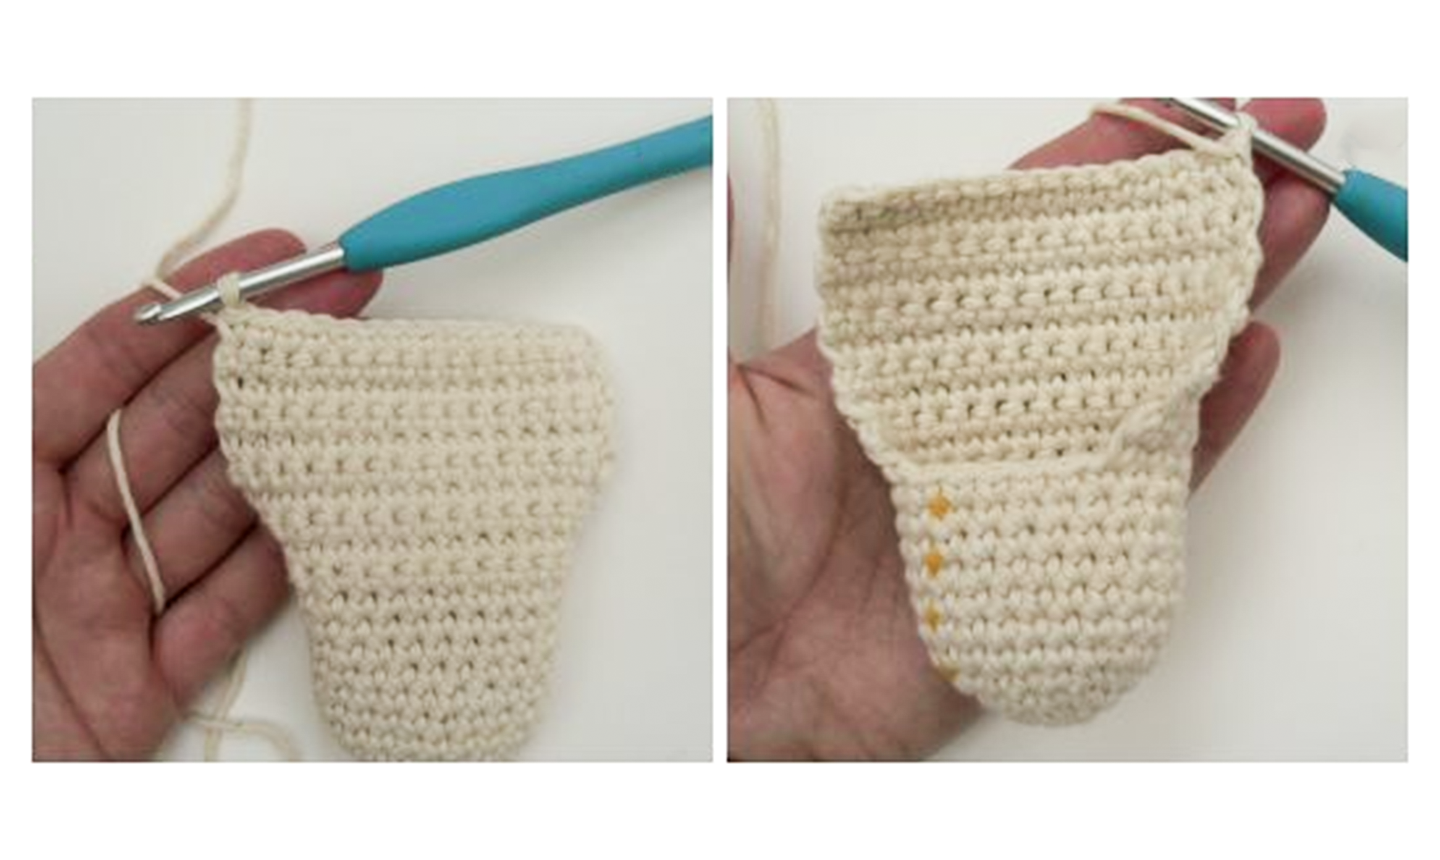
Rows 4 – 11: Repeat Row 3. (15 sts)
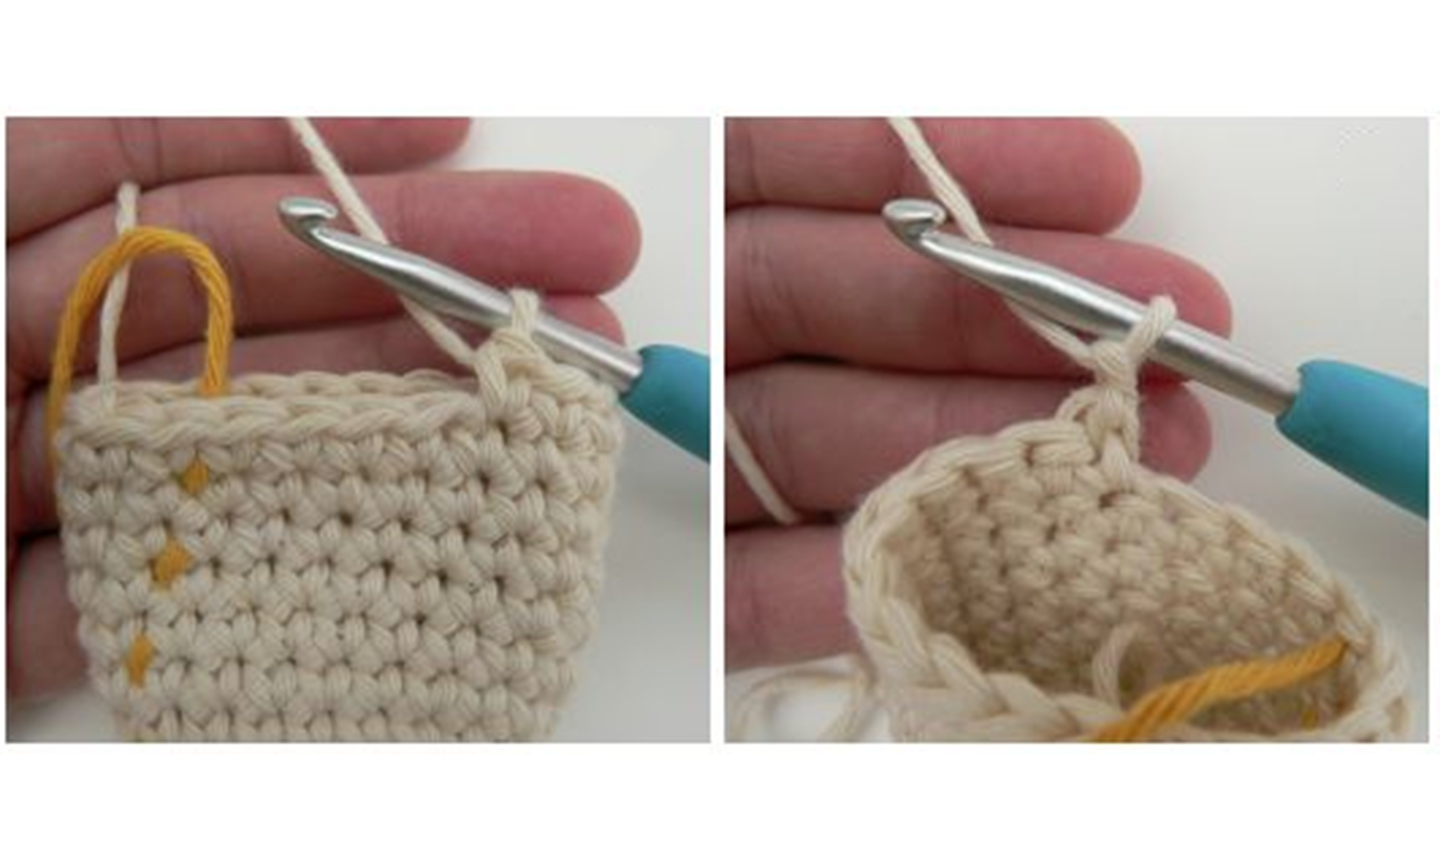
Seam the Heel
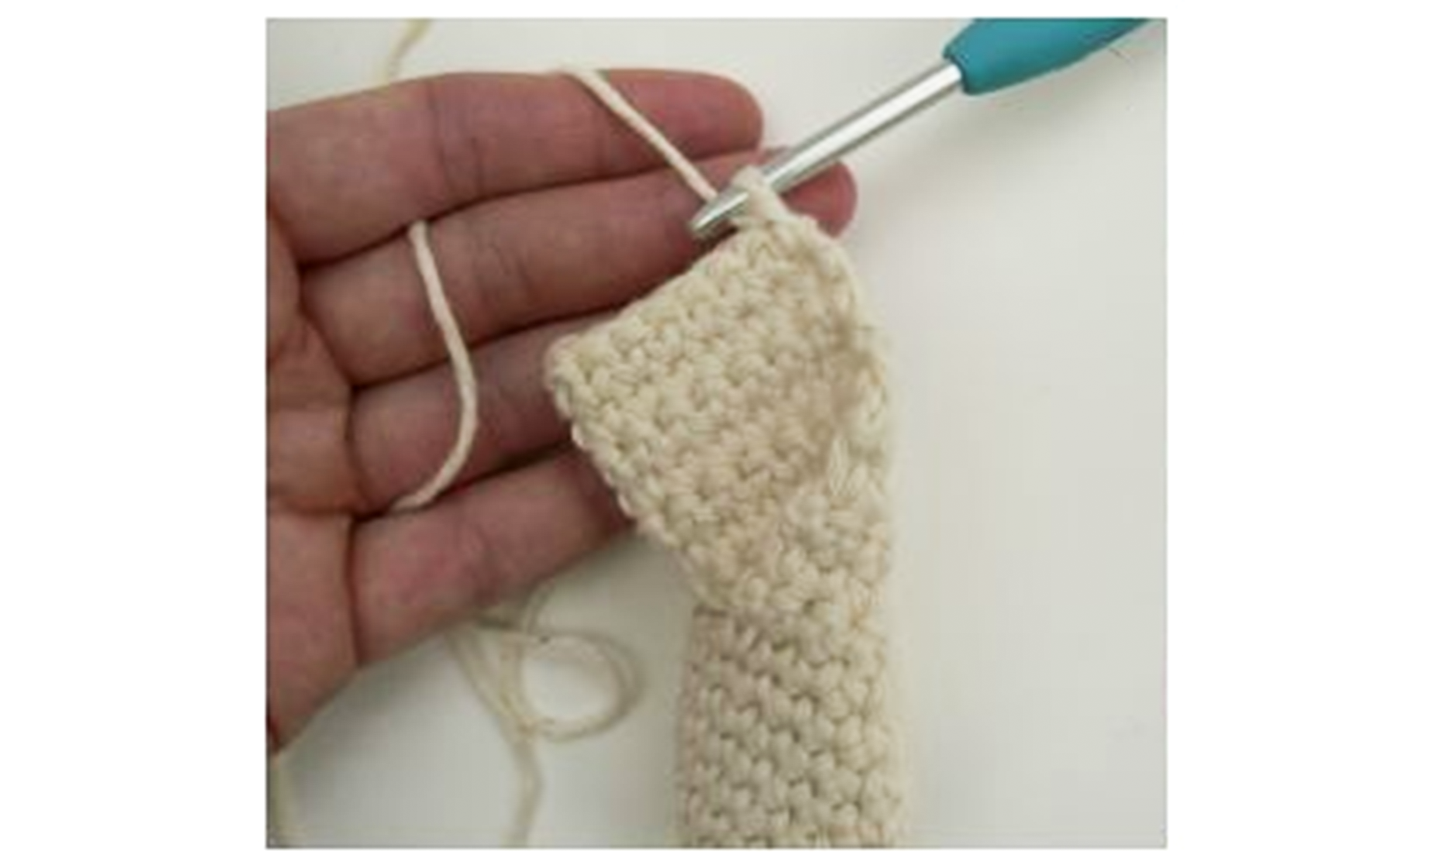
Fold the back seam in half with right sides together.
Working through the front loop of the piece closest to you and the back loop of the piece farthest away from you, attach the two sides together by making a sl st though both layers.
Sl st in each of the next 7 sts. Ch 1 and fasten off. Turn the seam right side out.
Pro Tip: Before you fasten off your seam, make sure the bootie is the correct size. If it’s not, jut pull out the seam and work a few more flat rows to make the foot longer. Then seam it up again, and you’re good to go.
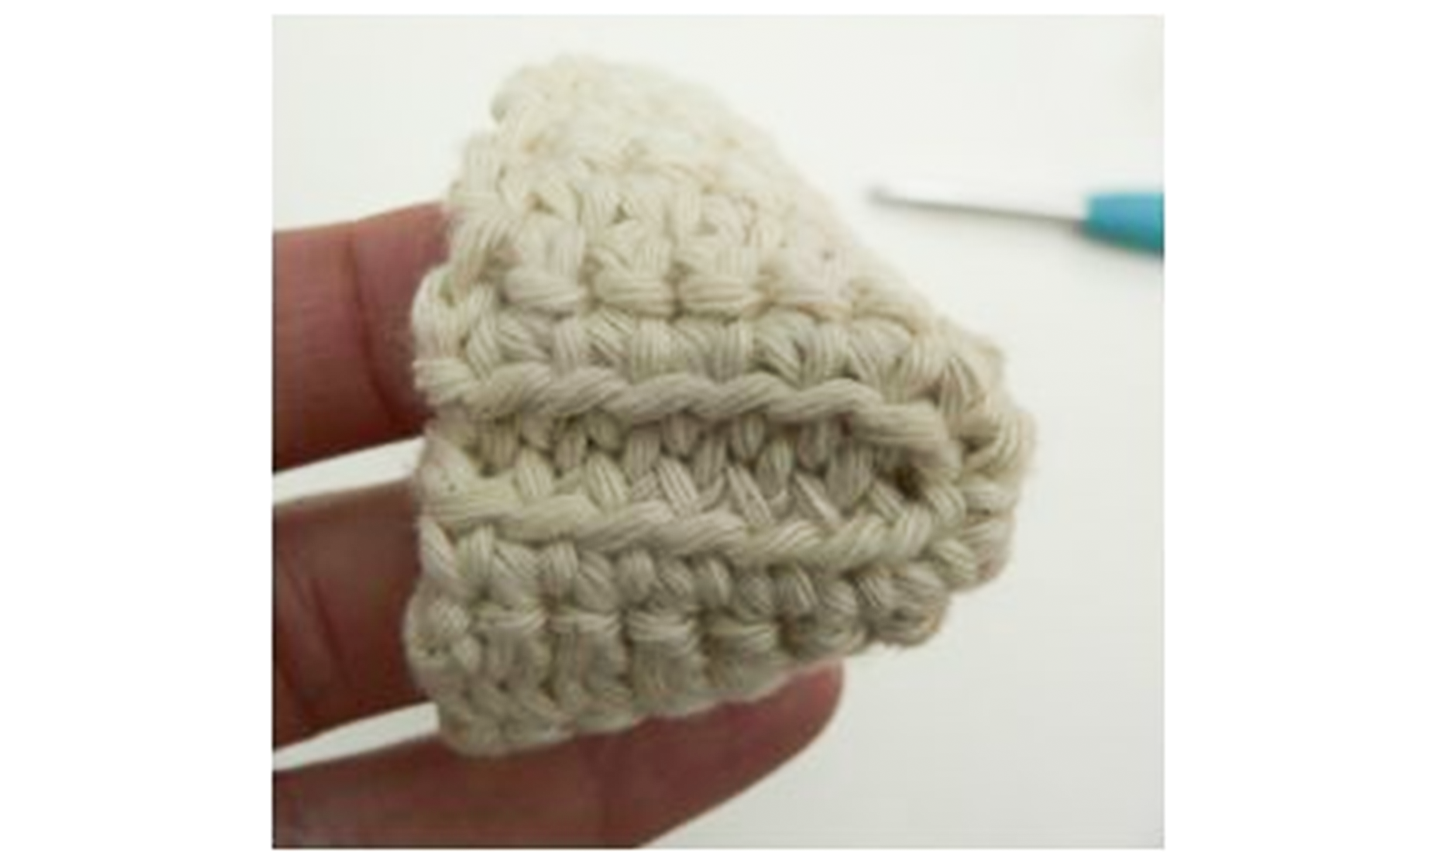
Closing the seam like this will give you a ridge at the back of the bootie.
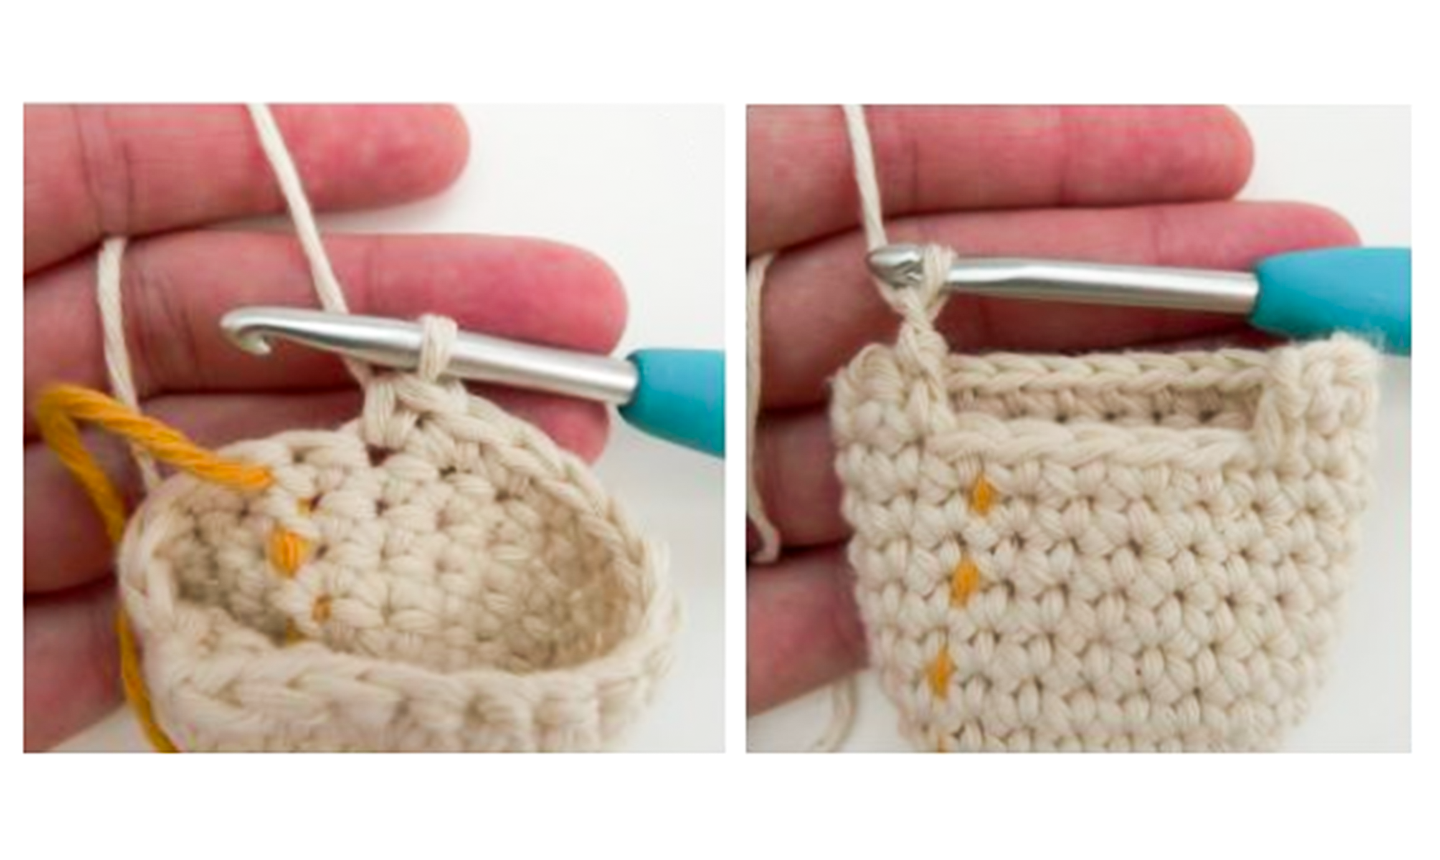
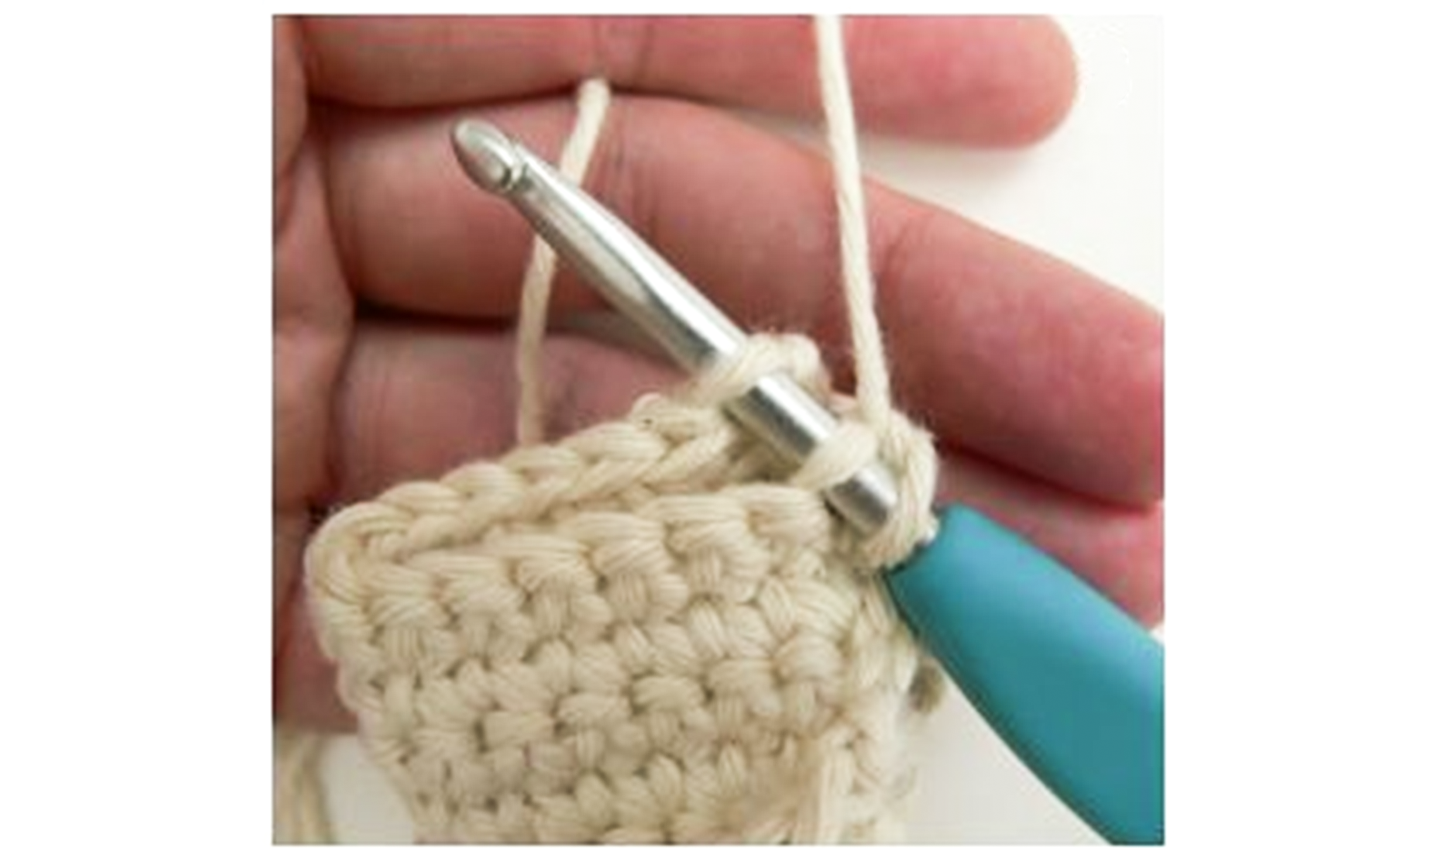
Crochet the Edging
Rnd 1: With the right side facing you, join your yarn in the first stitch to the left of the seam and ch 1. Sc evenly around the foot opening. Join to the first st with a sl st. (26 sts)
Fasten off and weave in your ends.
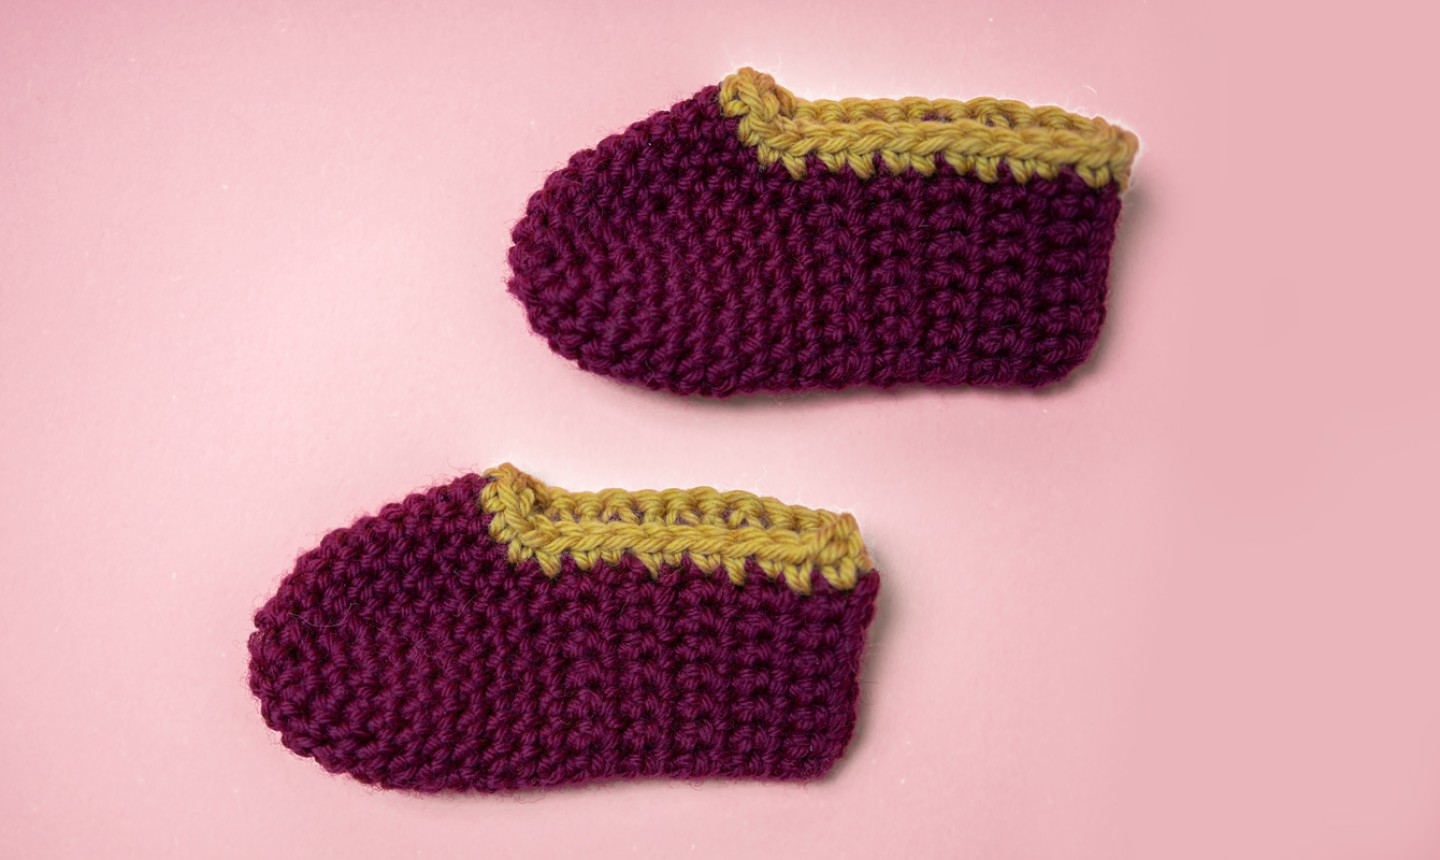
Go Wild with Color
Dipped-Toe
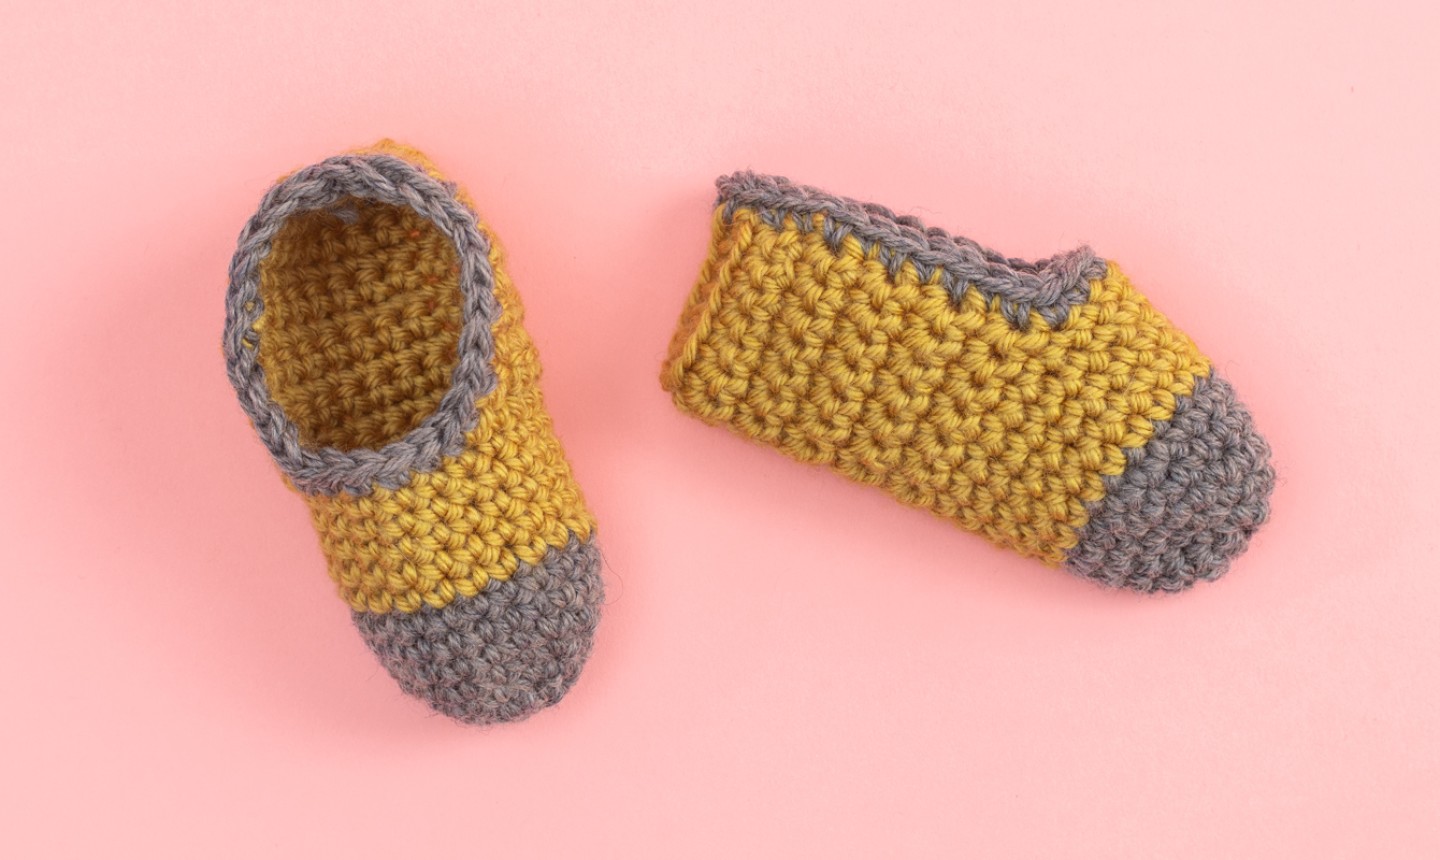
Change color after the seventh stitch of Round 6 of the toe. Changing colors in the middle of the row will hide the color change on the bottom of the bootie.
Stripes
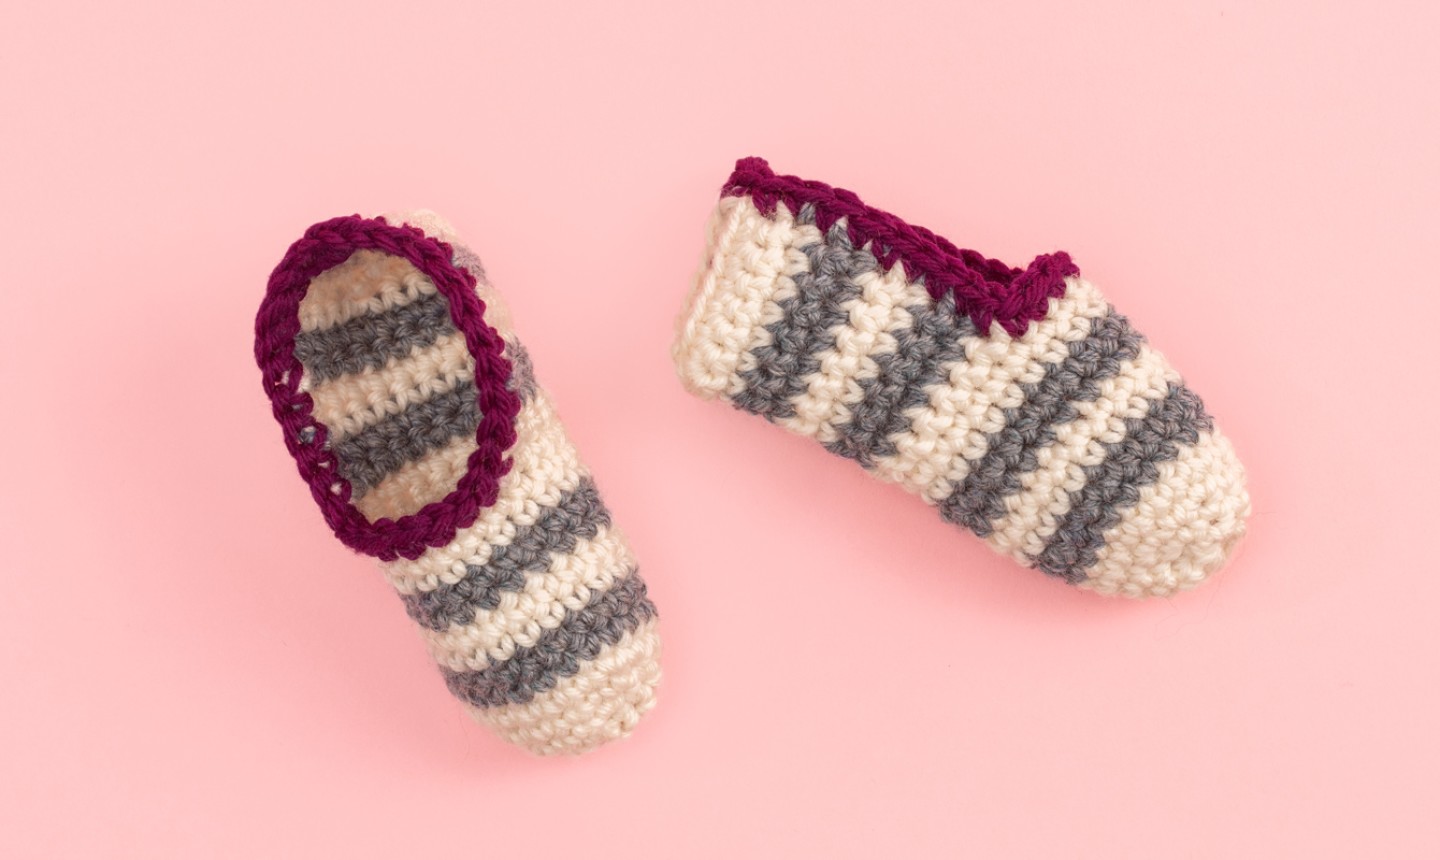
Rnd 5 of the toe: Change color after the 7th sc. Work two rnds in new color.
Rnd 7: Change color after the 7th sc. Work two rnds in new color.
Rnd 9: Change color after the 7th sc. Work two rnds in new color.
Rnd 11: Change color and work an extra round. Continue working in this color for the first 3 rows of the foot.
Row 4 of the body: Change color after the 8th sc. Work 2 rows in new color.
Row 6: Change color after the 8th sc. Work 2 rows in new color.
Row 8: Change color after the 8th sc. Work 2 rows in new color.
Row 10: Change color after the 8th sc. Work 2 rows in new color.

Ce serait super pour faire différents chaussons de bébé pour les dragées de naissance. Un grand merci
These are perfect for my new great grandson. Thank you❣️
These are great! I'm going to make some.
It is a bit difficult belonging from New Zealand