
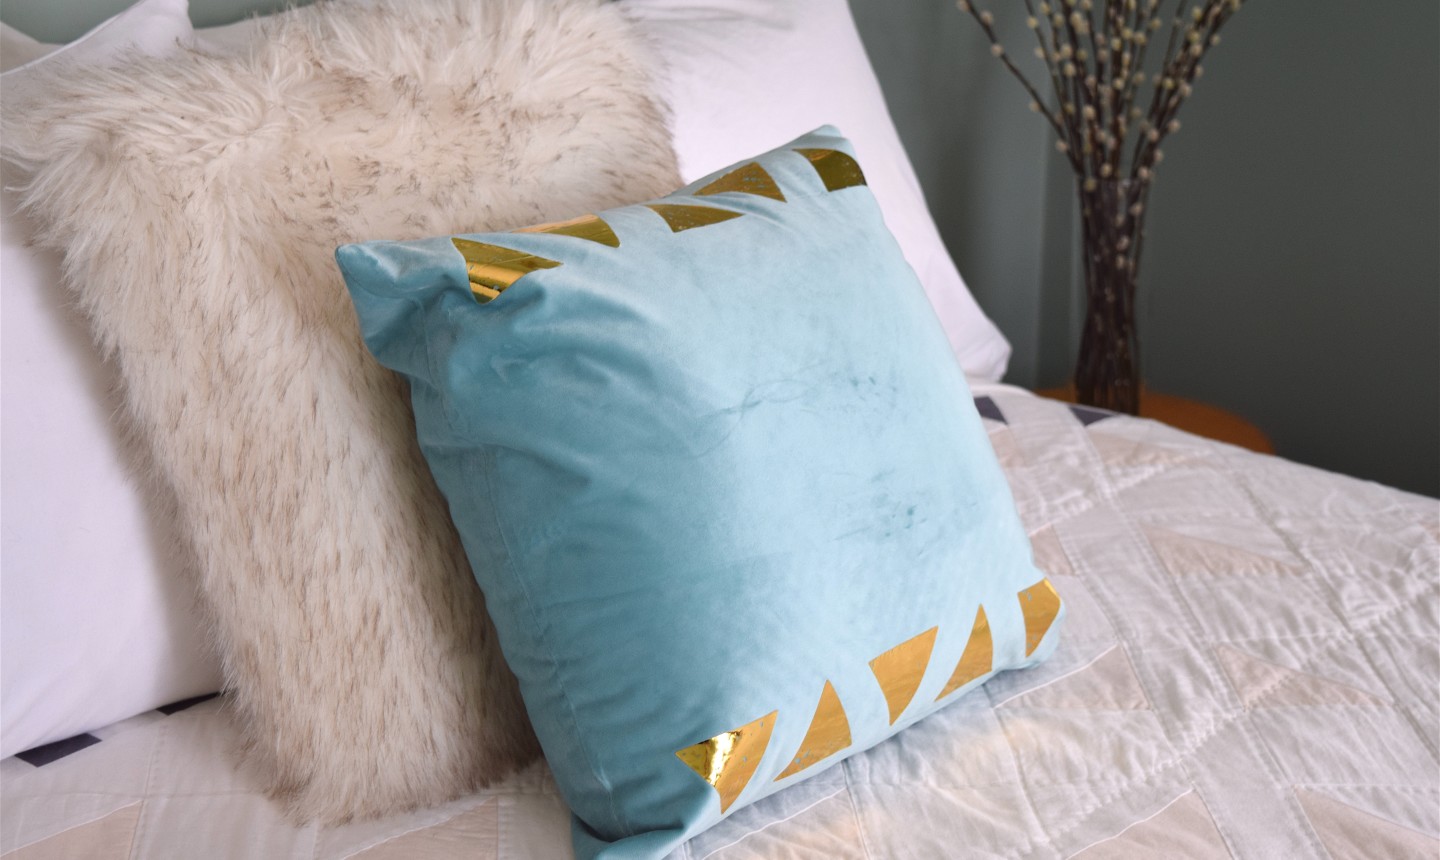
Save the money you would’ve spent on a designer pillow with this glam DIY dupe! It’s the perfect accent to brighten up your neutral couch or add a splash of color to an all-white bedding theme. And if you’ve never used this kind of iron-on transfer before (it’s super easy), you’re about to discover a fave new craft technique!
Gold Foil Pillow
Level: Easy
What You Need
Instructions
1. Cut Out the Shapes from the Adhesive

To get your on-point pillow design started, slide a white Deco Foil hot melt adhesive sheet into the triangle hole punch. Punch out as many triangles as you’d like (we opted for 10).
2. Iron on the Adhesive
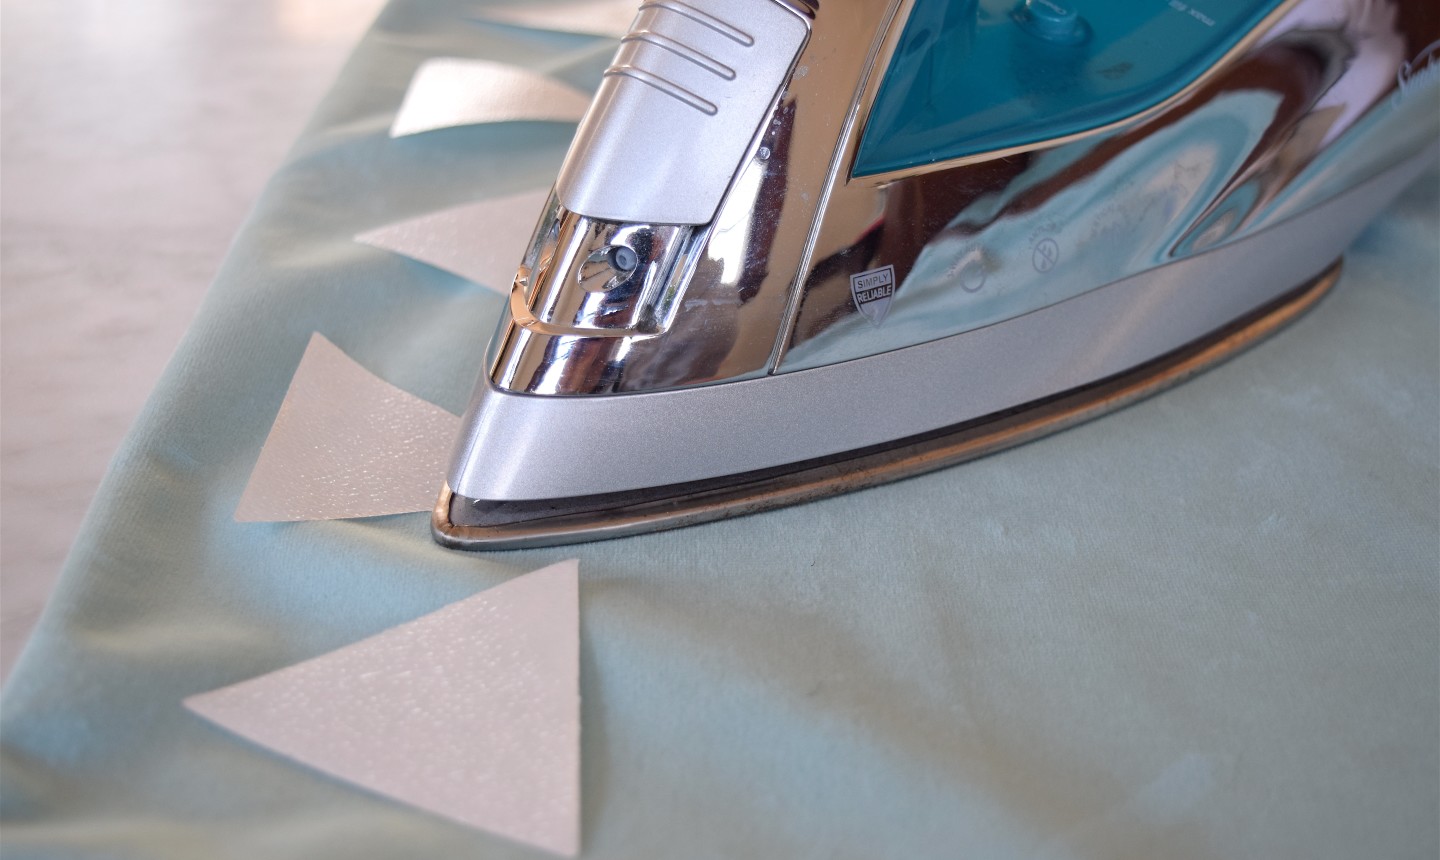
The adhesive won’t be activated until you iron it, so use this time to play with your design. Do you want clean rows of triangles? Or maybe you’re looking for a more intricate design? For this tutorial, we went with a simple line of triangles along opposite ends of the pillow.
After deciding on your design, place the shapes onto the fabric with the adhesive (the rough side) face down. Set your iron to the silk/wool setting and make sure the steam function is turned off. Run the iron over the adhesive paper shapes, ensuring each shape gets about 30 seconds of direct heat.
Pro Tip: We ironed directly on the adhesive shapes, but If you’re concerned about your fabric burning, lay parchment paper over the shapes as a buffer. It’s typically included in the Deco Foil packet.
Once you’re done ironing, let the adhesive cool.
3. Remove Adhesive Backing
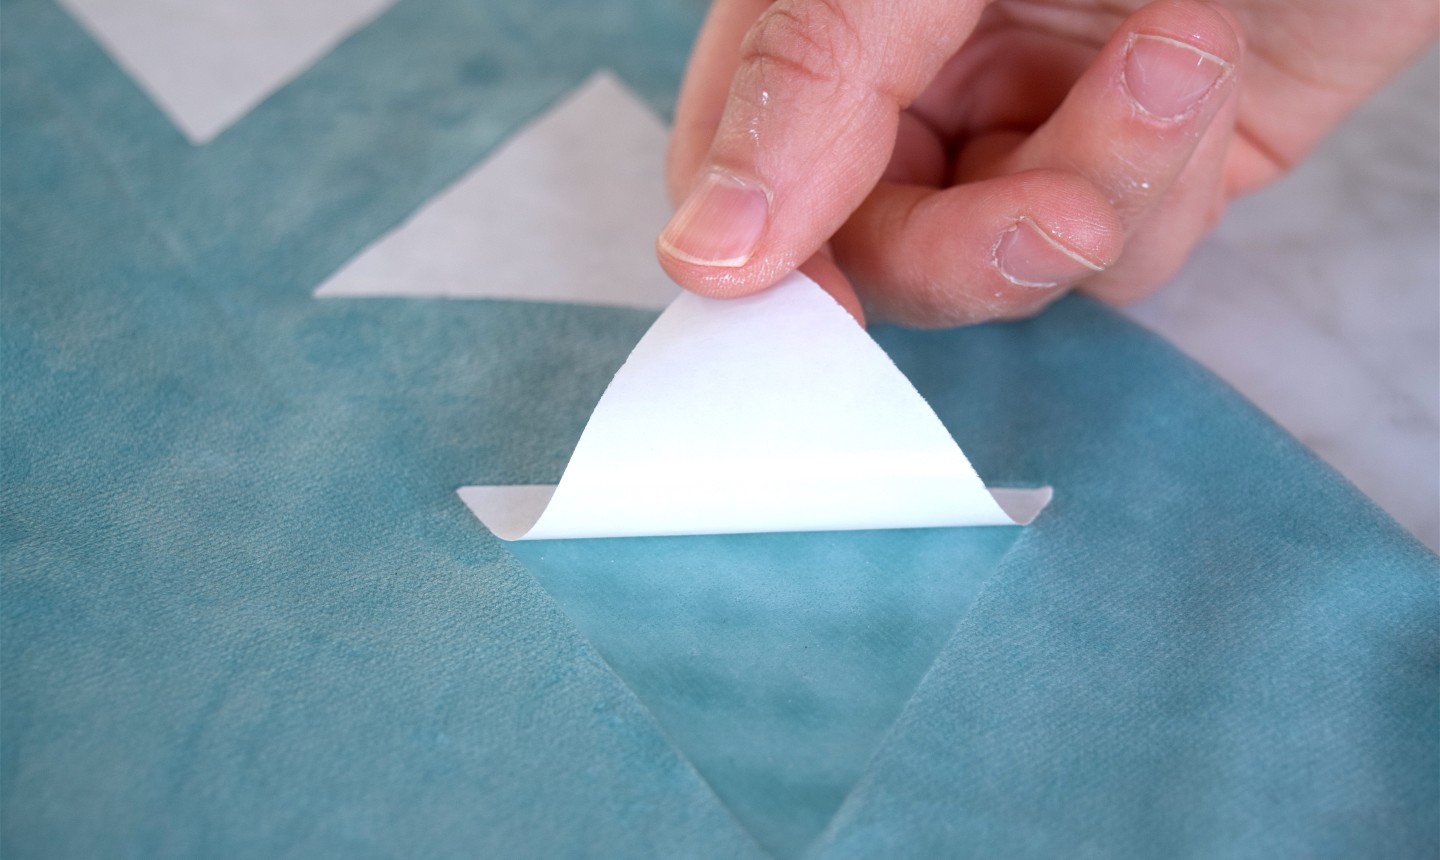
When the materials are cool to the touch, peel off the white liner to expose the adhesive design.
Pro Tip: If you’re having a hard time picking up the corner of the liner, try bending the fabric a little to slightly separate the liner so you can grab hold of it.
4. Gild Your Design
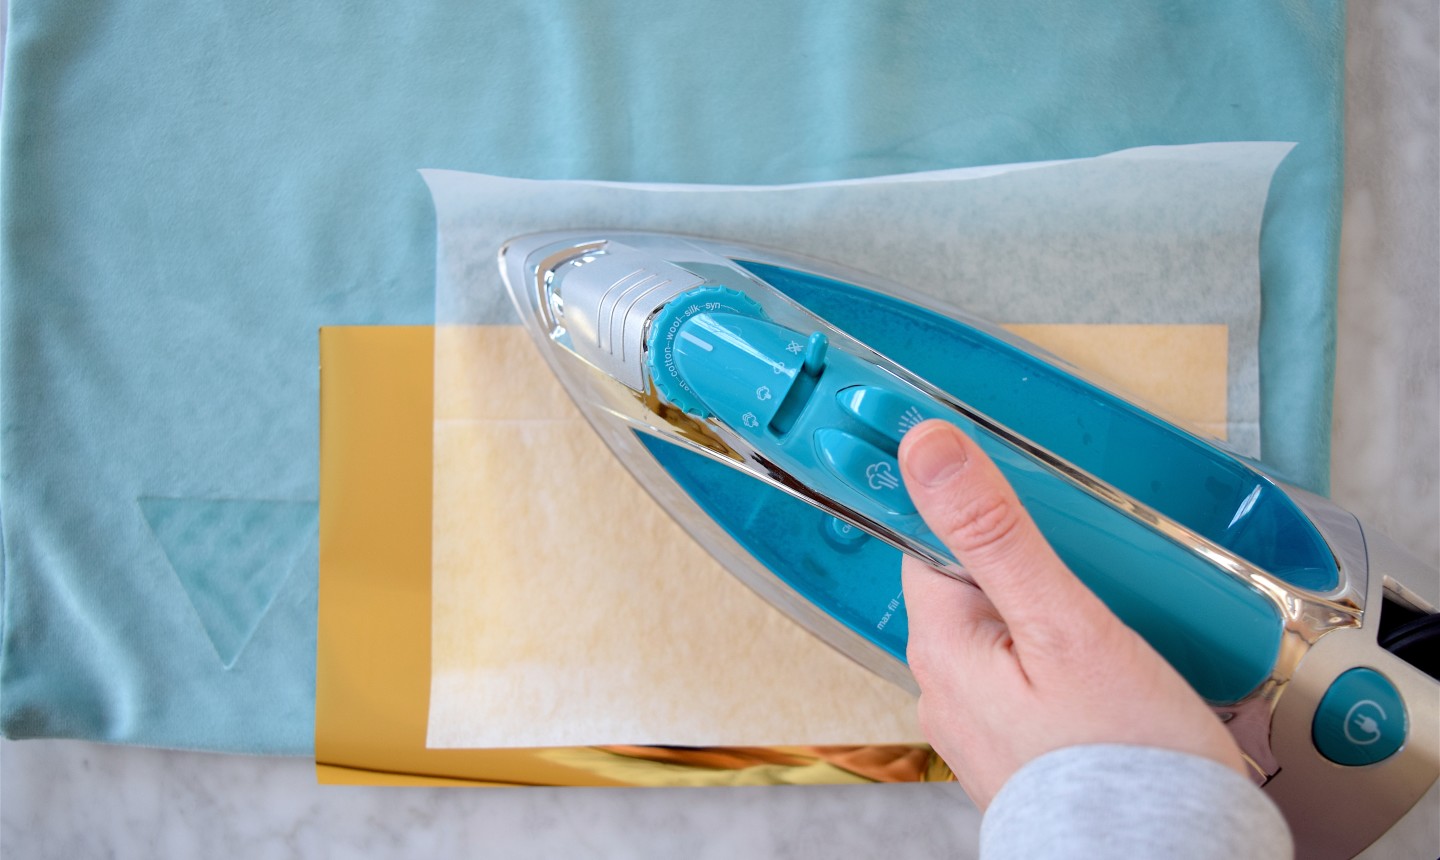
Cut a piece of the gold foil transfer sheet a little larger than your adhesive design area. Place the foil over the design with the gold side facing up, then cover with parchment paper. Slowly iron over the parchment paper, applying pressure, for roughly 30 seconds.
Pro Tip: For a slightly distressed look, crinkle the gold foil before ironing. Rather than creating a smooth, gold sheen, you’ll get more of a textured, gold leaf effect.
5. Reveal Your Design
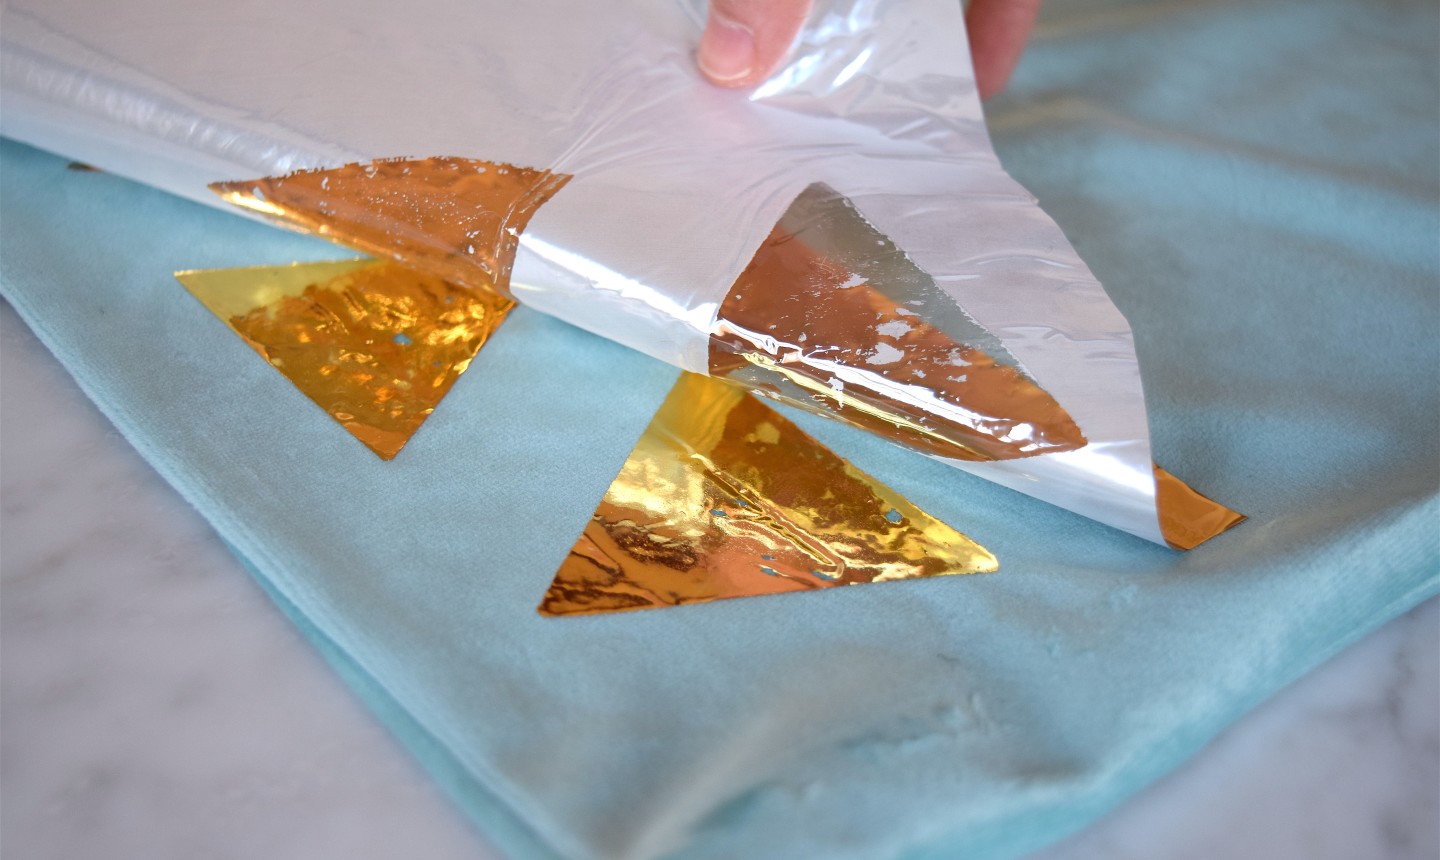
Remove the parchment paper and allow everything to cool. Once ready, peel the foil transfer sheet away from the adhesive design.
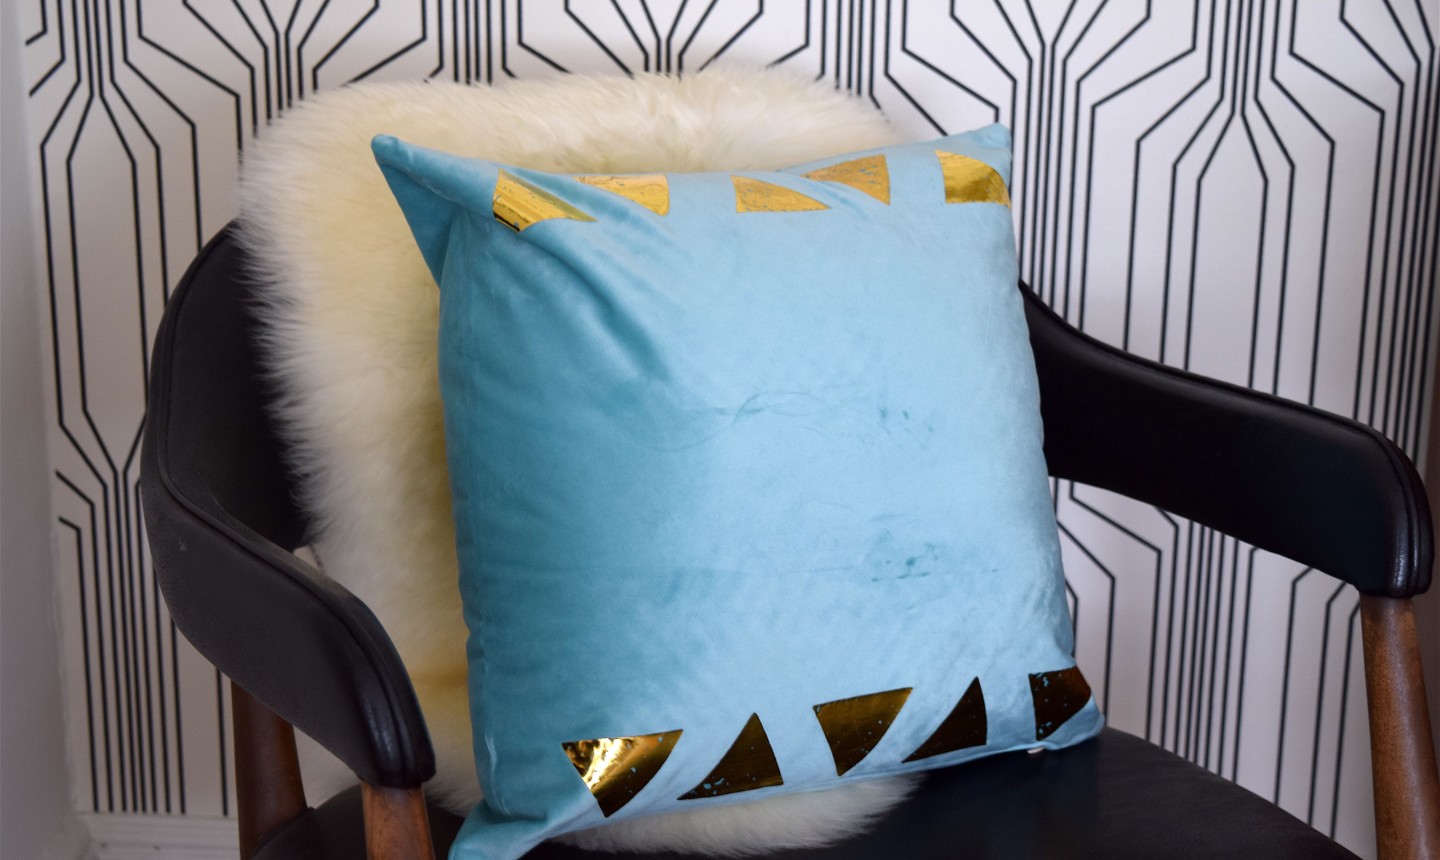
Slip your pillow insert into your pillowcase and enjoy!
Pro Tip: If your pillow gets dirty, hand-wash in cold water — the foil can handle a gentle dip.
Photos by Alison Caporimo
Share tips, start a discussion or ask one of our experts or other students a question.
Already a member? Sign in
No Responses to “DIY This Gold Foil Pillow for a Totally Luxe Look”