

One thing’s for sure: You’ve never seen a Mother’s Day cake quite like this. But when you’ve got a cool mom, she deserves an equally cool cake. Bring on the fiery drip details and vintage tattoo-inspired topper — this Mother’s Day rocks.
Mother’s Day Heart Tattoo Cake
Level: Intermediate
What You Need
For the Cake
For the Heart Topper and Flowers
For the Drip
Instructions
1. Prep the Cake
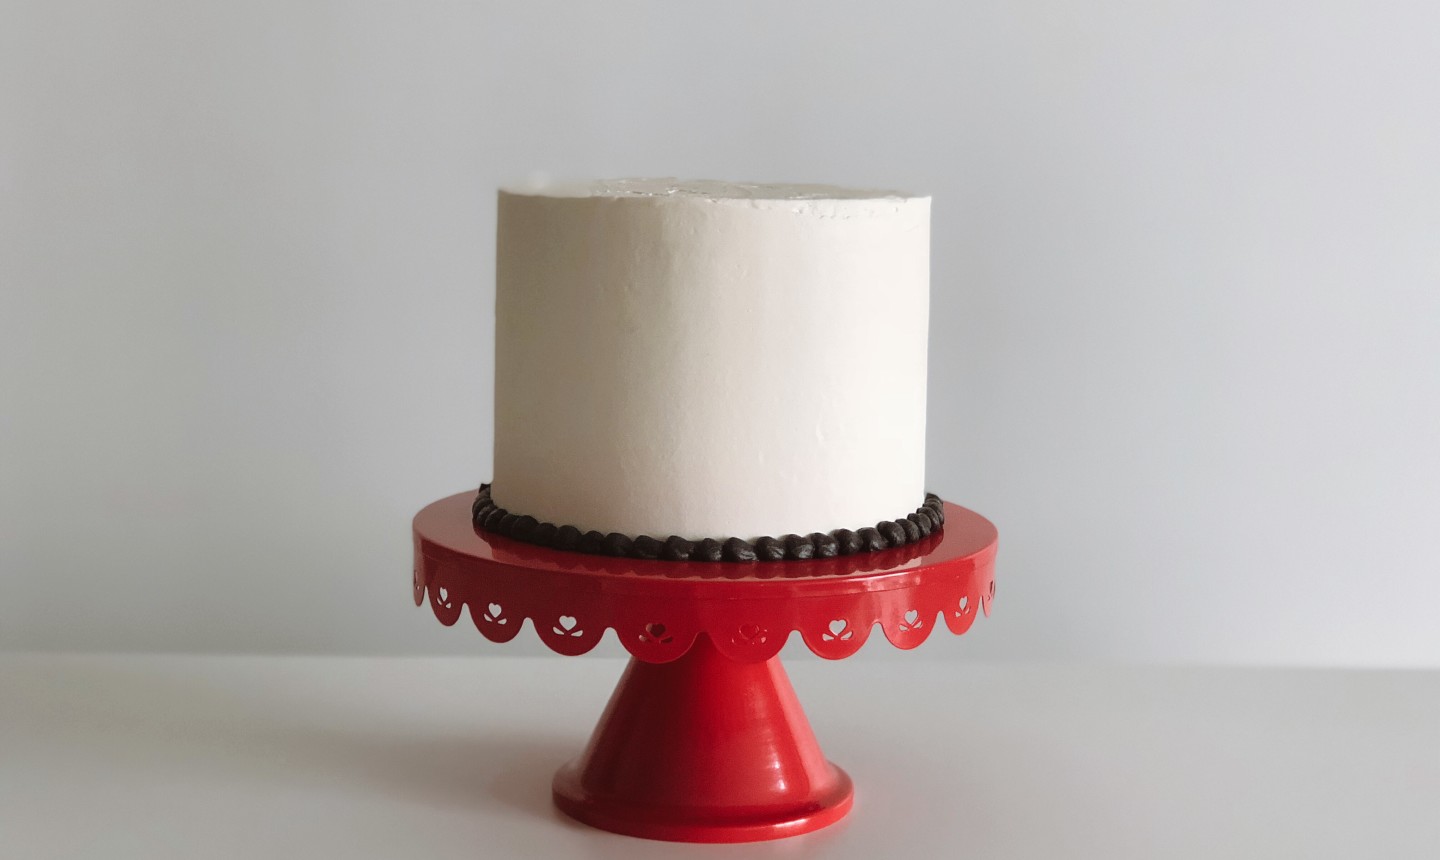
Bake your mom’s favorite cake, stack the layers and add a crumb coat. Let set in the fridge, then frost with white buttercream.
Use black buttercream to pipe a border on the bottom of the cake. Put it back in the fridge to set.
2. Cut Out the Topper
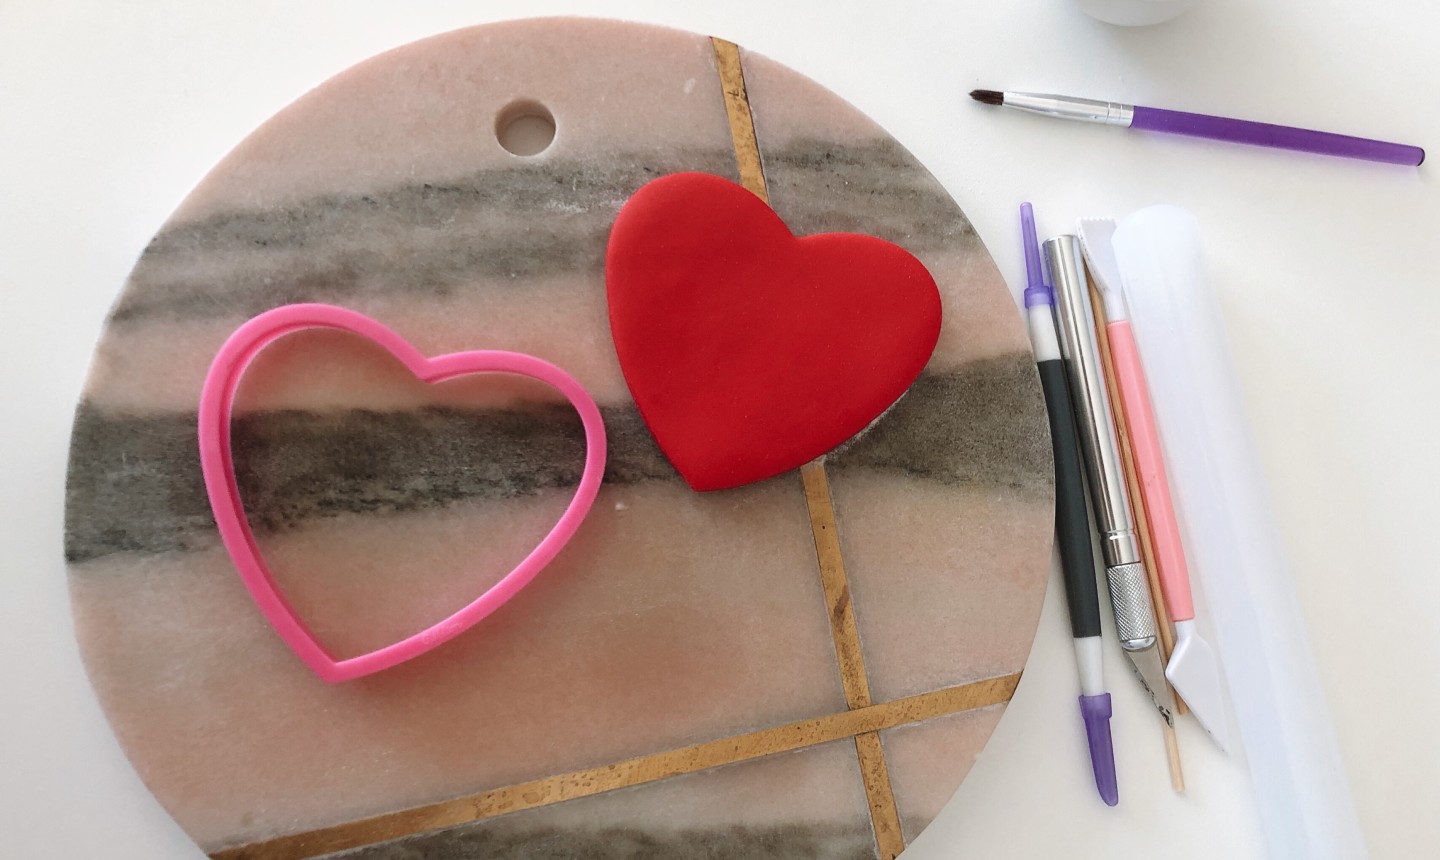
Mix Tylose powder into your red fondant, using about ½ teaspoon per 4 ounces of fondant. Roll the fondant out to approximately ½” and cut out a large heart with a cutter. Dip one end of a wooden skewer in water or edible glue and insert it about halfway inside the heart. Let dry.
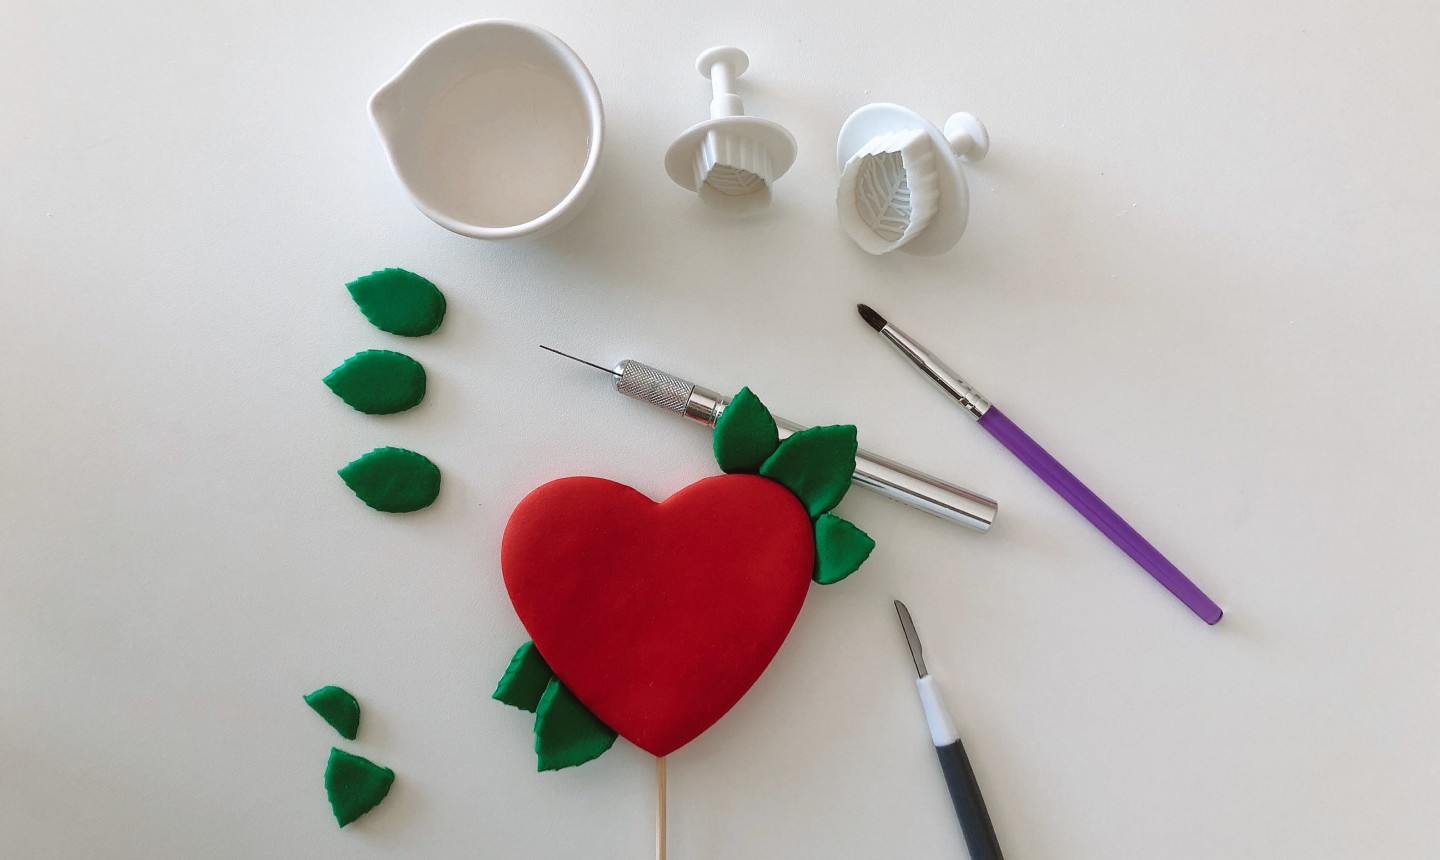
Once your topper has dried out a bit, roll out green fondant to about ¼” and cut out leaves. Make enough for both the topper and the flowers at the bottom.
Trim the leaves with a knife to adjust the size, if needed. Attach leaves to the heart using edible glue.
3. Make the Flowers
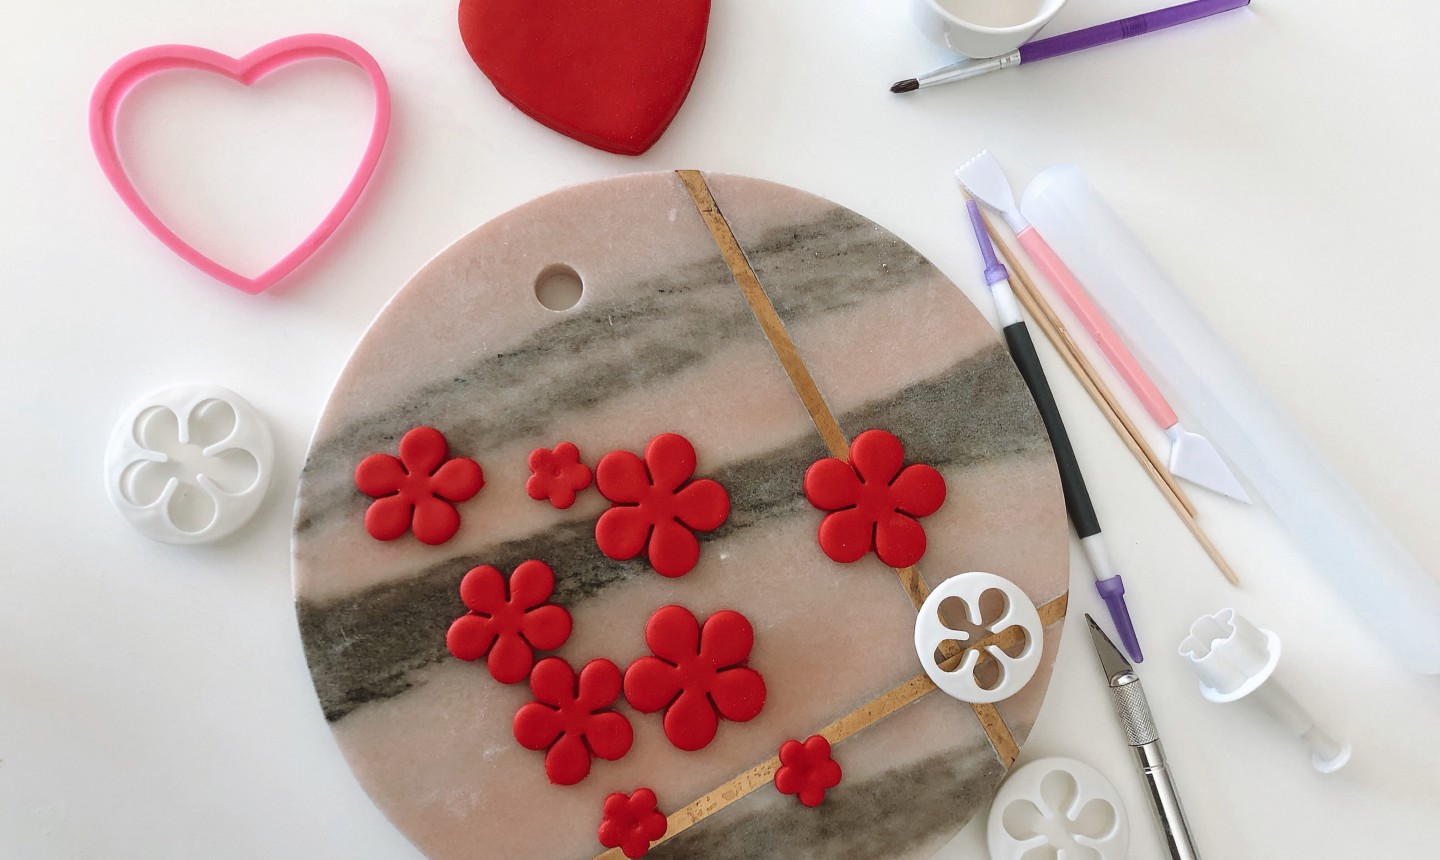
Roll out the remaining red fondant to about ¼” and cut flowers in 2-3 different sizes.
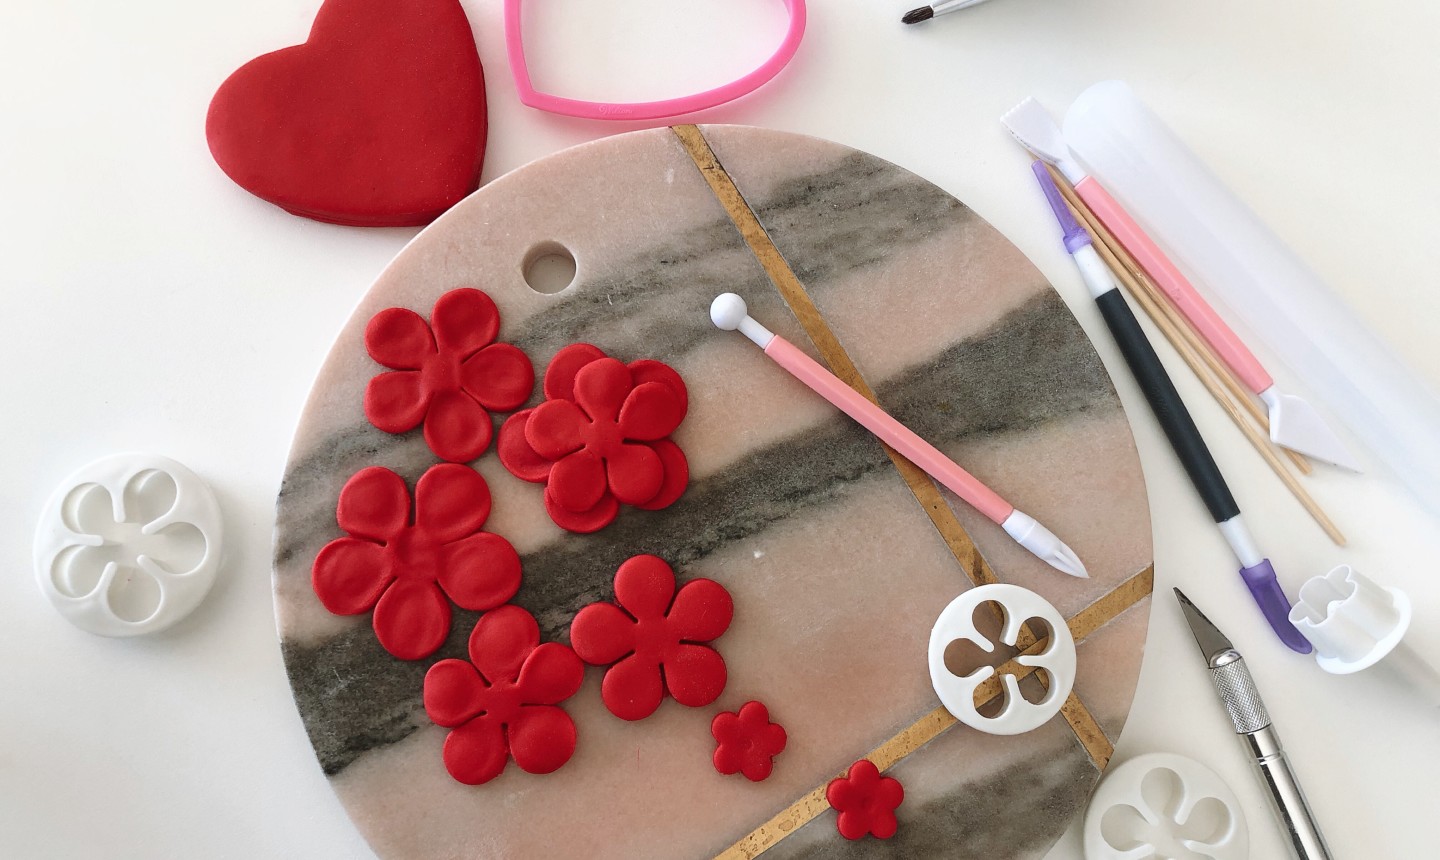
Flatten the petals a bit with your fingertips, then stack up your shapes to create layered blooms. You should end up with two bigger flowers and a smaller one.
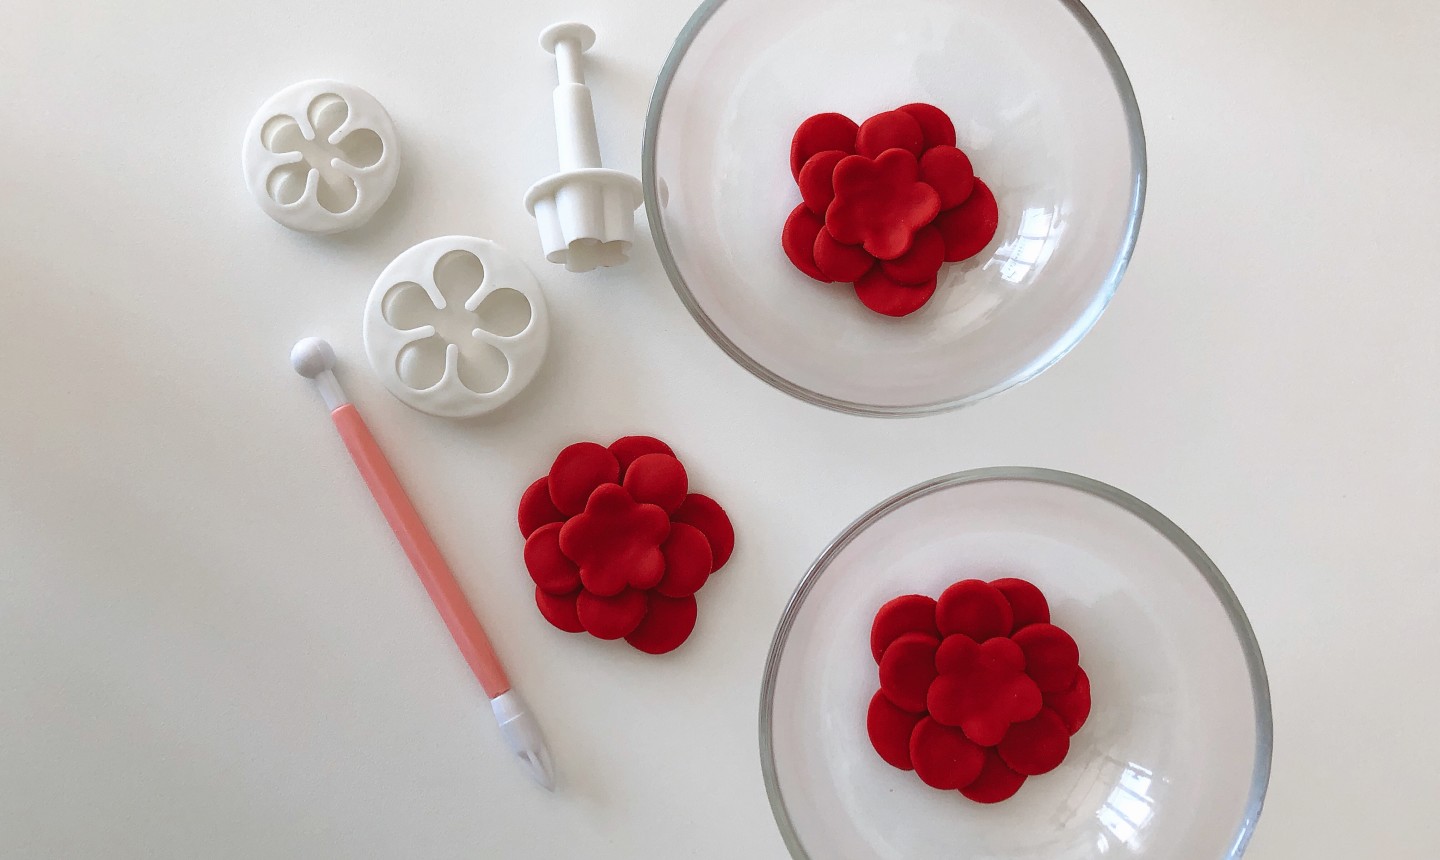
Place each flower in the bottom of a small bowl so it sets in a slightly curved shape, then leave to dry.
4. Paint on More Details
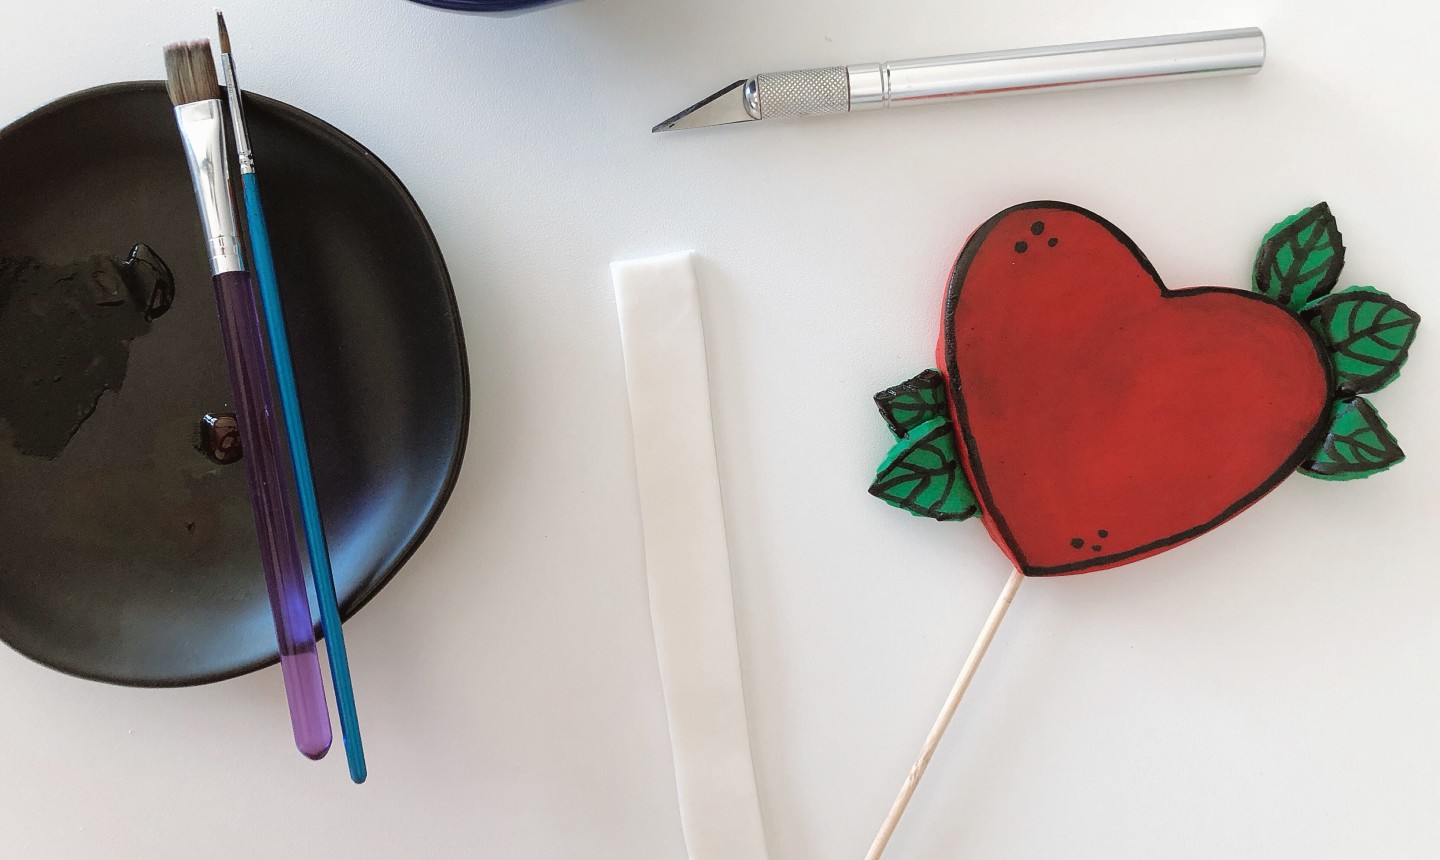
Since we’re going for a vintage look, outlining is key! Outline the heart and leaves using a thin brush and black gel color diluted with a little vodka.
Pro Tip: Before outlining, you can tone down the heart and create shadows for a more realistic vintage look. Just use a wider brush and black gel color heavily diluted with vodka.
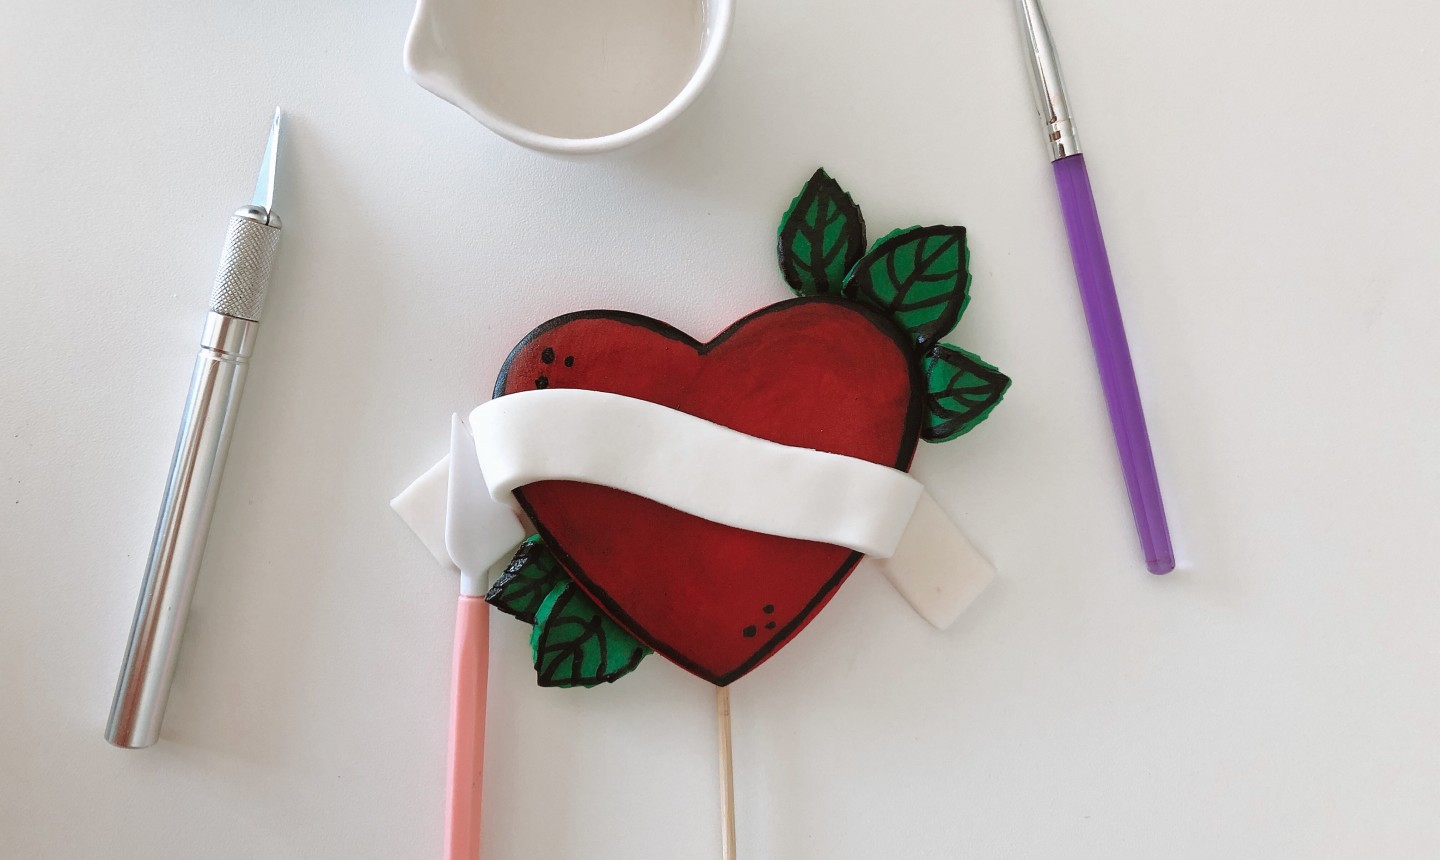
Roll out white fondant and cut a wide strip. Attach on top of the heart with a little water or edible glue. Tuck in the ribbon under the edges of the heart to create a 3D effect.
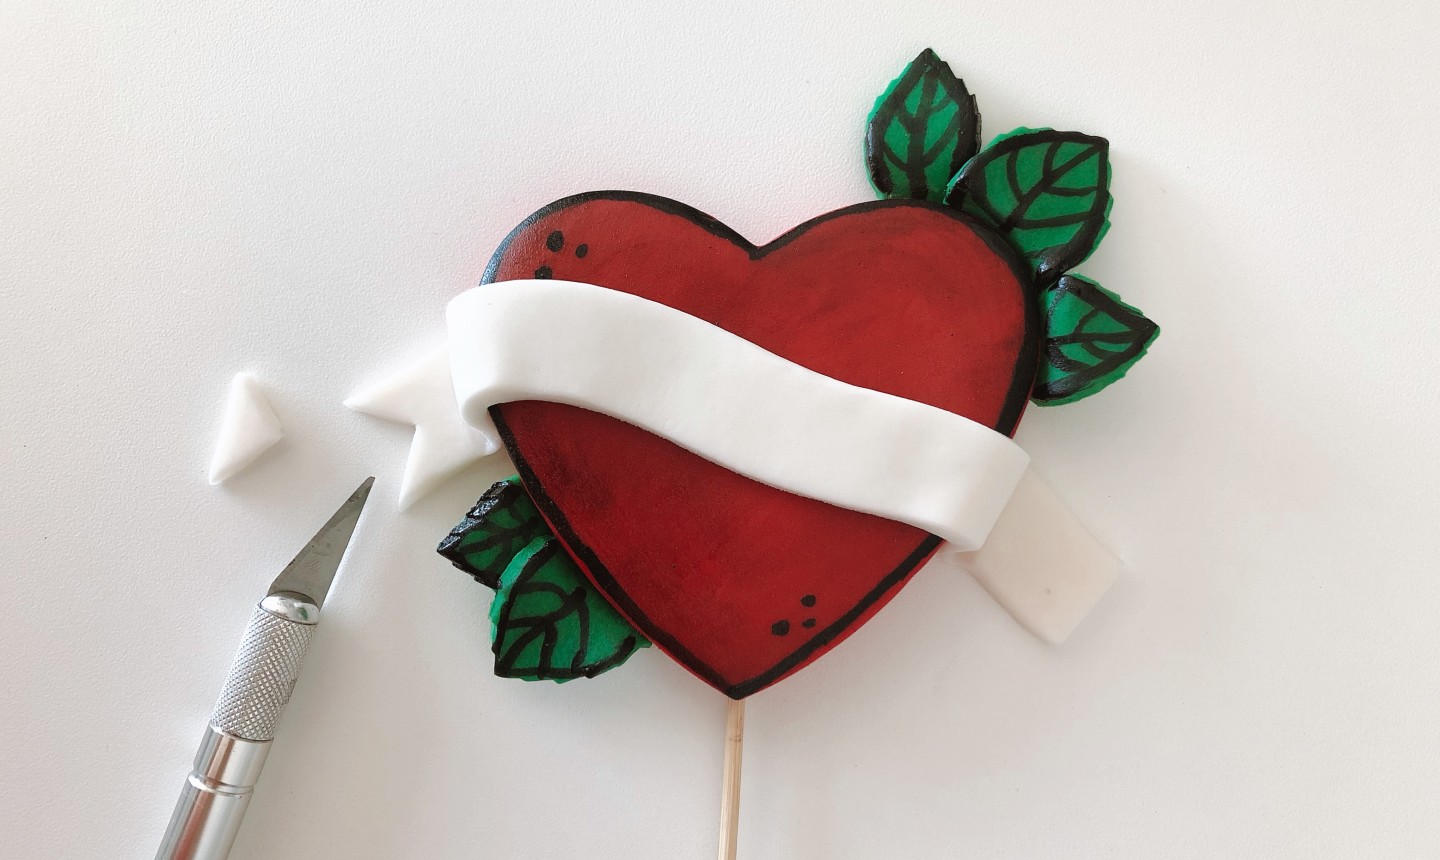
Use an X-Acto knife to cut the edges of the ribbon in a classic banner shape.
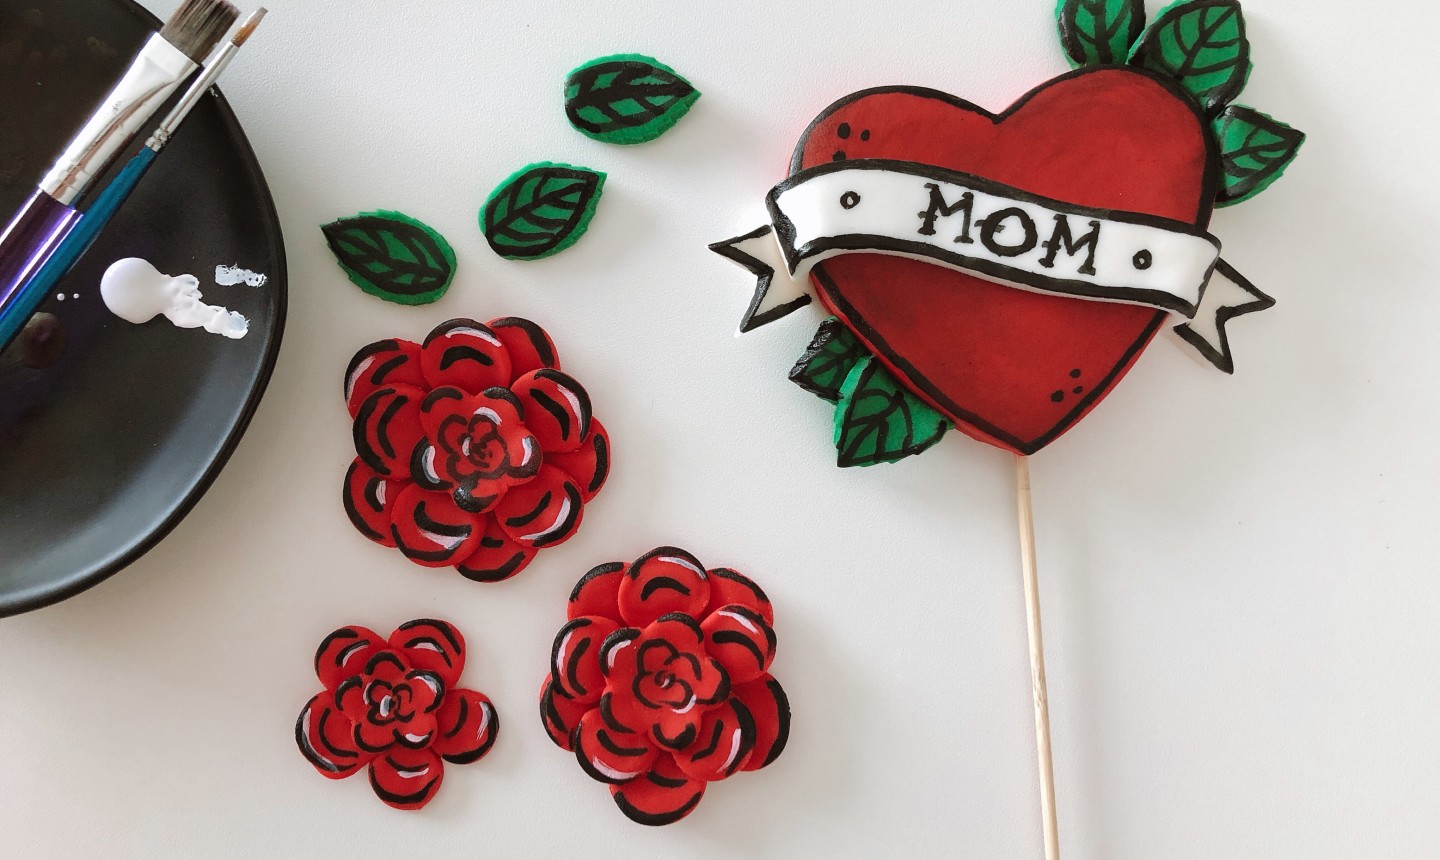
Using your black gel color, outline the ribbon and write “MOM” in the middle. Let your topper dry, preferably overnight.
While you wait, outline the edges of every flower layer. Add a little white food coloring for highlights, then your retro roses are ready!
5. Drip, Drip, Drip
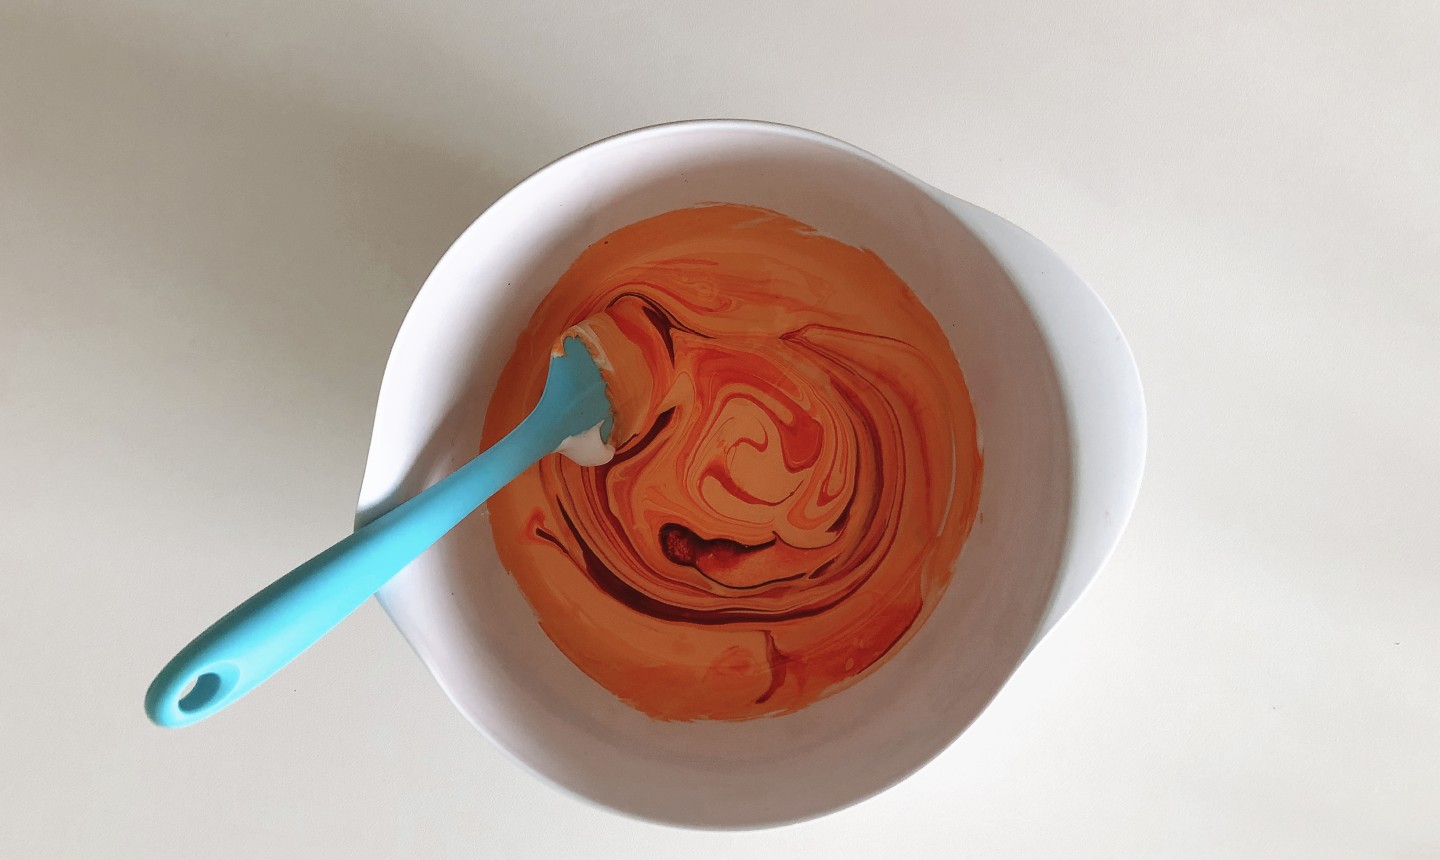
Mix together your egg whites and powdered sugar to prepare a thick but still fluid royal icing. (You can also use candy melts to make the drip, if you prefer.)
Color your royal icing with orange food gel and add a drop of red to create a marbled effect.

Put half of the mixture in a piping bag and create drips all around the cake edge. Pour the rest of the glaze on top of the cake and smooth it out. Place the cake back in the fridge to set for about an hour.
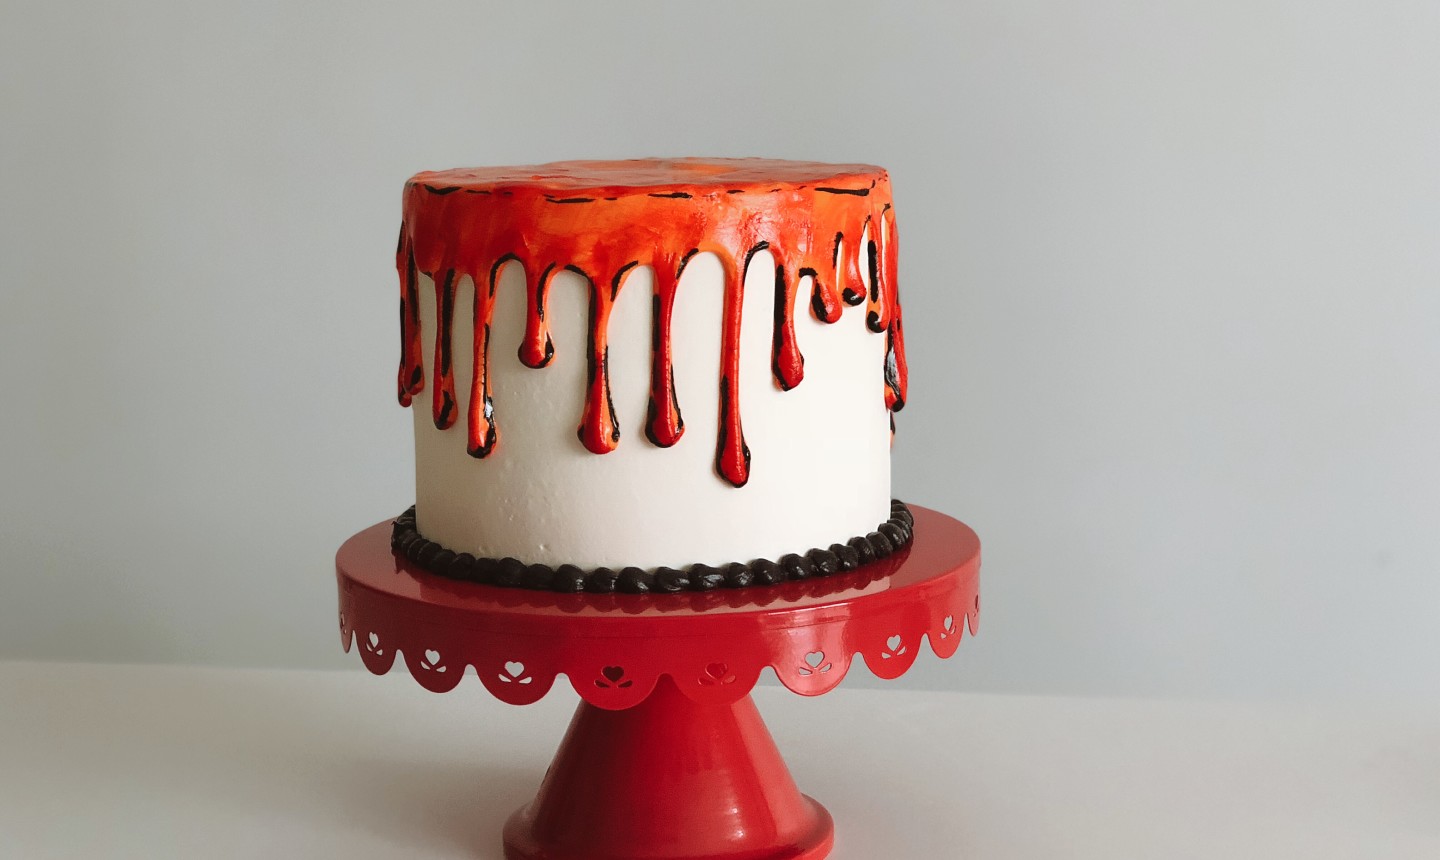
Once set, outline the drips in black gel using a paint brush.
6. Bring It All Together
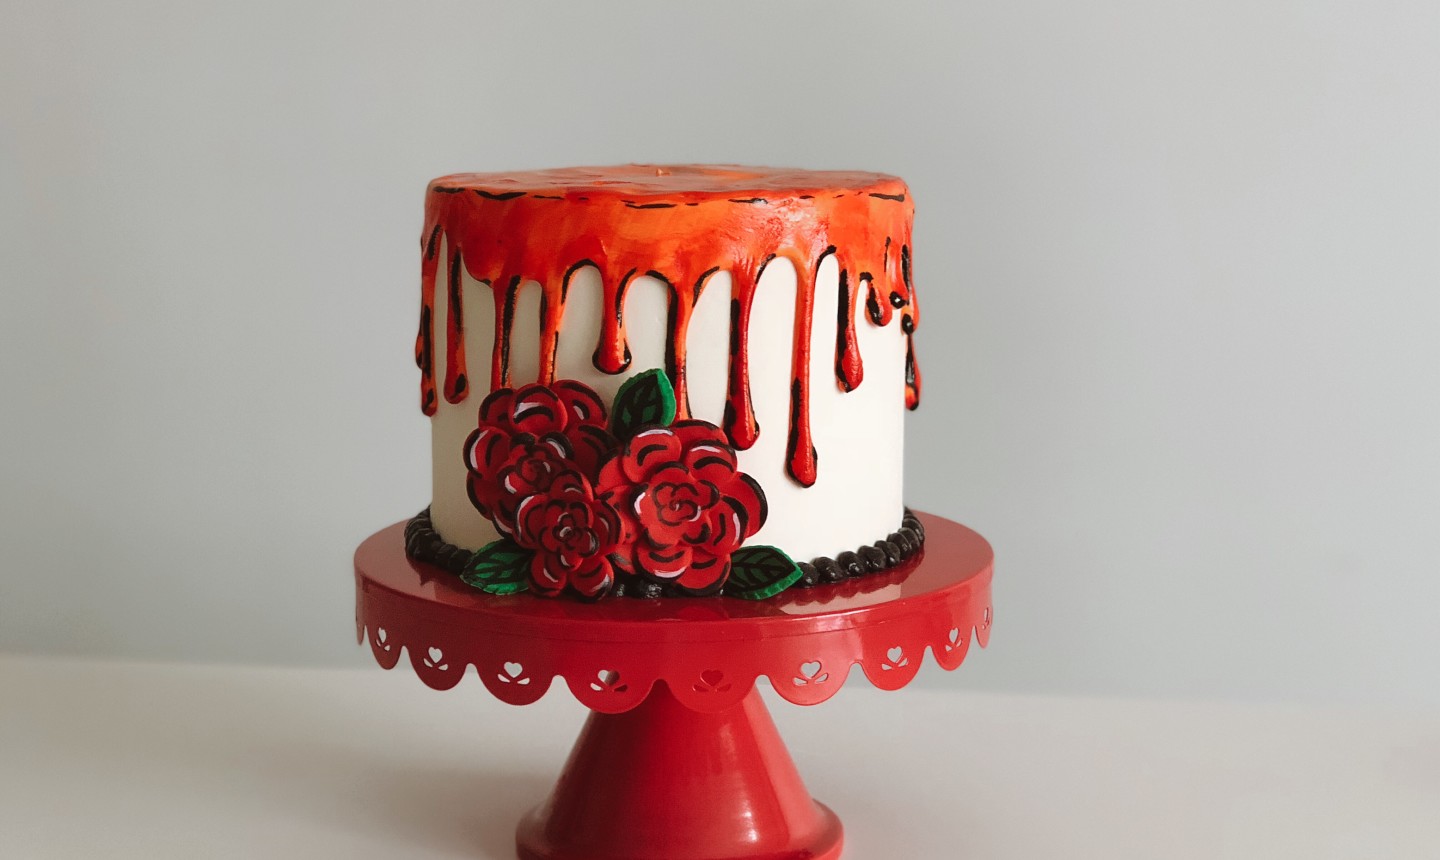
Once the flowers are set, cluster them at the bottom of the cake. Tuck in some leaves as well.
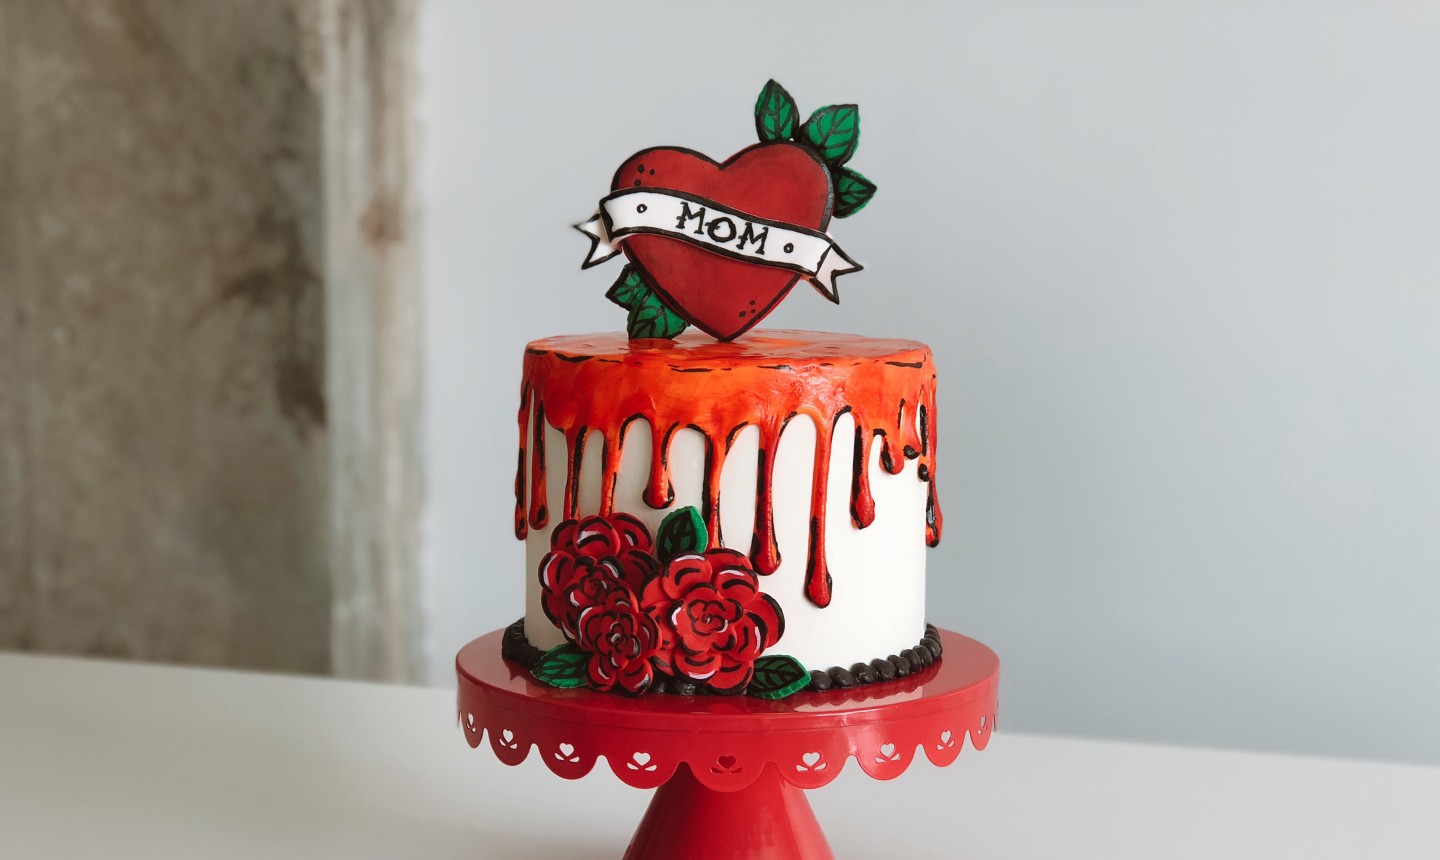
Place the topper in the middle of your cake and — voilà! — the coolest Mother’s Day cake is ready for prime time.
Share tips, start a discussion or ask one of our experts or other students a question.
Already a member? Sign in
No Responses to “Bake Mom This Tattoo-Inspired Cake to Show How Much She Rocks”