
Would you believe that there is a way to create your own good luck and enjoy a sweet snack food at the same time? It’s true, and it’s all contained in this step-by-step photo tutorial for how to make fortune cookies at home.

Lucky you! Here’s an easy-to-follow tutorial for how to make fortune cookies
Everyone loves the tradition of fortune cookies at the end of a Chinese takeaway or restaurant meal. However, the actual cookies are often lacking, with a bland, stale flavor. By making your own fortune cookies, you are guaranteed a freshly baked, delicious treat that is leagues above any cellophane-wrapped cookie you’ve ever tasted. It’s also a fun baking project including an element of craftiness and cleverness as you create your own fortunes with which to fill the cookies.

How to make fortune cookies
Makes 6-8 cookies
Active time: 20 minutes
Total time: 30 minutes, plus cooling
Ingredients:
- 1/4 cup flour
- 1/4 cup granulated sugar
- Pinch of salt
- 1 egg white
- 1/2 teaspoon vanilla extract
Special supplies:
- Fortune cookie messages
- Muffin tin or aluminum foil
- Metal spatula
Step 1:
Write out 10-12 fortunes on paper before you get started. You’ll really only need 6 to 8, but it is a good idea to have a few extras in case you make an error. Ideally, the pieces of paper will be small (no longer than 2 inches) and fairly short (1/4 to 1/2 inch).
For the cookies shown, I created a series of messages in 8-point Arial type, printed them out, and then cut them out.
You can easily handwrite them, as well. Be creative with your messages!

Step 2:
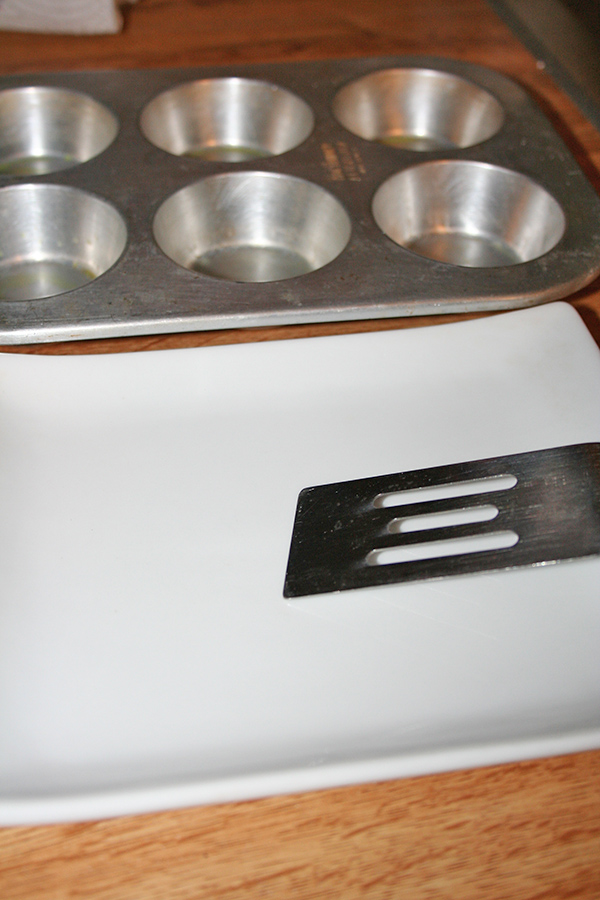
Once your fortunes are ready and you want to get baking, preheat oven to 400 F. Line two cookie sheets with parchment paper or silicone mats. Make sure that you also have the following supplies nearby: a smooth work surface, a metal spatula and a muffin tin or aluminum foil.
Step 3:
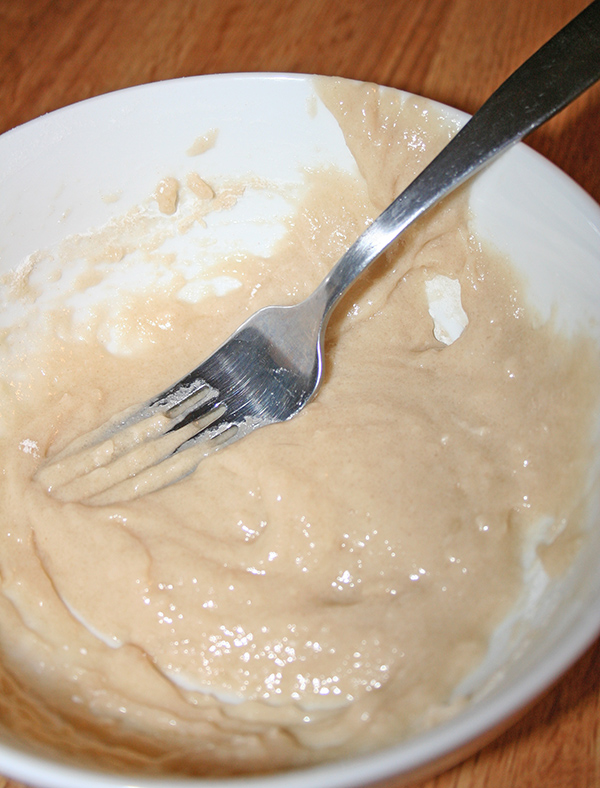
In a medium-sized bowl, sift together the flour, salt, and sugar. Set to the side.
Step 4:
Whisk the egg white and vanilla until the mixture is foamy, but not so much that it becomes stiff.
Step 5:
Add the egg mixture to the flour mixture, and stir with a fork until combined and smooth.
Step 6:
Place 3 teaspoonfuls of batter at least 4 inches apart on each sheet (I did this in a large triangle). Spread each round of batter into a circle about 3 inches in diameter, taking care to spread the mixture evenly (so it is of even thickness in the middle and edges) and thinly, but not so thin as to be translucent. If you still have batter left over, divide it into another round or two on each sheet. It is unlikely that you will have more than eight circles of batter.
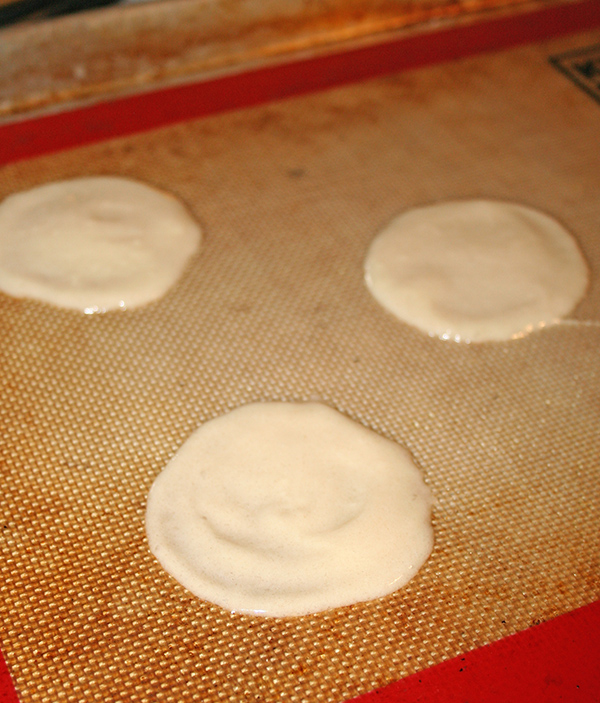
Note: The reason why you are using two sheets is that once the cookies are baked, you’ll have to work very quickly to form the cookies while they are still quite warm and pliable. Since they begin to “set” rather quickly, working in two batches of three or four cookies at a time will allow you to work at a reasonable pace.
Step 7:
Bake for 5 minutes, or until the cookies have just turned golden at the edges. The center will remain paler. Remove from oven, and quickly remove the first cookie from the sheet with a metal spatula, and place it upside down on a board or work surface. Place the fortune close to the center (it’s fine for the fortunes to be folded) and fold the cookie so that it becomes a half-moon shape. Bring the corners together gently to form the signature fortune cookie shape. Repeat as quickly as you can with the remaining cookies.
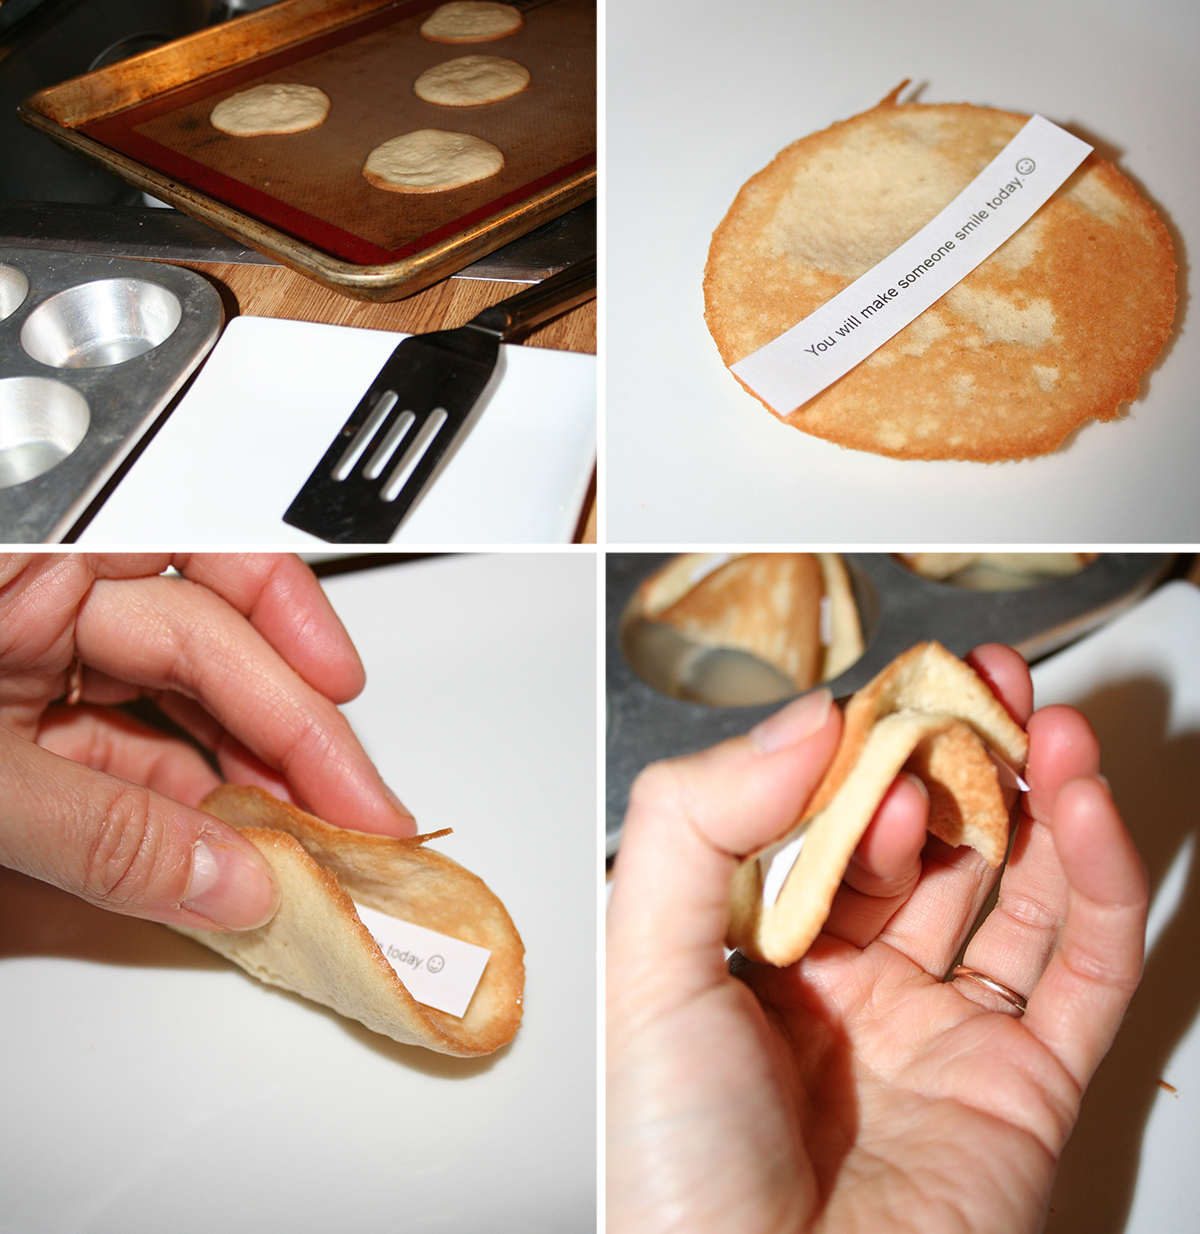
Note: This step is not difficult, but it is tricky to do without breaking the cookies as you bend them. You’ll get used to it the more cookies you fold, but the key is to work the cookies gently but assertively and confidently into shape.
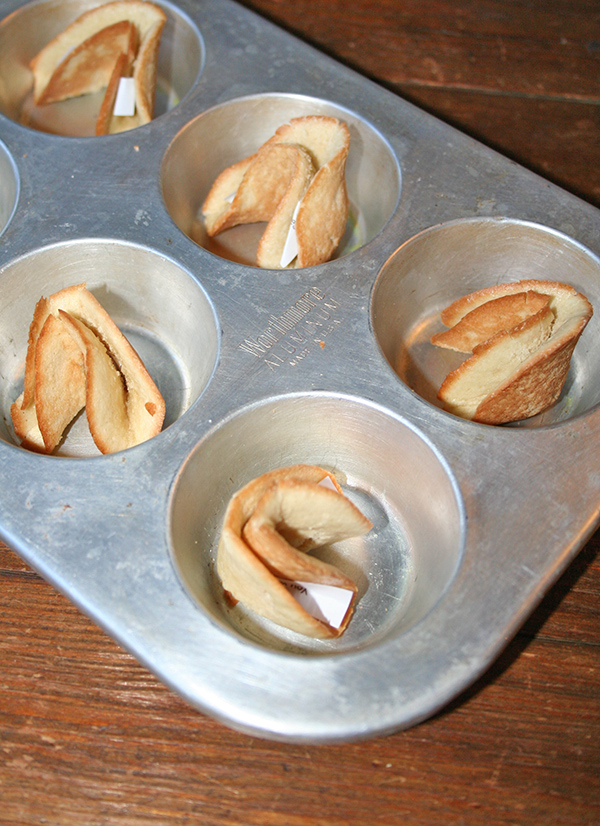
Step 8:
To keep the cookies holding their shape, you can place them in the cups of a small muffin tin (or even place two cookies nestled in one cup) or wrap them with aluminum foil.
Step 9:
Place the second tray of cookies in the oven, and repeat Step 7 with the new batch.
Step 10:
After about 20 minutes, the cookies that you left in muffin tins or wrapped in foil will have set enough to hold their shape without assistance, so you can free them and place on a wire rack to set completely. The cookies will be soft at first, but after a few hours whey will become crisp.

Share tips, start a discussion or ask one of our experts or other students a question.
No Responses to “Lucky You: How to Make Fortune Cookies [Printable Messages Included!]”