
Potholders are the perfect project — they’re quick and easy to stitch up, they make great gifts and you can use scraps left over from larger projects. Follow this tutorial and you’ll have some ready to present in no time.
Quilted Potholder
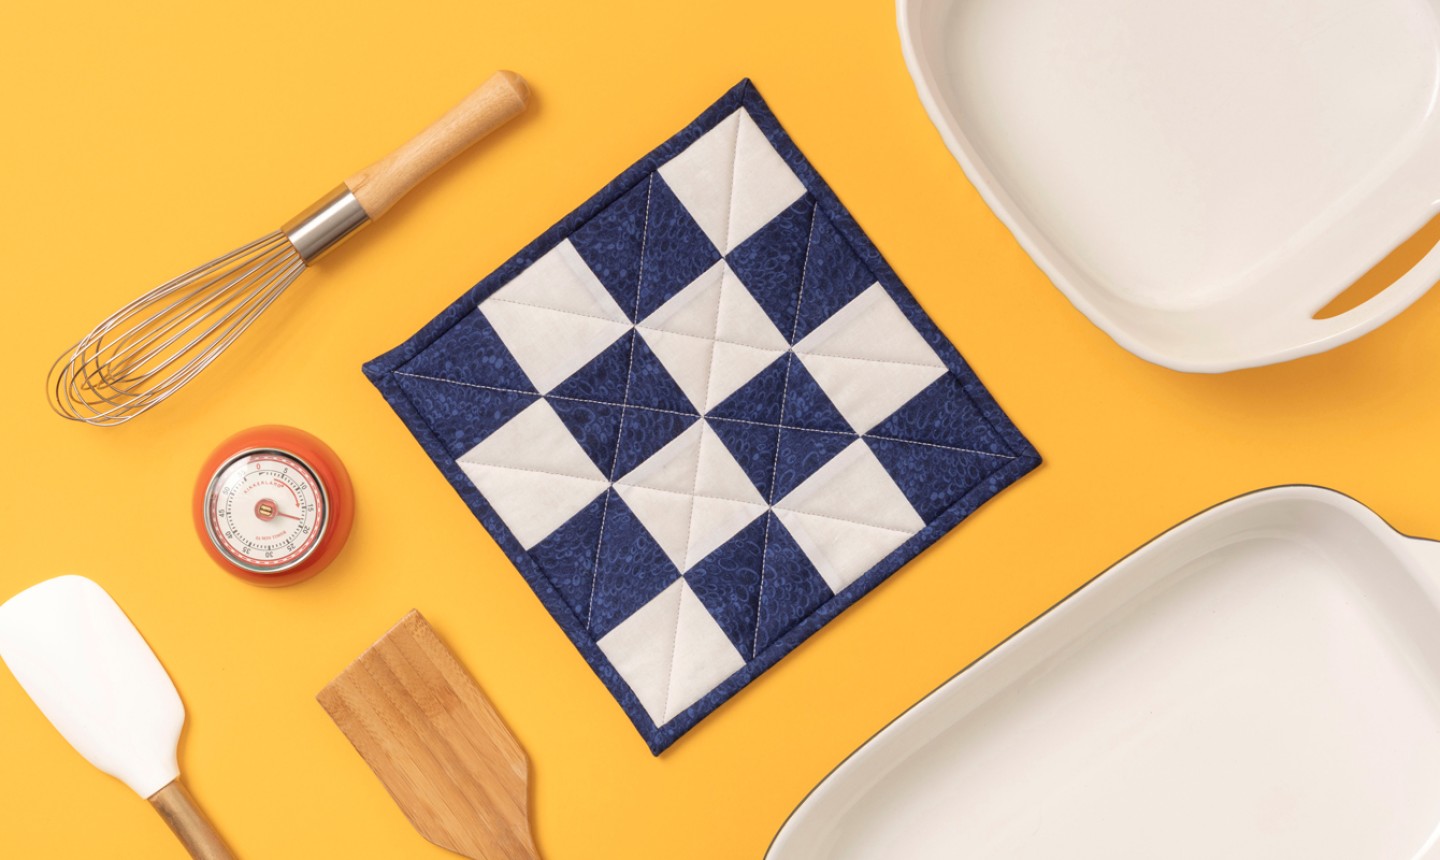
Level: Easy
Finished Size: 8″ square
What You Need
Pro Tip: Insul-Bright is a specially made fabric that reflects hot and cold energy back to itself. This material needs to be used with at least one layer of cotton batting in order to absorb condensation.
Instructions
1. Make Your Quilt Block
Start by making four four-patch blocks, using the instructions here.
Lay the first pair of four-patches right sides together, then stitch down one side with a ¼” seam allowance , joining the two blocks into a row. Press the seam allowance to one side.
Repeat with the second pair of four-patch blocks.
Lay the rows on top of each other, right sides together. (Orient them so you keep the checkerboard pattern.) Sew the rows together with a ¼” seam allowance and press the seam open.
Pro Tip: You can use any 8″ quilt block for the top of this potholder — you don’t have to stick with the checkerboard pattern we used. Experiment with a snowball block, a pinwheel, a log cabin design or a friendship star.
2. Square Up Your Block
Trim your finished block to square up the edges.
3. Layer the Quilt Sandwich
Layer your pieces in the following order: potholder back (wrong side up), Insul-Bright (there is no right or wrong side to this fabric), cotton batting and potholder top (right side up).
4. Secure the Layers
Pin baste through all your layers to secure the potholder for quilting. Basting spray can also be used to adhere the cotton batting to the potholder top.
5. Quilt It
Using your home sewing machine with a walking foot , machine quilt the potholder. Straight line quilting and stitch in the ditch are both great options for this project.
Trim your potholder so the edges are even, cutting away excess batting and backing layers.
Pro Tip: After quilting, you may want to baste around all edges ⅛” from the edge — this will keep the layers together so the binding goes on more easily.
6. Make the Binding
To make your binding , start at one end of your fabric strip and fold the strip in half lengthwise (wrong sides together), pressing until you have reached the end of the strip.
7. Bind the Potholder
Bind your potholder using prepared binding from Step 6 or using purchased ready-made binding. Bind the potholder just as you would bind a quilt.

And you’re done! Use these potholders when you cook your next weeknight meal or gift them to the foodie on your holiday list.
Share tips, start a discussion or ask one of our experts or other students a question.
Already a member? Sign in
No Responses to “These Custom Quilted Potholders Make for a Great Housewarming Gift”