
Sometimes a sewing pattern is almost perfect, except you’d prefer it was a V-neck. No biggie — with some simple know-how, you can change your pattern and sew the neckline you want.
How to Create a V Neckline
Level: Intermediate
What You Need
Pattern pieces Fabric Ribbon or string Sewing pins Fabric strips Fabric marker Curved rulerInstructions
1. Check the Bust Point
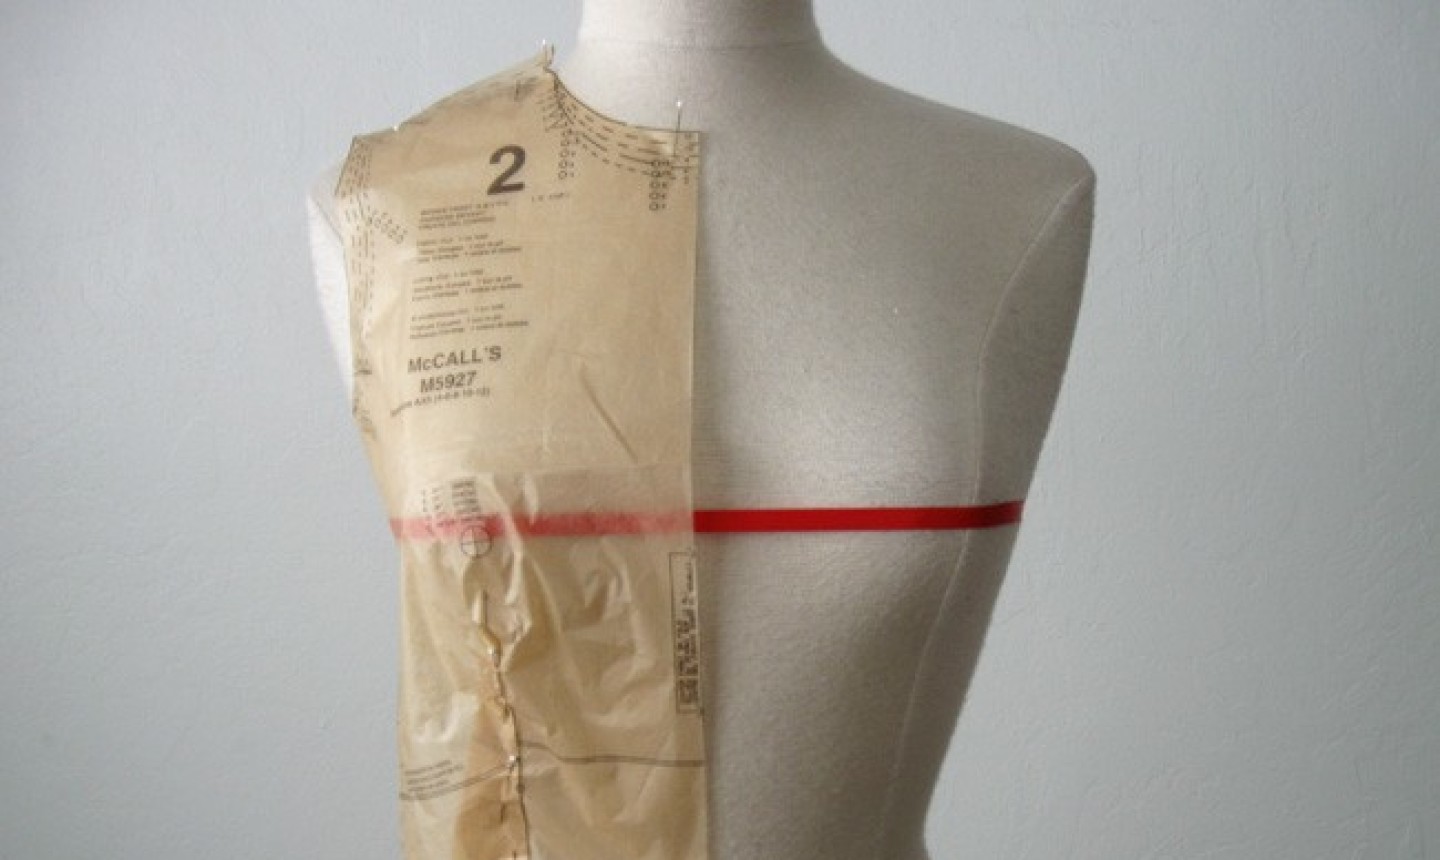
Before you start making any cuts, determine the full bust point (also called the apex) on your pattern piece. The apex is marked on many patterns with a cross or X in a circle. Compare that to your full bust point and make any adjustments needed.
On the dress form above, the red ribbon marks the full bust point. This step is essential for getting the fit you want. If the apex is in the right spot, you know that the V-neckline will land on your chest in the right place, too.
2. Determine the Center of the V point
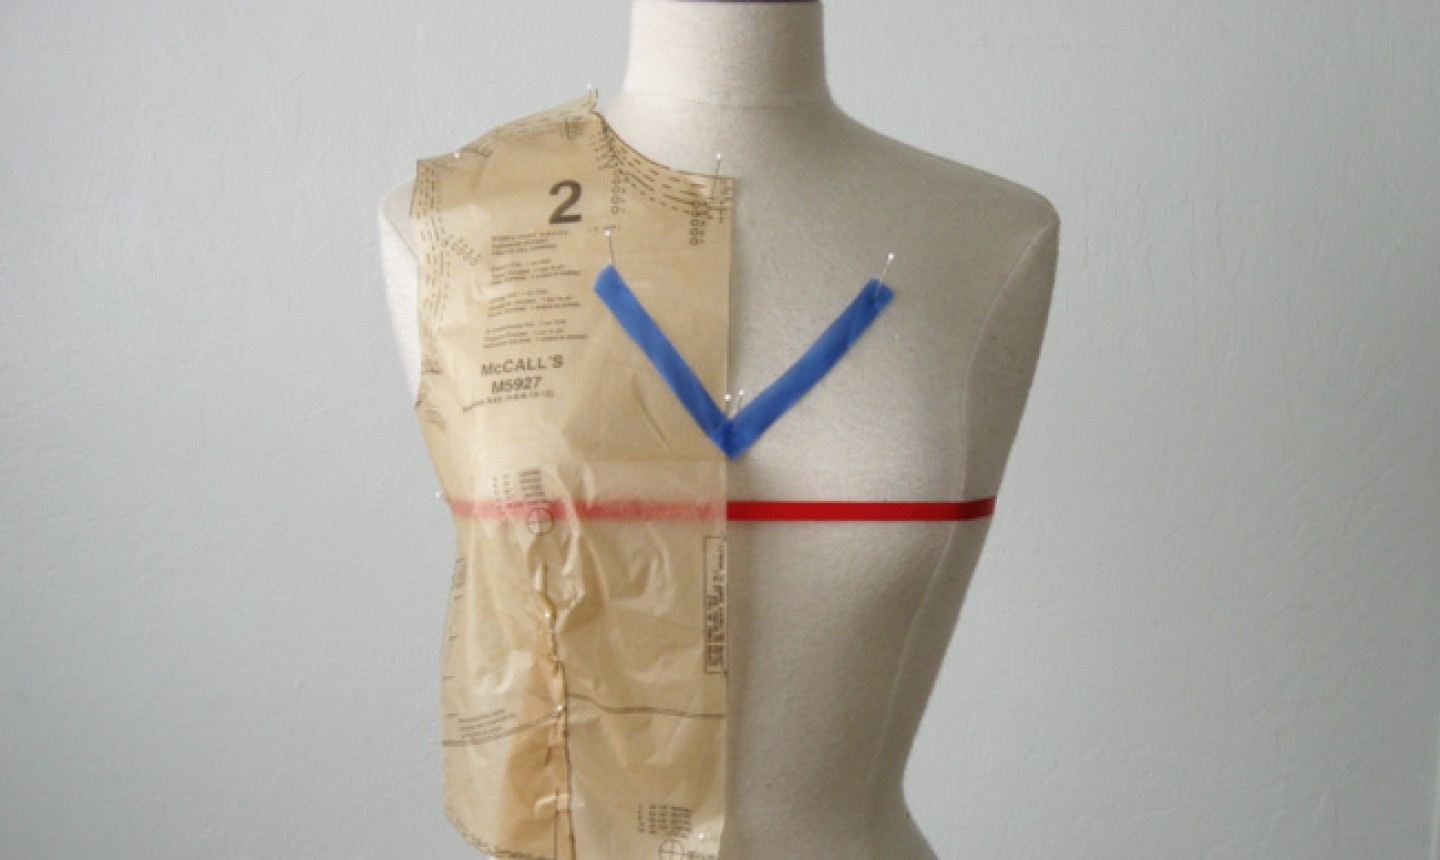
There are a couple of ways to figure out where to put the bottom of the V:
At this point, you only need to mark the bottom of the V. In the next step, you’ll complete the rest of the neckline.
3. Draw the New V Neckline
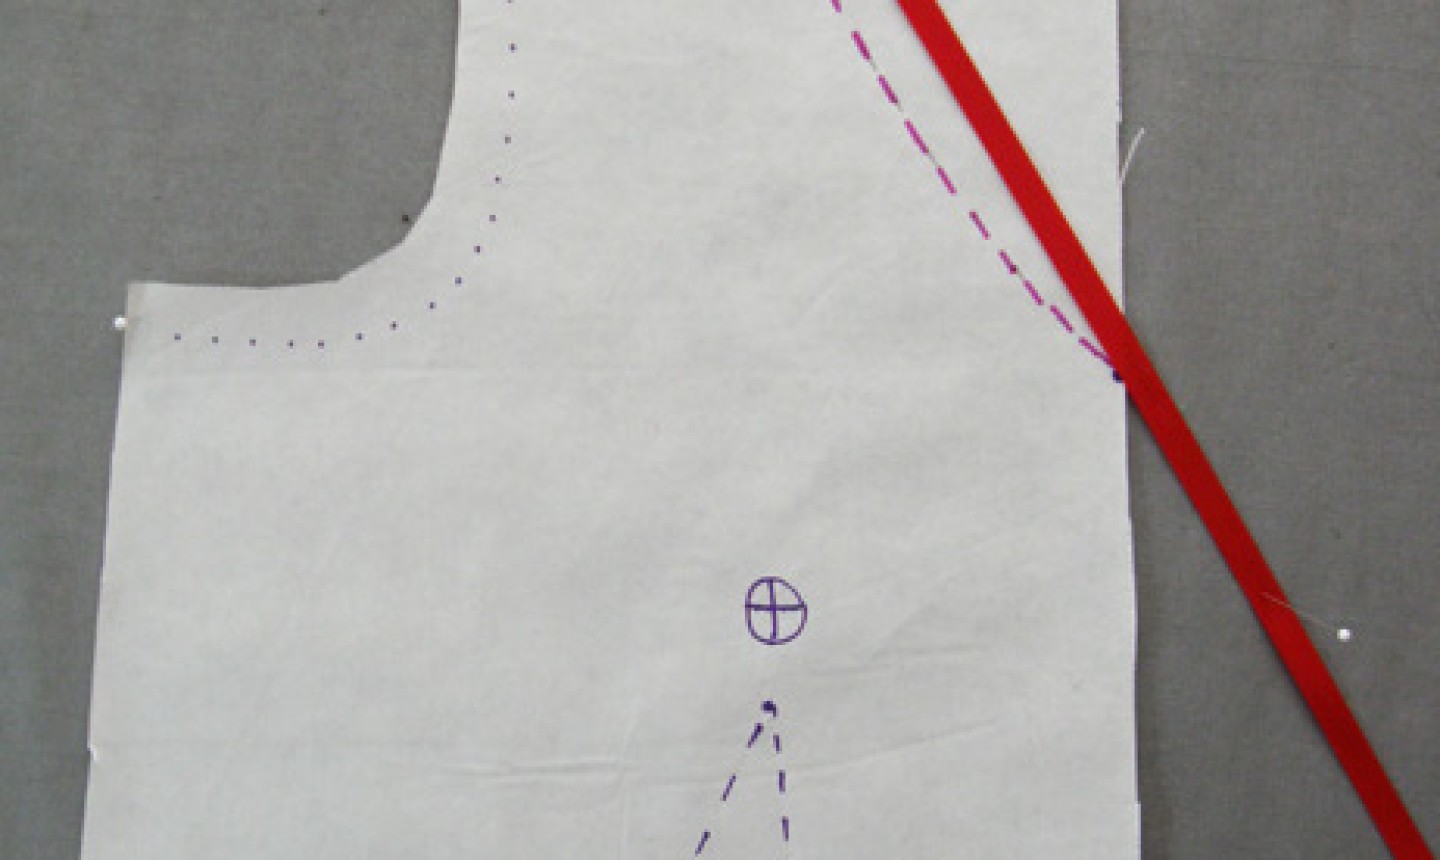
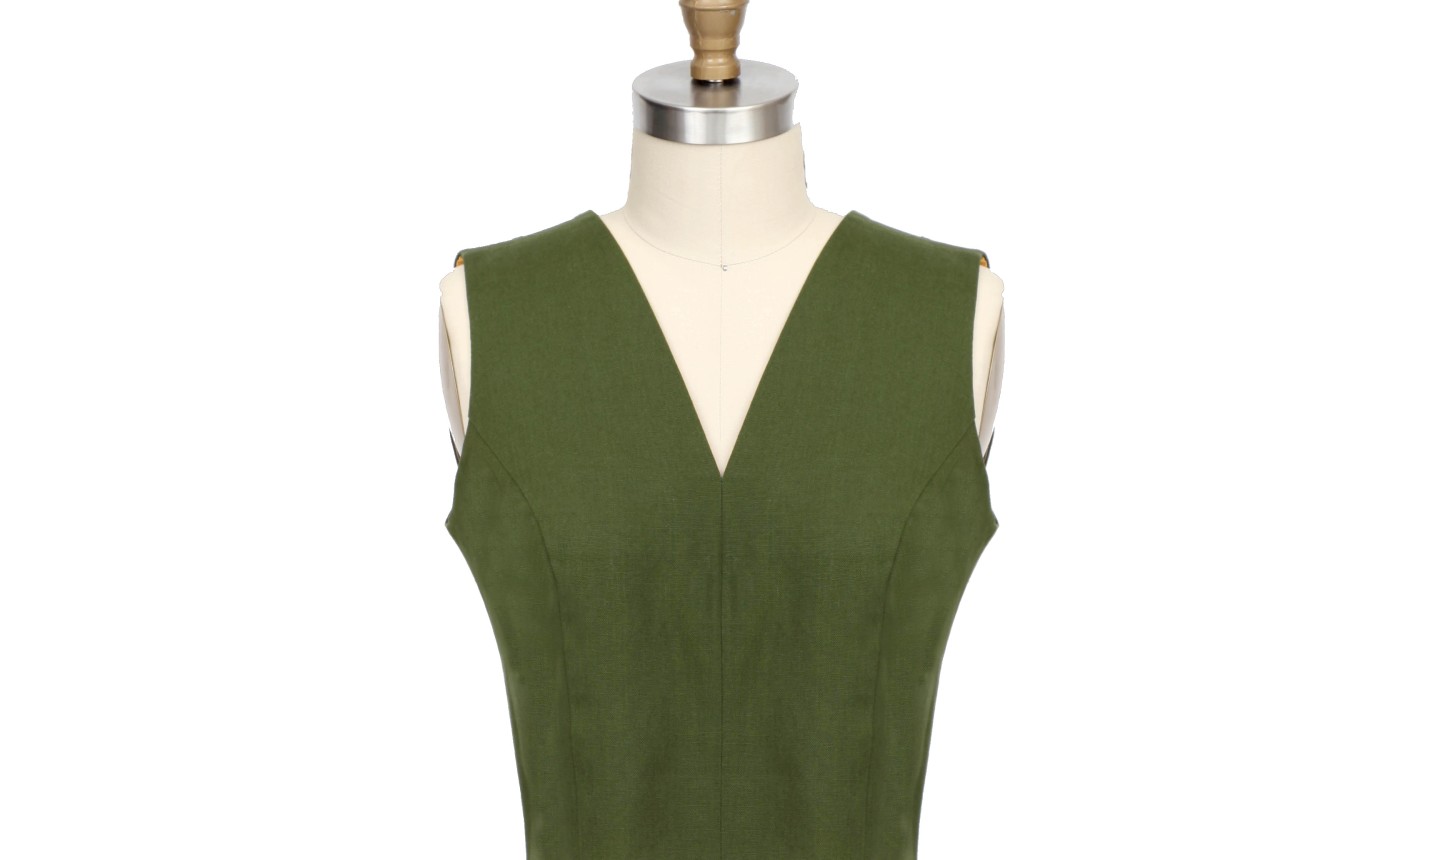
Here’s the pro tip that makes all the difference: a flattering V neckline isn’t really just a straight V. As the picture shows, there’s quite a bit of curve in the V neckline shape, even though when you’re wearing it it looks nice and straight.
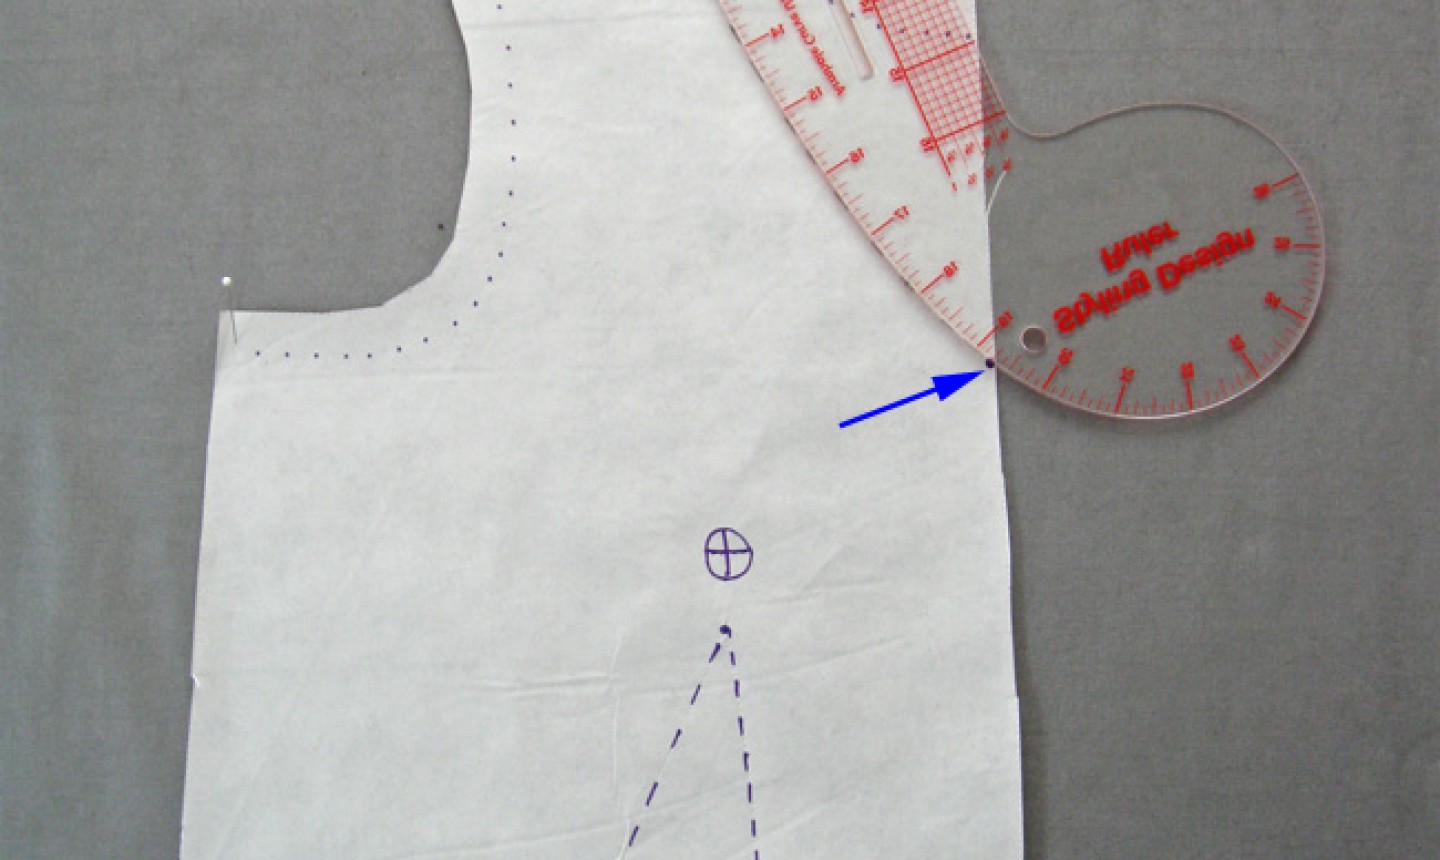
Use a curved ruler and play around with the shape until you have a pleasing V.
It’s also important to consider the opening across the top of the neck. For this style, we took off a bit off the inside shoulder to help the neckline lay nicely. This is optional; you can keep the shoulders where they are if you like.
Mark the line that will be the finished edge of the neckline (which will also be the stitching line). Later you will add the appropriate seam allowances.
4. Adjust the Bodice Back
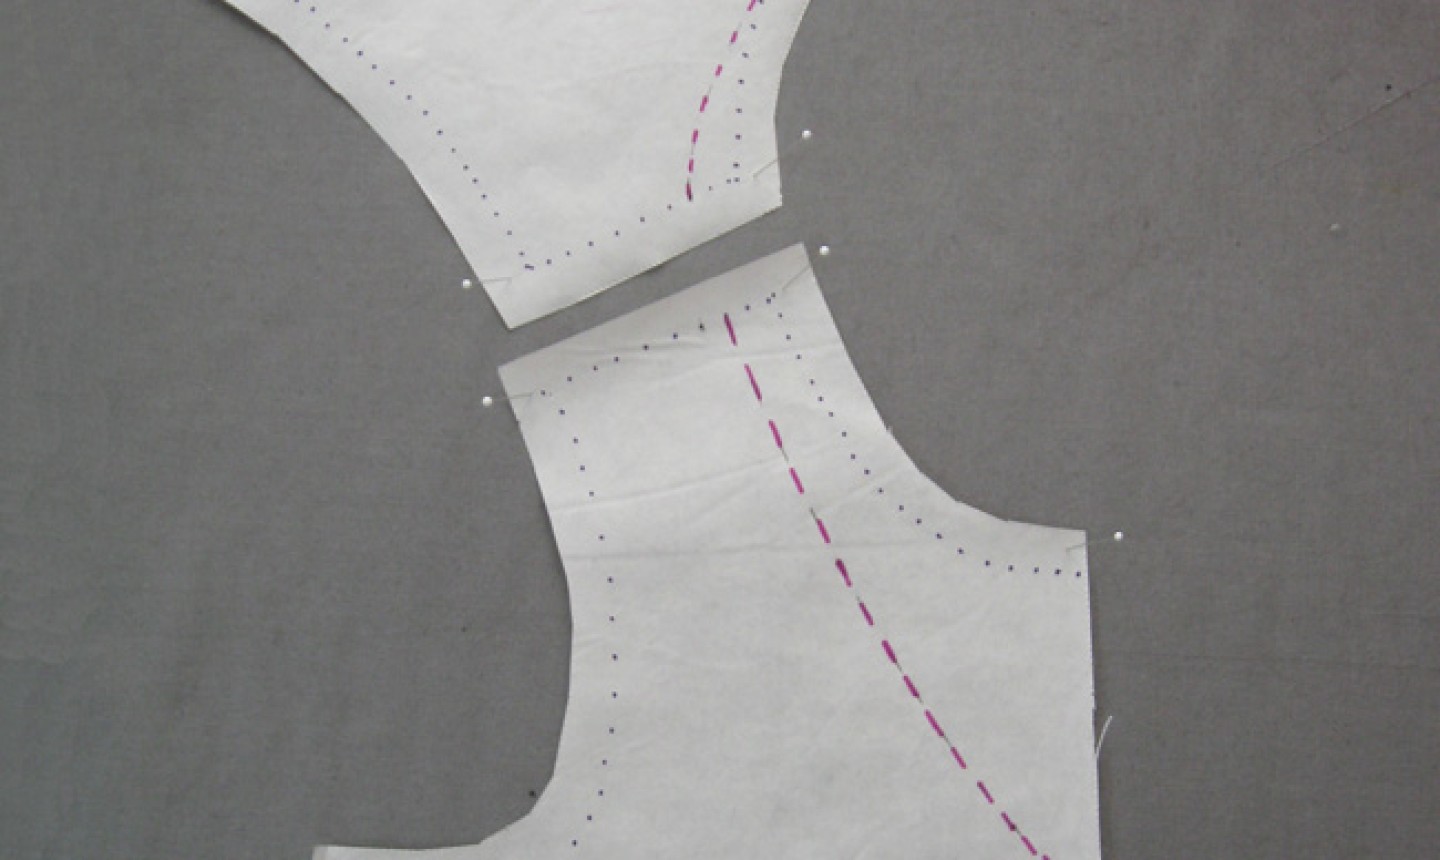
If you changed the width of the shoulder as we did above, making the neck opening wider, then you must make the same adjustment on the back bodice piece at the shoulder as well. Note that these are the stitching lines, and seam allowances still need to be added.
5. Add the Seam Allowance
Add a seam allowance that matches the rest of your sewing pattern to the outside of the new V neckline lines.
Whew! Now you’re ready to cut and sew your pattern as normal. Then put it on and flaunt those pretty collar bones, you gorgeous thing.
Share tips, start a discussion or ask one of our experts or other students a question.
Already a member? Sign in
No Responses to “How to Transform Any Top Into a V-Neck”