
We’re calling this ombré technique ‘faux Fair Isle’: by cleverly slipping stitches (also sometimes called mosaic knitting), you can get two colors in the same row, but only have to carry one color. Sneaky!
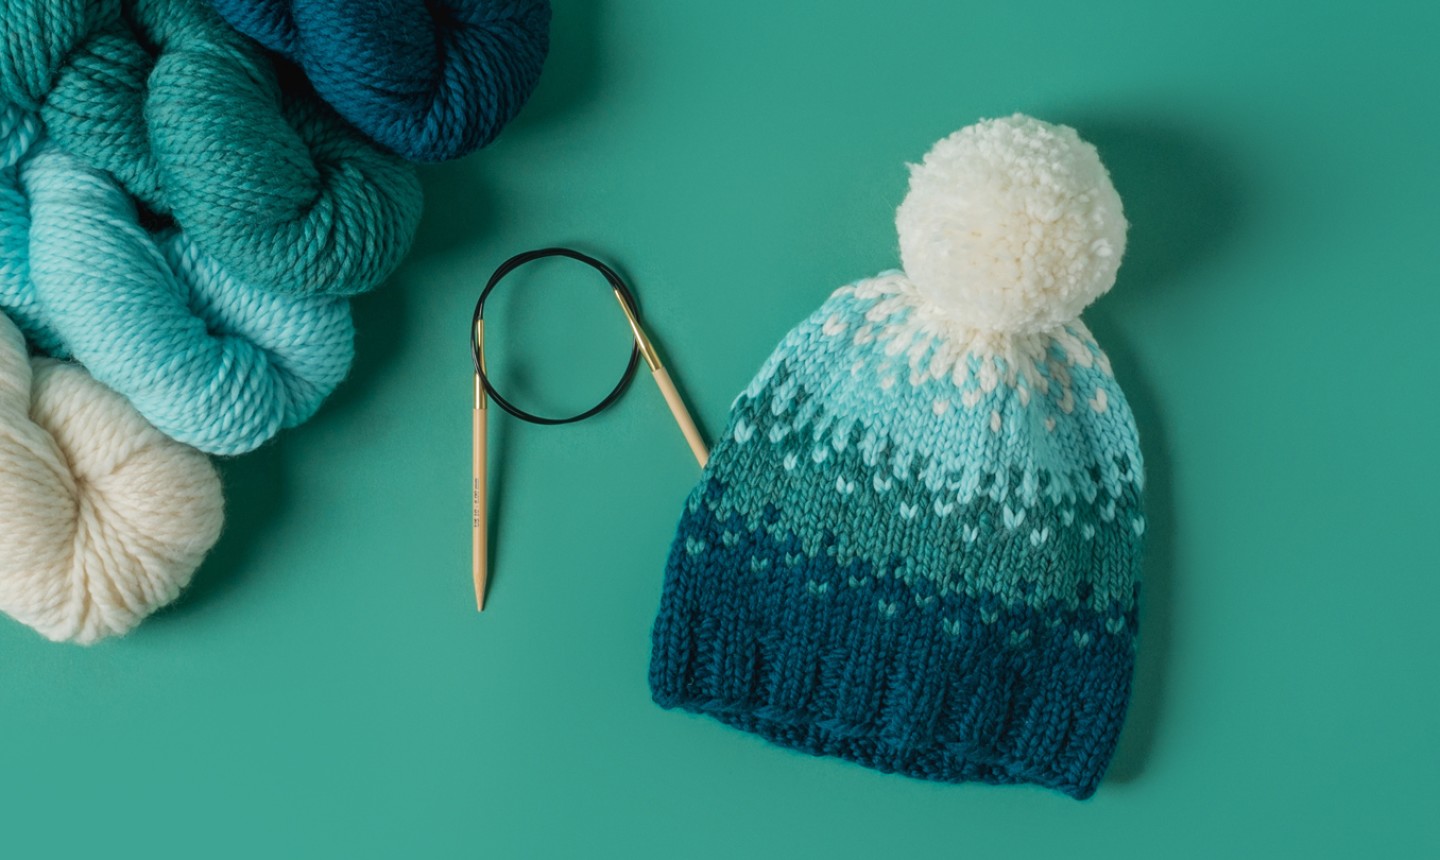
Easy Ombré Hat
Level: Beginner-friendly
What You Need
Pro Tip: You can definitely knit more than one hat with all this yarn. Try reversing your ombre and knit another version fading from light to dark.
Gauge
3.5 sts = 1″ in stockinette (row gauge is not critical here)
Finished Size
17″ circumference; fits large-sized child to medium-sized woman
Pattern Notes
Abbreviations
Instructions
With color A, CO 60 sts. Place a stitch marker to mark the beginning of your round, and join to work in the round.
Rnds 1-6: *K2, p2; repeat from * to end of round.
Rnds 7-10: Knit.
Colorwork Section 1
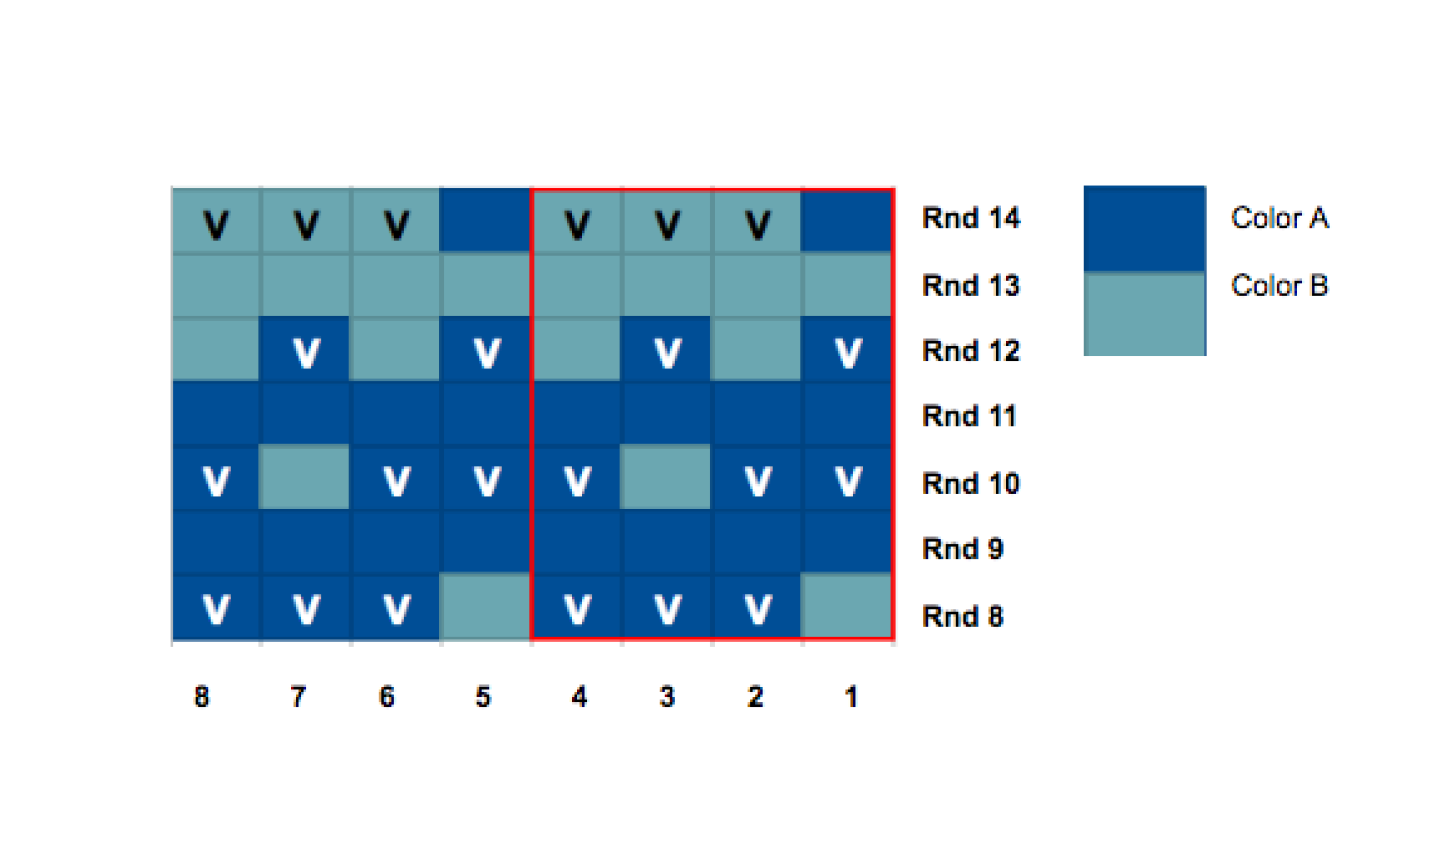
Rnd 8: *With color B, k1, then slip the next 3 color A sts onto your right needle. Repeat from * to end of round.
Pro Tip: Take it easy: don’t pull the yarn tight when you’re knitting your color B stitches. You want to leave the yarn a little loose in the back so your hat doesn’t pucker.
Rnd 9: With color A, knit every stitch.
Rnd 10: Slip the first 2 color A sts. *With color B, knit 1, slip next 3 sts; repeat from * until 1 st remains. Slip last st.
Rnd 11: With color A, knit every stitch.
Rnd 12: *Slip 1 st, k1 st with color B; repeat from * to end of round.
Rnd 13: With color B, knit every stitch.
Rnd 14: *With color A, k1, then slip the next 3 color B sts. Repeat from * to end of round. Cut color A, leaving a 6-inch tail.
Pro Tip: Sometimes charts make it easier to see what you’re doing. This chart, read right to left, bottom to top, uses a V to indicate which stitches are slipped. Stitches without a V are knit in the colors shown.
Rnds 15-18: With color B, knit.
Colorwork Section 2 (worked with colors B and C)
Rnds 19-25: Repeat rnds 8-14 working with colors B and C. The sts worked originally worked in color A are worked in color B this time, and the color B sts are now worked in color C. Cut color B after rnd 25.
Rnds 26-29: With color C, knit.
Colorwork Section 3 (worked with colors C and D)
Rnds 30-36: Repeat rnds 8-14, working with colors C and D. The sts worked originally worked in color A are worked in color C this time, and the color B sts are now worked in color D. Cut color C after rnd 36.
Rnd 37: With color D, knit every stitch.
Rnd 38: *K1, k2tog; repeat from * to end of round. (40 sts remain)
Rnd 39: Knit.
Rnd 40: *K2tog; repeat from * to end of round. (20 sts remain)
Pro Tip: Things might get a little tight here as you decrease. If you want to switch to double-pointed needles, you totally can. Or you can experiment with the magic loop method. OR, it’s only one round…make it work!
Finishing
Cut the yarn, leaving an 8-inch tail. Thread the yarn onto your tapestry needle, and pull the the needle through the stitches in the order they’re on the needle. As you pass the tapestry needle through, slip each stitch off the knitting needle. Gently pull on the yarn to tighten the stitches, and thread your tapestry needle through a second time. Pull tightly to close up the hole, and thread the tail to the inside of the hat.
Weave in your ends to the inside of your hat, and trim them. Block your hat for the smoothest stitches.
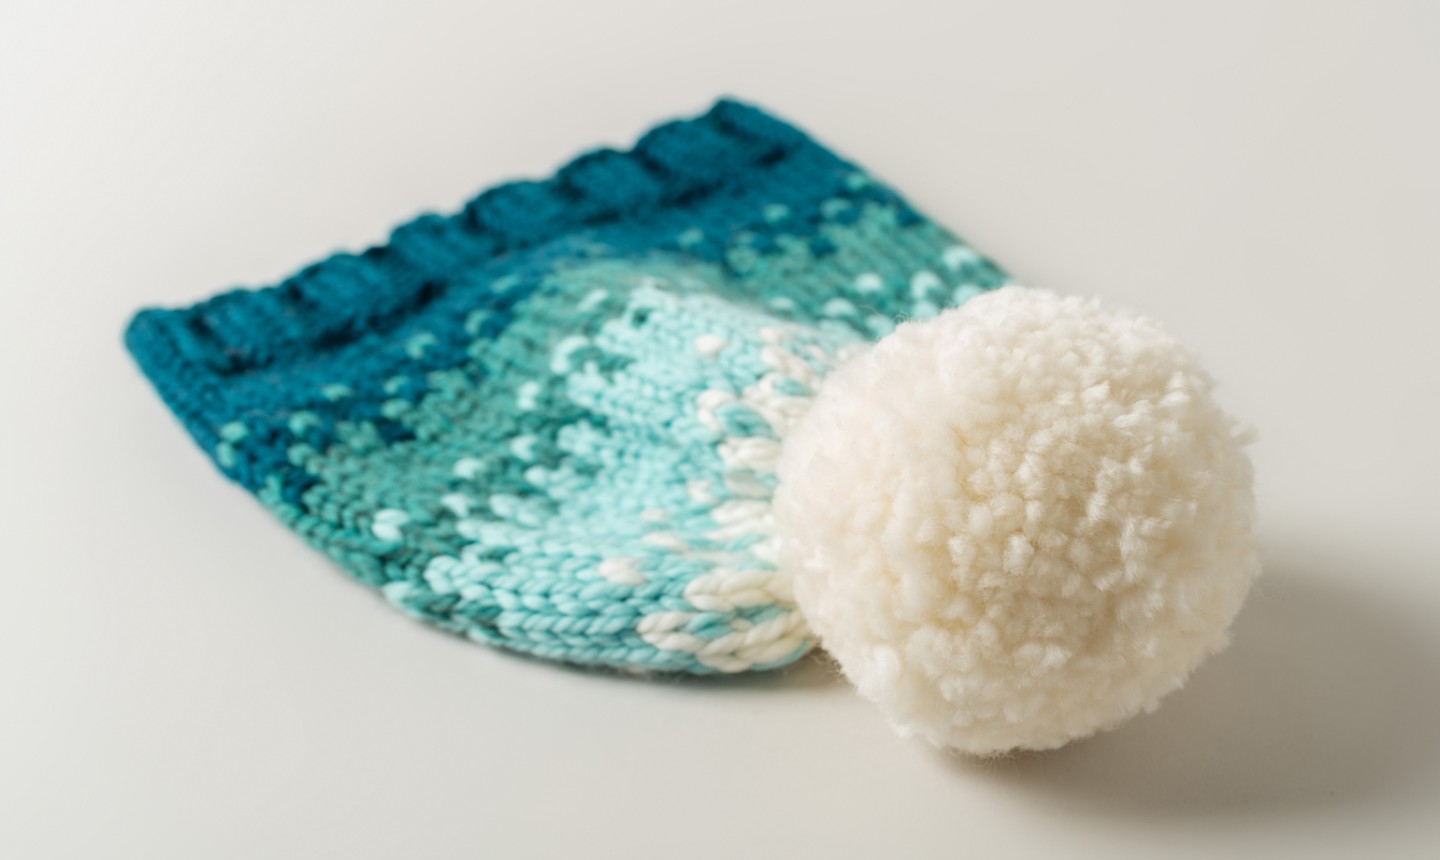
Now, it’s time to pompom. Use a pompom maker if you have one, or make your own pompom with cardboard. Use the long ends of the pompom to tie the pom to the top of your hat. Pompoms don’t wash well, so tie the strings in a bow — that way you can take it off when it’s laundry time.
This is so cute!! I made it with 2 strands of dk weight yarn, my color A was 2 colors of pink, B was one pink and one white, and then C was 2 strands of white. I made it for a baby girl and casted on 56 stitches. It's my first time doing color work with floats, so I thought that was a great way of dipping my toes into the water before trying fair isle. Definitely want to make more. :)
Hello, How do you make this larger? Many women do not have small heads/or have lots of hair. Thanks
Just scrolled to membership page. Please post information on a solid background page. I donot want to strain my eyes to read this, necessary information before I join. Thanks 😊
That’s no fun to read this and eager to learn this stitch, when you don’t give us the ability to print instructions and patterns please reconsider in respect for you members, give us a chance to print that is easy to follow. Regards. Future member
How do I print or save?
Do you have a simple way to print this pattern. As it is displayed it takes 5 pages. I did not see a print option in this pattern. Please let me know as I would like to try this. Thanks!
Is there any way I adjust the pattern to make a larger size hat for a large woman ?
Unable to log in as I no longer have verizon.net I now have a gmail account??????where do I change this info